Check out how we made these easy DIY wooden jack-o-lanterns for a great Halloween decoration! These are perfect for indoors, on the porch, or next to your candy bowl!
Probably the single most iconic decoration for Halloween is the traditional jack-o-lantern. You go to the farm, pick out a pumpkin, carve out a face, and put a candle inside.
But there's a major problem with carved pumpkins- they rot!
Here's some options for what to do with your rotten pumpkins after Halloween!
When a jack-o-lantern doesn't even make it to actual Halloween, it's always a little disappointing.
Not to say that you shouldn't carve pumpkins with your family, but a Halloween craft that is going to last all the way to Halloween is a DIY wood jack-o-lantern!
This Halloween woodworking project is a simple one to do and will look great in your home. Wood Halloween decorations can last for years and be statement pieces for your home.
Let's show you how to make this simple wood pumpkin craft!
How to build a DIY wooden jack-o-lantern
A DIY pumpkin lantern is a great project for lots of needs in your haunted house.
Wood lanterns can be used on a mantel, by the front door, or glowing next to your candy bowl on Halloween night!
Plus, since you're using battery powered candles to light up the inside, they are perfectly safe and you won't need to worry about burning the place down with an unattended tea light candle!
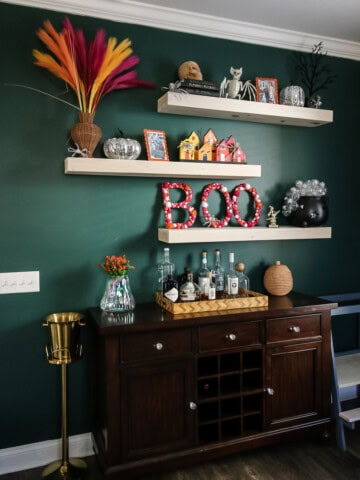
We love Halloween pumpkin decor at our house (have you ever seen our pumpkin front steps or the hanging pumpkin garland on our porch?) so we wanted to add a new twist this year.
If you're looking for a simple pumpkin decor this Halloween, look no further than this project!
DIY wooden pumpkin lanterns
DIY wooden jack-o-lanterns are a really fun decoration that can be used in a lot of different ways.
And since Halloween is our favorite holiday, we're going to make sure we give you the woodworking plans to make your own for free!
Make sure you read the overview here on how to make them, then grab the free printable plans to make some for your family!
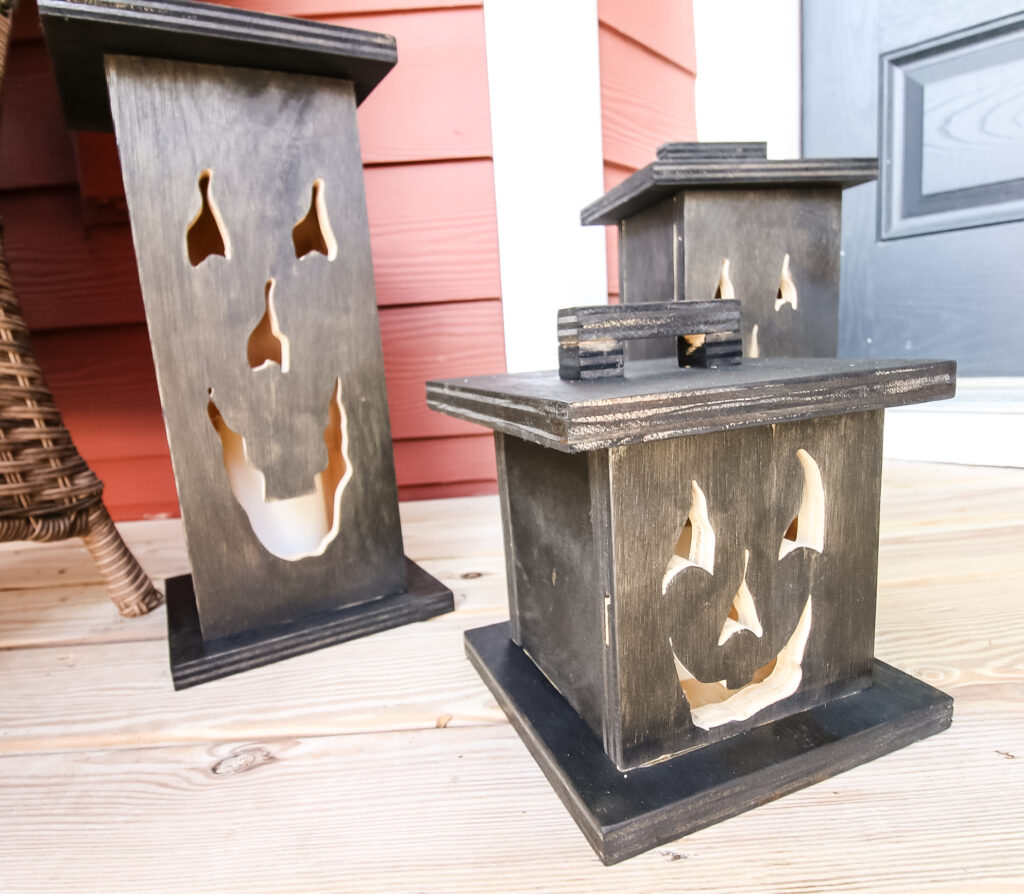
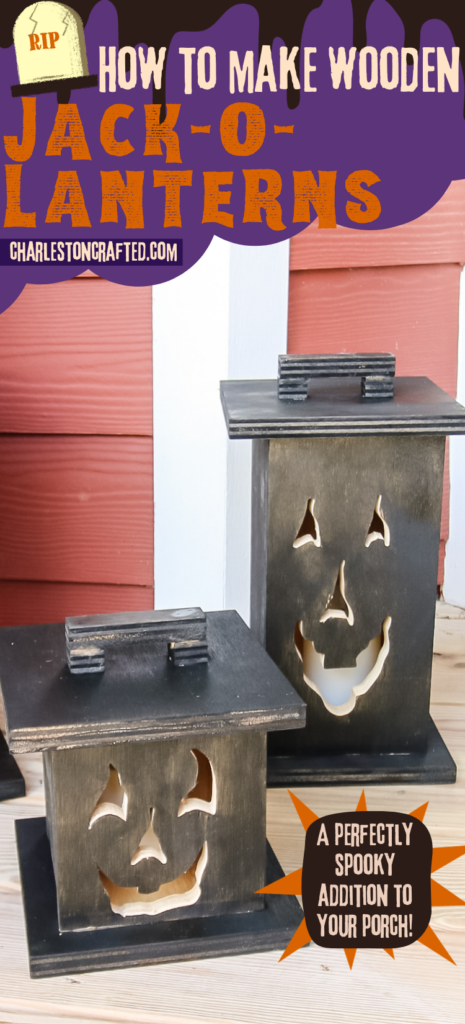
We decided to make three different sized pumpkins (Morgan says everything looks better in threes) and think they look super good together. So this tutorial will tell you the steps for making one and then you can get the specifics for each size pumpkin in the woodworking plans!
Our DIY pumpkin topiaries are another great pumpkin decor piece!
Materials needed:
- Plywood, scrap wood or any wood you can get your hands on that is at least 8" wide
- Wood glue
- Bar clamps
- Nails and brad nailer (this makes it easier, but you could do the whole project with glue and clamps)
- Jig saw or scroll saw
- Sander
Step one- Cut out pumpkin face
Start out by cutting all your boards down (remember, exact measurements in the FREE downloadable plans).
Then, trace and cut out a jack-o-lantern face. You can really just freehand this however you like to make your jack-o-lantern look as funny or spooky as you'd like.
You could easily print a jack-o-lantern face and trace it on your board or just draw one out with pencil.
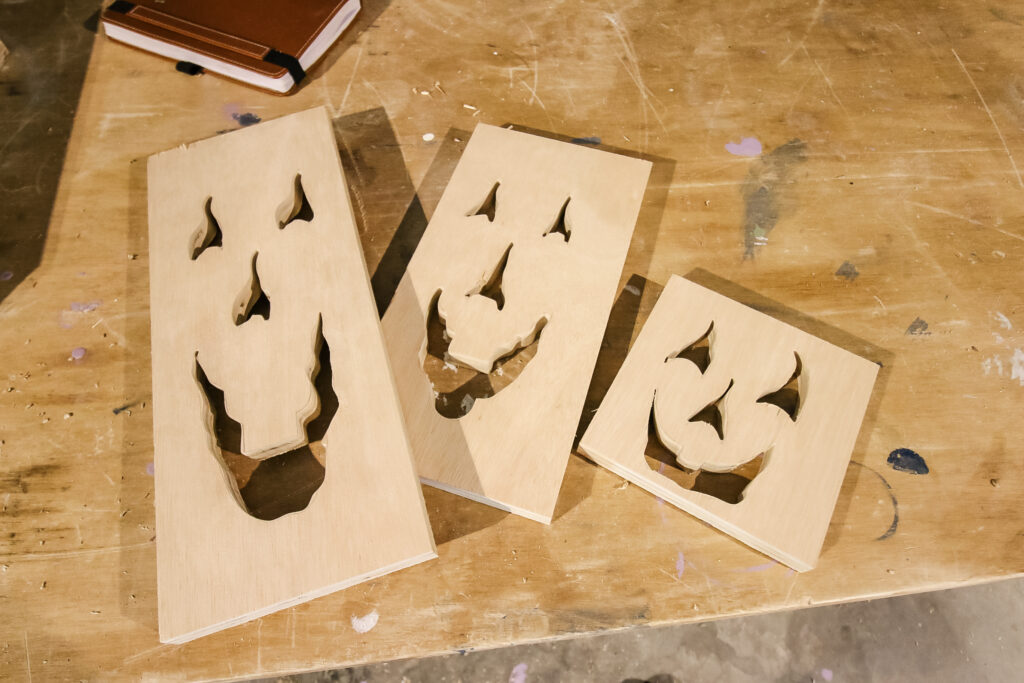
After you have your face drawn on the board, drill a hole in the eyes, nose and mouth with a drill, then use a jigsaw or scroll saw to cut them out.
Sand down all your pieces and give yourself a pat on the back!
Step two- Build pumpkin body
We'll start off assembly by building the body of the pumpkin.
We didn't want nail holes visible, so we used just wood glue and clamps to assemble the body.

Putting wood glue on both long edges of the two side pieces, we clamped on the face we cut out in step one and the back board to form a square.
Next, flip the pumpkin body over and apply wood glue along the bottom edge of the whole thing.
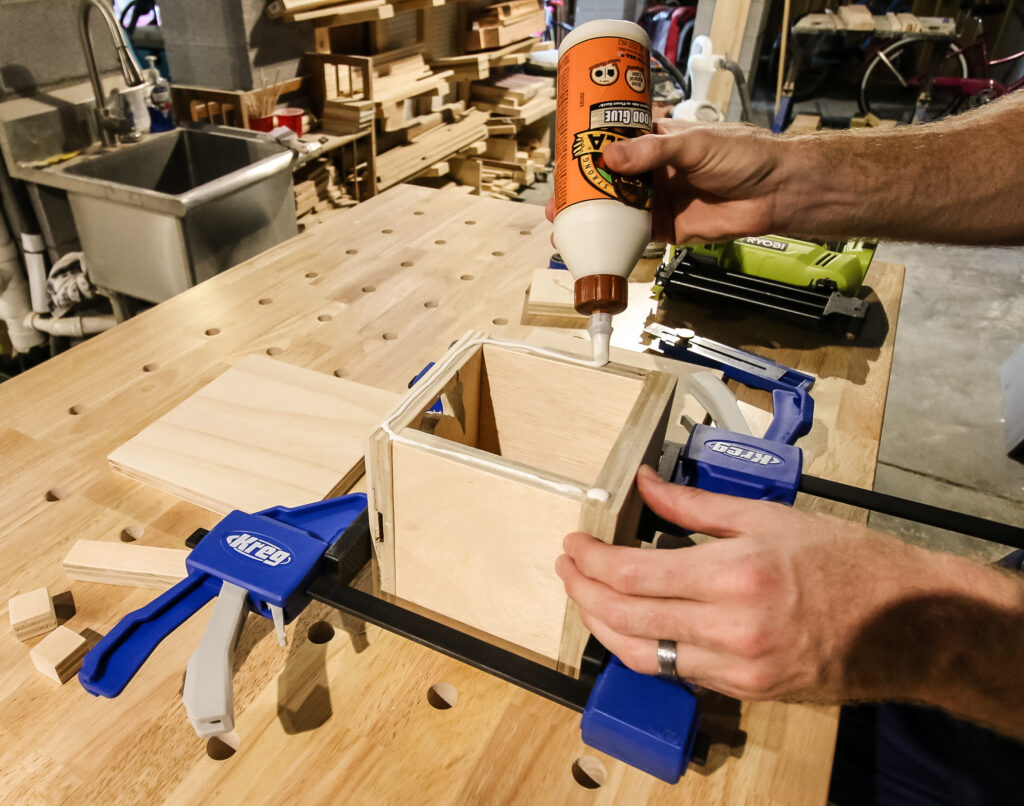
Take the base piece and line it up so that there is a 1" gap around all sides of the body. Here, we used a brad nailer to attach the base since the nails would be on the bottom and not visible. This just helps speed up the process.
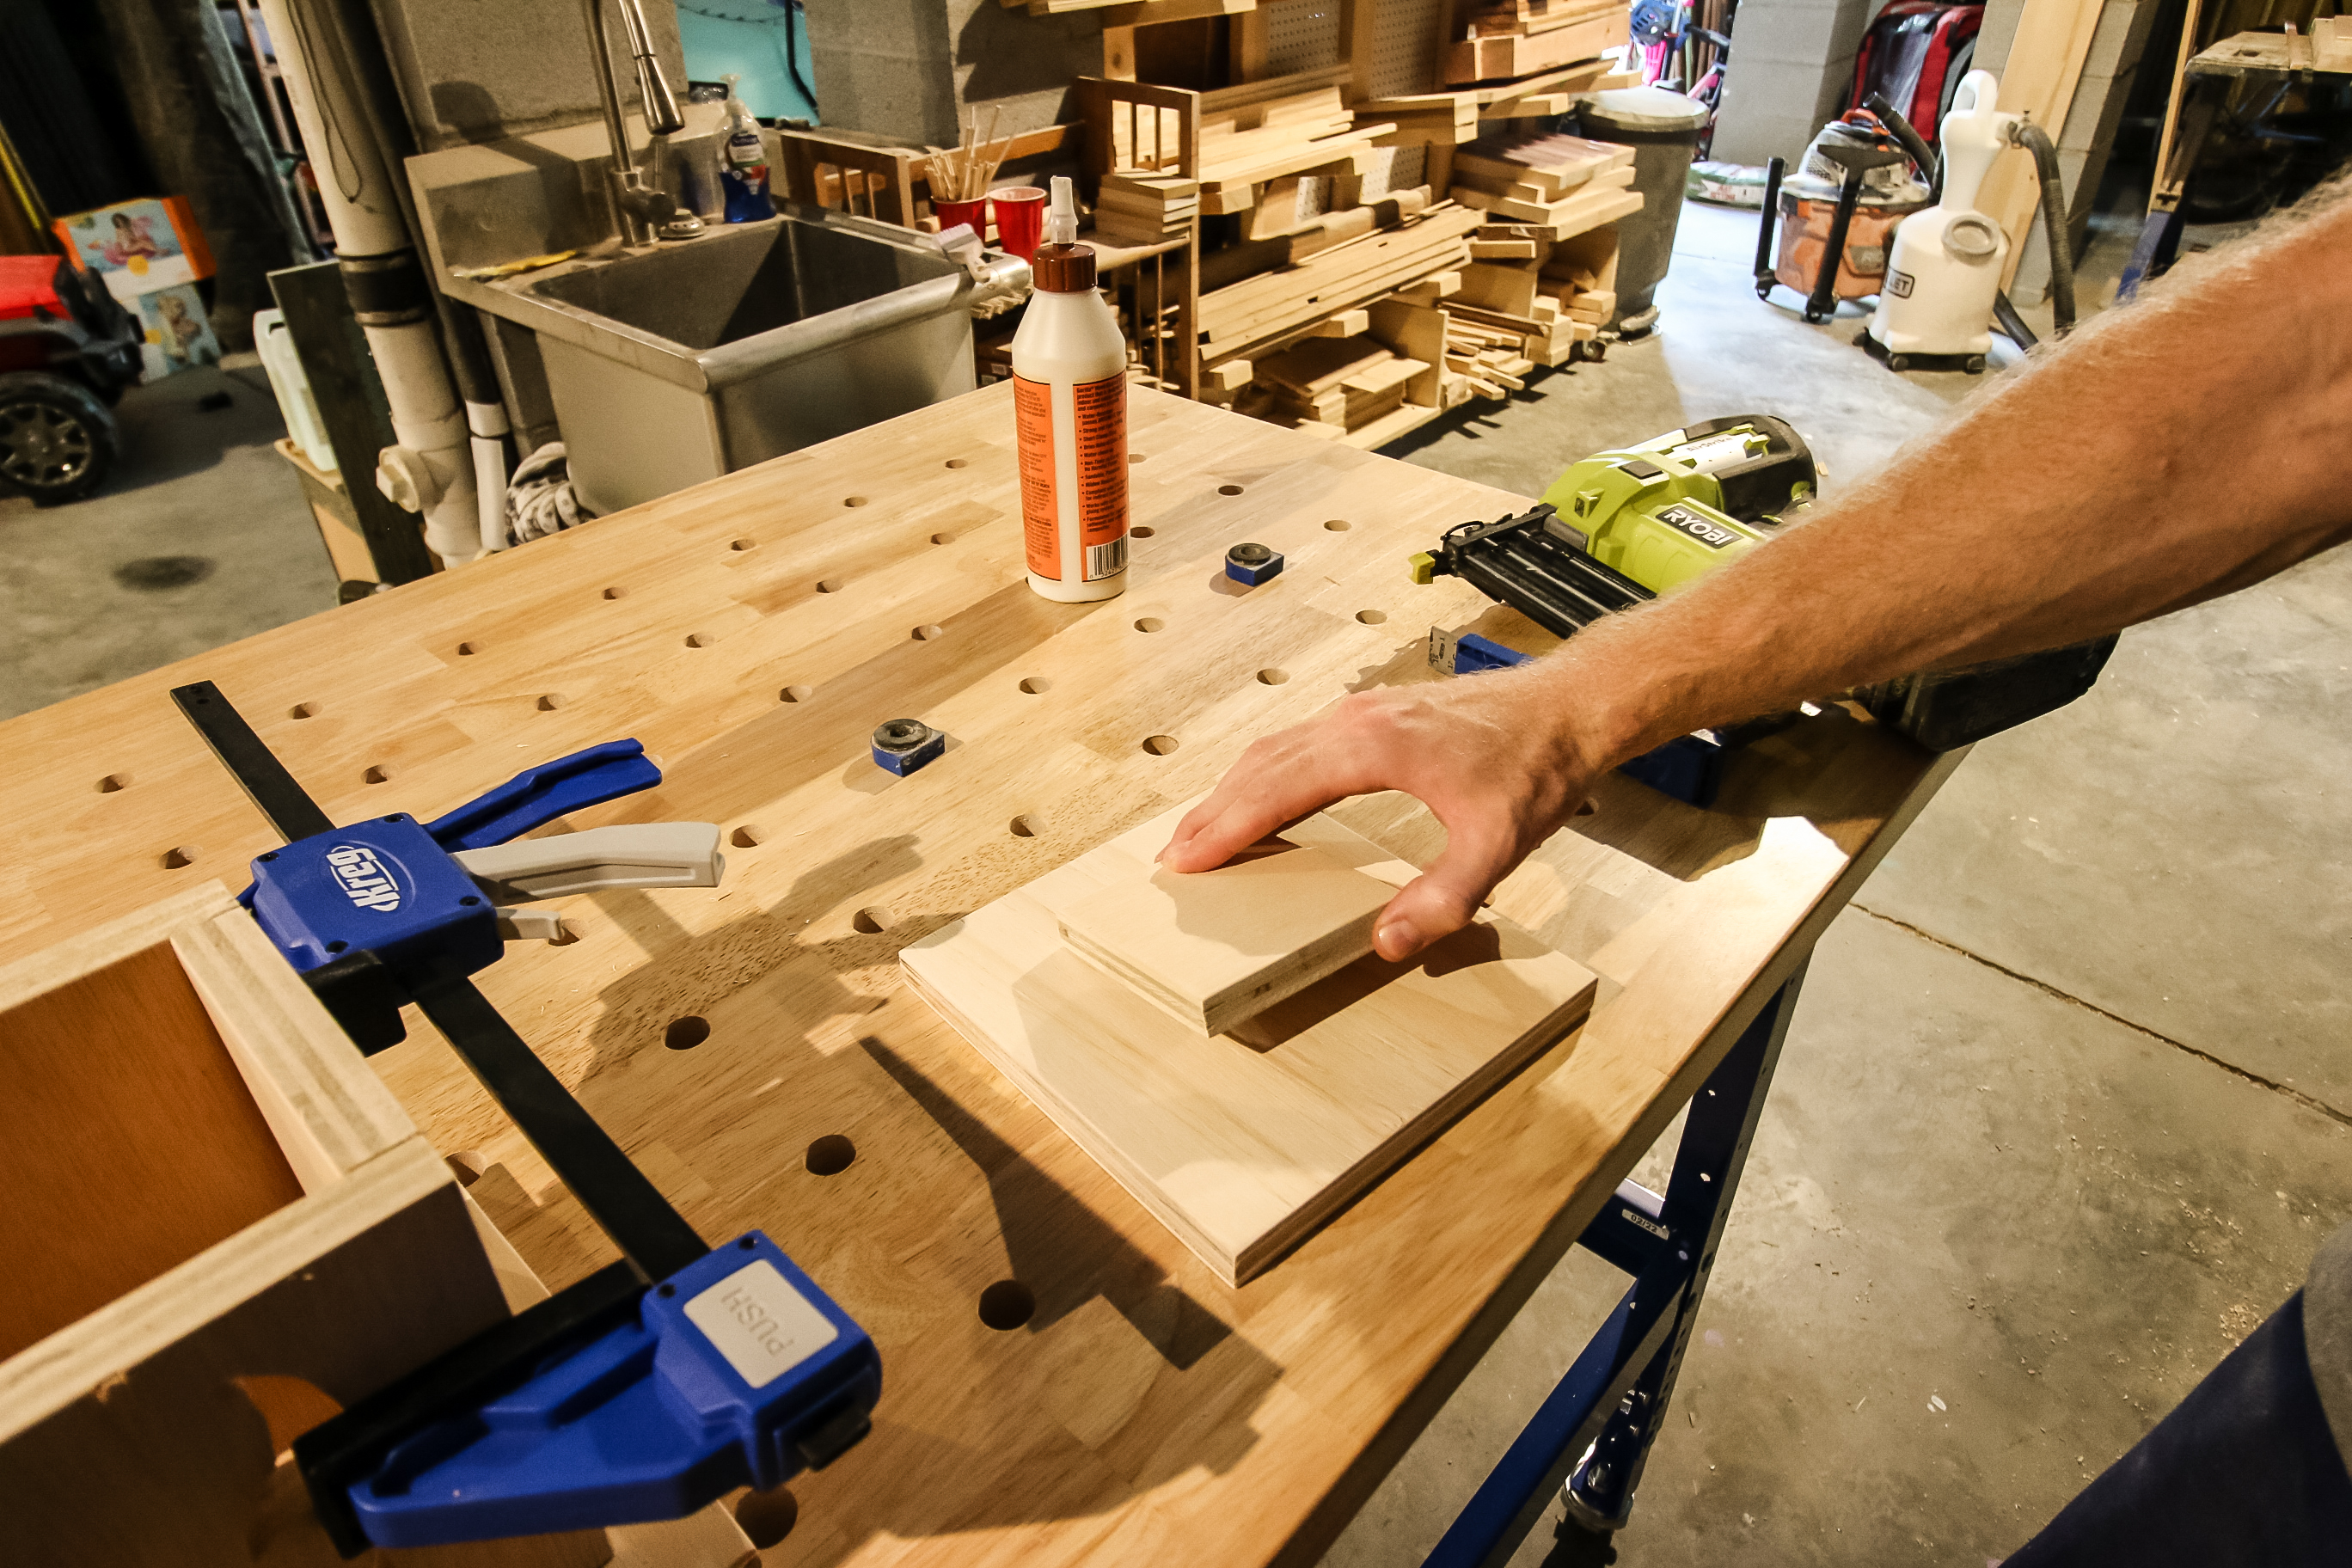
Step three- Build pumpkin top
In order to keep the lid from sliding around, we used wood glue and nails to attach a small square of wood centered on the underside of the top. This will sit between the four sides of the pumpkin body to keep the lid from moving around.
Then we used three small pieces of wood to make a handle on top of the lid of the wooden pumpkin.
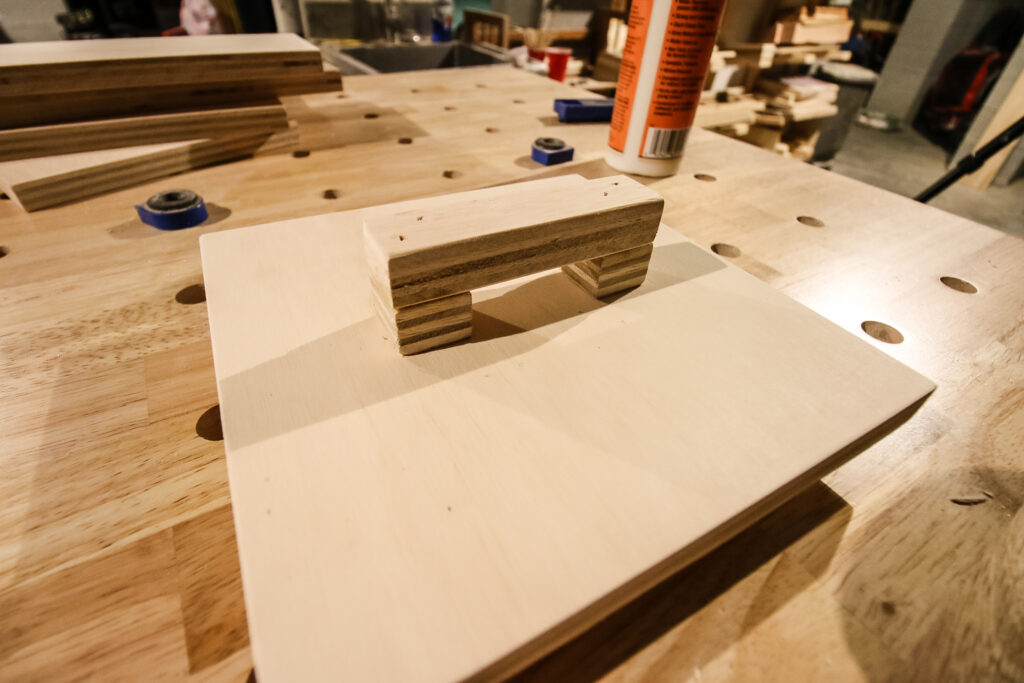
It was easy to put them together with wood glue and just leave them to dry. You could also use hot glue on this step to get them to dry quicker as there won't be a lot of pressure and won't be an issue.
Step four- Add a light
You could choose to stain or paint your easy wood jack-o-lantern or just leave it natural. We left them natural at first, but then added a Minwax True Black stain to add to the spooky factor.
Click here to learn more about black stains!
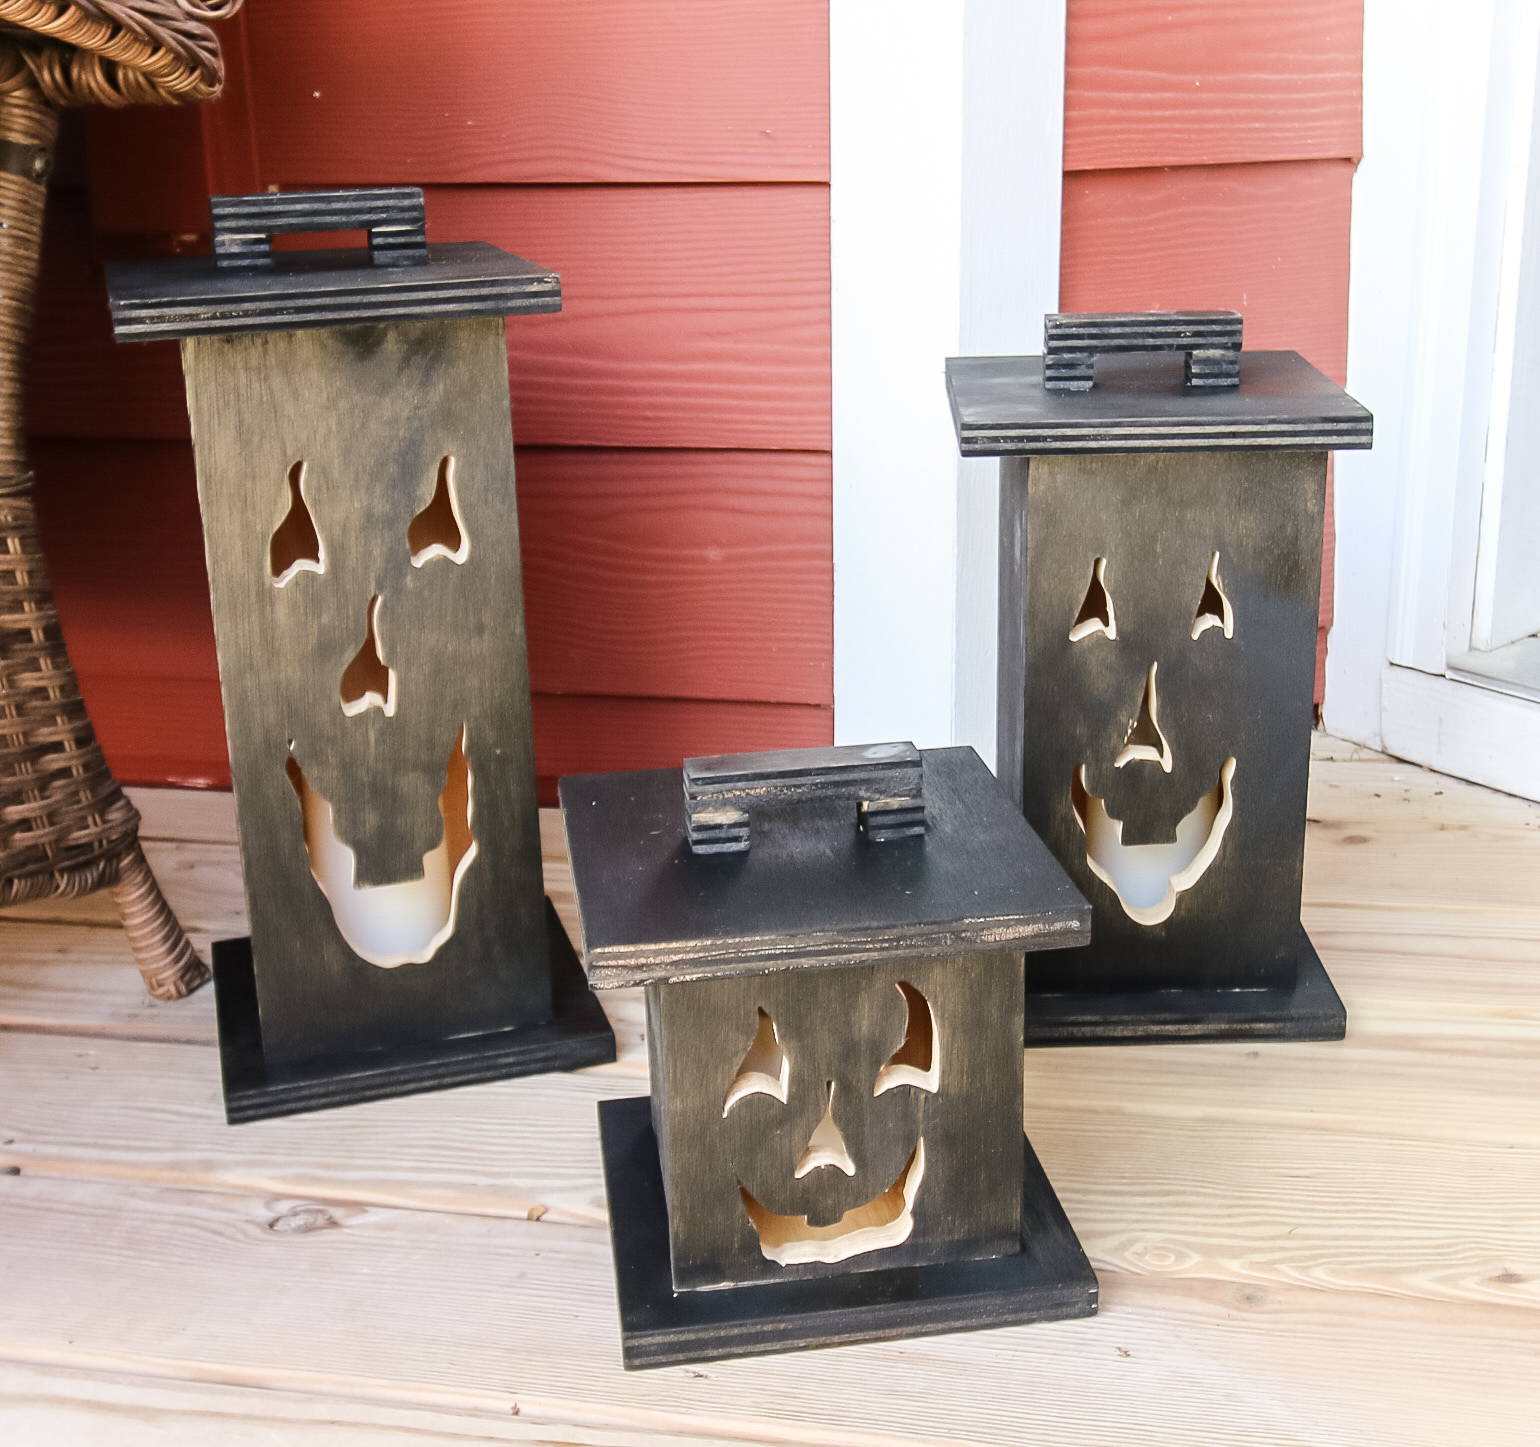
As with any wood project, you probably don't want put a live flame inside of it, so we added battery powered candles inside of each jack-o-lantern to illuminate them.

Then, we set them outside on the front porch for a spooky effect.
Simple wood jack-o-lanterns
Our DIY wooden jack-o-lanterns are a fun and easy Halloween craft idea that can be used in a number of different ways.
These look really good in a set of three in different sizes paired together.
We love an easy Halloween woodworking project and fall decor and these pumpkin shaped lanterns are a wonderful addition for the kids who come to our house for trick or treating!
Easy DIY wooden jack-o-lantern plans
Love these wooden jack-o-lanterns? Make some for yourself!
We made our woodworking plans for this project free for the Halloween spirit! Our plans come with a full material list, cut list and step-by-step instructions for three different sized wooden jack-o-lanterns.
Your kids and visitors will love this Halloween decoration!
Our favorite Halloween projects
Here are some of our favorite Halloween DIYs from the past!
Indoor Halloween Decor
- How to put up fake spiderwebs the right way
- Spider staircase
- DIY halloween village display
- Embroidery hoop Halloween wreath
- Spiderweb Halloween mantel
Outdoor Halloween Decor
- DIY concrete pumpkins
- How to pose skeletons in your yard
- DIY plastic pumpkin topiaries
- How to make a light up pumpkin arch
- Skeleton beach day yard display
- Skeleton pirate yard display
- Skeletons being chased by dogs yard display
Basic woodworking information for every project
Here are some of our most popular woodworking articles!
Shopping for wood:
Woodworking project ideas
- 100+ of the best woodworking project ideas!
- 62 easy beginning woodworking projects
- Woodworking project ideas to make and sell
See all our printable PDF woodworking plans!
Our favorite tools + supplies
- See all our favorite tool reviews
- How to use a Kreg jig
- The ultimate wood stain guide
- The best wood fillers for your project
Remember to also always use safety equipment while woodworking and using tools. Make sure you have proper eye protection, ear protection and a good mask to keep yourself safe.

Looking for something?
We've been doing this since 2012 so we have a LOT of blog posts!
Search stuff like: Ceiling Projects | DIY Plant Stands | Thrift Flips

Hey there, I'm Sean, the woodworking enthusiast and builder behind CharlestonCrafted.com! Since 2012, I've been sharing the magic of turning raw materials into beautiful creations. I love teaching others the art and satisfaction of woodworking and DIY. I try to inspire fellow crafters to make something extraordinary out of nothing at all.