
The DIY coffered ceiling we just put up in our new nursery seriously makes this look like the nicest room in the house. We did another DIY beadboard ceiling in our stairwell and hallway last year, but this one did even better, thanks to experience and better products from Woodgrain.
Click here to pin this project to your Pinterest board!
Thank you to Woodgrain for sponsoring this post. All opinions are our own.
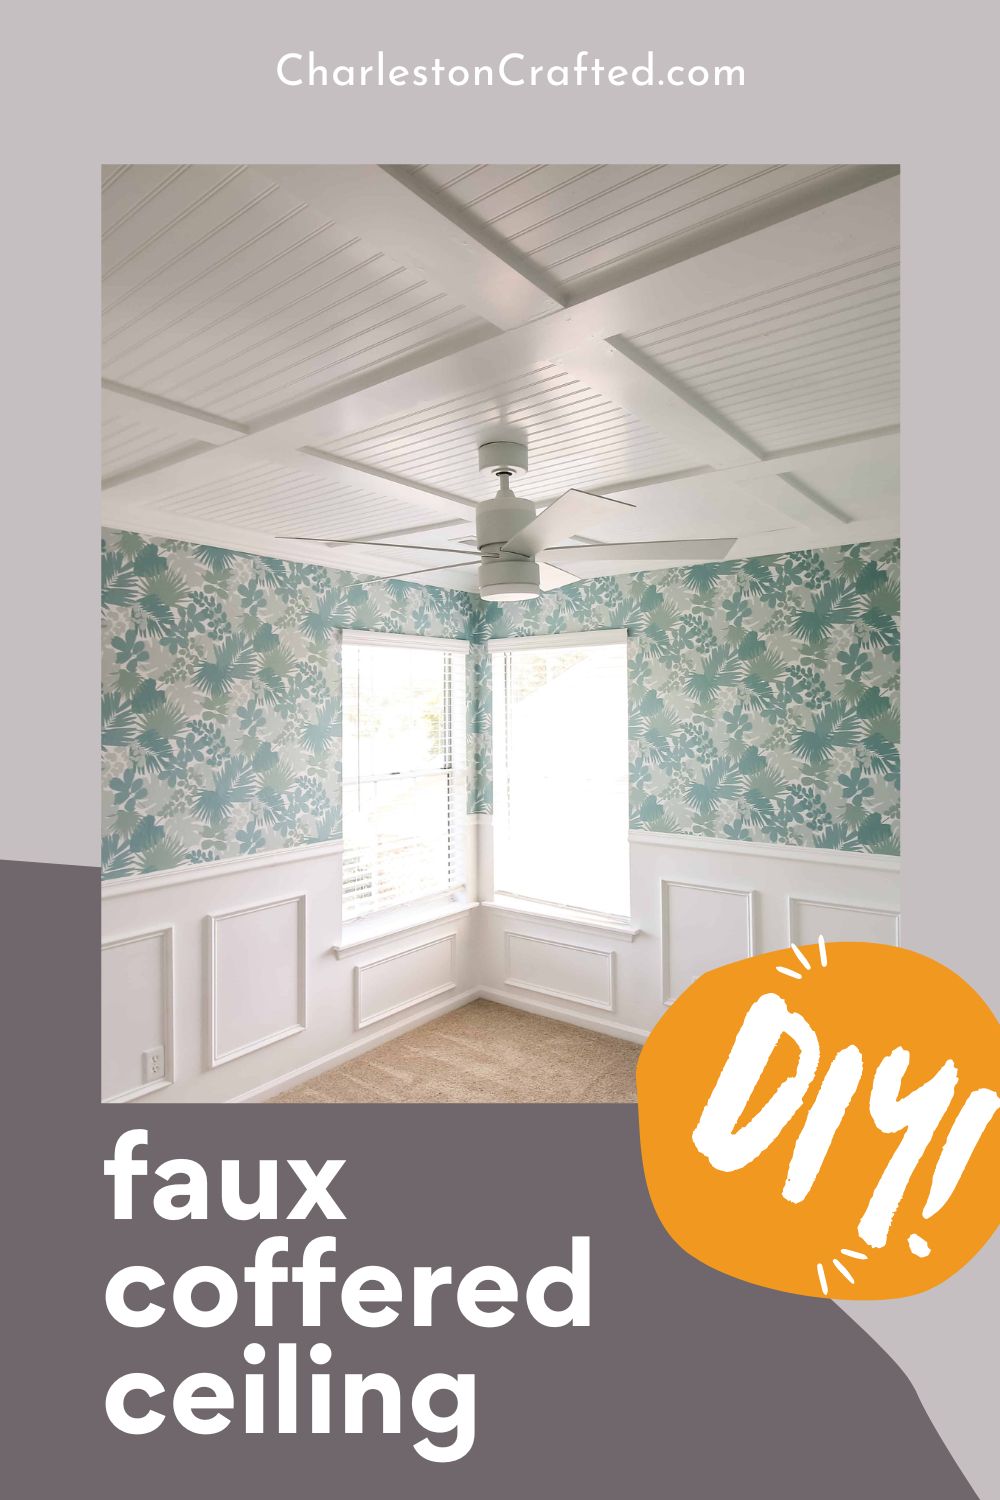
DIY Coffered Ceiling
We partnered with Woodgrain using their Finished Elegance line for this project just like we did with the DIY wainscoting we shared a couple of weeks ago.
This DIY coffered ceiling design was actually fairly easy in the grand scheme of things and way easier than in the stairwell since we didn’t have to balance ladders on the stairs.
love this project? check out all of our nursery projects here!
Here’s how we made our nursery’s DIY coffered ceiling:
Click here to get this whole project in a handy printable PDF!
The Bead Board
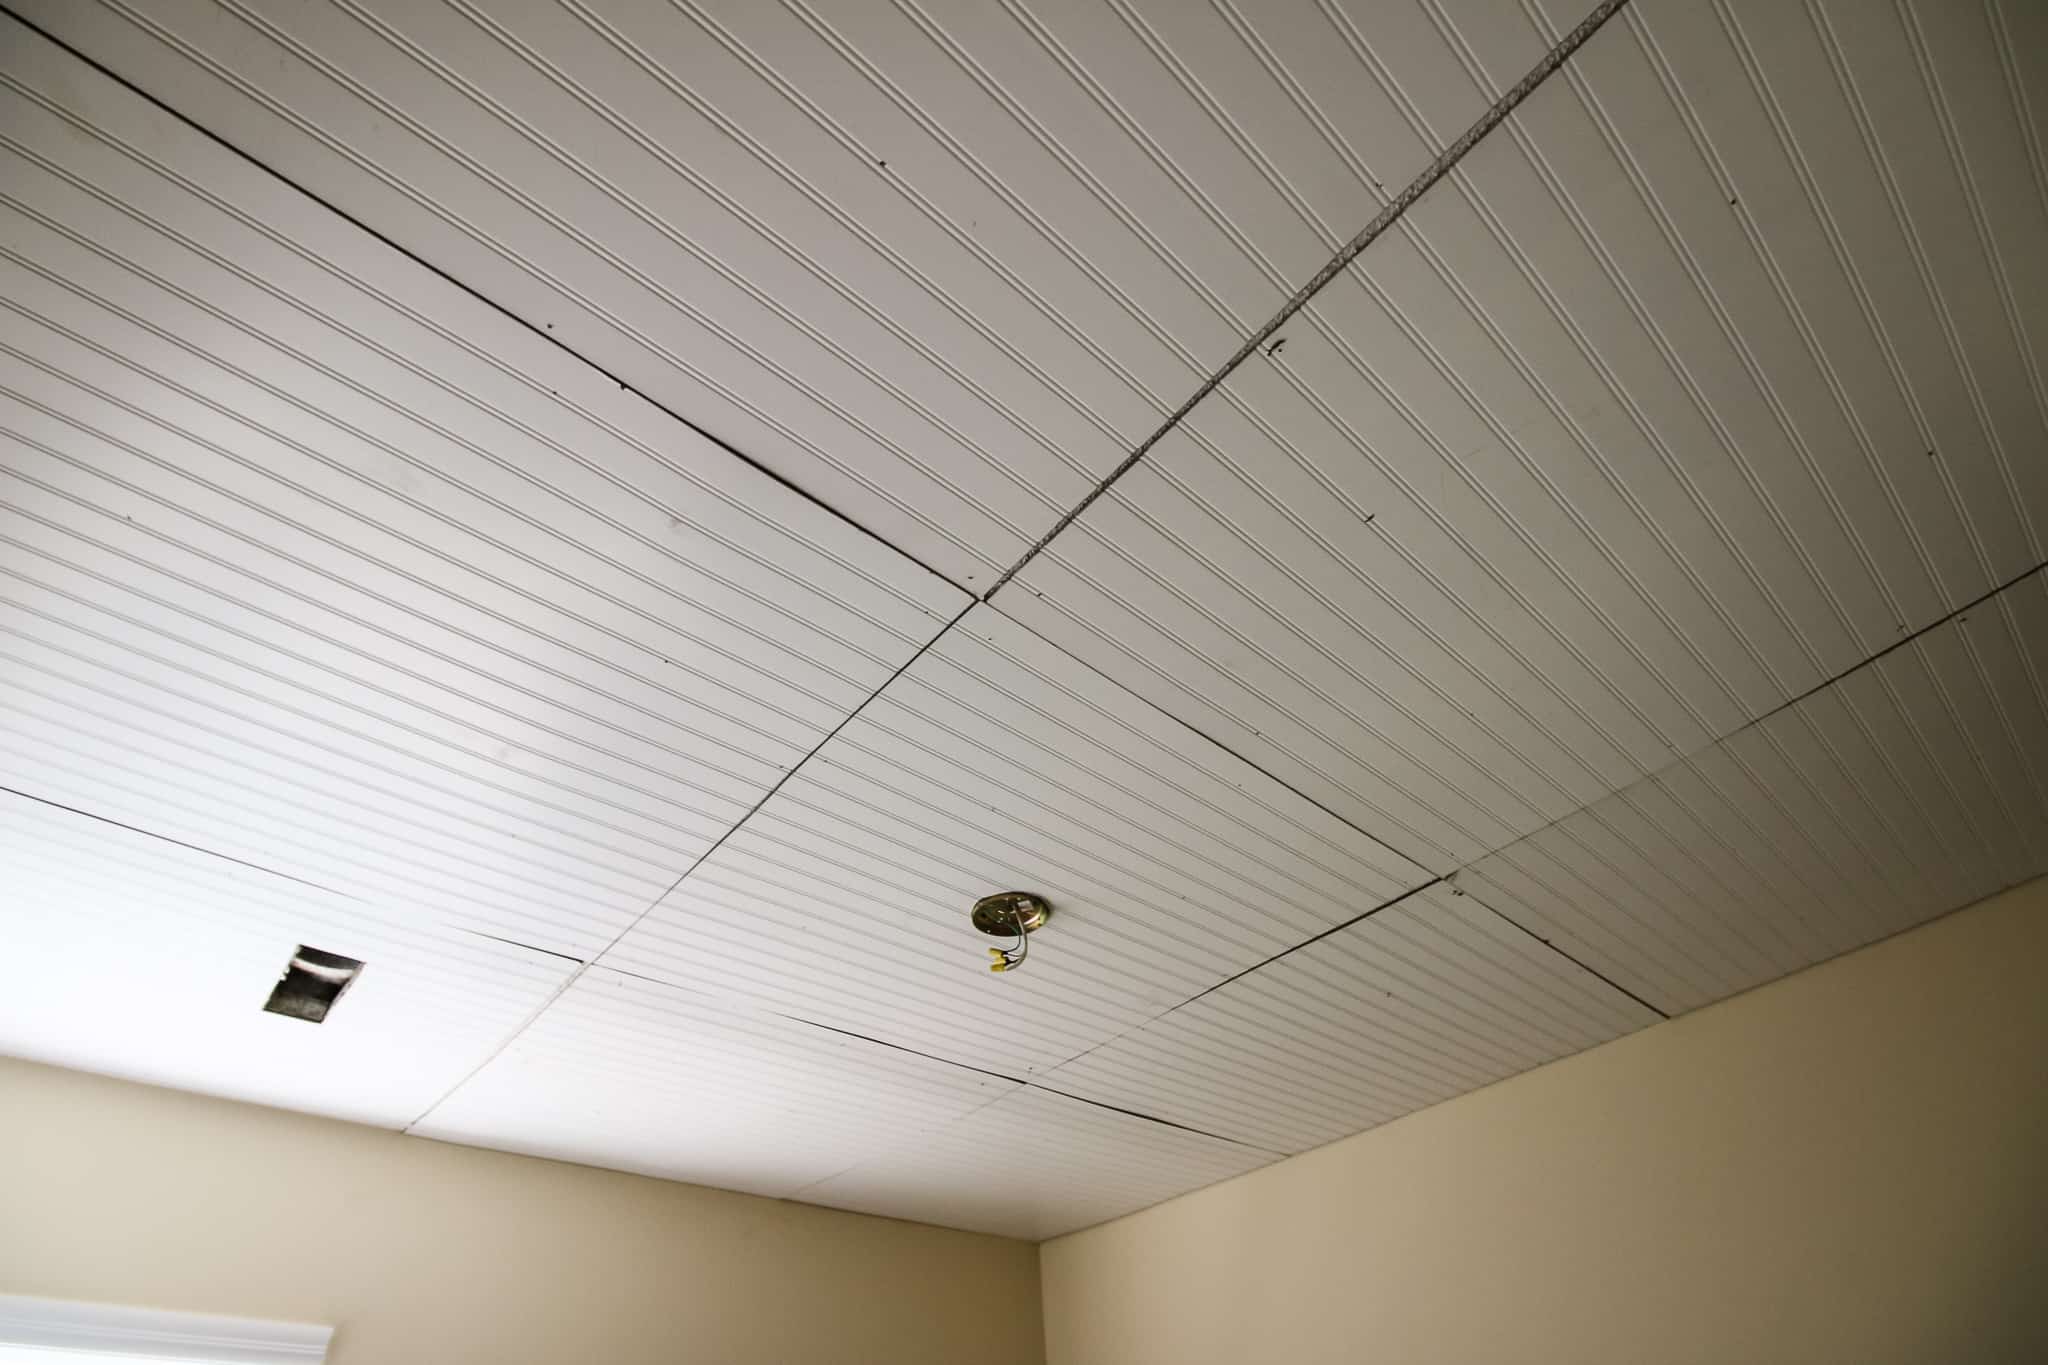
We started by sketching out our ceiling with exact measurements, then cutting 10 squares of bead board to fit.
Nine identical squares for our square room and one different for the entry nook.
We attached the squares using construction adhesive and our nail gun. This made it very easy to install.


We had to cut holes for the fan hookup and the air vent, but otherwise, this was an easy process.

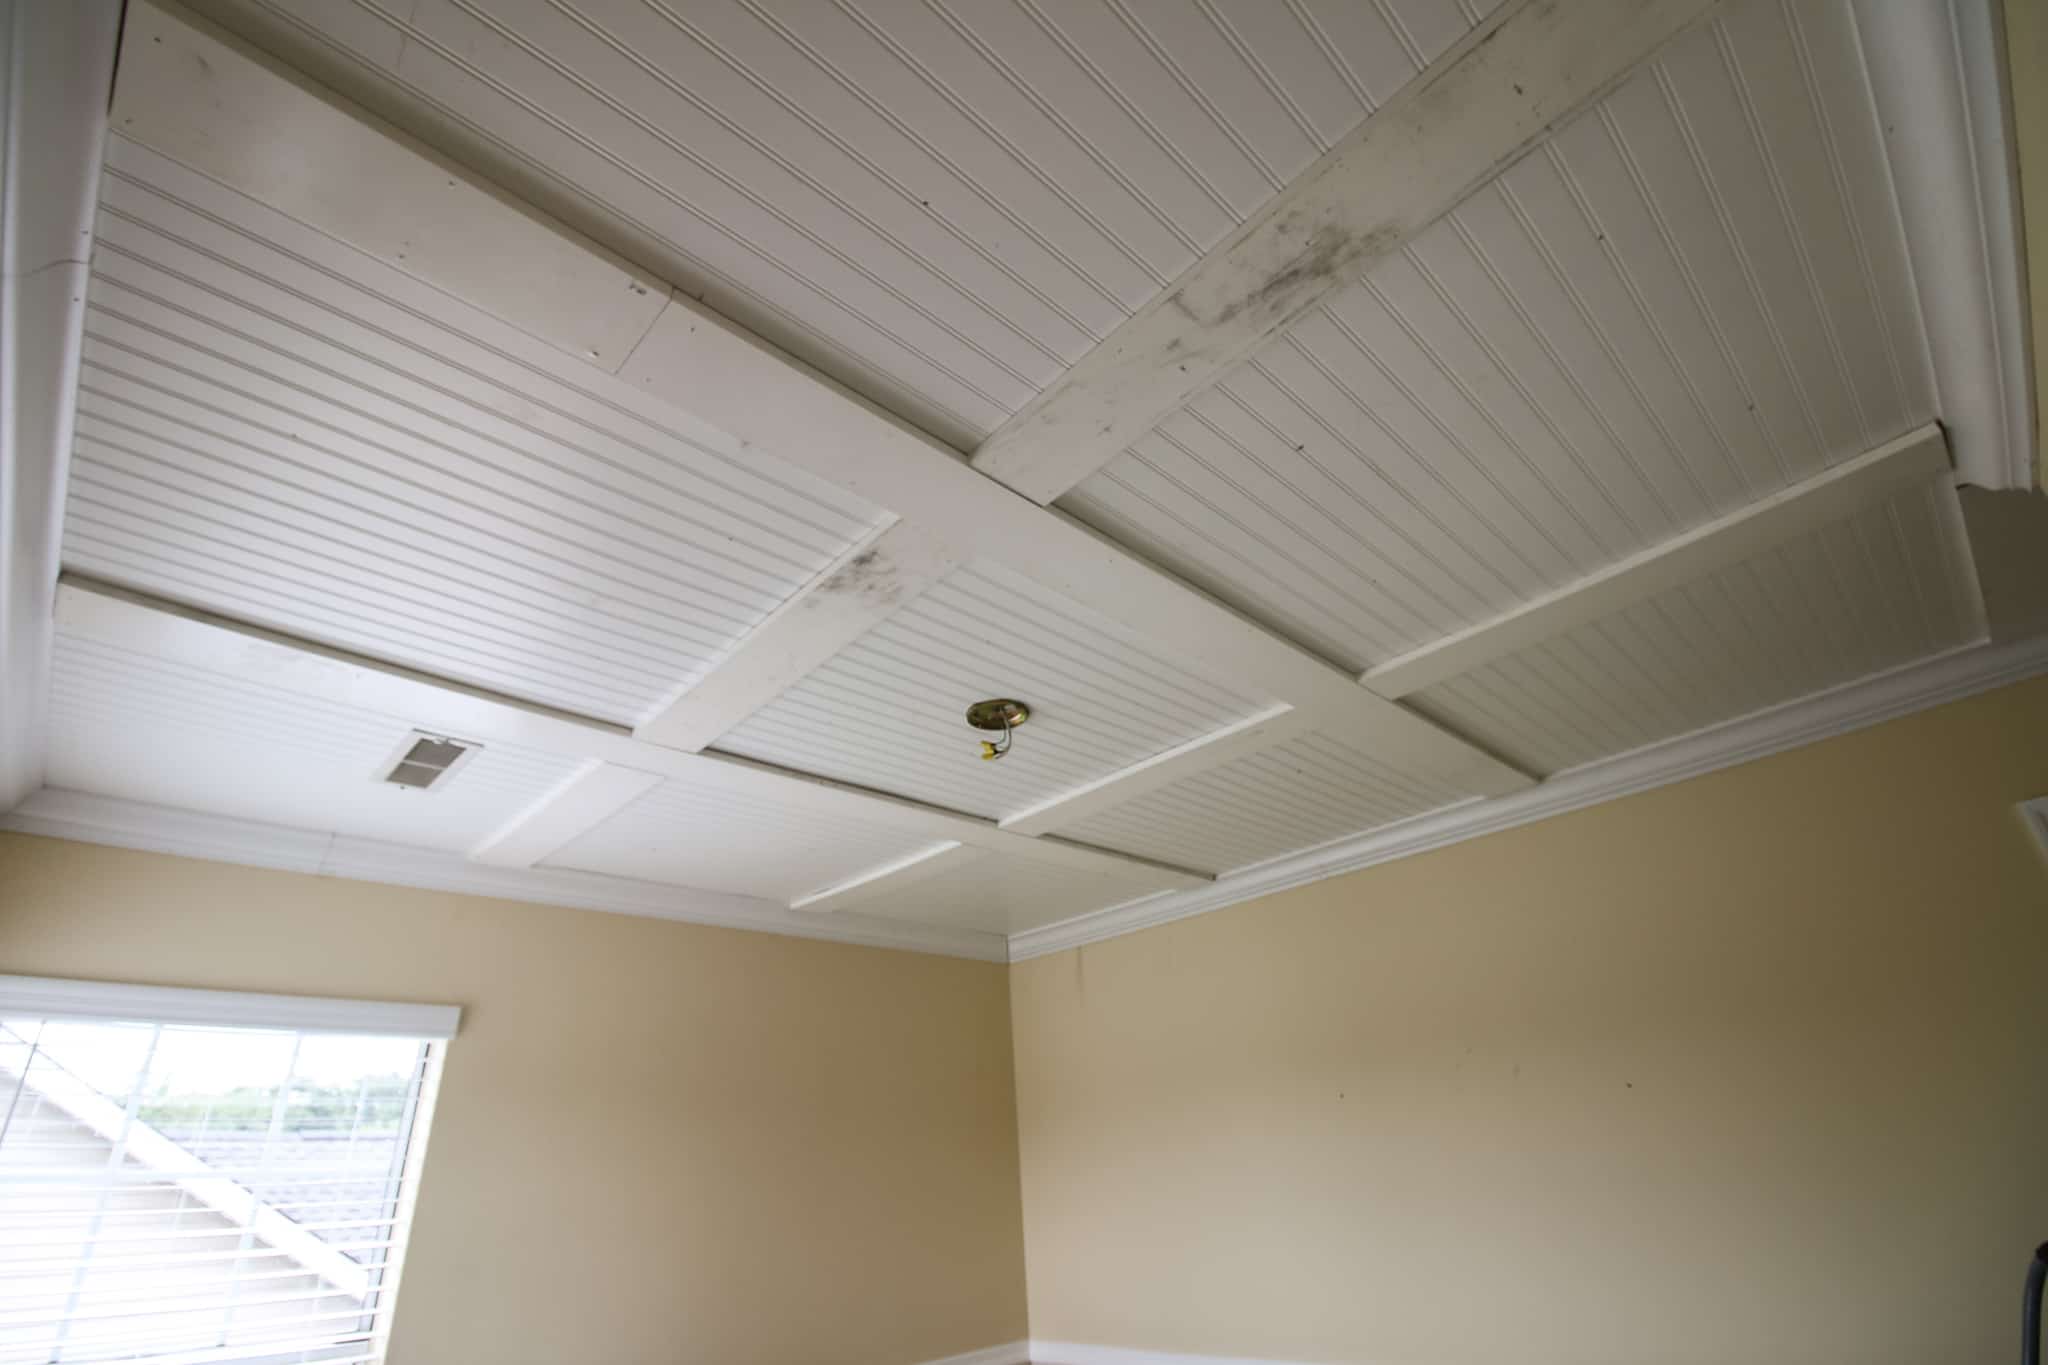
It definitely looks worse before it looks better!
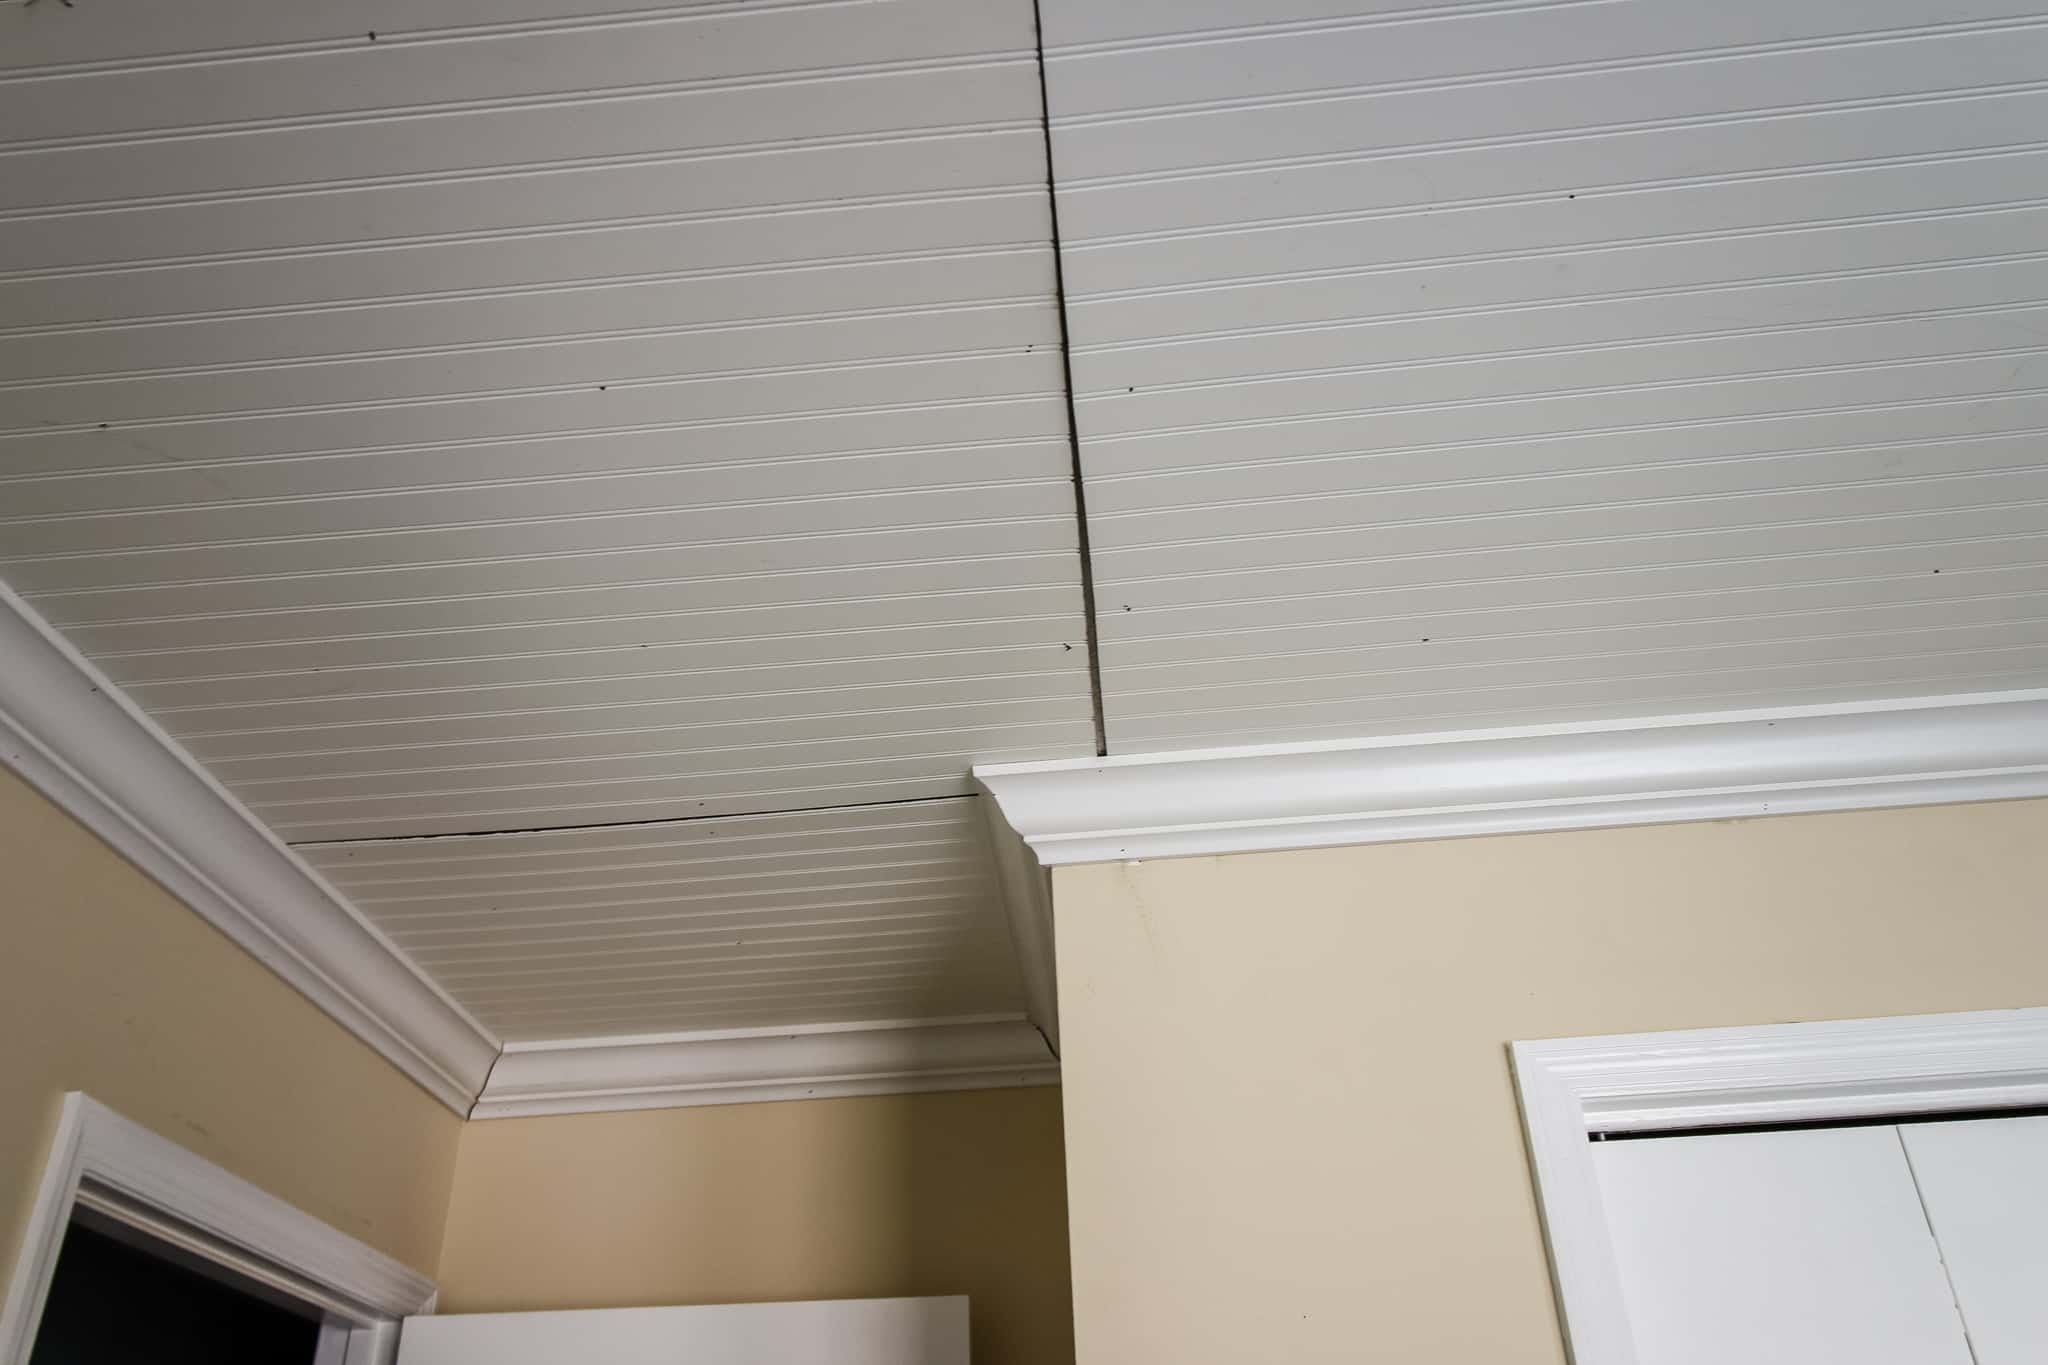
Crown Molding
We used Woodgrain’s 5 1/4 inch crown molding all the way around the room.
Their molding is flexible and light so it’s easy to handle when you’re trying to nail it in place.

We recommend you start with a long whole piece and work from there. This is easy to just nail into place.
Beams
Woodgrain has this awesome flat molding in various widths (we went with six inches wide) that we used to create faux beams for the coffered ceiling.
These butted right up against the crown molding nicely with their flat edge.
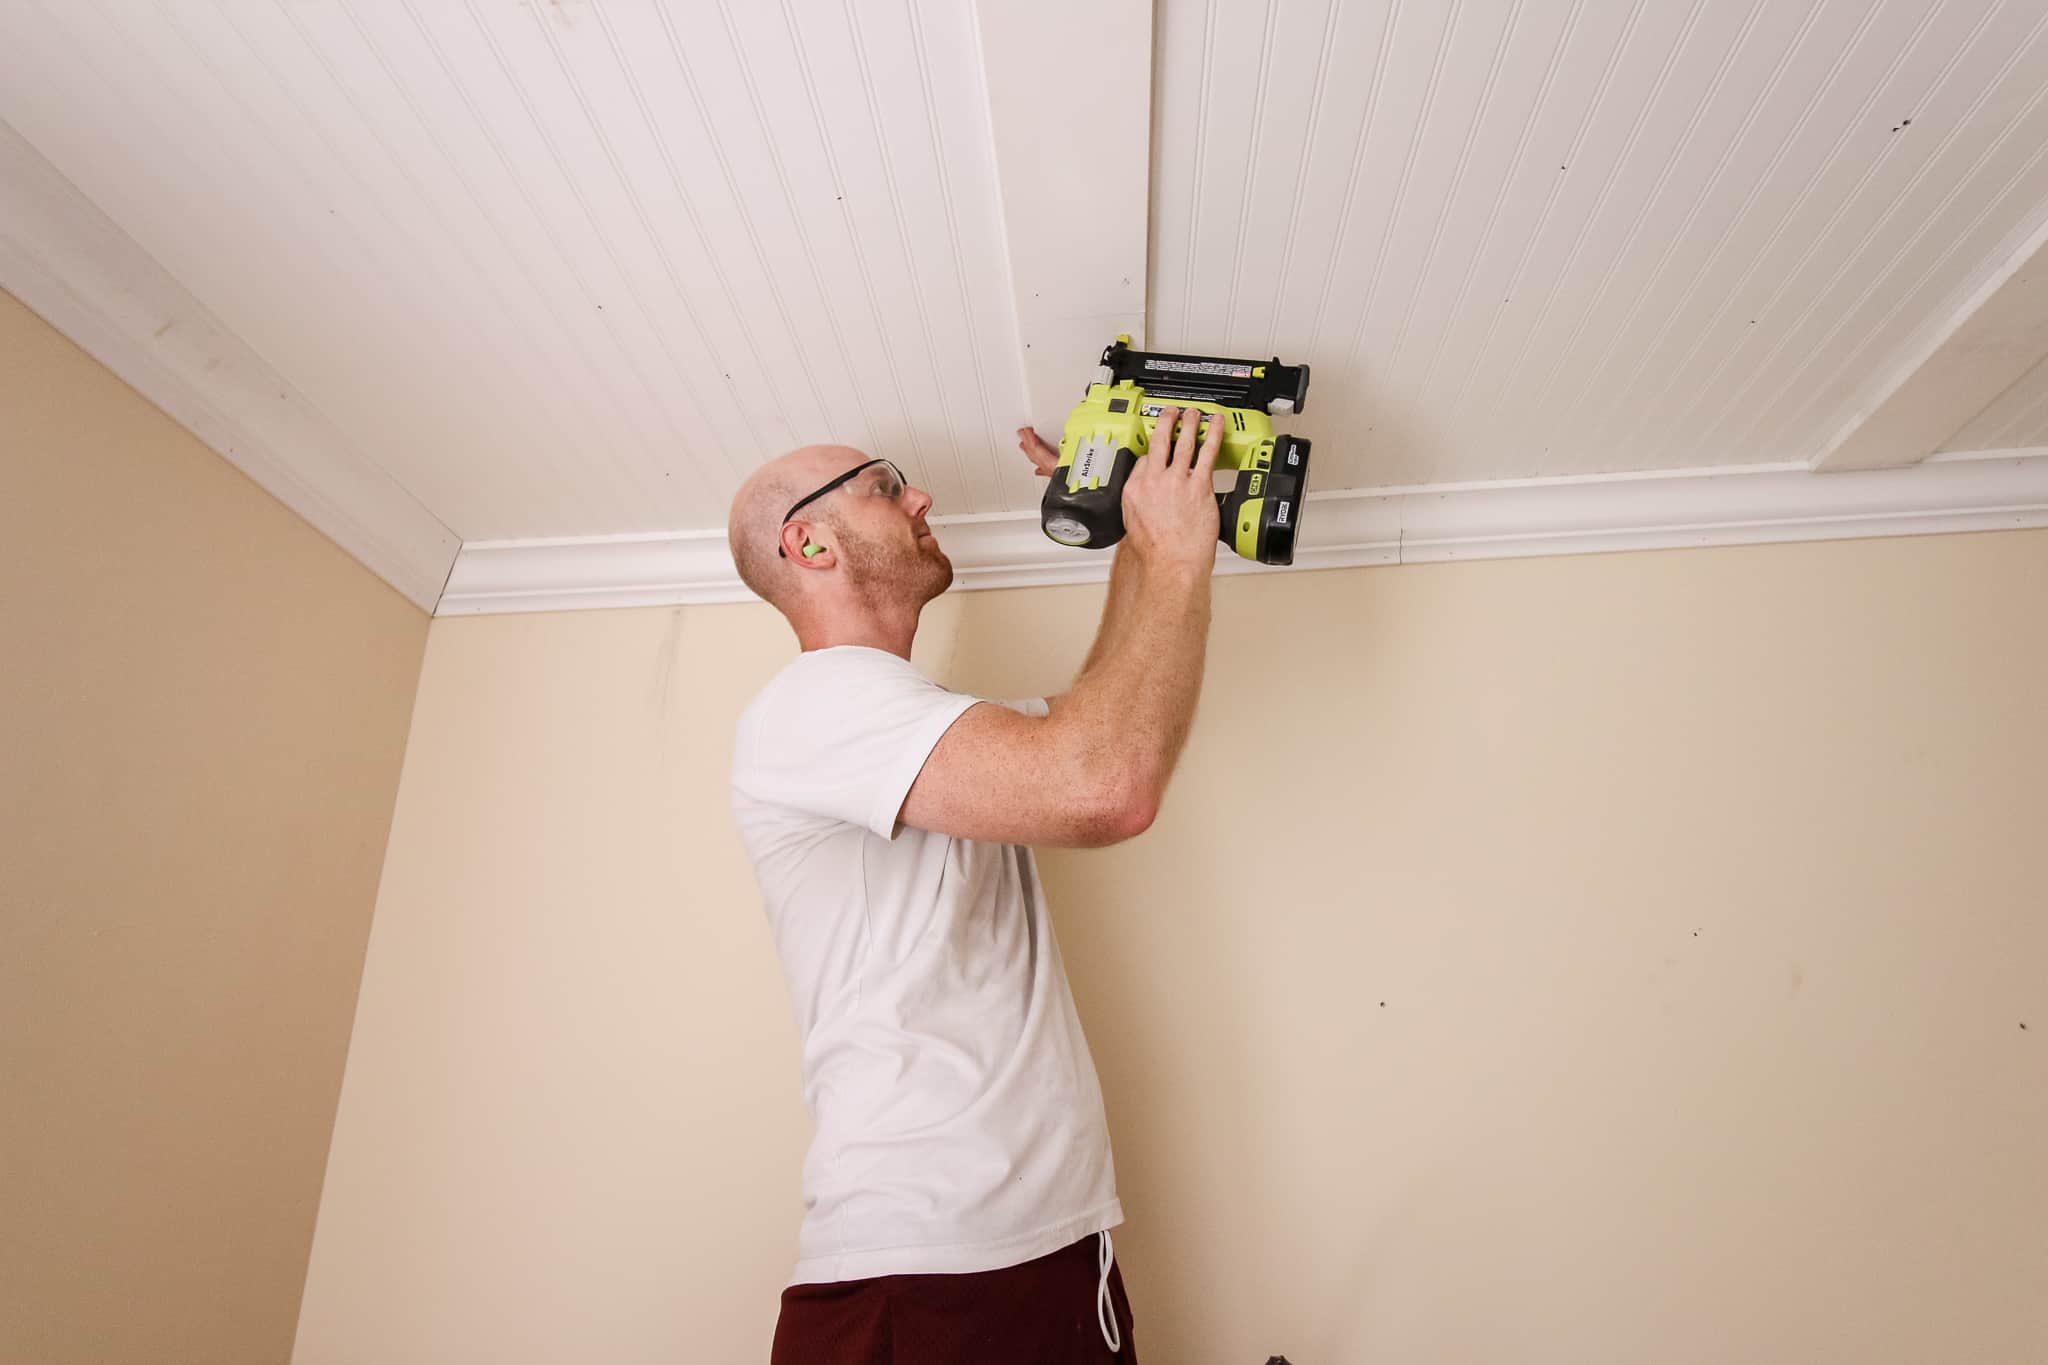
We started by doing long beams in one direction, then cutting the appropriately sized short beams to run across the other direction.
This created our 10 squares in a ceiling grid pattern.
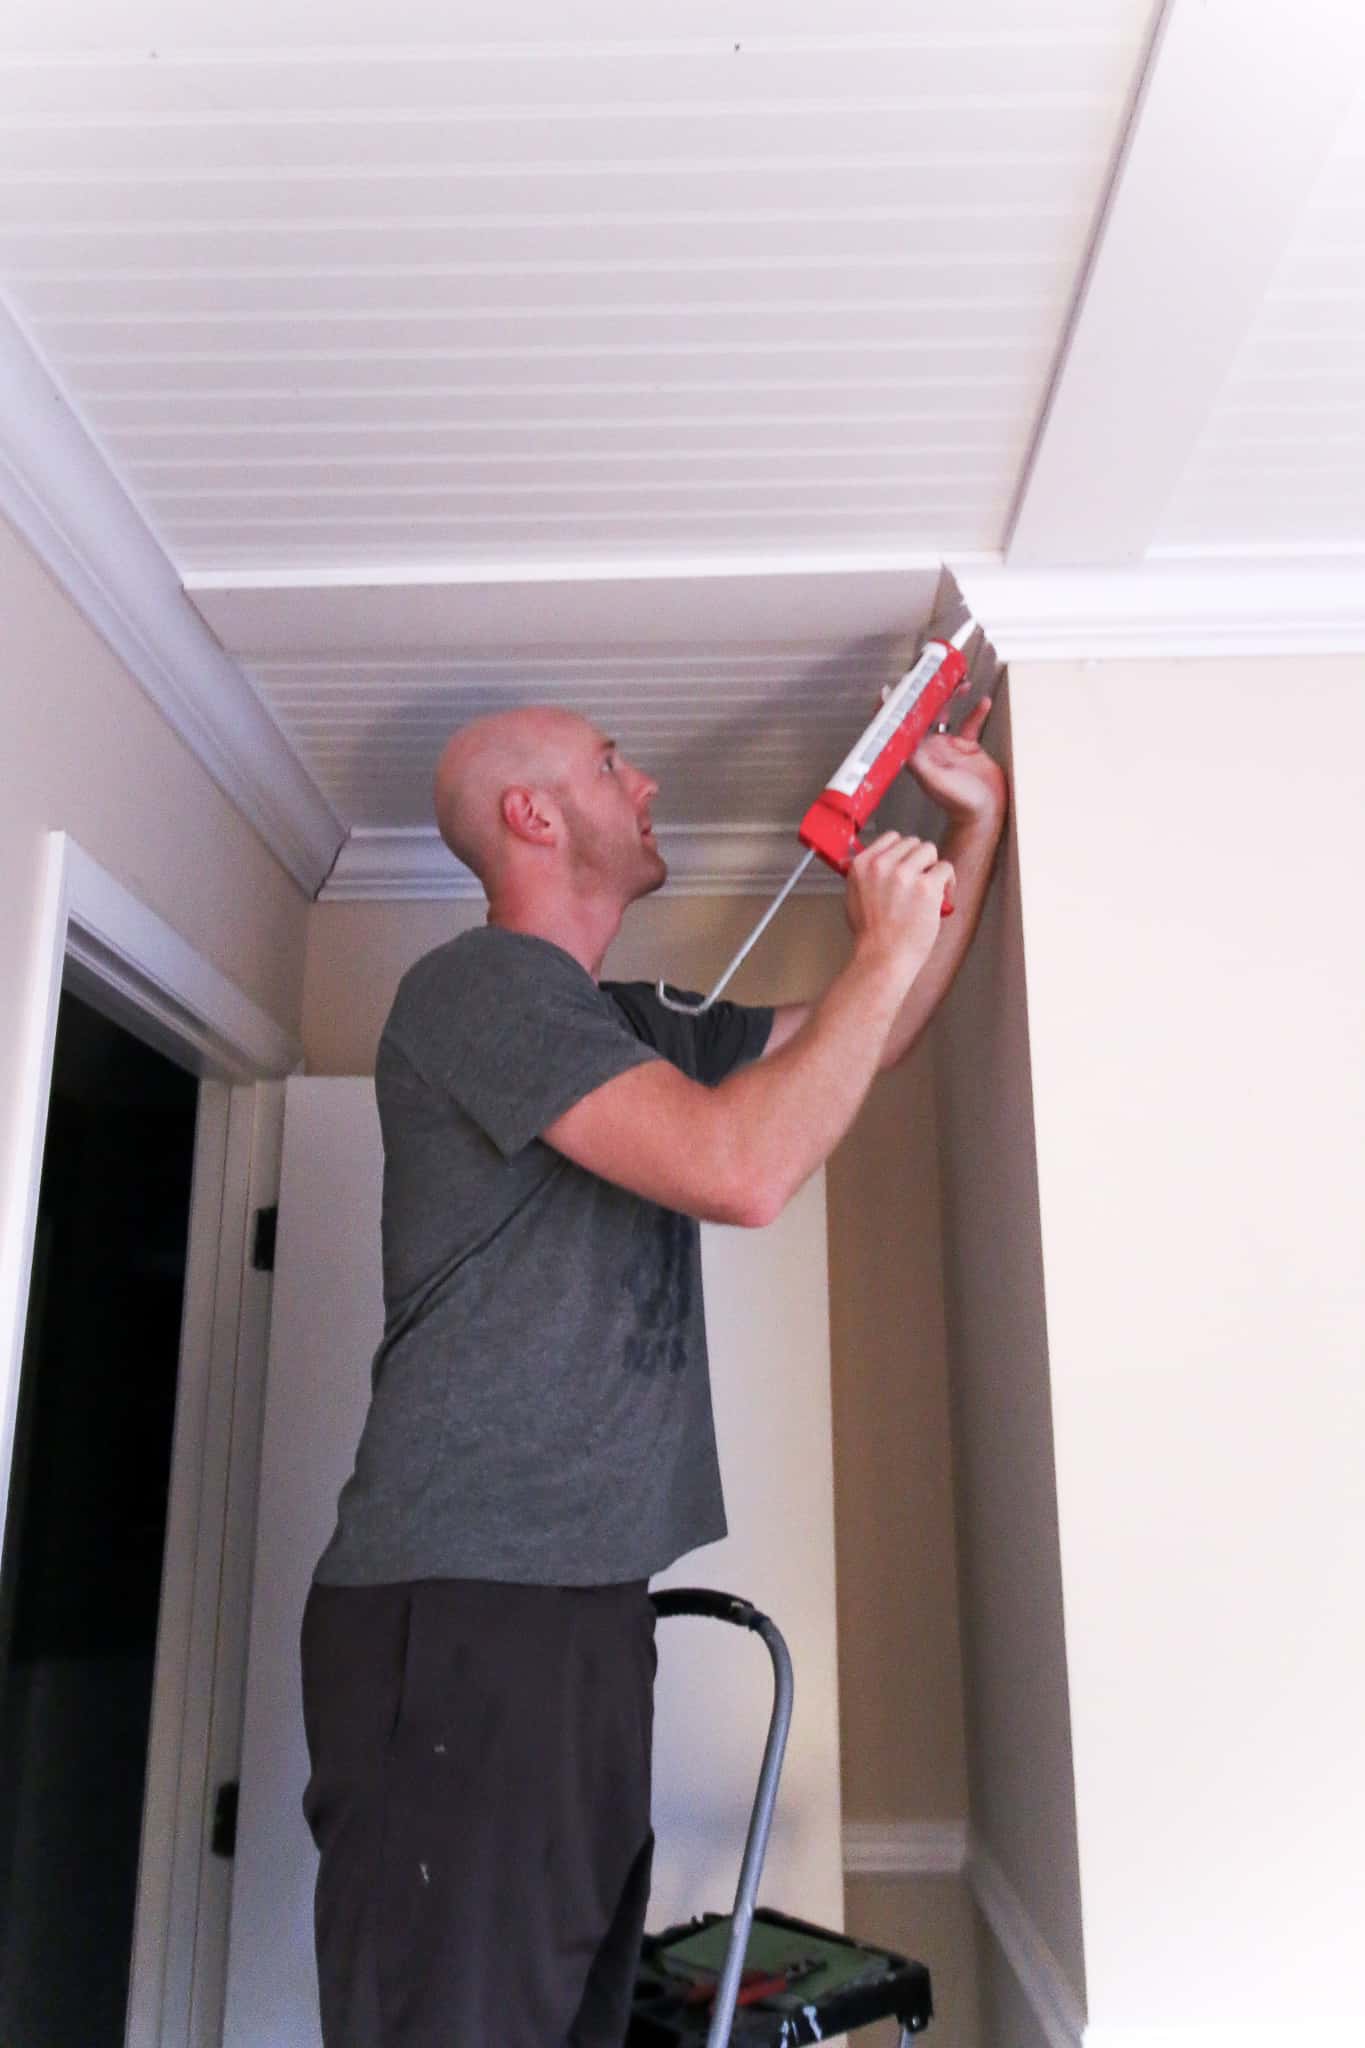
Finishing
We spent a good amount of time caulking and sanding all the corners, nail holes, and edges to make sure everything looked as seamless as possible.


Woodgrain makes their own color-matched caulk that works great with their pieces of molding.
It blends into the color of the crown molding especially well.
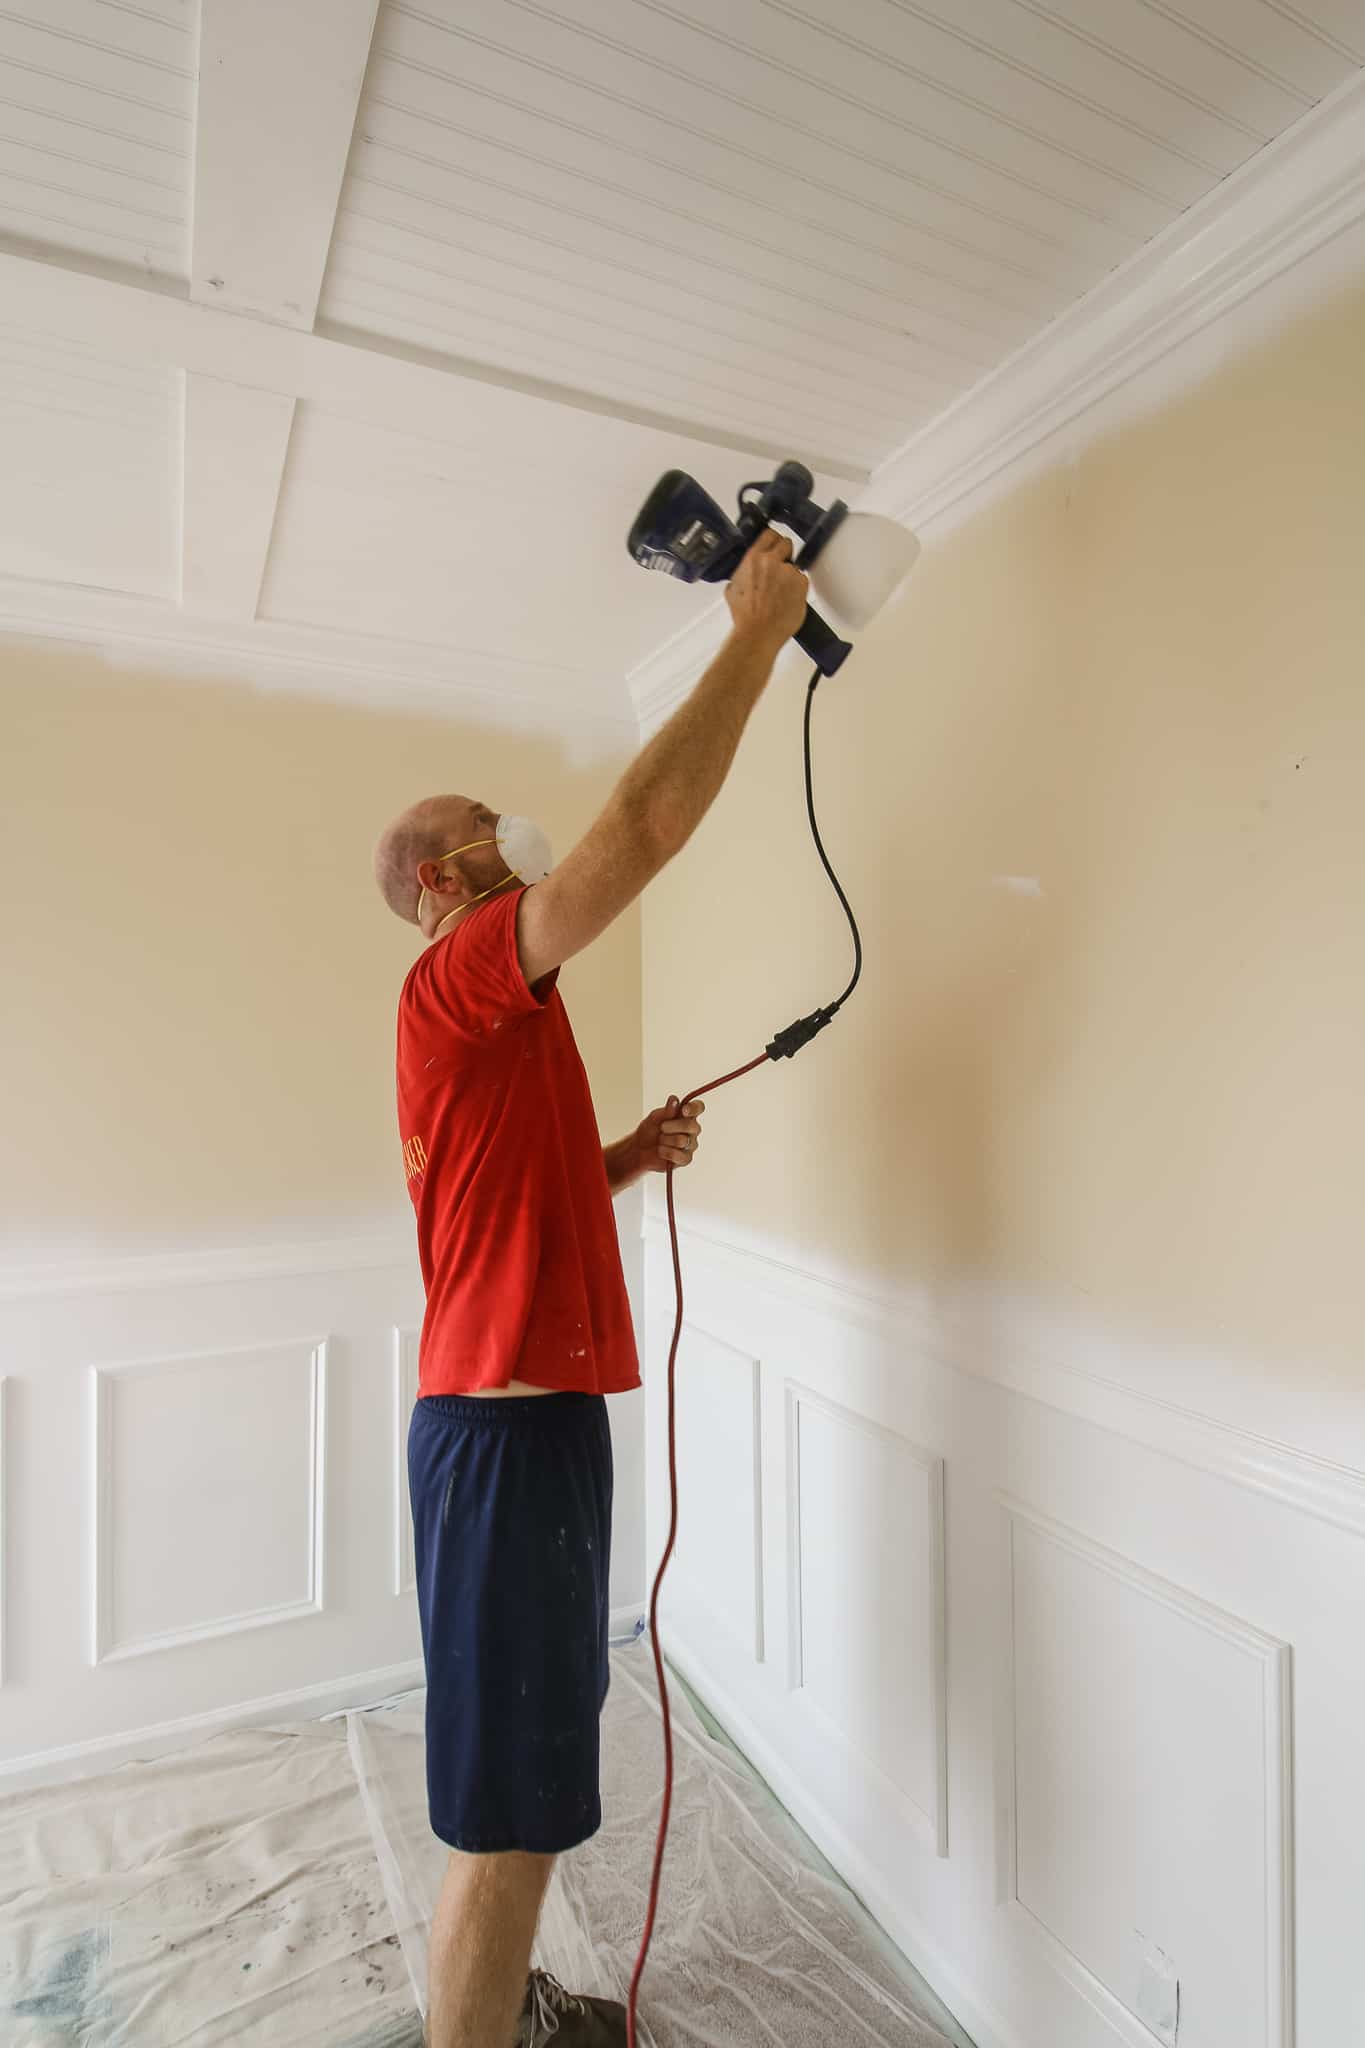
Since the bead board was an off white though, we used our HomeRight paint sprayer to give the entire ceiling one coat of an off-the-shelf white.
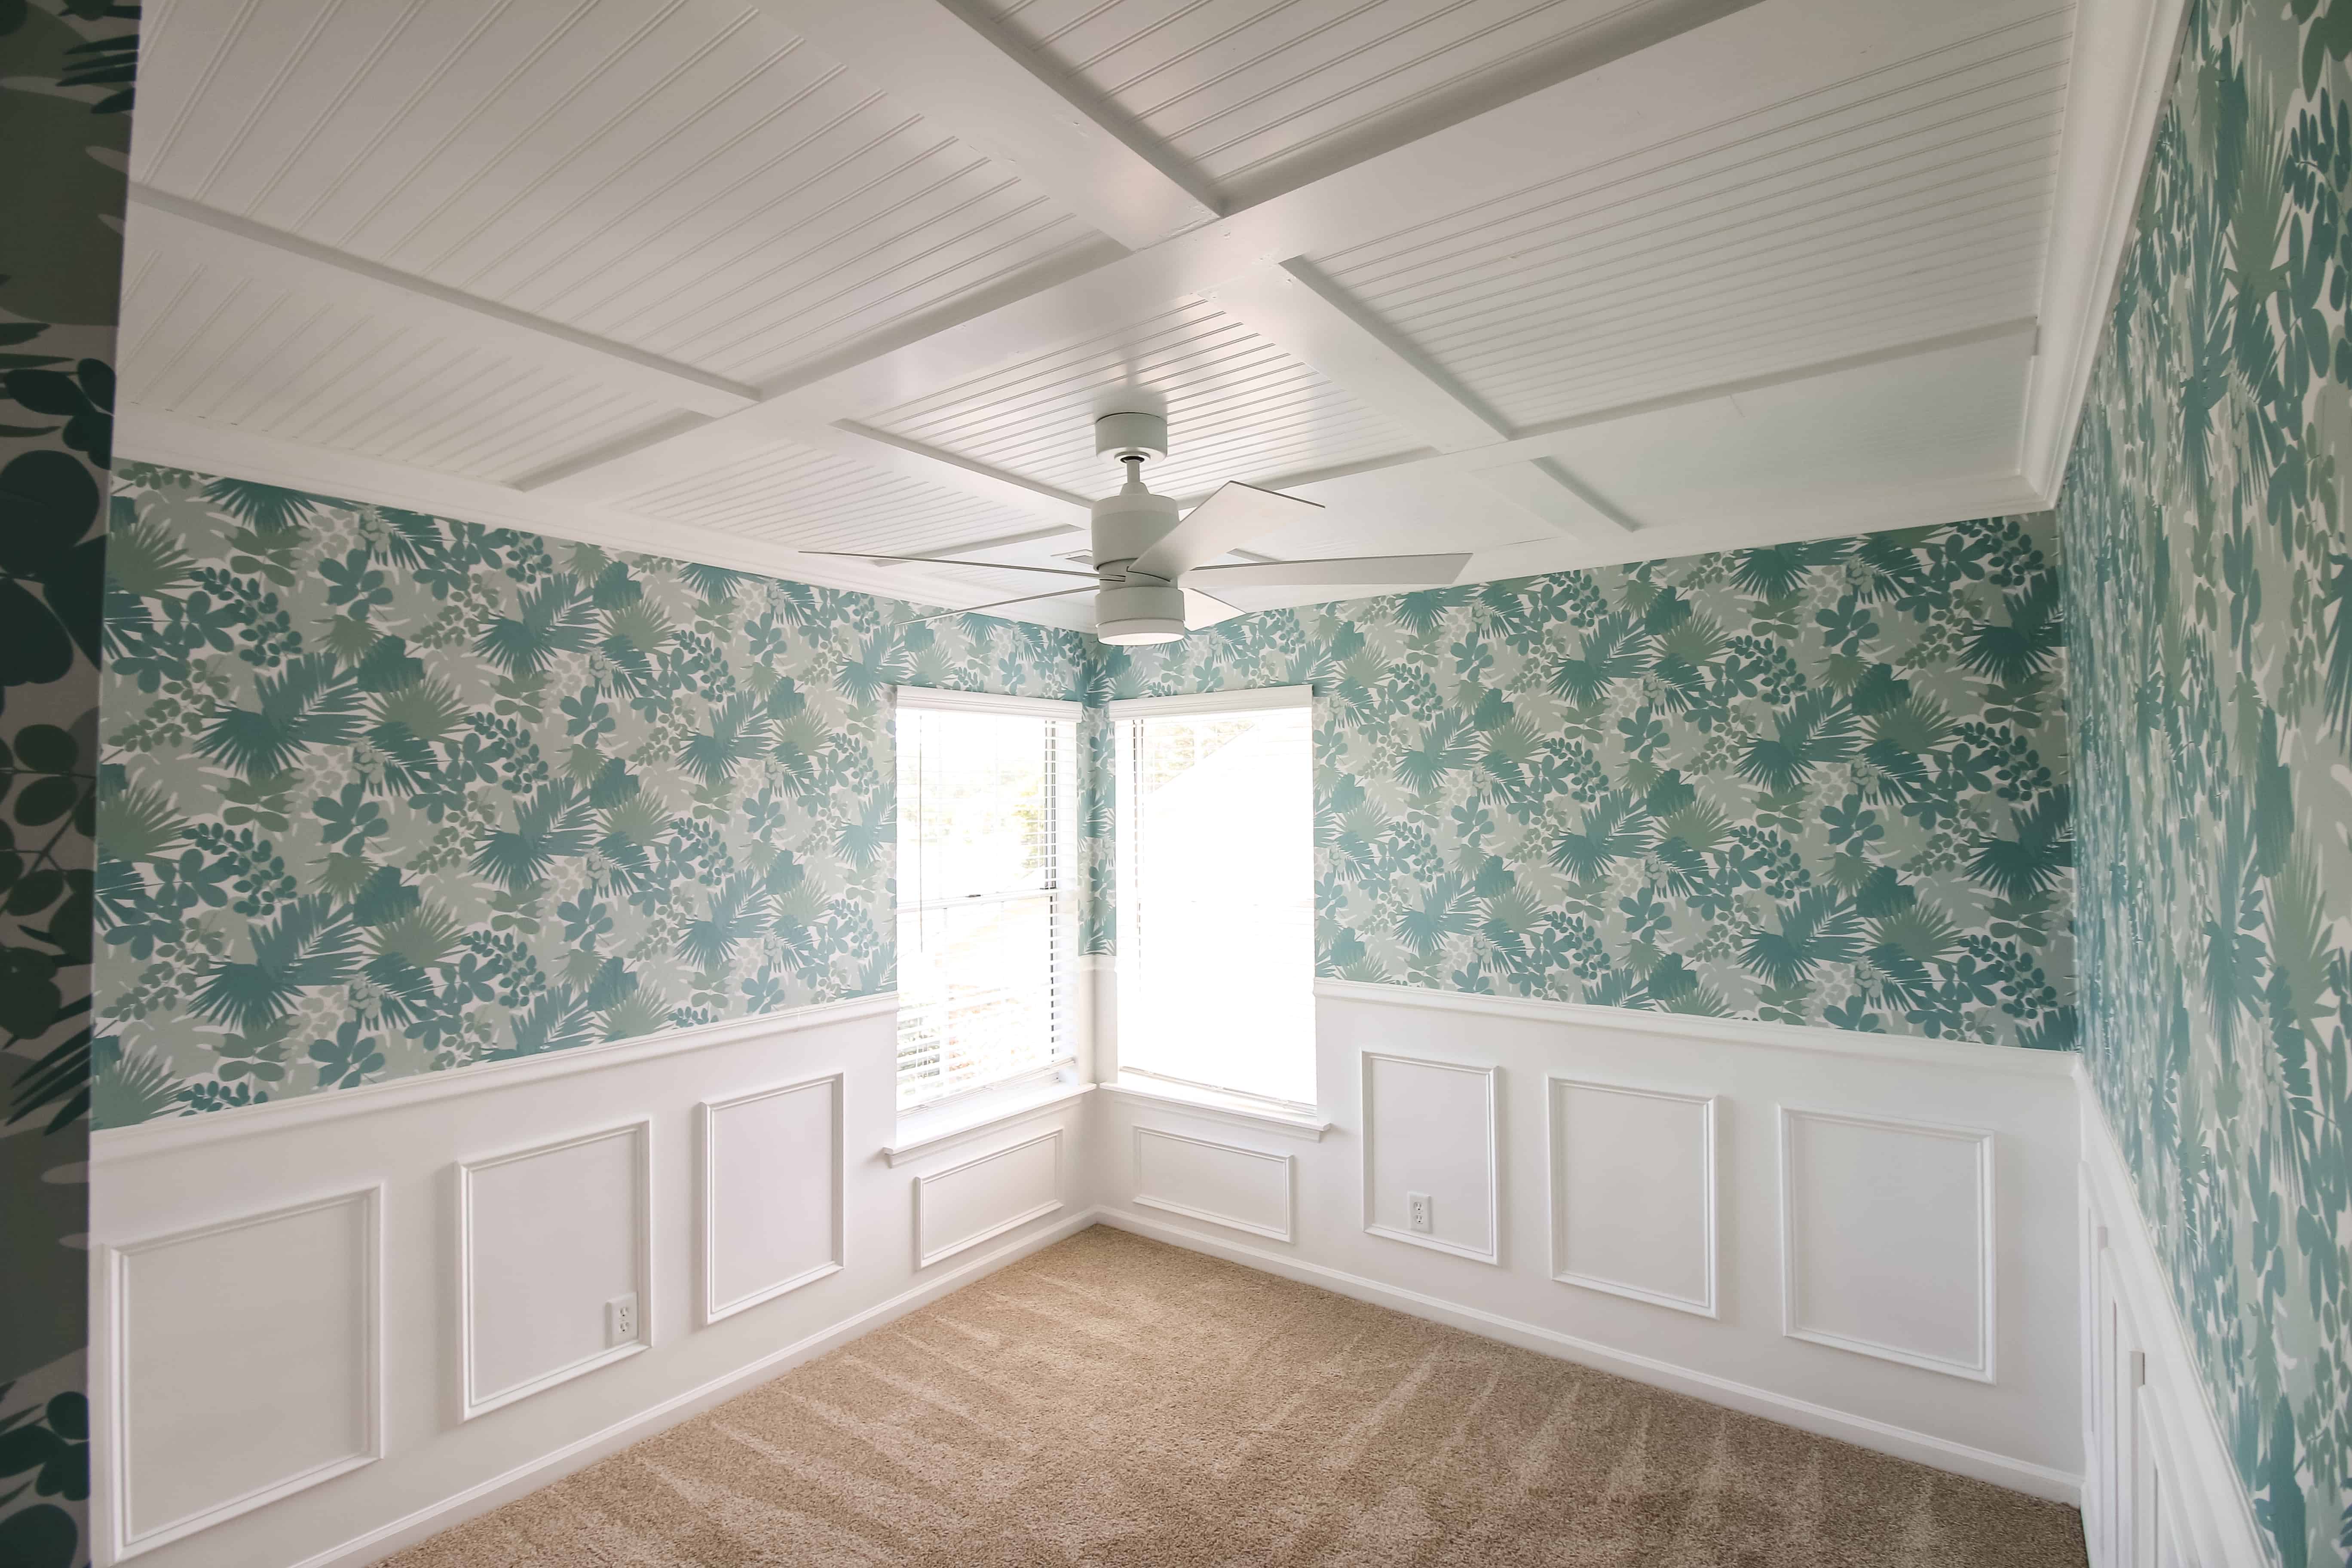
The Final Product
Look how amazing this ceiling turned out y’all!
This DIY coffered ceiling really wasn’t that hard at all. It took a couple of phases, but we had all the bead board, crown molding and beams up in one day.
It helped that I had cut the bead board pieces the night before.
Then we just caulked and sanded during the week and painted when we painted the wainscoting.
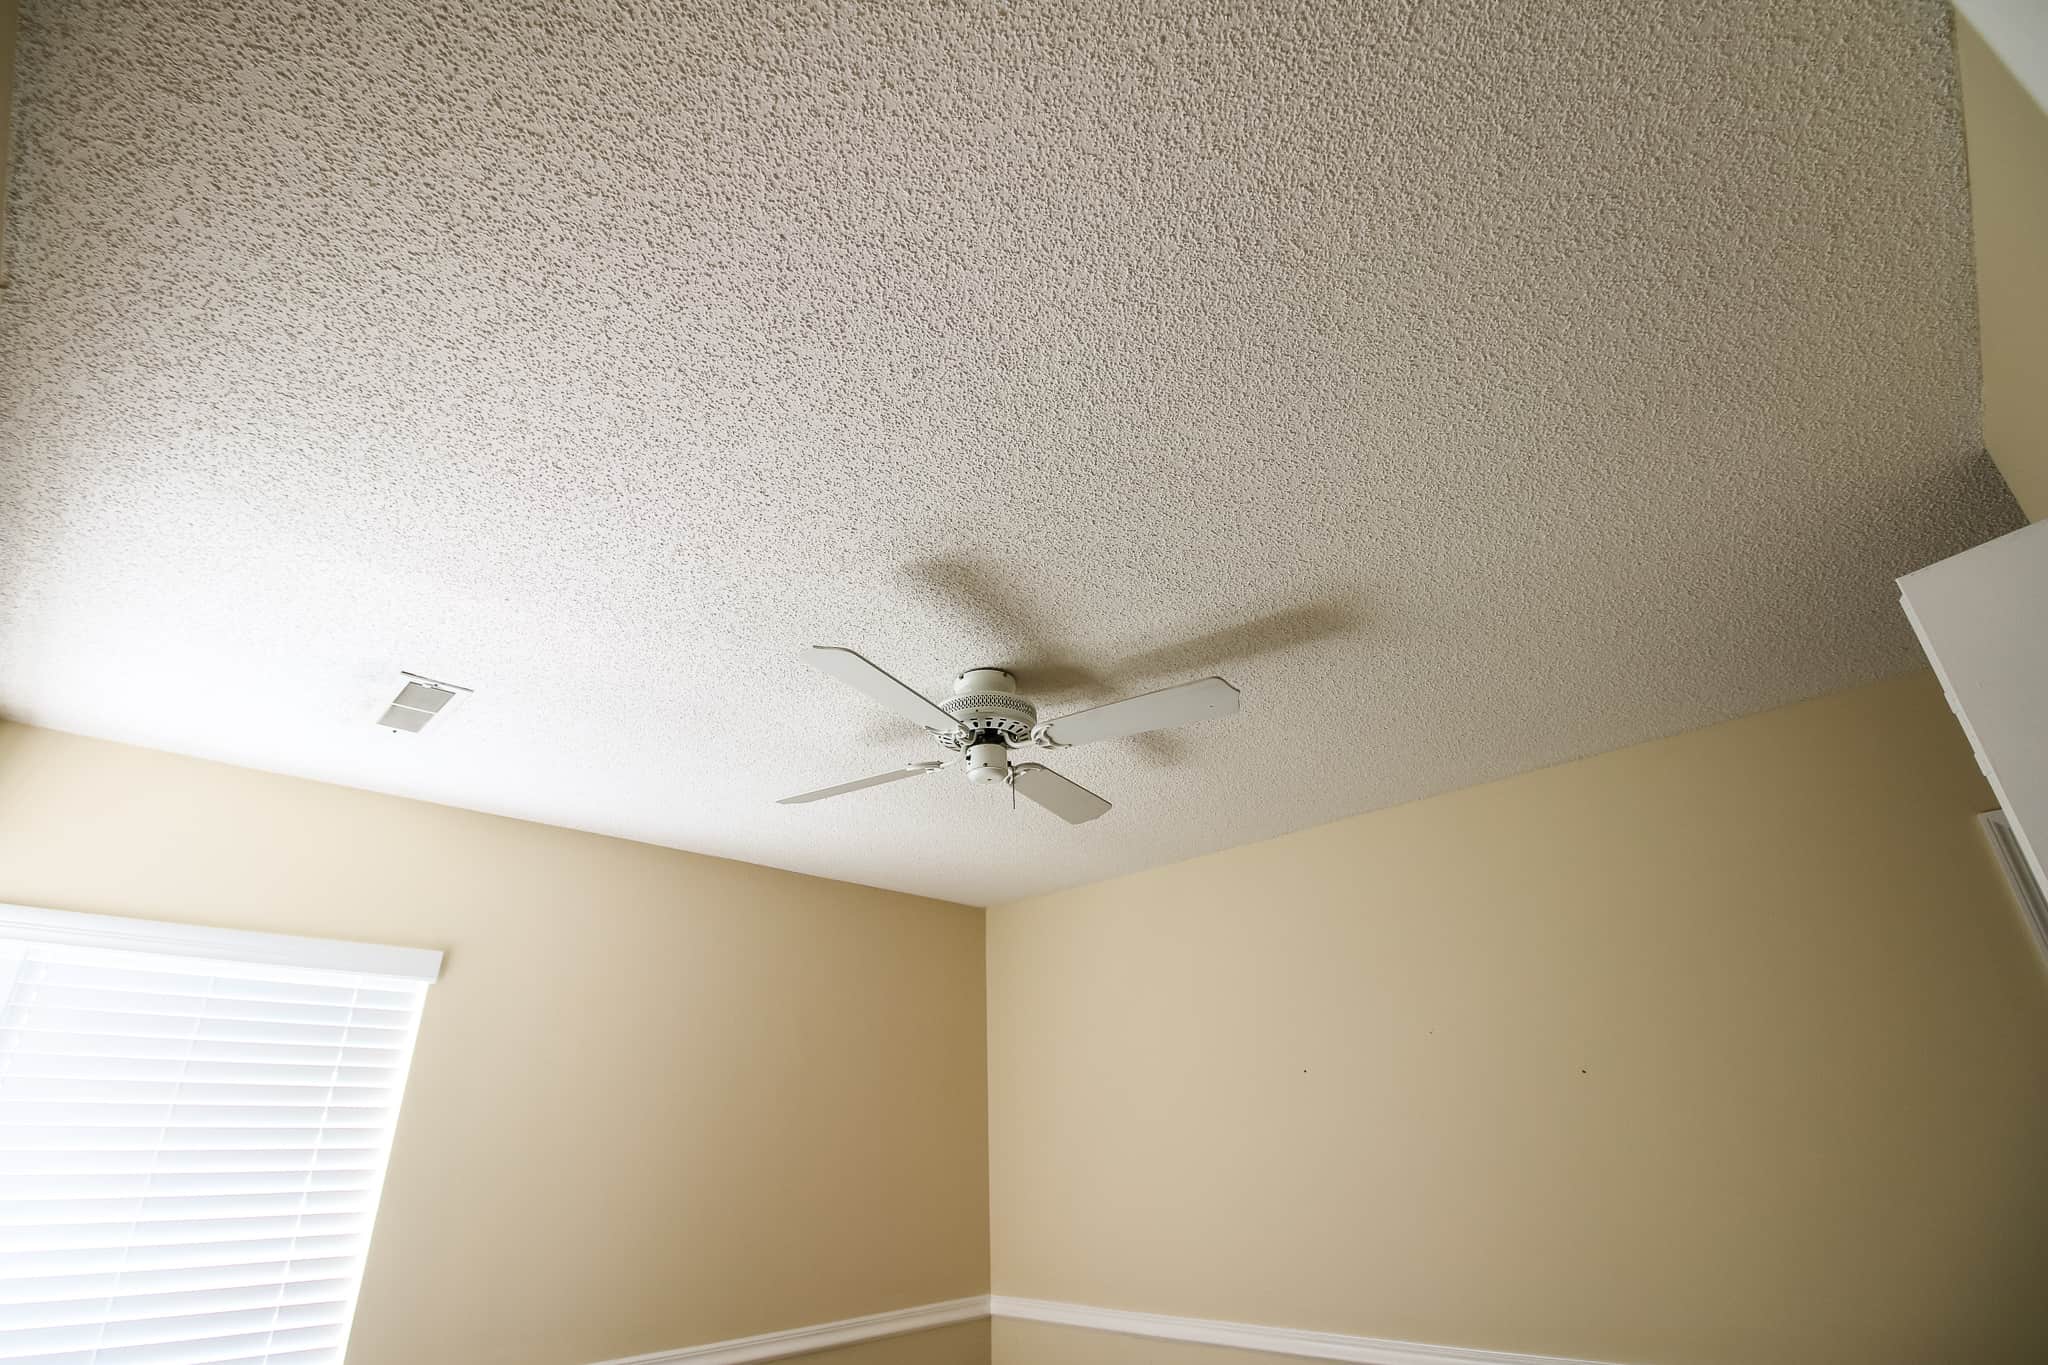
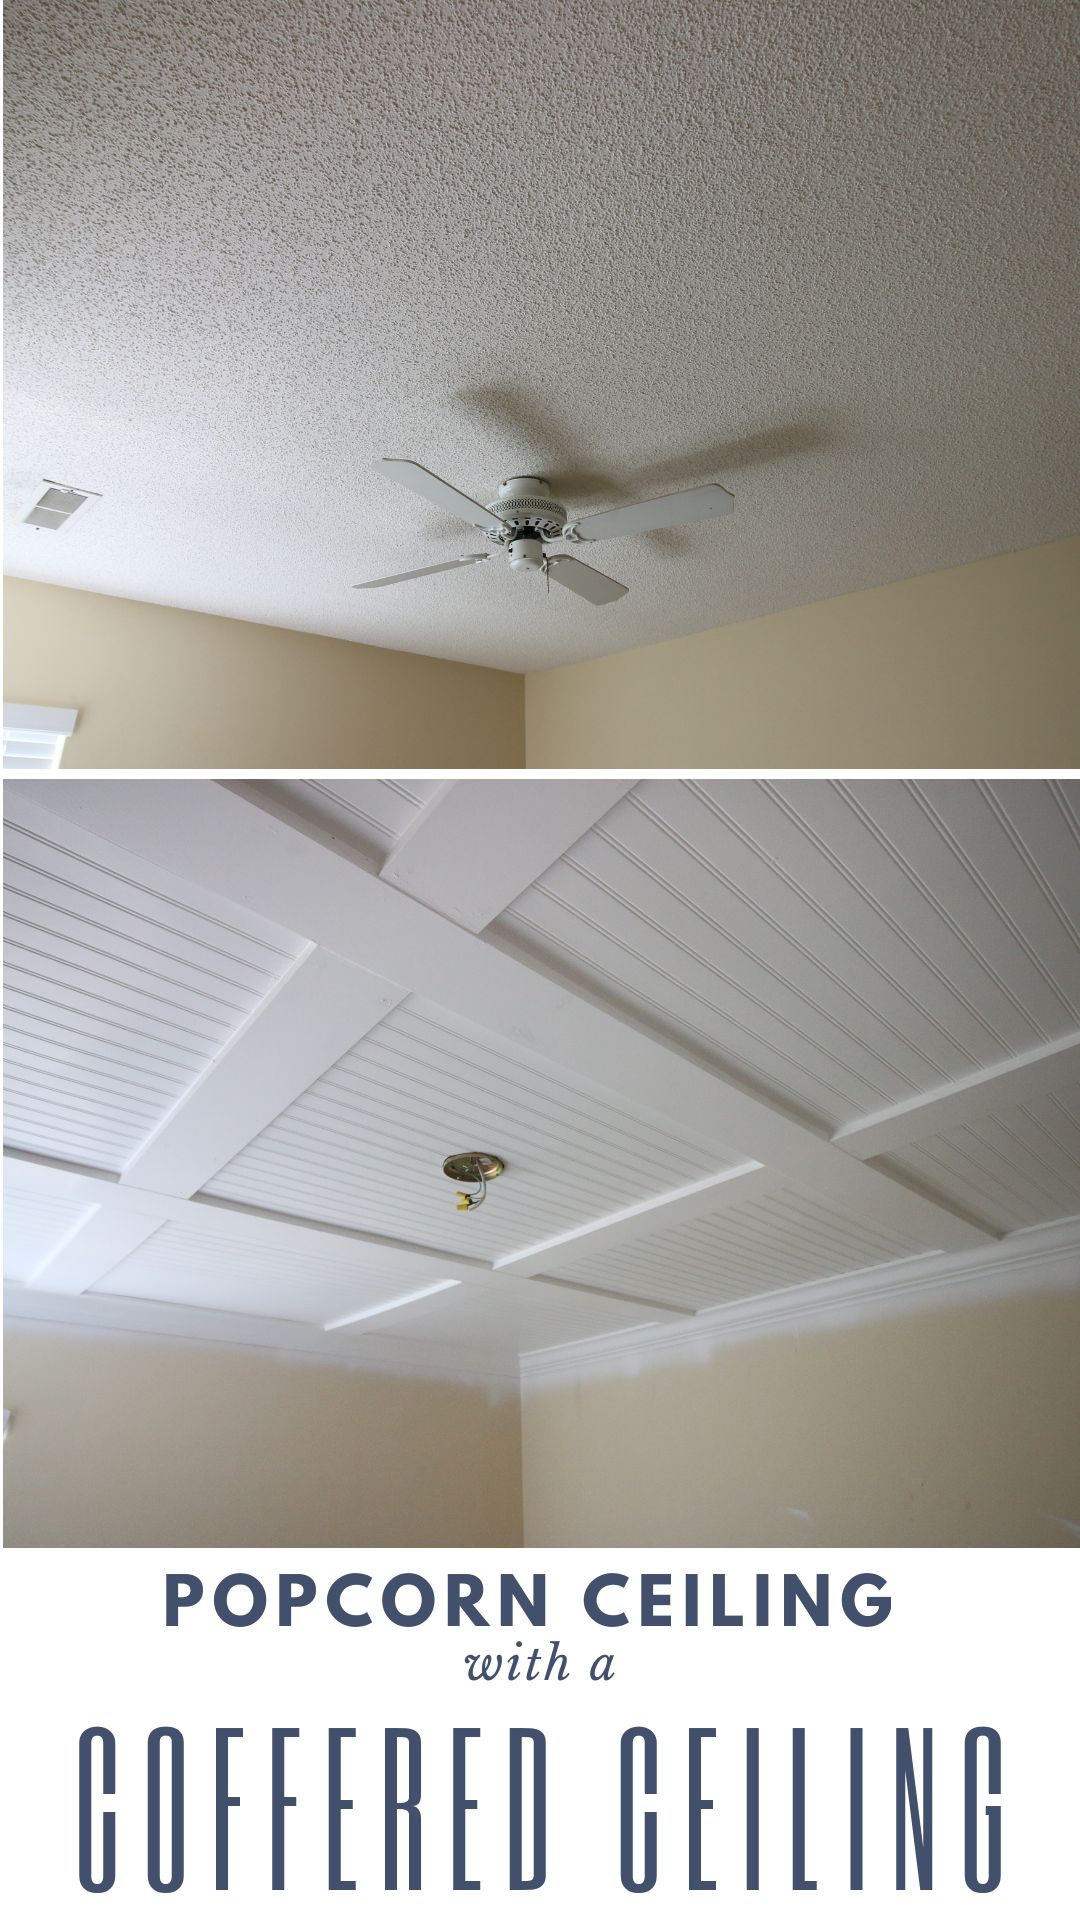
Before:
After:
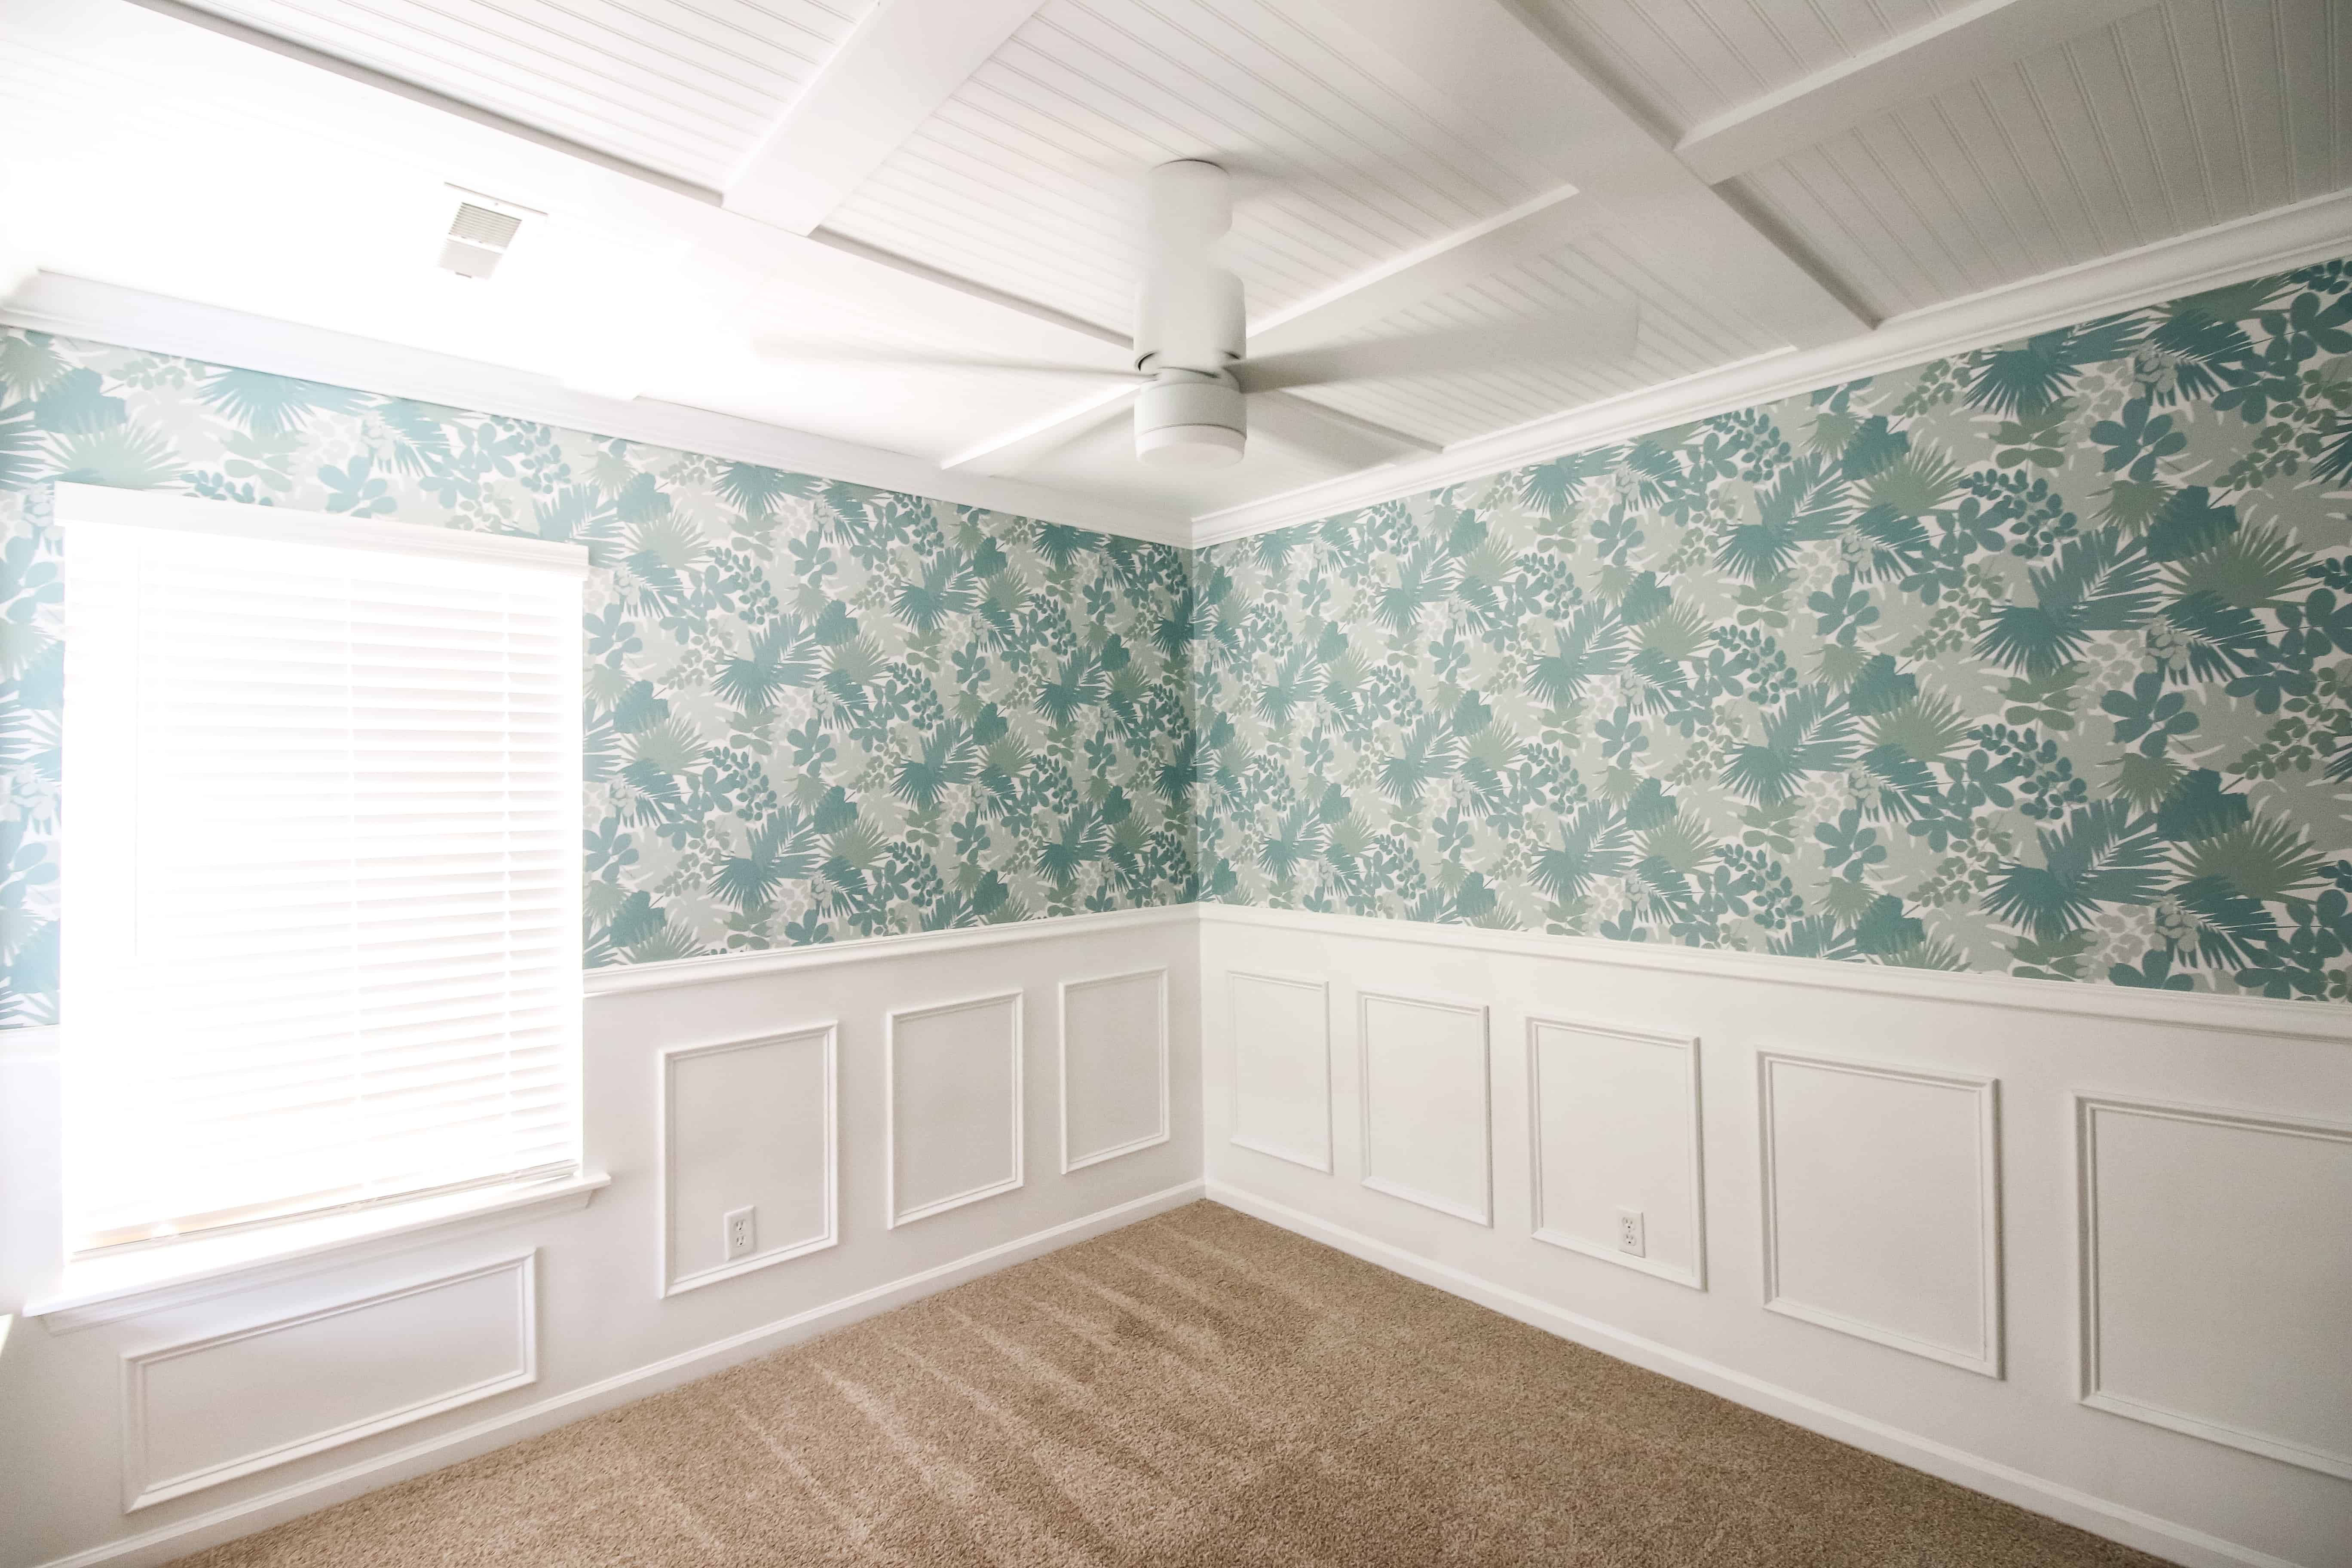
Obviously you’re getting a little sneak peek in these final photos of the fan and wallpaper as well, but we wanted to give you the full effect.
I love how much architectural detail this project added to this basic space!
Click here to pin this project to your Pinterest board!
For now, thanks again to our partners at Woodgrain for the amazing products they have that we were able to use for our nursery DIY coffered ceiling.
Their Finished Elegance line is great for the DIY home renovation crowd.
The products are really nice, we love that they come finished and how easy they are to cut and work with. We highly recommend Finished Elegance by Woodgrain for your next molding project!
Be sure to click over and check out our Jungle Theme Nursery Reveal!


Looking for something?
We’ve been doing this since 2012 so we have a LOT of blog posts!
Search stuff like: Ceiling Projects | DIY Plant Stands | Thrift Flips


Hey there, I’m Sean, the woodworking enthusiast and builder behind CharlestonCrafted.com! Since 2012, I’ve been sharing the magic of turning raw materials into beautiful creations. I love teaching others the art and satisfaction of woodworking and DIY. I try to inspire fellow crafters to make something extraordinary out of nothing at all.
Peggy Hendrix
Wednesday 10th of November 2021
Thsi is absolutely wonderful!! We are going to to this in our new dining room - living room combo. I have 2 question though. Now it's 2021-Has your ceiling held up during these 3 years? Also, did you ONLY use the brad nailer? It seems like you'd need to put at least some screws or long nails into trusses to be sure of nothing coming loose. I would love to read a reply from you sometime soon, as we'll be starting our project soon. Thanks SO much!! I posted this comment on the Youtube post but I never can find if someone responds! so I thought I'd put it here and maybe you could email me your reply. Thanks again! Peggy
Morgan
Friday 12th of November 2021
Hi Peggy, we used the nails and also construction adhesive to keep everything in place. We no longer live in that house, but it held up until we left with no issues whatsoever. But you certainly should feel free to add any additional support that would make you feel comfortable as it will be in your home.
Terri
Friday 8th of October 2021
I have been searching for ceiling update ideas for months and this is IT! I will be going to Home Depot tomorrow to get started. Thank you sooooo much for sharing this information. I appreciate it. I don’t have popcorn ceilings but live in an old house that needs some TLC.
Morgan
Friday 8th of October 2021
Thanks Terri! I hope it turns out great!!
Olivia
Wednesday 2nd of September 2020
Any tips for which order to start putting the beadboard on the ceiling? Notice a few gaps in between them, which obviously is covered up with the boards after. Just concerned that we might do our best to measure, but when we start putting them up, we'll end up with some overhang, and unevenness and want to avoid.
Morgan
Sunday 6th of September 2020
If you have a square room, I would start in one of the corners and work one direction. Then start the next row and line up the ridges in the bead board. If you have a rectangular room, do the same thing. If you have odd nooks in your room, it might be best to save that for last so you can get as many perfect rows in place as you can, then work into the nooks.
Jeff Ellman
Saturday 29th of August 2020
Excellent job, looks very nice! I would have coped the inside corners of the crown molding, but the caulk should suffice. Congrats!
Elizabeth
Wednesday 22nd of July 2020
I asked about room dimensions because I like the look of the proportion of ceiling squares to the total room and would like to mimic that in my condo living room which is 14 x 14.5 feet. Trying to gauge how many squares to do, factoring in efficient use of bead board sheets. Thanks!