Want to make a pumpkin topiary for your Halloween decor? This tutorial uses plastic pumpkin candy bowls to make this lighted yard decor. It's a super simple tutorial and really inexpensive to make using plastic pumpkin candy buckets. You gotta check it out!
I just love Halloween. It is the very most fun holiday to decorate for.
It's an excuse to be silly, and over the top, and to have spiderwebs in and around your home!
I wanted to add some light up decor to our yard this year, but didn't want to buy any large inflatables. So, I decided to make my own light up pumpkin topiaries.
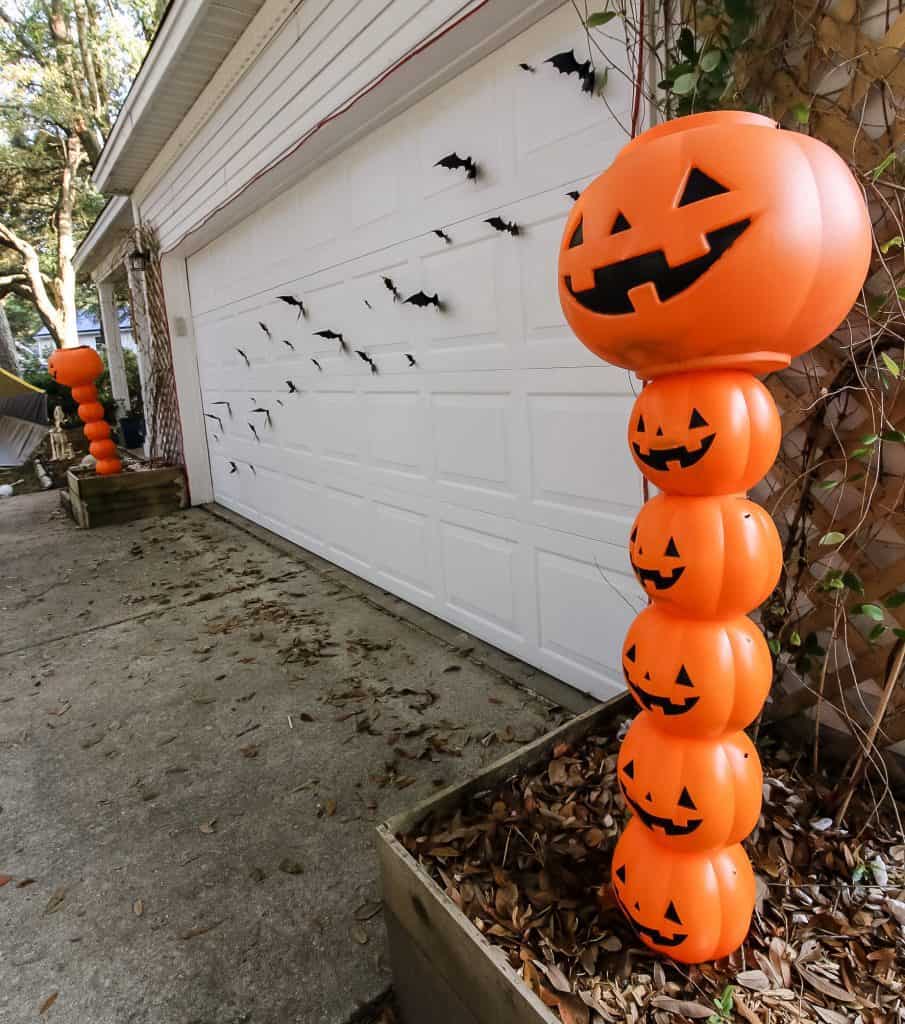
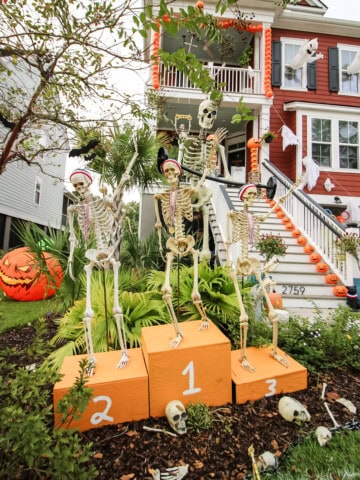
We made a set of two stacked pumpkin topiaries, but you could make one (maybe in a pot?) or as many as you want! These would look great scattered throughout your yard.
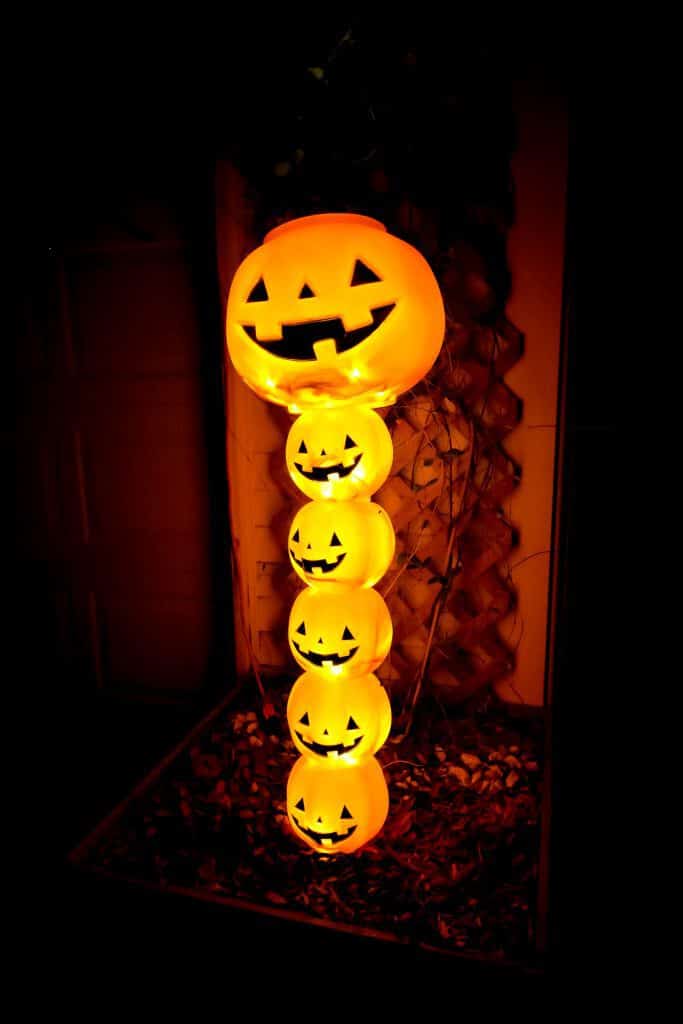
We left ours orange and black for a super Halloween look, but you could do solid orange or even white or gold for more of a chic Fall look.
Check out how we used plastic pumpkin buckets to make concrete pumpkins!
How to Make a DIY Plastic Pumpkin Topiary
To make these topiaries you will need plastic pumpkin candy bowls.
The cheapest place that I found them was at Walmart. They also sell them at the Dollar Store and online.
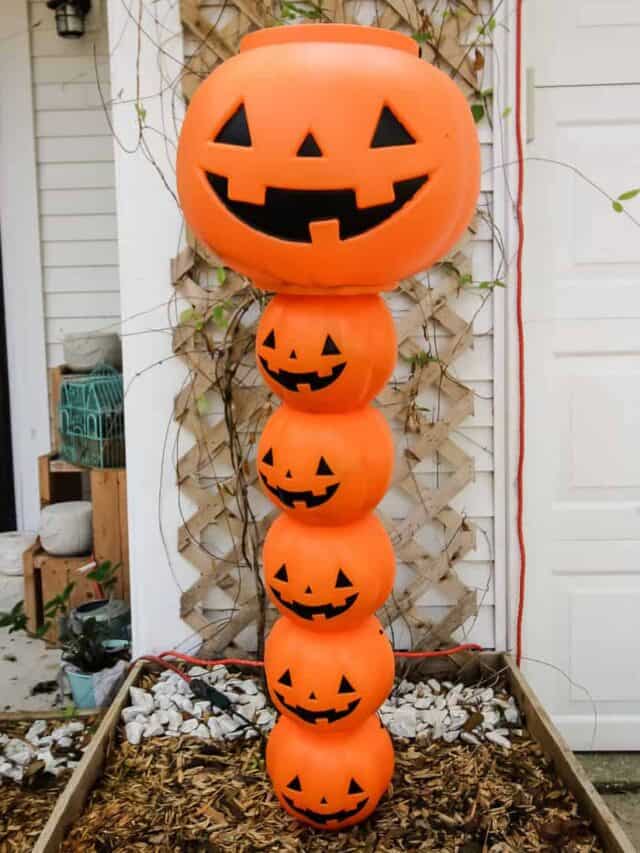
I went for orange plastic jack-o-lantern style buckets. They also came in black and solid white so you could get a lot of different looks!
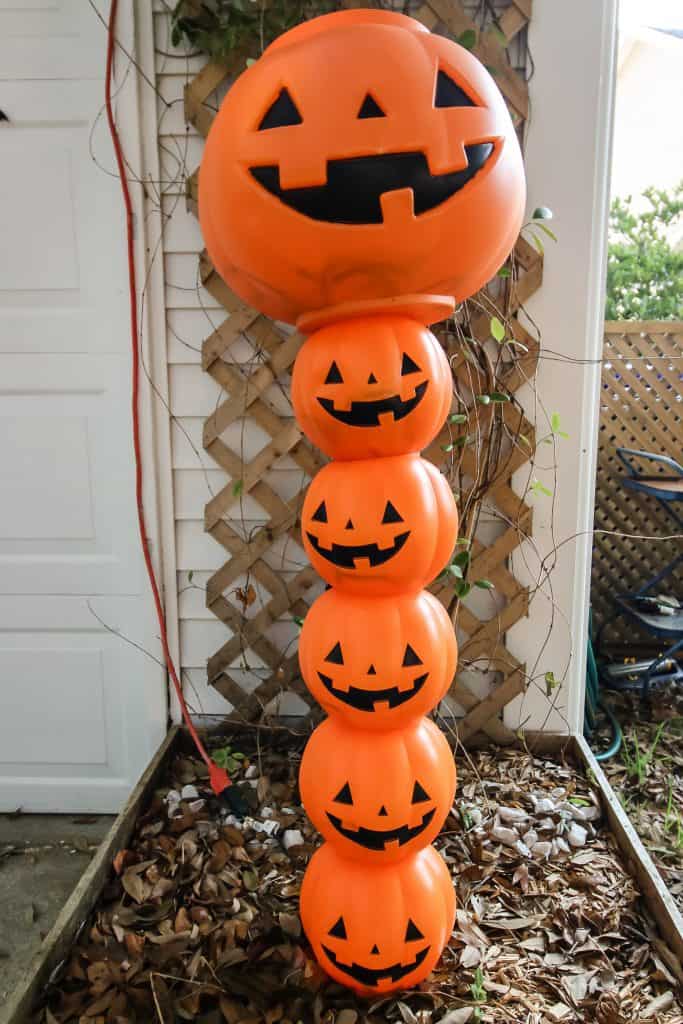
For each pumpkin stack topiary I used five small pumpkins and one large pumpkin.
You will also need 1" PVC pipe and a 1" diamond bit or hole bit for your drill.
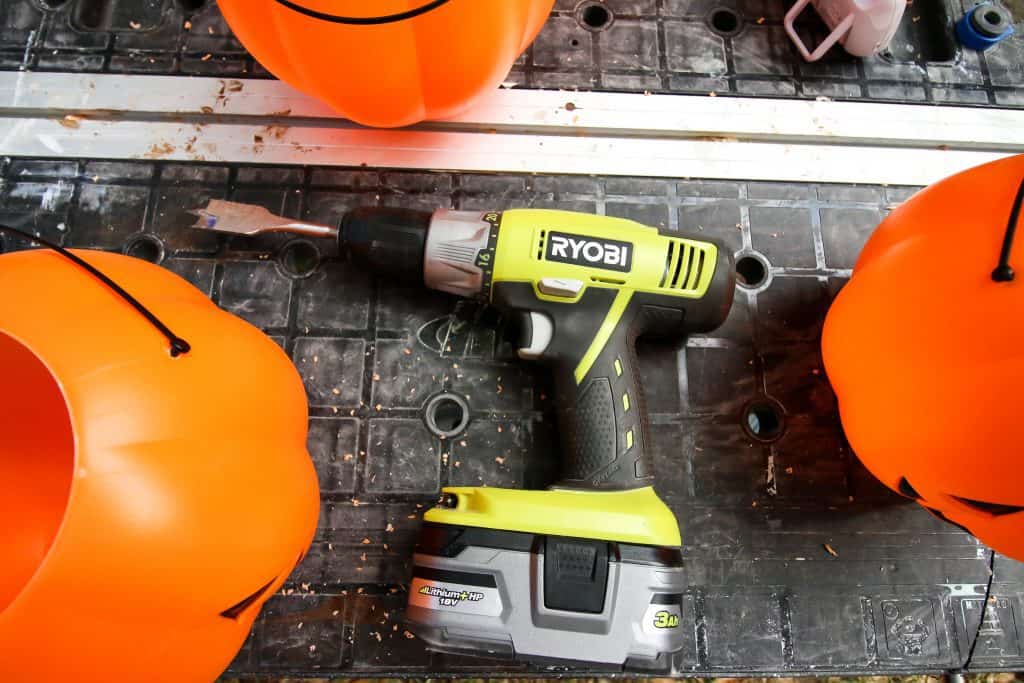
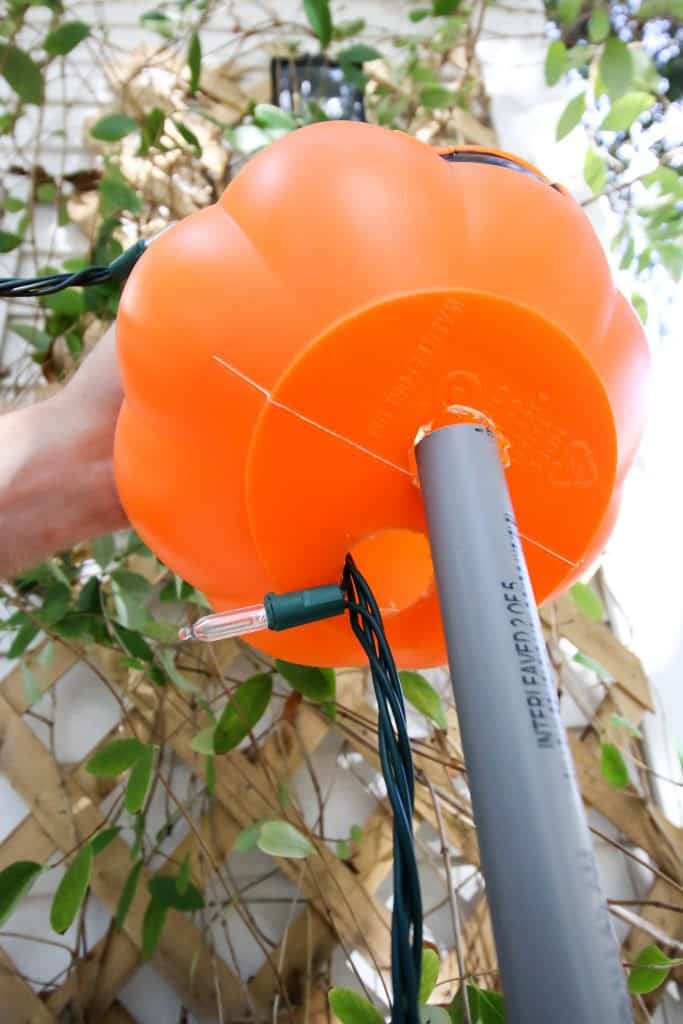
Step one: drill holes in pumpkins
Drill two large holes in the bottom of each pumpkin. One hole should be centered and one towards the back.
These holes need to be slightly wider than your PVC pipe and big enough for the plug of string lights to fit through them. Hold the pumpkin steady and drill straight through without putting too much pressure on the pumpkin so it doesn't crack.
When we first did this project, we used a spade bit and that wasn't great because the tips would catch the pumpkin and spin it around. Using a hole bit makes it much easier.
It helps to have a second person who can hold the pumpkin in place while you drill. Maybe have some candy since you're trying to get into the Halloween spirit.

Step two: install PVC pipe
So there's two options for the PVC pipe to hold your topiary. When we originally did this for our first house, we had big planters where we wanted these to go. So, we stuck the PVC pipe in the dirt about a foot deep.
At our current house, we didn't have those planters, but I did build these tall planters that live at the top of our stairs. So, I filled some disposable plant pots with concrete and stuck the PVC pipes in there and let them dry. Now these can go in the planters and hold the weight.
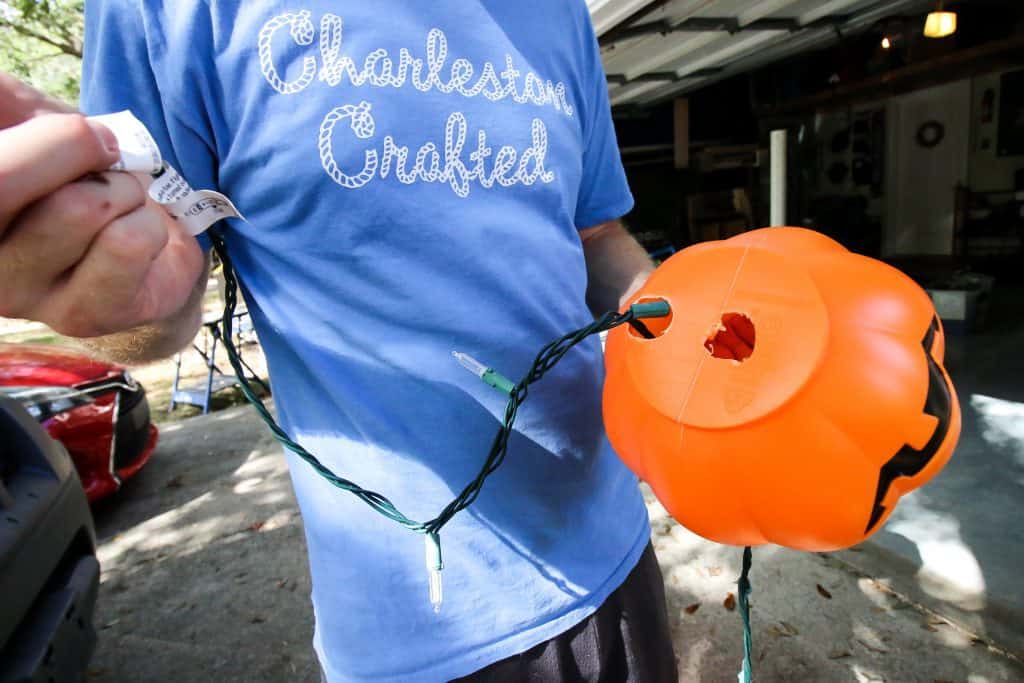
Step three: string lights through second hole
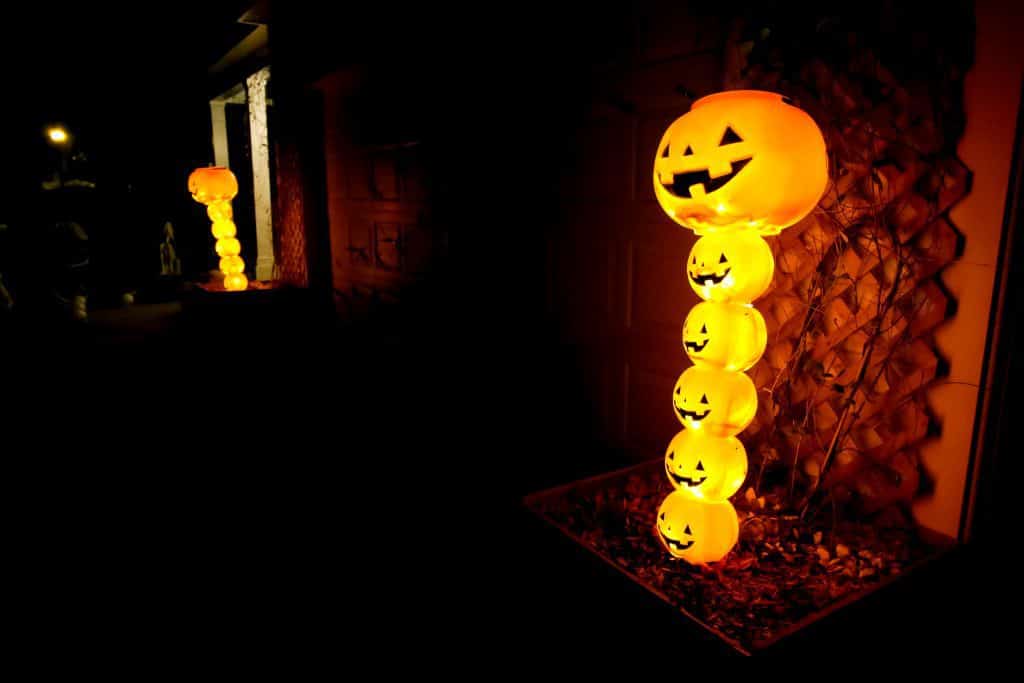
Next you want to turn this into a lighted pumpkin topiary with string lights or Christmas lights.
String your lights through the bottom pumpkin out the back hole. Then continue onto another pumpkin and another and so on.
Step four: stack pumpkins
After you have all the pumpkins strung up, stack them onto the PVC pole through the hole in the middle of the pumpkin. As you're stacking, make sure you have a handful of lights inside of each pumpkin so that they are illuminated.
Then bunch all excess lights in the big pumpkin on top.
Use a hammer or mallet to push the pipe down at the end to be sure it's secure and not showing out the top of the pumpkin. If it's too tall still, you can snip off any excess.

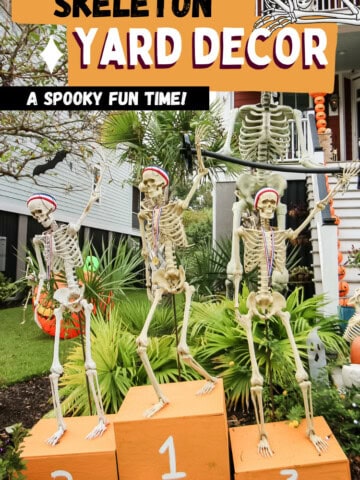
DIY stacked pumpkin topiary
I really love how these turned out! They are simple but make a big impact on our yard. We placed one on either side of the garage door!
They would also make a big impact on your front porch on either side of the door in a pot or bucket.
Love Halloween? Download our FREE printable Halloween greeting cards!
I love how this project turned out and really hope that the Trick or Treaters love them, too!
Any questions about how to make a Halloween topiary?
How to make a plastic pumpkin light up topiary
Want to make a pumpkin topiary for your Halloween decor? This tutorial uses plastic pumpkin candy bowls to make this lighted yard decor. It's a super simple tutorial and really inexpensive to make. You gotta check it out!
Materials
- 5 small plastic pumpkin candy bowls
- 1 large plastic pumpkin candy bowl
- Christmas lights
- 5' PVC pipe - 1" diameter
Tools
- 1" drill bit
- Drill
- Mallet or hammer
Instructions
- Drill 2 holes in the bottom of each pumpkin - one centered, the other towards the back.
- Use hammer or mallet to knock PVC pipe into the ground where you want it to go.
- String the lights into the first pumpkin through the back hole. Place center hole of pumpkin onto PVC pipe and push down.
- Repeat with other pumpkins, ending with large pumpkin.
- Add excess lights to large pumpkin.
- Use hammer or mallet to knock PVC pipe into ground far enough it doesn't show.
Recommended Products
As an Amazon Associate and member of other affiliate programs, I earn from qualifying purchases.


Looking for something?
We've been doing this since 2012 so we have a LOT of blog posts!
Search stuff like: Ceiling Projects | DIY Plant Stands | Thrift Flips

Hello, I'm Morgan, half of the creative force behind CharlestonCrafted.com! With a passion for DIY that dates back to 2012, I've transformed three homes and now I'm dedicated to helping others craft their dream spaces. Let's turn your house into a home together!

[…] Trouvé à Charleston Crafted […]