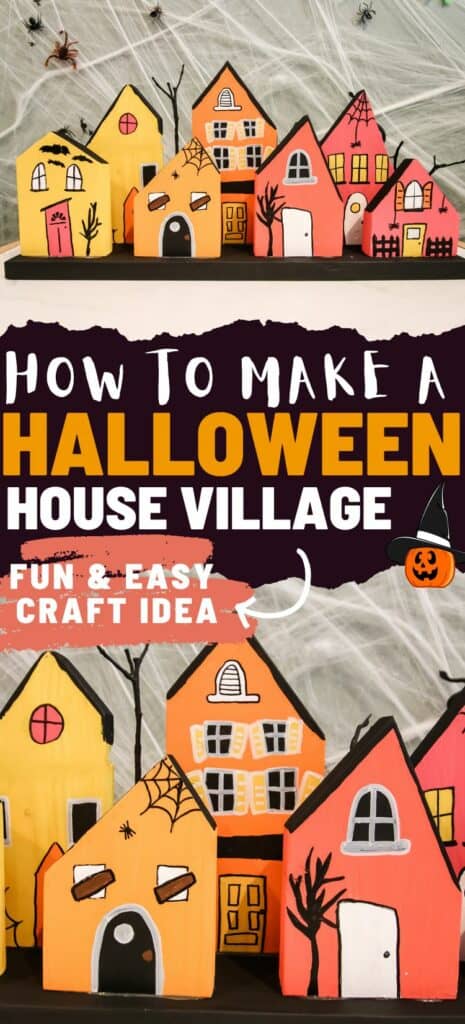
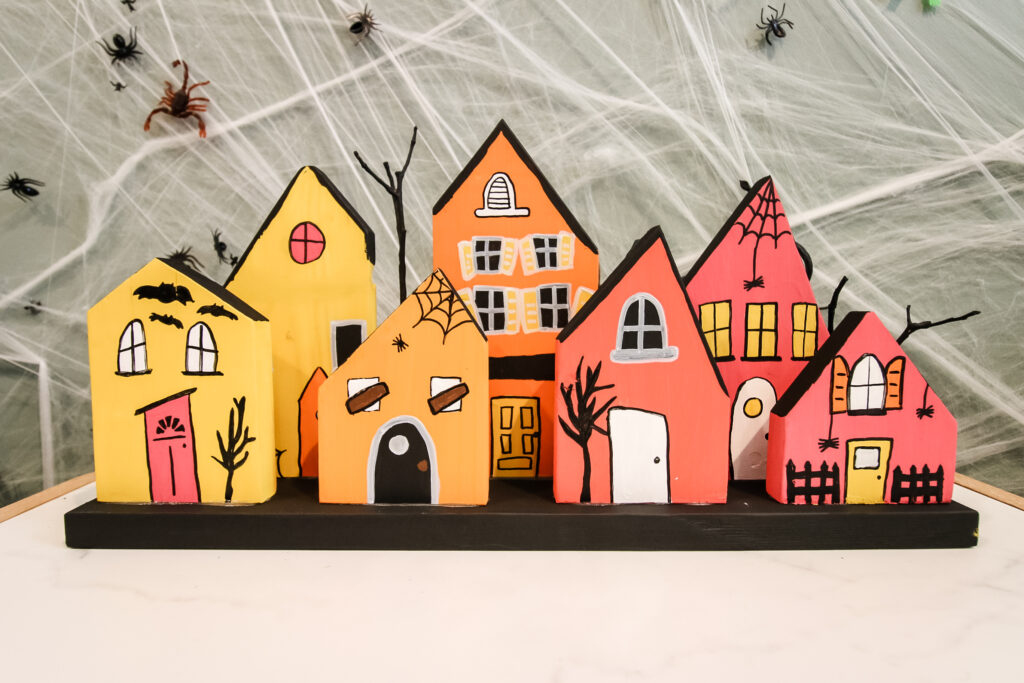
Want to add a DIY halloween village display to your indoor Halloween decorations? Here's how I made this cute wooden Halloween house town!
I was thinking of our wooden Christmas village and thinking how it would be fun to make a similar village for Halloween.
I googled around for a few ideas and found two that really inspired me:
I decided to make my own version of the wooden mini Halloween town!
This is a super easy and creative DIY Halloween wood craft. It was fun and easy to make and you could easily customize it to match your color scheme or Halloween home decor style.
How to make a DIY Halloween village display
It is super easy to make this simple wood block Halloween village!
Supplies needed:
- 1"x4" lumber - exact amount depends on how many houses you want
- Miter saw
- Sander or sand paper
- Craft paint
- Paint brushes
- Paint pens
- Wood glue
- Optional: sticks + hot glue to attach
Steps to make:
STEP 1: CUT YOUR BOARDS
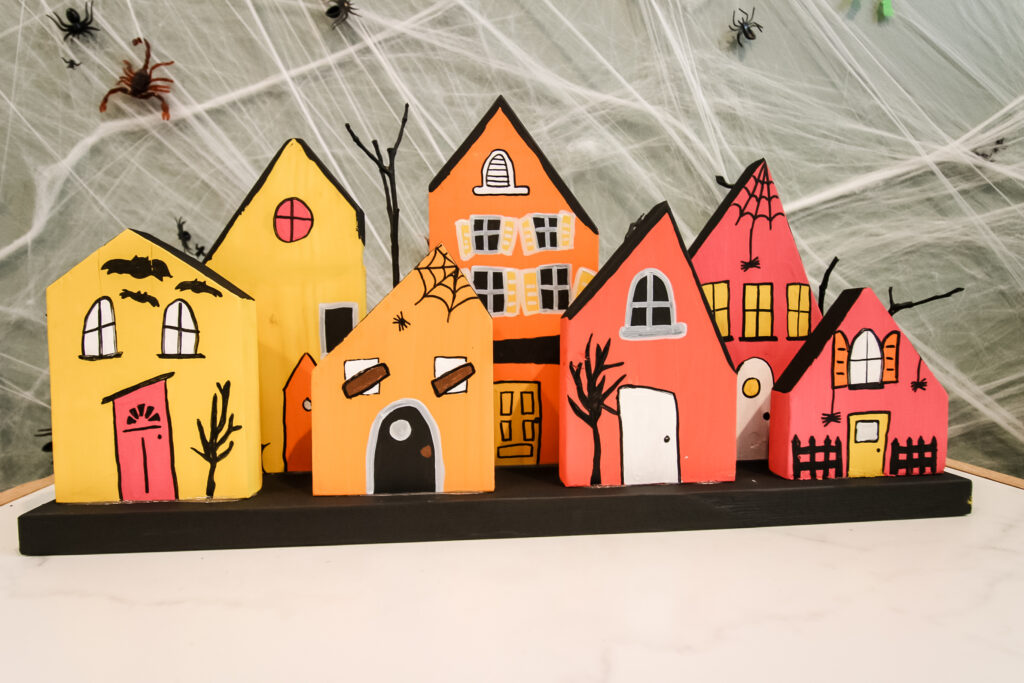
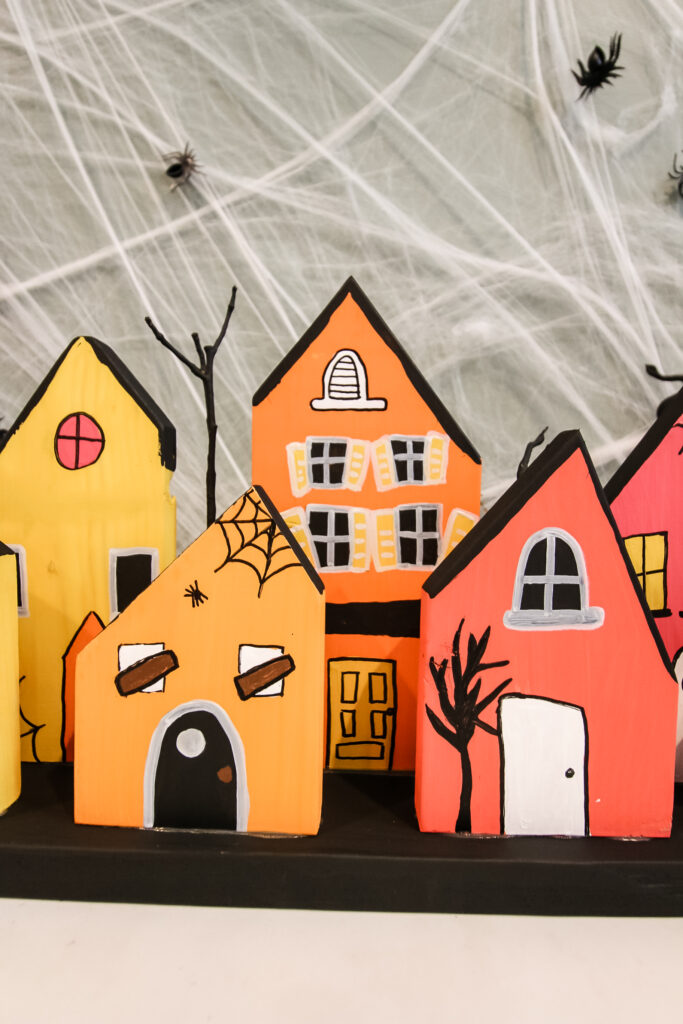
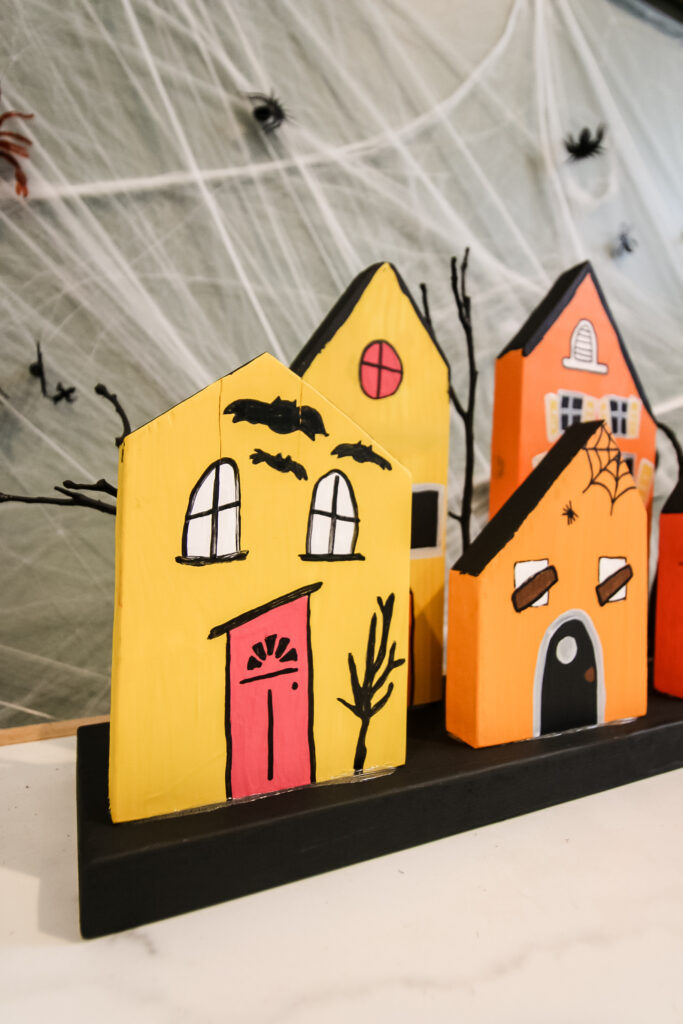
Cut the boards into house-shapes. Sean did this using the miter saw. The roofs are intentionally uneven/off-center for an extra spooky look.
Cut a board approximately 18" long to serve as the base.
Sand the boards smooth.
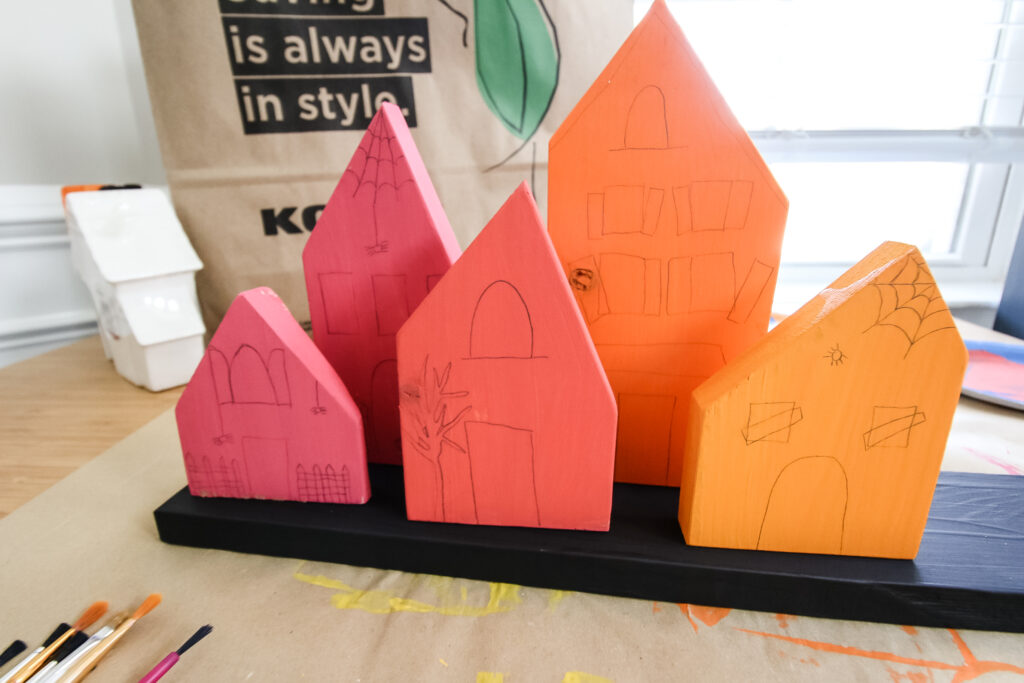
STEP 2: PAINT THE BASE COAT
I painted my houses bright pink, yellow, and orange. The middle houses between the colors I did a blend of orange + yellow and pink + orange for more of an ombre look.
Be sure to paint the sides and back of the house blocks as well while you are at it!
I painted the base piece black as well.

STEP 3: ADD DETAILS
Once dry, I used small paint brushes and paint pens to add windows, doors, and spooky details.
This is a great time to really have fun with it! Add spiders, webs, bats, and any spooky details you love!
I did initial detail painting with a small brush and then outlined and added final details with black and white paint pens for better control.
Once that was done, I decided to use black paint to paint the roof tops for more of a final look.
STEP 4: GLUE TOGETHER
Use wood glue to attach the houses to the base piece.
Optionally, add spooky sticks for trees! These are easiest to stick in place with hot glue. You can leave them natural wood color or paint them black.

STEP 5: DISPLAY
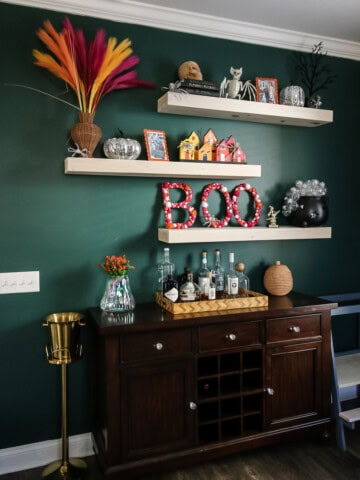
Display and enjoy amongst your Halloween decor! I love it in front of our spider web wall, but it would also be great on a shelf, buffet table, or mantel!
Any questions about my Halloween mini village?

Looking for something?
We've been doing this since 2012 so we have a LOT of blog posts!
Search stuff like: Ceiling Projects | DIY Plant Stands | Thrift Flips

Hello, I'm Morgan, half of the creative force behind CharlestonCrafted.com! With a passion for DIY that dates back to 2012, I've transformed three homes and now I'm dedicated to helping others craft their dream spaces. Let's turn your house into a home together!