Want to learn how to make furniture easily at home? Time to start making pocket holes! Here's how to use a Kreg Jig to do so!
An important part of most building projects is joining two pieces of wood together. Our favorite way to do that is by using pocket holes! Today I am going to show you how to use a Kreg Jig pocket hole jig.
A Kreg jig is probably the most basic joinery system and is extremely user friendly. If you learn how to use a Kreg jig, you'll be able to build things ranging from a cup holder to a platform bed.
What are the types of Kreg Jig pocket hole jigs?
The models of Kreg Jig pocket hole jigs that are currently sold include:
- Kreg® Pocket-Hole Jig 720PRO
- Kreg® Pocket-Hole Jig 520PRO
- Foreman Pocket-Hole Machine
- Kreg® Pocket-Hole Jig XL
- Kreg® Pocket-Hole Jig Micro
- Kreg® Pocket-Hole Jig 320
- Kreg Jig® Mini
We generally prefer to use the 720 for most projects, though the Foreman (most expensive) can be handy for very large projects.
The basics on how to use a Kreg Jig Pocket Hole Jig
Whenever you use power tools, you should be wearing safety goggles, securing the workpiece properly, and avoiding loose clothing or jewelry that could get caught in the drill.
Materials needed:
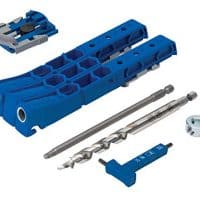
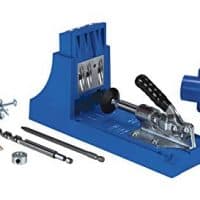
- Kreg Jig Pocket Hole System
- Kreg Jig 750 Pro- best for working with smaller pieces of wood and drilling repetitive holes. Also the most sturdy stand-alone system.
- Kreg Jig 520 Pro- best for on the go pocket holes or drilling on large pieces of plywood.
- Kreg Jig 320 - best for clamping to long pieces of wood
- Right Angle Clamps
- Drill
- Kreg screws
How to use a Kreg Jig to drill pocket holes
The steps for drilling pocket holes vary slightly between each Kreg system, but the basics remain the same regardless of which tool you are using.
1. Measure the thickness of your wood
The first step is to measure the thickness of your wood. Use the true thickness, not the "common" thickness. For example, a 1"x4" board at the store is actually only ¾" thick. This makes a huge difference in drilling pocket holes.
2. Set the thickness on your Kreg system
Once you have the thickness of your material, set that thickness on your Kreg system. On the Kreg 720, you don't have to adjust because of their AutoMaxx clamping system.
On the Kreg 520 and Kreg 320, slide the tabs to fill in the appropriate thickness measurement.
3. Set the thickness on your drill bit
Next, set the same thickness on the collar of your Kreg drill bit. Kreg uses a specialized drill bit that drills a unique hole that works with their screws. The stop collar stops the drill bit where it needs to finish to drill the perfect hole.
To set the collar, use the hex key that comes with your system to loosen the collar, slide it to the appropriate thickness, and tighten with the key.
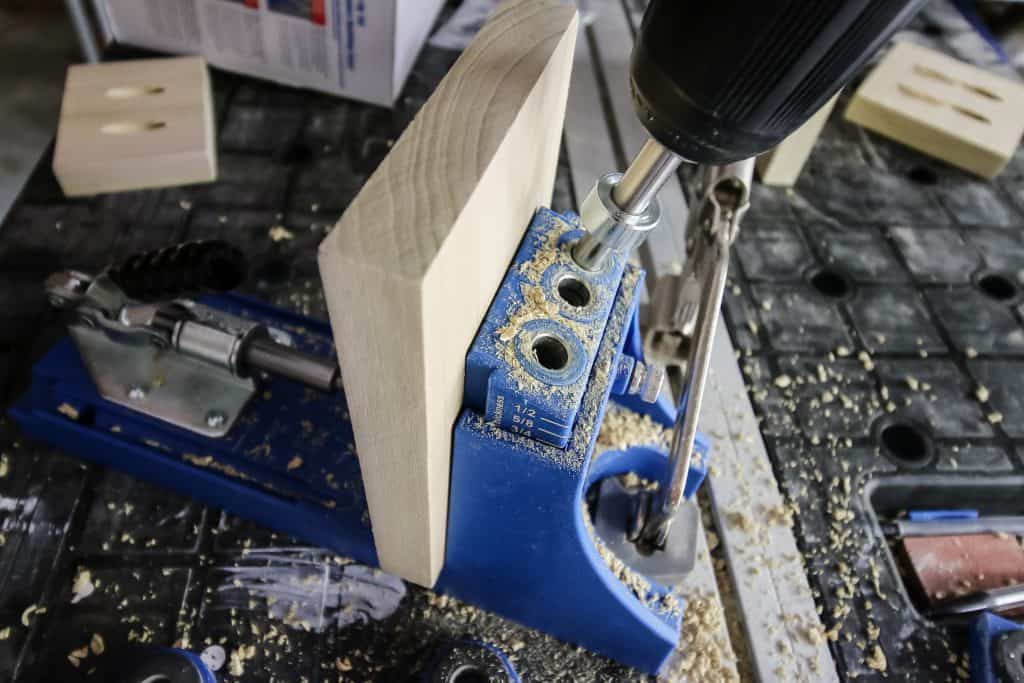
4. Drill your holes
Once the system and drill bit are both set to the appropriate wood thickness, it's time to drill holes. Determine exactly where your holes need to go and clamp the wood and system together.
Drill your pocket holes using short, repetitive motions through the metal guides in the Kreg system. It's important to plunge the drill in and out multiple times to clear out wood shavings as you're drilling.
How to use a Kreg jig to connect boards
Once you have drilled your pocket holes using your Kreg system as described above, you need to connect your boards together for your project.
5. Clamp your material
To connect boards using a Kreg jig, align your boards at a right angle. Use right angle clamps to keep your boards together exactly where they need to attach.
6. Drive your screws
Choose the correct length Kreg screw for the thickness of the material you're using (see below for screw sizes). Drive the screw into the pocket hole using the provided square driver bit that came with your Kreg system. Drill slowly until the boards are firmly pulled together and the screw won't go any further. Repeat for all holes in your project.
Don't over-rotate your screw once it has reached the max depth in your pocket hole. This can cause the area to become overworked and could lessen the integrity of your joint.
Remove the drill and your wood should be joined and ready to move on to the next step in your build.
Looking for project inspiration? Be sure to check out all of our Kreg Jig Projects!
What size screws do I need?
The size Kreg screw that you need is based on the thickness of your wood. Measure how think your wood is and purchase the right size screw accordingly:
- ½" material = 1" Kreg screws
- ¾" material = 1 ¼” Kreg screws
- 1 ½" material = 2 ½” Kreg screws
Also, make sure you purchase the correct screw for soft/plywood or hardwood, depending on what you're building with.
In general, if you plan to do a good amount of building, it is a good idea to stock up on a variety of Kreg screws! There is nothing worse than being a screw or two short of completing a project and having to go to the store.
Can you use regular screws with Kreg jig?
You can't use regular screws with a Kreg jig. The Kreg screws are specially designed with threads on part of the screw, smooth on part of the screw, and a flat-bottomed head to pull the pieces together.
Kreg screws also require a square driver bit. Kreg screws are designed for Kreg pocket holes and you should only use those.
You will need to use the Kreg square drill bit along with the Kreg square screws in order to use a Kreg Jig to join material together using pocket holes!
How can I conceal the pocket holes after assembling my DIY project?
If you want to fill your Kreg holes, you have a few options:
- Purchase Kreg plugs - they come in a variety of wood species. Glue them into the hole, let dry, then use a flush cut saw to remove excess.
- Fill with wood filler
- Create your own custom wood filler by mixing wood glue and saw dust
- Position the joint when assembled so that the pocket holes are not visible

How to Use a Kreg Jig
Kreg Jig pocket hole systems are the most user-friendly way to build furniture and other decor projects. This post will show you how to use a Kreg jig for your next project. There are slight differences in how to use each Kreg system, but the concept is the same for each. Follow these steps to set up your Kreg jig and get to drilling!
Materials
- Wood of your choice
- Kreg screws to match your wood thickness
Tools
- Kreg pocket hole system
- Cordless drill
Instructions
- Determine the thickness of the wood you're working with.
- Set the jig to the thickness of your wood.
- Set the stop collar on the Kreg drill bit to the thickness of your wood.
- Clamp the system and wood piece together where you want to drill your holes.
- Drill using an in-and-out motion, which clears out the wood shavings as you go.
- Attach your wood pieces together using the appropriate length Kreg screw.
Recommended Products
As an Amazon Associate and member of other affiliate programs, I earn from qualifying purchases.
Be sure to hop over and check out all of our Tool Reviews!
If your drill bit is getting stuck in the wood, it's either really dull or loose in the chuck of your drill. Check to make sure it's fully locked in the chuck and check the sharpness of the blade.
Screws not holding mean that you might not have drilled the hole to the appropriate depth and there's not enough of the screw in the second piece of wood. You also might need to add some wood glue to the joint to make it secure.
Make sure that you don't over-drill the screw into the hole as that can split the outside of the wood. Also make sure you are drilling as straight as possible in the holes.
You'll need to re-drill your holes because they can't be adjusted once they are drilled. You can drill it right next to the old hole and fill the one that is misaligned with a pocket hole plug or wood filler.
If using a Kreg 720, this has AutoMaxx clamping technology to adjust to the thickness of your wood, but you can also adjust it slightly using the dial on the side. If using the Kreg 520, squeeze the trigger more until it is tighter on the wood.
To create cleaner pocket holes, make sure that you go up and down a couple of times when drilling the hole. If you just go in once, it can leave them rough or splintered. Just go back up and down a couple times and it will come out cleaner.
Screws can poke out if you drilled your pocket hole too deep or if you drill the screw in too far. This is most common on ½" plywood, so try not to drill the hole all the way through and try not to overtighten the screw. Instead, use wood glue to secure the bond and the pocket holes to hold in place.
Pocket holes should get stripped or too big unless you use too big of a screw. If that happens, drill a new hole next to the existing one and fill the first one.
If your joint isn't flush, make sure you clamp the boards in place before installing the screw so that it doesn't move the board.
Ensure consistent depth by making sure you're using the same jig and there's nothing in between the board and the jig, including any wood shavings.
I've never had a Kreg screw break or strip, so if it is, you are probably putting too pressure on the screw or have used it too many times.
If the pocket hole is too close to the edge, you'll need to move it and drill another hole and fill the first one.
To remove a Kreg screw, insert the square head driver into the hole and get it into the head of the screw, then apply light pressure and back it out of the hole.
You'll need to set your jig to drill deeper or screw it all the way through.
If the drill big is getting stuck in the jig, the jig and drill bit stop collar are likely not set to the appropriate same depth.
Basic woodworking information for every project
Here are some of our most popular woodworking articles!
Shopping for wood:
Woodworking project ideas
- 100+ of the best woodworking project ideas!
- 62 easy beginning woodworking projects
- Woodworking project ideas to make and sell
See all our printable PDF woodworking plans!
Our favorite tools + supplies
- See all our favorite tool reviews
- How to use a Kreg jig
- The ultimate wood stain guide
- The best wood fillers for your project
Remember to also always use safety equipment while woodworking and using tools. Make sure you have proper eye protection, ear protection and a good mask to keep yourself safe.
Interested in the Kreg Jig? Click here to read our full Kreg Jig review and to see all of our Kreg Jig projects.
New to the Kreg Jig? Here is a step by step guide on how to use a Kreg Jig!
OR grab our FREE Kreg Jig Cheat Sheet here! Download the cheat sheet!

Looking for something?
We've been doing this since 2012 so we have a LOT of blog posts!
Search stuff like: Ceiling Projects | DIY Plant Stands | Thrift Flips

Hello, I'm Morgan, half of the creative force behind CharlestonCrafted.com! With a passion for DIY that dates back to 2012, I've transformed three homes and now I'm dedicated to helping others craft their dream spaces. Let's turn your house into a home together!


[…] favorite way to build furniture is using pocket hole screws and our Kreg Jig pocket hole jig. This tool makes it so easy to build sturdy, beautiful […]