Here's a step by step tutorial on how to pose skeletons in your yard, climbing trees, or climbing up the side of your house!
This post was sponsored by National Hardware. All opinions are our own. Thanks for supporting the brands that make Charleston Crafted possible.
We are VERY into halloween. It's my favorite holiday. When we moved into this neighborhood tow years ago, we were told that people go ALL OUT for the holiday. I was so excited!
We have been having a blast decorating and adding a new element or two each year to our decor.
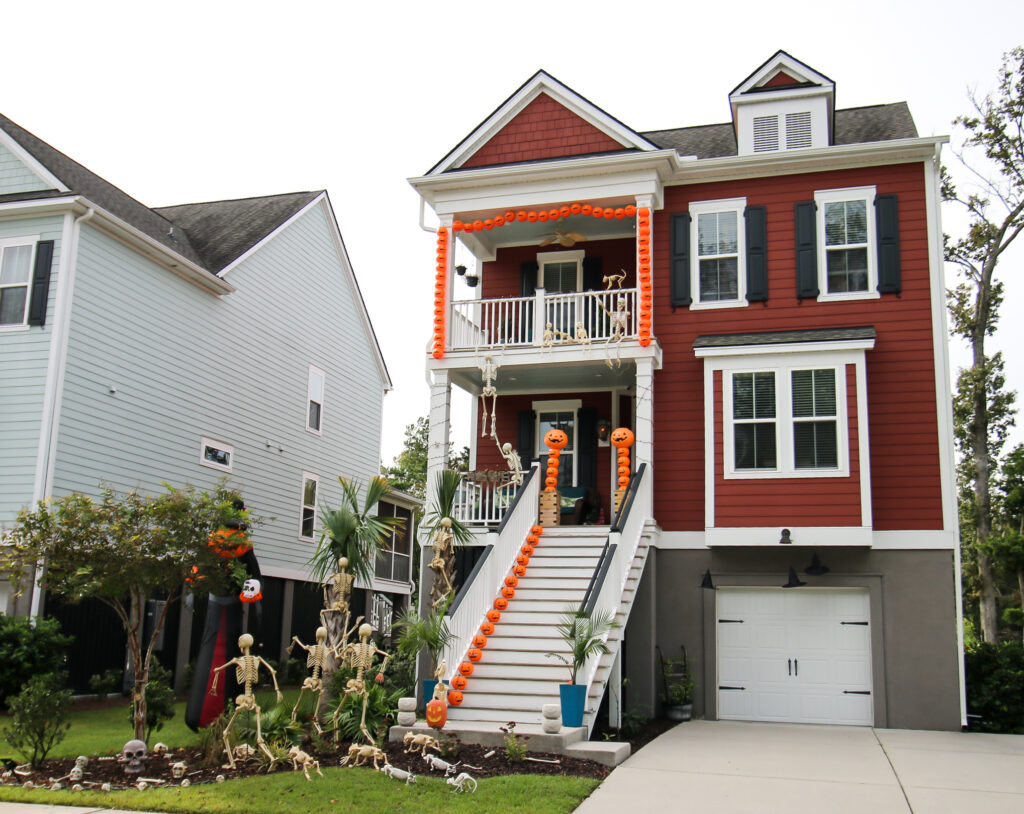
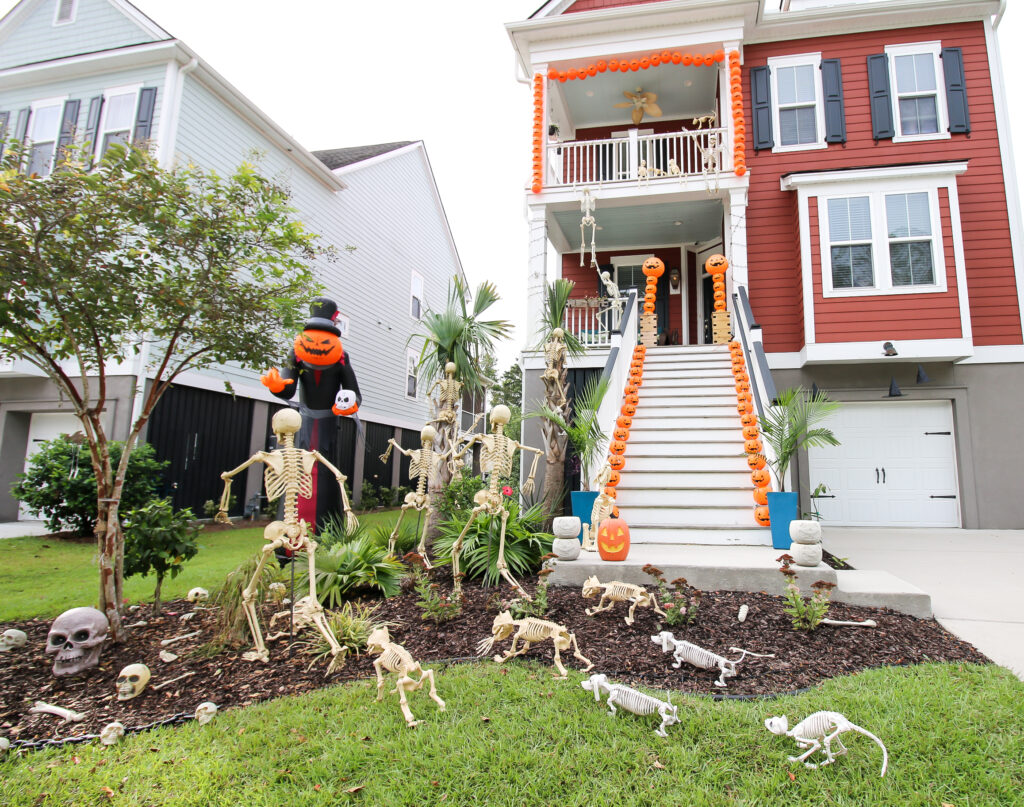
This year we added a pumpkin arch garland on our upper porch and an elaborate skeleton scene.
Skeletons are a quintessential Halloween decor, but I think that skeleton yard decor is always cutest when it tells a story.
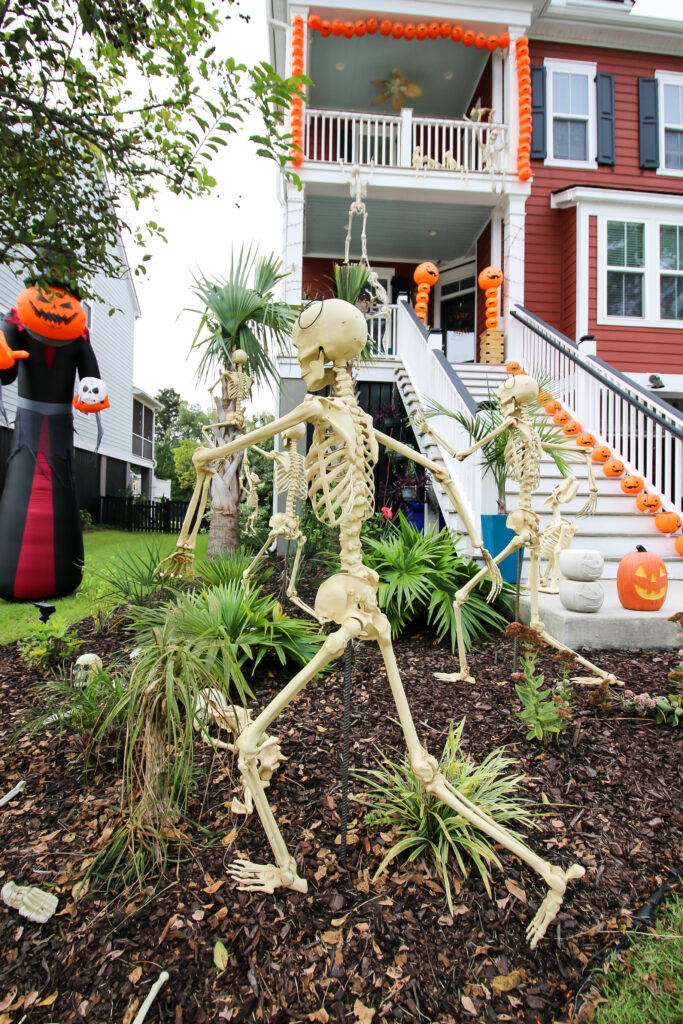
Inspired by the wide variety of skeleton dogs we saw at Home Depot and Target, we decided to create a scene of skeletons fleeing a pack of skeleton dogs!
This scene required us to have standing skeletons, climbing skeletons, and skeletons on the house. It was so fun to set up and we are excited to share our process and tips with you today!
How to pose skeletons in your yard
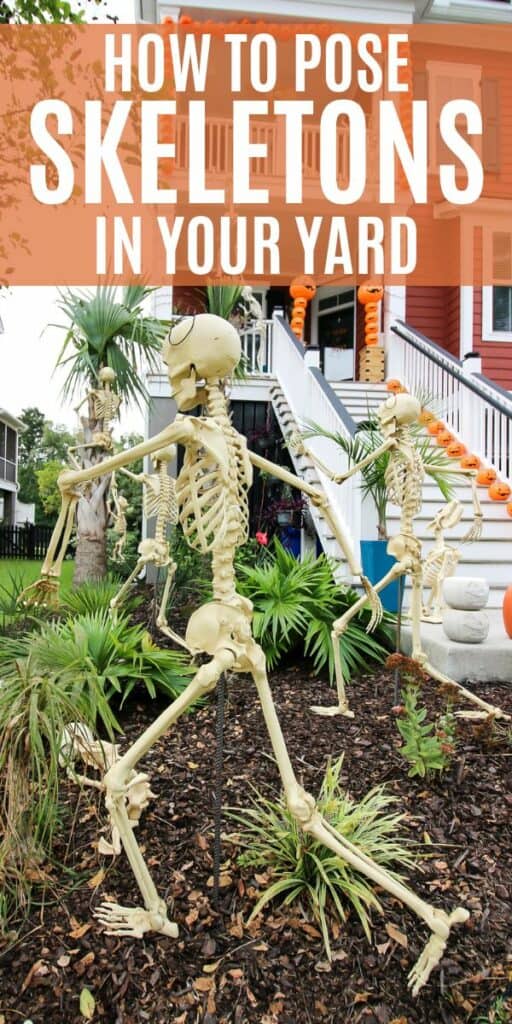
Wondering how to pose skeletons for Halloween? Once you plan your design, it's easy to get posable skeletons to stand or climb!
How to make a posable skeleton stand up
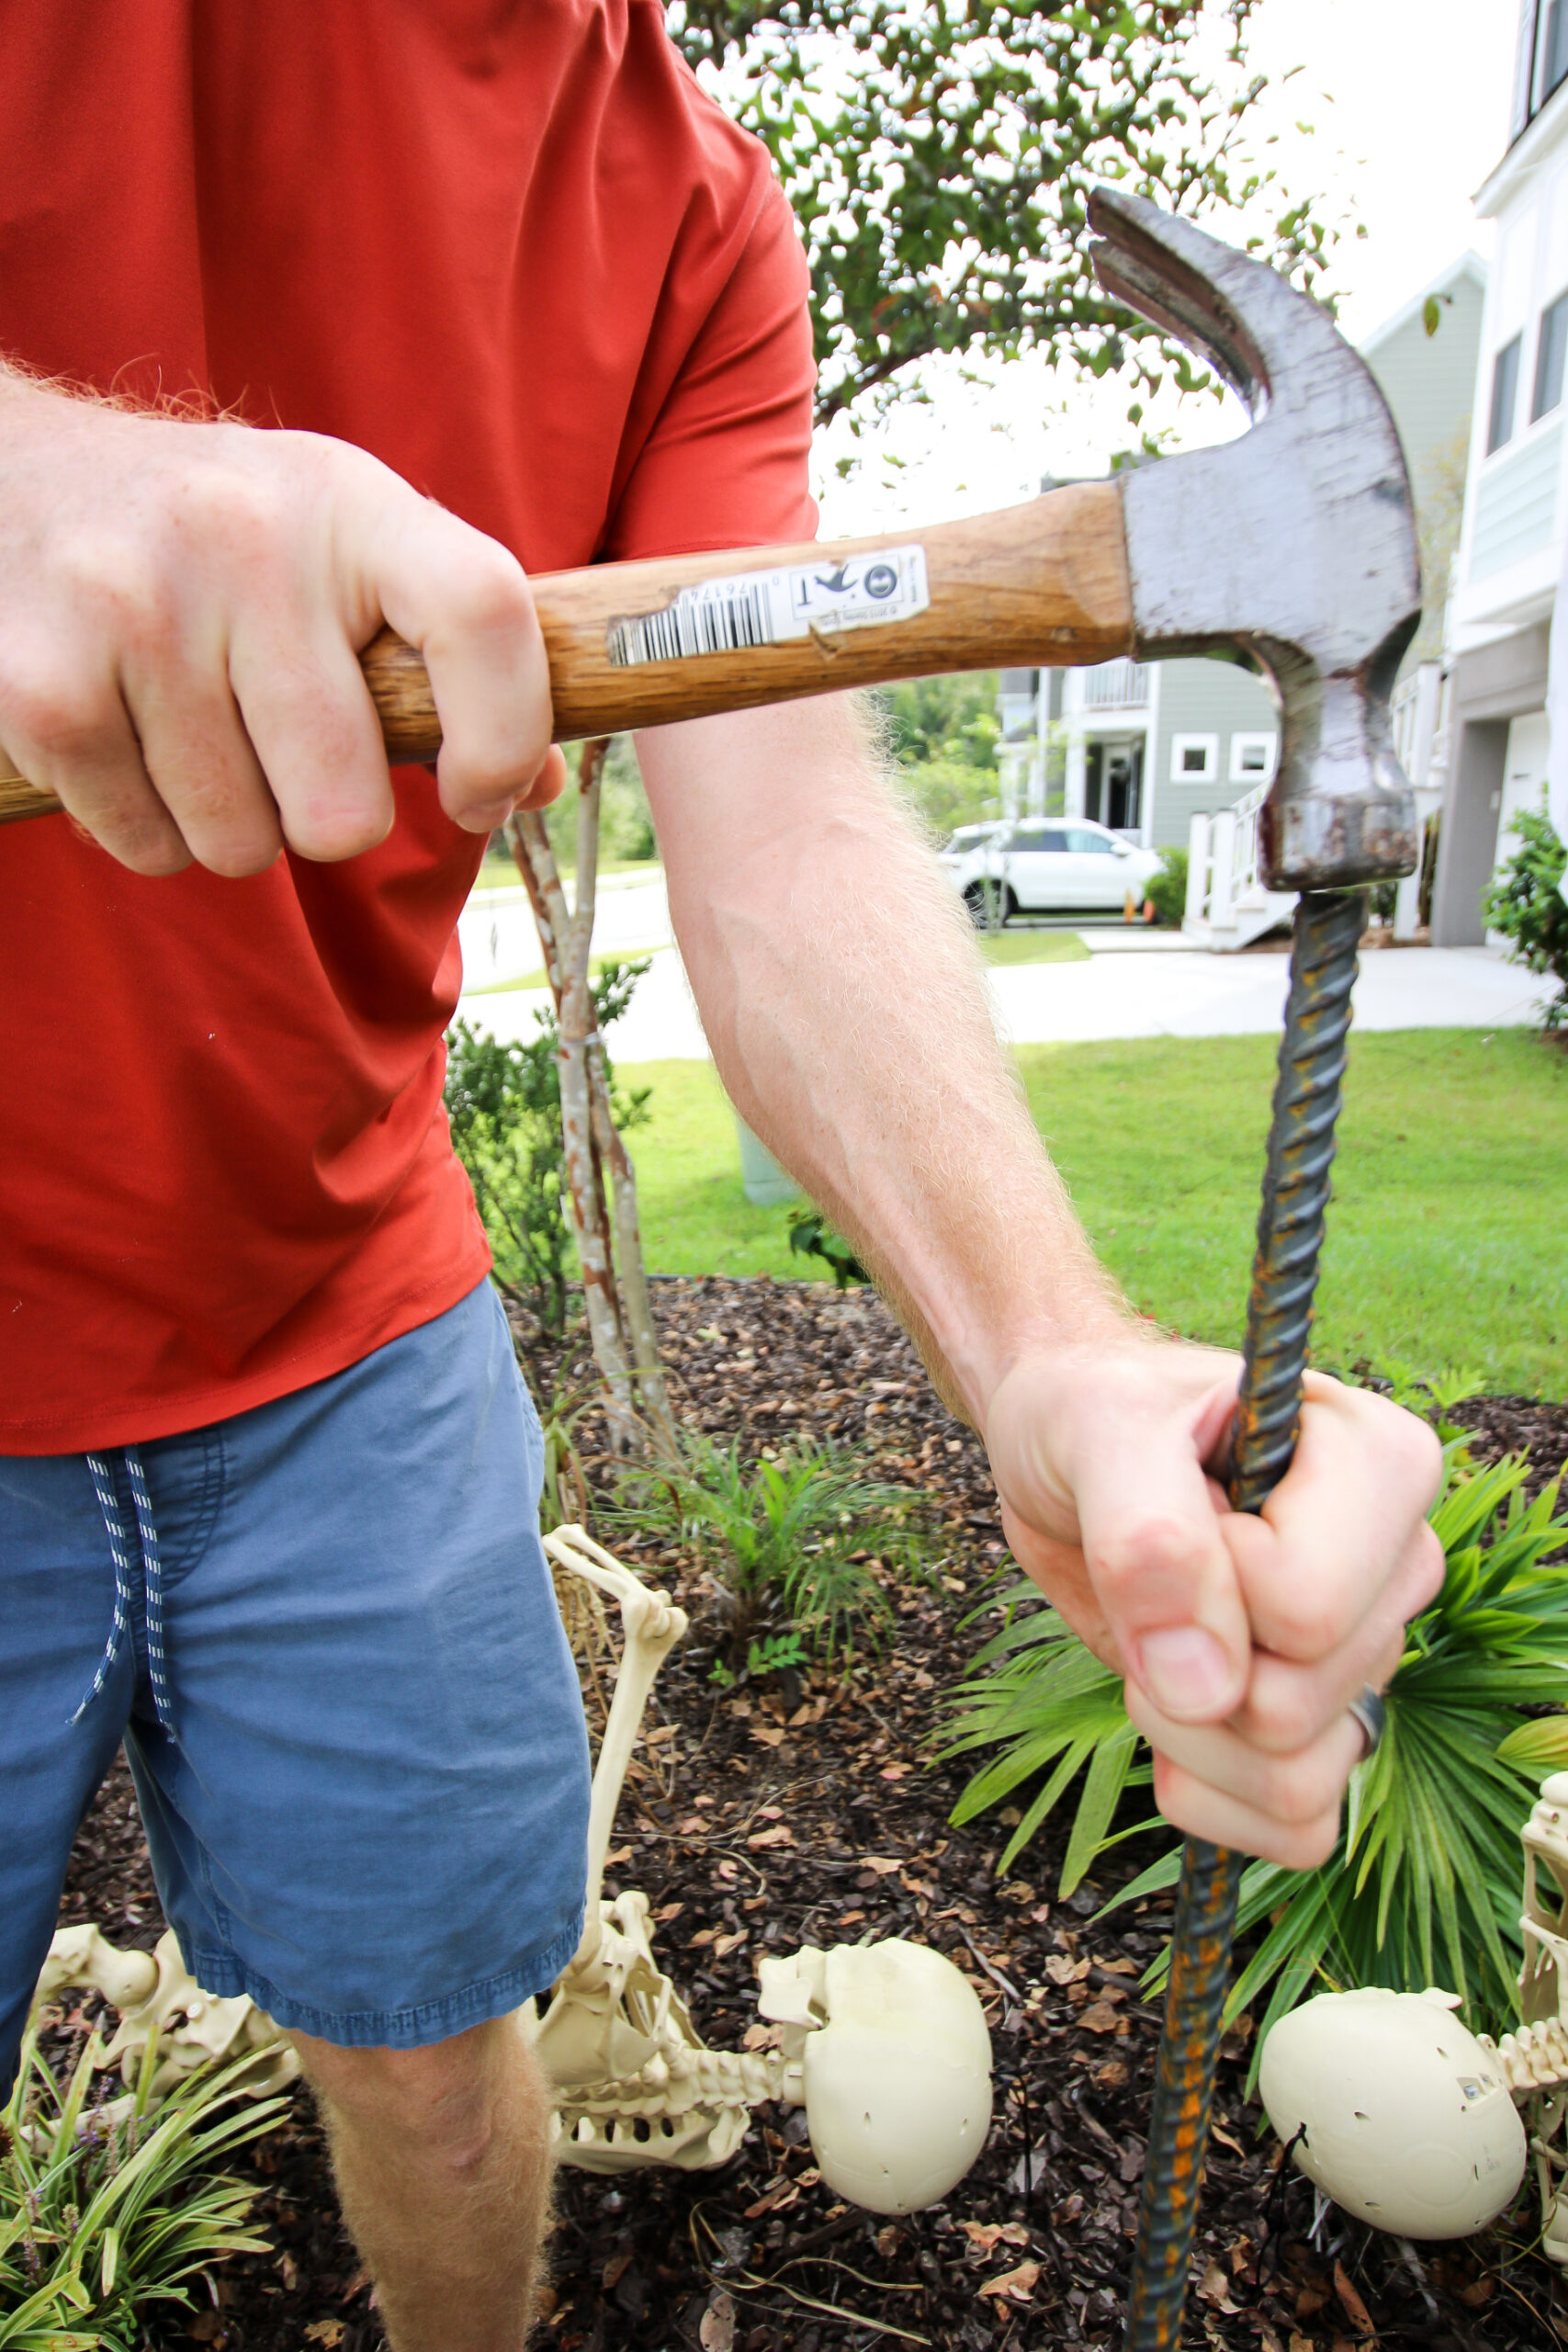
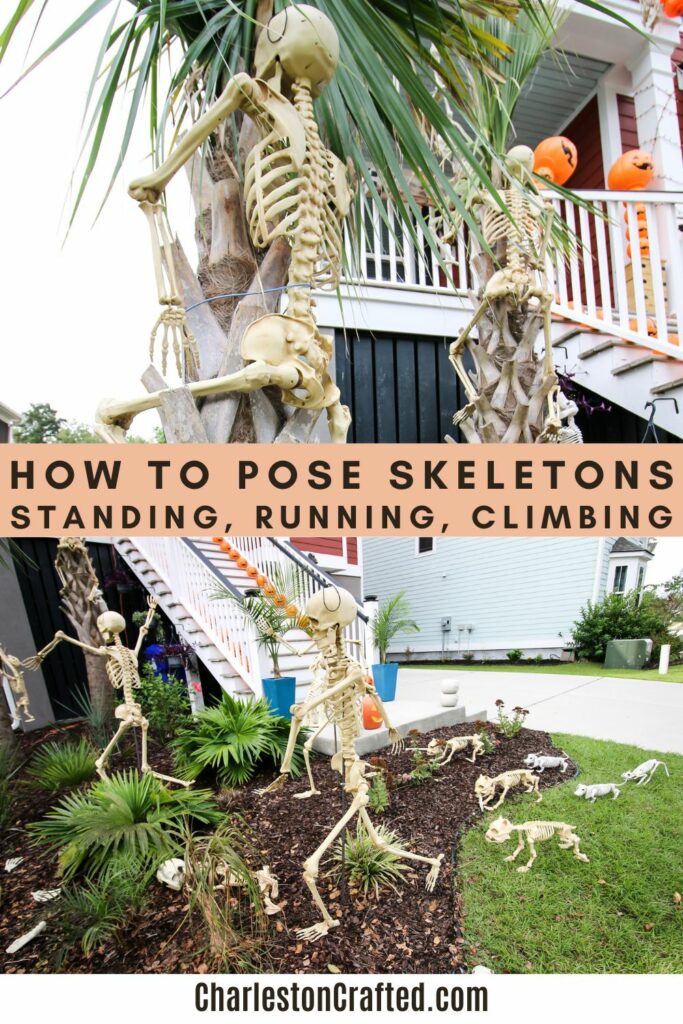
I spent a while wondering how to get a skeleton to stand up in our yard to get the desired "running from dogs" look. We decided to build a DIY skeleton stand for each to hold in place.
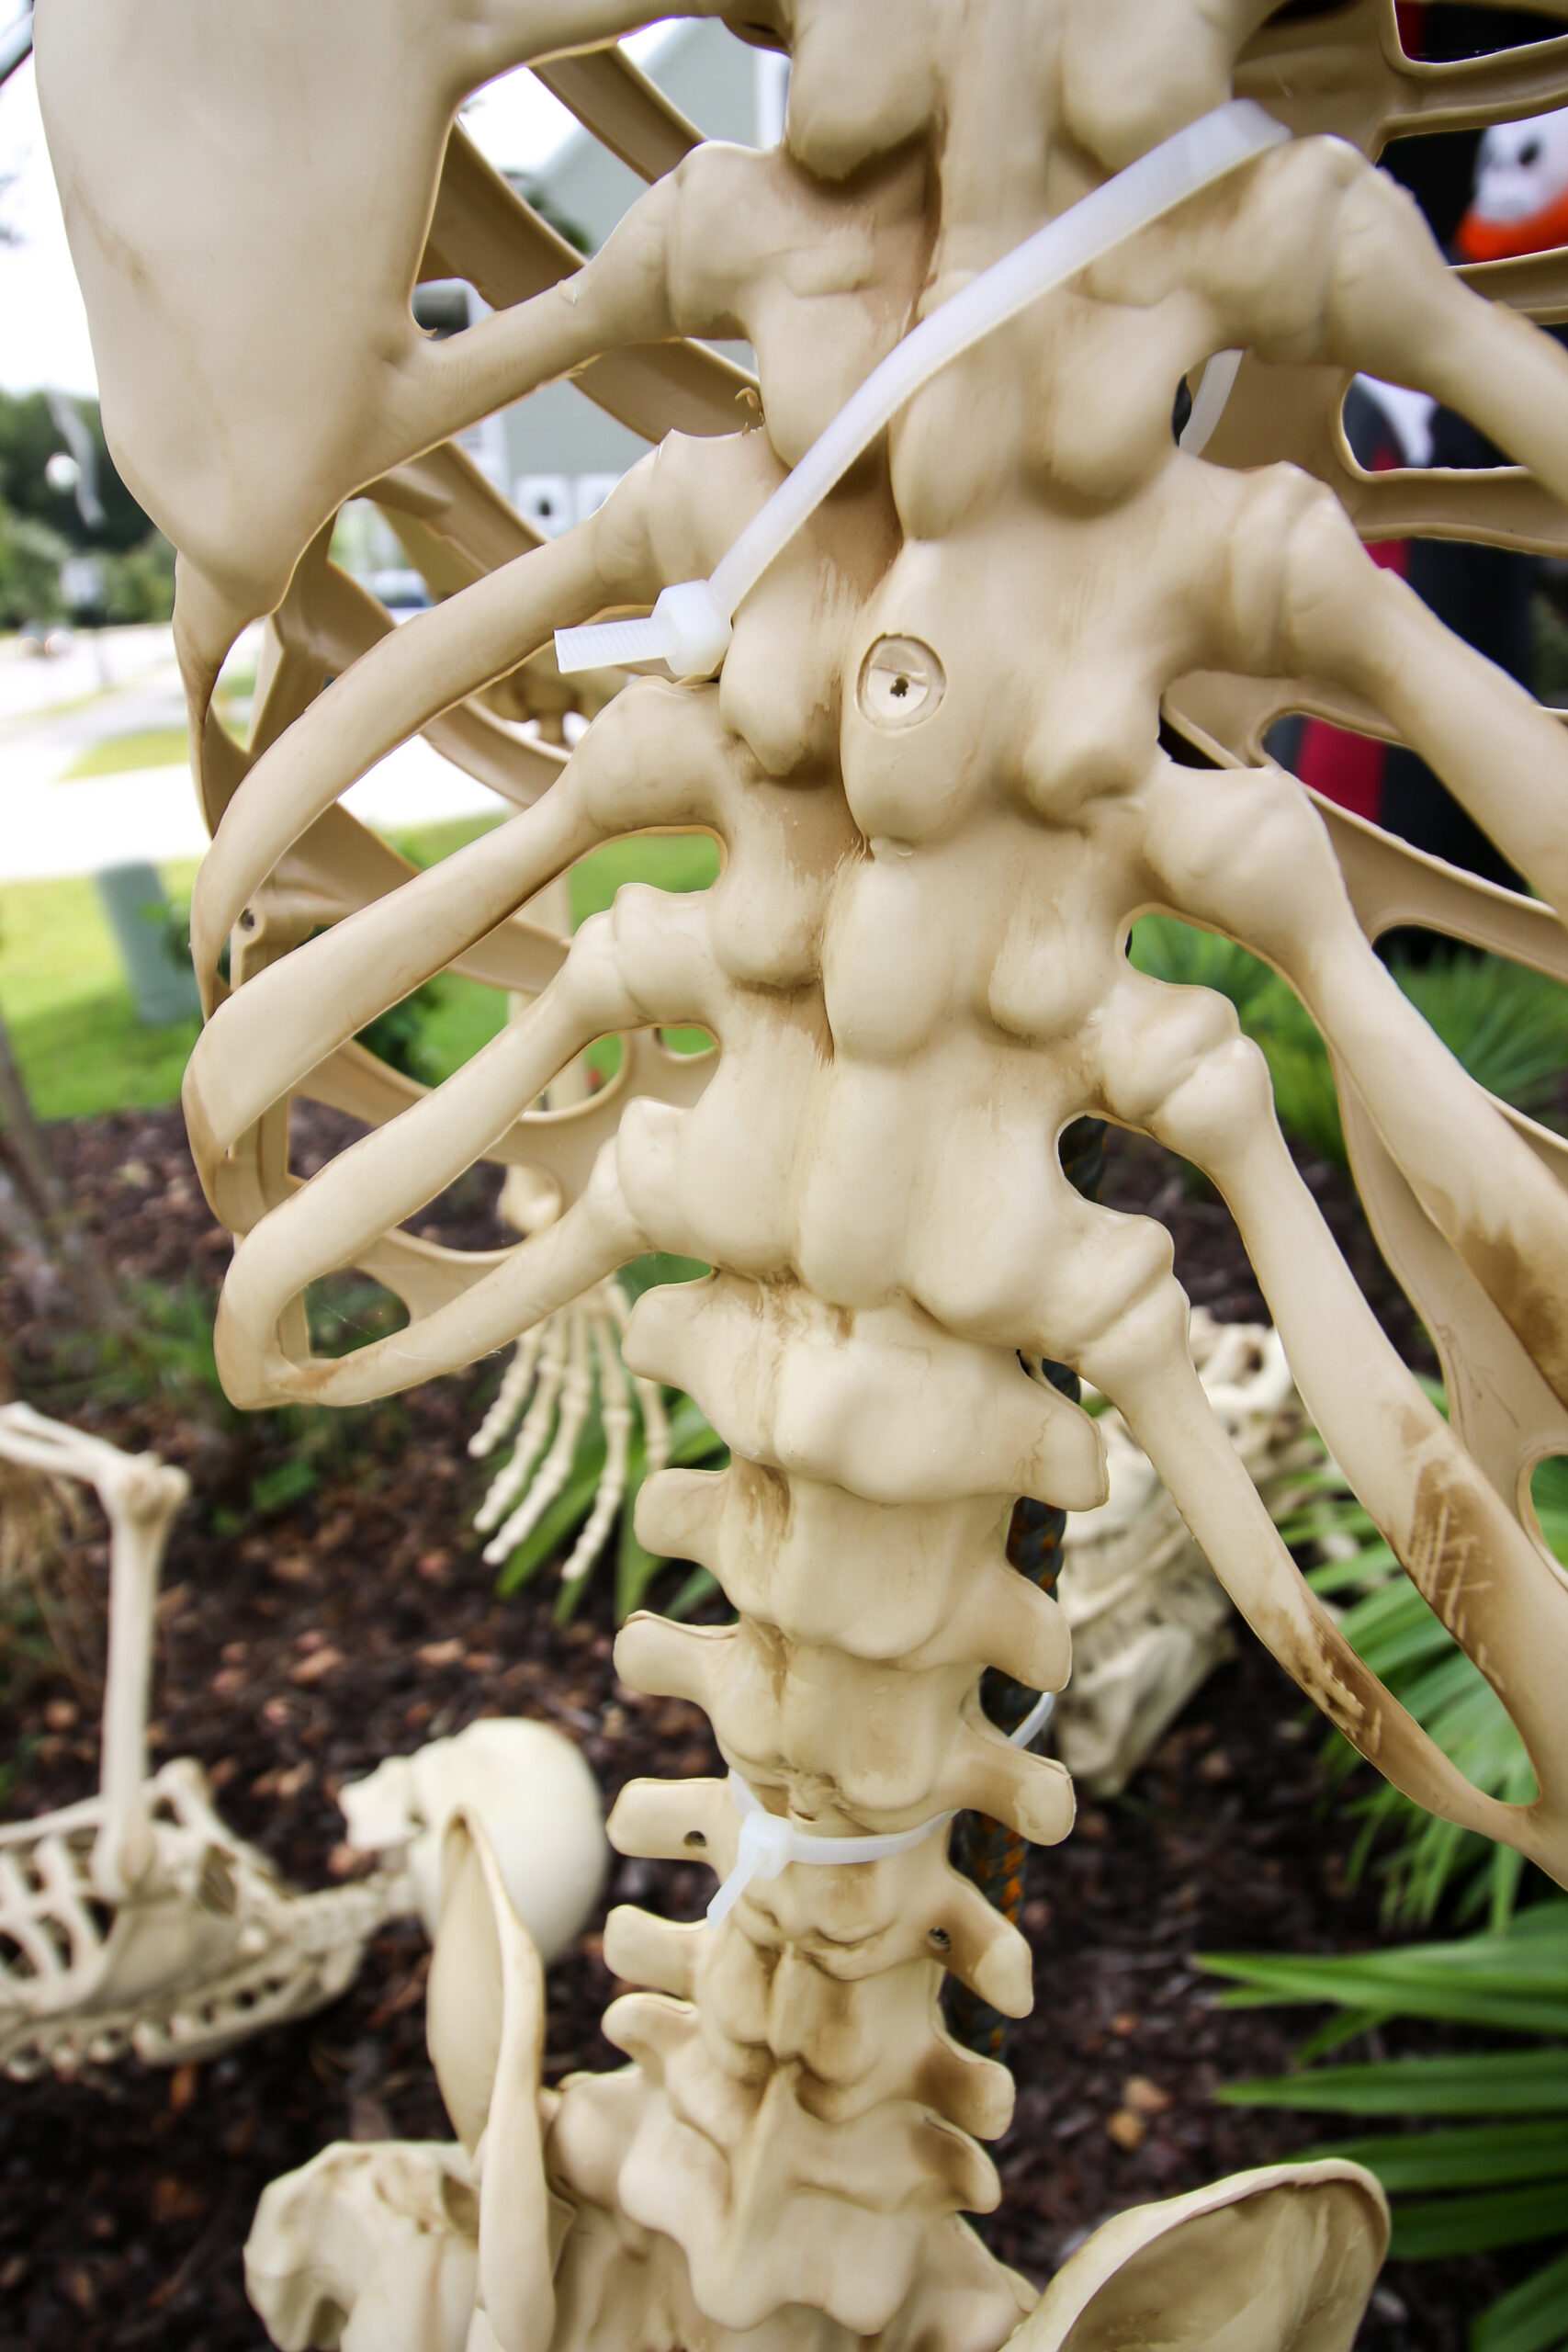
To do this you will need rebar and zip ties. We got our rebar from National Hardware! We chose 48" rebar for our 5 foot size skeletons.
If your skeleton is not posable or it is a bit old with loose joints, you might also want some clear fishing line like this, to tie legs and arms in place. Our plastic skeletons hold poses well so we didn't need that this time!
How to make a skeleton stand up
- Choose the placement of your skeleton
- Hammer a piece of rebar into the ground in that spot until it is very secure
- Place skeleton so the spine aligns with the rebar. You can line it up to the back of the spine or front (inside the ribcage) depending on which way you want the skeleton to face.
- Use zip ties to attach the skeleton to the rebar. We used 3 per skeleton. Trim excess.
- Pose any arms or feet for the perfect look!
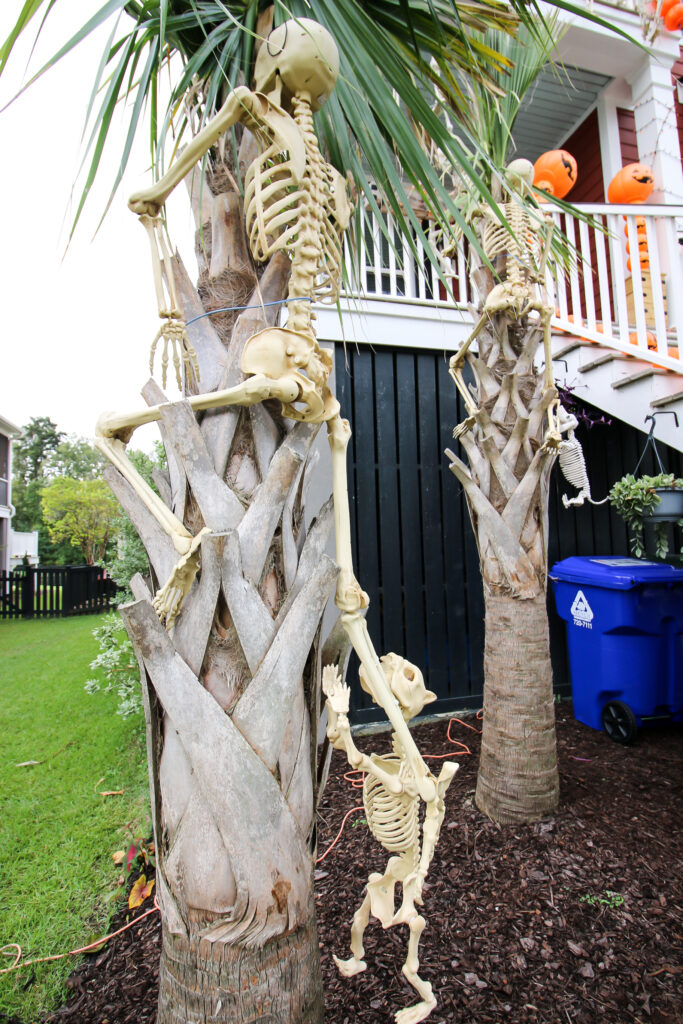
How to attach a skeleton to a tree
As a part of our design, we also wanted to hang some skeletons so they were climbing our trees (up onto the house).
To do this, we used Plastic Coated Wire from National Hardware.
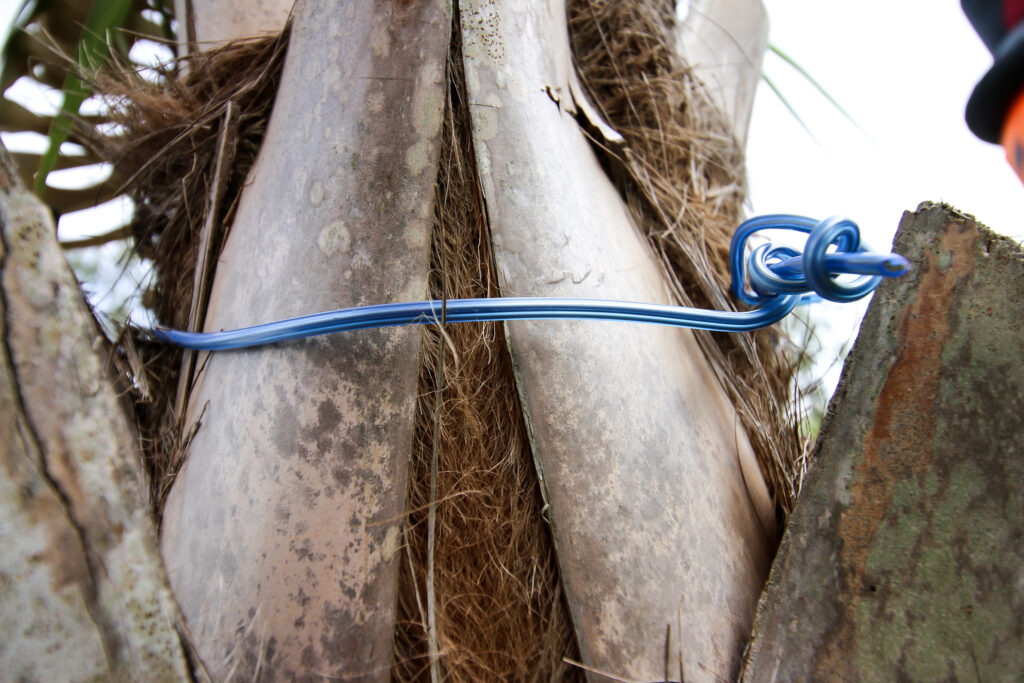
This wire can hold up to 100lbs and the plastic coating makes it perfect for outdoor use. It can also be bent and holds it shape really well.
Simply pose your skeleton on the tree and loop the wire around the skeleton and the tree to secure it in place. You may need 1-3 looks, depending on if you have poseable skeletons and if theres anything on the tree for them to prop up on.
How to hang a skeleton off the side of the house
Finally, we hung several skeletons off the house. They look like they are climbing the house, hanging from the porch, and sitting on the side of the porch railing.
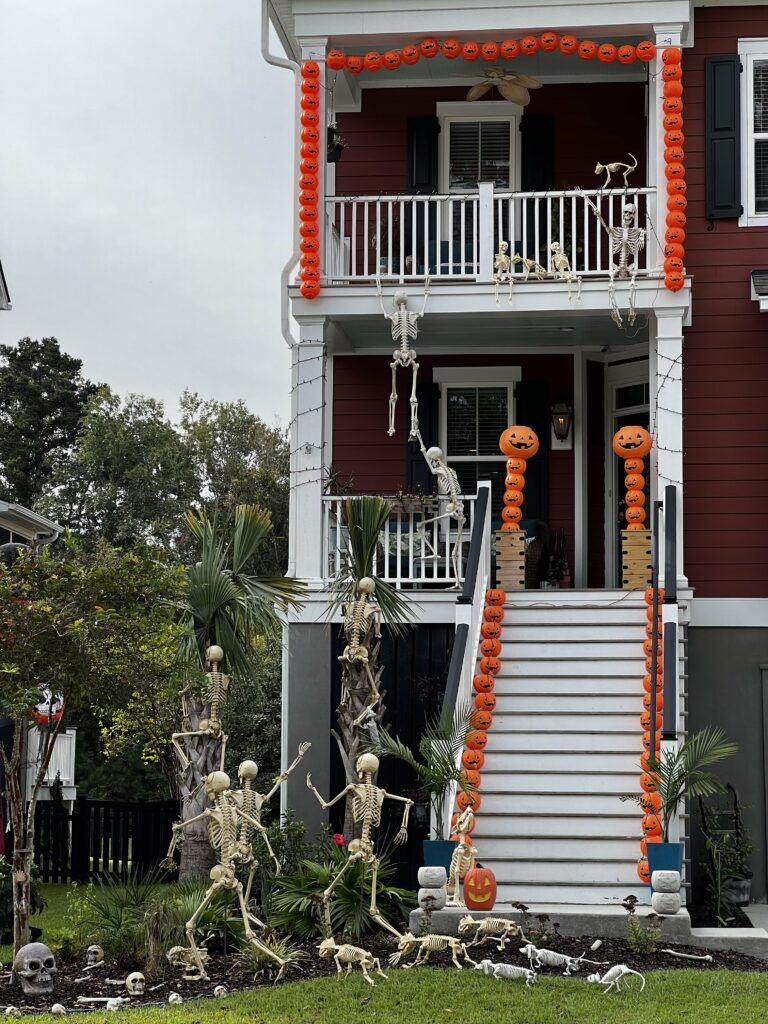
To get this look, the skeletons are all hung on zip ties from the wrists, ankles, or spine. We attached them to railings or small hooks on the side of the house.
I adore how our display turned out. Our neighbors love it too. It's so fun to see the kids faces light up with joy!
Any more questions about our Halloween skeleton display?!

Looking for something?
We've been doing this since 2012 so we have a LOT of blog posts!
Search stuff like: Ceiling Projects | DIY Plant Stands | Thrift Flips

Hello, I'm Morgan, half of the creative force behind CharlestonCrafted.com! With a passion for DIY that dates back to 2012, I've transformed three homes and now I'm dedicated to helping others craft their dream spaces. Let's turn your house into a home together!