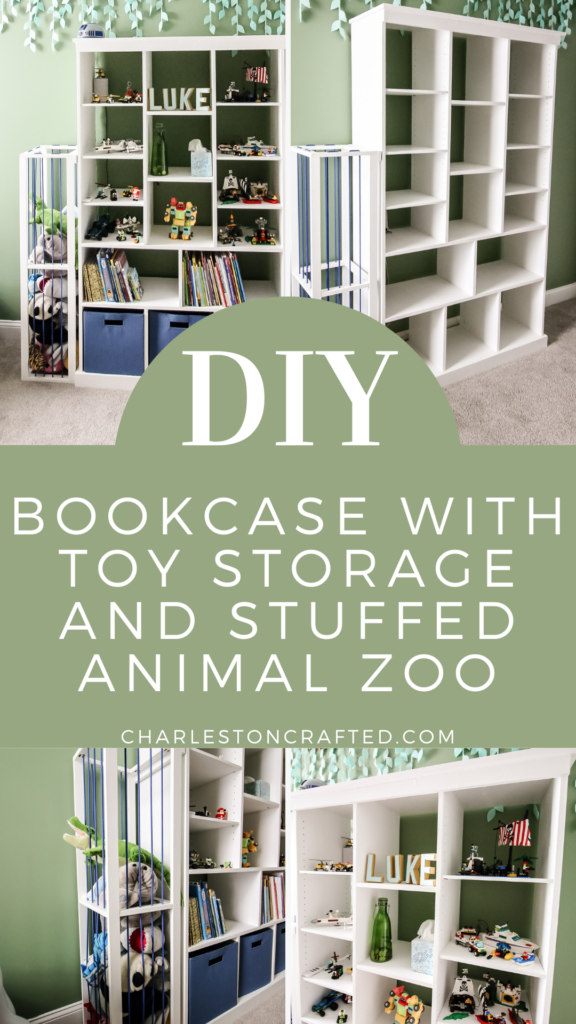
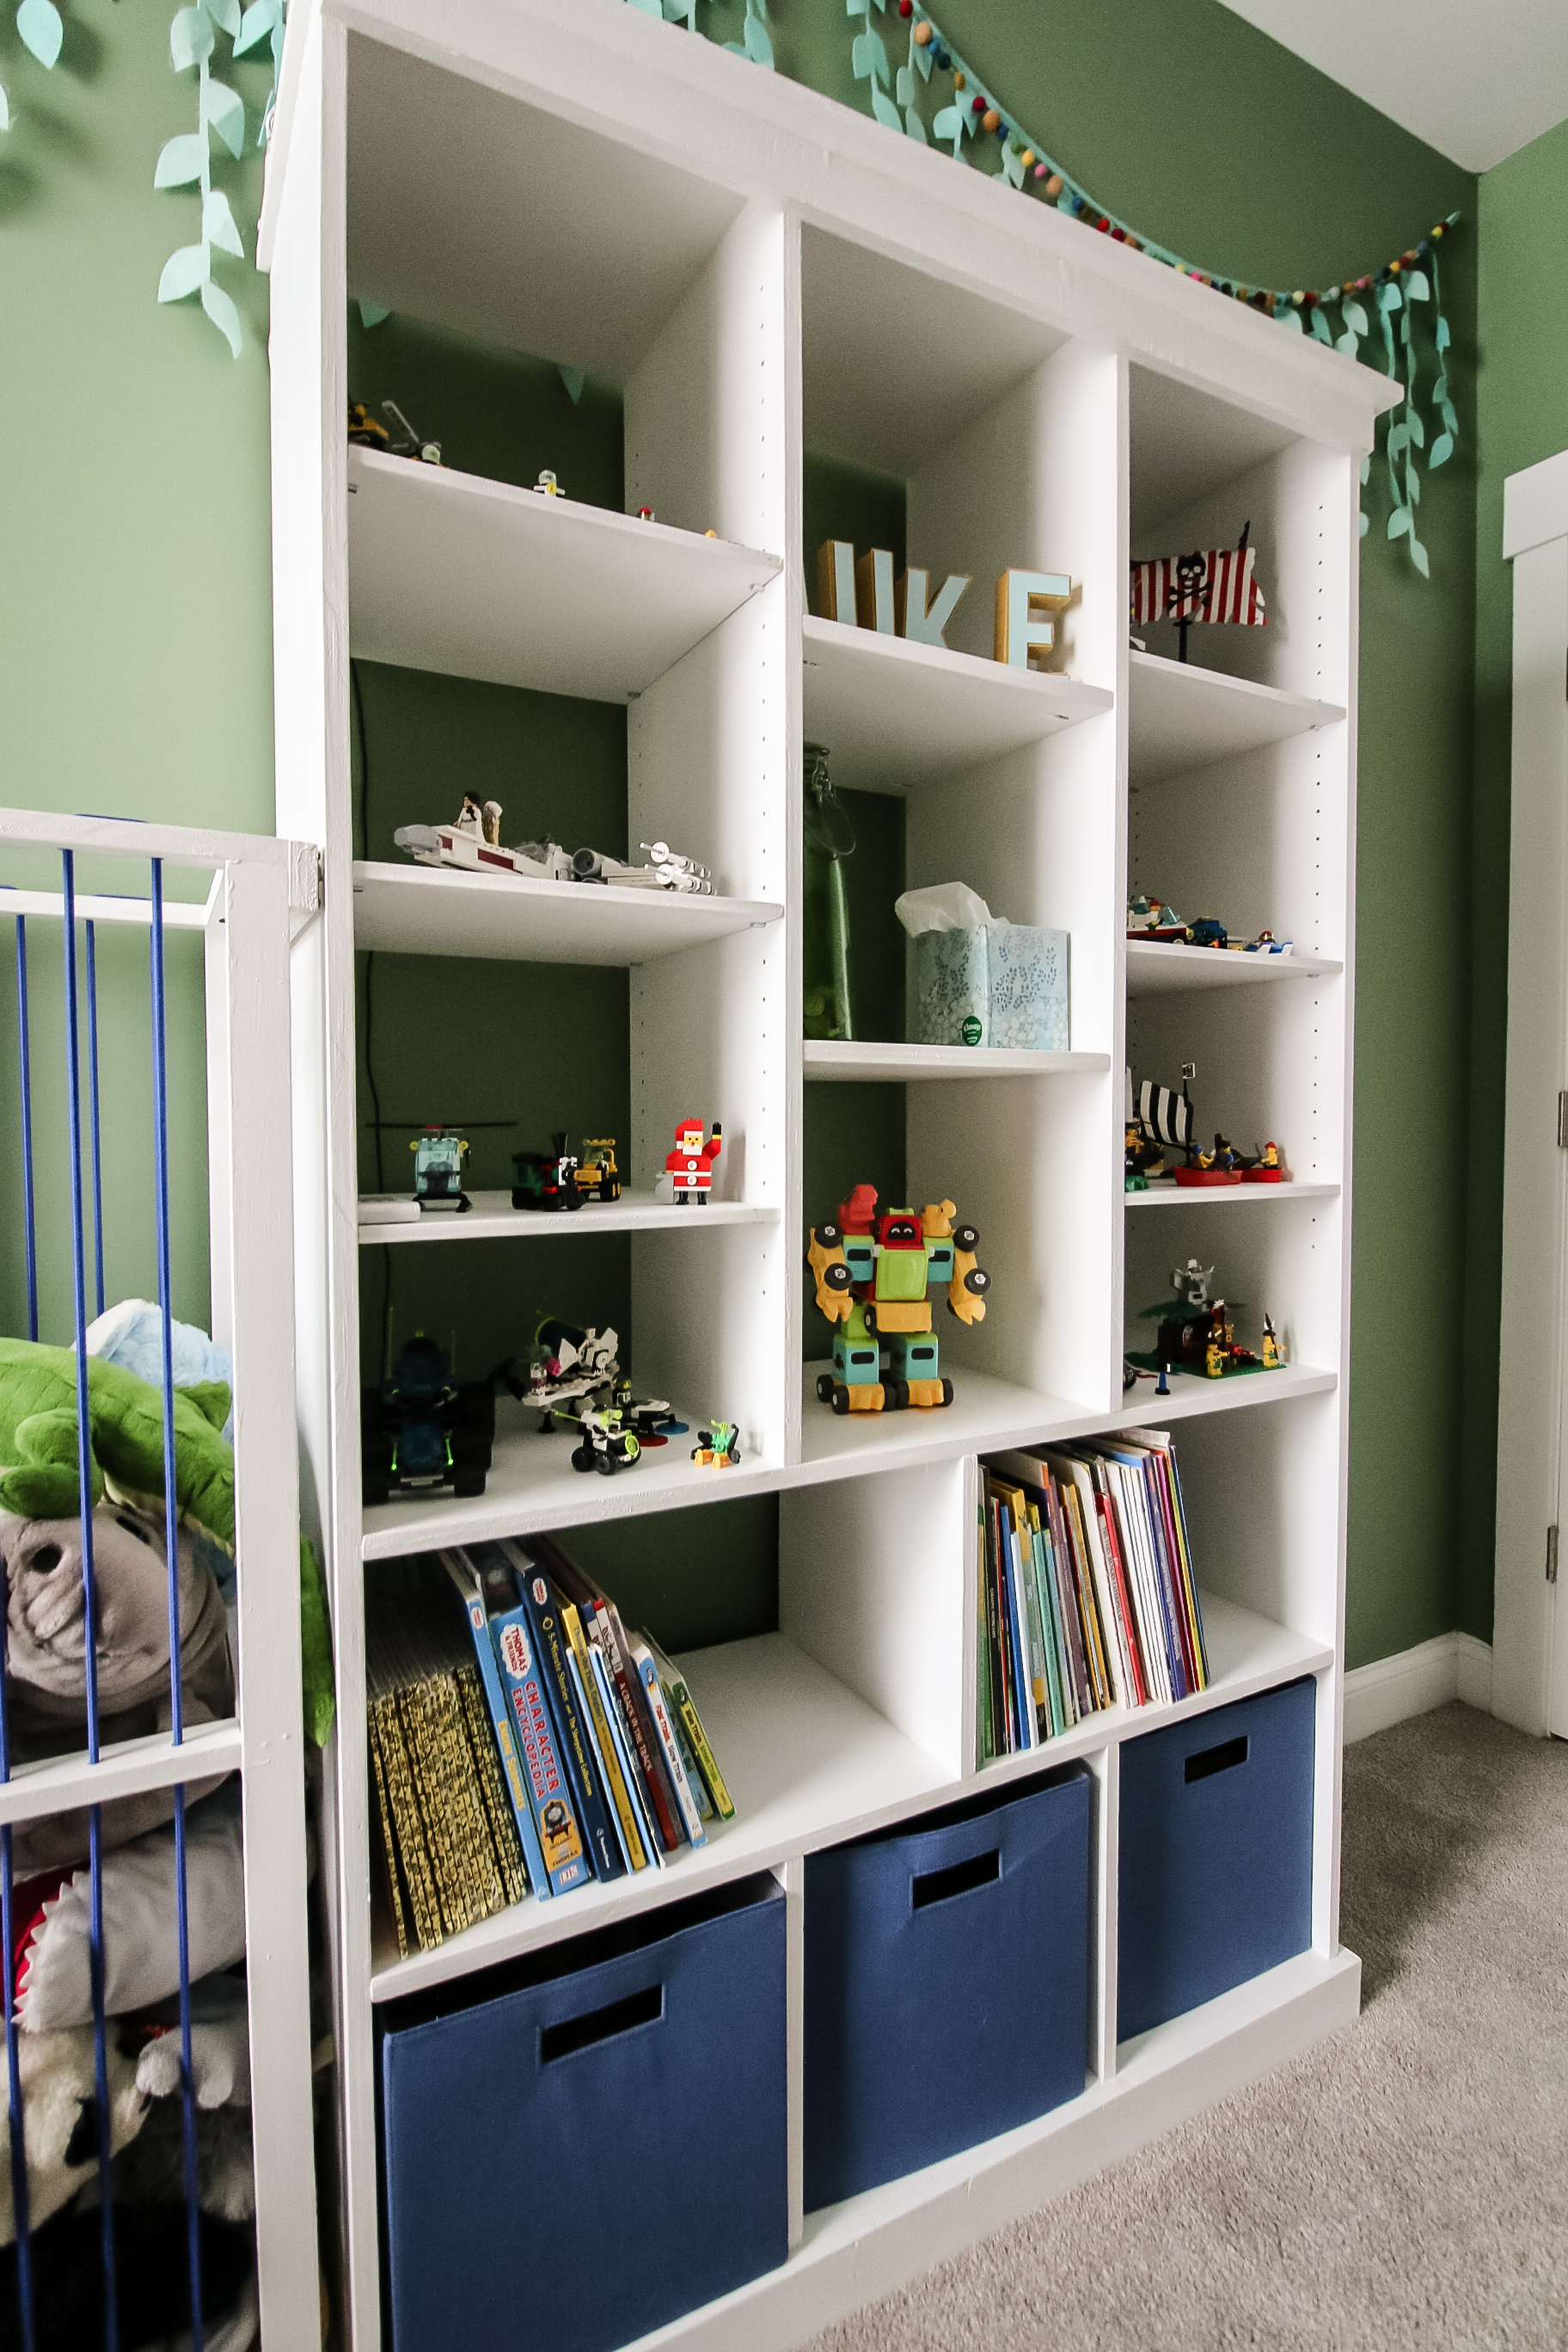
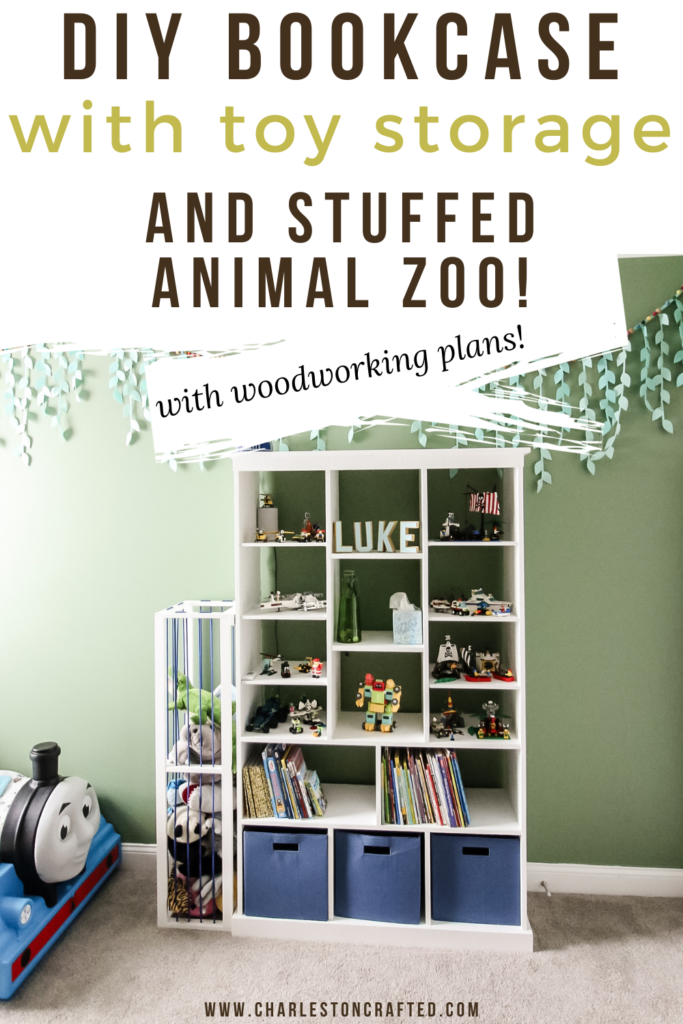
This simple bookcase has space for cube storage and books, but also has display shelves for toys and LEGO builds. Add on the detachable stuffed animal zoo for your kid to enjoy!
This post was sponsored by Kreg Tool. All opinions are our own and our opinion is that we love Kreg Tool products. Thanks for supporting the brands that make Charleston Crafted possible!
This summer when my dad came to visit, he brought with him two tubs of my old LEGO that he had found in his garage. I have no idea how they were still around because he transformed my bedroom to his office in his old house 18 YEARS AGO and moved and they are somehow reappearing.
Alas, it was an awesome day for our 5 year old son.
He had stumbled on a few LEGO sets and figures in his life, but never showed too much interest. When we got these tubs, we proceeded to spend hours and days trying to figure out what sets all these miscellaneous pieces came from and reconstruct all the sets.
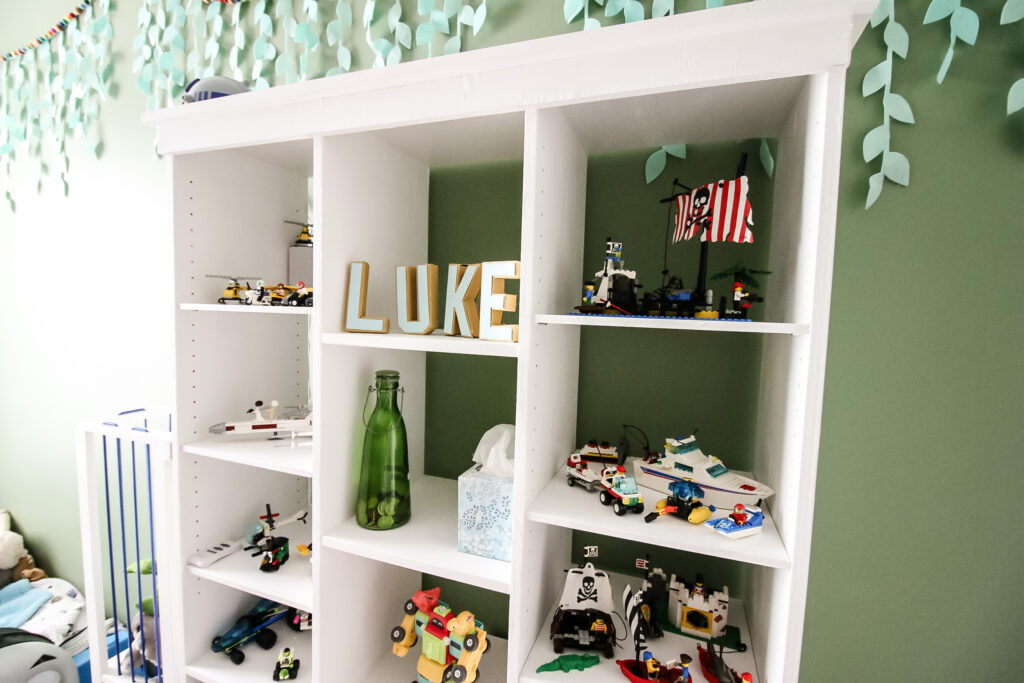
Two dozen sets later, they were all built and crammed on top of his small bookshelf. So, we decided that it was time to build him a new bookcase that would have a way to display his new found LEGO sets.
This was also time to reassess some of the other storage in his room, including how he had stuffed animals, so we added a stuffed animal zoo to the side of the bookcase to streamline his storage.
Here's the bookcase with toy storage and LEGO display we came up with.
DIY bookcase with toy storage
This bookcase obviously sounds like it has a very niche use when I describe how we're using it, however it works as a traditional bookcase or for displaying any types of toys or trinkets.
We made this using the Kreg Shelf Pin Jig so that we could move the shelves around to accommodate the different height LEGO sets he has and will inevitably keep getting, so that adjustability works for anything you want to store, whether it's books or photos.
Let's give you the general overview of how we built the bookcase and how you can get the free woodworking plans to make one for yourself!
Check out our plans for a DIY montessori forward facing bookshelf!
Materials and tools needed:
- ¾" plywood
- ½" plywood
- Wood glue
- Keyhole brackets
- Roll of ¼" bungee cord
- 1 ¼" Kreg pocket hole screws
- 1 ¼" brad nails
- Circular saw
- Kreg Rip Cut
- Kreg Shelf Pin Jig and shelf pins
- Kreg 720 Pocket Hole Jig or similar
Basic woodworking information for every project
Here are some of our most popular woodworking articles!
Shopping for wood:
Woodworking project ideas
- 100+ of the best woodworking project ideas!
- 62 easy beginning woodworking projects
- Woodworking project ideas to make and sell
See all our printable PDF woodworking plans!
Our favorite tools + supplies
- See all our favorite tool reviews
- How to use a Kreg jig
- The ultimate wood stain guide
- The best wood fillers for your project
Remember to also always use safety equipment while woodworking and using tools. Make sure you have proper eye protection, ear protection and a good mask to keep yourself safe.
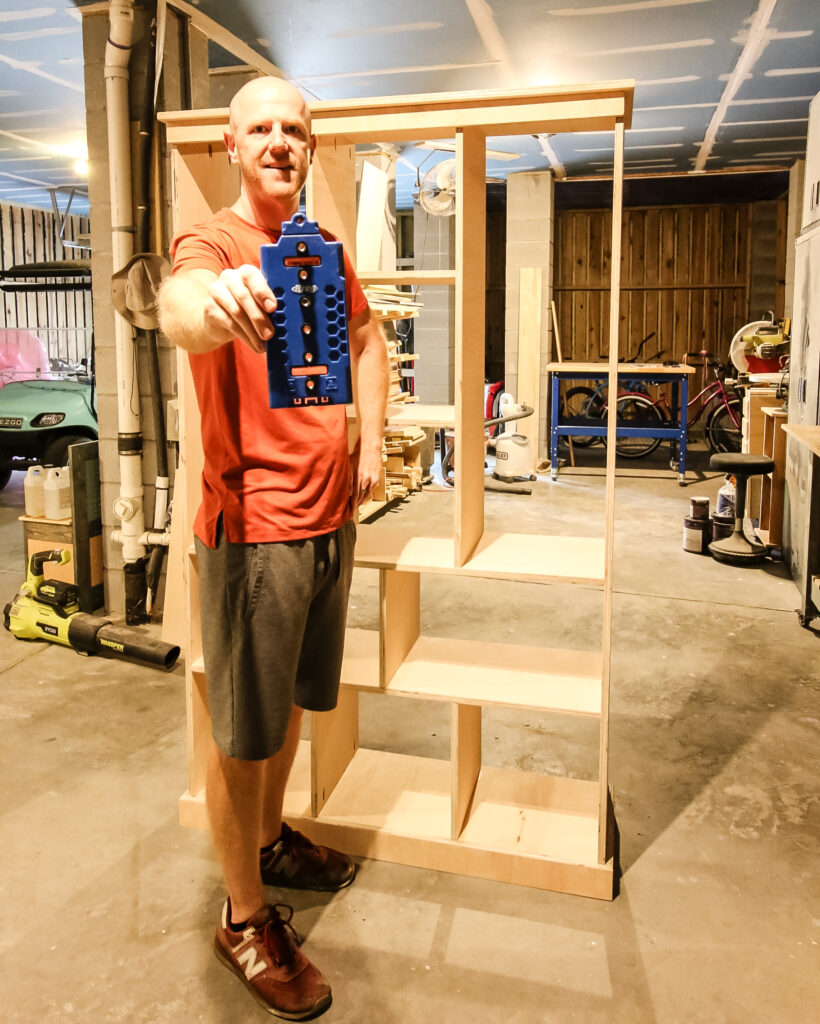
How to build a bookcase with toy storage and LEGO display
This bookcase is a great storage solution for kids books, toys, LEGO, stuffed animals or whatever you need to clean up.
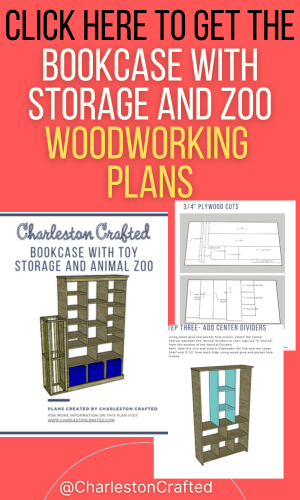
Adding the stuffed animal storage zoo is an optional part of this build and the project was designed specifically so that you could build these separately and attach them together.
Let's show you how we built this project!
Step one: Build frame and lower storage
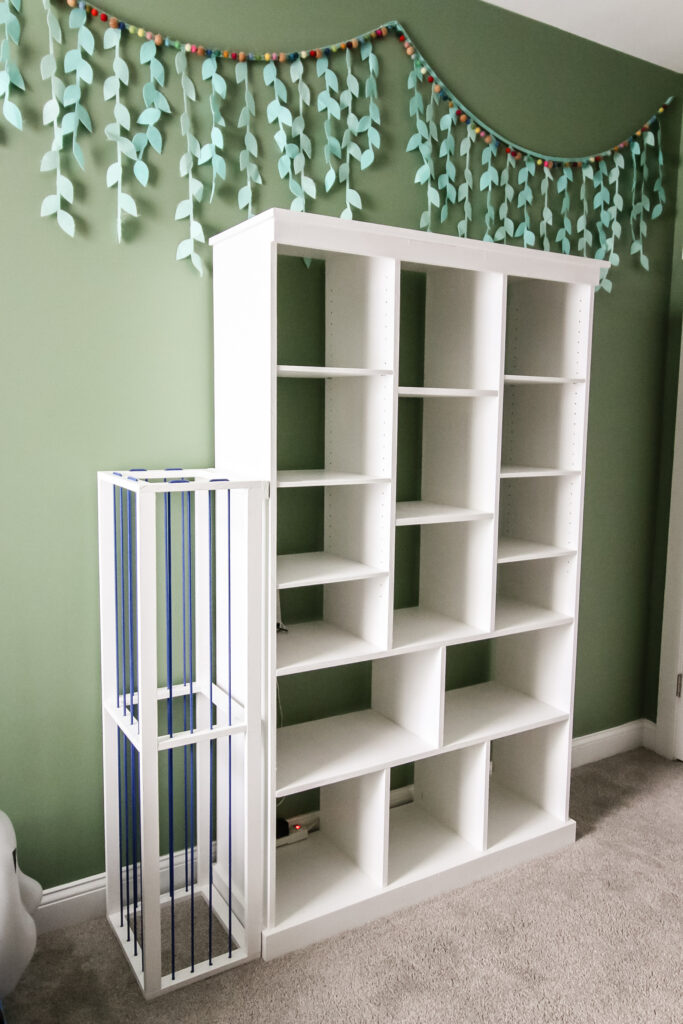
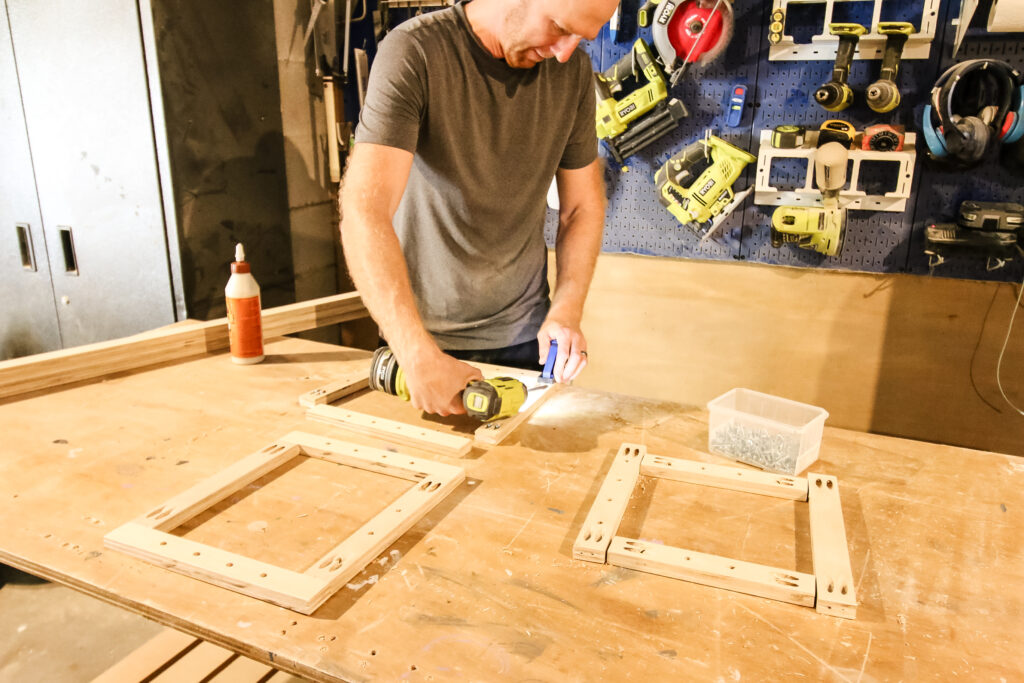
Start out by building the frame of the bookcase to get it all together. We used wood glue and pocket hole joinery for all of our joints on this project.
With the big pieces required for this project, we used our Kreg 520 a lot because it clamps directly onto the workpiece instead of having to pick up the board and put it into the jig.
You first attach a lower shelf down near the bottom of the two sides, but not all the way at the base so you can add trim later.
Then you attach the top board onto the sides so that it has overhang on three sides.
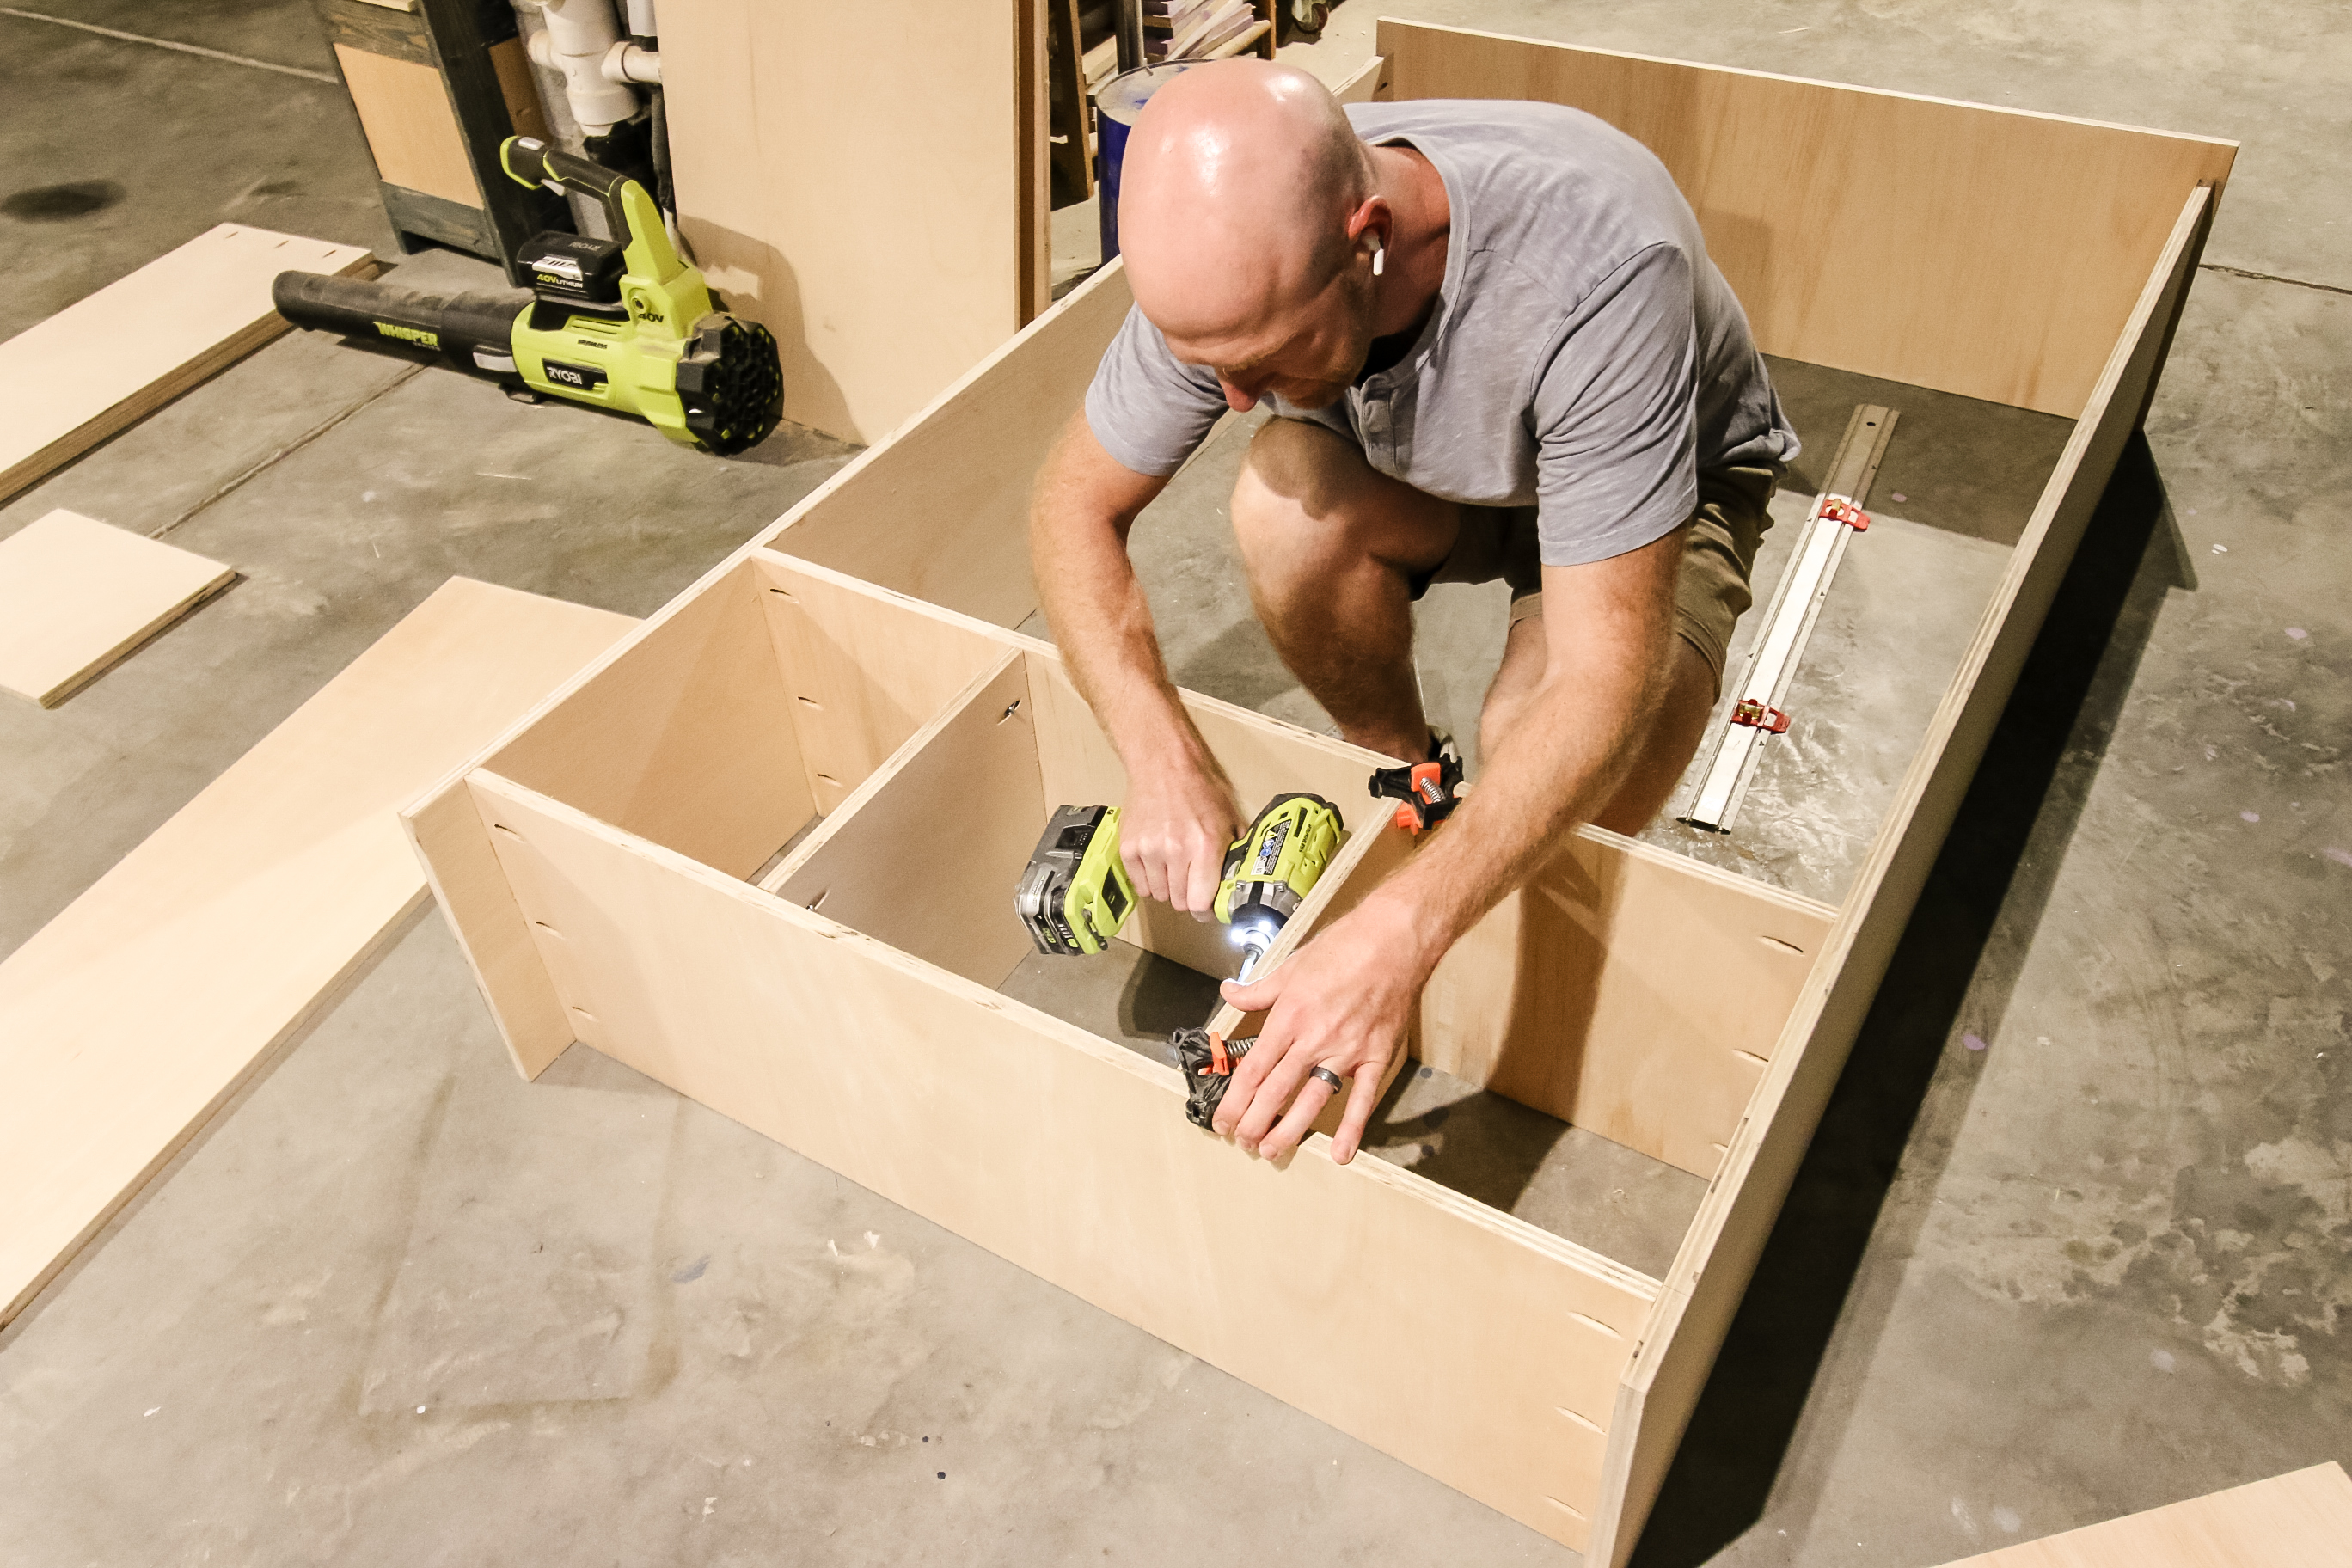
Then you'll add two more shelves on the bottom using glue and pocket hole screws. These shelves will be for making the cube storage and the main bookshelf area.
The cubes are perfectly sized for any 13"x13" storage bins like these! These are great for storing miscellaneous items that don't sit well on a shelf.
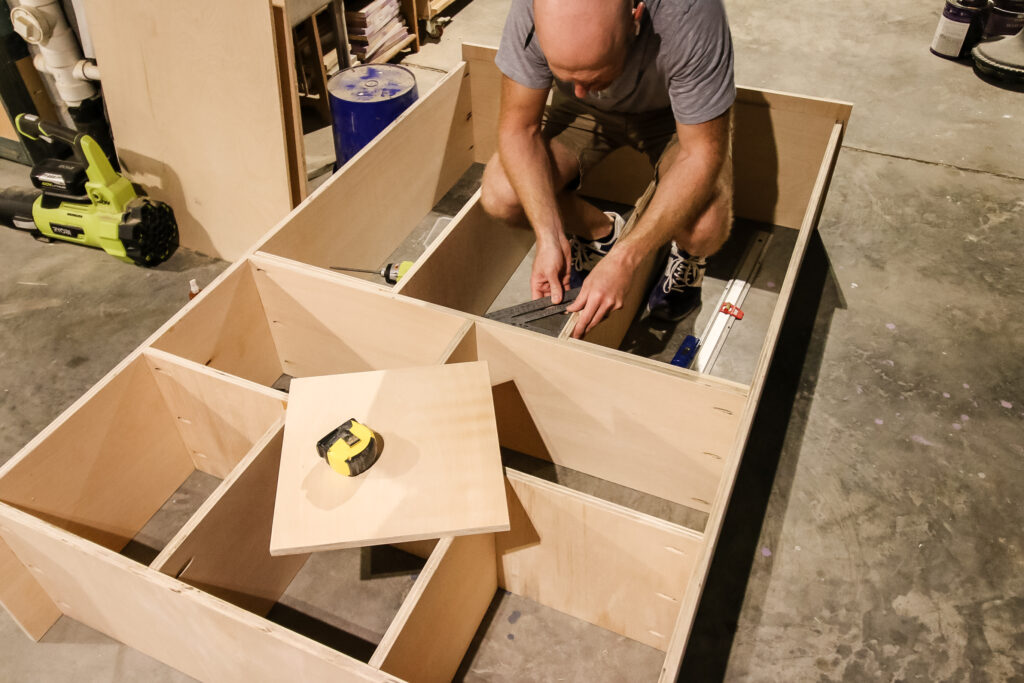
Step two: Build center storage
Then you'll build the center storage areas. These are fixed in place by glue and pocket holes to attach the vertical dividers to the top and the shelf and two locked in place shelves between them.
The center storage unit can be built by itself and then slid into place and attached.
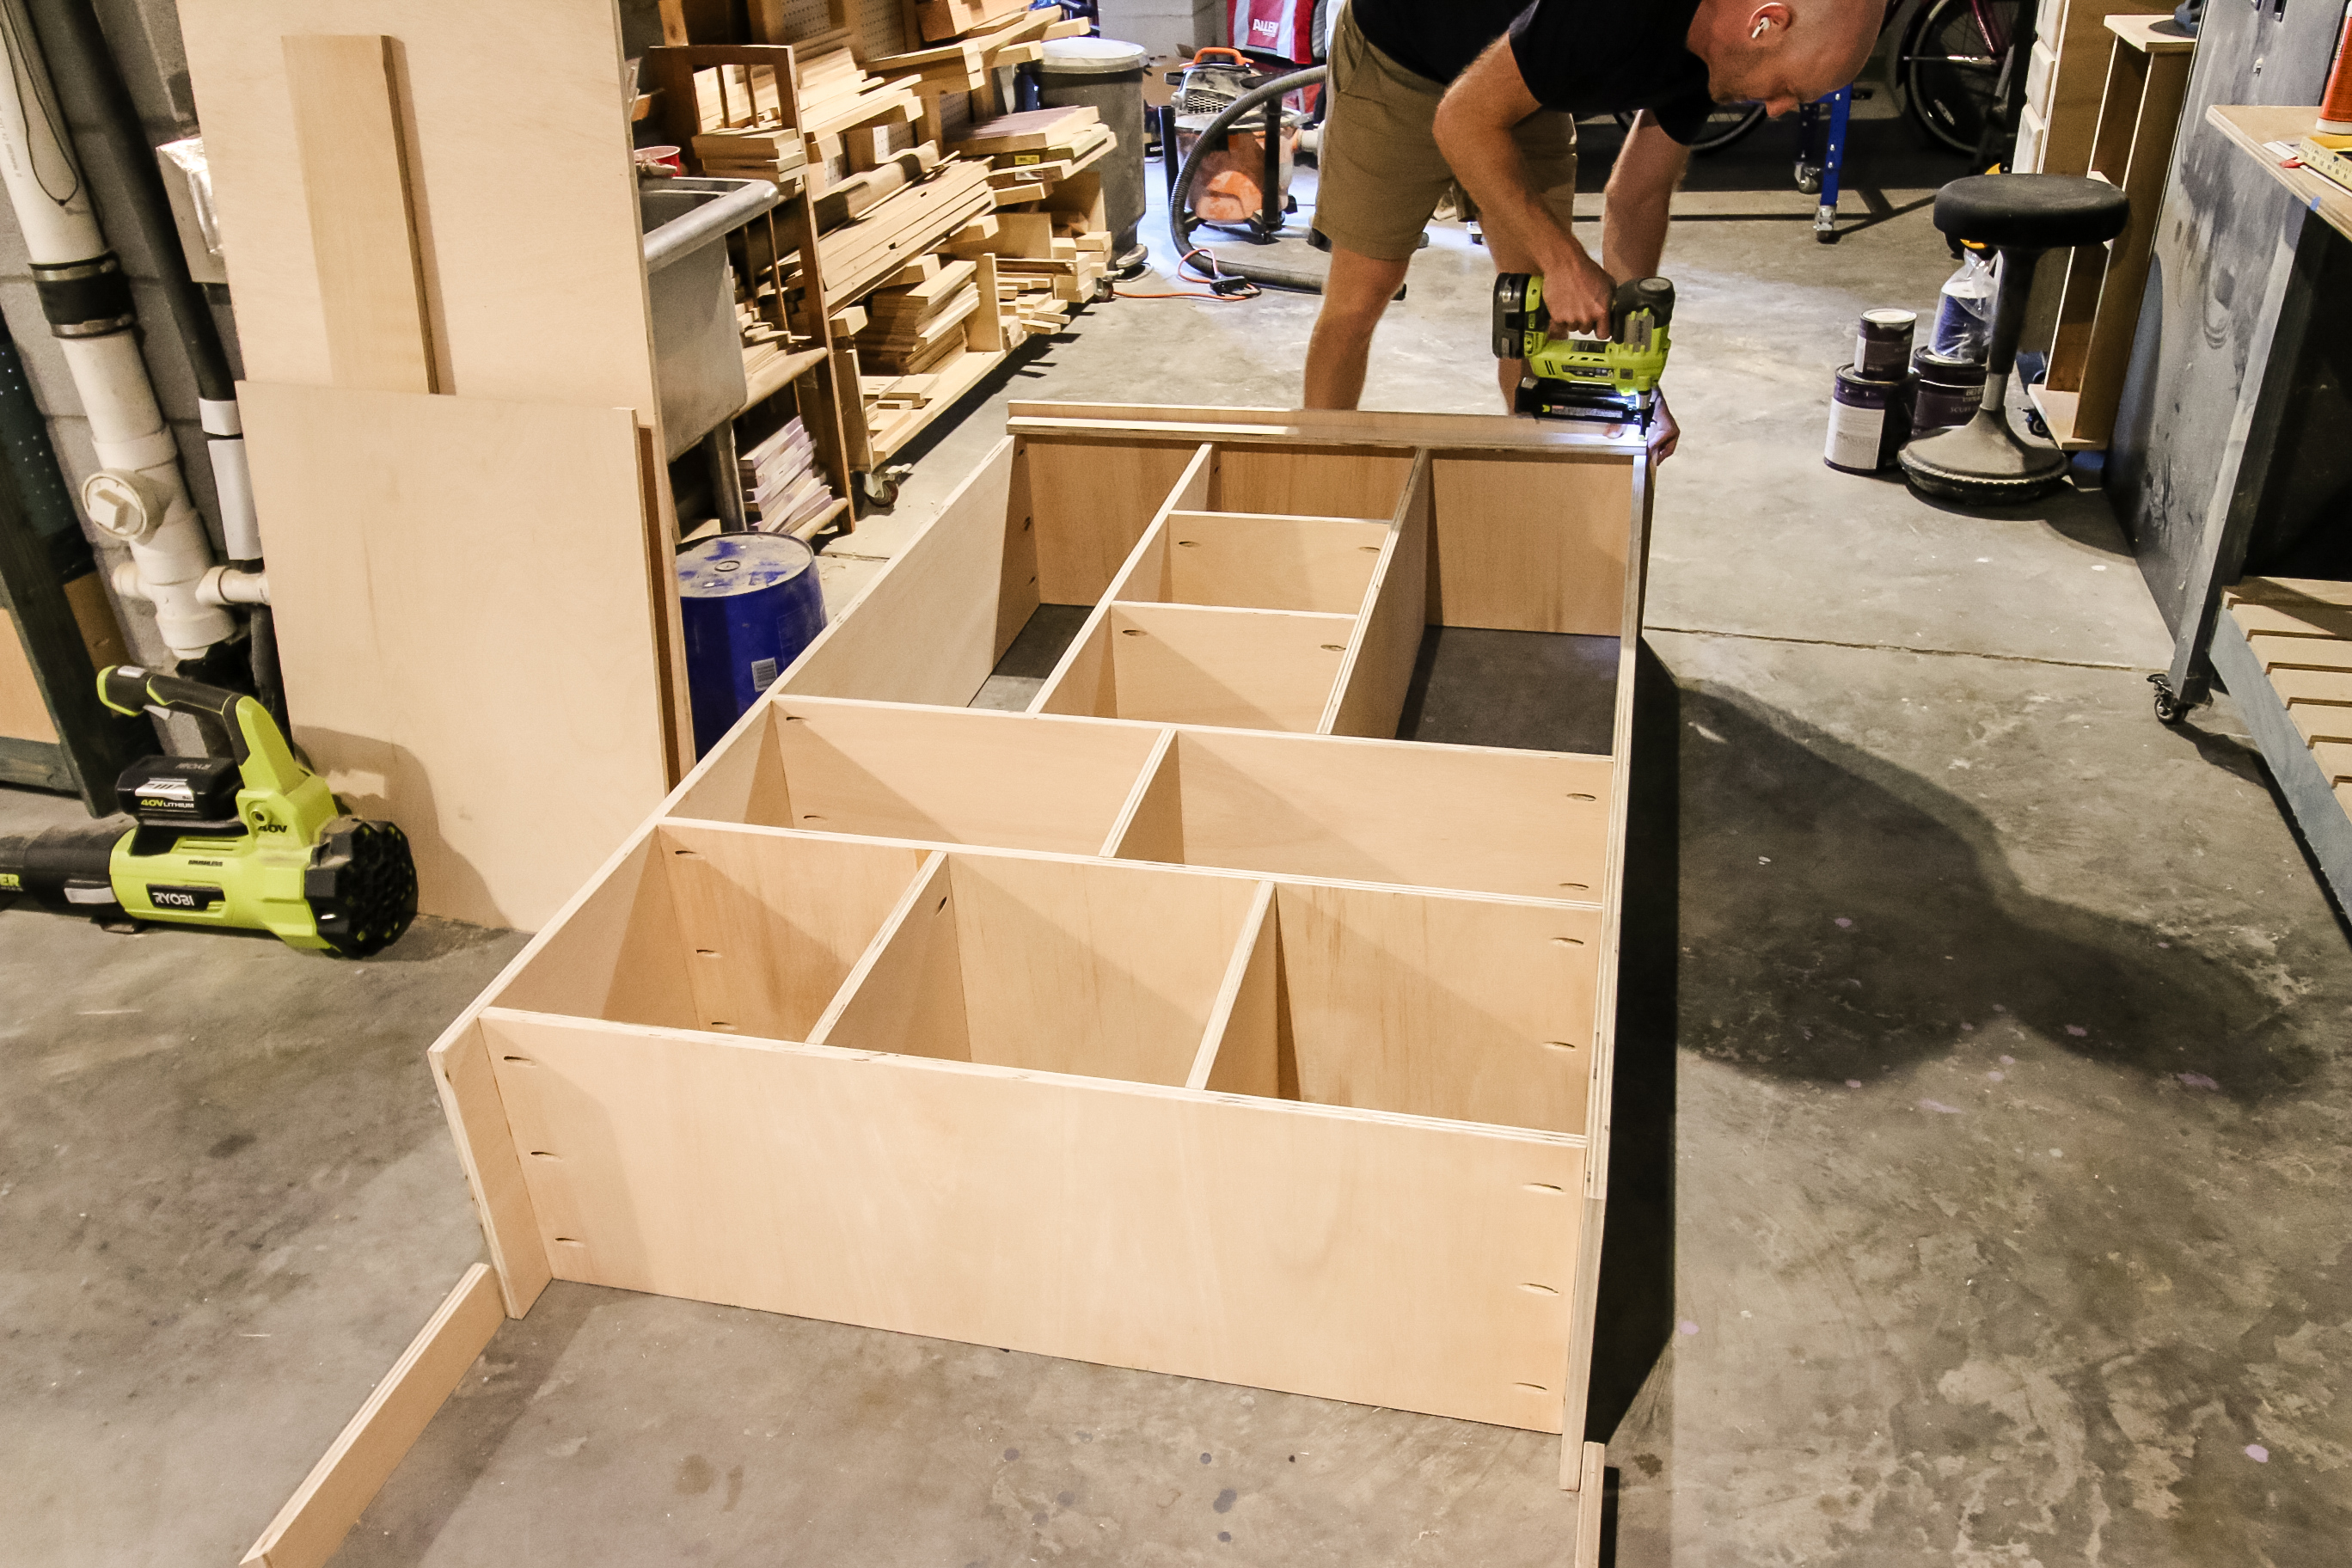
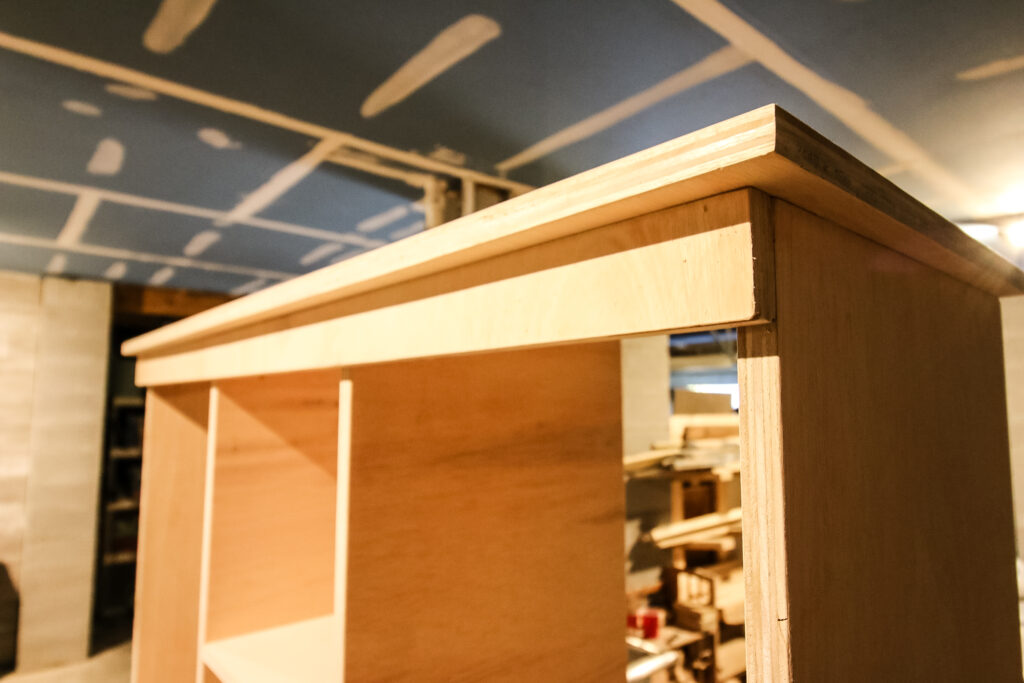
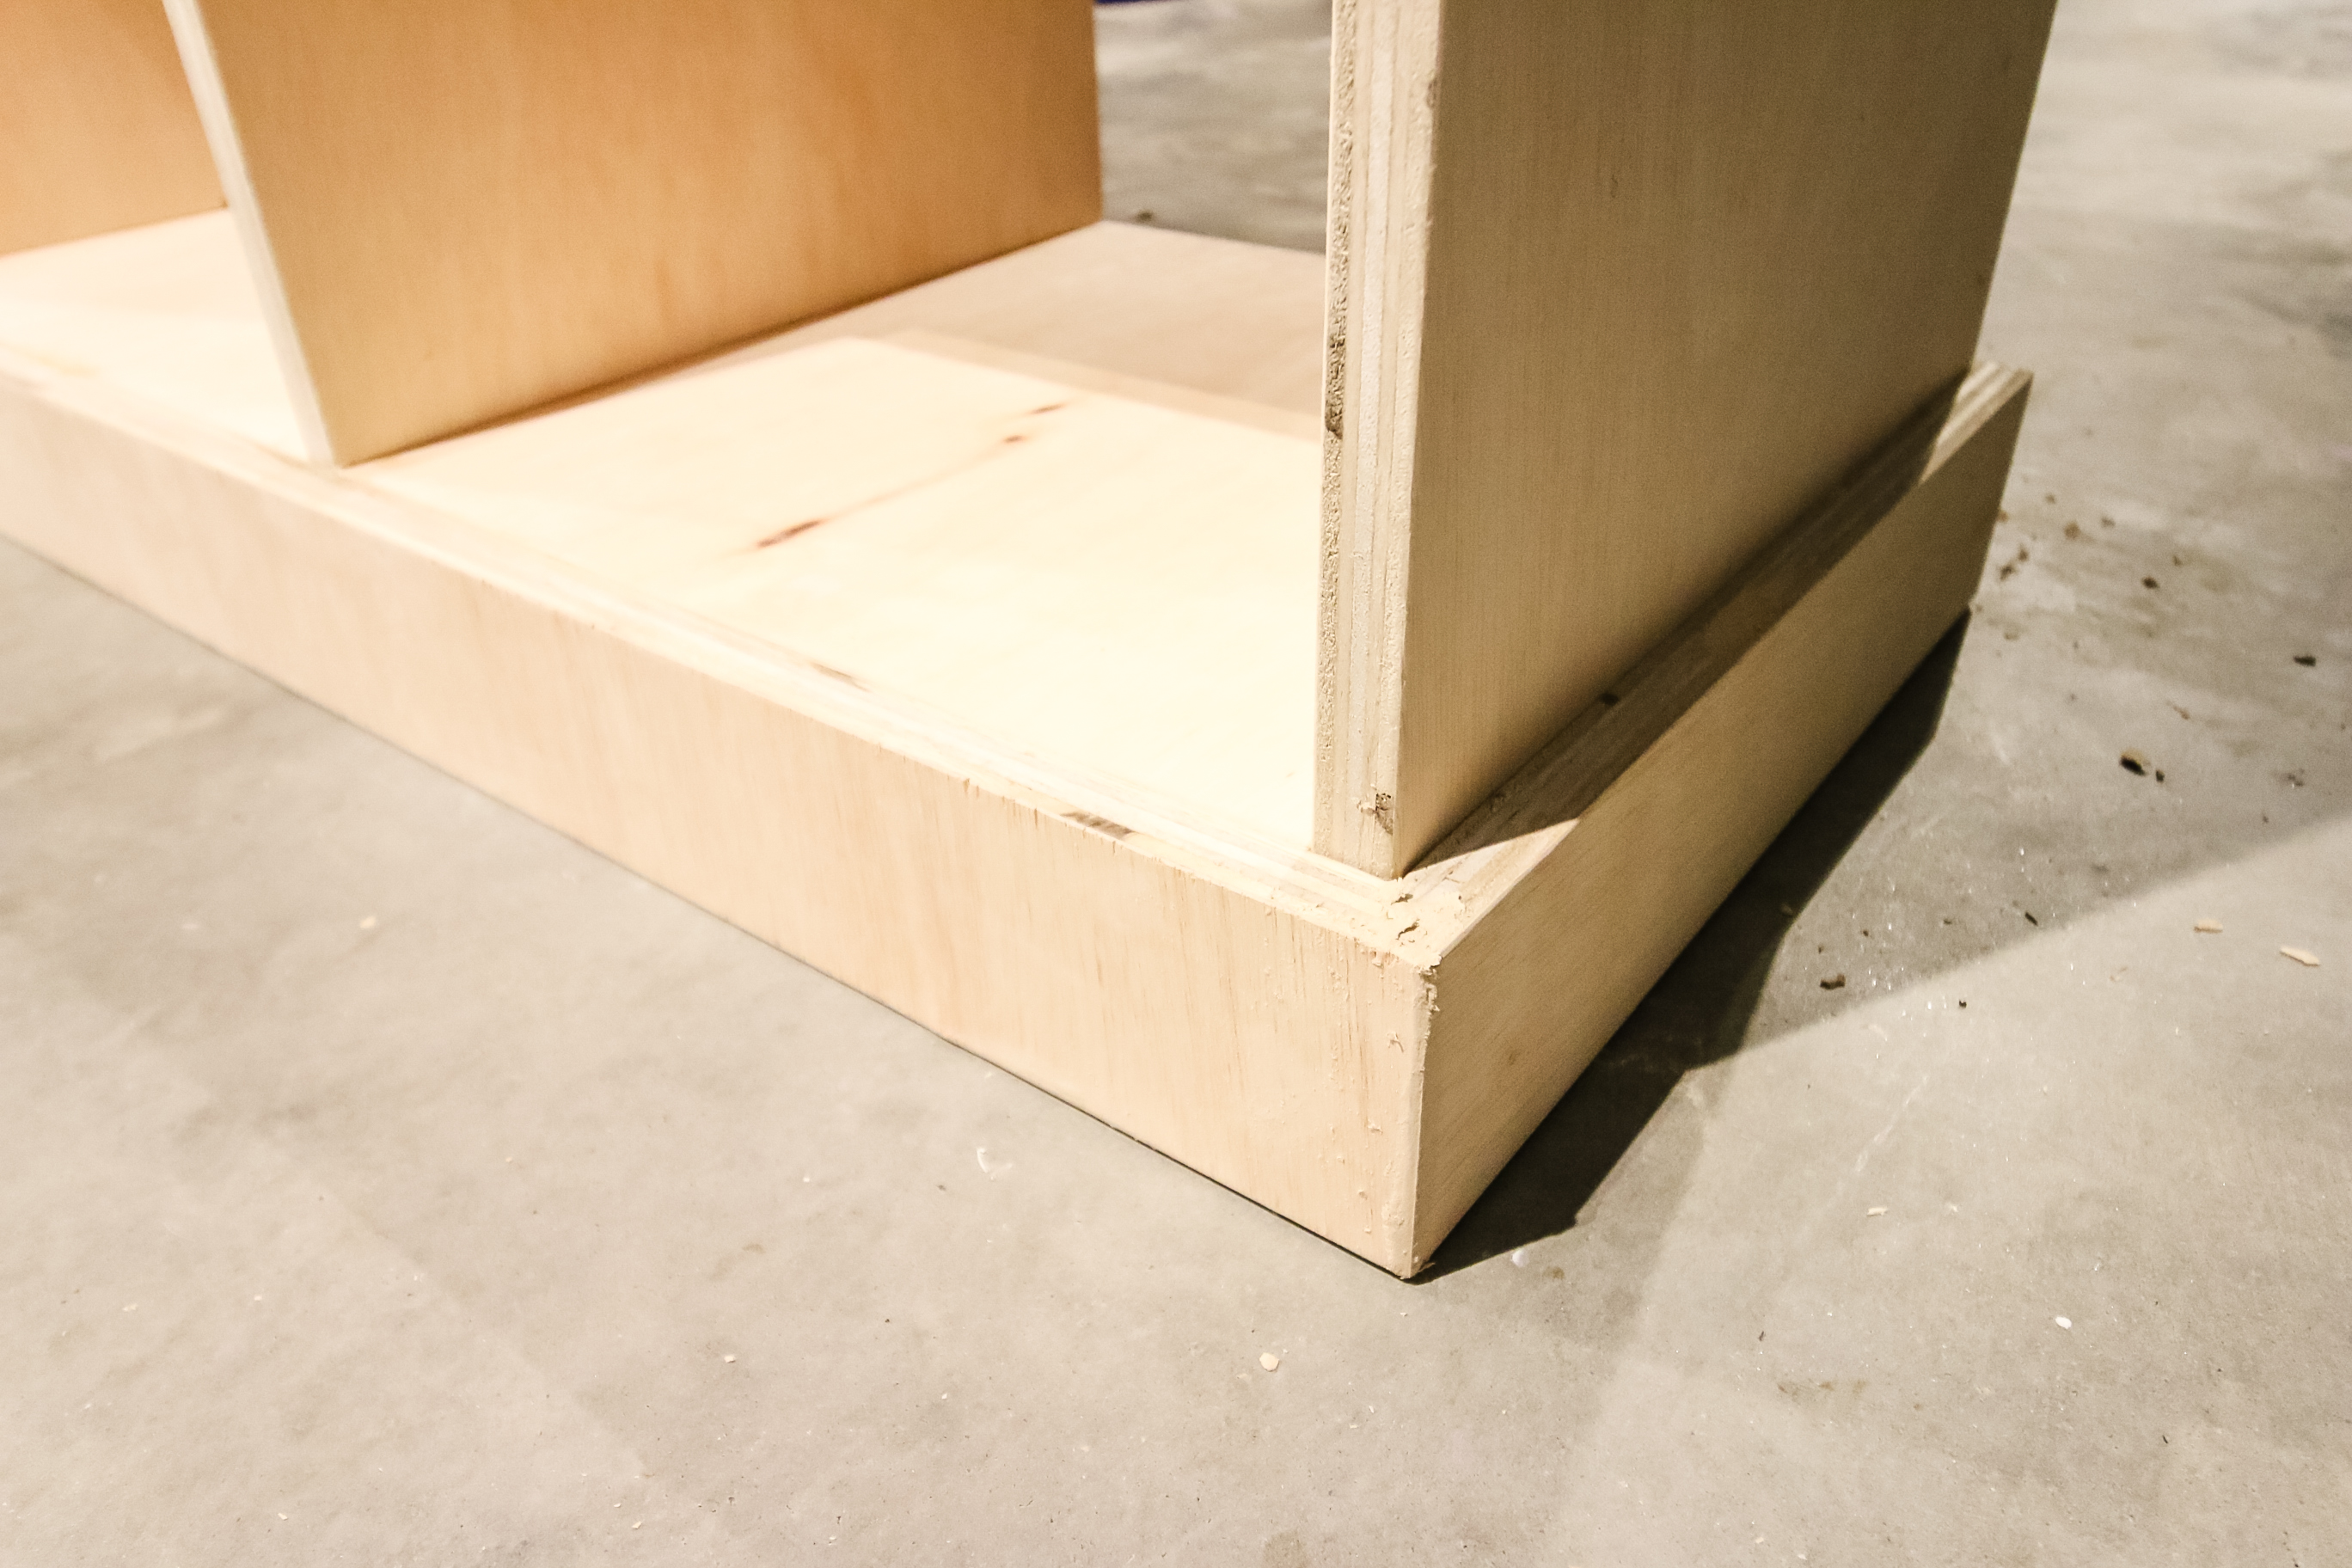
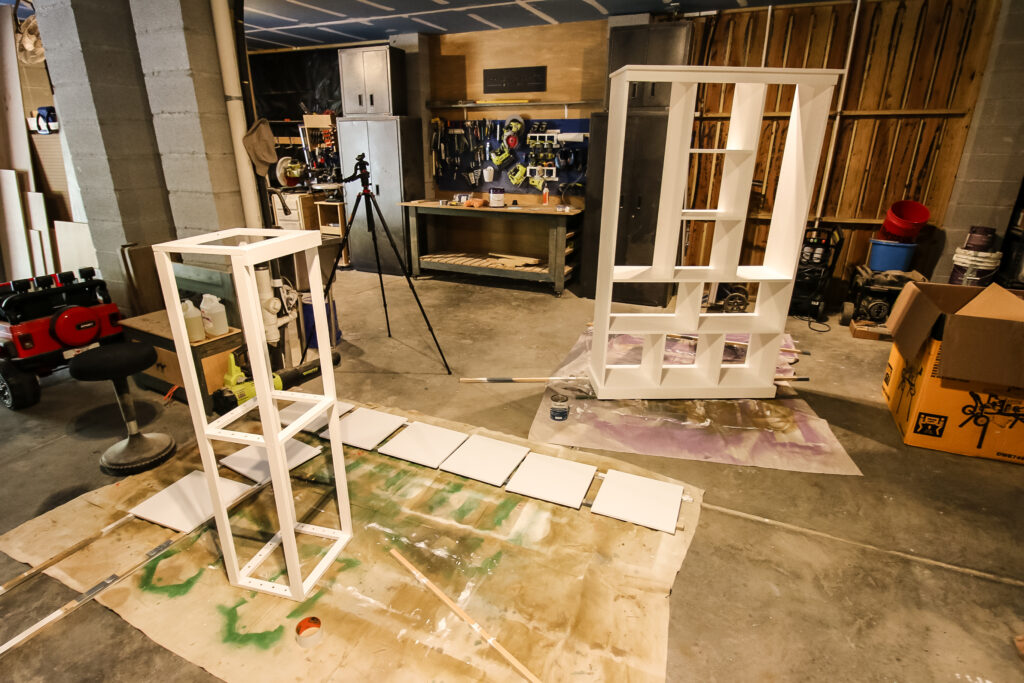
Step three: Add decorative trim
Then we added decorative trim to keep this bookcase from looking like a plywood box.
The trim is easiest to attach with wood glue and brad nails, but you can also use a good ol' hammer and nails if you don't have a nailer.
We attached trim to the top and bottom to give it more dimension.
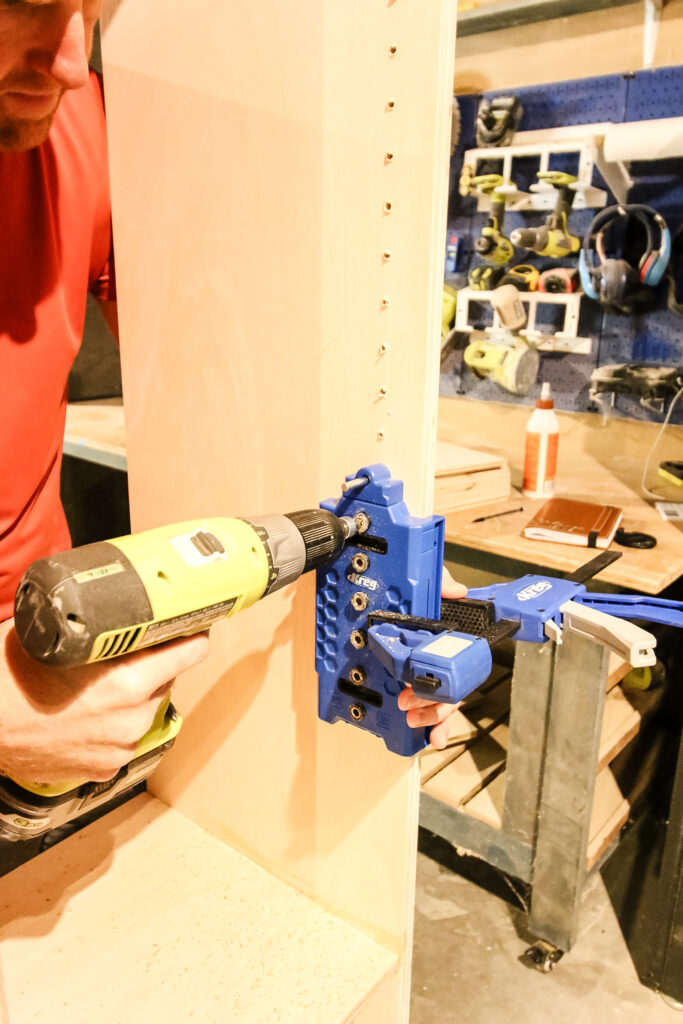
Step four: Drill shelf pin holes
Next we drilled shelf pin holes. This process is sooooo easy using a Kreg Shelf Pin Jig.
The Kreg Shelf Pin Jig clamps onto the inside of your bookcase or cabinet and has a small side piece that keeps it along the outside edge at a consistent point.
The pin holes are easy to drill and as you move down, you literally hang the jig on the bottom hole from the last set you did.
You move the jig around to all four sides of your shelf so that you can drill perfectly even and level holes for a shelf to sit on later!
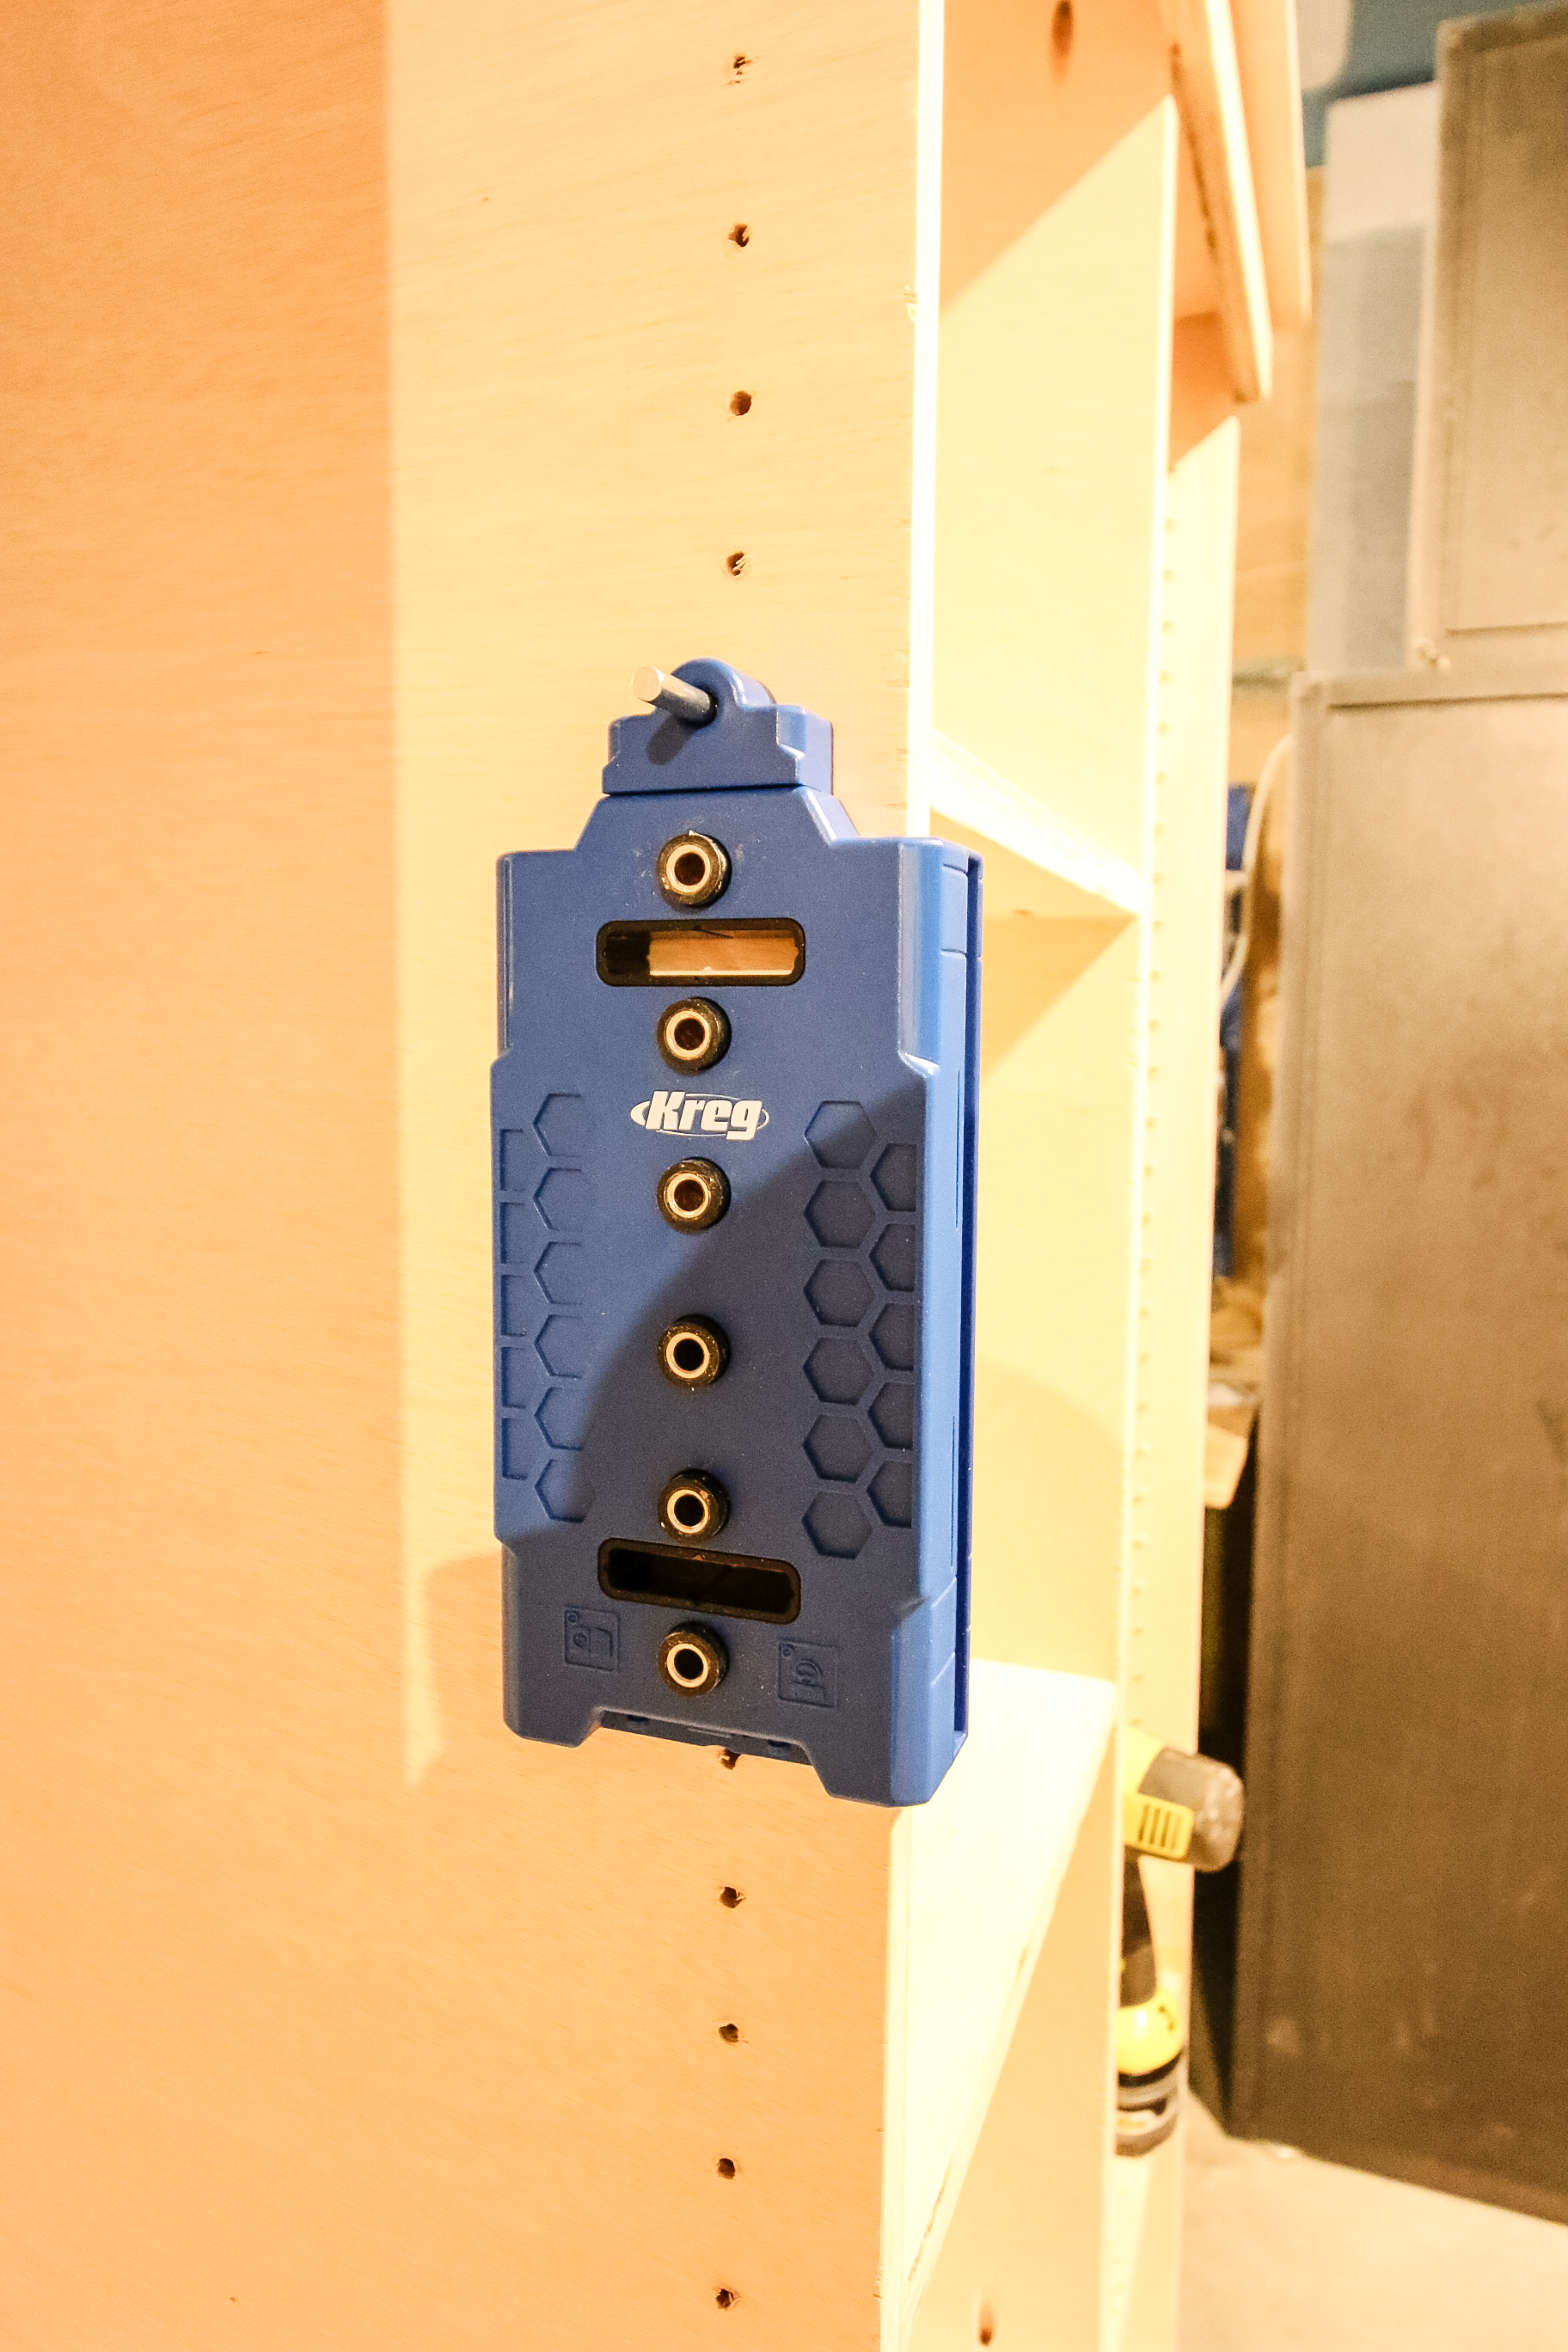
Give it a test by sliding four shelf pins into the same level holes all the way around and set a shelf board down on top of it!
Now you're ready to move onto building the stuffed animal zoo!
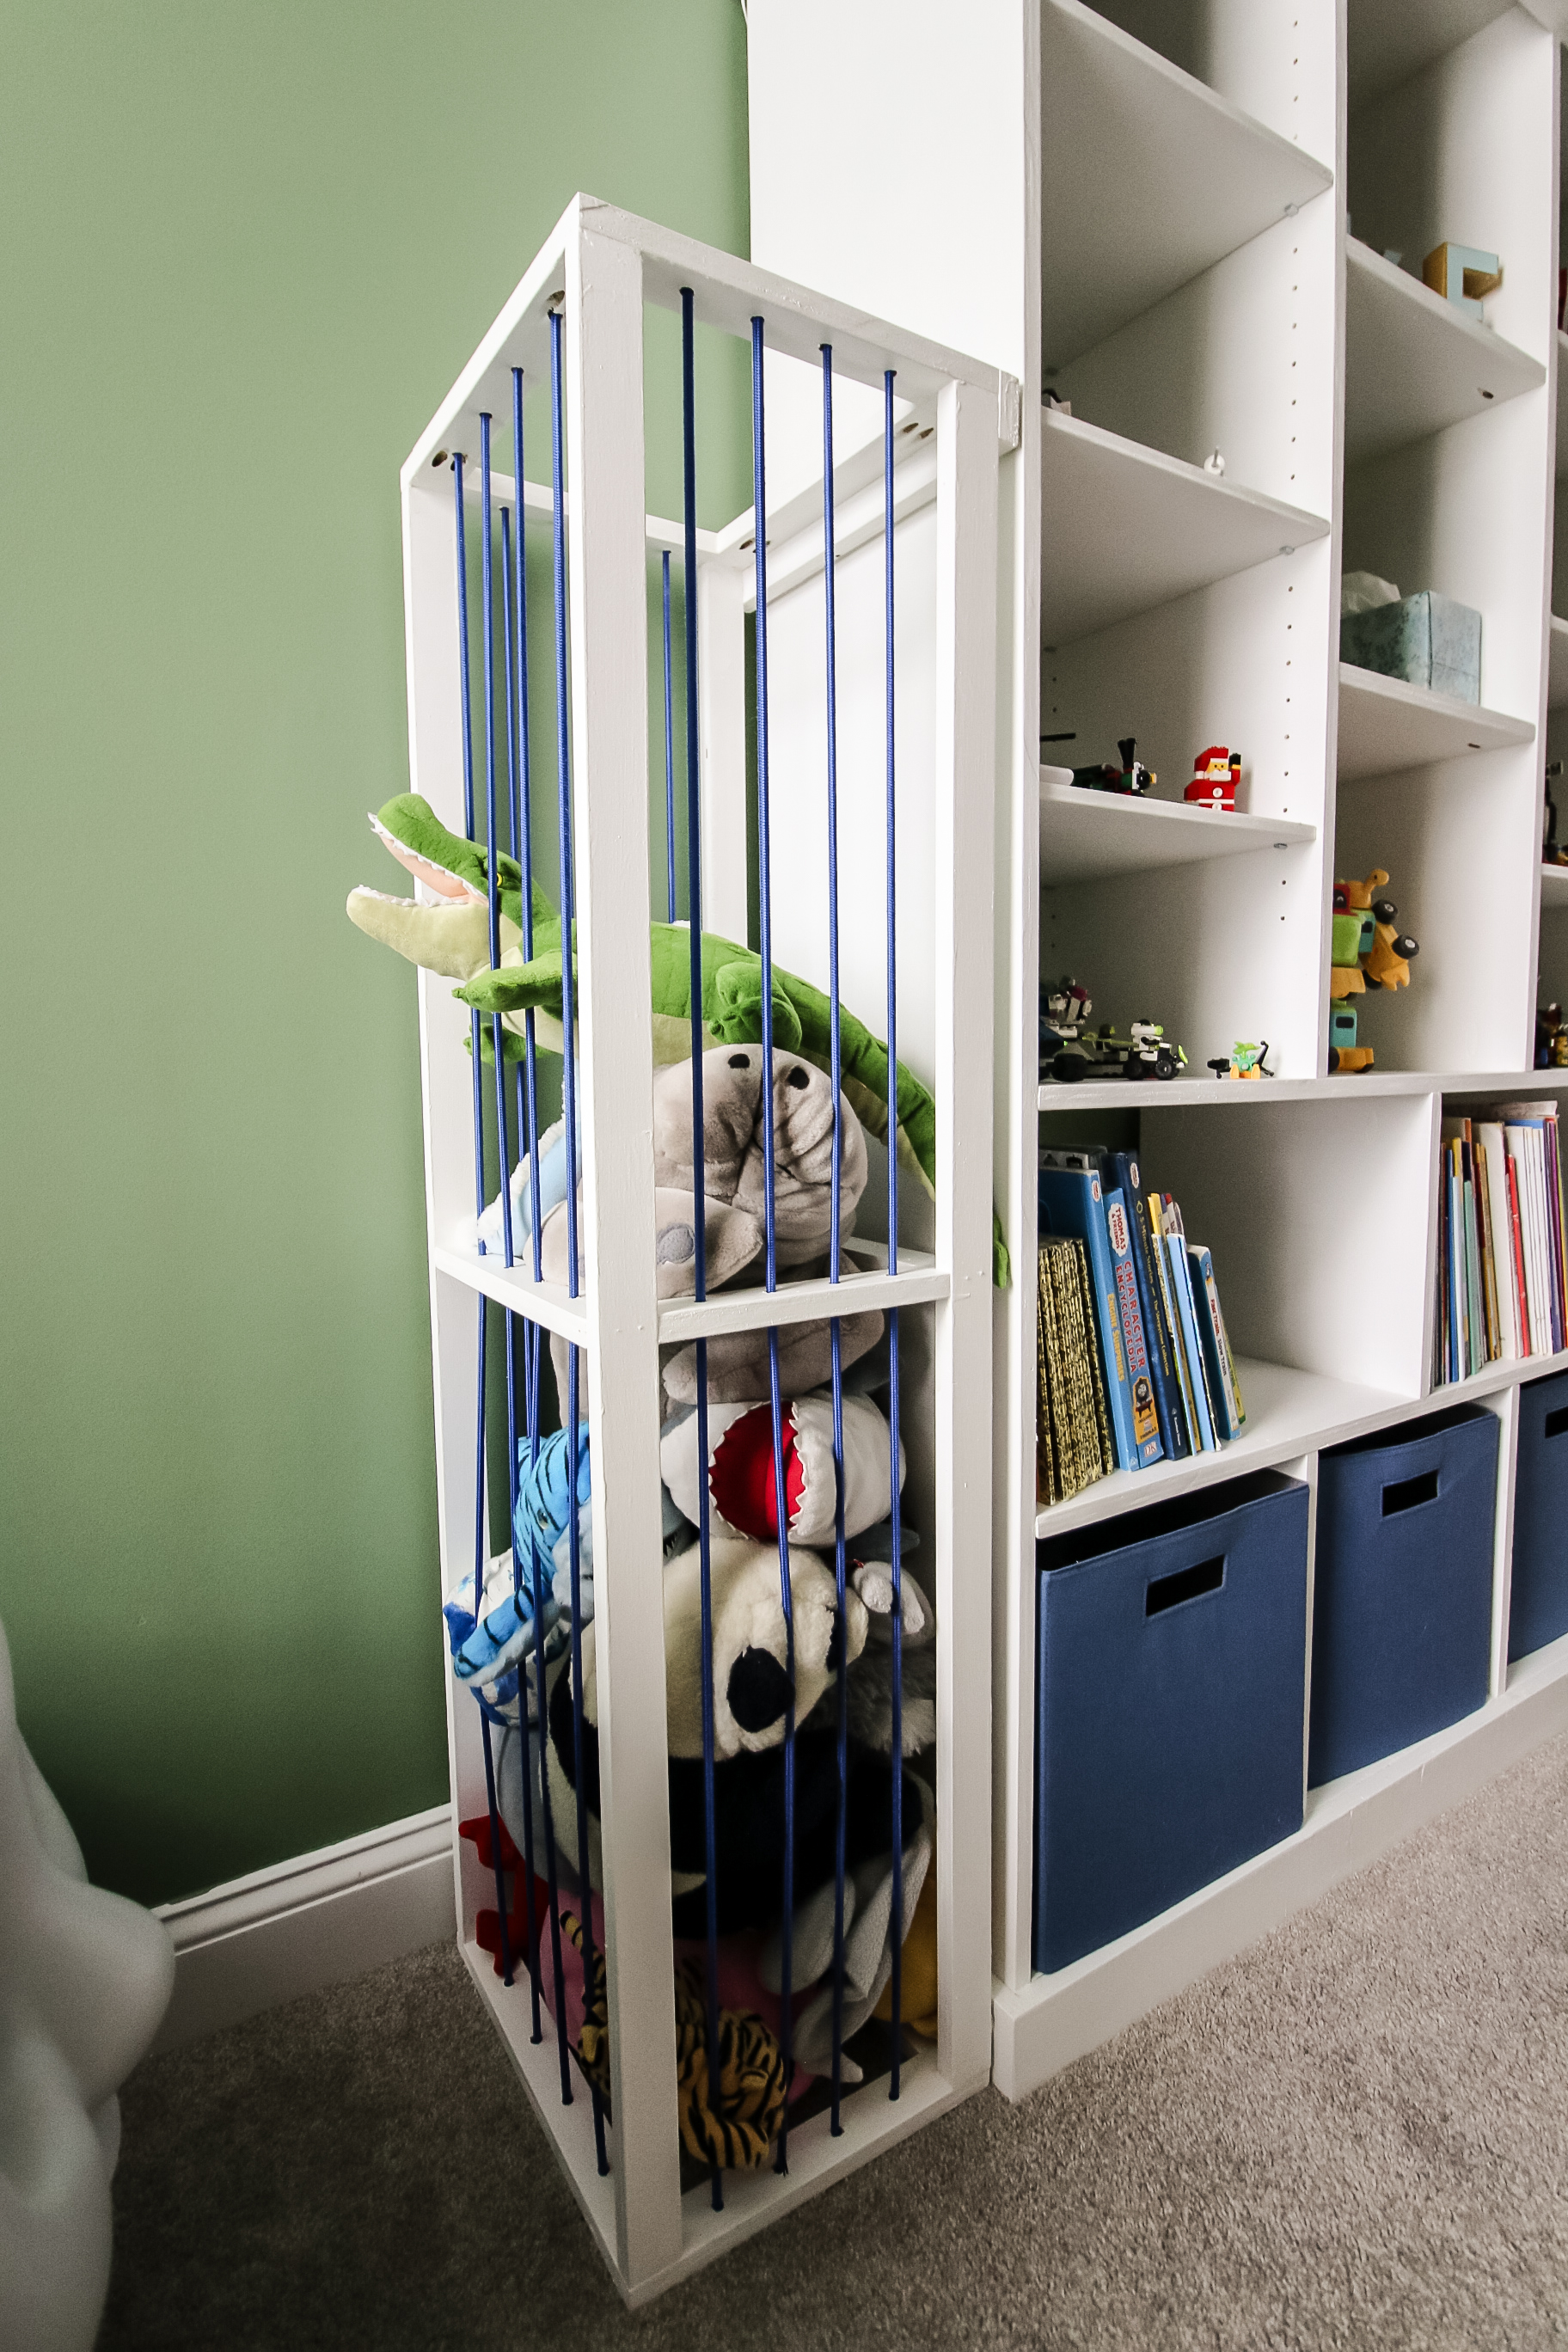
How to build a stuffed animal zoo
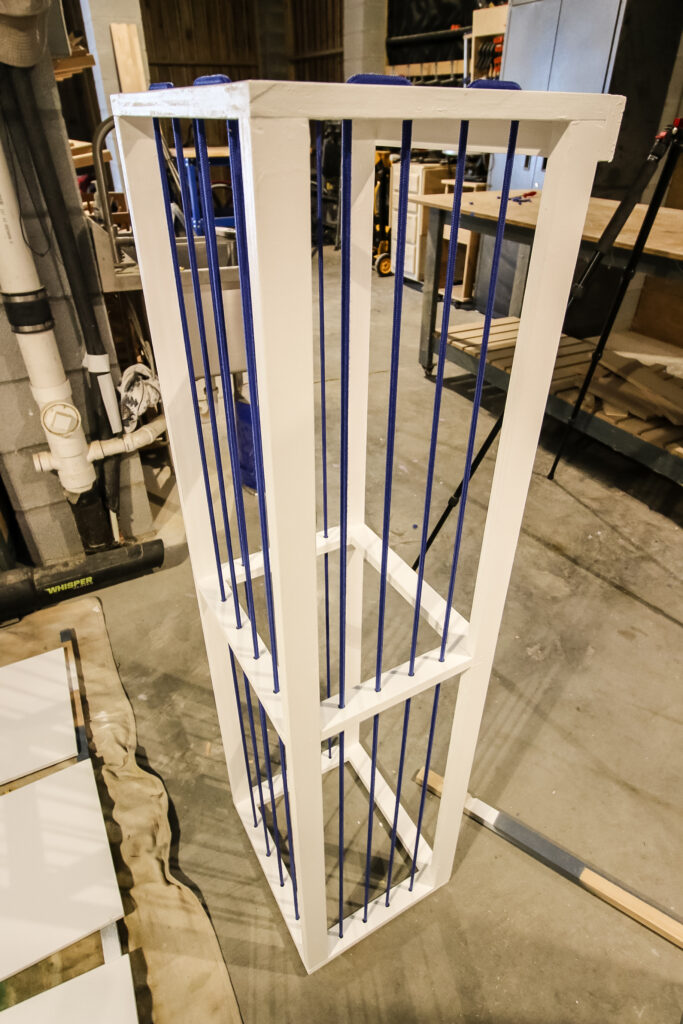
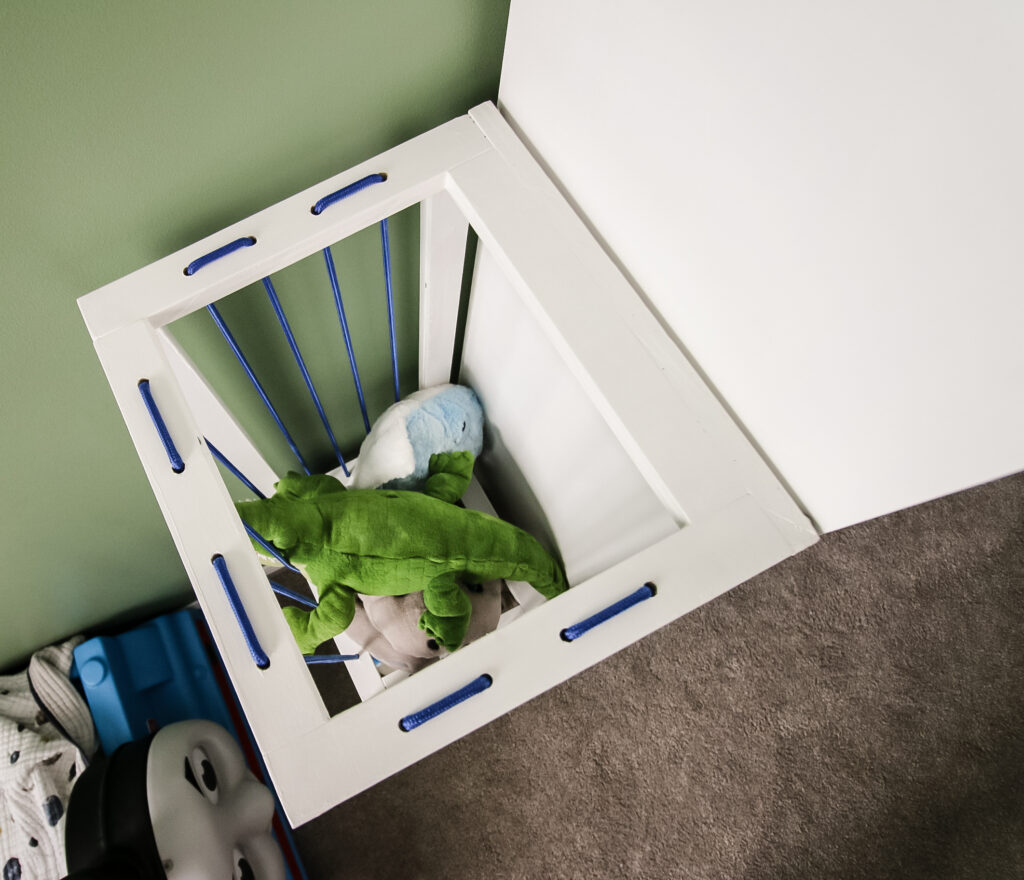
An animal zoo is a great idea for DIY stuffed animal storage because you can go vertical with storing your kid's stuffed toys.
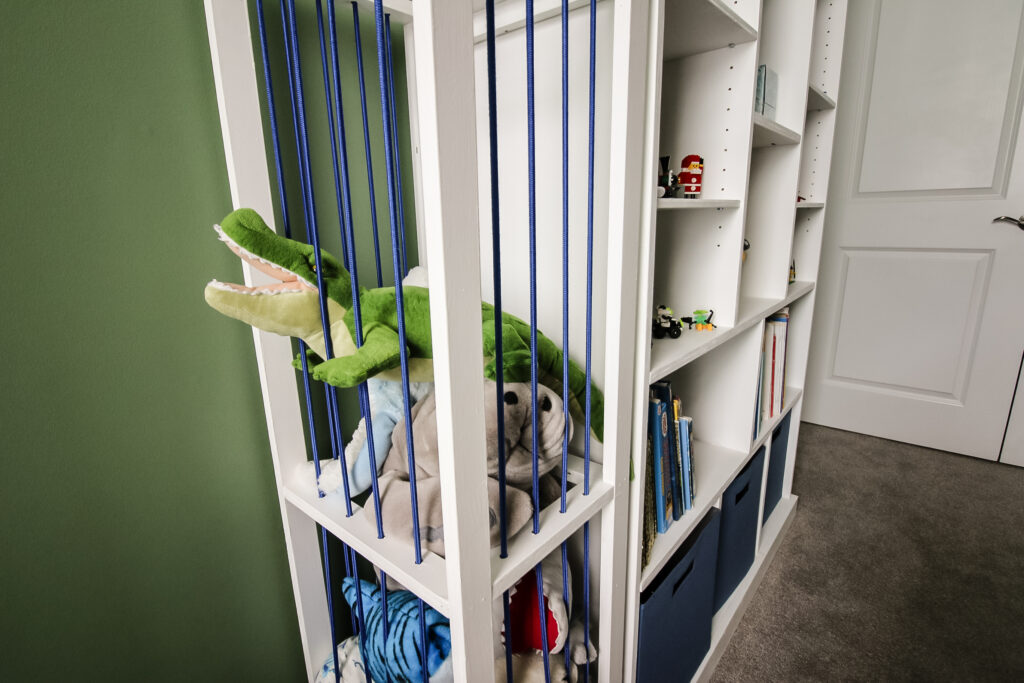
This stuffed animal zoo attaches to the side of the book case to store stuffed animals alongside the toys.
You can build this or not, but it attaches and detaches easily.
Step one: Build DIY stuffed animal zoo
Assemble the stuffed animal zoo frame according to the full woodworking plans we have available, but you basically construct two squares for the top and bottom, then connect them with four posts in the corners.
Then, use pocket holes to attach four more boards in the middle of the unit as support.

The boards on the sides all have holes drilled in them where the bungee cords will go through. It's best to drill all of these holes first to make it easier!
After this step is a good time to do any painting or staining you're going to do. We decided to paint our shelves and zoo white to pop off the dark green color we painted in our son's jungle themed room two years ago.
Step two: Add animal zoo hardware
Next, we strung up the bungee cord throughout the zoo.
We started by going in through a bottom corner, then going up and down and tying off on the far end. Then, you go back and pull all the cord taut so it's springy and cut it and tie it off on the original hole.
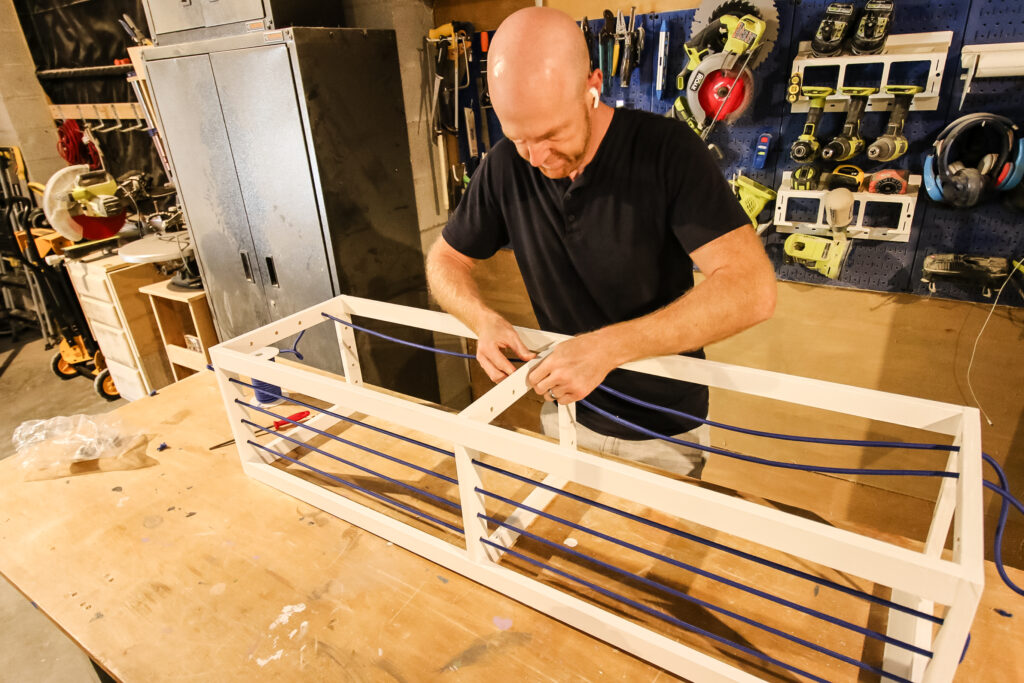
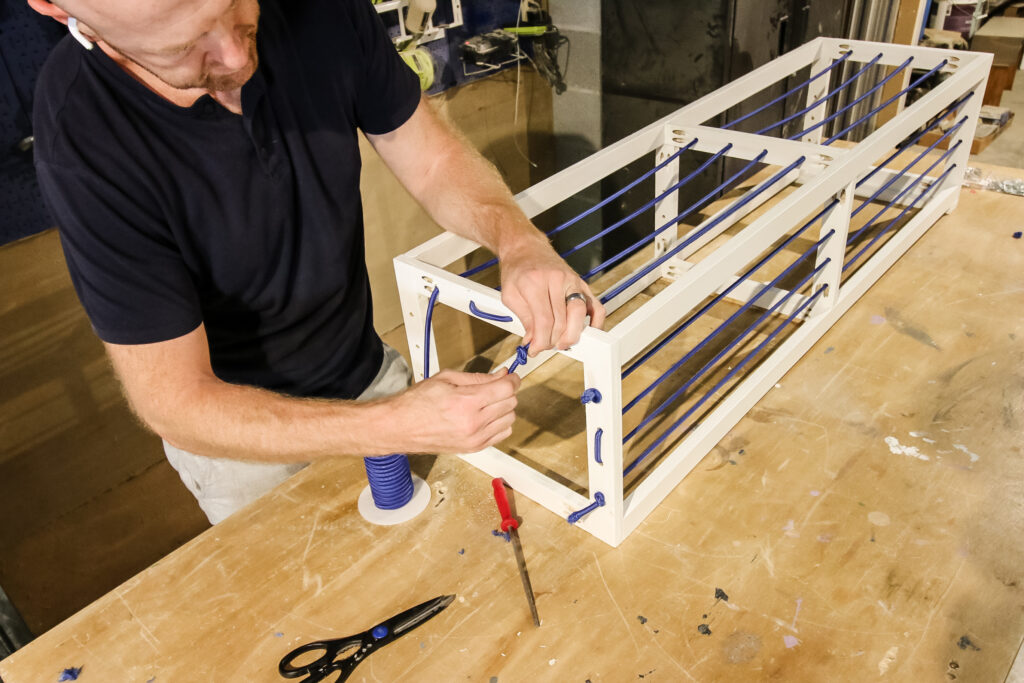
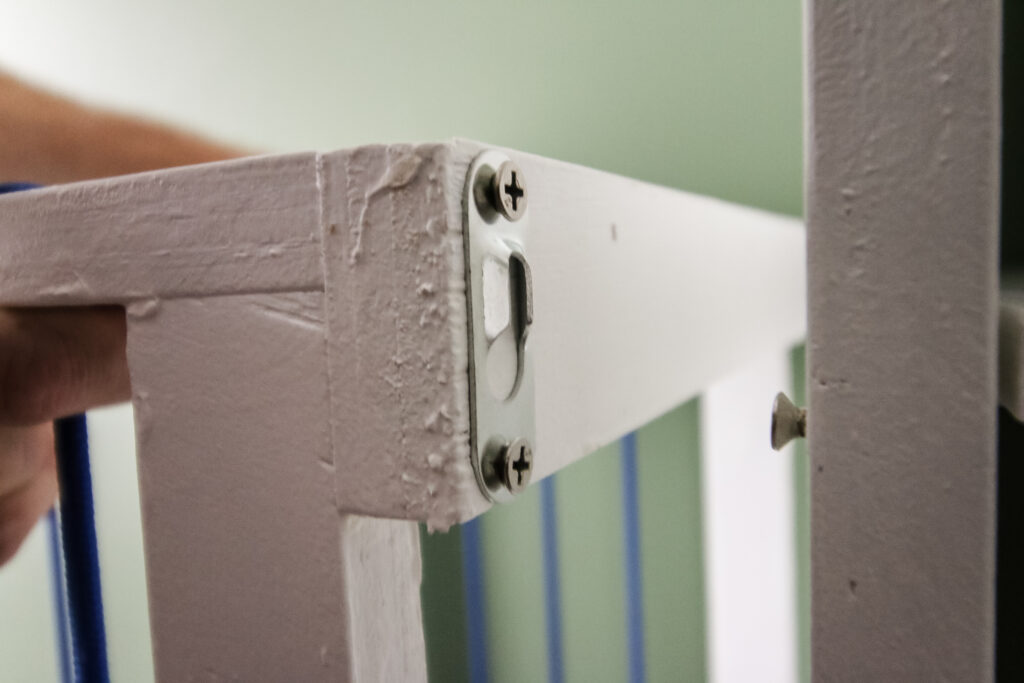
Do that for all the sides and then attach keyhole brackets to the open side of the zoo and put screws into the bookcase to align with the zoo.
After everything is on, slide the animal zoo brackets onto the screws on the side of the bookcase and push it down into place so it is secured.
Display books, toys, LEGO and stuffed animals in one!
Our DIY bookcase with LEGO shelves and stuffed animal zoo look so great in our son's room!
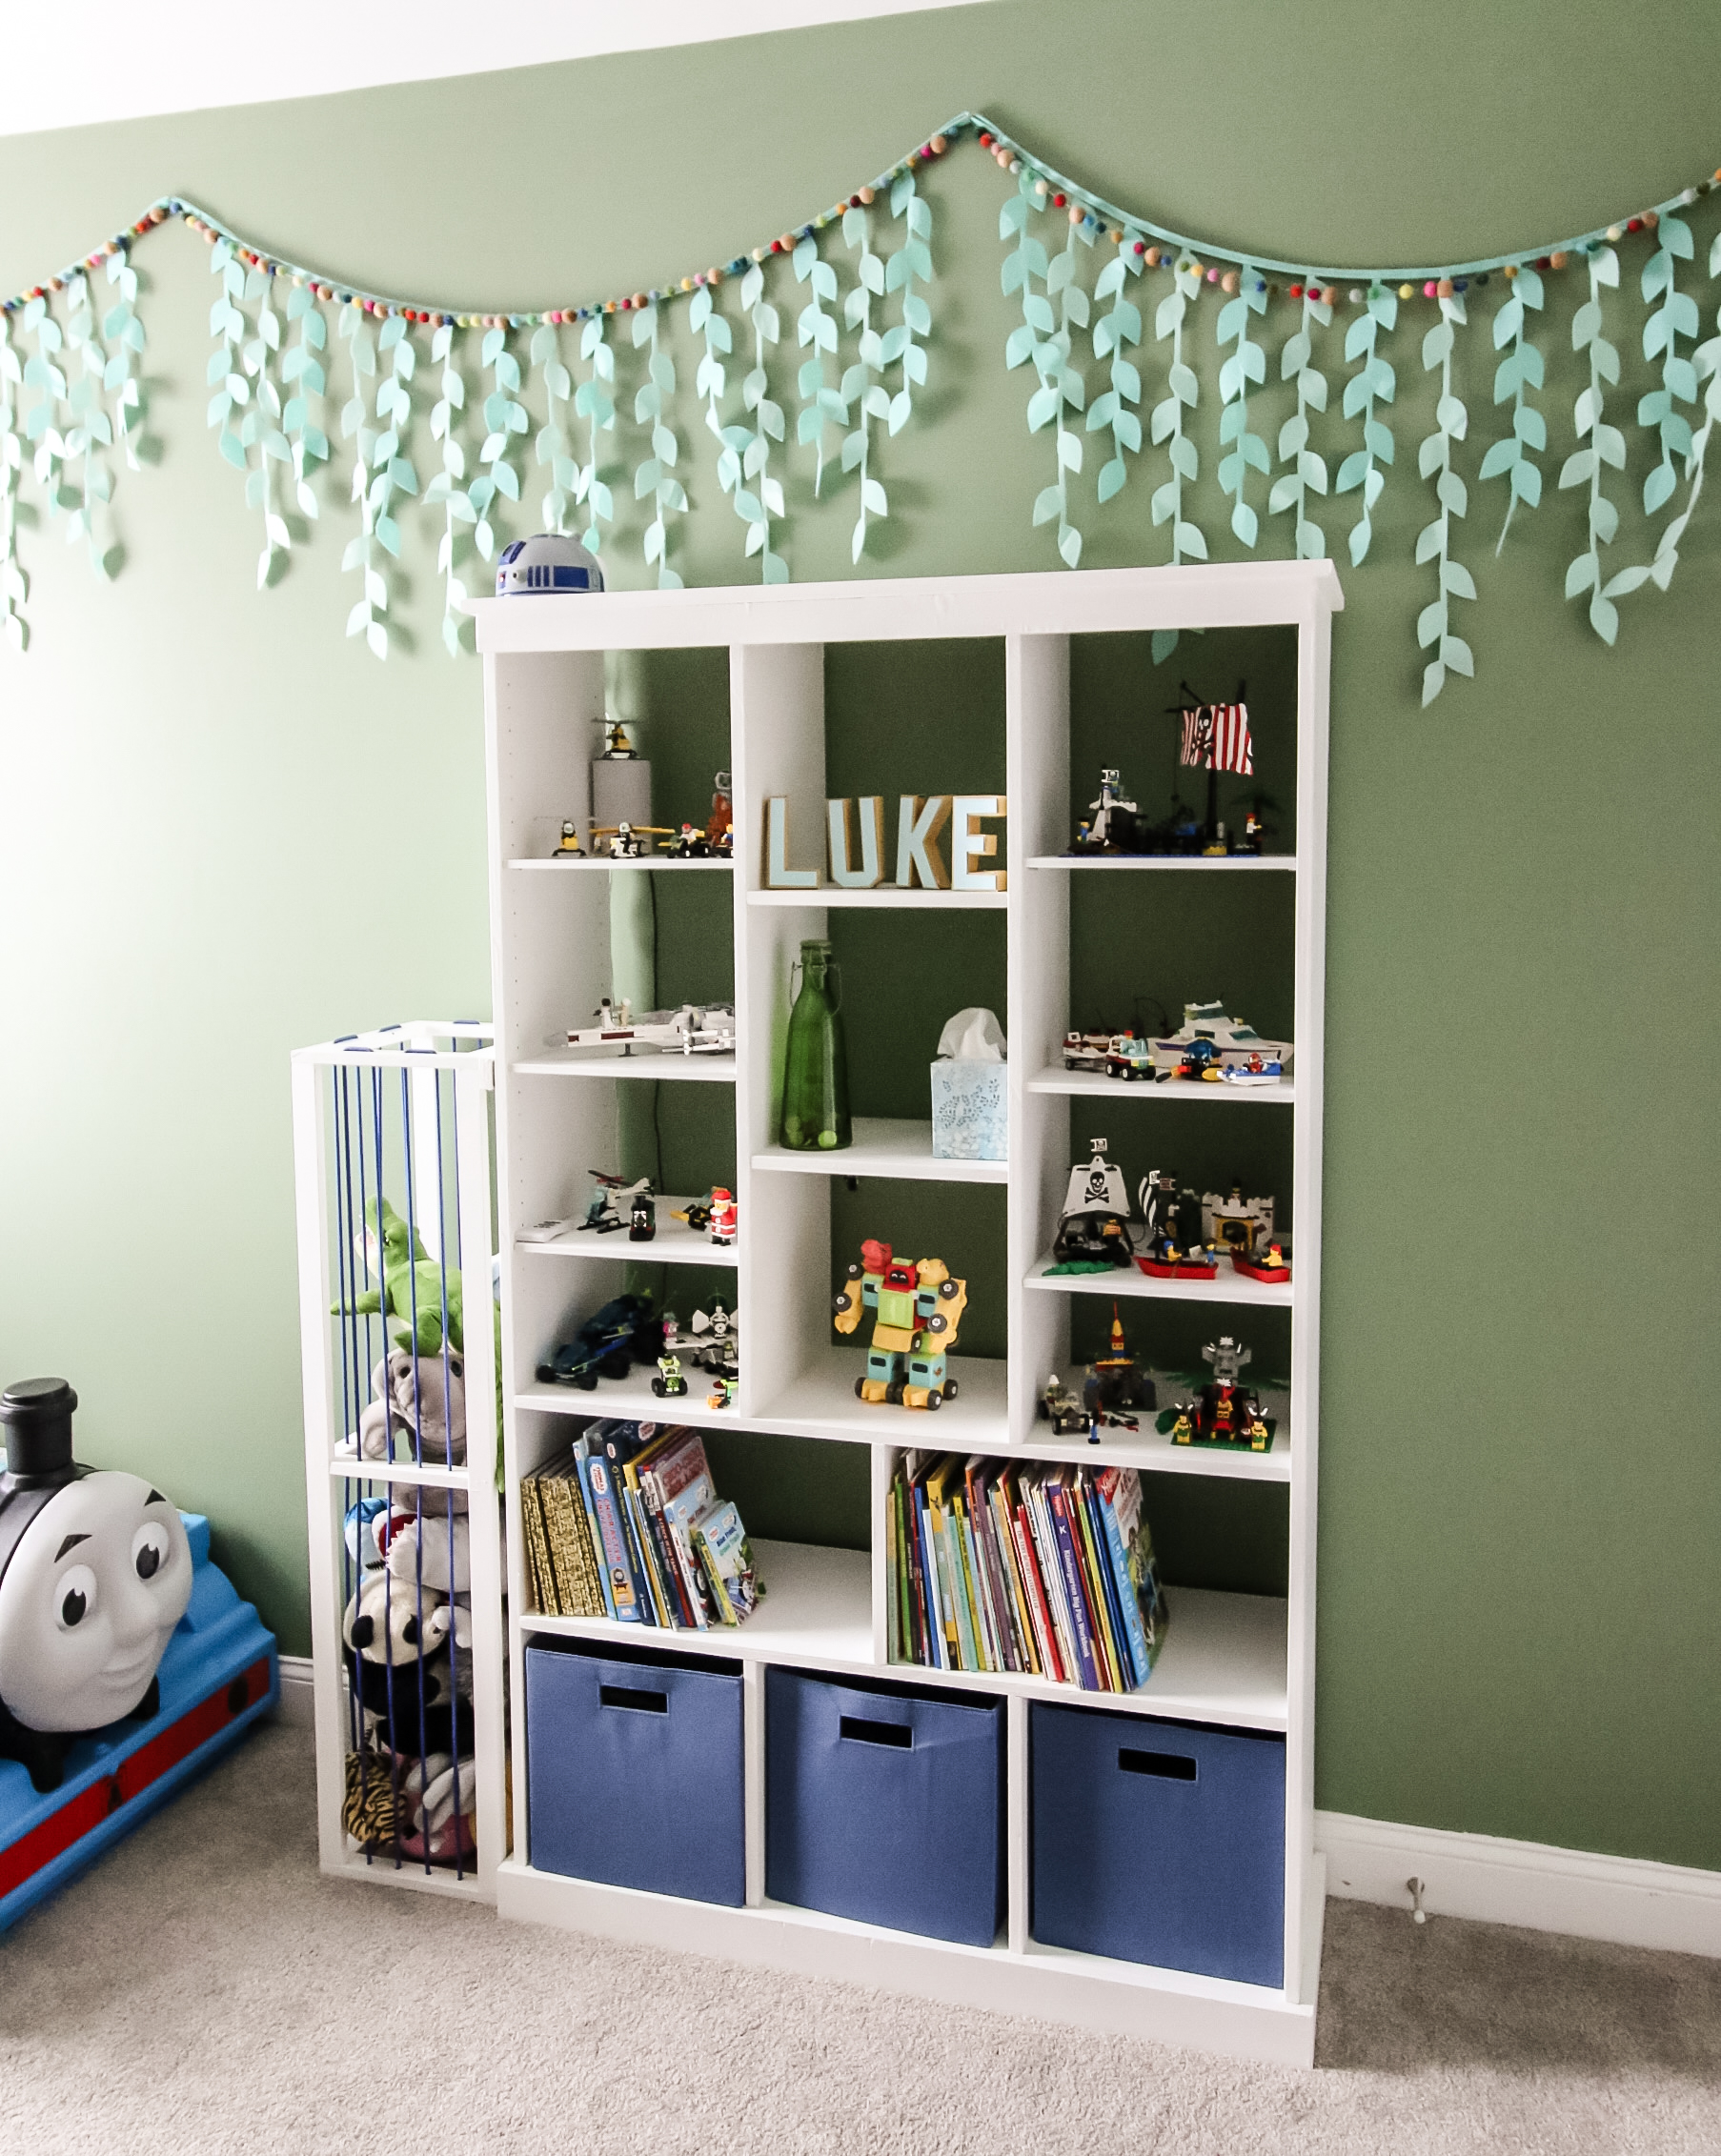
He loves the LEGO display shelves because he can have all of his builds out at once to look at. Each LEGO display shelf is also currently separated by LEGO type, so he can see each one where he wants to.
We are also able to store tons of stuff in the cubes and a lot of books on the bookshelves. Again, if you aren't into LEGO but your kid has something else, you can easily add bins or other toys on each shelf.
Bookcase with toy storage woodworking plans!
Lucky for you, our DIY bookcase with toy storage plans are completely free thanks to our friends at Kreg! You can download the free woodworking plans on their Kreg Projects and Plans page!
Our woodworking plans include the full material list, cut list and step-by-step instructions with computer model imagery to help you build this bookcase yourself!
Make sure you review this whole post and then get the full instructions in our woodworking plans!
Before you go...
This is just one of the many bookshelves we've built for our kids. Be sure to also check out our DIY tree-shaped bookshelf and our DIY dollhouse bookshelf that can also be used as an actual dollhouse!
Montessori Kid's woodworking plans bundle
Love building for your kids? Click here to get our bundle of Montessori inspired woodworking plans for:
Get the bundle (valued at $55 individually) for only $44.99 together! That's a FREE plan!

Looking for something?
We've been doing this since 2012 so we have a LOT of blog posts!
Search stuff like: Ceiling Projects | DIY Plant Stands | Thrift Flips

Hey there, I'm Sean, the woodworking enthusiast and builder behind CharlestonCrafted.com! Since 2012, I've been sharing the magic of turning raw materials into beautiful creations. I love teaching others the art and satisfaction of woodworking and DIY. I try to inspire fellow crafters to make something extraordinary out of nothing at all.