Want your child to have their own wooden workbench to build just like you? Here's how to build a toddler workbench for your toddler with these simple plans.
Today we're bringing you free plans for a DIY toddler workbench! These plans are simple to follow and will result in tons of fun for your little one!
Get your toddler started learning about DIY projects right alongside you as they use their very own toddler sized workbench!
This workbench is designed for small kids who can work in the shop with mom or dad and play pretend as they build new things, just like you!
We designed this workbench for our son when he was 2 years old. However, he is now almost 5 and still loves it! We have moved it to our garage, where he can work alongside dad.
This workbench is sized to be appropriate for any age that likes a play kitchen - most likely ages 2 - 6.
Safety first!
Remember to always follow safety procedures when working with power tools. That means wearing protective gear such as safety glasses, gloves, hearing protection, and dust mask and using appropriate tools to ensure safe construction.
How to build a toddler workbench
Obviously the key to building anything for a toddler is size. It needs to be small enough that they can use it functionally.
As with most toddler furniture, the concept is the same as an adult version, just shrunken down to fit their height.
As we continue to grow and do more projects in the workshop, it's harder to split time watching our son.
We wanted to put this toddler workbench together so that our son could pretend to work right alongside us in the garage with his own imagination.
If you like building kid toys, make sure to check out our plans for a Pikler Triangle and Climbing Arch!
Supplies and tools used
- 3 Board , 1x4 , 96"
- Plywood , ½" Thick , Half Sheet
- Pegboard , ¼" Thick , Quarter Sheet
- 4 Hinges
- 2 Knobs
- 36 1 ¼" Kreg Screws
- 24 1" Kreg Screws
- Wood Glue
- Clamps
- Pocket hole jig
- Miter saw
- Table saw
- Tape measure
- Drill
- Sander
Cutlist and plans
The plans for this build were sponsored by Kreg Tool, and you can get the full plans and cut list here on their website!
Construction of a DIY toddler workbench
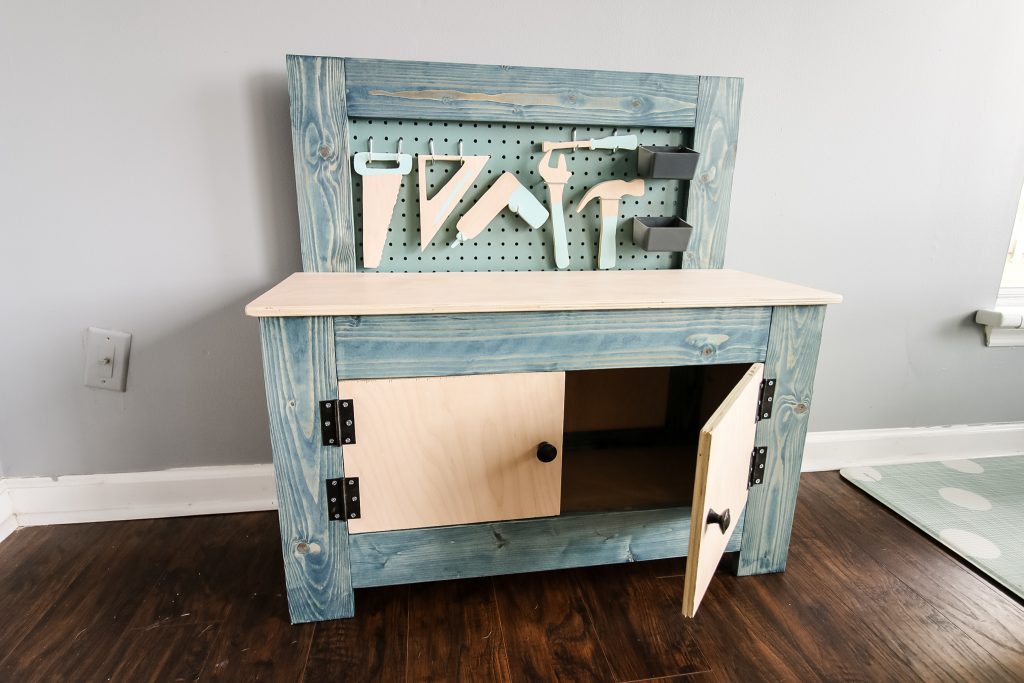
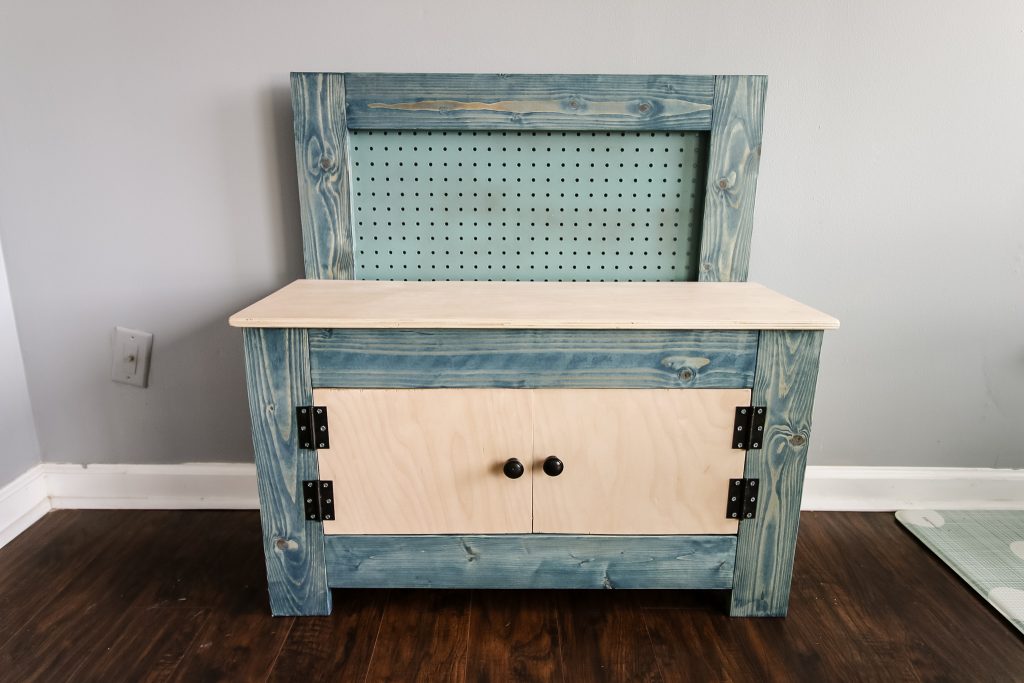
The concept of our DIY toddler workbench is to build a frame, then add plywood sides and doors.
You could do this plan and skip the sides and doors and just make it a workbench with a top and a lower shelf.
Whatever you think works best! Our son loves opening doors, so he's getting doors!
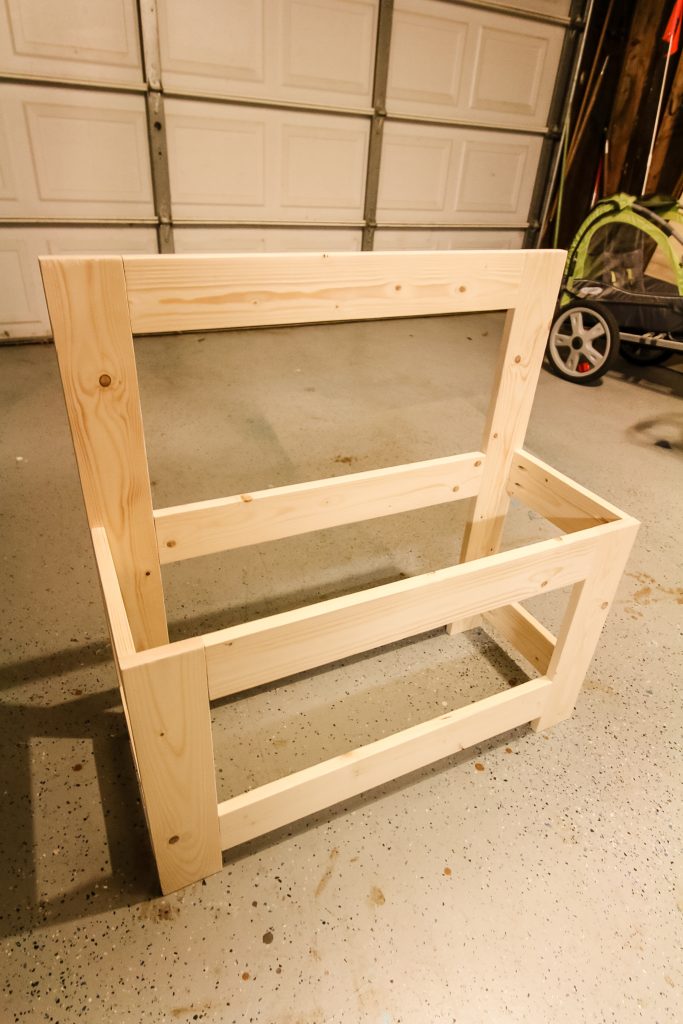
We started by building the frame, which is made up of 1x4s. We built the front and the back sections, then connected them with four short beams.
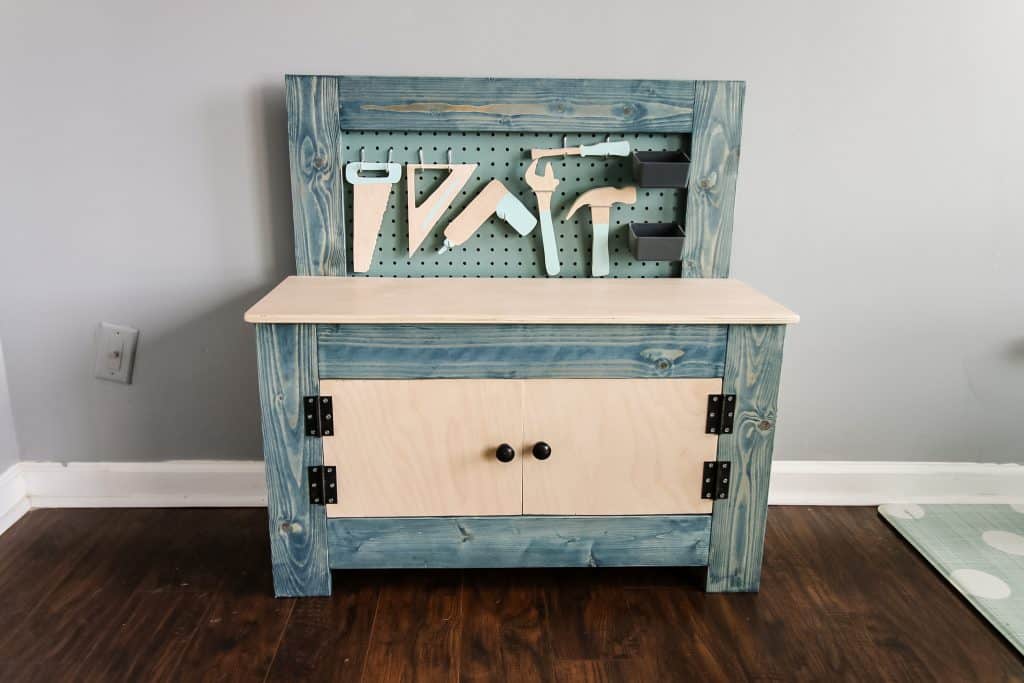
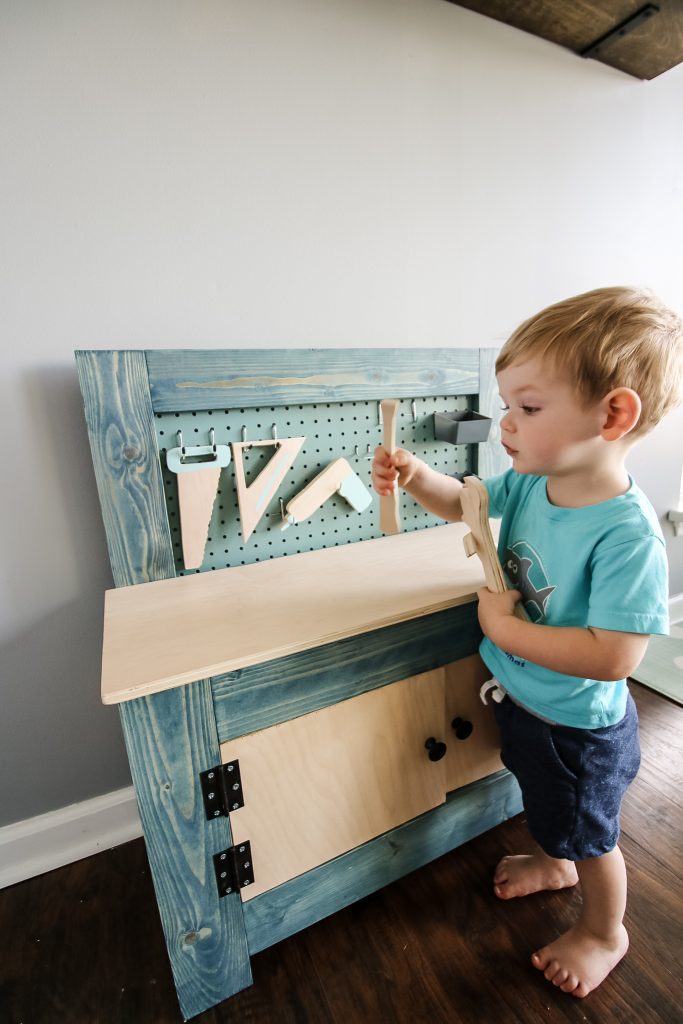
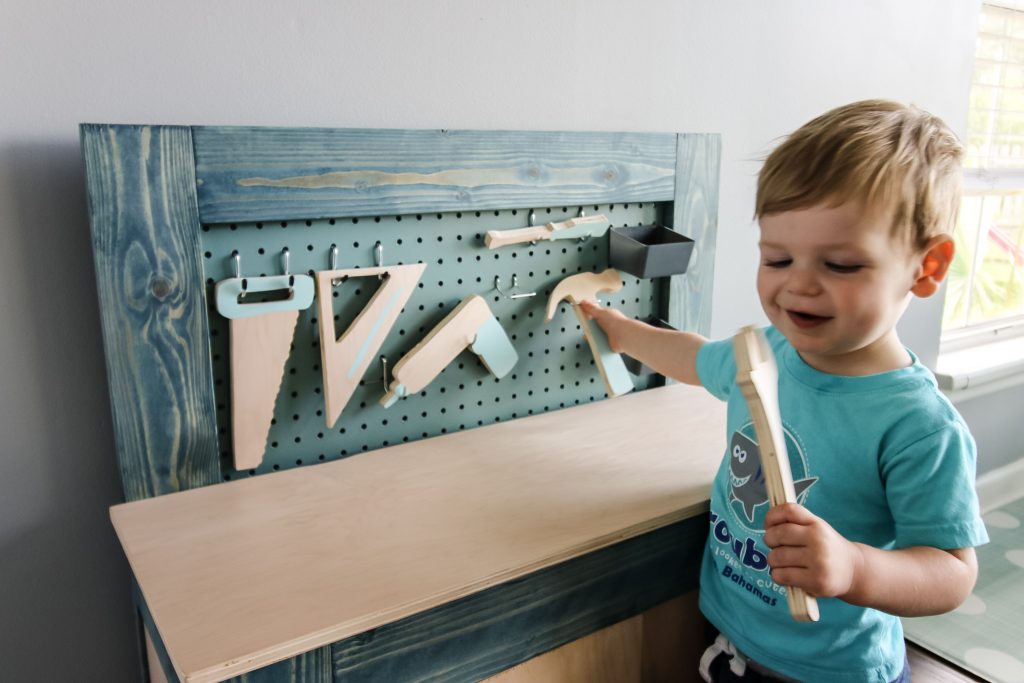
Our toddler workbench has a two-toned look, with the frame one color and leaving the plywood natural.
So we took the opportunity to stain the frame before moving on.
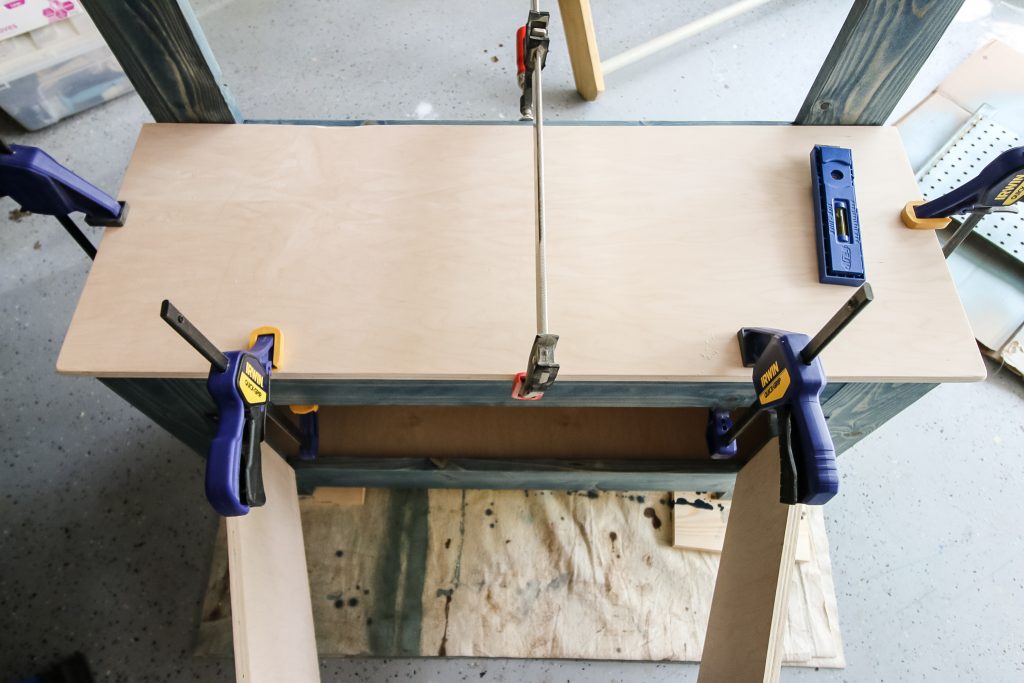
Next we added plywood on the sides and back, then the bottom. Trust us, do it in that order.
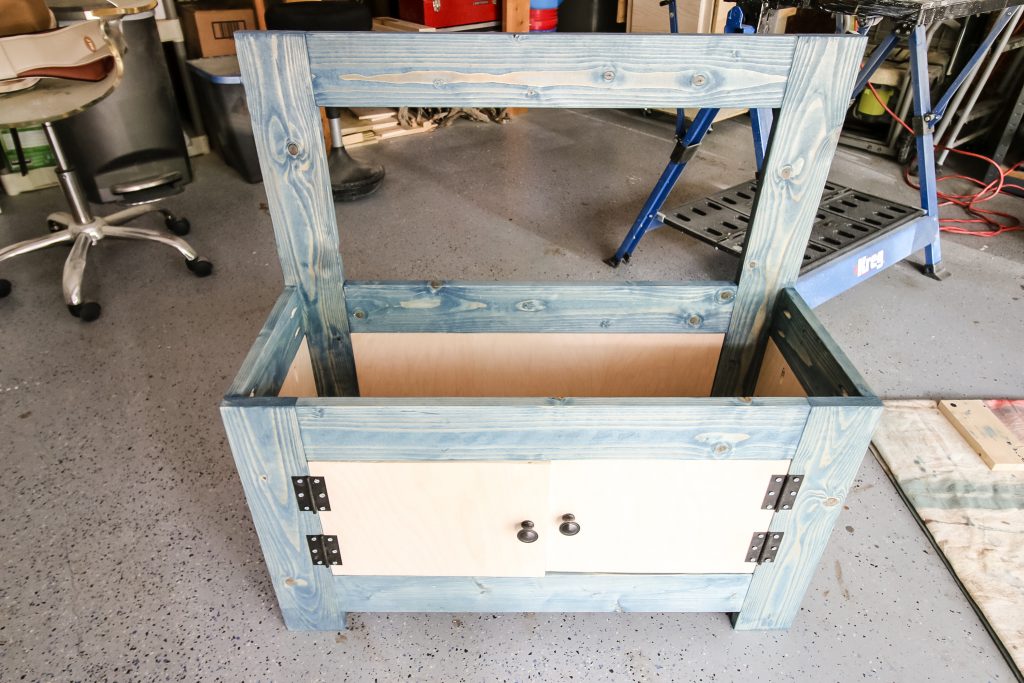
Next up came the doors. We added four hinges and two spare knobs we had from other projects to make functional, swinging doors.
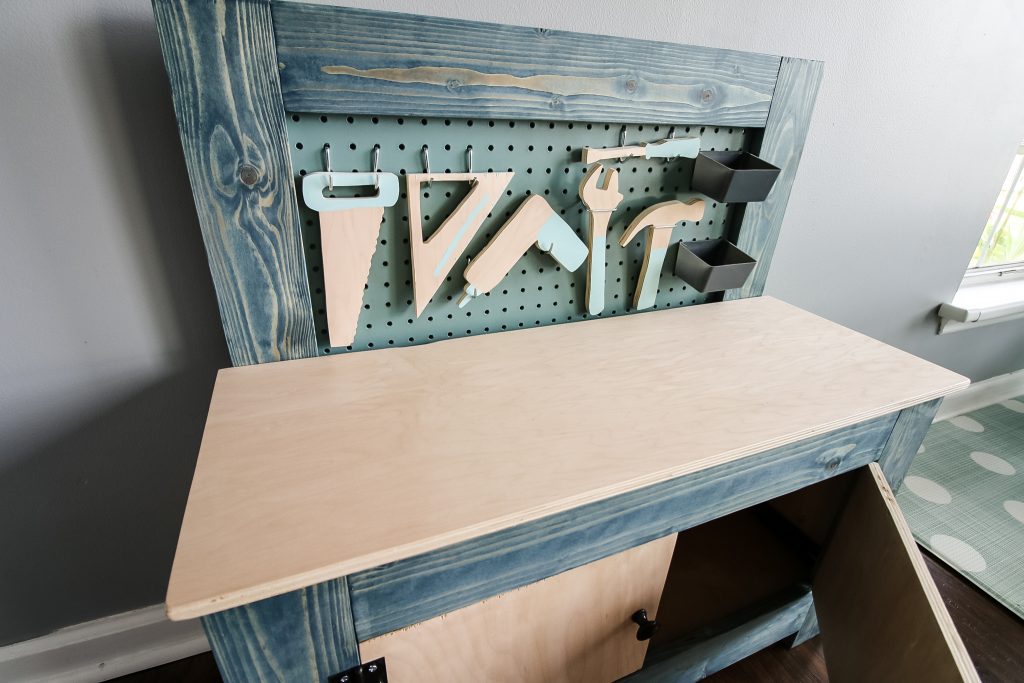
Finally, we glued on the top work surface and screwed in the pegboard to the back.
Check out our tutorial + woodworking plans for how to build a kids learning tower!
Finishing your toddler workbench
The workbench can be either stained or painted. We went with a 2 tone look with navy blue stain and natural wood doors/countertop.
If you plan to keep it indoors, I definitely recommend finishing it to match furniture that will be nearby!
Accessories for our toddler workbench
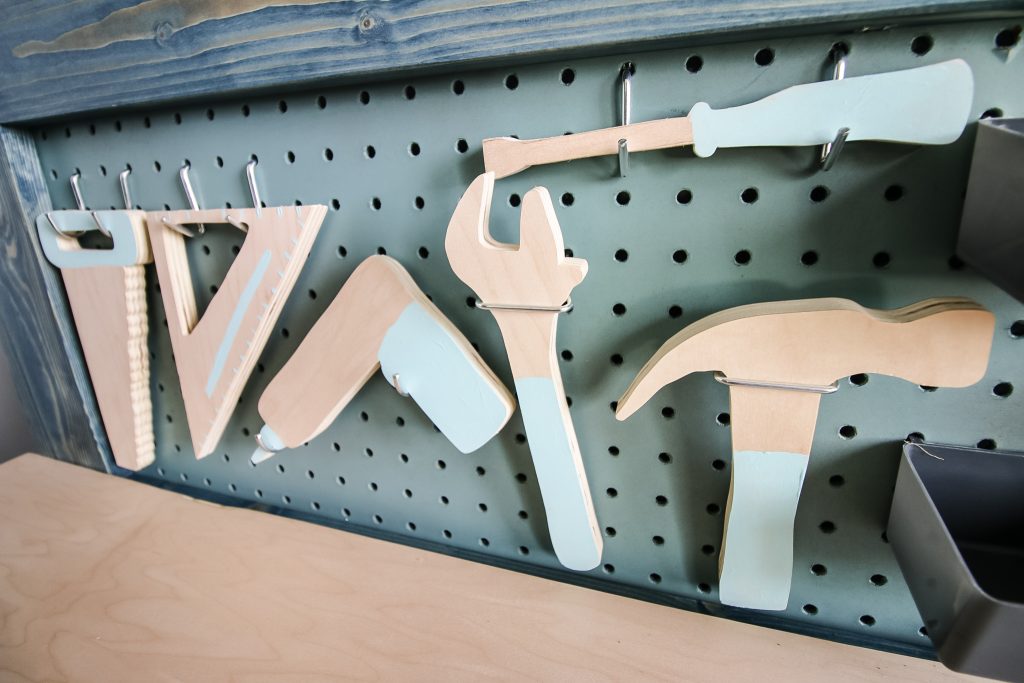
We finished off our DIY toddler workbench by adding real pegboard hooks.
But what are we hanging on those hooks? We used our scroll saw to cut out simple wooden tools from plywood cut offs!
These were really simple. We traced actual tools and shrunk them down. Then we cut them out with a scroll saw and sanded them.
We painted the handles on one side so they would stand out against the bench top.
The Plans
We've partnered with our friends at Kreg Tool to bring you our DIY toddler workbench plans FOR FREE!
There are a lot of pieces to connect in this project, but doing it all with Kreg pocket holes is super simple and makes the workbench sturdy.
So head over to BuildSomething.com to get the full set of plans for our DIY toddler workbench.
While you’re there, make sure you check out some of our other furniture plans, like the geometric base coffee table, a modern platform bed that can be build for $50, or a simple nightstand.

Looking for something?
We've been doing this since 2012 so we have a LOT of blog posts!
Search stuff like: Ceiling Projects | DIY Plant Stands | Thrift Flips

Hey there, I'm Sean, the woodworking enthusiast and builder behind CharlestonCrafted.com! Since 2012, I've been sharing the magic of turning raw materials into beautiful creations. I love teaching others the art and satisfaction of woodworking and DIY. I try to inspire fellow crafters to make something extraordinary out of nothing at all.


Nikki says
What color stain was used for this? I love it!
Sean says
Glad you like it! It's called "Worn Navy" by Varathane- https://amzn.to/2N0yDou