Want to make your own wood stain from paint? It's easier than you might think to stain wood with watered down paint. Here's how!
I am back with another DIY wood stain idea!
We love woodworking and DIY furniture projects, but sometimes you can be creative more than just the building of the piece.
Applying finish to your project is an important part of any DIY furniture build.
You can paint, you can stain, but what if you want something in between?
It's actually possible to get the best of both worlds - the unlimited color options of paint mixed with the transparency of wood stain.
I experimented with this technique recently and was really, really thrilled with the results.
Be sure to check out our other DIY wood stain ideas!
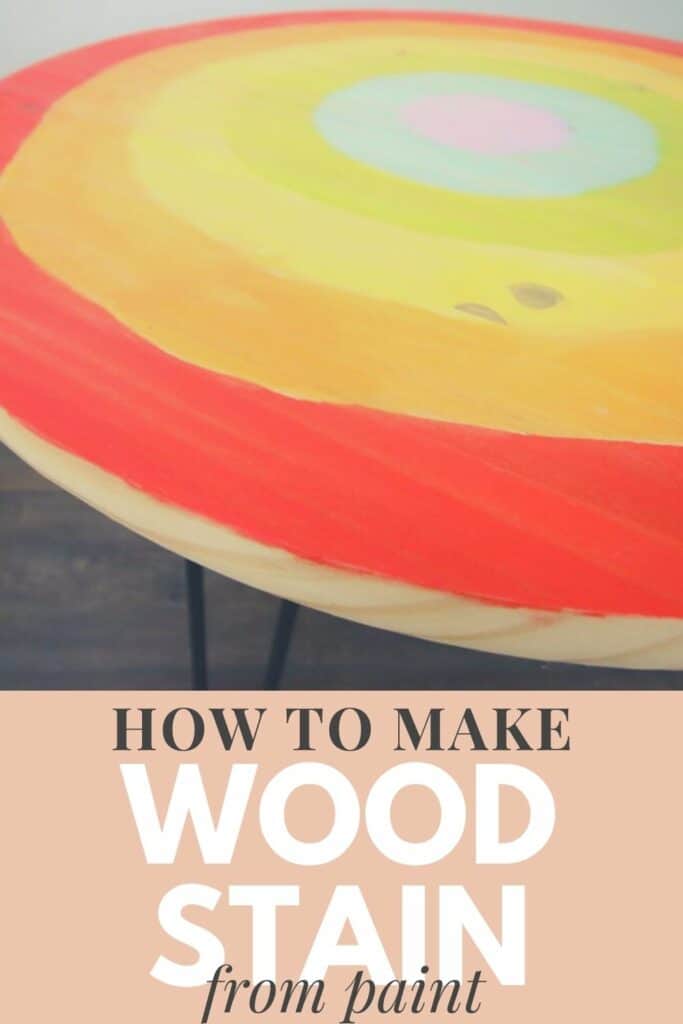
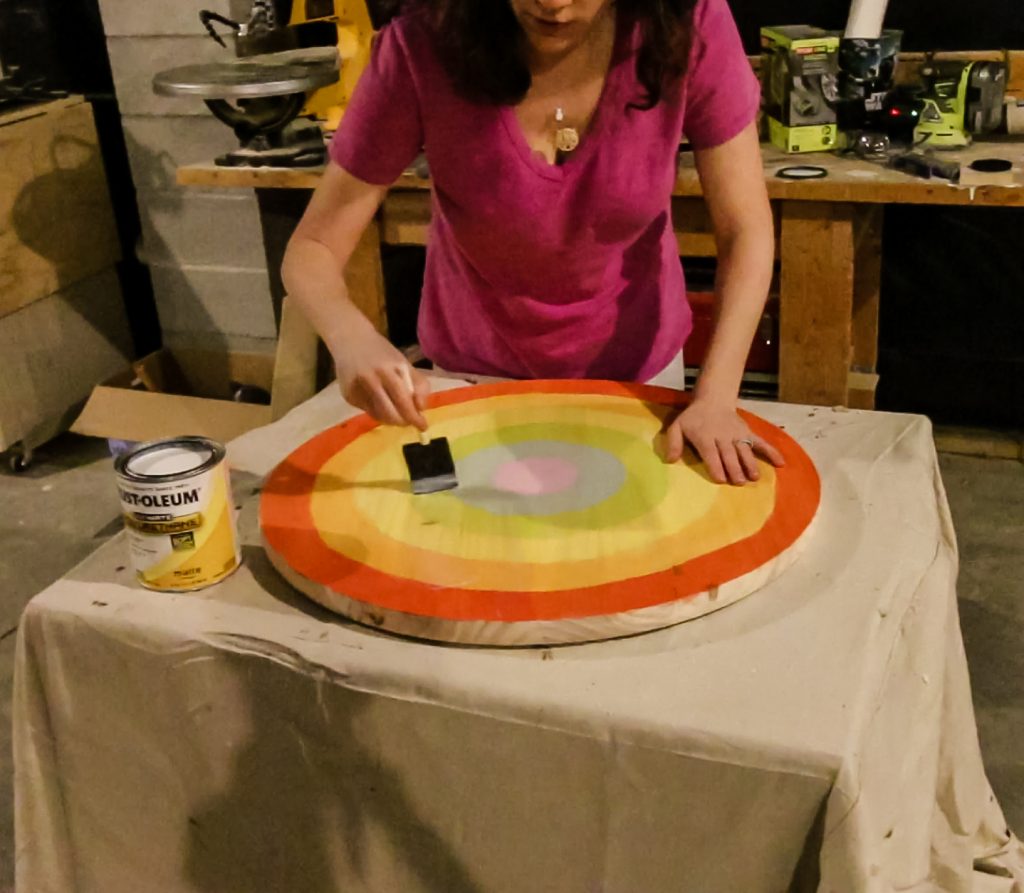
I decided that I wanted to paint this table to look like tie dye rainbow, since it was for a kids' space.
I wanted it to have a DIY color wash look and not look painted but almost water colored and more transparent.
Whether you want a similar look or just want to stain wood any paint color that you want, this method is perfect!
All you need is paint (latex wall paint or acrylic craft paint - I used a mix of both) and water!
Why stain and not paint?
Paint is a great way to add color to wood - but it does not let the natural beauty of the wood shine through.
This paint technique waters down the paint for a more transparent finish that allows you to see the wood grain on your pieces of wood.
How to make a wood stain from regular paint
Supplies needed:
- Acrylic paint or latex paint
- Water
- Cup or bowl
- Paint brush
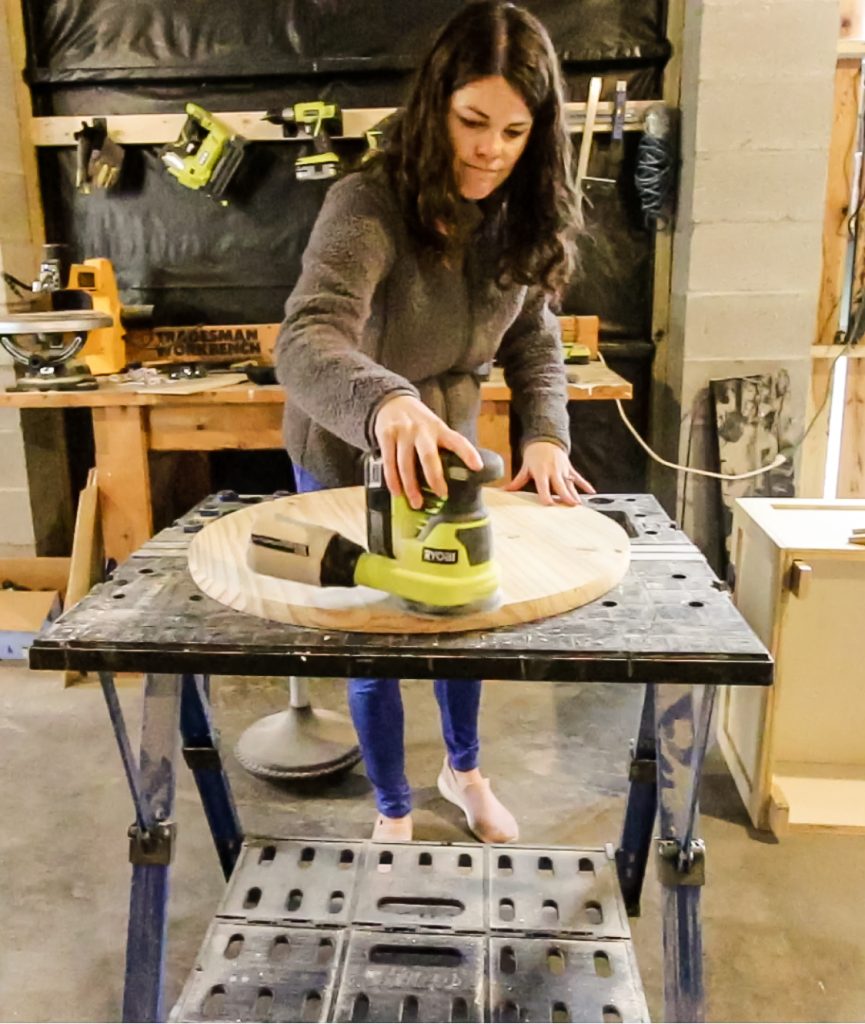
- Pieces of wood or sanded, unfinished wood furniture
- High grit sandpaper
A note about the paint - I used acrylic craft paint for some of my colors and latex wall paint for some. I saw no differences in performance.
I would however suggest sticking to water based paint. Oil and water do not mix well, so it stands to reason that oil based paint would not work well for this.
Steps to make a wood stain from paint:
STEP 1: Prepare the stain
In a cup or bowl, add a squirt of your paint. Add about twice as much water as you add paint.
2 parts water to one part paint creates a nice water color look. You can add more or less paint, depending on the look you want.
I suggest experimenting on some scrap wood to be sure you like the color and darkness.
Also, be sure to mix more paint than you think you need.
It's really hard to get a second batch to match perfectly and better to have a bit extra than run out ¾ of the way through your project.
I use 1 part paint to 2 parts water
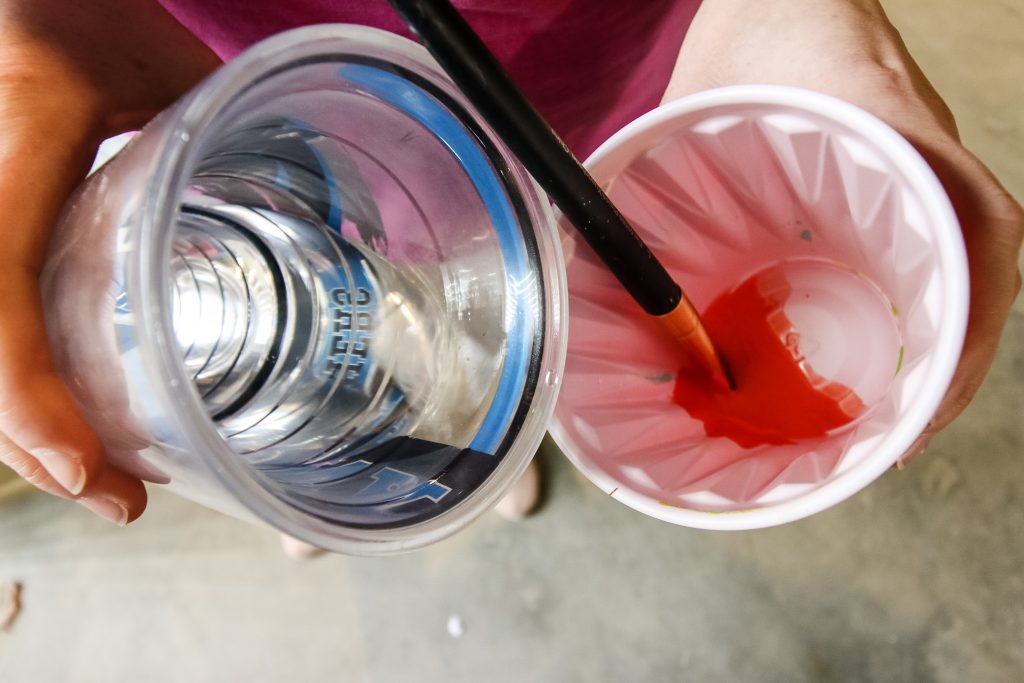
Use your brush or a stir stick of any kind to mix thoroughly to dissolve the paint with water.
Usually this gets the paint brush pretty dirty so I suggest washing it/the handle off before trying to do any precise staining with it.
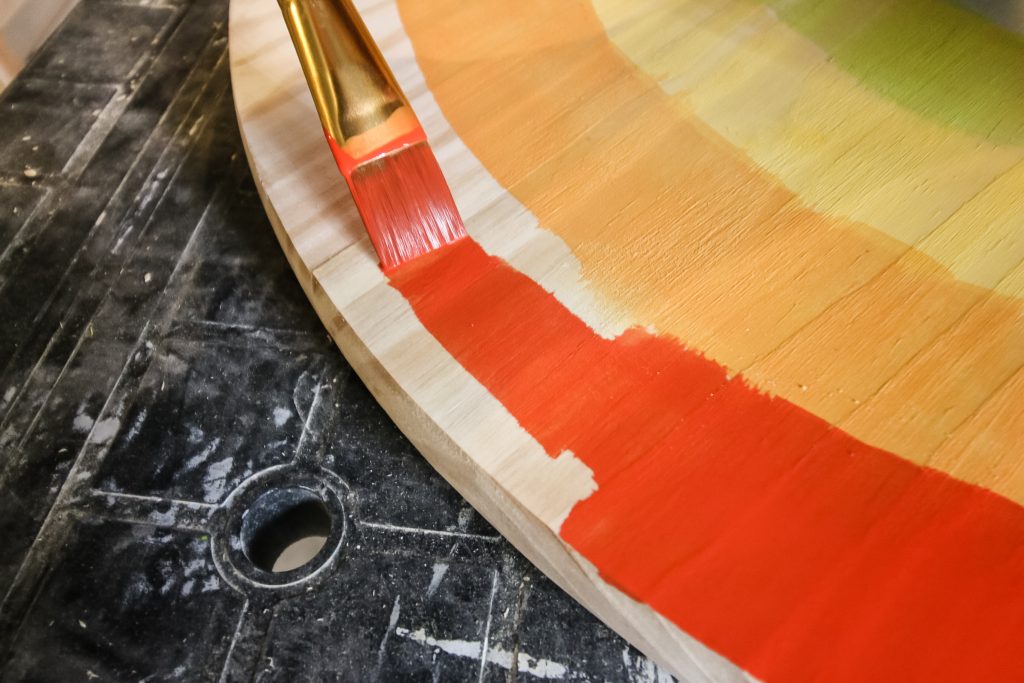
STEP 2: Apply stain to wood
Use a dry brush to apply the stain to wood. Apply a light coat at first to avoid pooling and drips.
Paint in the direction of the grain for best results.
Once you have stained your entire piece, allow for it to start to dry for about five minutes.
At this point, you can either wipe off any excess if it is pooling or apply a second coat if you prefer for it to get darker.
You can use a paper towel or clean cloth to dab any drips or pooling areas.
STEP 3: Sand lightly
Water-based wood stains like this can sometimes raise the grain of wood.
That means that the wood grain might feel like a raised ridge to your fingers. It's not noticeable to your eye, but you might feel it.
I like to take a high grit sand paper and very lightly sand the surface. Some people even use a paper grocery bag for this - you want a very light touch.
Sand in the direction of the grain for the smoothest possible finish.
Then, use a clean cloth to wipe off any dust or debris so it doesn't get stuck in place.
STEP 4: Apply sealant
Apply with a clean paint brush. Be very careful to avoid any drips. It's better to apply a few thin coats than one thick one.
Let the piece fully cure and you are ready to put it to use!
Once fully dried, apply the sealant of your choice. I use matte polycrylic.
I love how this effect looks on the kid's craft table I made! I was going for a tie dye vibe and think it totally hit the mark!
Here are all of my methods for making DIY wood stains!
Any more questions about how to stain wood with paint?
Once your stain has completely dried, don't forget to seal it! Here are our tips for sealing stained wood.
Need to fill a project? Here are our favorite wood fillers compared!
Before you stain, learn about pre-stain wood conditioners and if you should use one!
We tested these ten stains on five different wood species!
Check out our favorite white wood stains and black wood stains and gray wood stains!
Here are our favorite light wood stains + dark wood stains!
Be sure to watch my video on how to open a can of wood stain.

Looking for something?
We've been doing this since 2012 so we have a LOT of blog posts!
Search stuff like: Ceiling Projects | DIY Plant Stands | Thrift Flips

Hello, I'm Morgan, half of the creative force behind CharlestonCrafted.com! With a passion for DIY that dates back to 2012, I've transformed three homes and now I'm dedicated to helping others craft their dream spaces. Let's turn your house into a home together!