Trying to figure out how to open & close a can of wood stain without making a huge mess? Have no fear, we are sharing a step-by-step guide AND a how to video to get you started the right way on your staining project!
Wood stain is magical. It can transform dated furniture, floors, or any woodworking project.
But... how do you open a can of stain?
You don't have to be a frequent DIYer to open a stain can lid in an easy and clean way. And you don't need any fancy tools.
What tool do you need to open a can of wood stain?
There's no pop top. You don't need a can opener or even a special tool.
It might not be immediately obvious how to get inside the can and to the wood stain inside.
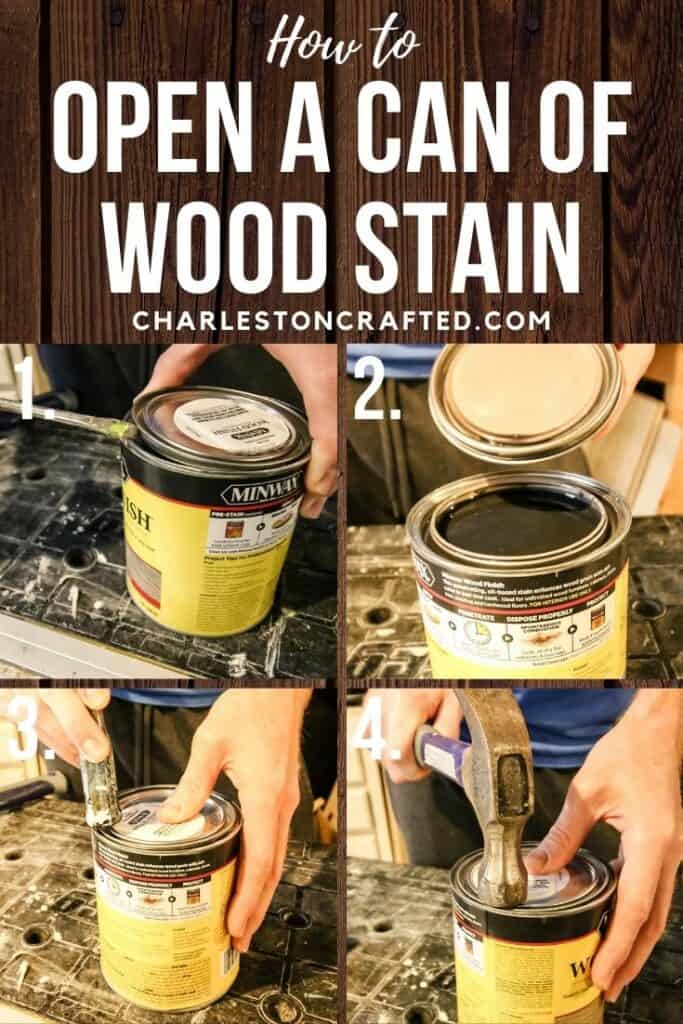
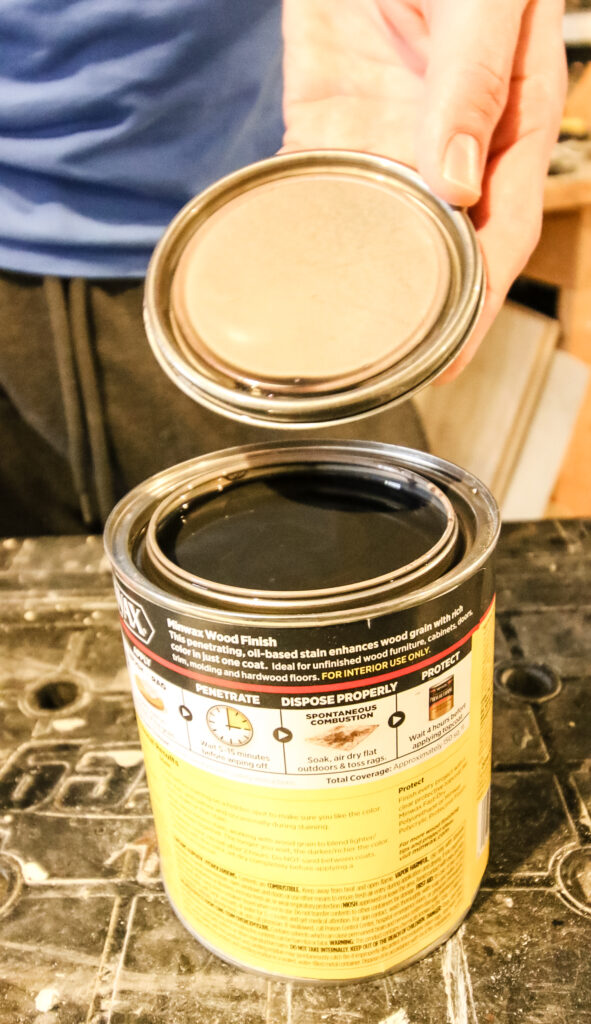
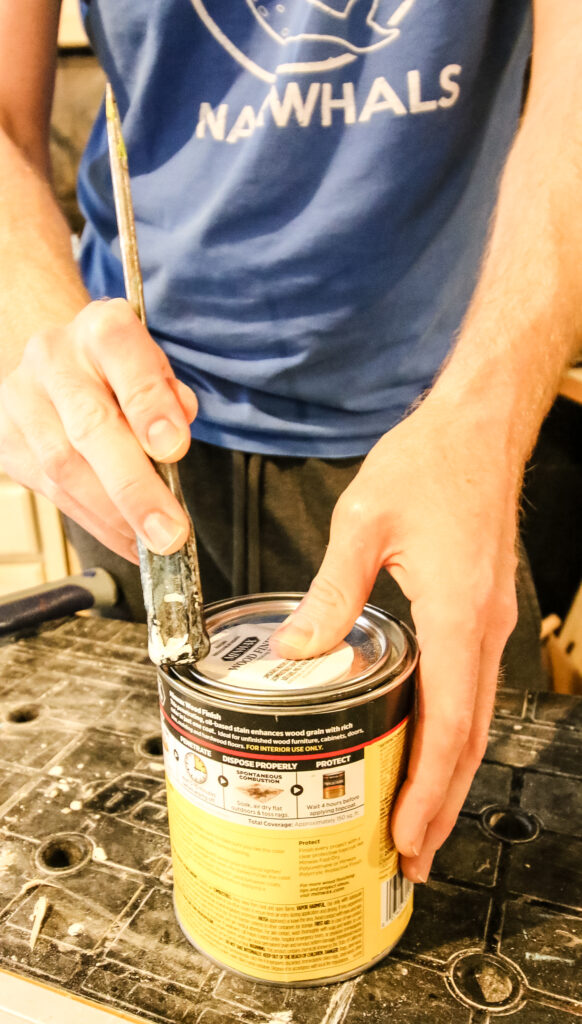
To open a can of stain, all you need is a flathead screwdriver.
No, you do not need a special can opener tool!
Save your money at the paint store and just reach for your trusty flat head - a screwdriver is the best paint can opener.
Will my screwdriver get stain on it?
No, the end of your screwdriver should never touch wet stain.
If your screwdriver is touching wet stain, you would have to be sticking it inches into the can, which wouldn't even be possible until after you open the lid.
Lift the lid carefully and you shouldn't get stain on anything.
How to open a can of stain
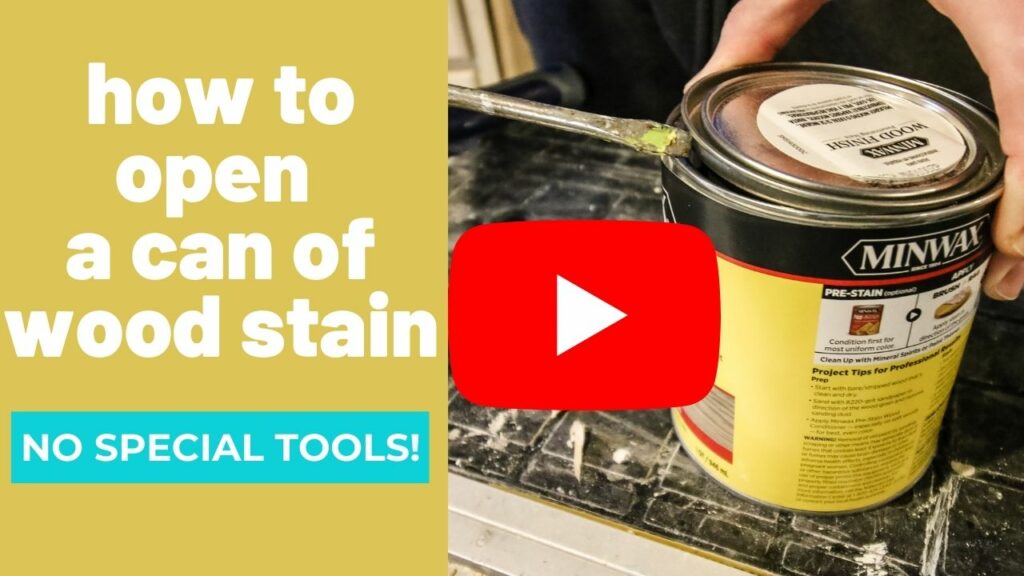
All you need to do is place the end of the flat head screw driver in between the lid and the can itself and gently pry upward to separate the two.
Repeat this, working your way around the can until the whole thing can easily be lifted off.
Place the lid upside down on your tabletop and get painting!

Does this work on water based and oil based stain?
This will work on any paint-can style can. The based finish does not make a difference.
Does this work on any brand of stain?
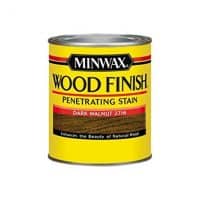
Yes! The can we used in the photos is Minwax brand (a favorite of ours) but this method works on any can in this style, the brand does not matter.
Here's how to open a Behr paint can with the Simple Pour Lid!
Does this work on new and used cans of stain?
Yes! You can use this method to break the seal on the can the first time or the tenth time.
However, as the can gets more used, damaged, or excess stain spilled on, it might take more and more muscle to pry the lid open.
Here's some tips to help with that problem!
How to open an old can of wood stain that is stuck
Sometimes cans of stain get rusted or otherwise "glued" shut.
Having trouble? Here are some tips to help to open stubborn cans of stain:
- Place the tip of a knife between the can and the lid. Slice the dried stain, all of the way around to loosed up the seal.
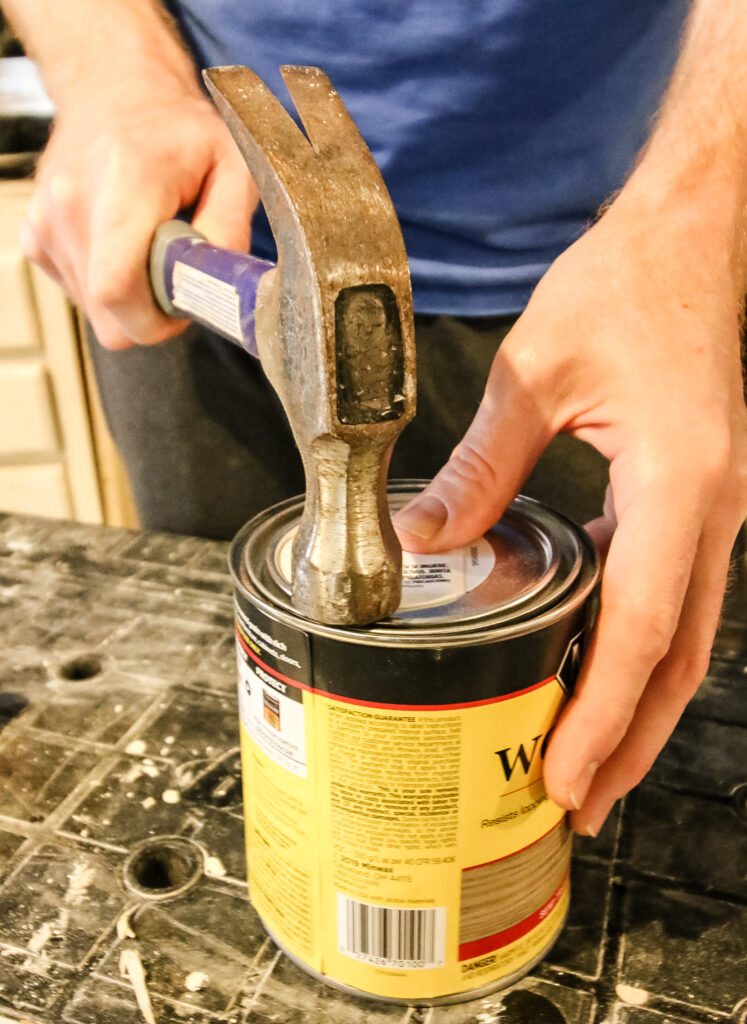
- Try using a hammer to tap the end of the screw driver to apply more force towards opening the can.
- Use a knife or the flat head screwdriver to scrape off any dried stain that might be "gluing" the lid shut, then try the above steps.
How to open a can of wood stain without a screwdriver
No flat head screwdriver? You should probably get one!
Not helpful in the moment, I know. Here are some other tools you can use in the exact same way:
- Punch style can opener
- Putty knife
- Metal key
How to close a can of wood stain
Be sure that you close your can tightly when you are done using it.
Before closing, wipe off any excess stain, especially in the lip between the can and where the lid will sit. This helps to prevent it getting "glued" closed with dried paint.
It's easiest to use a paper towel to wipe it off.
WARNING: cloths with wet wood stain on them are known to spontaneously combust in the trash. Always let any stain-stained cloths completely dry flat, separately before putting in the trash.
Make sure that you get an air tight seal to keep the stain from drying out over time.
Replace the lid on top of the can and hammer around the edge of the lid to re-seal the can. A hammer or rubber mallet work great for this.
If you don't have a hammer you can use the end of a screwdriver or even the back end of a paint brush. Anything you can "hammer" with can serve as your hammer.
How to store a wet paint brush
I usually prefer to apply wood stain with a lint-free cloth, but sometimes I do use a foam paint brush. If you want to keep using a paint brush later, and don't want to wash it now, you can store it!
Place the brush in a plastic bag and seal the bag.
Place the whole bag in the refrigerator. It will be ready when you are ready to start back at your DIY project.

How to open a can of wood stain
If you are new to DIY, you might never have tried to open a can of wood stain before! Here is how to open the can and close it easily without any special tools.
Materials
- Can of wood stain
Tools
- Flat head screwdriver
- Hammer or mallet (optional)
Instructions
- Place the tip of the screwdriver straight down in between the outer lip of the lid and the rim of the can.
- Press down on the handle of the screwdriver to gently pry the lid upwards.
- Rotate the can and repeat this every inch or two until the lid is fully loose.
- When done, replace the lid.
- Use the back end of the screwdriver or a hammer or mallet to bang along the lip of the lid to seal it in place.
- Double check the lid is fully sealed.
Notes
Always wipe the top rim of your can clean before replacing the lid to help avoid rust or it getting "glued" shut.
Recommended Products
As an Amazon Associate and member of other affiliate programs, I earn from qualifying purchases.
Video Tutorial
Be sure to check out my video tutorial showing exactly how I opened the can of wood stain!
Enjoy this post? Check out my article on how to seal stained wood, too!
We love sharing home improvement projects and hope that this tip helped you today!

Looking for something?
We've been doing this since 2012 so we have a LOT of blog posts!
Search stuff like: Ceiling Projects | DIY Plant Stands | Thrift Flips

Hello, I'm Morgan, half of the creative force behind CharlestonCrafted.com! With a passion for DIY that dates back to 2012, I've transformed three homes and now I'm dedicated to helping others craft their dream spaces. Let's turn your house into a home together!