Want to build a DIY kid's table - without even picking up a saw?! This is the easiest child's table you will ever build!
I love the loft in our new home. It's a bedroom-sized space just off of Luke and Rory's bedrooms, right at the base of the stairs to our 3rd floor playroom.
I have a feeling that this loft space will change purposes a lot over the years. Right now, we are using it as a playroom with all of Luke's small toys.
We've already built a forward facing bookshelf and a huge toy shelf.
I have some pretty cool plans for a fancy craft table with space for a paper roll and supply storage.
But, for now, I needed something that I could build in one day that Luke could use to sit at to color, play with play doh, or eat a snack.
So, this is an extremely simple toddler table.
But, there's a lot of joy in that. Things don't have to be fancy or complicated to still be super useful and "good enough for now".
If you want to build a child's table but don't have a power saw or any interest in doing woodworking, this is the project for you!
You can easily make this DIY toddler table in an evening and be on your merry way.
It could also work as a DIY kids desk or DIY kids work table - I'd just go with a wider tabletop (36", which is a size they sell on the shelf at Lowes and Home Depot) and a taller leg (I have a chart below with leg height suggestions by age).
Here's how I made this super easy toddler table.
How to make a kid's table: the easy way!
To make this DIY simple child's table, all you need to do is screw legs into a top. Of course, there is more that you can do, but that is the main idea.
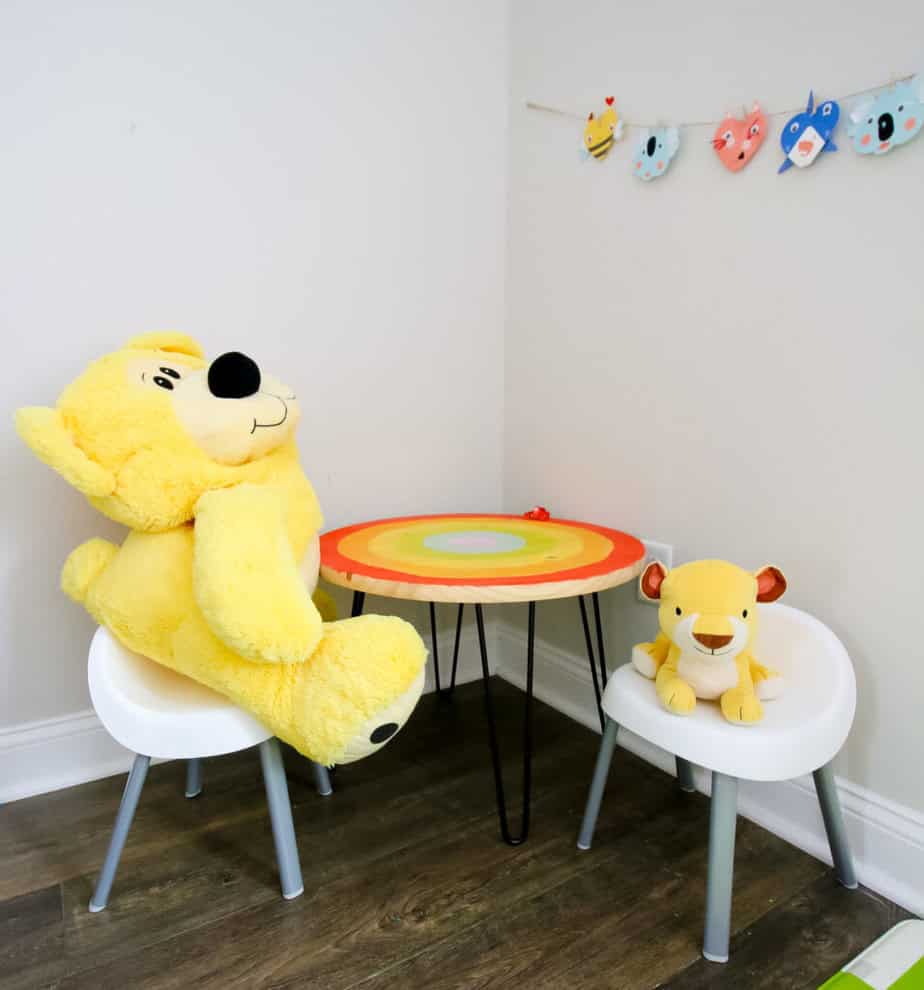
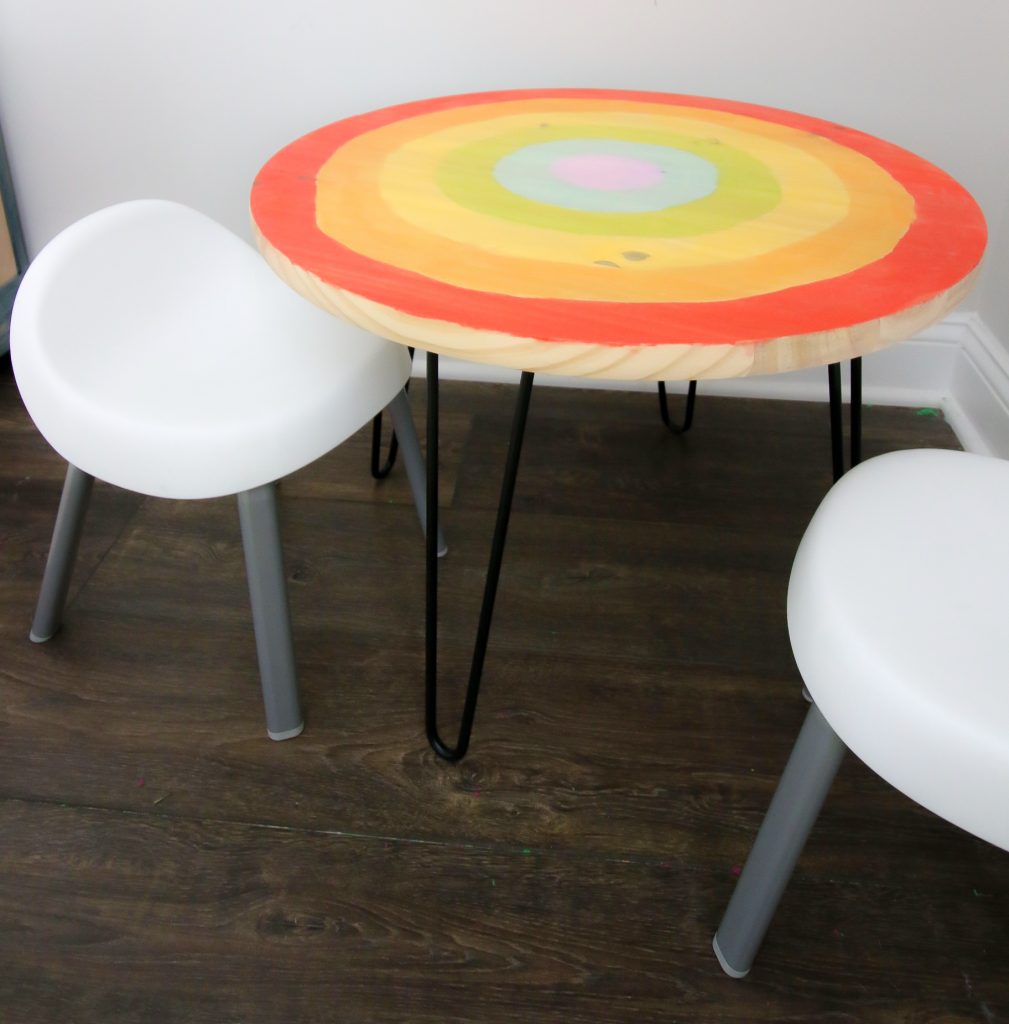
I used a pre-cut tabletop from Home Depot and hairpin legs from Amazon. You can use any style of legs - I just like the clean lines of these angled legs.
Materials:
- Pre-cut round tabletop (24 or 36" diameter)
- 4 hairpin legs (16-18" for toddlers, 18-24" for preschoolers, 21"+ for elementary aged) + screws to attach (usually included with legs)
- Paint or stain of choice
- Polycrylic or sealant of choice
Tools:
- Sander
- Drill
- Foam paint brush
How to build a kid's table step by step:
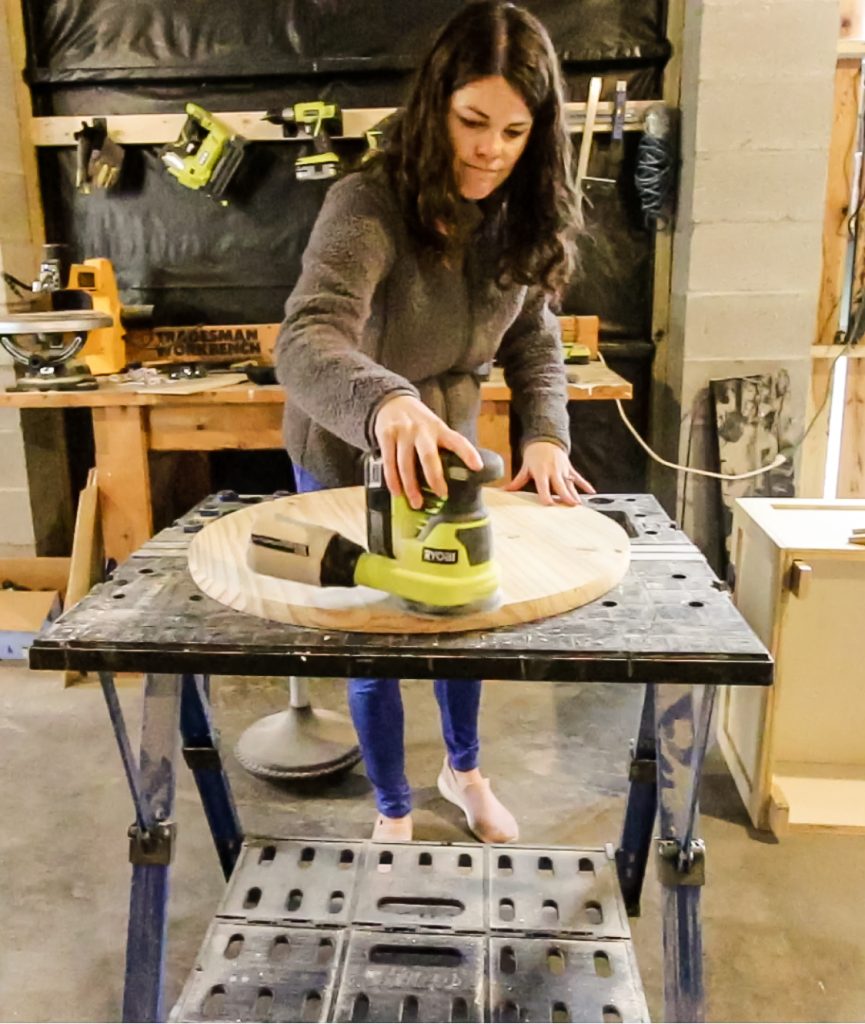
STEP 1: PREP THE TABLETOP
First, sand your tabletop.
It can be tempting to skip this step, but it is an important one.
While these tabletops are pre-cut, you need to sand them for two reasons:
- They often have rough spots that could give a toddler a splinter
- Stain or paint will absorb more evenly if the "coating" is sanded off
Definitely don't skip this step!
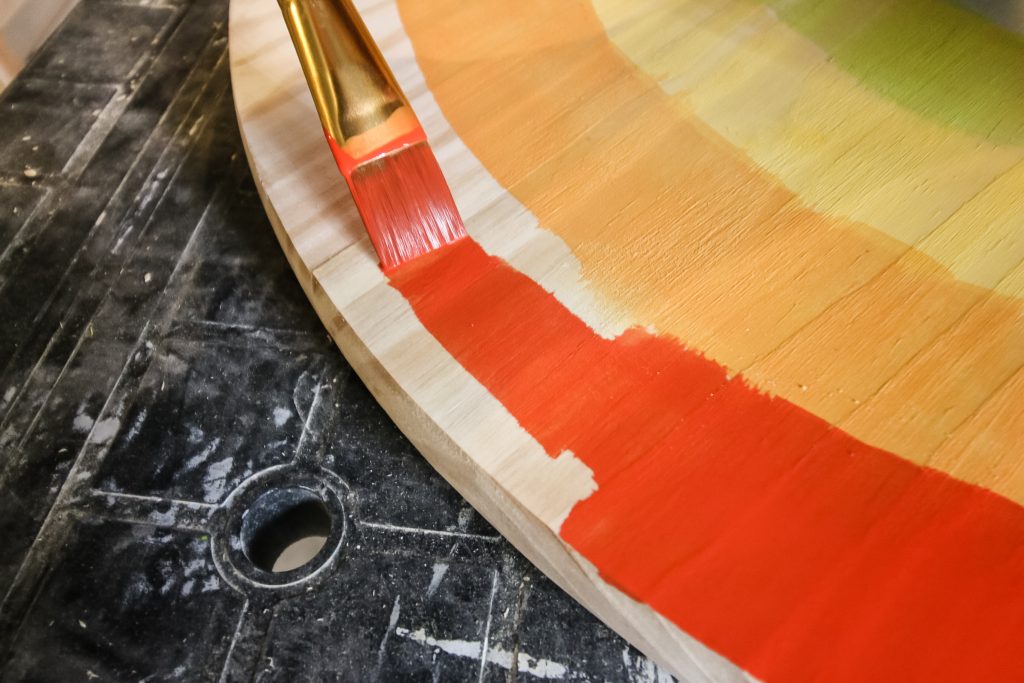
STEP 2: PAINT OR STAIN
Once your tabletop is sanded, it's time to paint!
You can apply a stain or paint of your choice.
I went over the top by painting this bullseye style rainbow on mine.
I wanted a watercolor look, and it turned out almost tie dye which is super fun.
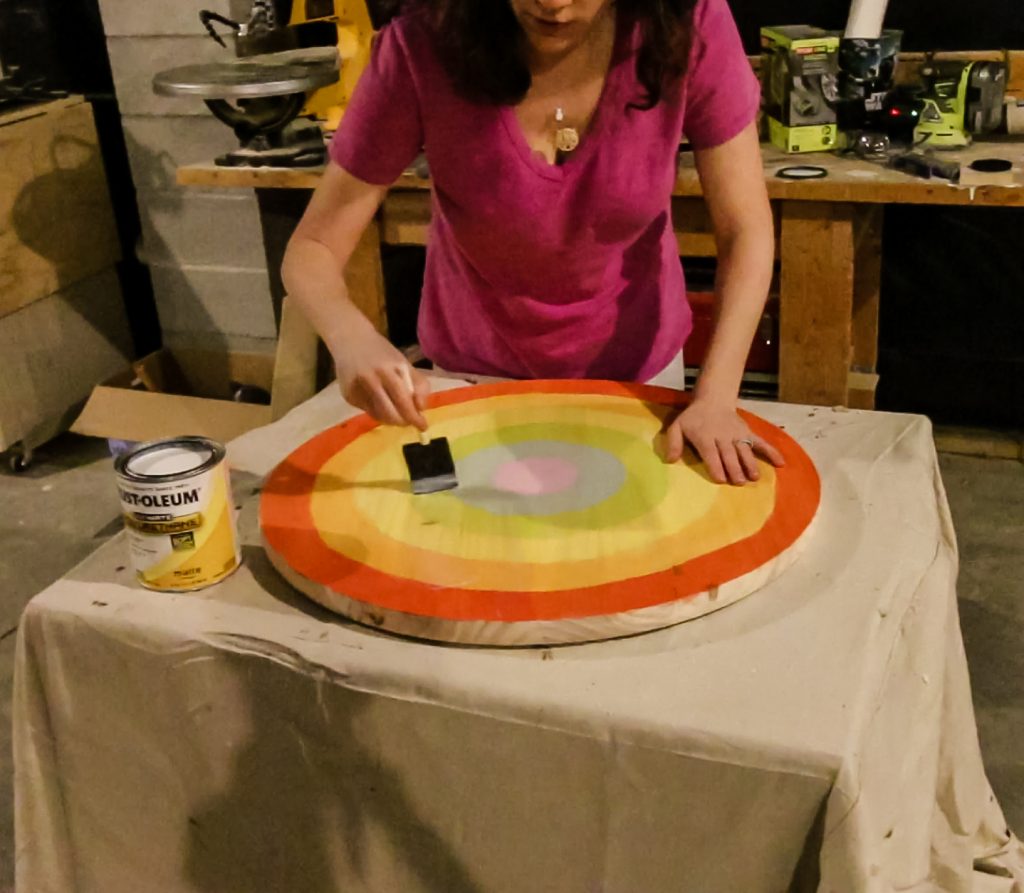
STEP 3: SEAL THE TABLE TOP
Once your paint is dry, it's time to seal. Sealing will help to protect the table and help it wipe clean from kid messes.
I used polycrylic and applied 3 thin coats.
Follow the instructions on your specific can for time between coats, if you need to sand in between coats, and total cure time.
Read my guide to sealing stained wood!
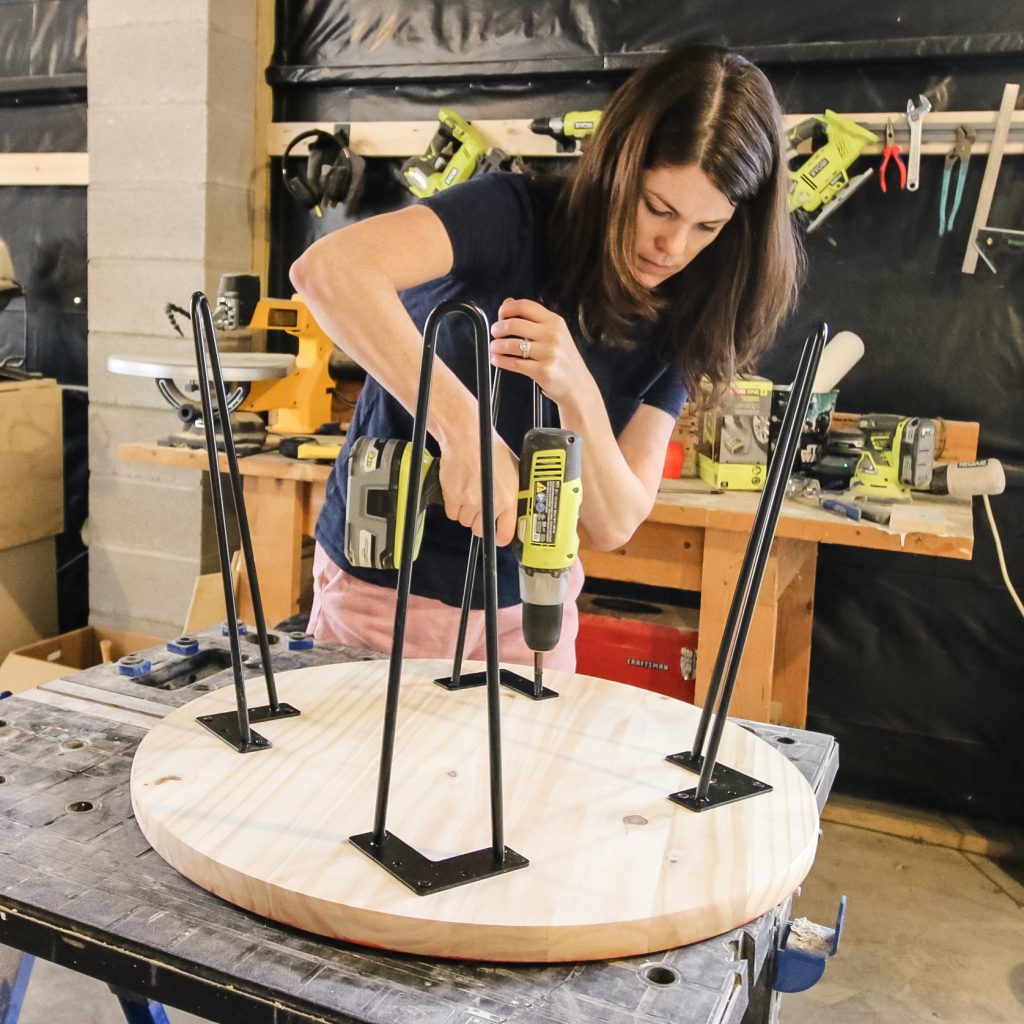
STEP 4: ATTACH THE LEGS
Once your sealant has cured, it's time to attach the legs.
Place the table top good side down on a clean, soft surface like a towel to avoid scratches.
Place your hairpin legs on the underside of the table. Use a ruler to place them evenly - I like the outer corner 1 inch in from the edge of the table.
Use a pencil to mark where the holes are in each leg then set aside. If you try to drill one in, the others will fall over so just scoot them over to your work surface.
You don't need to pre-drill holes, just use your drill to attach the top to the legs.
Repeat until all legs are attached. Flip your table over, wipe it of any dust or debris, and deliver to your kiddo!

Check out our tutorial + woodworking plans for how to build a kids learning tower!
Video tutorial
Catch this whole project in a video tutorial!
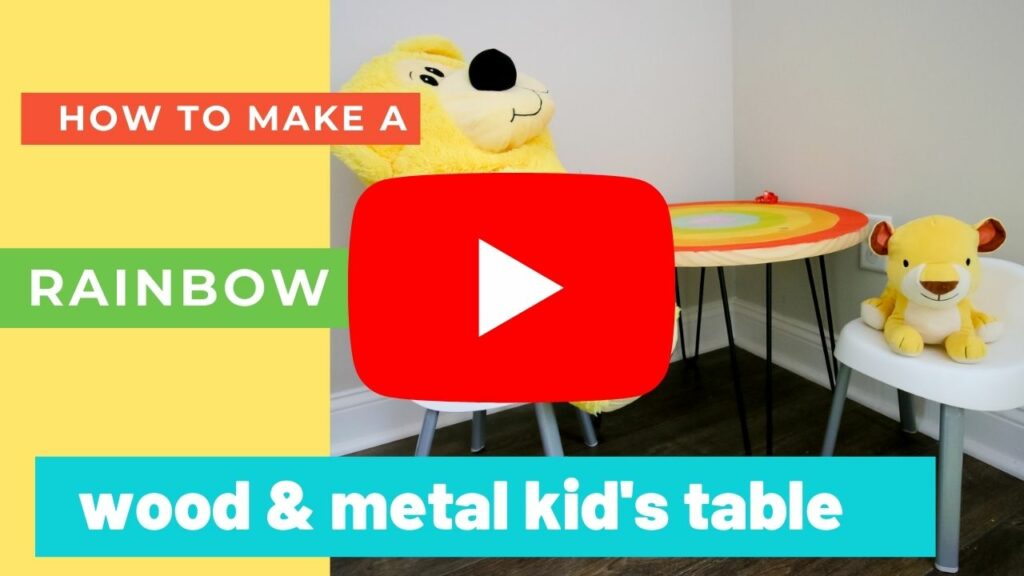

How to build a simple kid's table
Order the supplies for this project online & pickup at your local Home Depot today!
What is the best children's table height?
For best results, have your kid sit on their chair and measure from the ground to the top of their leg while sitting. Then, add a couple of inches for clearance.
In general, you want 6-10" between the seat of the chair and the underside of the table.
Here are some ideal kid's table heights:
| Child's Age | Table leg height |
| Toddler 2-3 years | 16-18" |
| Pre-school 4-5 years | 18-24" |
| Elementary 6-8 years | 21-26" |
Note that this should be the height of the legs or the underside of the tabletop, not the full table!
Any more questions about this easy way to build a small table?

Looking for something?
We've been doing this since 2012 so we have a LOT of blog posts!
Search stuff like: Ceiling Projects | DIY Plant Stands | Thrift Flips

Hello, I'm Morgan, half of the creative force behind CharlestonCrafted.com! With a passion for DIY that dates back to 2012, I've transformed three homes and now I'm dedicated to helping others craft their dream spaces. Let's turn your house into a home together!