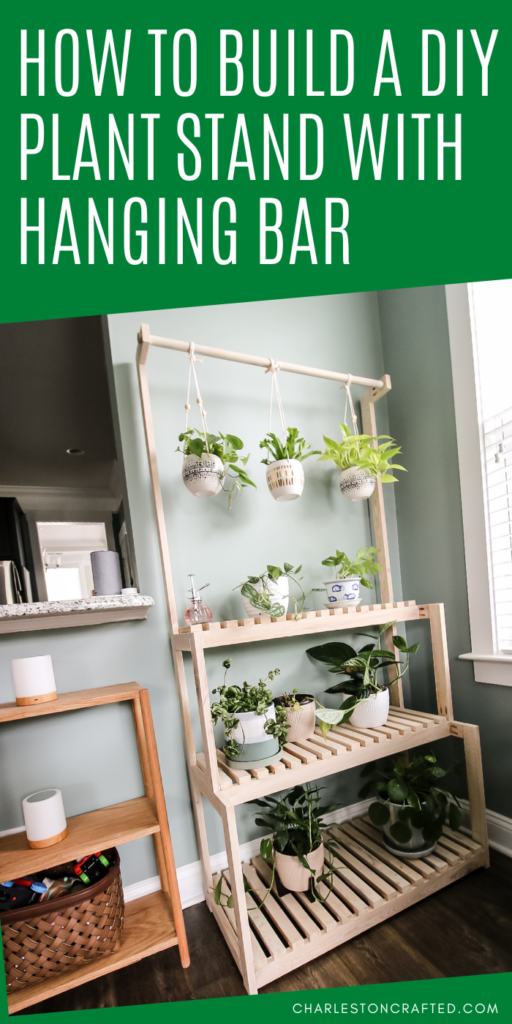
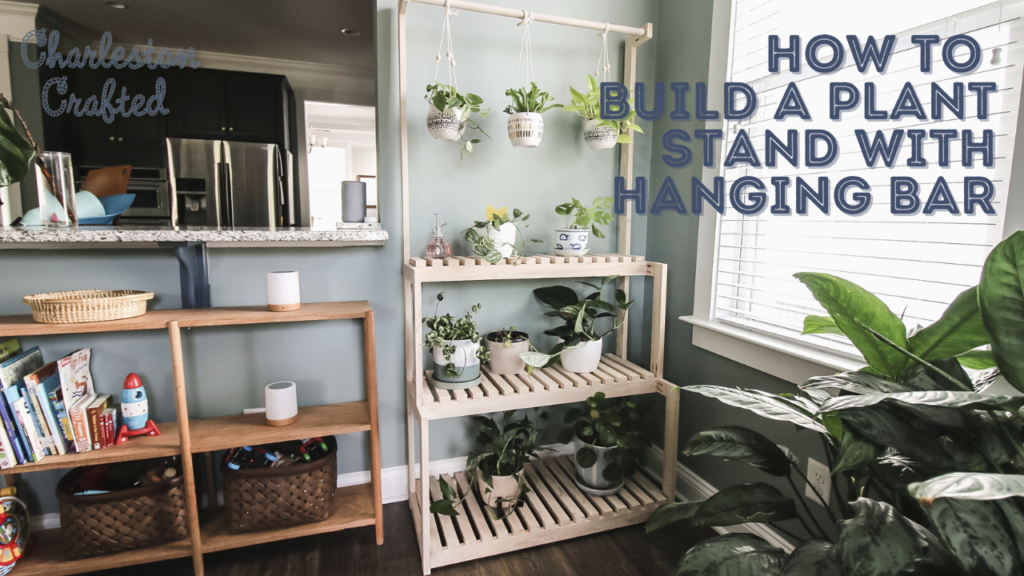
We have lots of potted plants in our house and needed somewhere to keep them together. So, we developed this DIY plant stand with hanging bar to put all our small potted plants together!
This post was sponsored by Kreg Tool, makers of the pocket hole tools we used in this build. All opinions are our own and our opinion is we love Kreg products. Thank you for supporting the brands that make Charleston Crafted possible!
It seems like once a month, we have to come up with a new place to store plants. Our house has dozens of potted plants inside and out so we need plant stands everywhere.
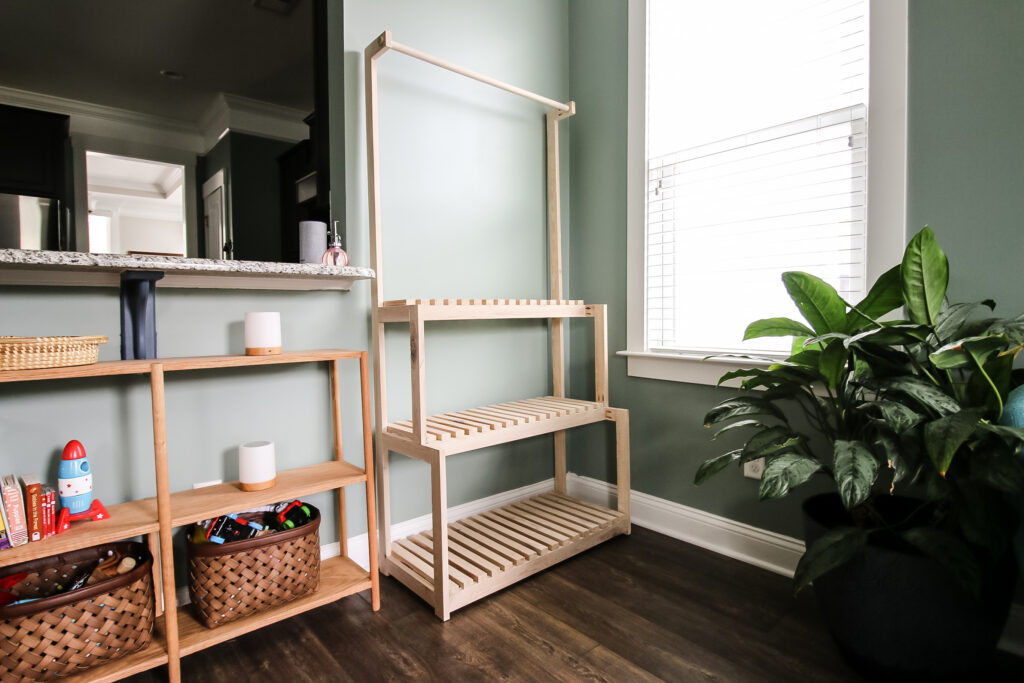
We have a weird blank corner in our living room where there is a faux wall divider to the kitchen that felt like the perfect place to consolidate some of our plants. We have potted plants and hanging plants that all needed a home, so we developed a plant stand with a hanging bar.
This is a simple build that, even with today's lumber prices, only costs about $50 and a couple hours to make. Read our full tutorial below on how to make DIY tiered plant stand with hanging bar for your indoor plants!
If you want a great outdoor plant stand, check out our 3-tiered DIY corner plant stand!
DIY free standing hanging plant stand
This DIY tiered plant stand has lots of features that are great for a wide range of plants in your home.
While this plant stand would work indoors or outdoors, we made it for inside our living room (check out our full living room reveal post here!) and it works great. You could easily copy this project and use it outdoors with a little outdoor sealant like we used on this rolling DIY angled 3 tiered plant stand.
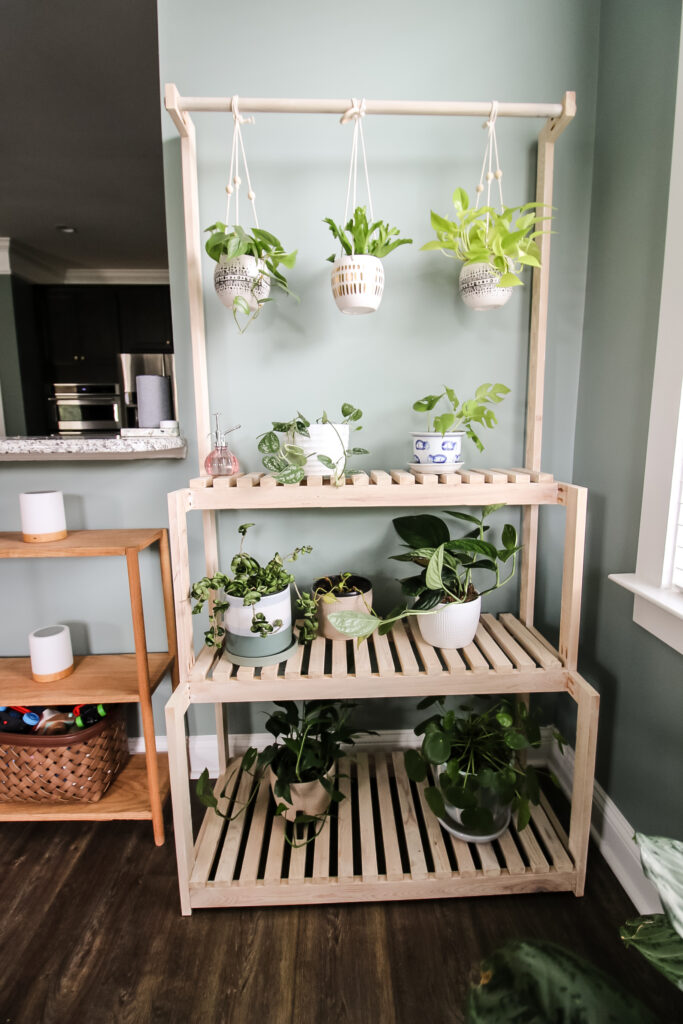
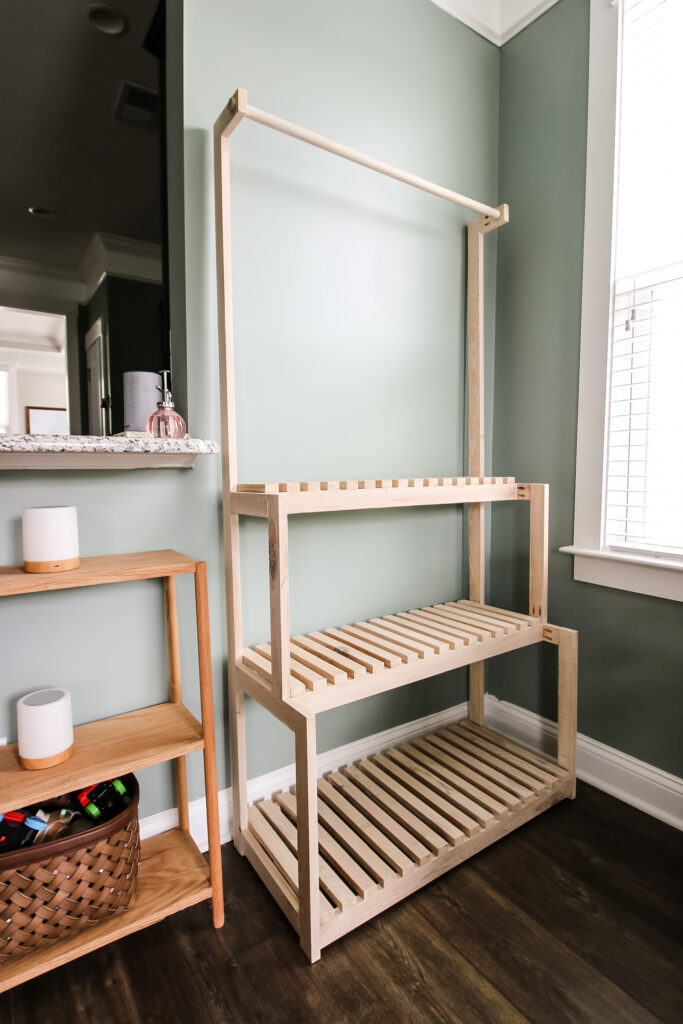
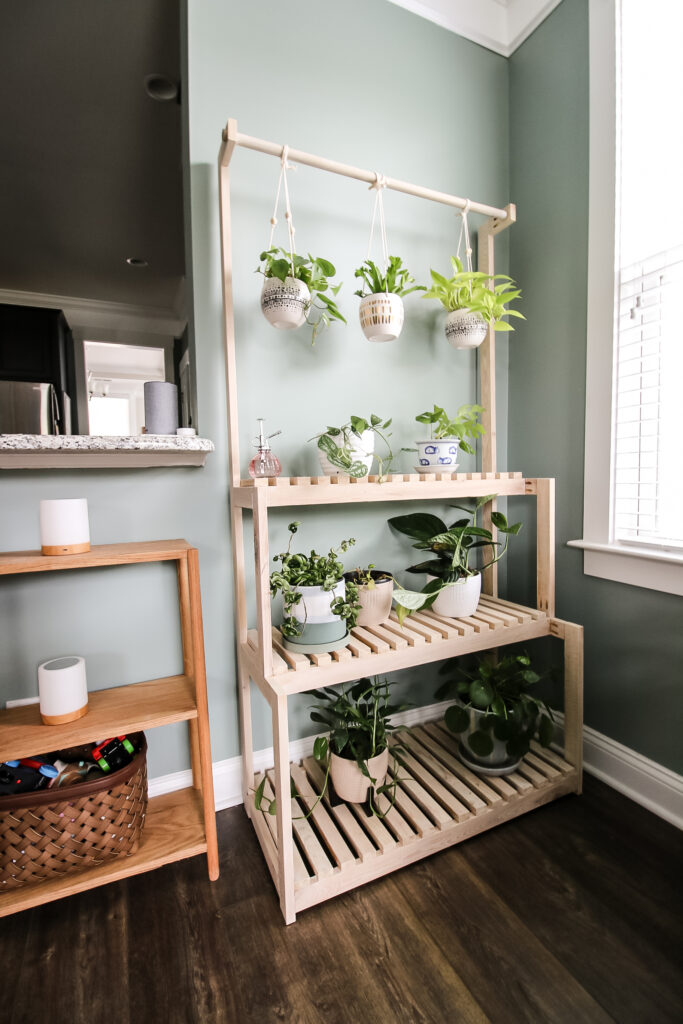
This DIY plant stand with hanging bar features three levels of slatted bars, allowing each level to hold different sized pots and still get good light. Hanging above is a bar that is perfect for trailing plants.
Let's show you how to build this modern plant stand!
How to build a DIY plant stand with hanging bar
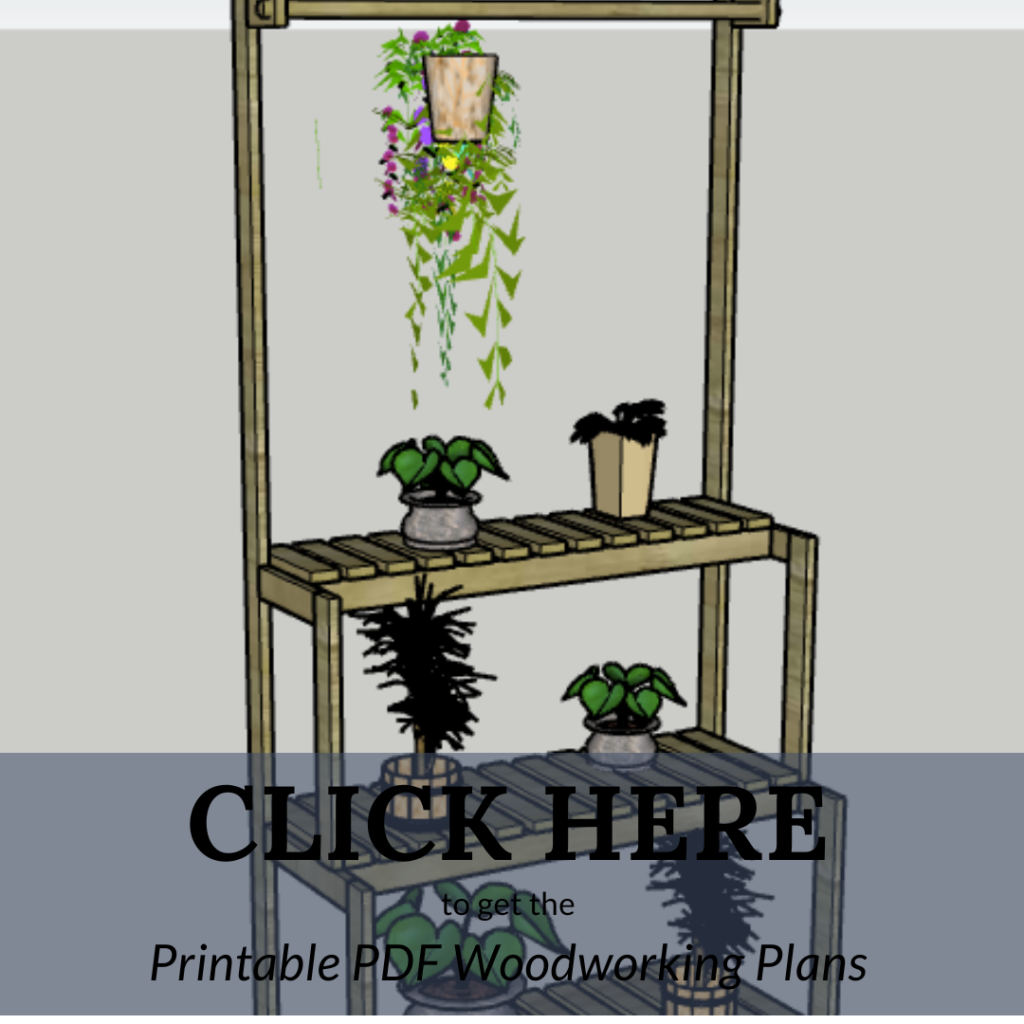
Here are the general steps and information you need to build a DIY plant stand with hanging bar. You can get the full information, including material list, cut list and step-by-step instructions, in our free woodworking plans on the Kreg Projects and Plans site!
Tools needed to build a DIY plant stand with hanging bar:
- Kreg 720 pocket hole jig
- Table saw
- Miter saw
- Cordless drill
- Orbital sander
- Measuring tape
Materials needed to build a DIY plant stand with hanging bar:
- Cypress boards
- 1 ¼" Kreg pocket hole screws
- Wood glue
- Stain and sealant
How to make a hanging plant stand
Here are the steps to build our DIY plant stand with hanging bar.
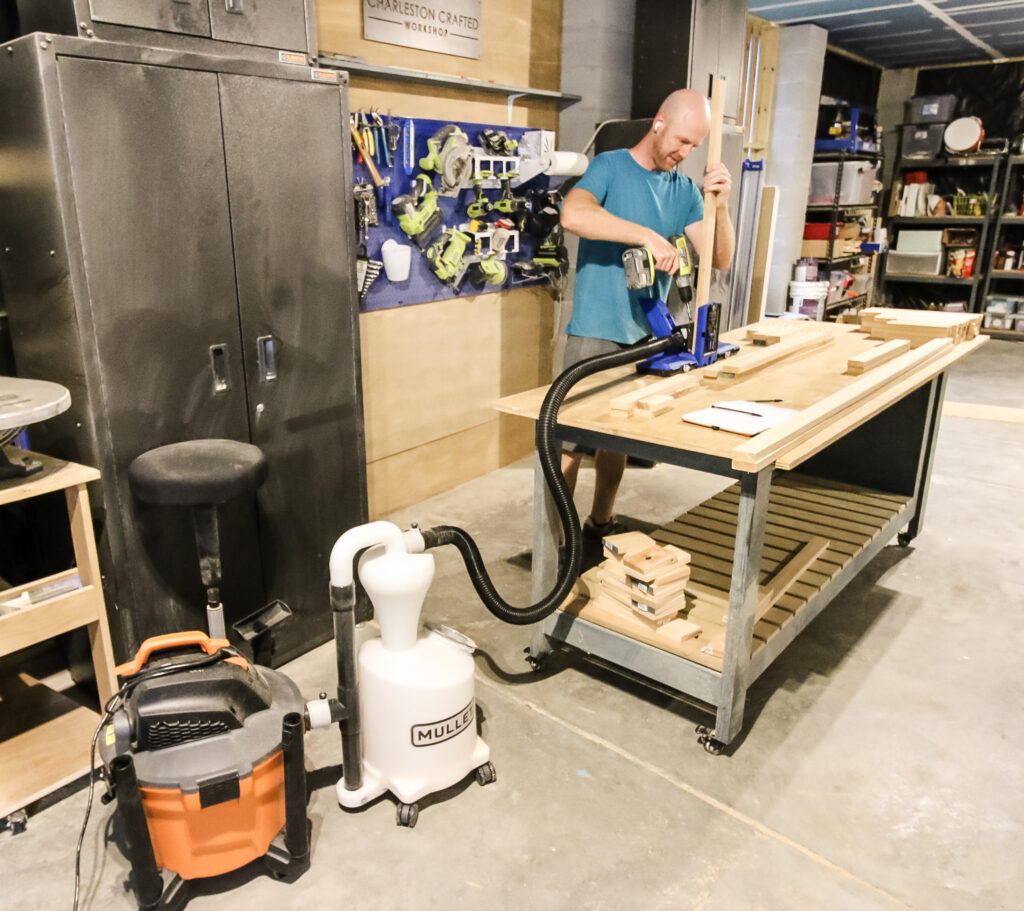
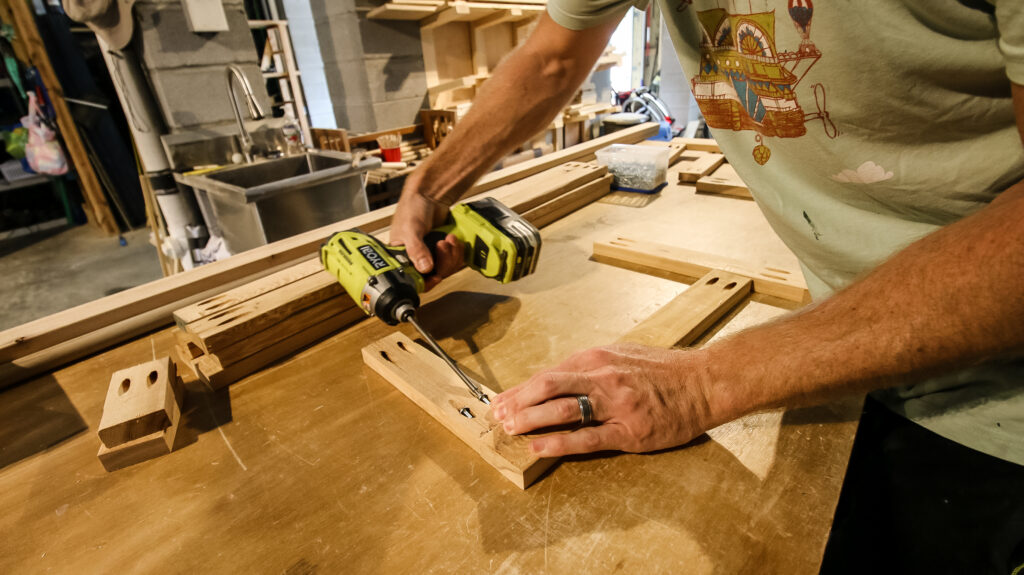
Step one: Make cuts and drill pocket holes
This is a great project to start by making all of your cuts and getting fully prepared before actually assembling the project.
The entire cut list for the project can be found in our free downloadable PDF plans, so grab those and make each cut.
After making the cuts, it's time to drill pocket holes. We used our favorite Kreg 720 Pro pocket hole jig to drill holes in each piece that needed them.
The Kreg 720 is our favorite jig because the AutoMaxx clamping system makes drilling repetitive holes quick and easy, but you can use your favorite Kreg jig to do this!
After everything is cut and drilled, make sure to sand it smooth so you're ready to build!
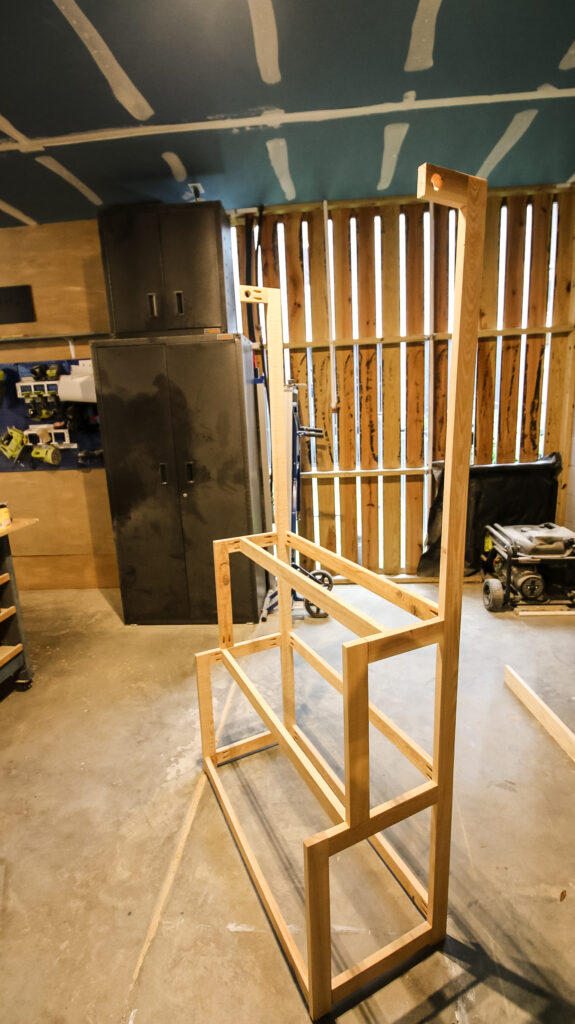
Step two: Assemble side frames
Start by assembling the side frames of the plant stand. Each frame is in a ladder step style, so there are three shelves that get smaller on the way up.
Each of these side frame pieces is held together with wood glue and Kreg pocket hole screws to keep them solidly in place.
Step three: Attach cross beams
Next, attach each of the cross beams to connect the two side frames.
Again, using wood glue and pocket hole screws, the cross beams hold the sides together and keep everything in place.
Each cross beam on each shelf is the same size, but they are closer together for each shelf to make the ladder style.
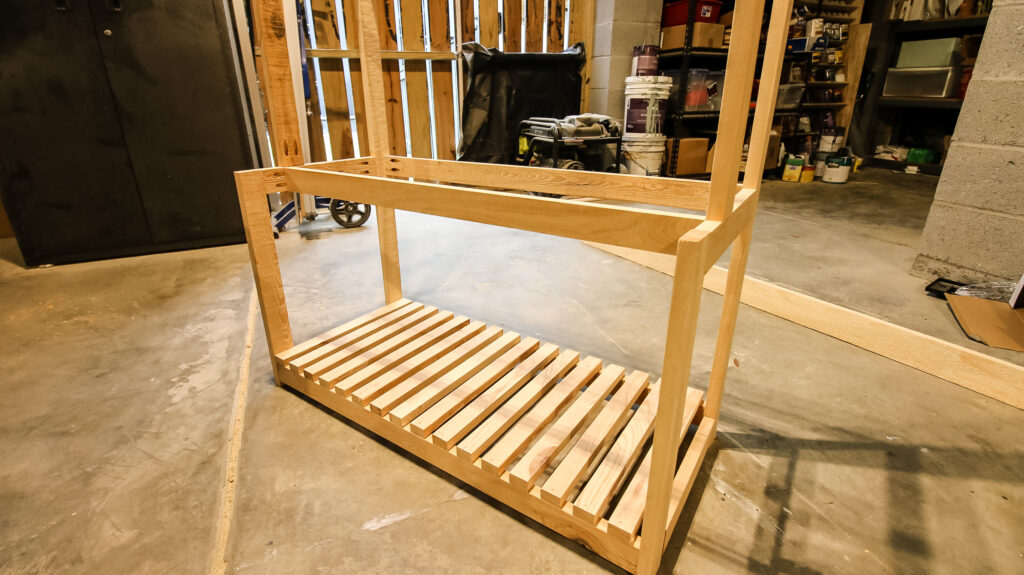
Step four: Add slats to shelves
Now that the whole frame is finished, we added the slats that will create the shelves.
Each shelf has 13 slats glued and nailed into place with a ¾" spacing in between them.
The slats are all the same size on each shelf, but are sequentially shorter on the way up.
When everything is glued and dried, this is a lightweight, but heavy duty plant stand!
This is very similar to our two tiered slatted plant stand we built a few years ago!
Step five: How do you make a hanging bar for plants
For this plant stand, we wanted to add a hanging rod for plants with trailing vines.
To do this, we added two short pieces of wood at the top of the back posts using wood glue and Kreg screws. But before attaching them, we drilled 1" holes in each piece.
After attaching the wood to the posts, we slid a 1" dowel through the holes across the entire plant stand. The dowel is perfect for hanging plants!

Step six: Stain and seal
You could choose to leave this project completely natural, but we wanted to cool it down with a light white wash to tie into the DIY modern coffee table we built last year.
We stained the white wash onto the project and then added a coat of polyurethane to keep it protected and seal everything in.
Using the poly and cypress wood makes this project water resistant, which is great since we'll be spraying and watering plants on it.
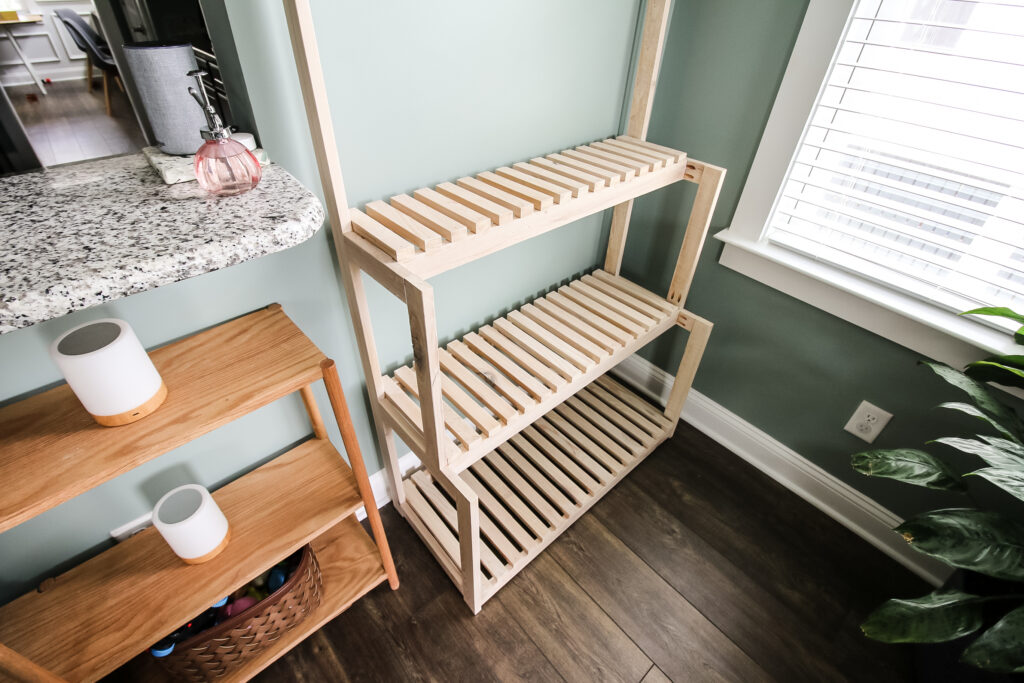
Step seven: Fill with plants
Finally the fun part- adding the plans! We hung three pots from the plant hanger and added lots of potted plants to each plant shelf.
The hanging planters look great filling the space down to the smaller plants on the top shelf while the bigger plants can fit on the lower shelves.
This DIY plant stand with hanging bar looks so good filling this empty corner of our living room!
FREE woodworking plans for a DIY plant stand with hanging bar
Like what you saw on this super easy DIY plant stand project? Well now you can build it yourself!
Thanks to our friends over at Kreg, you can get the woodworking plans for this project completely free!
Click over to view the printable PDF plans on the Kreg Projects and Plans site, where you can get dozens of other great plans for any project you're needing to take on for your home!
DIY plant stand with hanging bar video tutorial
Want to see a video tutorial on our DIY plant stand with hanging bar? You're in luck! Click over to see our project build on YouTube and get more inspired!
Interested in the Kreg Jig? Click here to read our full Kreg Jig review and to see all of our Kreg Jig projects.
New to the Kreg Jig? Here is a step by step guide on how to use a Kreg Jig!
OR grab our FREE Kreg Jig Cheat Sheet here! Download the cheat sheet!
Basic woodworking information for every project
Here are some of our most popular woodworking articles!
Shopping for wood:
Woodworking project ideas
- 100+ of the best woodworking project ideas!
- 62 easy beginning woodworking projects
- Woodworking project ideas to make and sell
See all our printable PDF woodworking plans!
Our favorite tools + supplies
- See all our favorite tool reviews
- How to use a Kreg jig
- The ultimate wood stain guide
- The best wood fillers for your project
Remember to also always use safety equipment while woodworking and using tools. Make sure you have proper eye protection, ear protection and a good mask to keep yourself safe.

Looking for something?
We've been doing this since 2012 so we have a LOT of blog posts!
Search stuff like: Ceiling Projects | DIY Plant Stands | Thrift Flips

Hey there, I'm Sean, the woodworking enthusiast and builder behind CharlestonCrafted.com! Since 2012, I've been sharing the magic of turning raw materials into beautiful creations. I love teaching others the art and satisfaction of woodworking and DIY. I try to inspire fellow crafters to make something extraordinary out of nothing at all.


