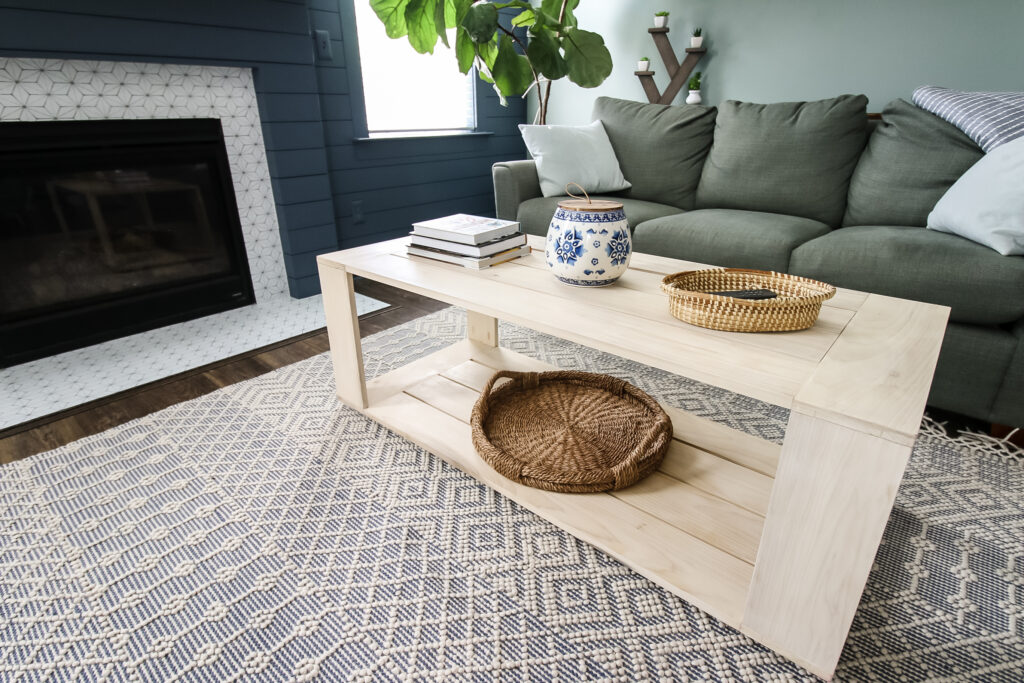
This post will show you a simple design for a sleek, modern looking rectangular coffee table. This two tiered table is perfect for decor, storage or functionality in your space. Get the free woodworking plans to make your own below!
This post is sponsored by Waterlox. All opinions are our own. Thank you for supporting the brands that make Charleston Crafted possible!
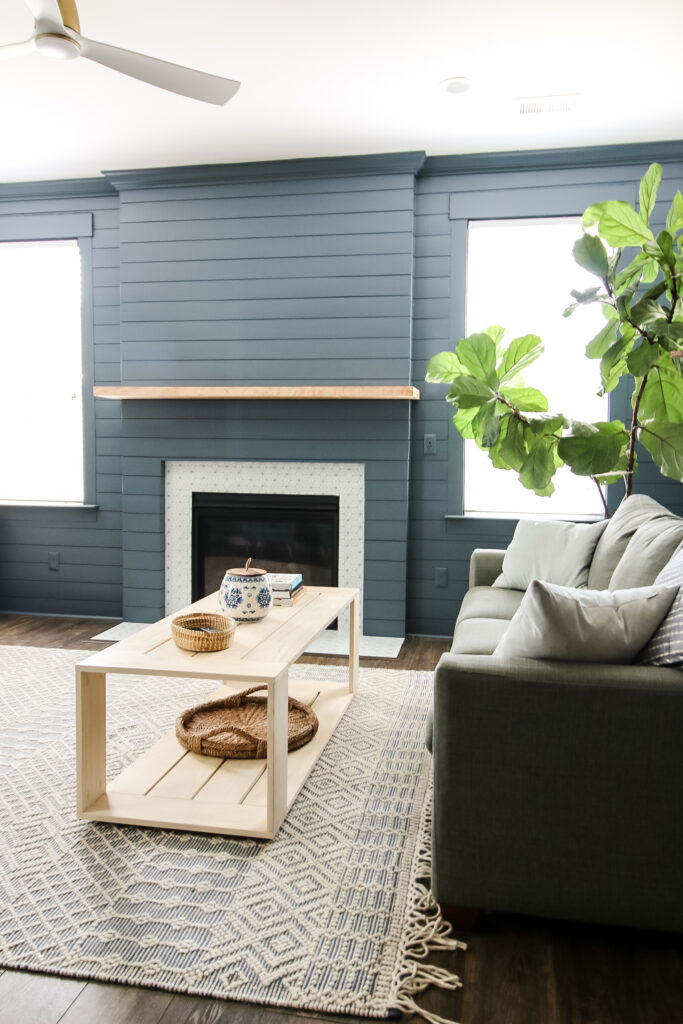
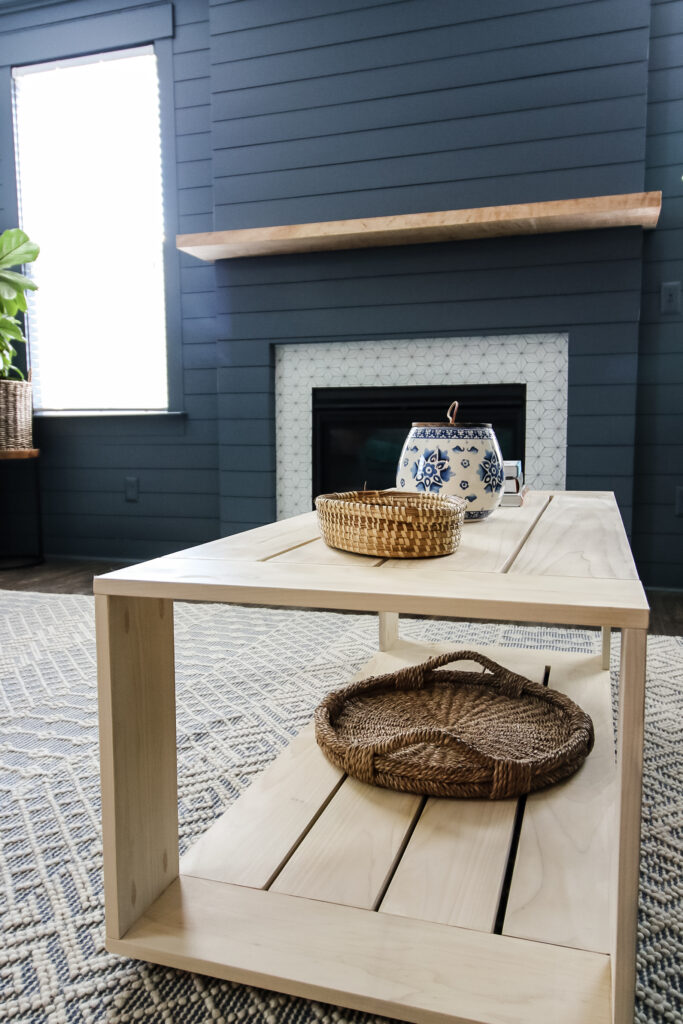
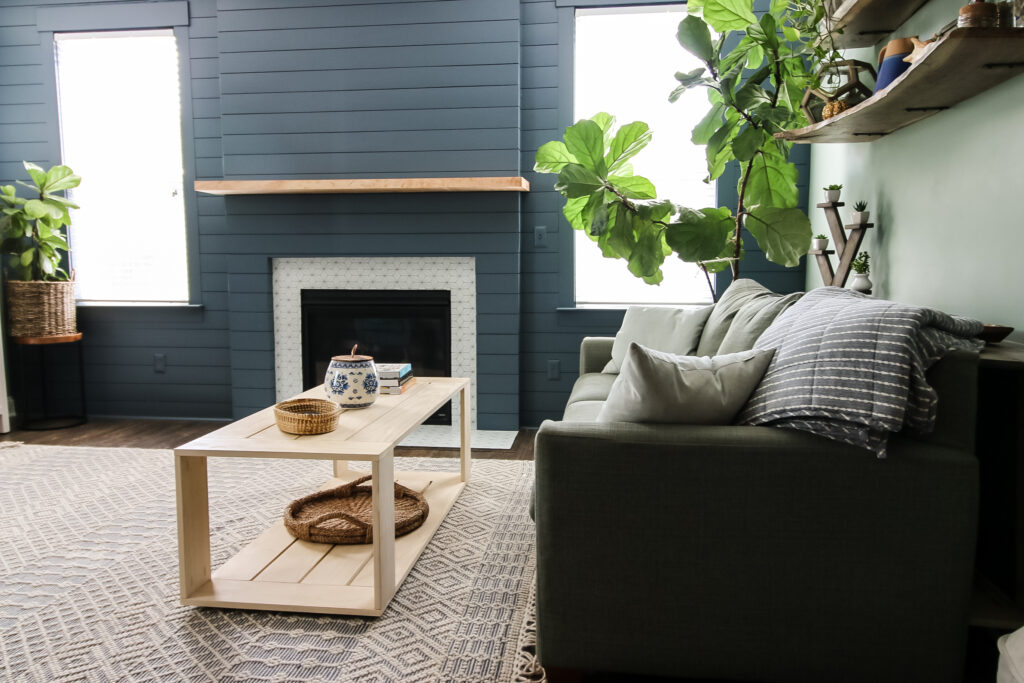
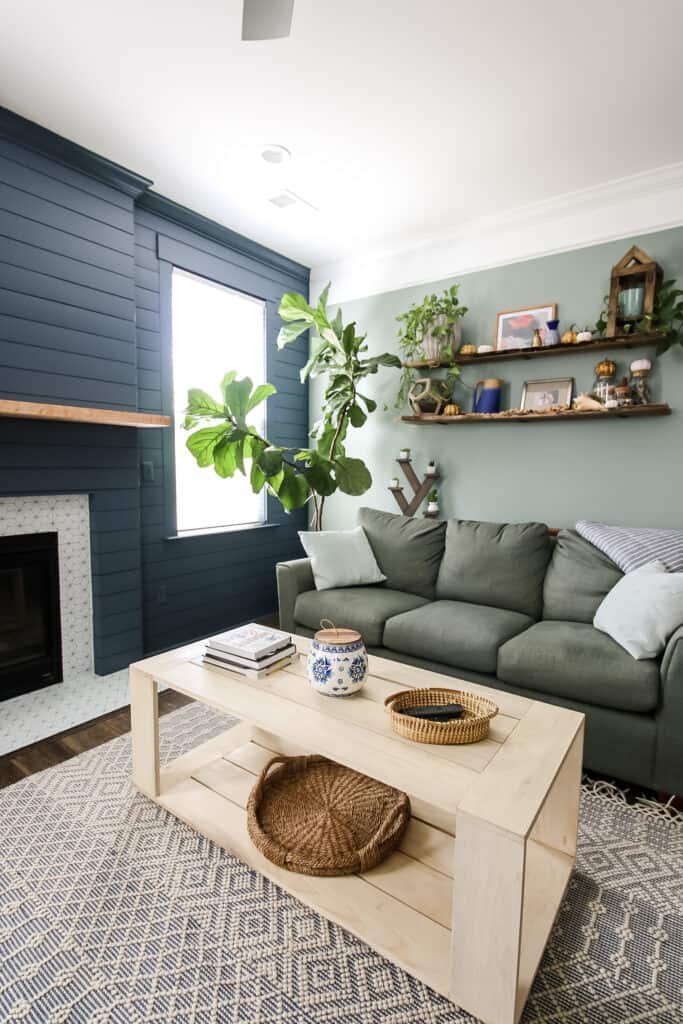
We're in the middle of our living room makeover, with the new shiplap fireplace accent wall being the focal point of the room.
The shiplap on the wall is in a horizontal pattern, adding a lot of straight lines to the room. The space is also wide and open, compared to our old living room in our previous home.
In our old space, we originally had a couch with a chaise lounge and not a lot of floor space. To fit those needs, we build an angled base, circular coffee table that we moved to our new house last year.
We knew the round table was too small and didn't fit the visual appeal of our new living room, so we decided we needed to build a new plank coffee table with a rectangular box shape.
This modern coffee table design is open and airy and features straight, clean lines that work well with the shiplap wall.
The design of the table also plays well with our dining room table, which is just about 15 feet away!
Scroll below to see how we built and finished this DIY coffee table and get the easy woodworking plans to make one for yourself!
How to build a coffee table
This is a fun coffee table project to build. It's put together with simple joinery, features a clean and easy design, and is finished with a beautiful look.
Sure, pallet coffee tables and mid century modern tables are still all the rage, but this design is perfect for all sorts of decor styles.
This post will show you the full design and simple steps for how to build a modern coffee table and take you through how to build one yourself.
Our post will share an overview of the entire process and link to all the products and finishes we used, but you can download the woodworking plan to get the step-by-step instructions, cut list, and material list to build one yourself.
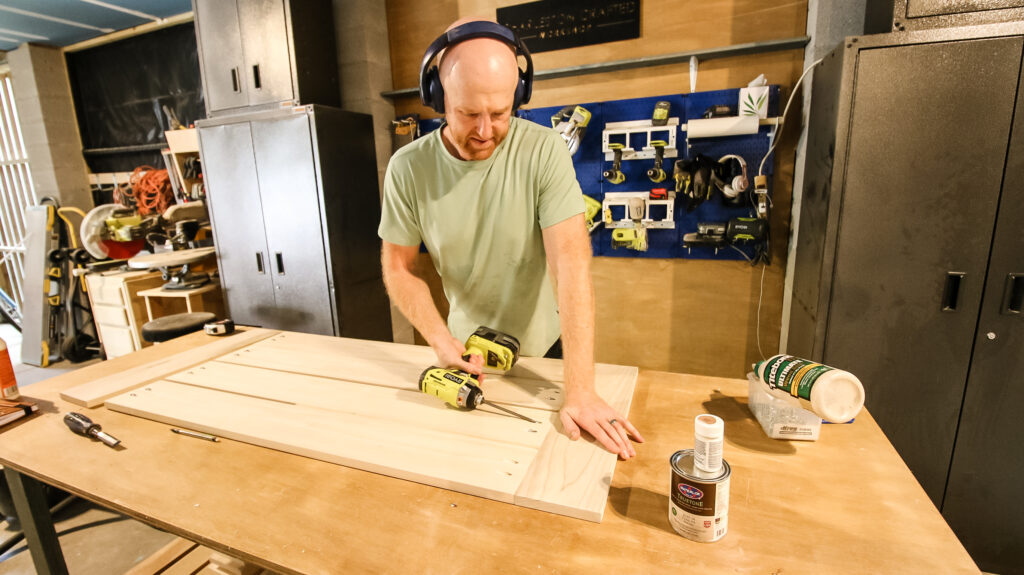
Step One: Build the top and bottom
The first step is to put everything together, duh!
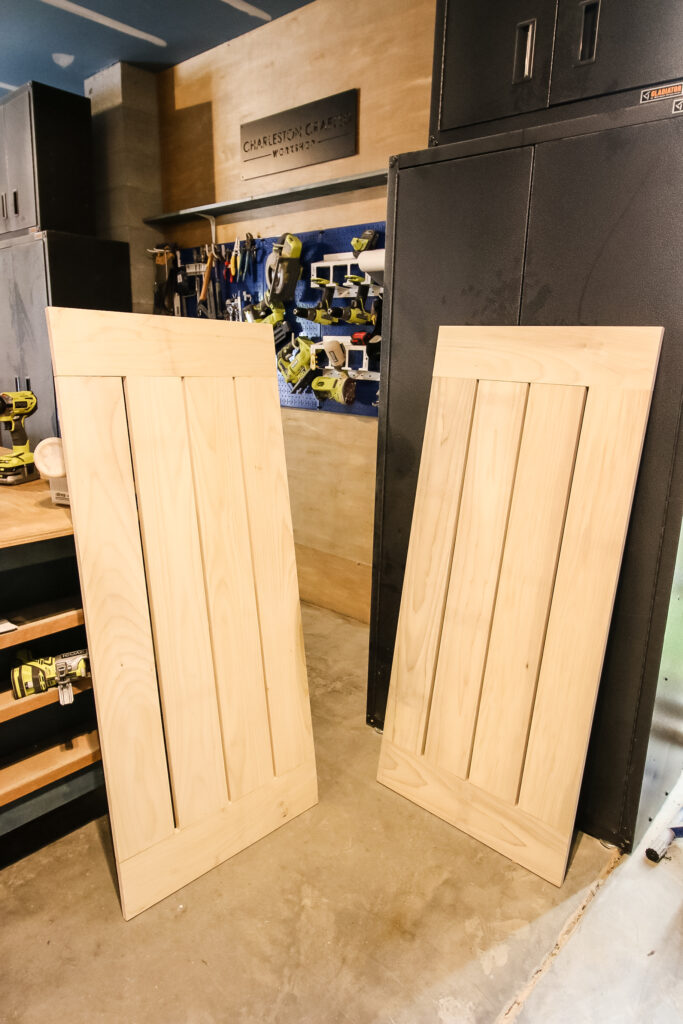
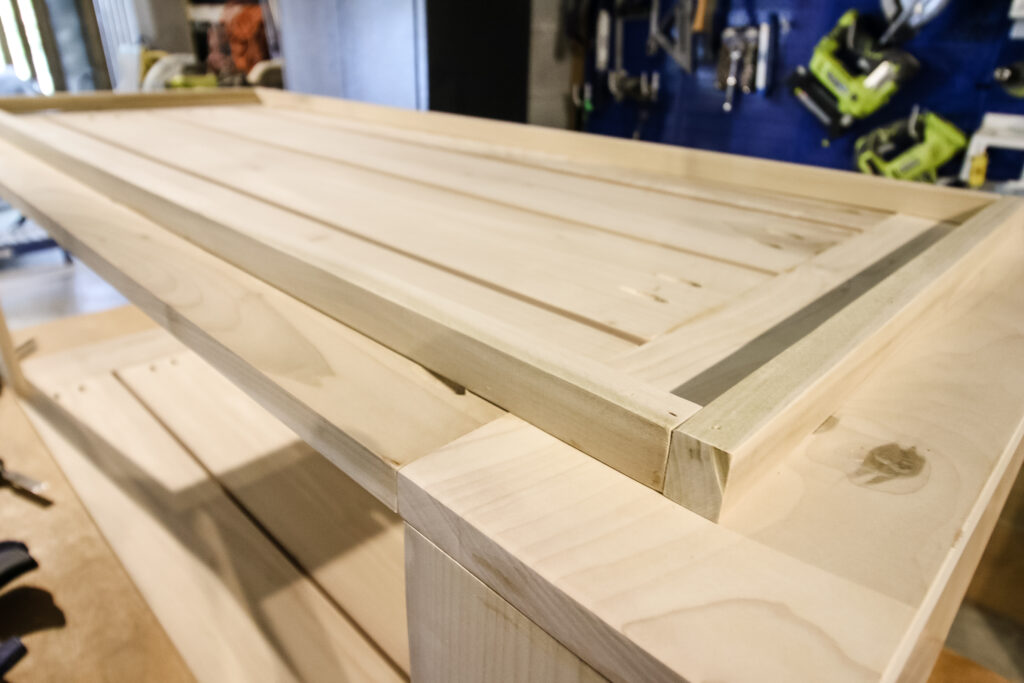
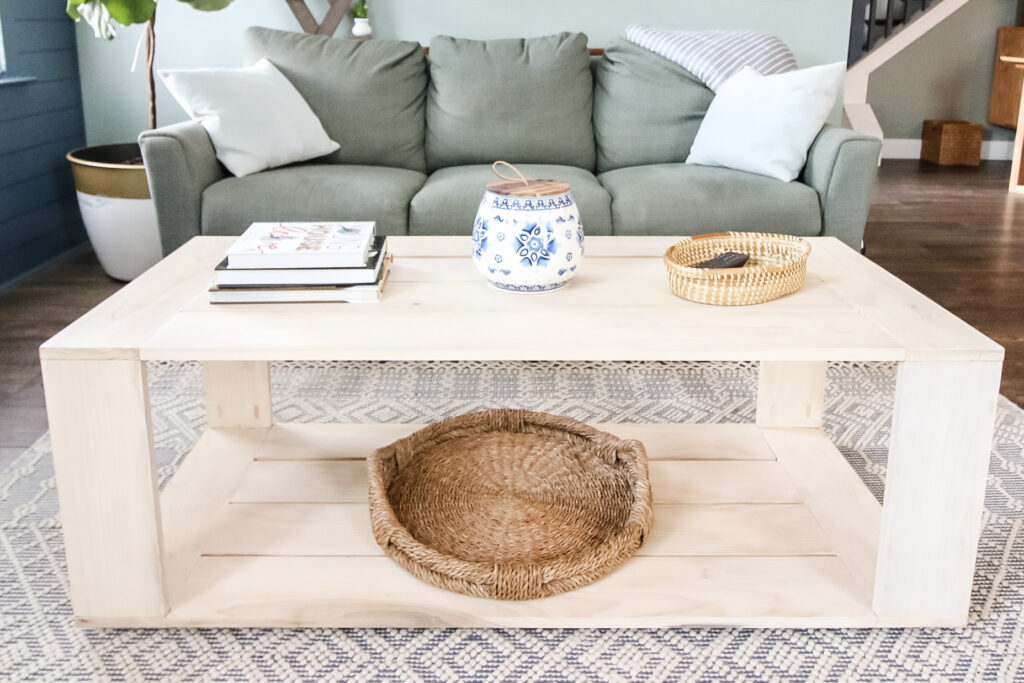
The design for this coffee table is a matching top and bottom, connected by legs.
Each of the top and bottom panels is two breadboard pieces connected by four slatted planks. The planks have a slight spacing between them to give the entire coffee table an open, airy feel, no matter what direction you look at it from.
This coffee table is put together using pocket hole joinery, making it a very user-friendly DIY project that anyone can do. You don't have to be a woodworking to make this beautiful table!
The top and bottom are assembled individually using wood glue and pocket screws to make them super sturdy.
Once you've got both panels put together, it's time to move on to step two!
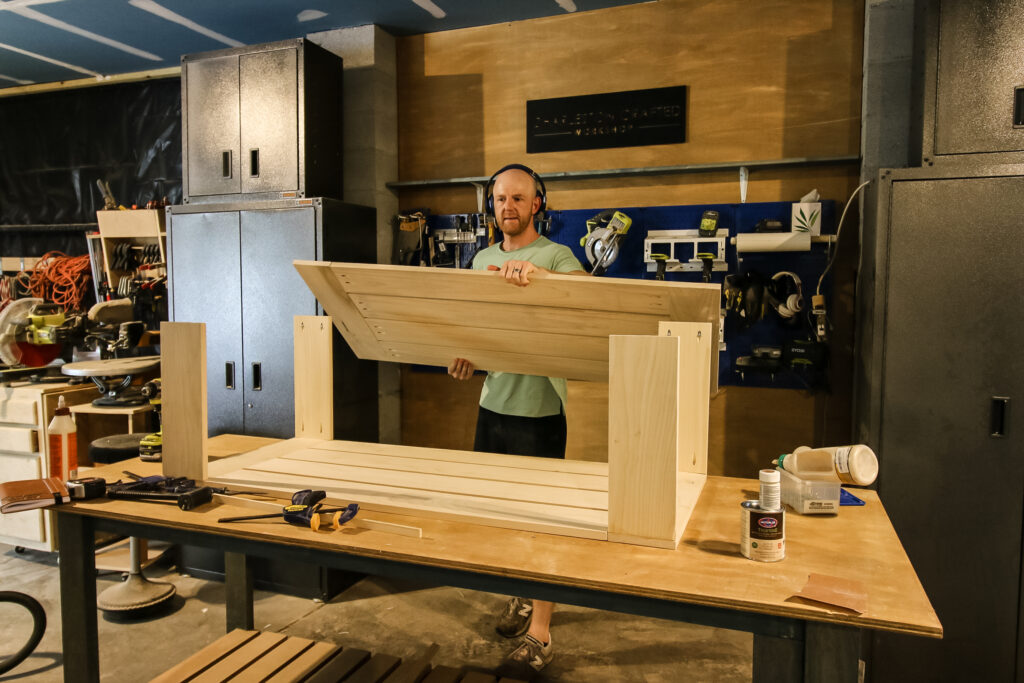
Step Two: Connect the top and bottom
These panels aren't going to be too useful if they aren't held together somehow.
Again, no fancy woodworking skills required here. The top and bottom of the table are connected at a butt joint with wood glue and pocket screws on the four legs.
The legs are just straight pieces of wood, long enough to make this a good height for setting your glass or reaching for a magazine.
Since the legs are very visible, we added pocket hole plugs into each hole to make them less noticeable.
Once all the glue was dry and everything was ready to go, we moved on to adding the toe kicks.
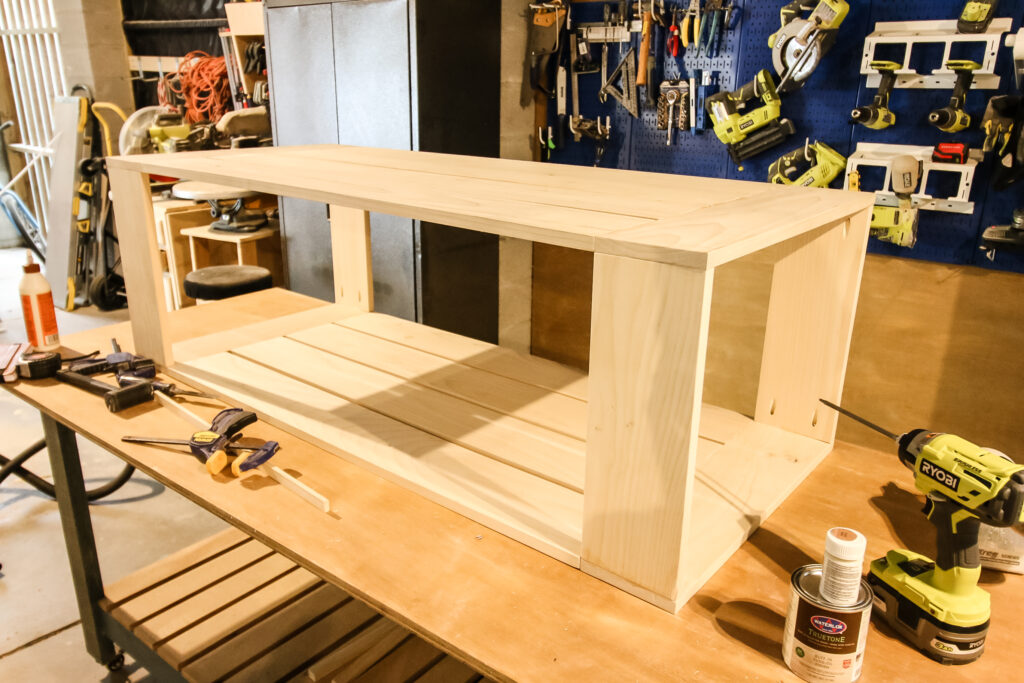
Step Three: Attach toe kicks
With no tall legs on the ground, you don't want to jam your toes on this beautiful table!
This coffee table is designed with hidden toe kicks to elevate the table ever so slightly off the ground.
Toe kicks give the visual interest that the table is floating, but also minimizes the risk of jamming your toe on the side.
The toe kicks are just a simple rectangular box of slats glued and nailed into the base of the coffee table at equal distances from the sides.
These keep the table up and keep your toenail polish intact.
Step Four: Add stain and finish
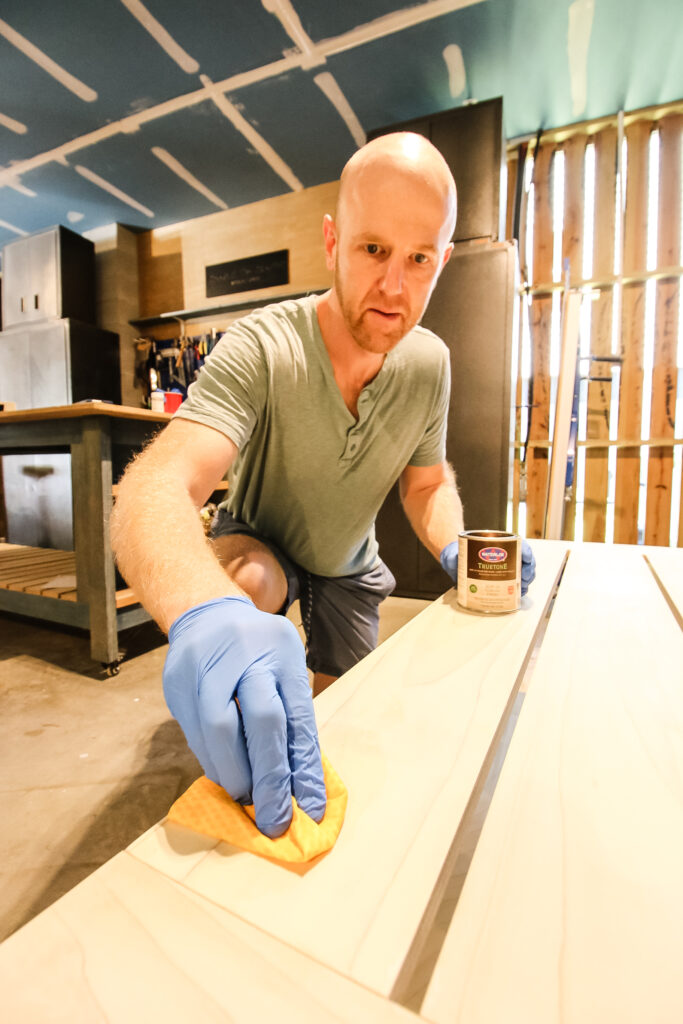
With the coffee table fully assembled, it was time to add our stain and finish!
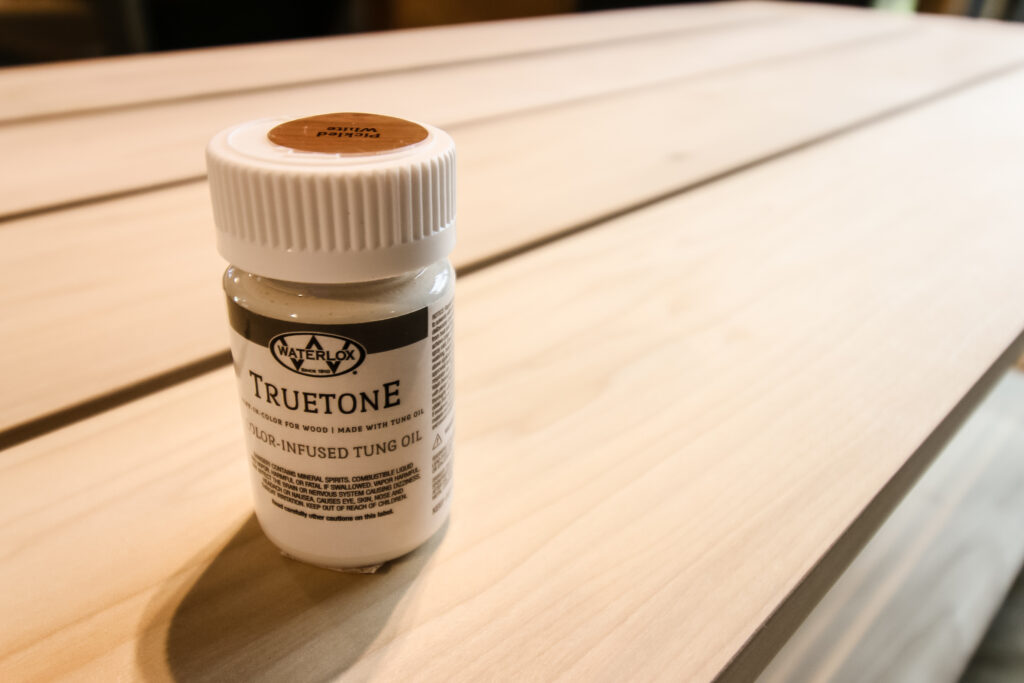
For this project, we used something a little different that we hadn't used before- Waterlox's TRUETONE color-infused tung oil and tung oil finish!
We previously used the Waterlox Marine Sealer and Finish when we built our outdoor potting bench with hidden storage. It worked great, so we were excited to use Waterlox products again for this indoor project.
Waterlox TRUETONE is a buff-in, color-infused tung oil that works much like a regular stain. It comes in 11 colors to fit your decor style.
We thought that TRUETONE was an awesome option for our coffee table because it offers water resistant protection for beverages, and is also low odor and VOC, which is good around our kids who are right at table height.
We chose the "Pickled White" color to play off of some of the other tones in our room and make the table look natural without being the focal point.
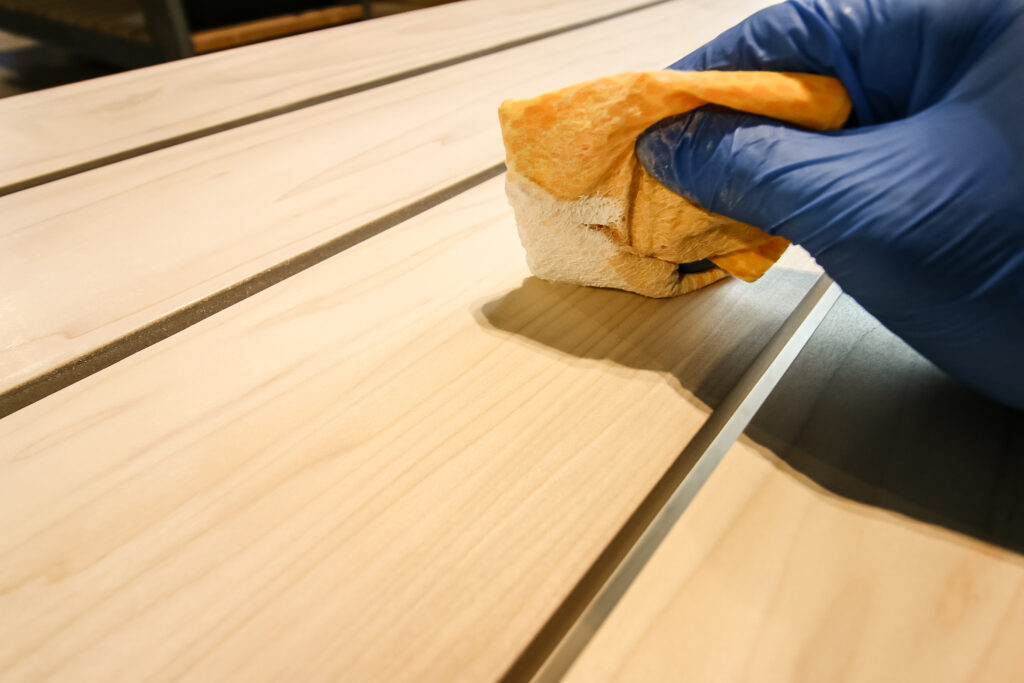
The TRUETONE oil is very easy to buff into a furniture piece with a lint-free cloth. We buffed it in just like a regular stain and it added a light white color throughout while also pulling the natural grain colors of the poplar we used.
This was a really nice option for us and added a great color tone.
After letting the color-infused tung oil completely dry, we added Waterlox's buff-in tung oil finish to seal the table.
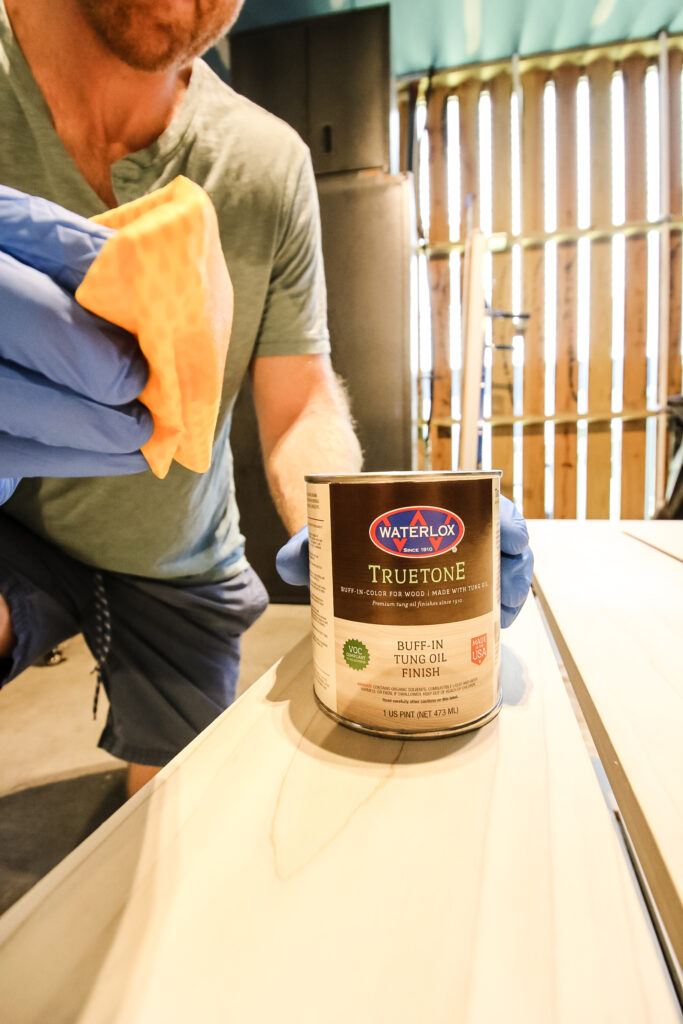
The tung oil finish adds a nice, rich, smooth look to the table and helps protect it from glasses or spills.
We love the TrueTone Tung Oil Finish because it is:
- Low VOC (VOC compliant in all 50 states!)
- Low odor
- 90% of the resin portion of the formula is from renewable, natural resources
- Non-toxic when dry and fully cured
- Easy to clean, maintain and spot repair
- Easily applied with a lint free cloth
- Handcrafted in small batches in Cleveland, Ohio by a 4th generation, family-owned company
Step Five: Enjoy!
Isn't this table beautiful! We love the clean lines and simple design that adds and open and airy storage space.
This table has so much visual interest and we love how simple it was to build.
We've been doing some more complex projects lately, so this was a nice relief to build a simple but beautiful piece of furniture that will live in the middle of our living room for years.
Modern rectangular coffee table woodworking plans!
If you haven't already, make sure you download our easy DIY coffee table plans so you can build one of these beauties yourself!
The plans include the material list to buy, full cut list with dimensions, and step-by-step instructions, detailing everything we laid out above.
Grab these plans while you can and build a wood coffee table you can be proud of in your home!
Basic woodworking information for every project
Here are some of our most popular woodworking articles!
Shopping for wood:
Woodworking project ideas
- 100+ of the best woodworking project ideas!
- 62 easy beginning woodworking projects
- Woodworking project ideas to make and sell
See all our printable PDF woodworking plans!
Our favorite tools + supplies
- See all our favorite tool reviews
- How to use a Kreg jig
- The ultimate wood stain guide
- The best wood fillers for your project
Remember to also always use safety equipment while woodworking and using tools. Make sure you have proper eye protection, ear protection and a good mask to keep yourself safe.

Looking for something?
We've been doing this since 2012 so we have a LOT of blog posts!
Search stuff like: Ceiling Projects | DIY Plant Stands | Thrift Flips

Hey there, I'm Sean, the woodworking enthusiast and builder behind CharlestonCrafted.com! Since 2012, I've been sharing the magic of turning raw materials into beautiful creations. I love teaching others the art and satisfaction of woodworking and DIY. I try to inspire fellow crafters to make something extraordinary out of nothing at all.


Ivory says
This is amazingly beautiful and I love the fact that the tuning oil protects it from spills etc. I love the tie kick. I just love it all. Thanks for the plan, and for sharing