We built this DIY toddler house bed for our 3 year old daughter! Check out how we built this kids house bed and get the woodworking plans!
It's amazing how fast our kids grow up. I don't just mean OUR kids, but I mean collectively all kids.
When you find out you're having a baby, you get them a bassinet for your room, but you also get a crib for their bedroom when their ready, but then all of the sudden they are little kids and the crib doesn't work anymore.
We built this DIY traditional style crib for our daughter after she was born and it is probably my favorite piece of furniture we've ever built (and is one of our most popular projects on the site too!)
Our son had this DIY mid-century modern crib when he was born!
But she has grown up and is fully toilet trained now, so in the morning it's important for her to be able to get up and go to the bathroom on her own. Plus, she's not a baby, so no need to keep her locked up in the crib.
We wanted to give her a fun and exciting new big girl bed, so we designed something a little different!
One of the most popular searches you'll see on the internet is for a toddler house bed, but those are typically just an open concept frame that looks like a bed.
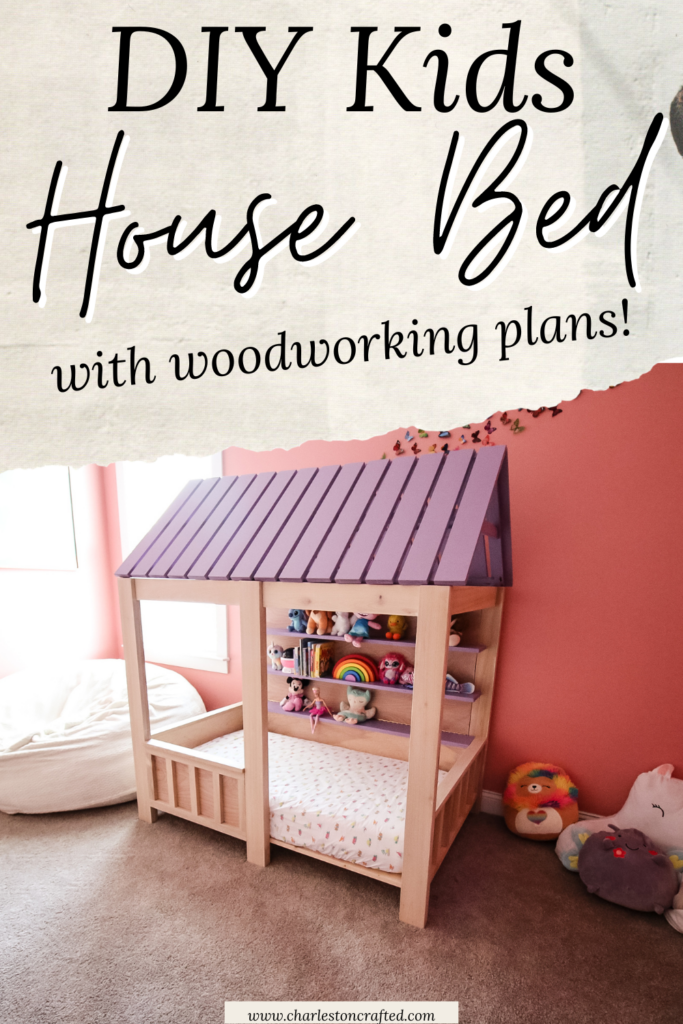
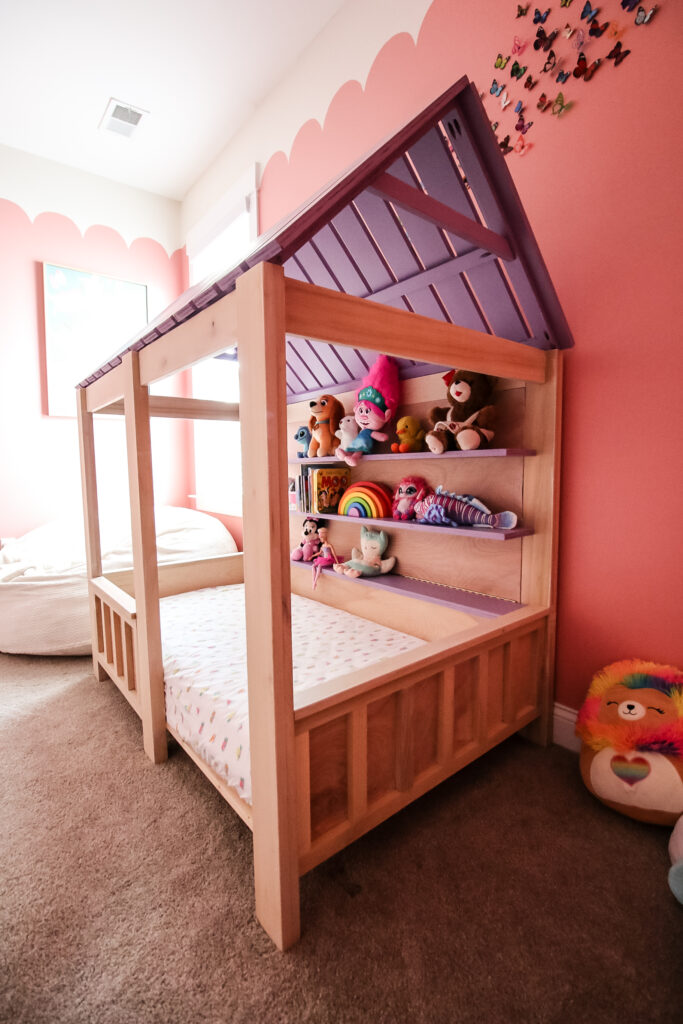
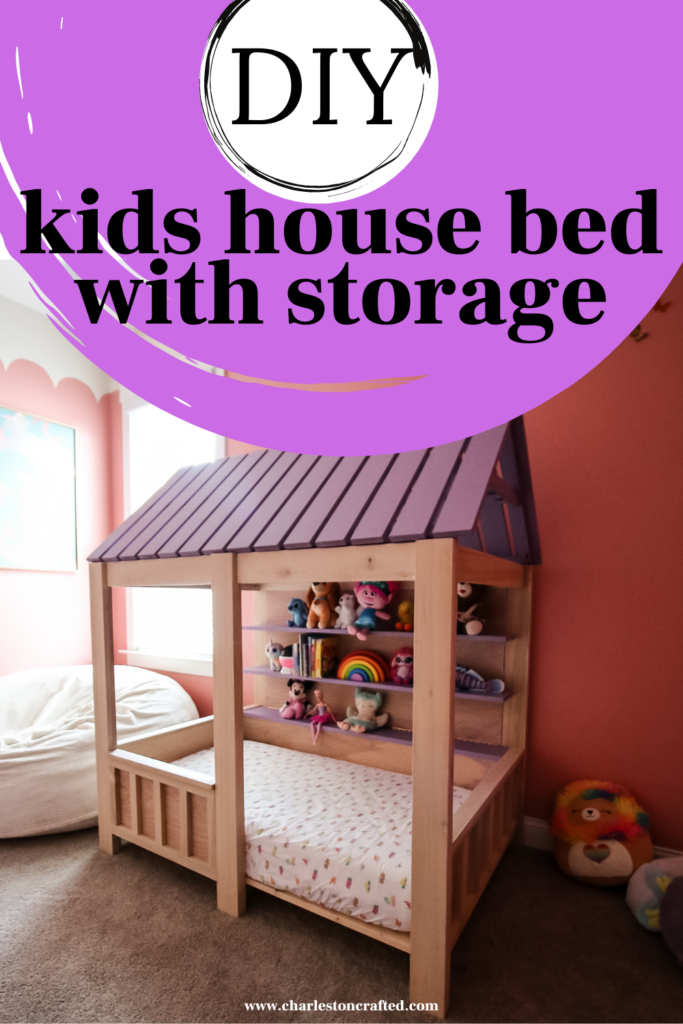
Instead, we wanted something that looks more like a real house, with siding, roof and doors and windows. Now she can even play in here like it's a real house.
Let's dive into the project and all the special features!
DIY house bed for kids
Our DIY house bed for kids is designed to look like a real playhouse, not just the frame of a house.
We did this to give it a little more pizazz, but also to add some toy storage features and make it a play space as well as a sleeping space.
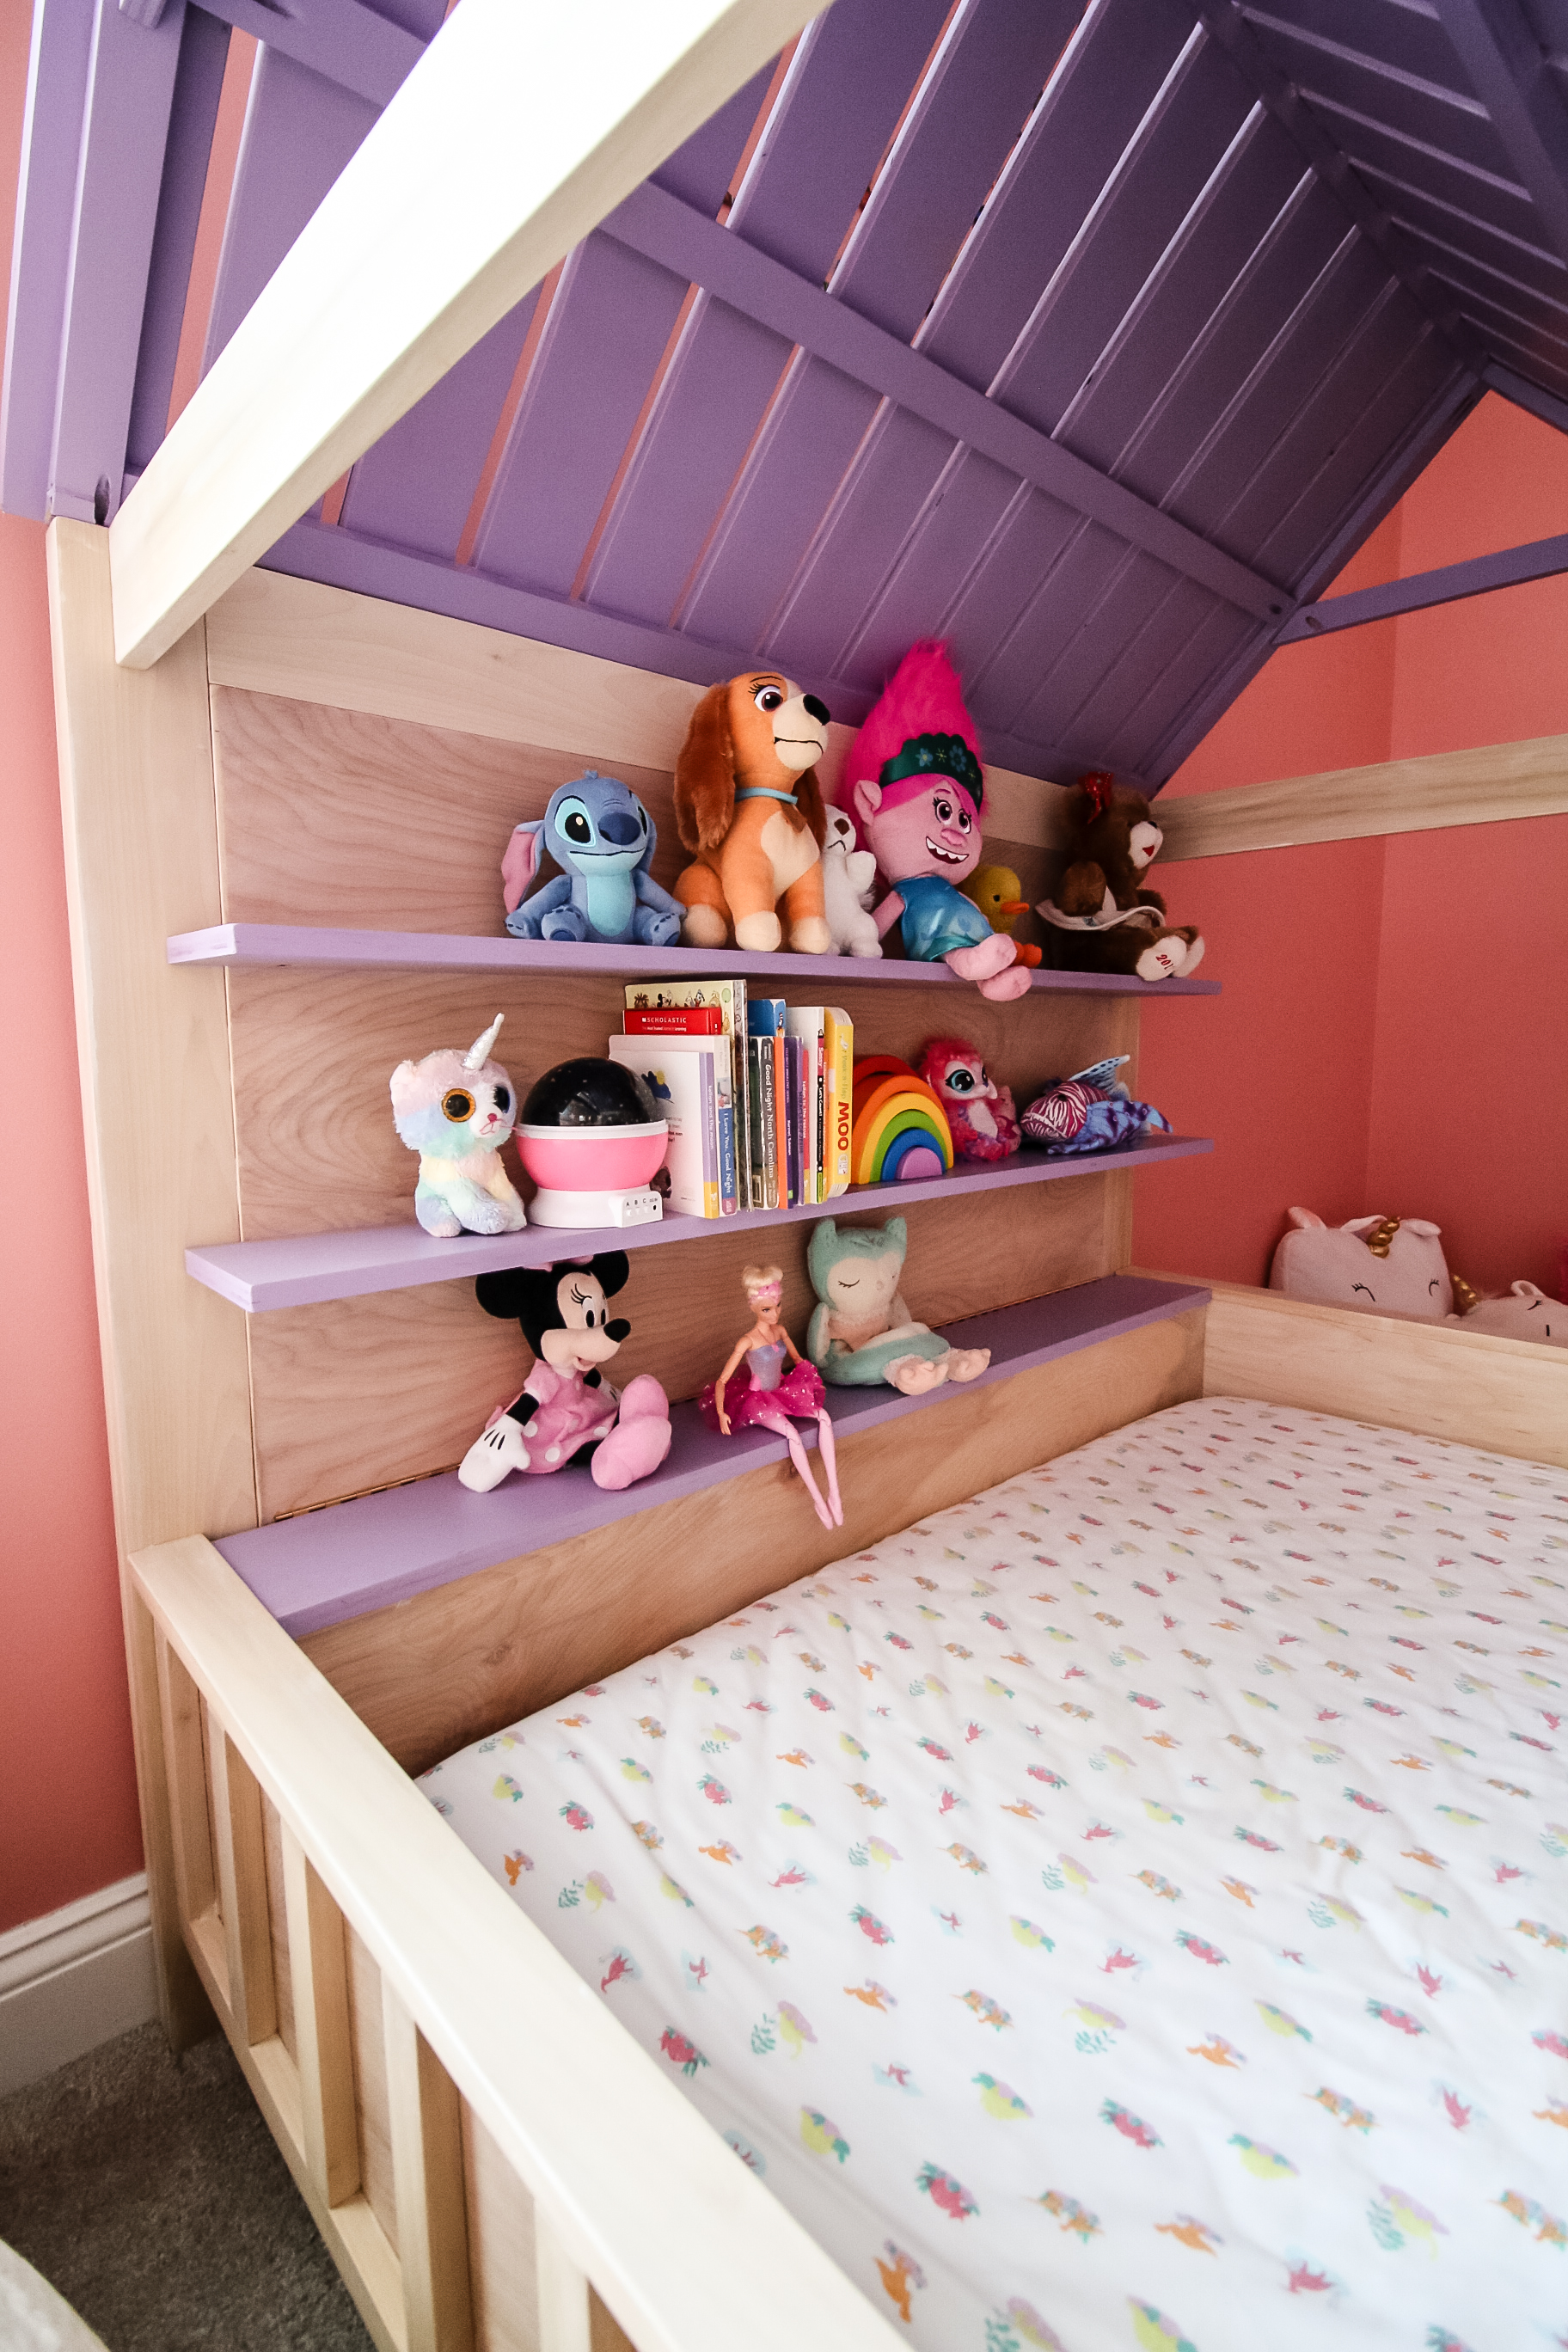
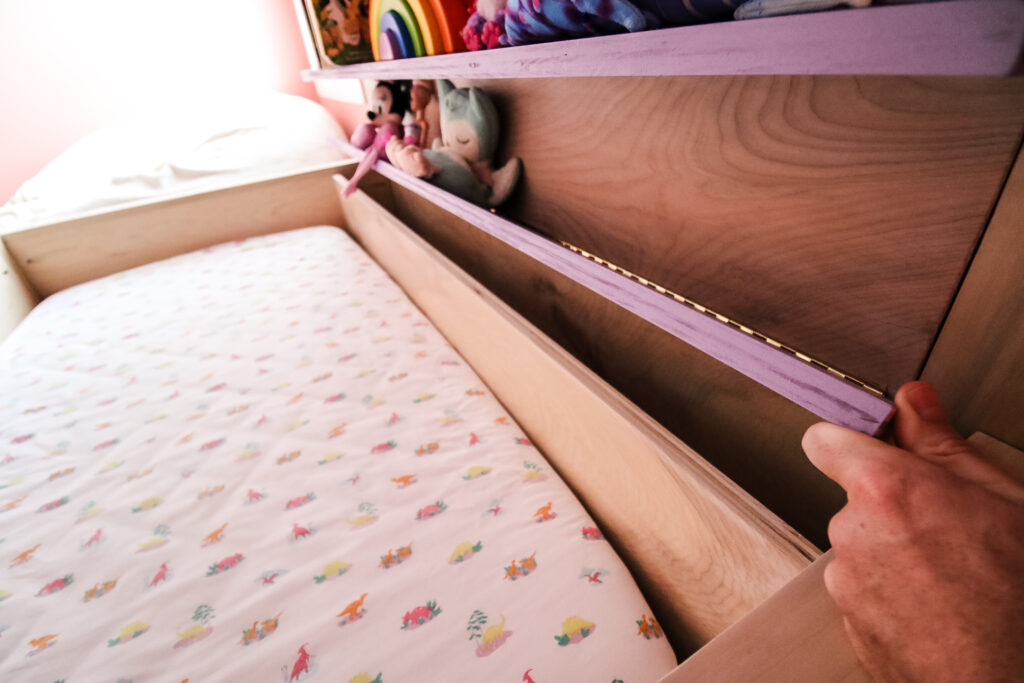
Wait, did you read that right? Yes, this DIY toddler house bed contains secret storage and shelves for displaying stuffed animals or books. We thought of it all.

How to build a DIY toddler house bed
This post will show you how to build a DIY toddler house bed with storage, but will be more of a general overview.
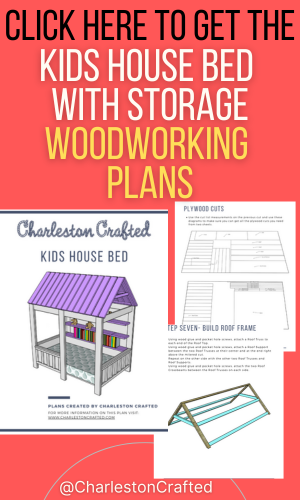
We have also created downloadable PDF woodworking plans so that you can copy it exactly and take the guess work out of it!
Our DIY toddler house bed plans include a material list, cut list and step-by-step instructions with computer model imagery. Do yourself a favorite and download them to make this project easy as you build your child the bed of their dreams!
Keep in mind that this plan utilizes a crib sized mattress, which is what we still feel is appropriate for our 3 year old and will be for a couple more years (when we'll inevitably design another new bed haha).
Materials needed to build a DIY toddler house bed
Here are the materials you'll need to build this DIY toddler house bed for kids.
- ¾" plywood sheets
- 1x4 poplar
- 1 ¼" pocket hole screws
- wood glue
- stain/paint
- table saw/circular saw
- miter saw
- drill
- brad nailer
- orbital sander
Basic woodworking information for every project
Here are some of our most popular woodworking articles!
Shopping for wood:
Woodworking project ideas
- 100+ of the best woodworking project ideas!
- 62 easy beginning woodworking projects
- Woodworking project ideas to make and sell
See all our printable PDF woodworking plans!
Our favorite tools + supplies
- See all our favorite tool reviews
- How to use a Kreg jig
- The ultimate wood stain guide
- The best wood fillers for your project
Remember to also always use safety equipment while woodworking and using tools. Make sure you have proper eye protection, ear protection and a good mask to keep yourself safe.
Step one- Make cuts and drill holes
The easiest thing to do for this project is to batch cut all the wood and drill all the holes and sand everything down.
Yeah, it's a lot of prep work before you get to do the actual fun work of building the bed itself, but it's easier to have everything ready.
Remember, we have the full cut list in our downloadable PDF toddler bed plans, so make sure you grab those to get the exact measurements.
We started by cutting everything down. First up was plywood, which we ripped down mostly with a circular saw and our Kreg Rip-Cut, which makes cutting giant sheets of plywood much easier.
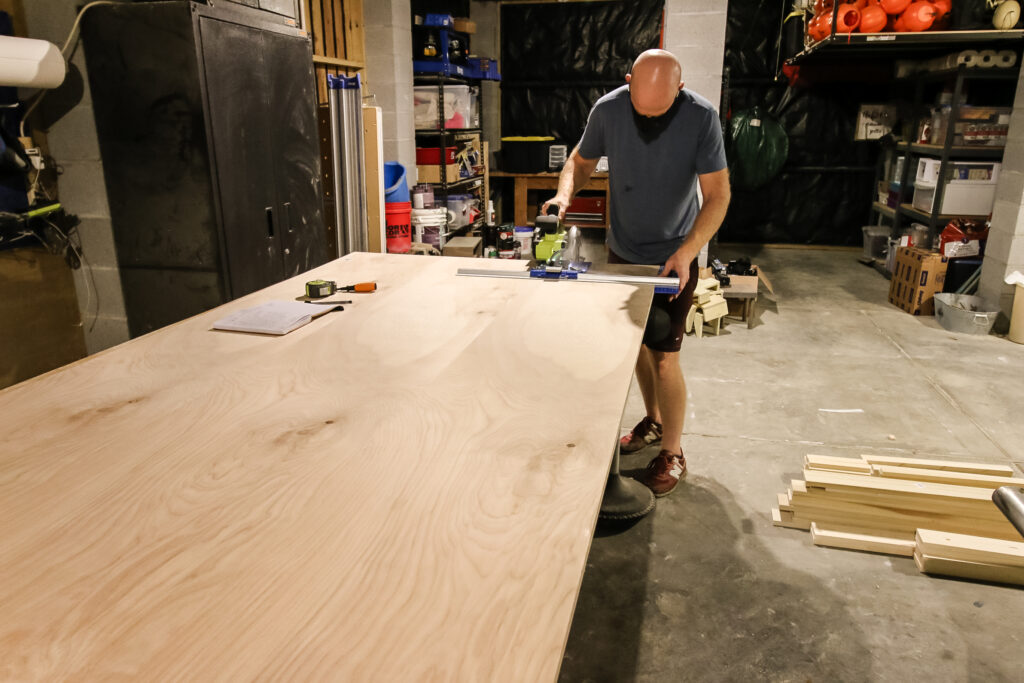
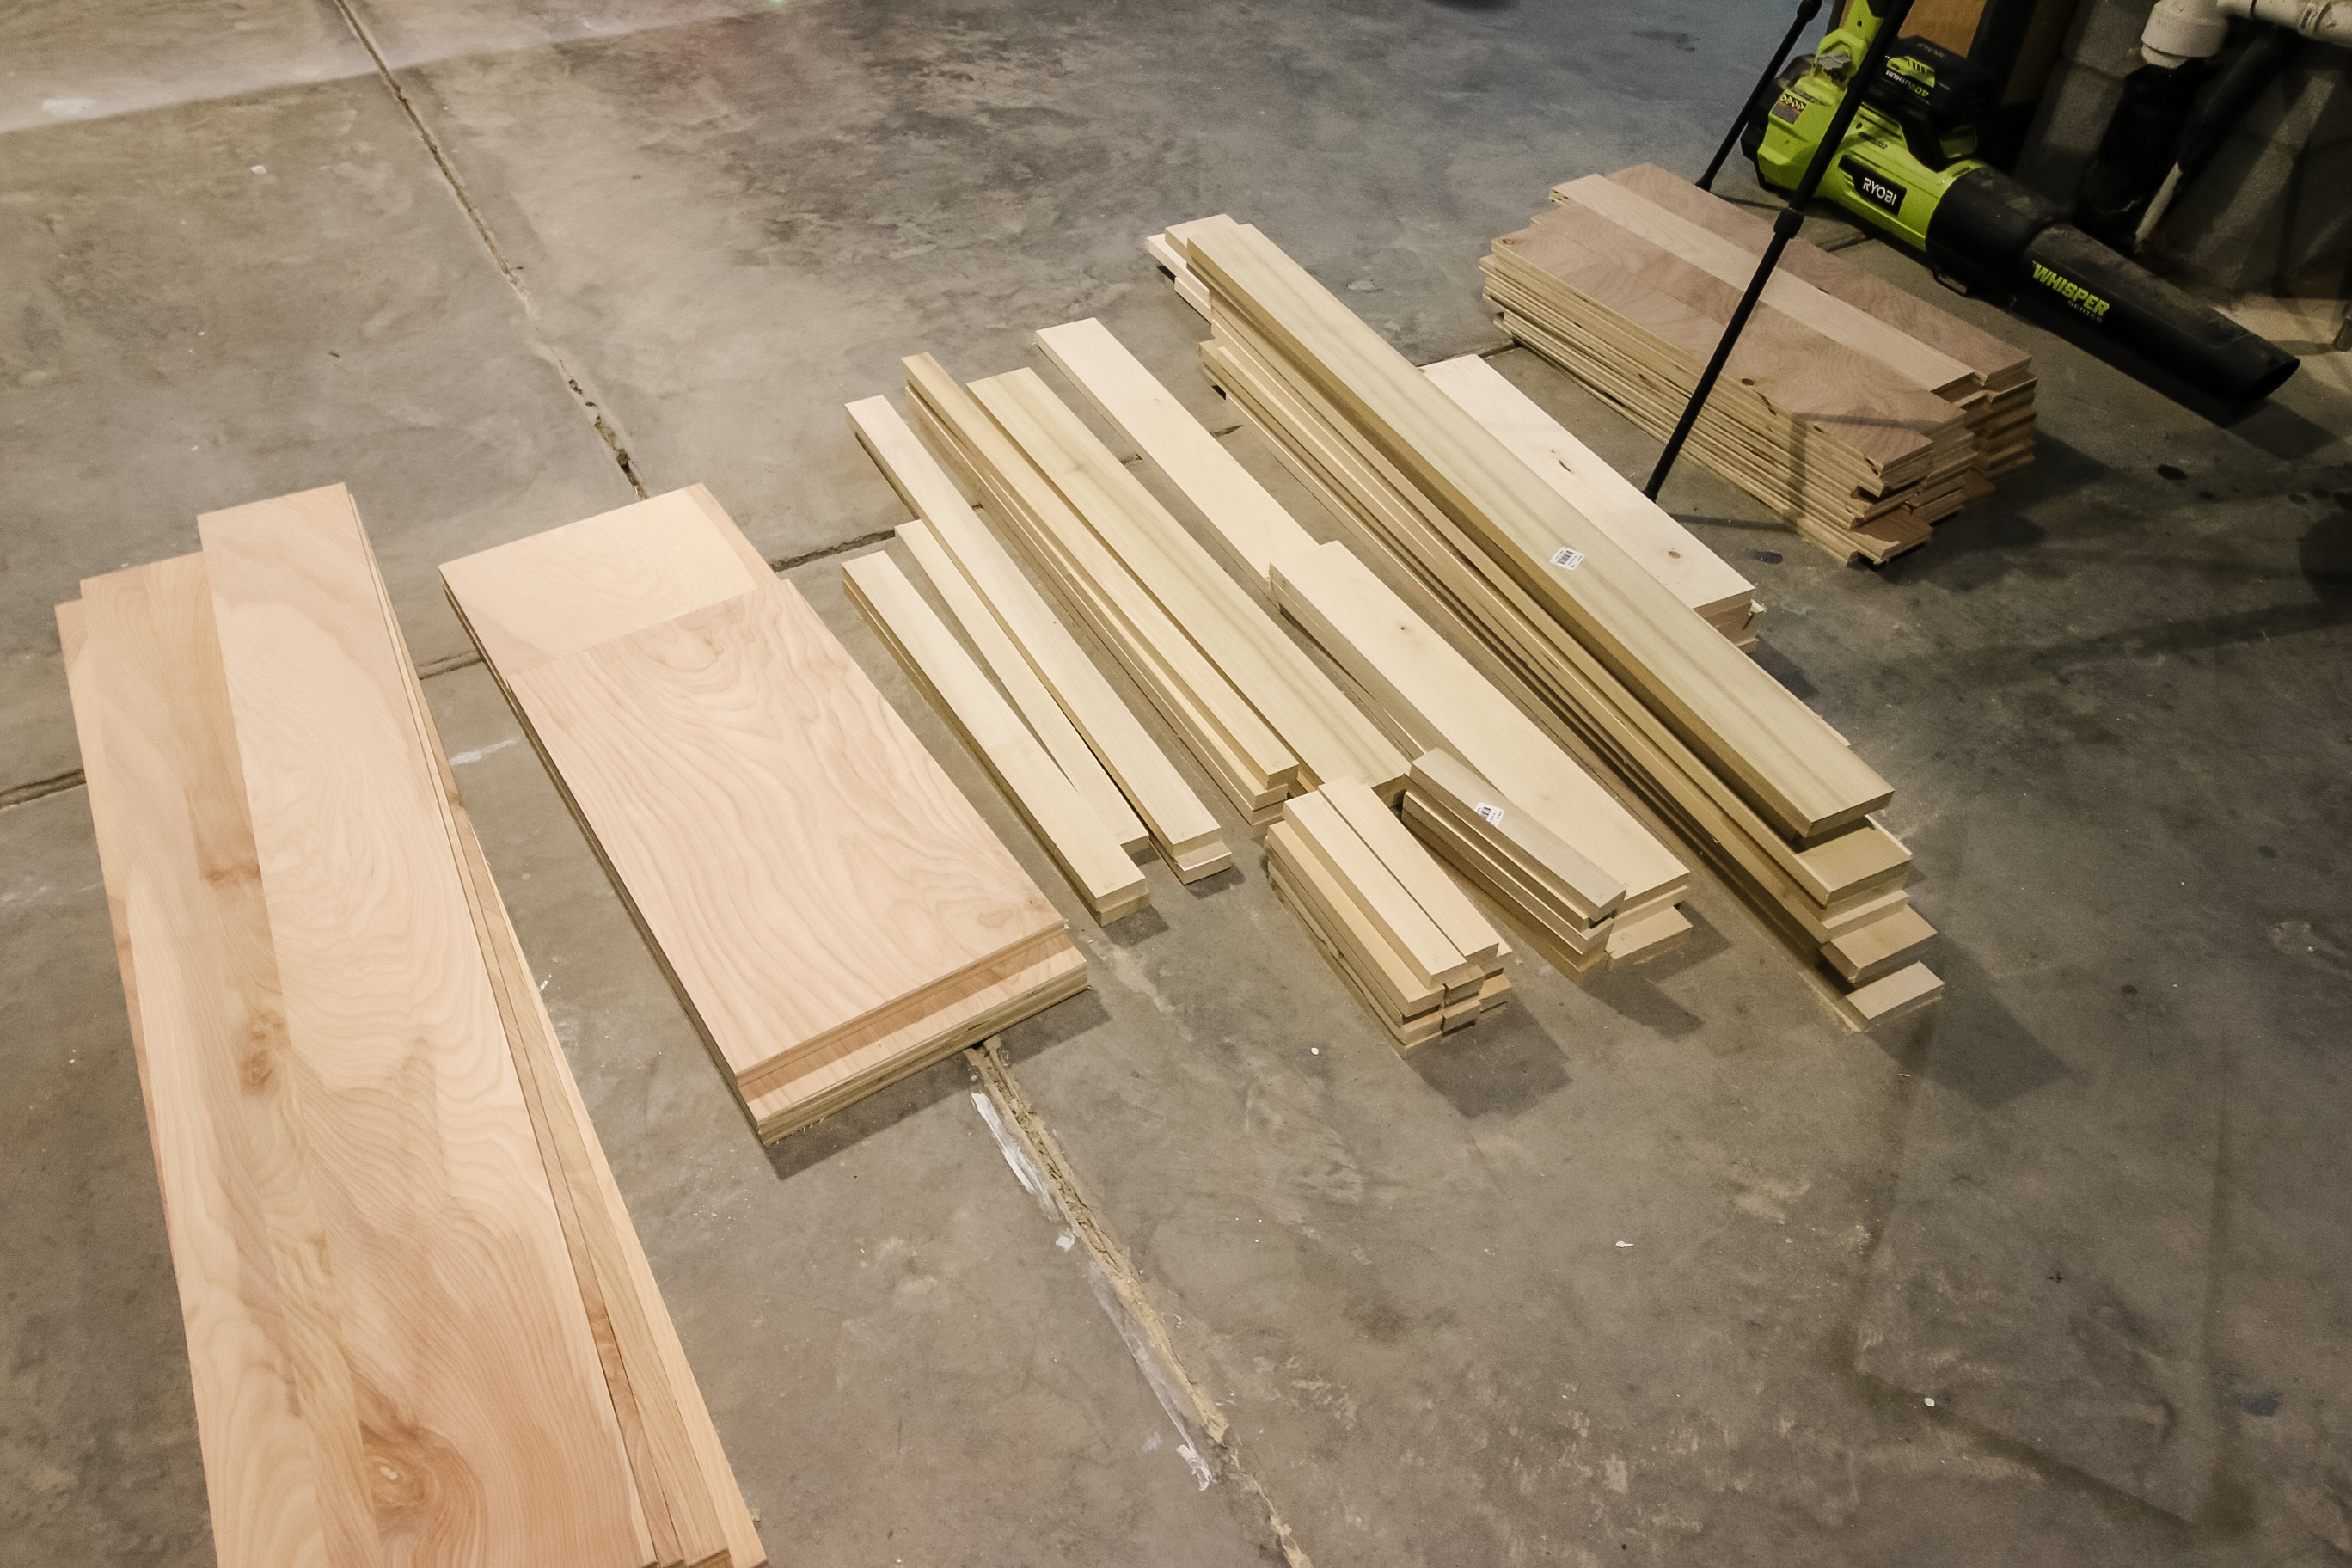
Then we cut down the different boards for slats and legs using our table saw and miter saw and left ourselves with a giant stack of boards.
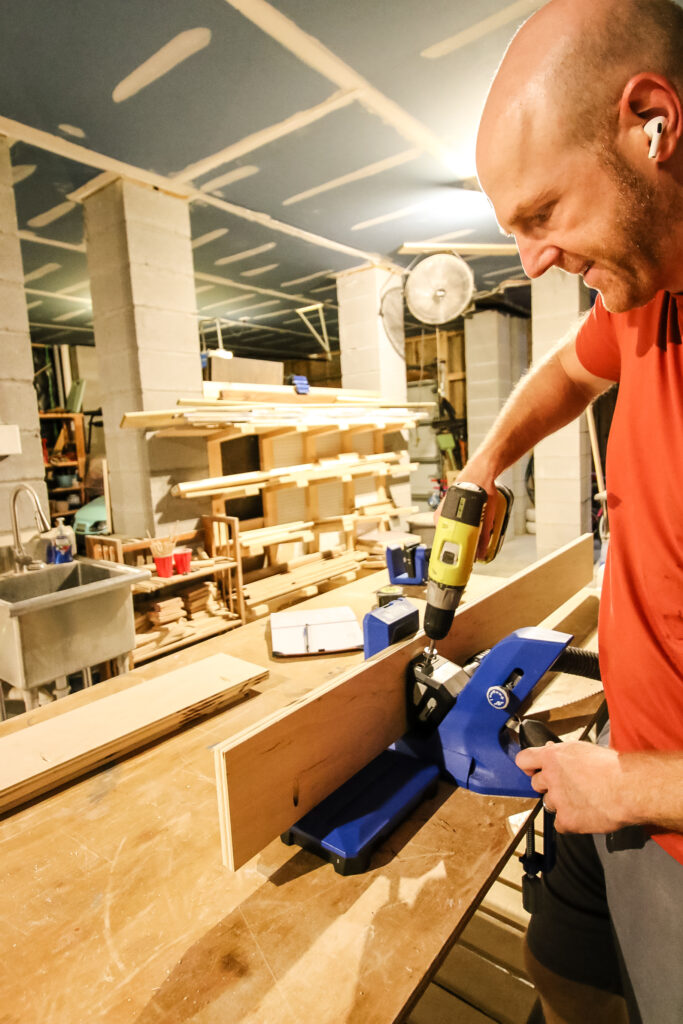
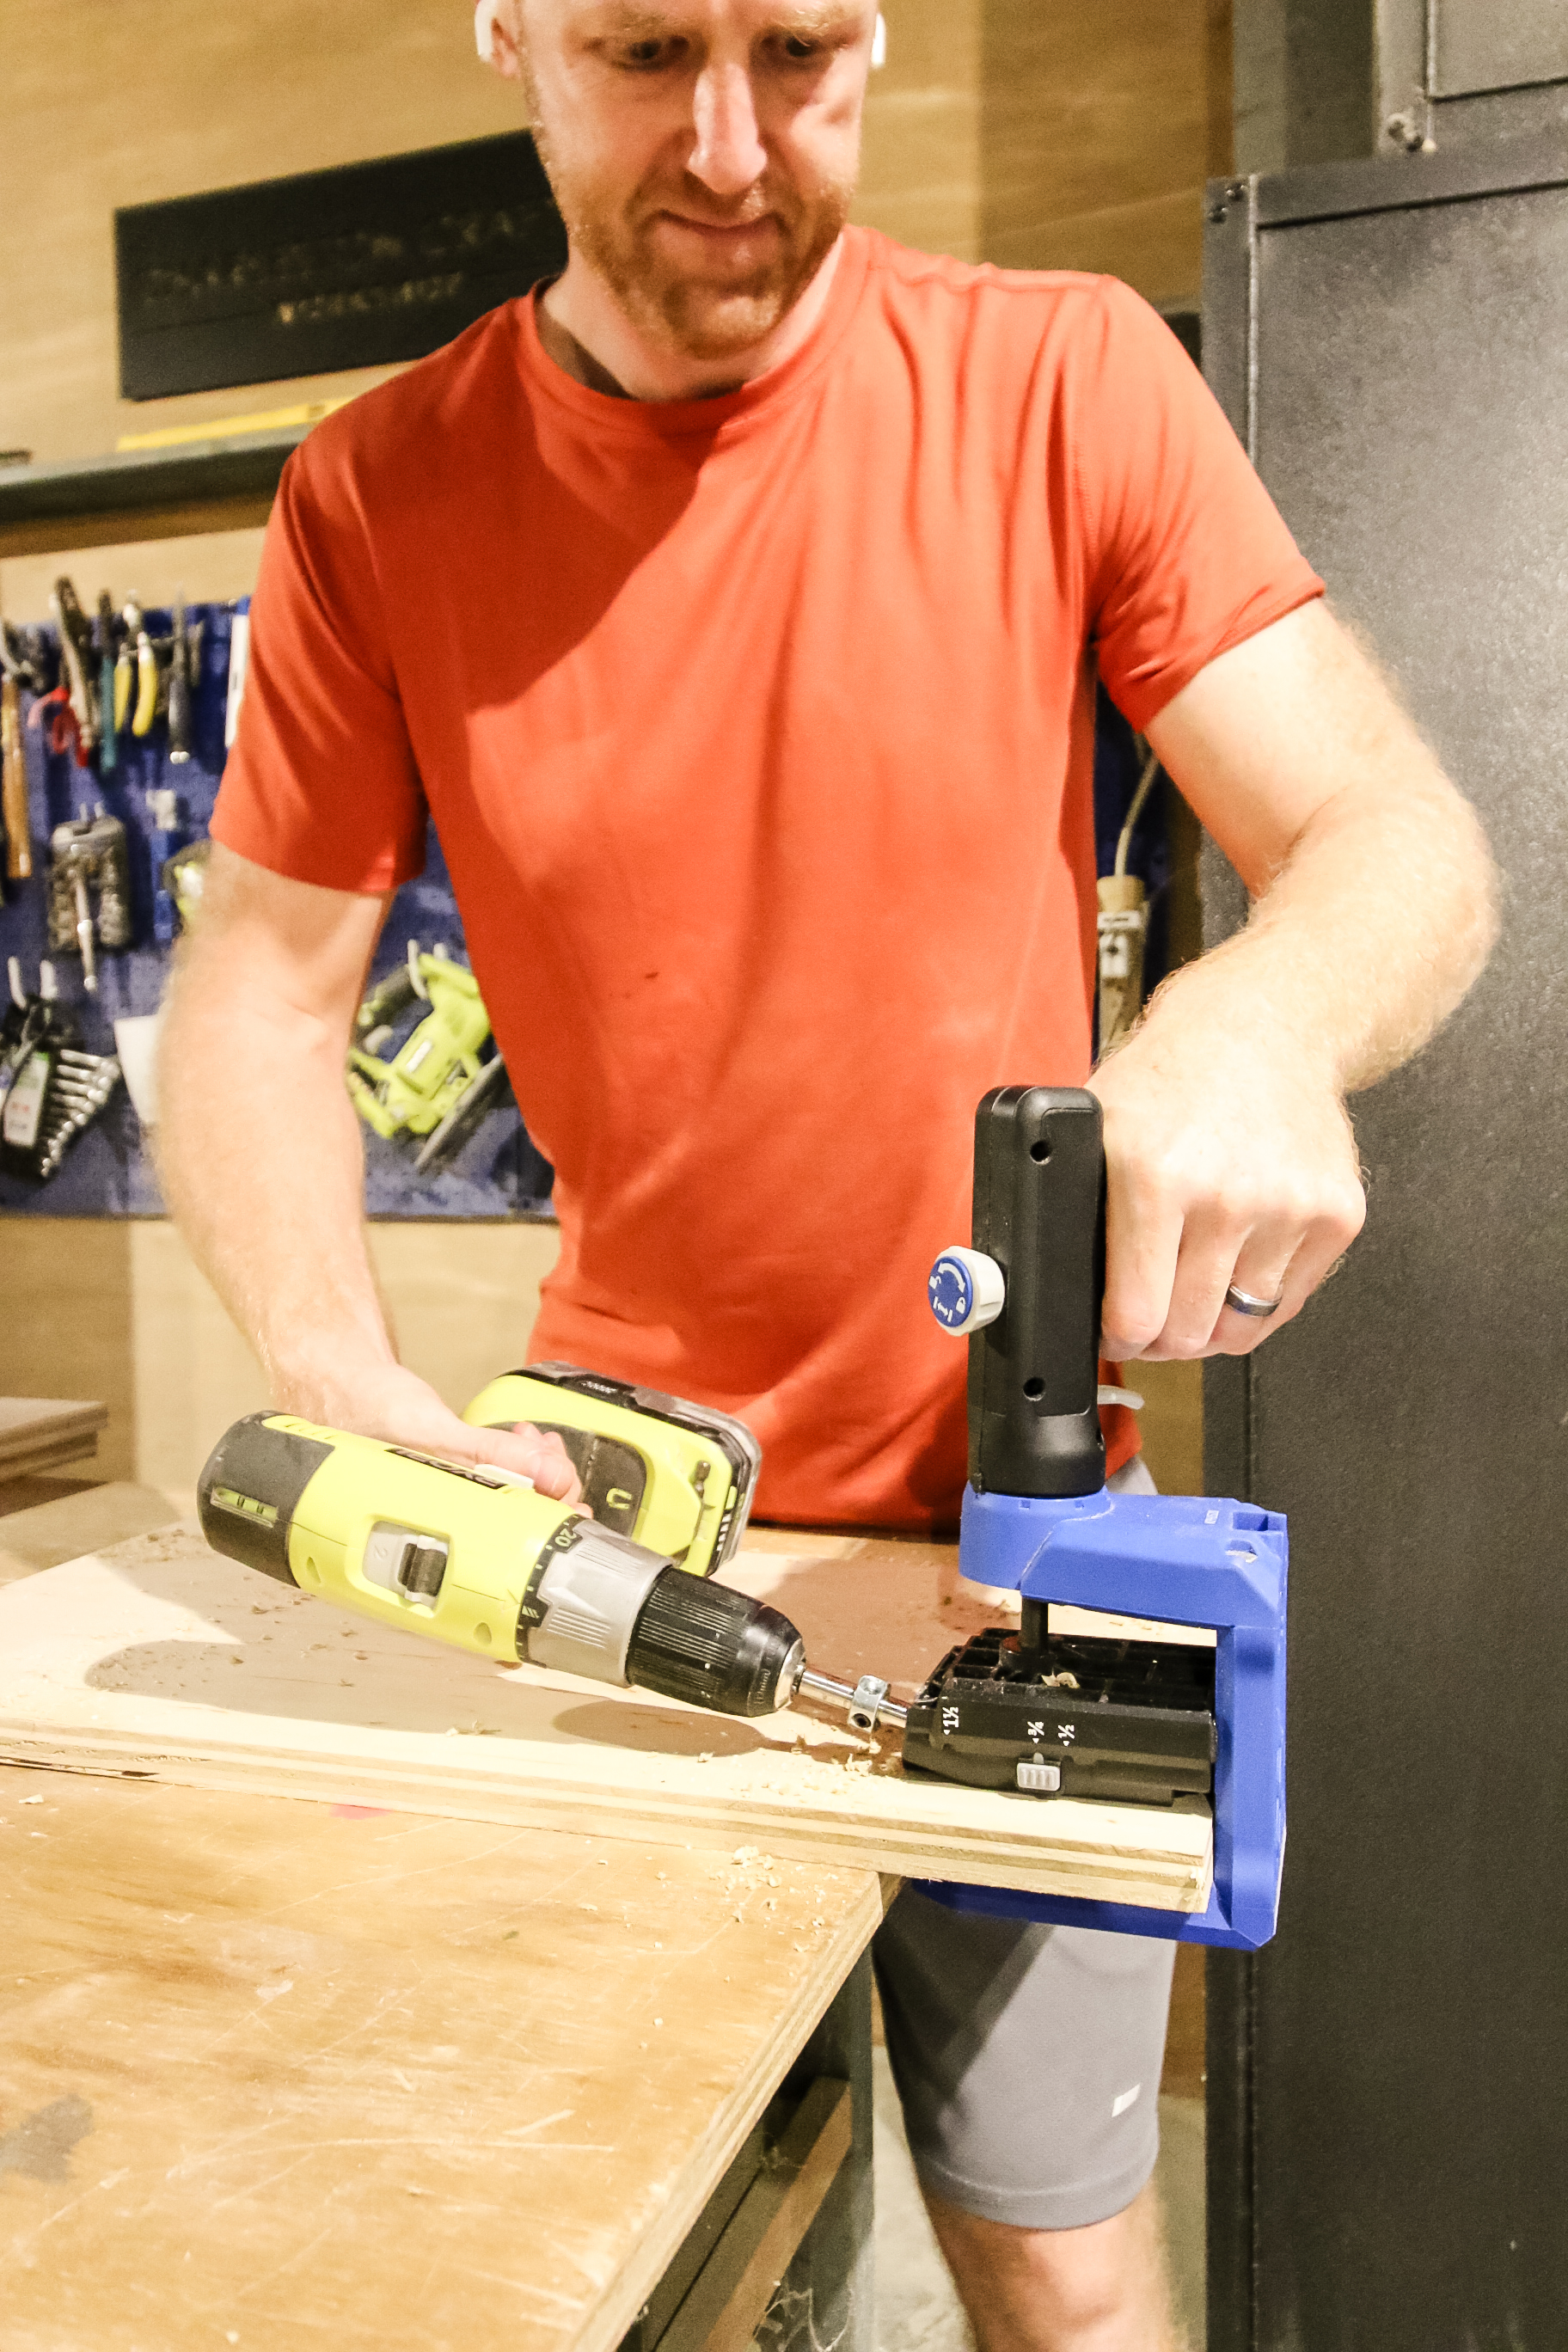
After that, we grabbed our Kreg 720 to drill pocket holes on all the 1x4s that needed holes and our Kreg 520 to attach to the plywood sheets to drill pocket holes.
After all the holes were drilled, we sanded everything smooth and got ready to build.
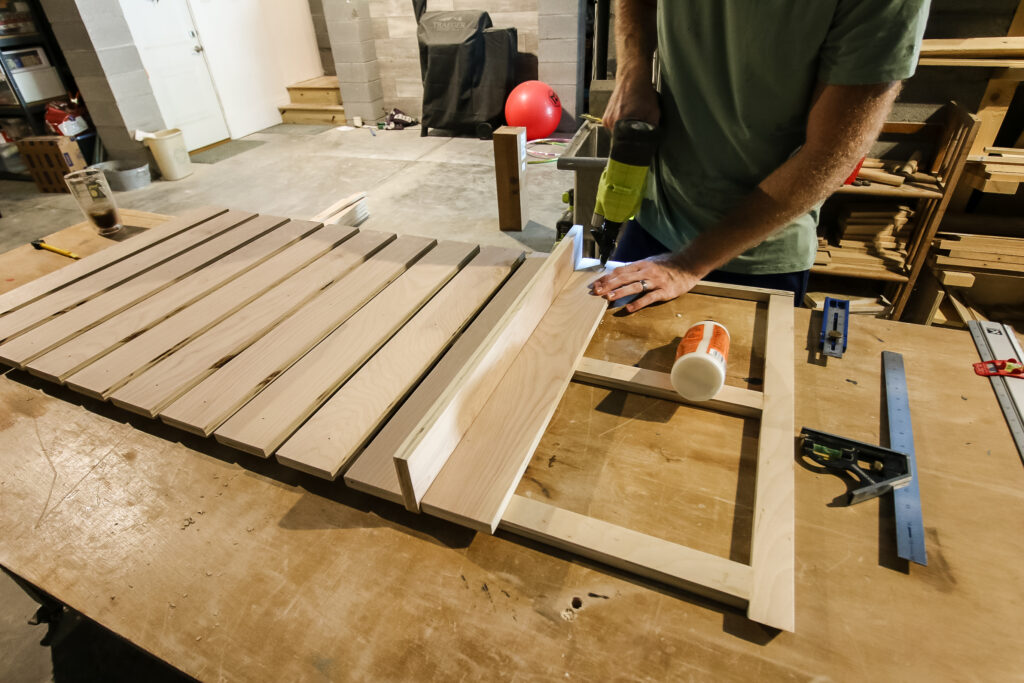
Step two- Build front and sides
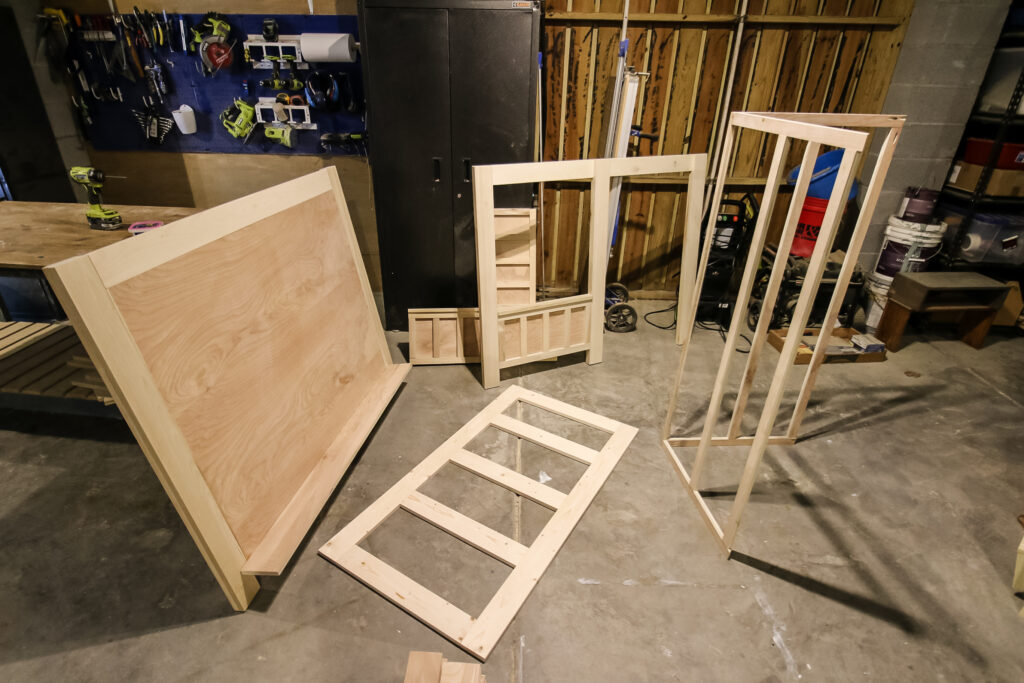
This project is similar to the old crib we had in that it is built in a modular system, meaning we built as many large pieces together in order to attach them later in the bedroom.
The front and sides of the house bed are made with some traditional style molding that is from cutting down strips of poplar and attaching them to a plywood backer.
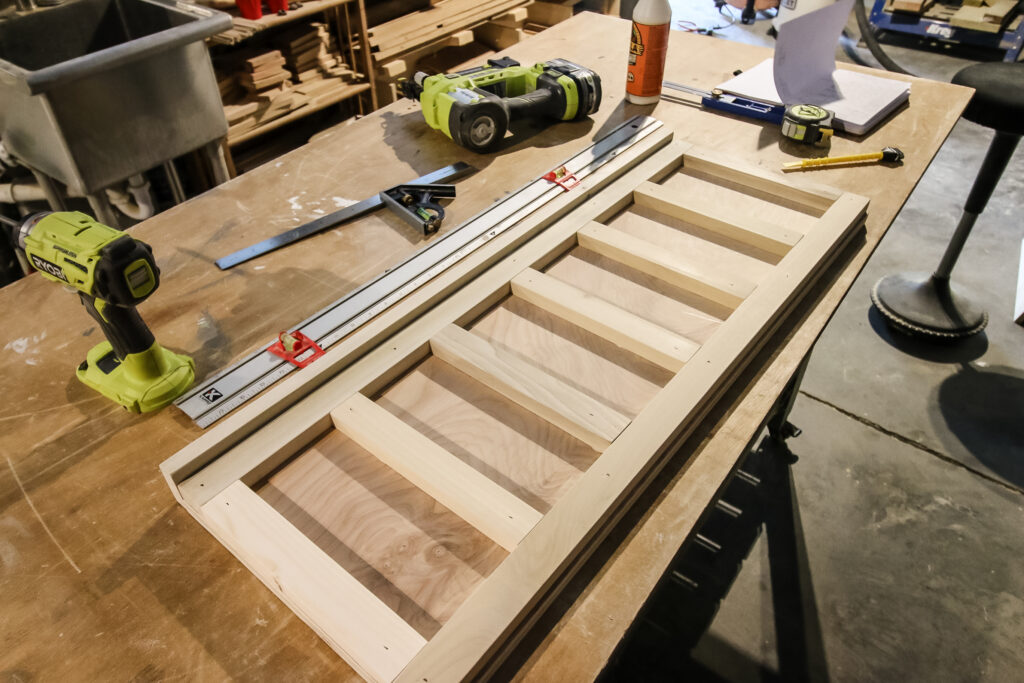
The sides are made identical to each other, and are later used to connect the back and front pieces together.
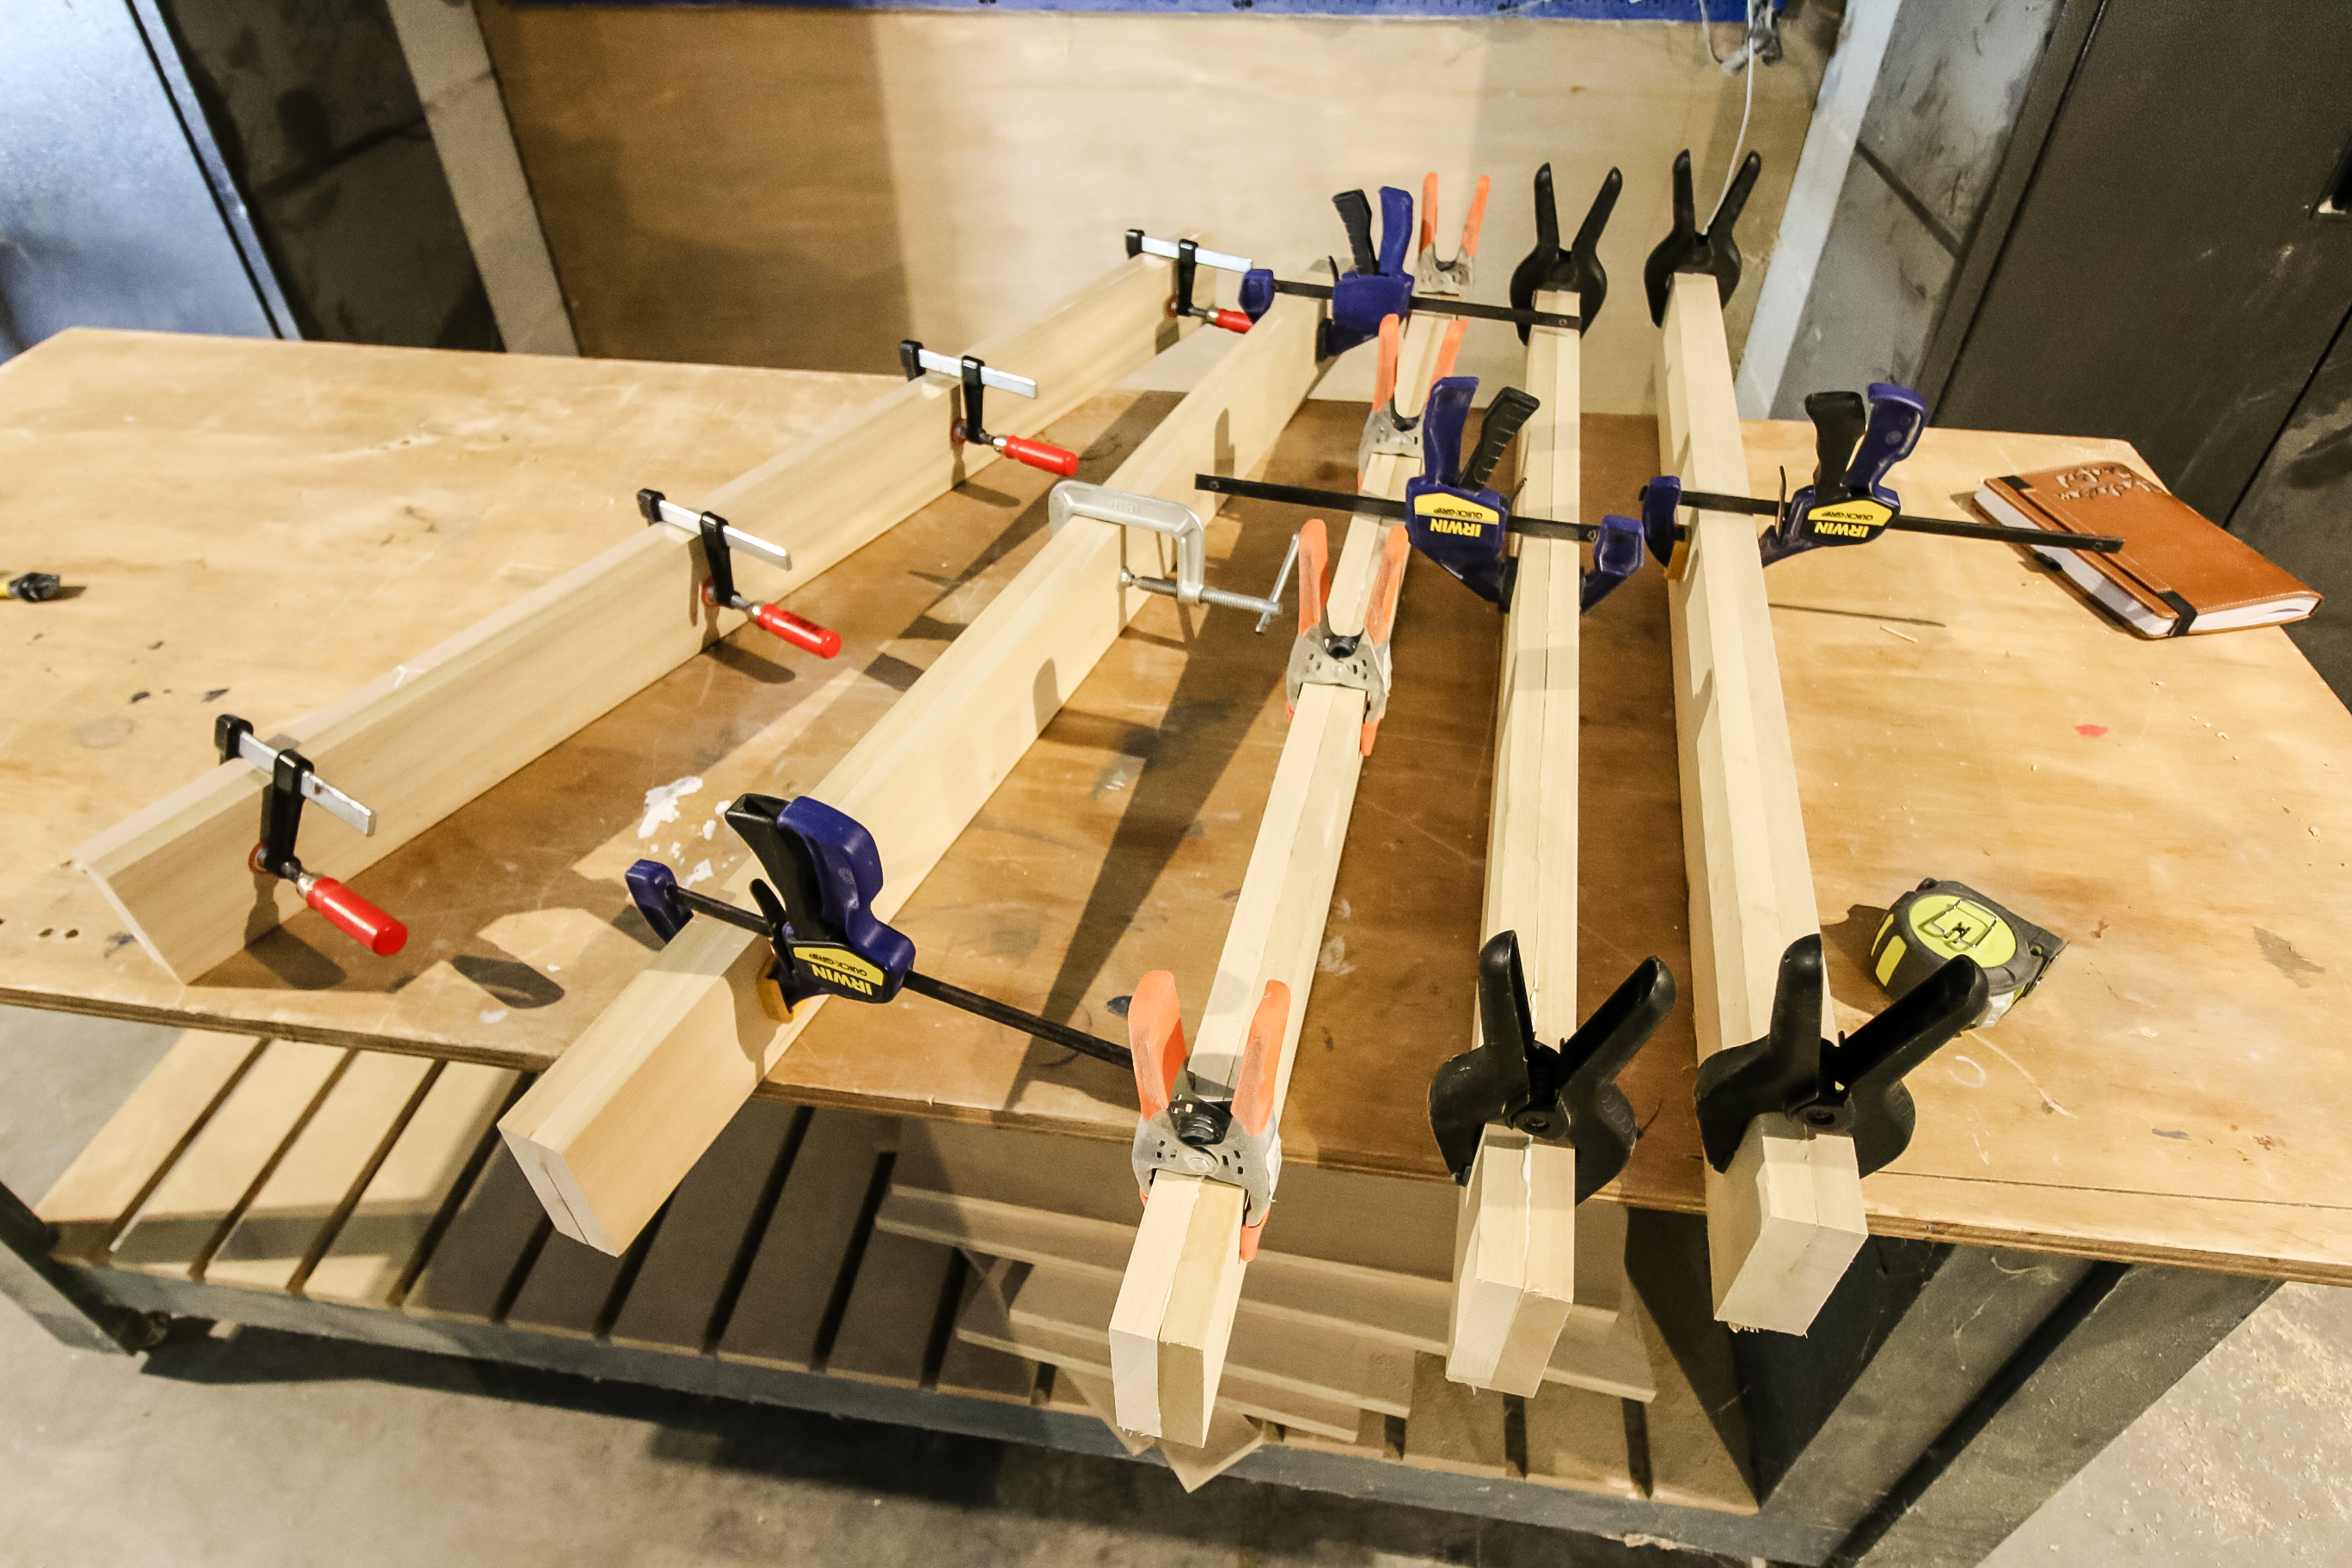
The front is made with a similar panel to the sides, but then have two legs attached to either side. The legs are made by gluing together two poplar boards to make a chunkier board to provide stability to the bed, which is what we did for the old crib as well.
We used the same leg method on our DIY four poster canopy bed in our room!
All these legs were glued up and let dry before attaching them to the front panel. Then we attached a third leg to the others using a support board across the top.
The legs also make this not a floor bed, which is pretty common in montessori house beds. We wanted ours up off the ground a little bit more, but it's still not a loft bed, which would be a little too dangerous for a 3 year old.
Step three- Build back
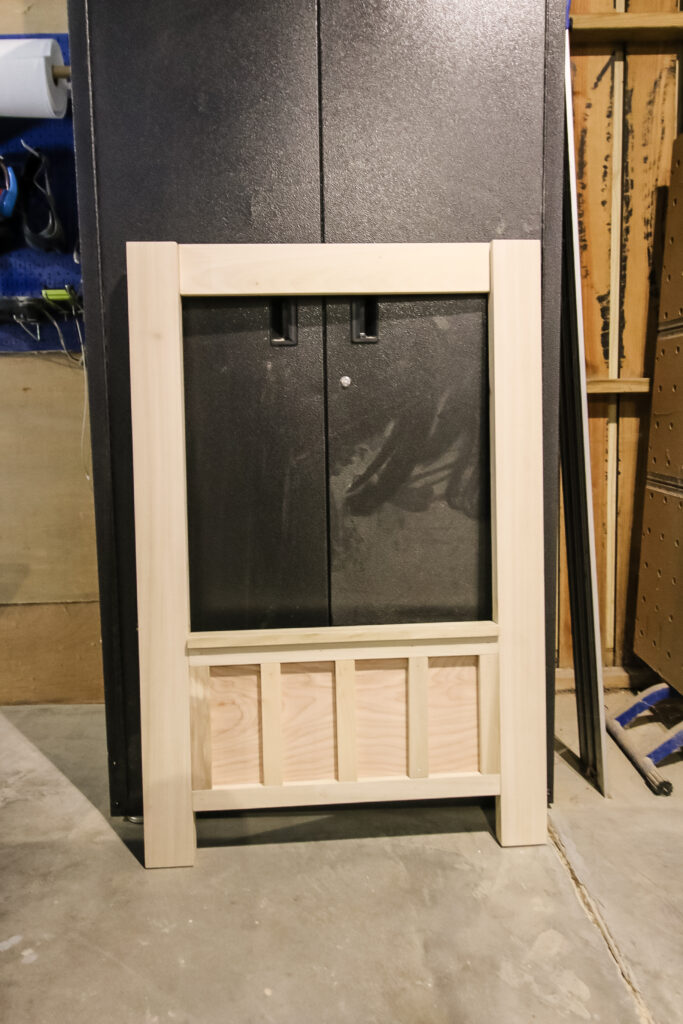
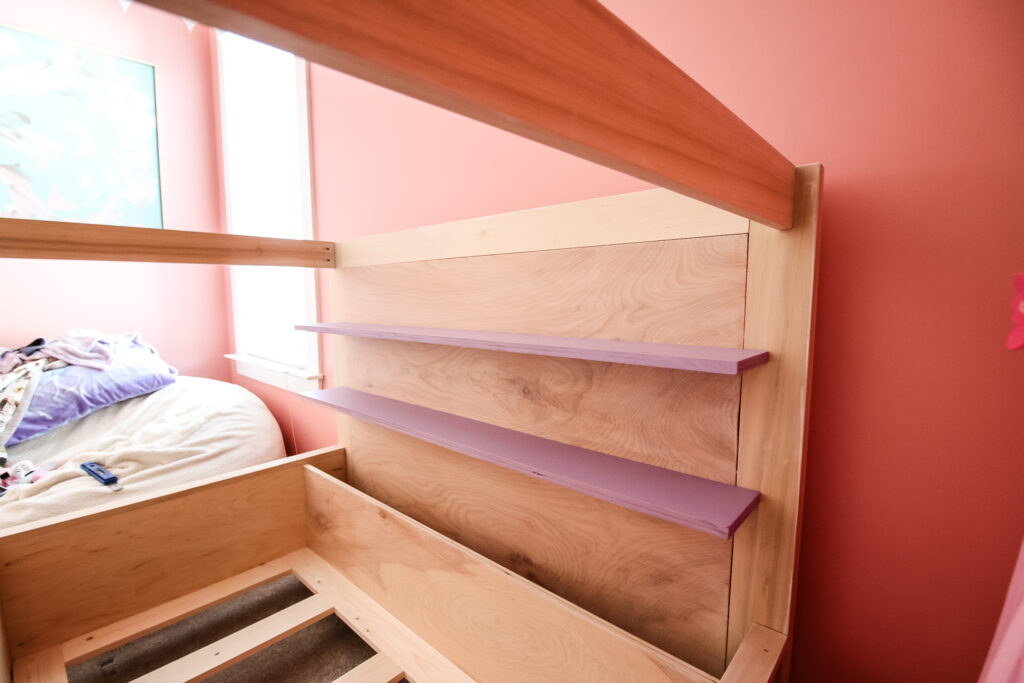
Next up was to use two more legs to help build the back panel. The back panel is mostly a giant sheet of plywood between the legs, but it also holds the base of the secret compartment.
That's right, the secret compartment. This bed is about 6" wider than what you need for a crib mattress.
That's because there is a secret storage area below the shelves that she can store little goodies, toys or stuffed animals.
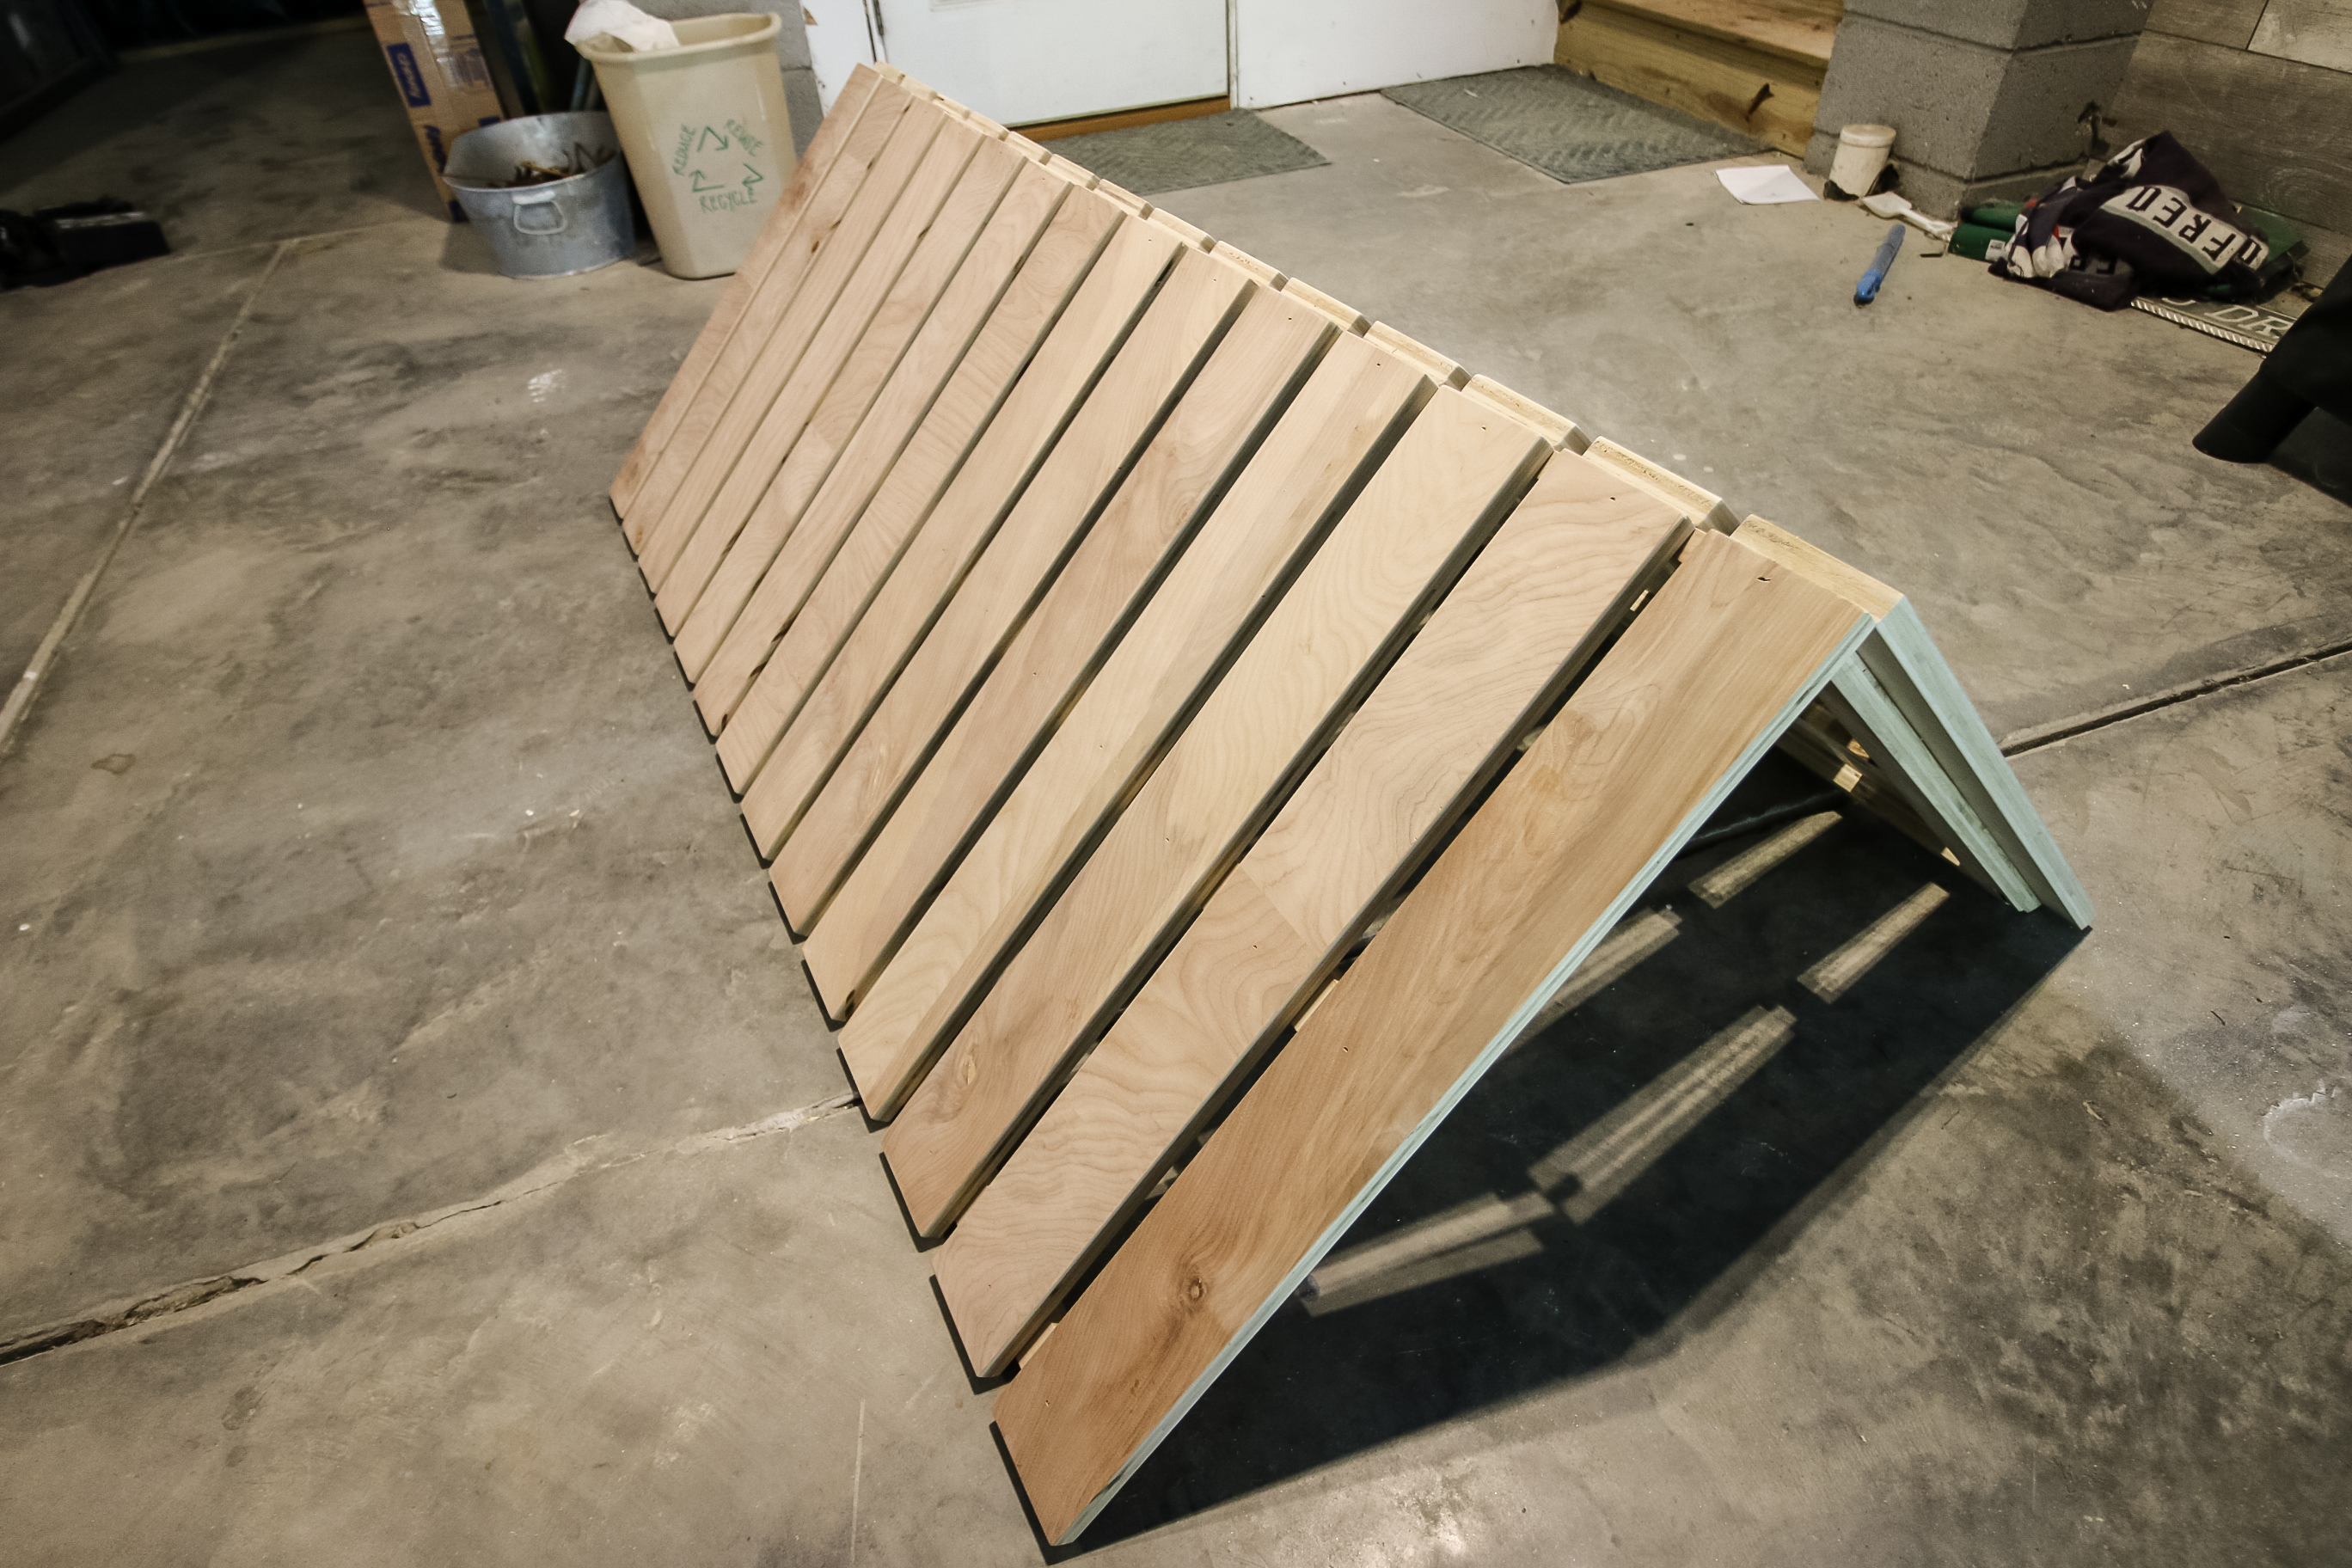
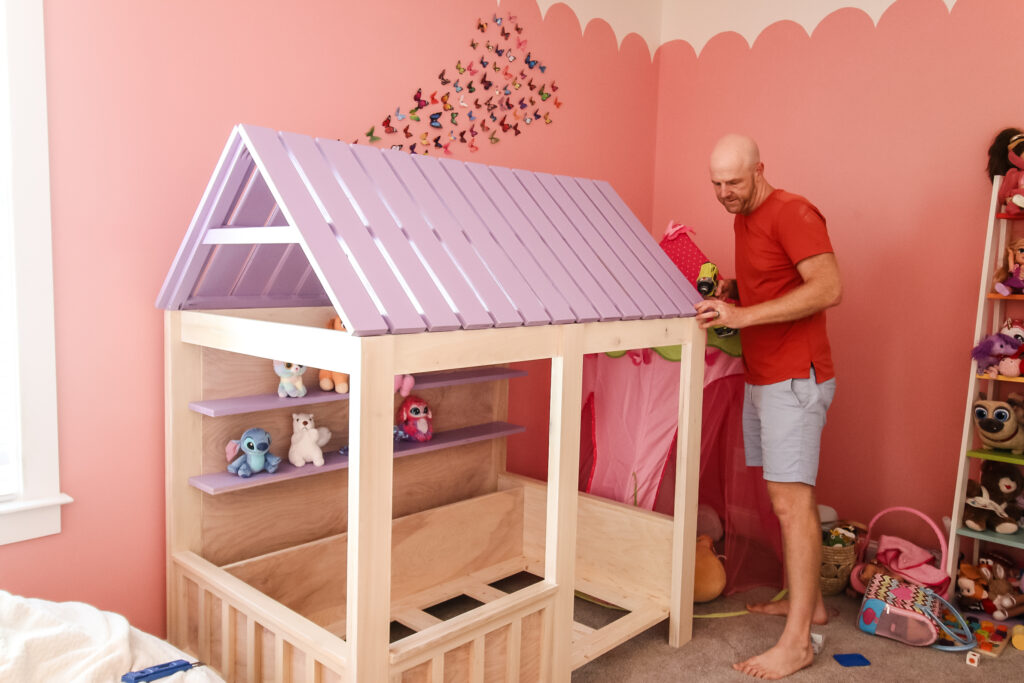
Step four- Build roof
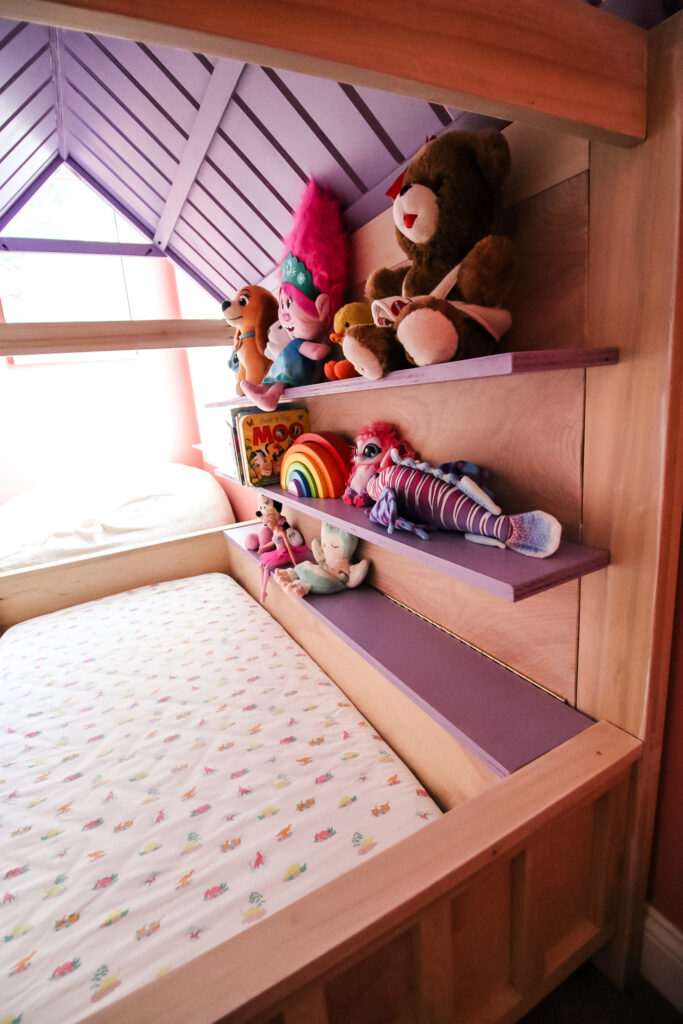
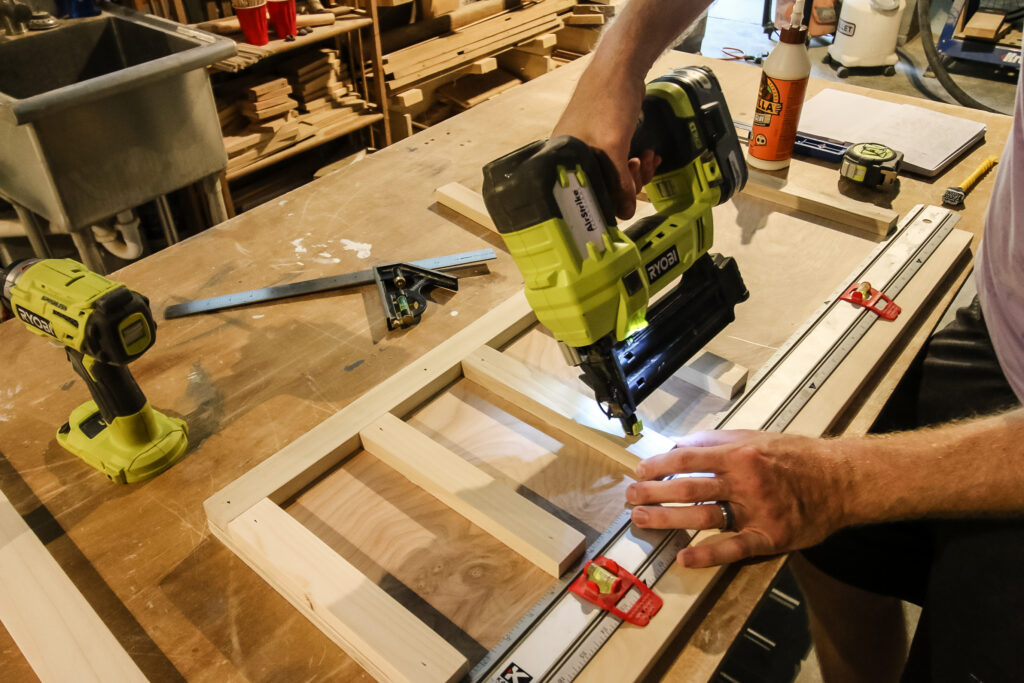
Next up was building the house shaped roof. Most house bed plans just have angled boards on each end and a single board across the middle, but we wanted to have an actual slatted roof.
We did start by building the frame of the roof to look like just the sides and support bar, but then added slats on each side. These slats are glued and nailed into place using a brad nailer.
We used a slat as a spacer between each one and worked our way down the board to get them all on one side, then flipped it over and did the other.
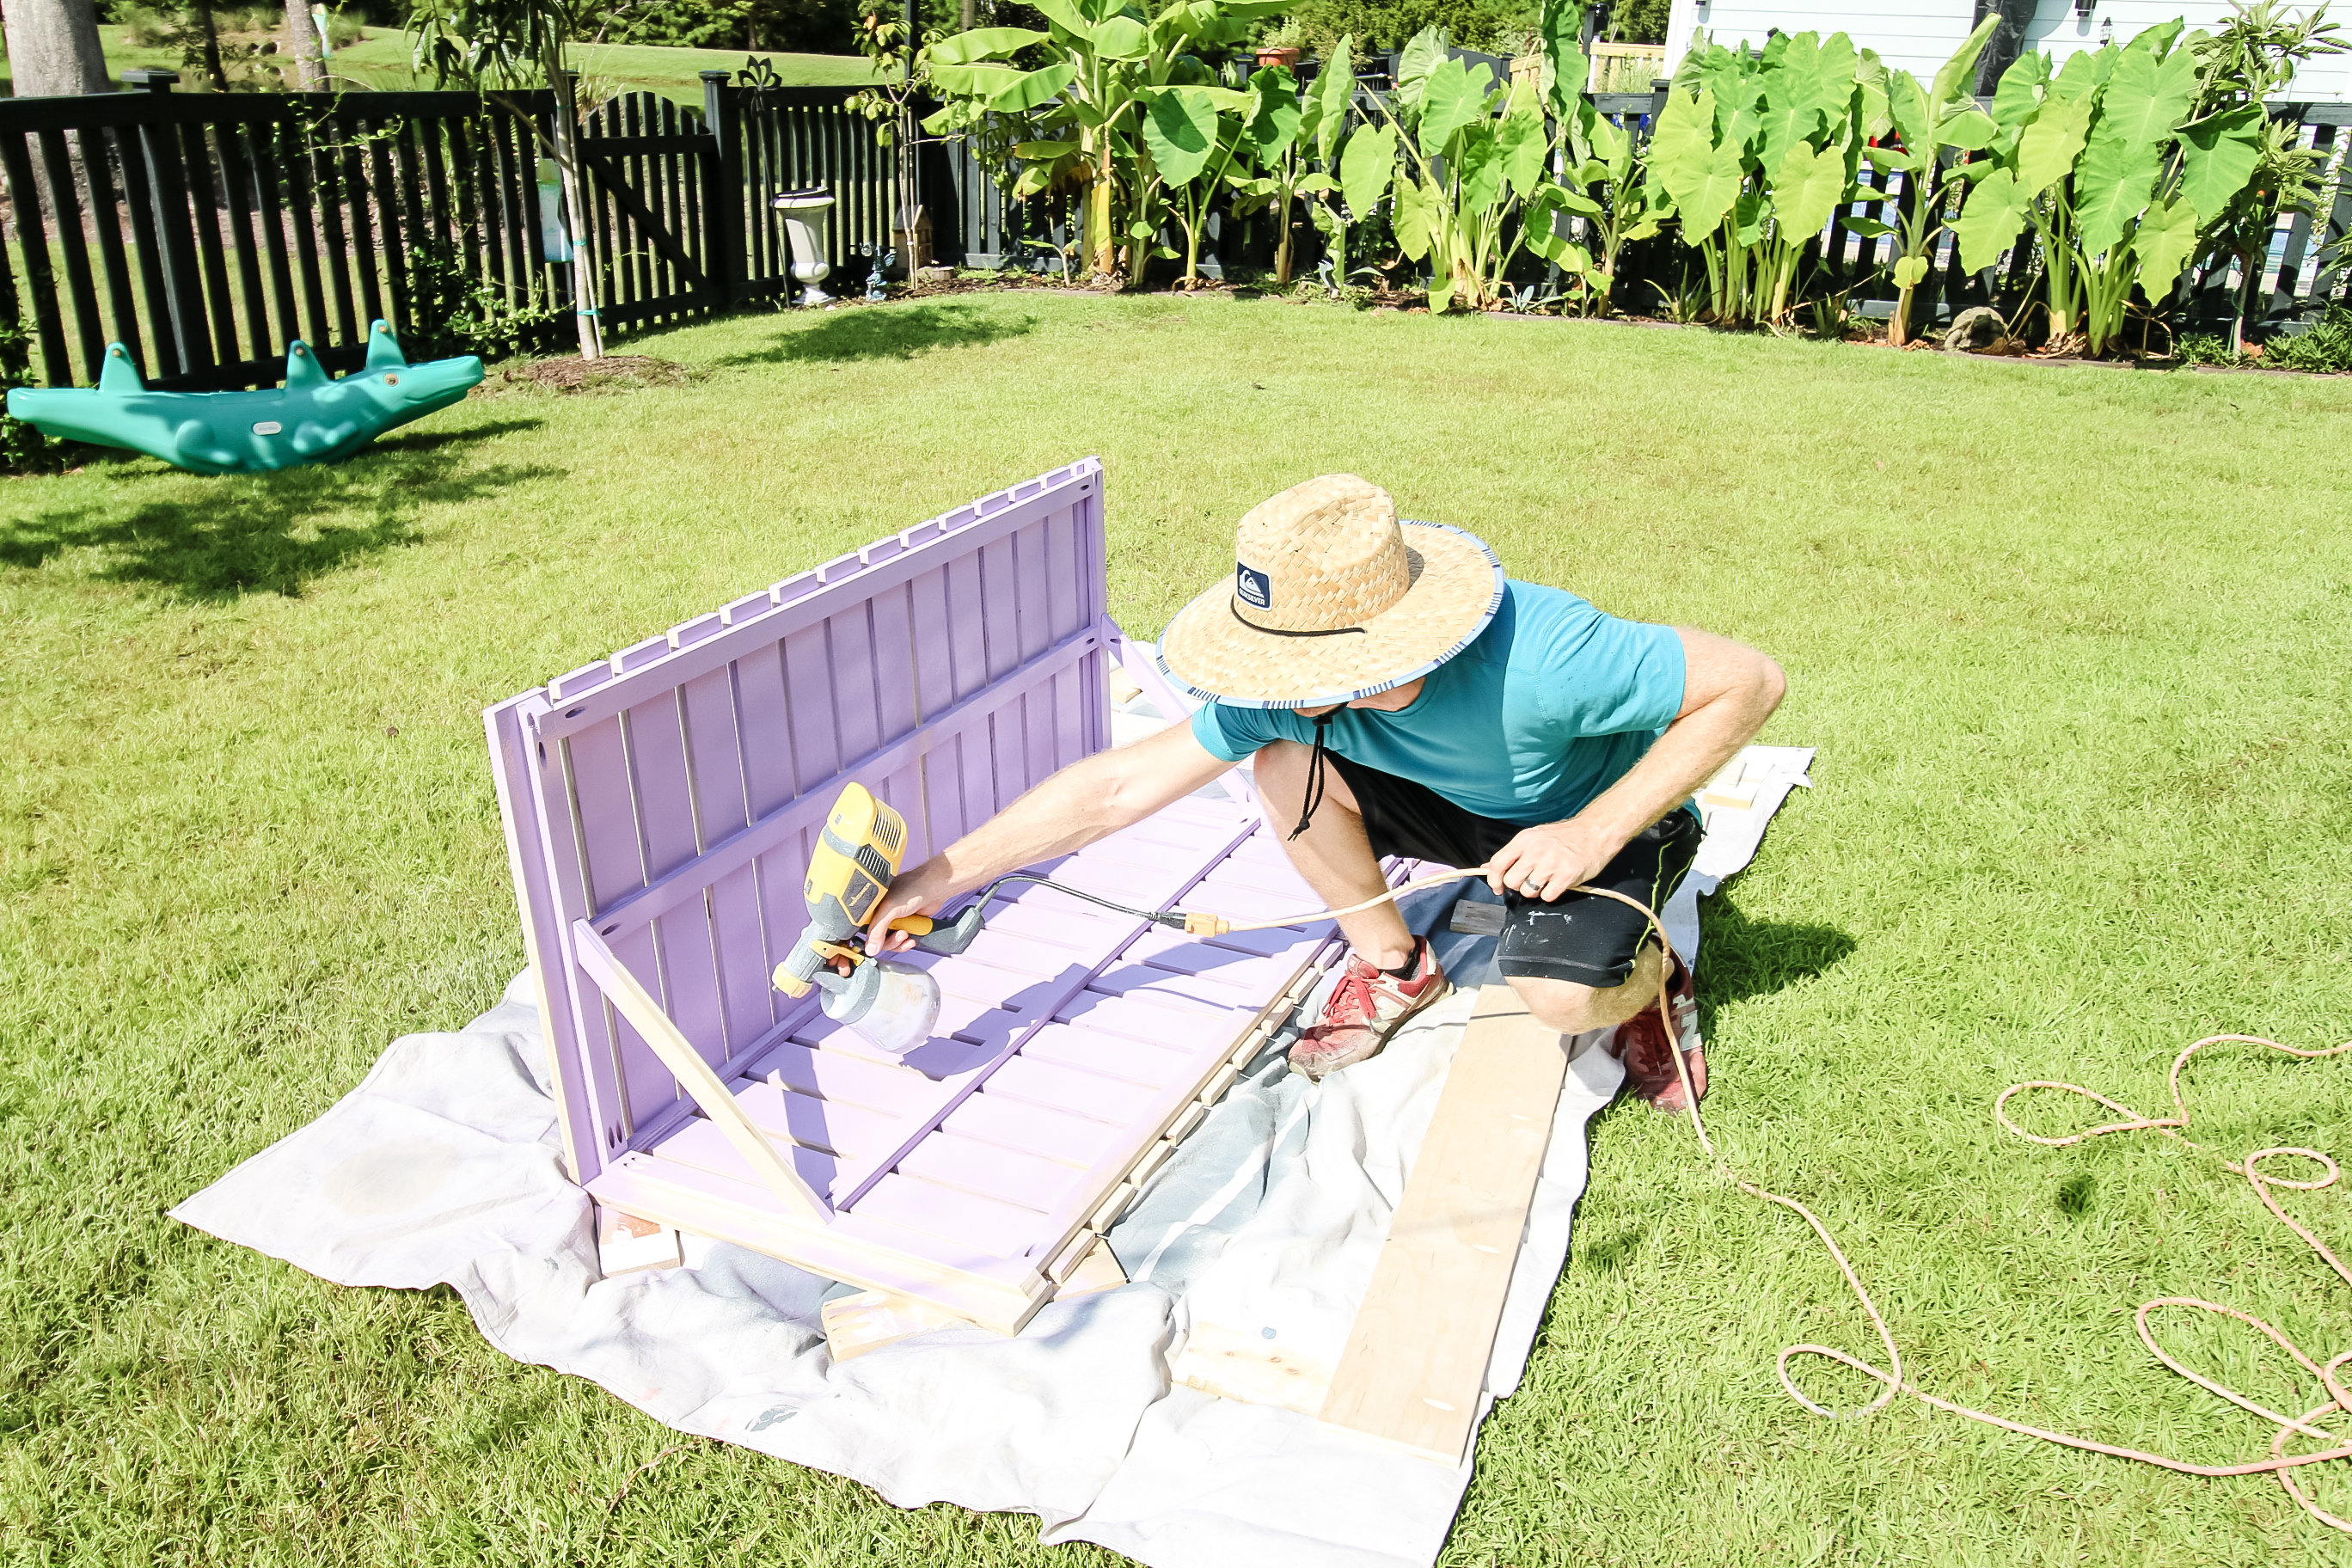
Step five- Paint and stain
Now that all the big pieces were assembled, it was time to paint and stain.
I find it's a lot easier to paint and stain when you're working with large pieces because you don't have to worry about getting every single side of each piece and you don't have to find space to lay it all out. It's just way easier.
The sides, back and front were all stained with Varathane's Antique White stain, and the roof and shelves were painted with Behr's Evening Slipper.
Purple is our daughter's favorite color and it is the same purple we used on her rainbow toy shelf and the rainbow mural in our loft playroom.
It is easier to use a paint sprayer on the roof because of all the angles of the slats, but if you don't have one, you can also get in there with a roller or brush.
Let everything dry, then you can move on to a coat of sealant to protect it!
Step six- Assemble bed
Assembling the bed is the most fun and the part that takes the least amount of time!
I assembled the bed with the help of our 4 year old while our daughter was at ballet class. Literally, it took about an hour to take apart the old crib and assemble the new bed.
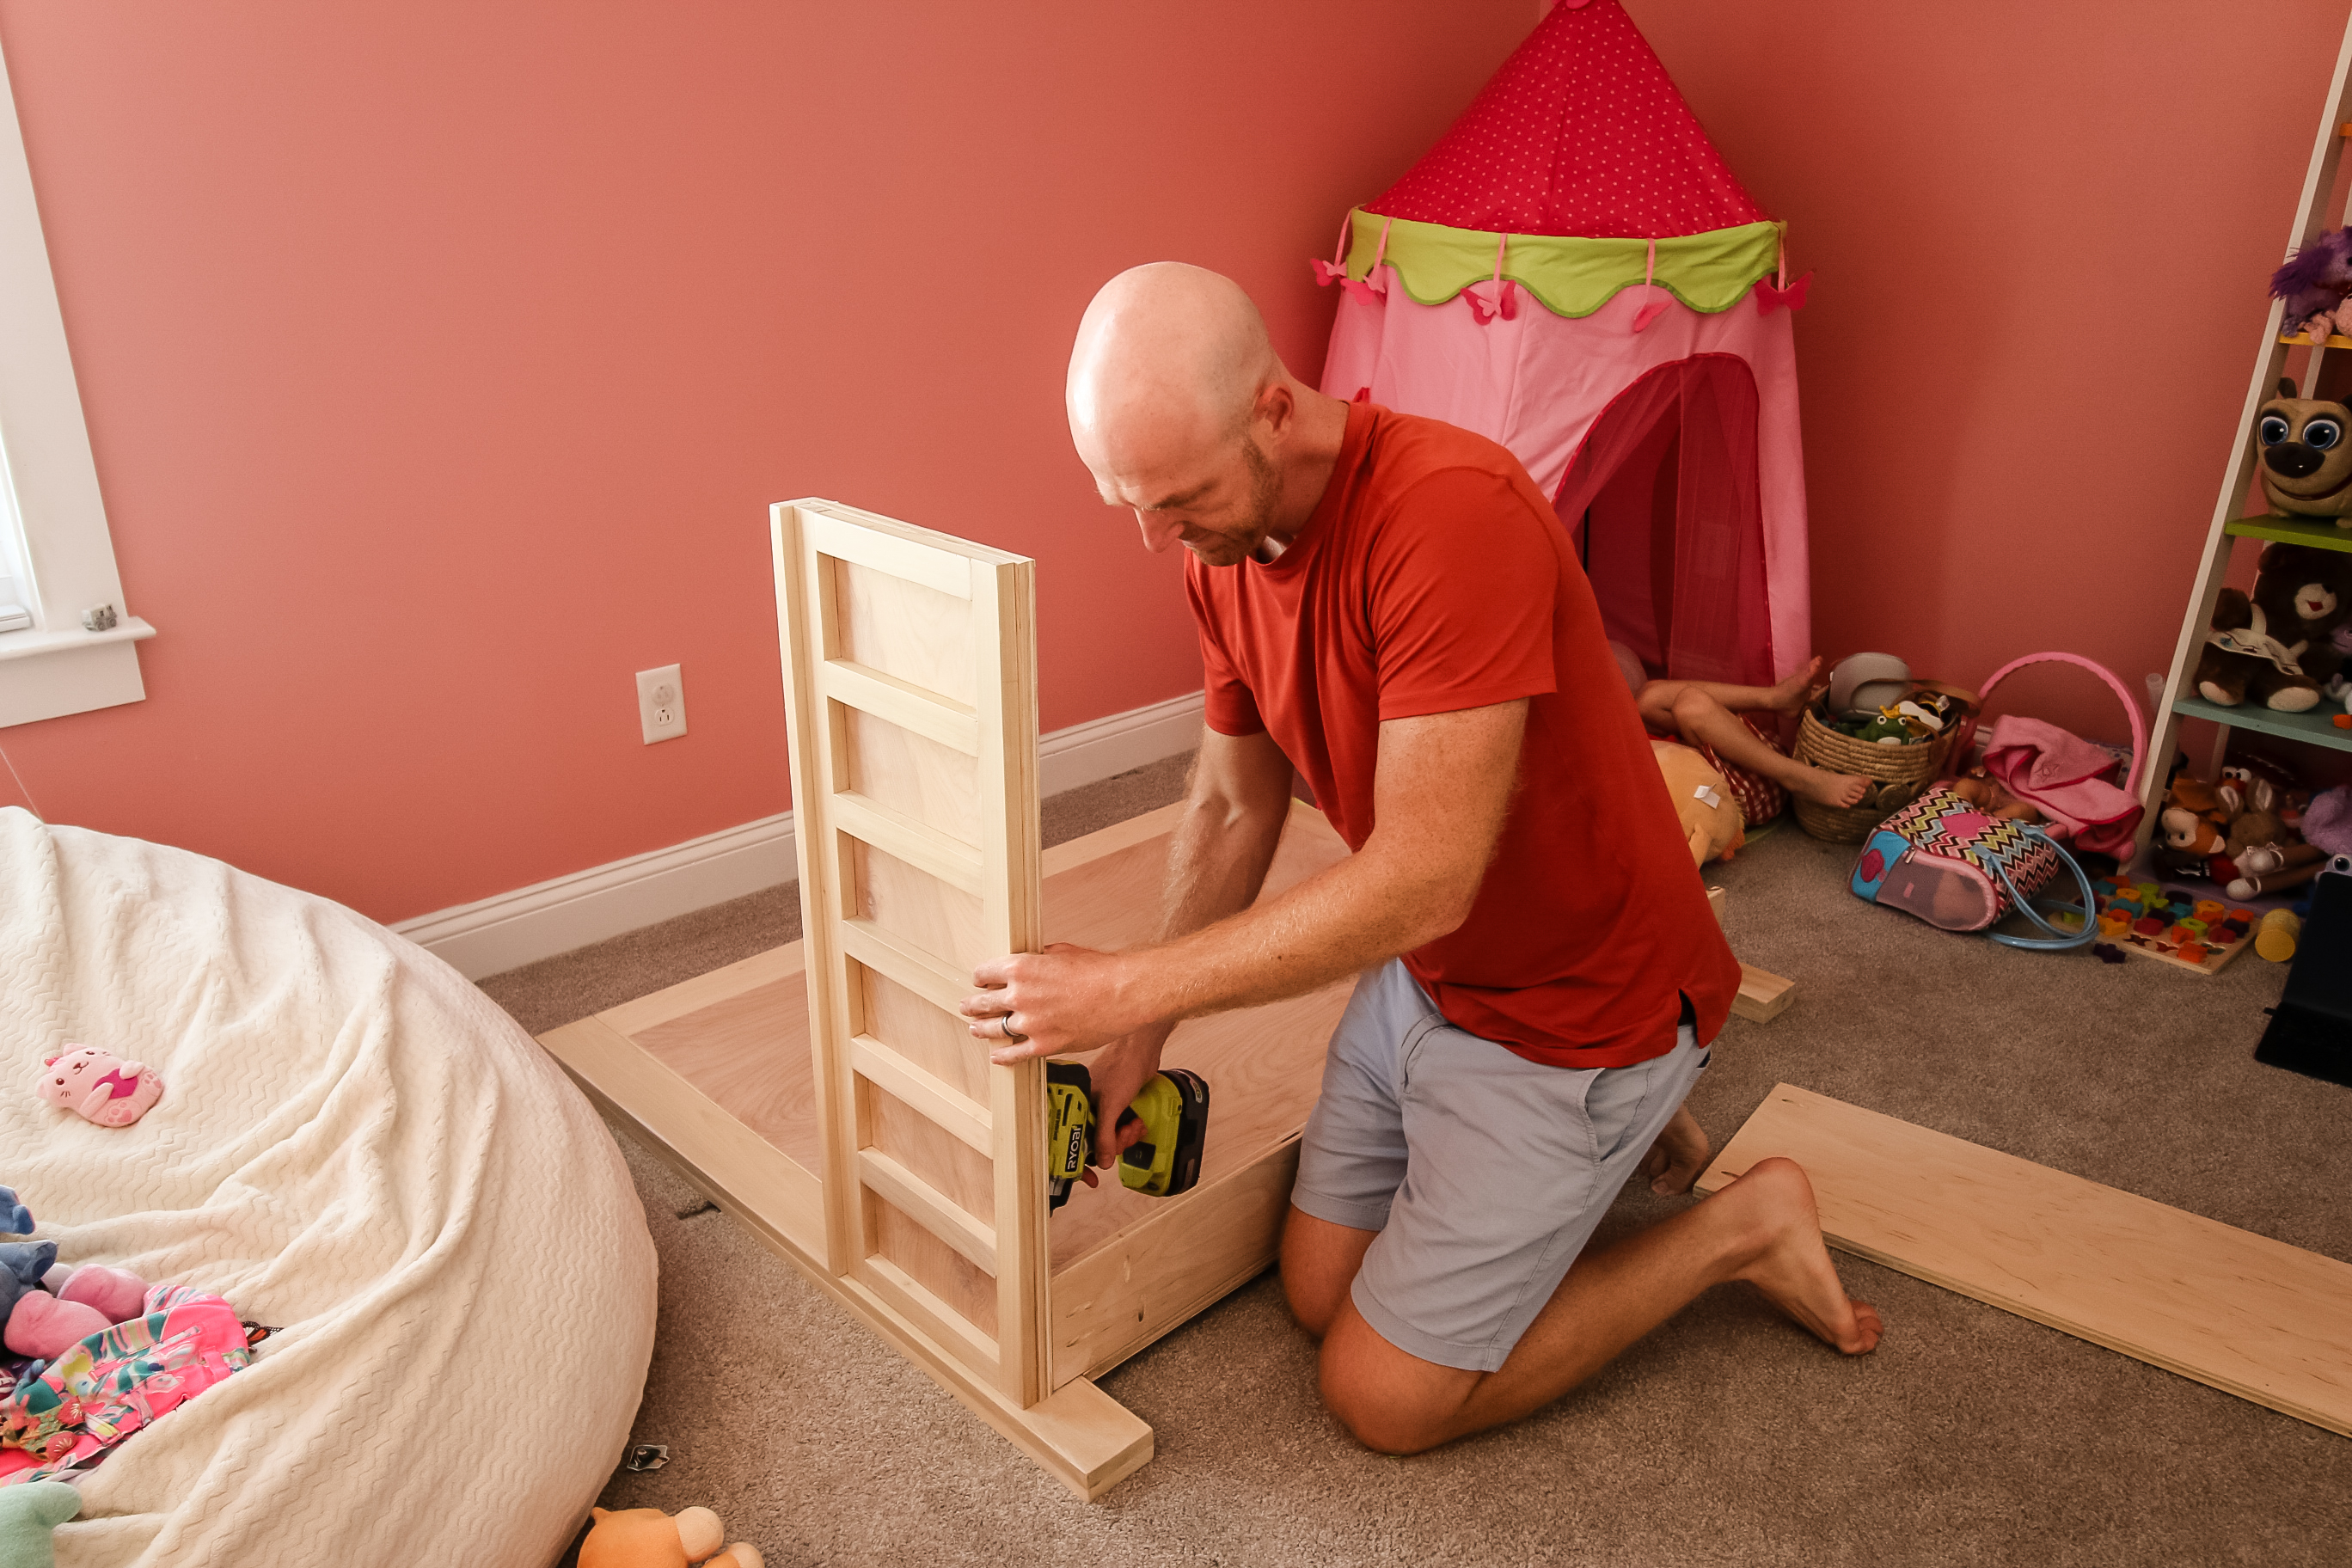
We started by attaching the two side panels to the back panel as it was flat on the ground, then added the top supports parallel with the panels.
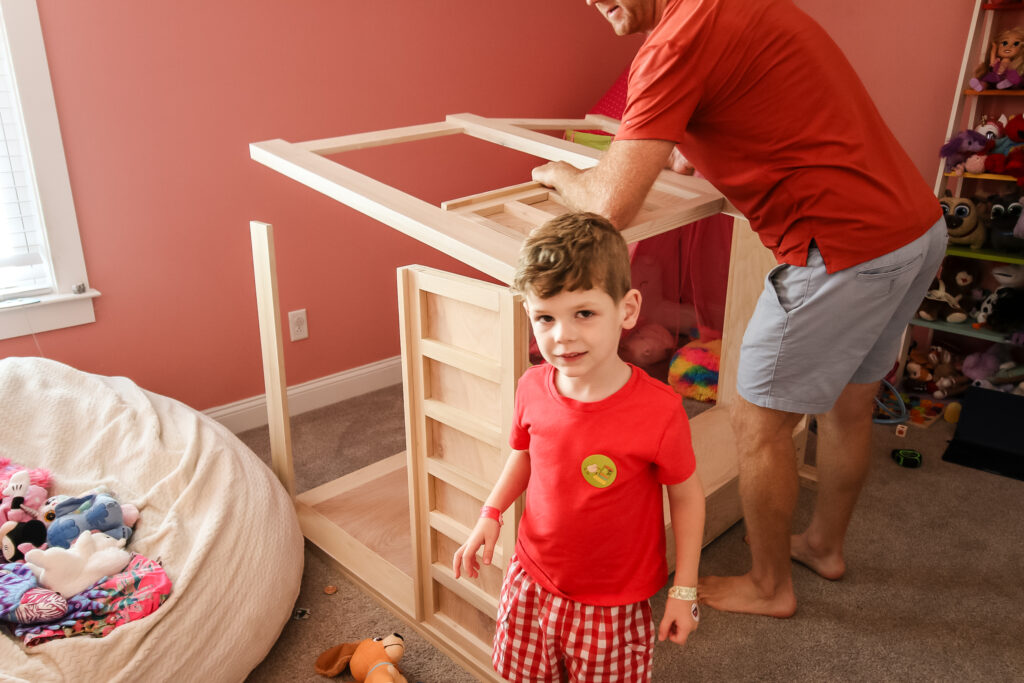
Then, we set the front panel on top of the sides and attached it in place. No, I didn't realize my son was photobombing this step haha.
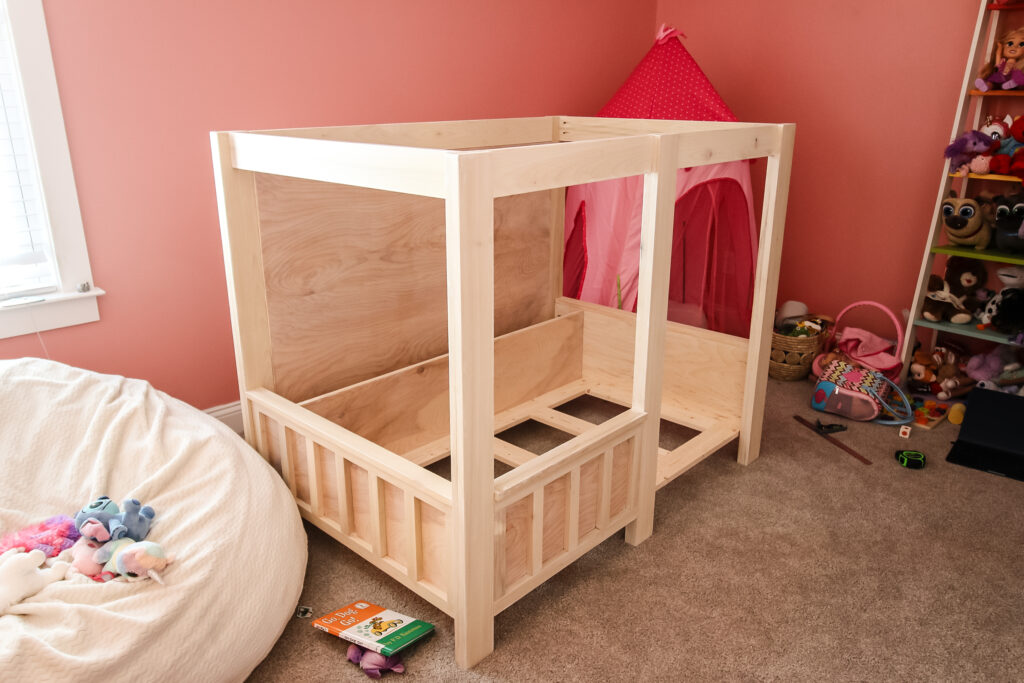
After that, we added the base to connect all four sides together at the bottom and keep them all sturdy and secure.
After turning the bed frame onto its legs, we put the shelves up along the back (these could technically have been attached while it was flat or before bringing all the pieces up from the garage).
Finally, we set the roof on top of the whole structure and screwed it into place.
DIY kids house bed
We love how our DIY kids house bed turned out! It looks so unique and is such a statement in our daughter's room!
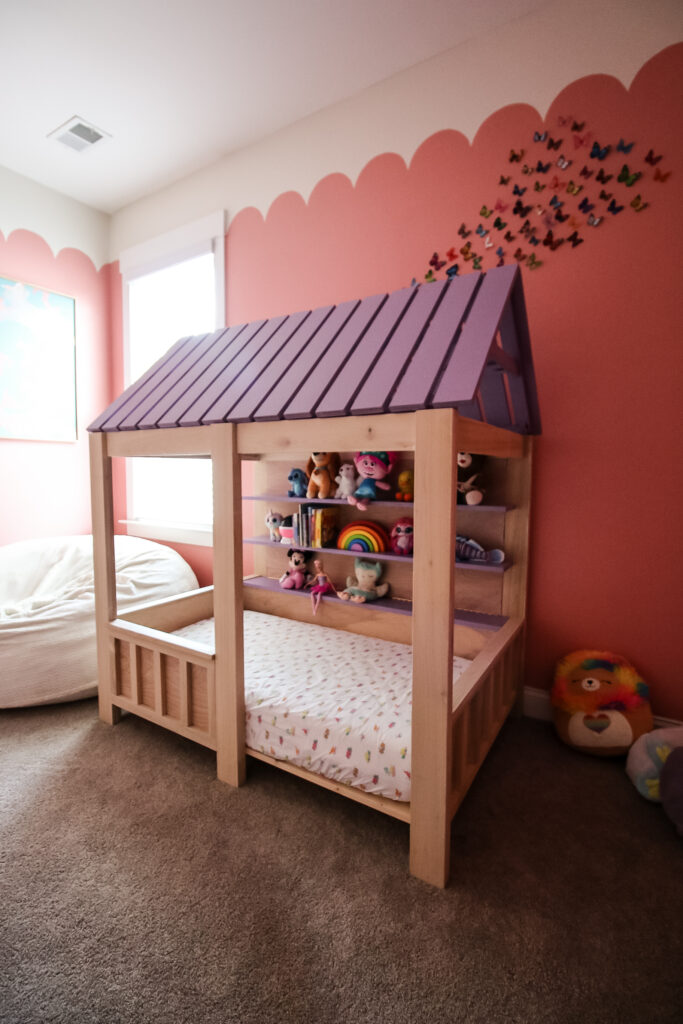
This is a beautiful piece of furniture and has so many cool elements in the design.
This house shaped bed is a great place for her to sleep, store some toys and play and will be for years to come!
DIY toddler house bed woodworking plans
While we did give you the overview, there are definitely quite a few intricacies left out of this post (we just couldn't fit them all).
So, remember that we have full downloadable PDF woodworking plans for our DIY toddler house bed!
The plans include the exact material list, but list and instructions you need, including where all the boards are connected and measurements for everything.
There are lots of kids bed plans out there, but we wanted to make sure that these give you the best bed for your kid!
Your child is going to love this DIY house bed and are going to be so proud that you built it for them yourself!

Looking for something?
We've been doing this since 2012 so we have a LOT of blog posts!
Search stuff like: Ceiling Projects | DIY Plant Stands | Thrift Flips

Hey there, I'm Sean, the woodworking enthusiast and builder behind CharlestonCrafted.com! Since 2012, I've been sharing the magic of turning raw materials into beautiful creations. I love teaching others the art and satisfaction of woodworking and DIY. I try to inspire fellow crafters to make something extraordinary out of nothing at all.


