Want to paint a rainbow mural in your home? Here's a step by step guide to the EASIEST way to get a rainbow painted wall!
I am on a quest to make the kid spaces in our home colorful and fun and exciting for them while they are still little and interested in me decorating their rooms.
That's why Luke got a jungle mural and Rory got big pink scallops around her room.
So, some people were perplexed when I painted the walls in the loft white. But, I had a plan.
They started out Agreeable Gray (builder beige) but right before Halloween I painted them Melting Icicles by Behr, a crisp white paint color.
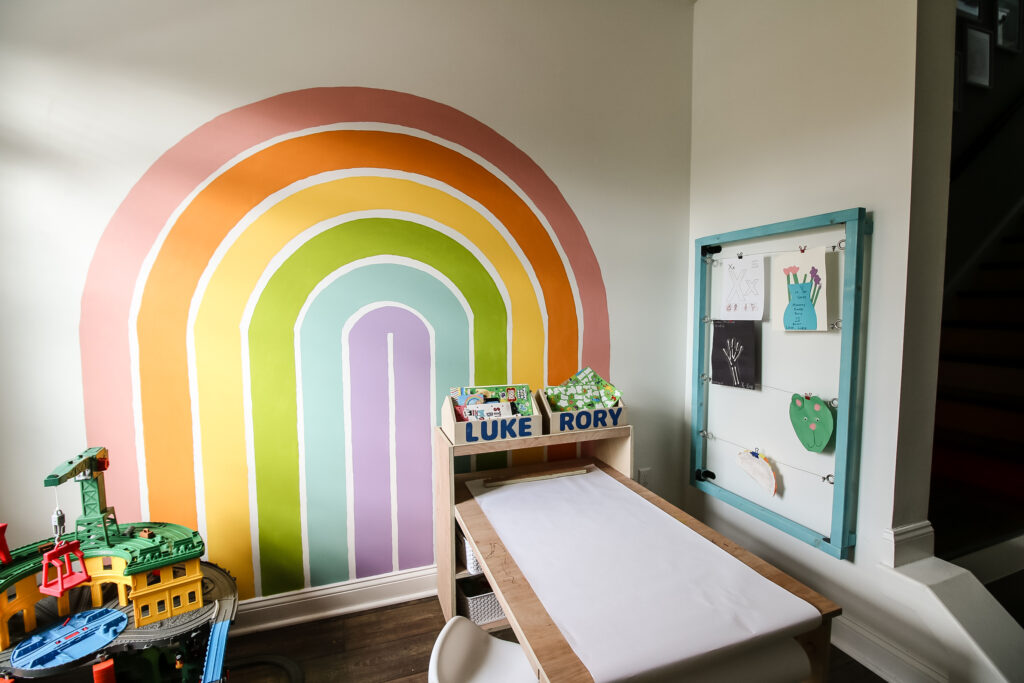
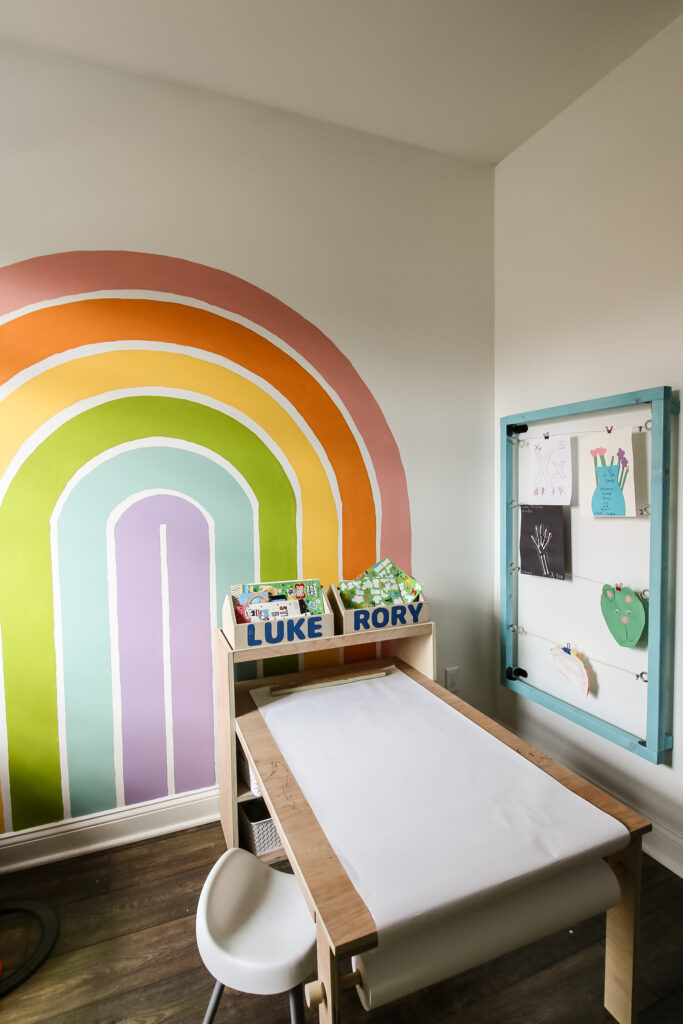
We decorated the loft for Halloween, Christmas, and then Valentines Day. We rearranged the furniture to accommodate big Christmas gifts like this DIY art table.
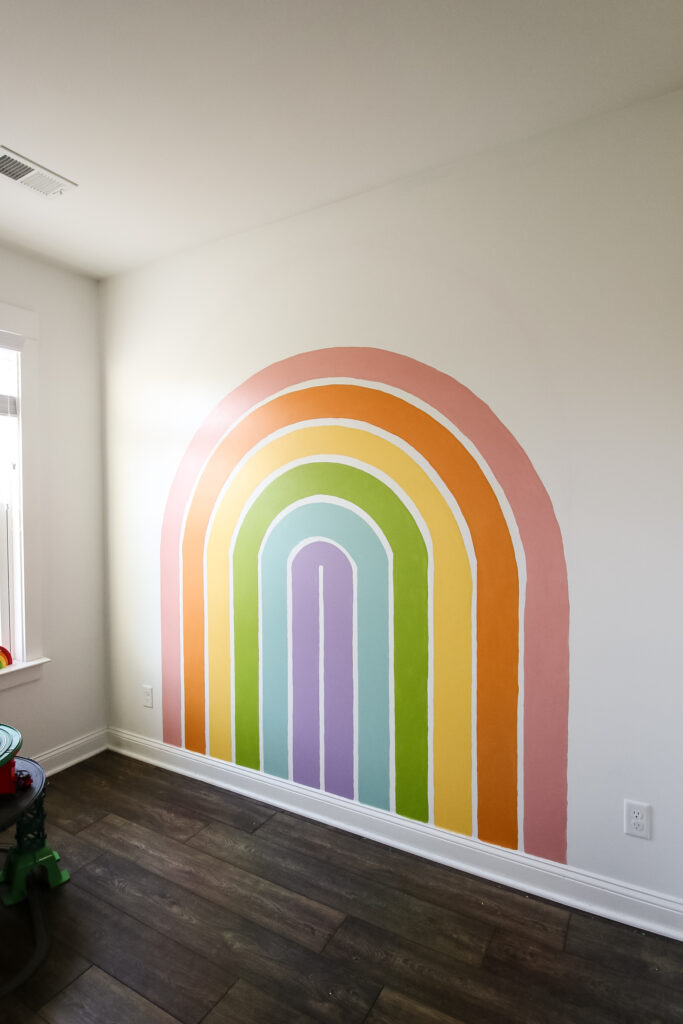
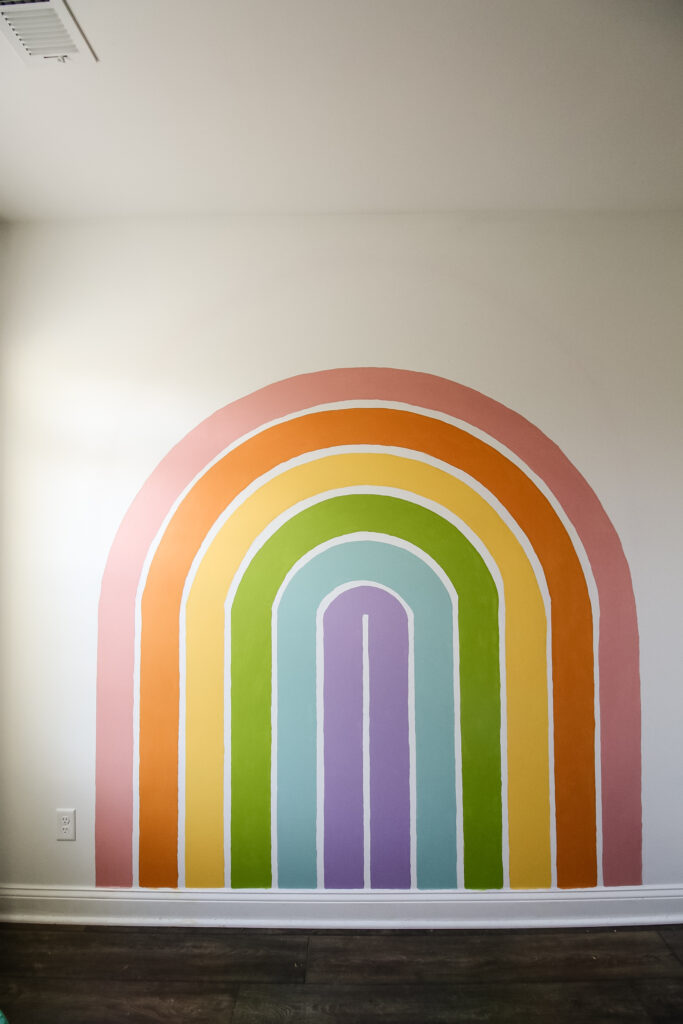
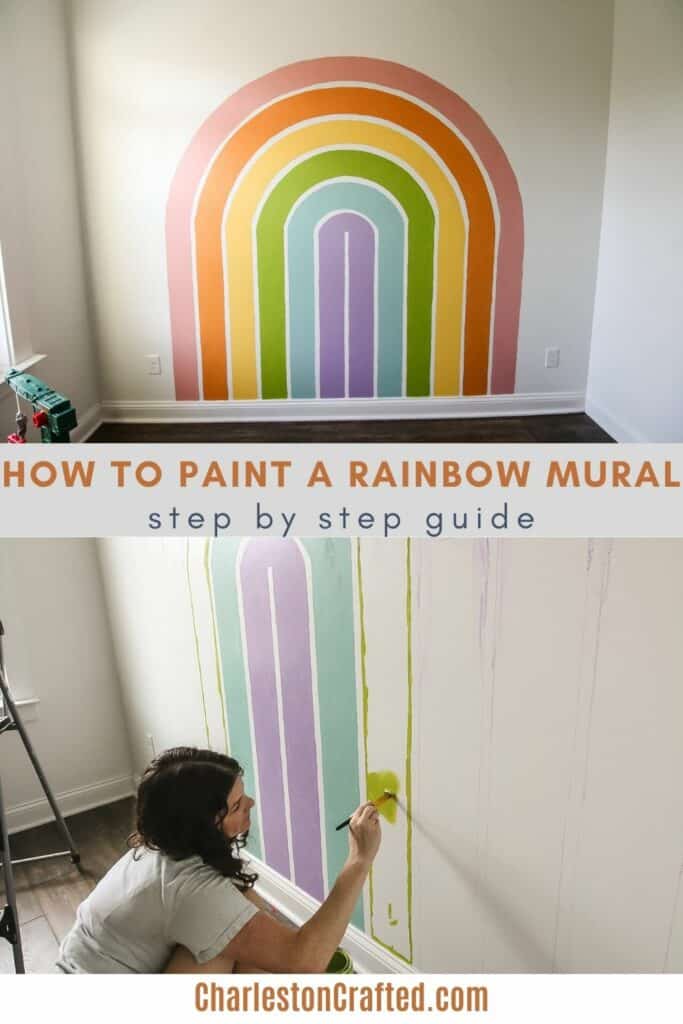
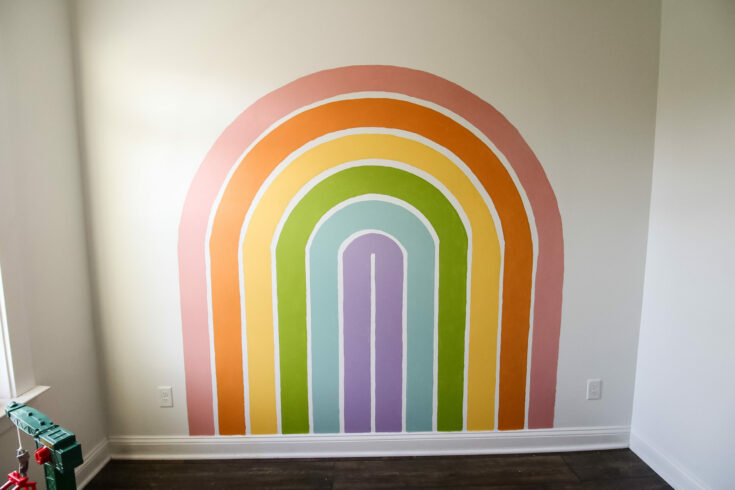
And finally we were ready for me to paint a mural! I decided to paint a giant rainbow on the wall to make this space colorful, kid-friendly, and fun.
Read my complete guide on how to paint a mural!
The other side of the room I am leaving plain white and will decorate with seasonal and holiday decorations.
What kind of paint can you use for a wall mural?
You can use acrylic craft paints or latex wall paints for an indoor wall mural. I personally prefer to use latex wall paint.
You only need a sample size of each color to do rainbow wall paint. I have a quart of most of these colors left over from the jungle themed bedroom.
Paint colors
You can choose to do bright colors, pastels, muted rainbow, or traditional rainbow colors. Grab paint swatches at the hardware store and tape them to your walls and look at them day and night, lights on and off, to pick the perfect shades.
I used colors left over from Luke's mural plus the pink from Rory's room so the colors would be cohesive with the adjacent spaces. Plus that made this project free to me!
Here are the paint colors that I used for my rainbow (all by Behr):
- Pink - Coral Fountain
- Orange - Toucan
- Yellow - Smiley Face
- Green - Green Neon
- Blue - Spring Stream
- Purple - Evening Slipper
How to paint a boho rainbow on the wall
Painting a DIY rainbow mural isn't a hard DIY project, but it does require a lot of prep work. Don't skip out on this - thorough prep work (plan about 2 hours to draw it out before even opening a paint can!) makes painting MUCH easier.
This is considered a "boho" rainbow because of the straight bottom and not the traditional semi-circle shape. If you want a traditional shape, just skip the straight lines and only do the arch!
Supplies:
- Paint in 6+ colors
- Chalk (colored for white wall, white for darker wall)
- String
- Thumb tack
- Long level
- Measuring tape
- Small and medium art paintbrushes
Steps for how to paint a rainbow on a wall:
STEP 1: Decide on your final dimensions
First you need to decide on the final height and width of your rainbow. Mine is 7 feet square.
Also determine how many colors you have and the width you want each stripe to be.
I went with a 6 inch color with a 1 inch white (wall color) band in between each.
Here's a sample of my math:
6 colors x 6 inches wide each x 2 stripes (each side of arch) each (12 total stripes along the bottom = 72 inches of colors
11 stripes of white (1 less than the 12 color stripes) @ 1 inch each = 11 inches
72" + 11" = 83 inches = close enough to my goal of 84 inches/7 feet
Fiddle with the math until you are happy with the layout. Drawing it on paper helps!
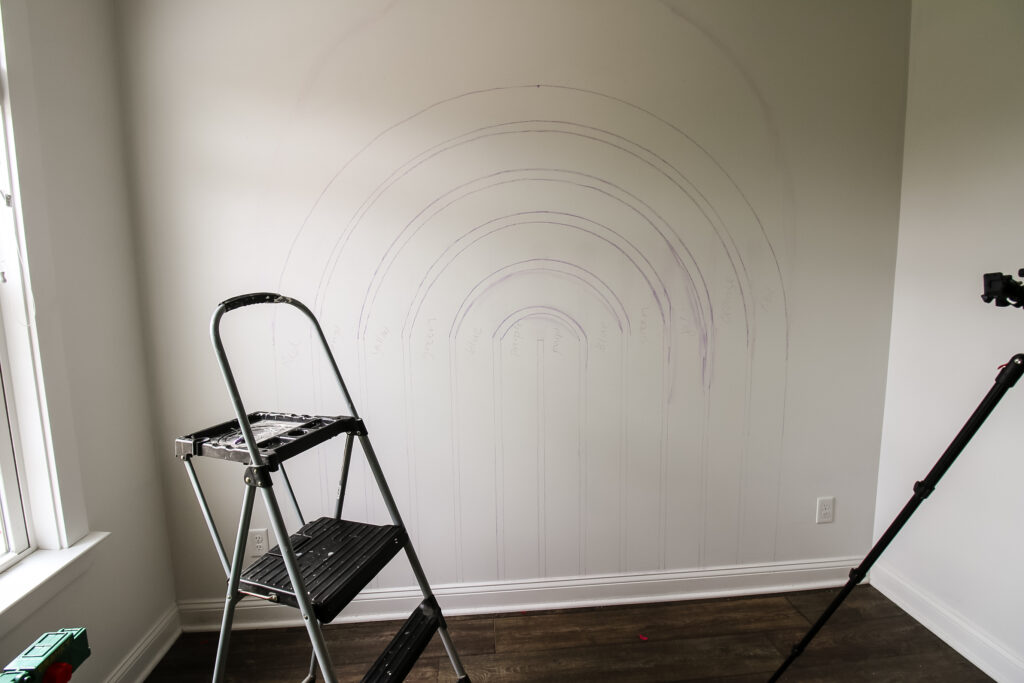
STEP 2: Identify the center of your wall & mark your stripes
Use a tape measure to identify the center of your wall horizontally and mark it with a tick mark of chalk
Measure out from there. I made my center point the center of the rainbow so it split a 1 inch white strip. Measure ½" out each direction and do a chalk tick mark.
Then in each direction I ticked off 6 inches (for a color) and then 1 inch (for white stripe) and repeated until all the stripes were ticked off.
STEP 3: Do some math
Now it's time to determine the height of your straight portions of the rainbow. This is the most difficult part of how to draw a rainbow with the boho look. I skipped it to begin with and that led to some wonky chalk lines. Don't skip this!
Measure the HORIZONTAL distance from the center of your rainbow to the outer edge. Or, measure the total width and divide in half. This will be the radius of your upper arch - "R".
Go to the top center of your rainbow - for me, 7 feet up, centered on your wall. Measure DOWN by your "R" measurement - so, 3 ½ feet down, centered. This is the center point of your circle for drawing your arches.
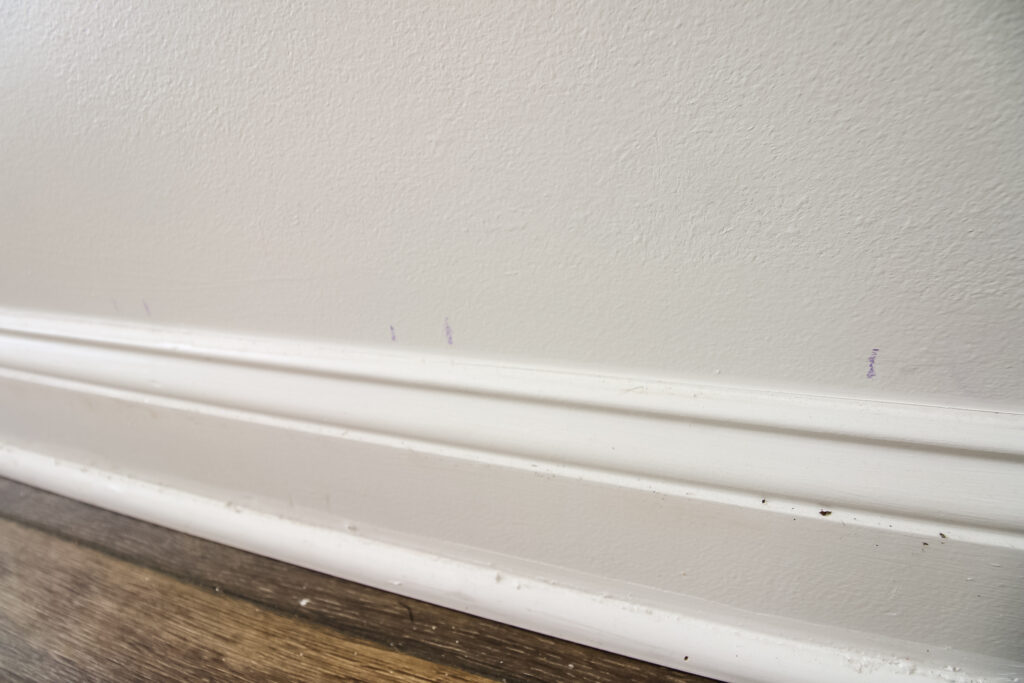
Draw light tick marks at this height across your rainbow wall. You can also go ahead and stick a push pin in this spot if you don't want to lose it.
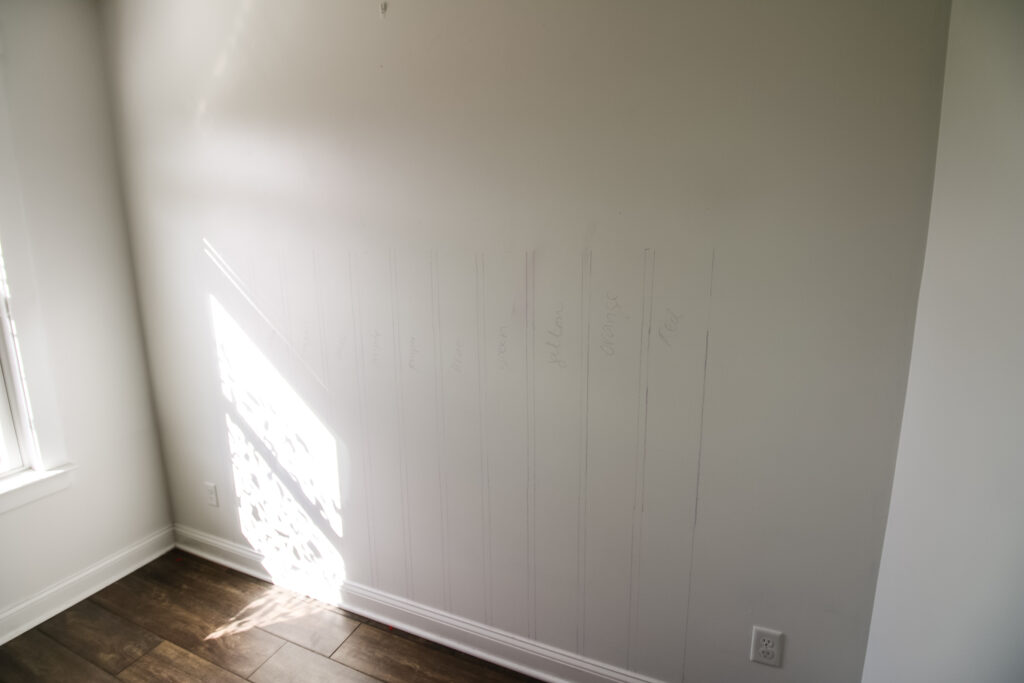
STEP 4: Draw your vertical lines
Starting at the tick marks you drew in step 2, draw a straight line (use a long level like this one) up to your R line (drawn in step 3) for each stripe.
This concludes the straight portion of your rainbow stripes. Are you seeing it yet? Hang with me.
** A note about painter's tape**
I was slightly shocked when I saw how many tutorials online advocate using painter's tape for rainbows. I even saw one where they tore it into tiny strips and taped off a whole arch.
Listen - I get having low confidence in your painting abilities. But trust yourself to paint this by hand. Take your time, have a paper towel ready to wipe smudges.
Painters tape bleeds and touching up the bleeding will be a nightmare. If you must, you can tape and then paint your wall color over it and then paint the colors over it - but it's much easier just to hand paint!
STEP 5: Draw the arches
Now we get to draw the arches to make this really look like a rainbow. If you haven't already, stick a thumb tack in at the center point on the R line, the top of your straight lines.
Tie a piece fo chalk (or a pencil, but chalk is easier to erase) to one end of a piece of string and the other end to the thumbtack.
Roll the chalk, wrapping the string around it, until the string is the perfect length from the center point to the outer stripe of the rainbow, right on that R line.
Holding the string taught, arch it upwards to trace a half circle up and over and down. It should line up perfectly with your outer line on the far side.
Repeat this for each vertical line, rolling the string around the chalk to make it shorter and line up with each line as you go.
Once you are done, use a damp paper towel to clean up any chalk errors and step back and take a look at your chalk lines. Be sure everything looks good. Maybe go have a drink and come back tomorrow for the painting!
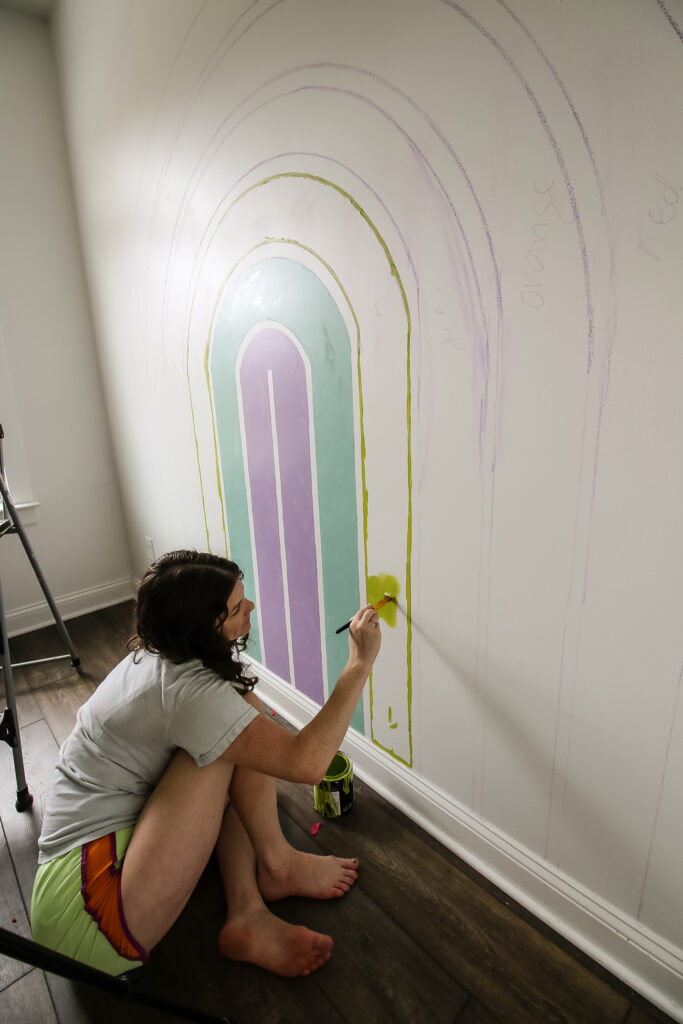
STEP 6: Fill in with paint
Start painting! Pick a band and use a small paint brush to paint along the chalk line. Then use a larger brush to fill it in.
Repeat for each band, then return later for a second (or third) coat. Once dry, use a damp paper towel to clean up any remaining chalk lines.
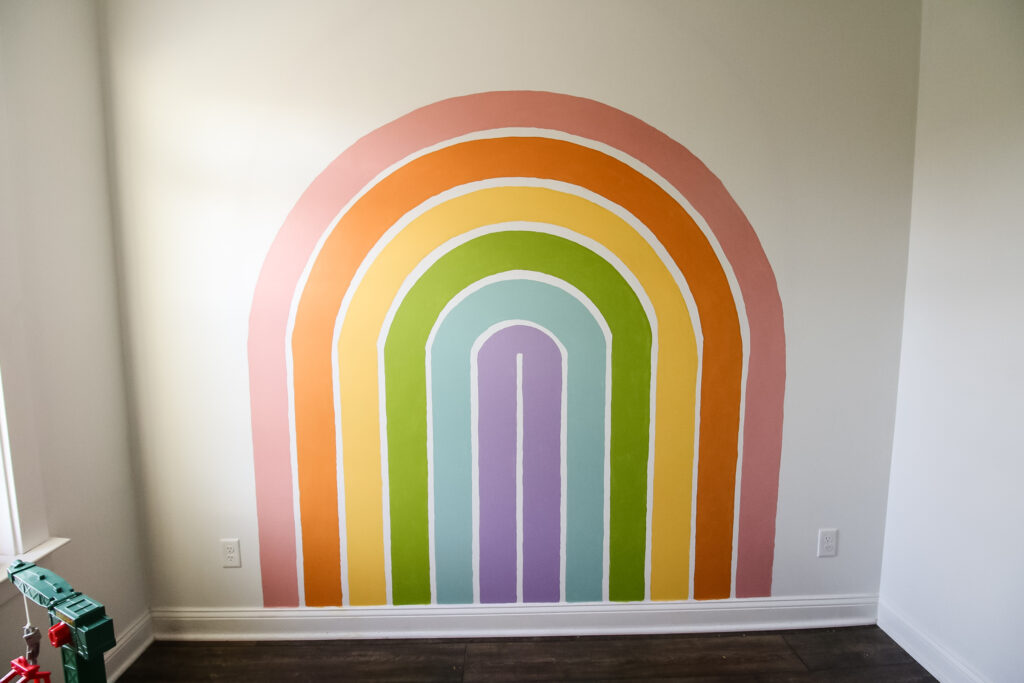
Enjoy your beautiful rainbow mural!
Video demonstration
Click here to watch me paint this rainbow mural on YouTube!
How to paint a rainbow wall mural
Want a fun rainbow mural for your home? Here's the easiest, cleanest way to do it yourself!
Materials
- Paint in 6+ colors
- Chalk (colored for white wall, white for darker wall)
- String
Tools
- Thumb tack
- Long level
- Measuring tape
- Small and medium art paintbrushes
Instructions
- Decide on your rainbow's dimensions
- Identify the center of the wall and mark vertical stripe widths
- Calculate measurements for arch height
- Draw vertical stripes
- Draw arches
- Fill in with paint
- Use a damp cloth to remove any chalk marks (once paint is dry)
Any questions about painting a DIY rainbow wall mural?

Looking for something?
We've been doing this since 2012 so we have a LOT of blog posts!
Search stuff like: Ceiling Projects | DIY Plant Stands | Thrift Flips

Hello, I'm Morgan, half of the creative force behind CharlestonCrafted.com! With a passion for DIY that dates back to 2012, I've transformed three homes and now I'm dedicated to helping others craft their dream spaces. Let's turn your house into a home together!