Looking to add a statement piece to your bedroom? Look no further than this DIY four poster canopy bed! This post will teach you all about four poster beds and how you can build one yourself for your own home!
This post was sponsored by Kreg Tool, makers of joinery and cutting solutions for your next DIY project. All opinions are our own. Thank you for supporting the brands that make Charleston Crafted possible!
Today's post is a huge one, but one that is also so relaxing!
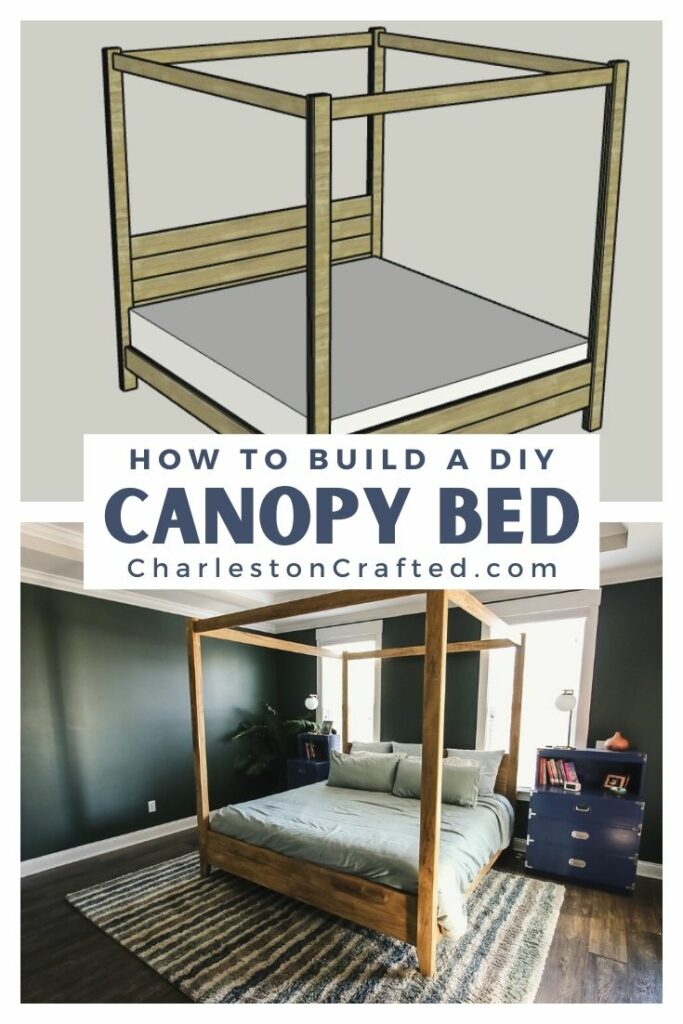
We just finished building a DIY four poster canopy bed for our bedroom and it is one of the coolest projects we've done to date.
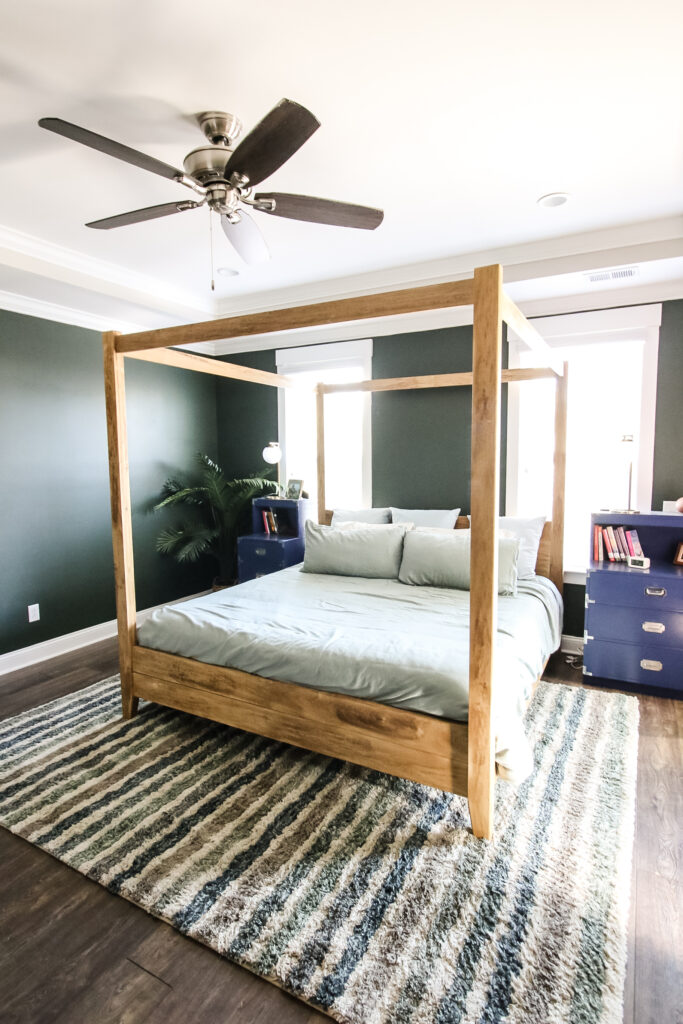
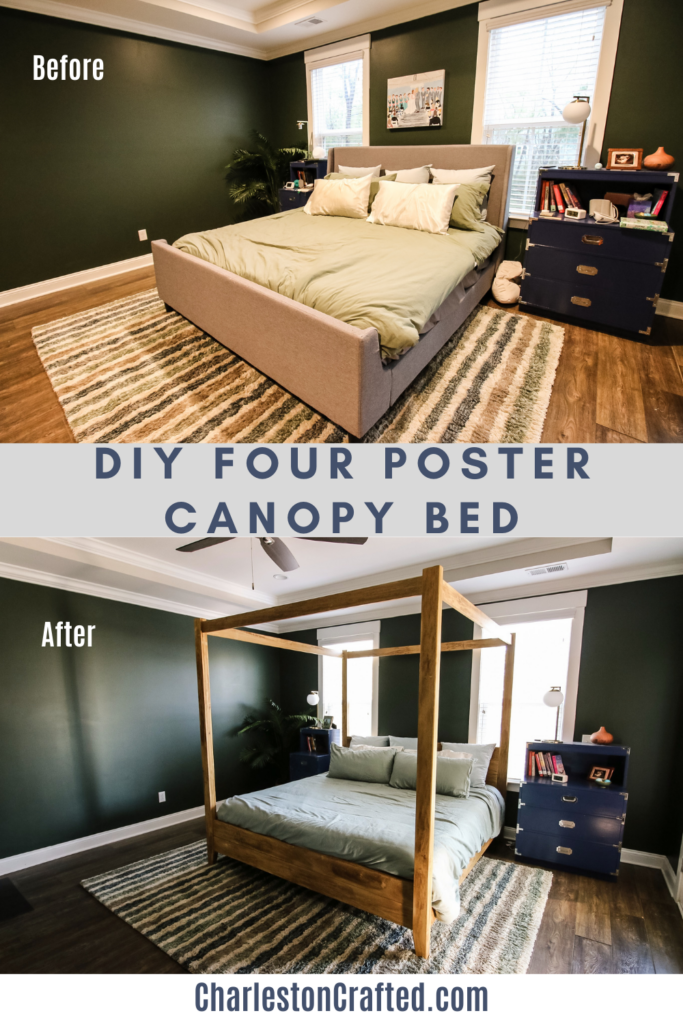
We recently finished off a massive walk-in closet renovation with built in clothes storage and a built-in dresser that allowed us to move all of the dressers out of our bedroom. After we painted the entire room a dark color (North Woods by Behr) we rearranged the remaining furniture and the space felt HUGE.
See our primary bedroom makeover reveal here!
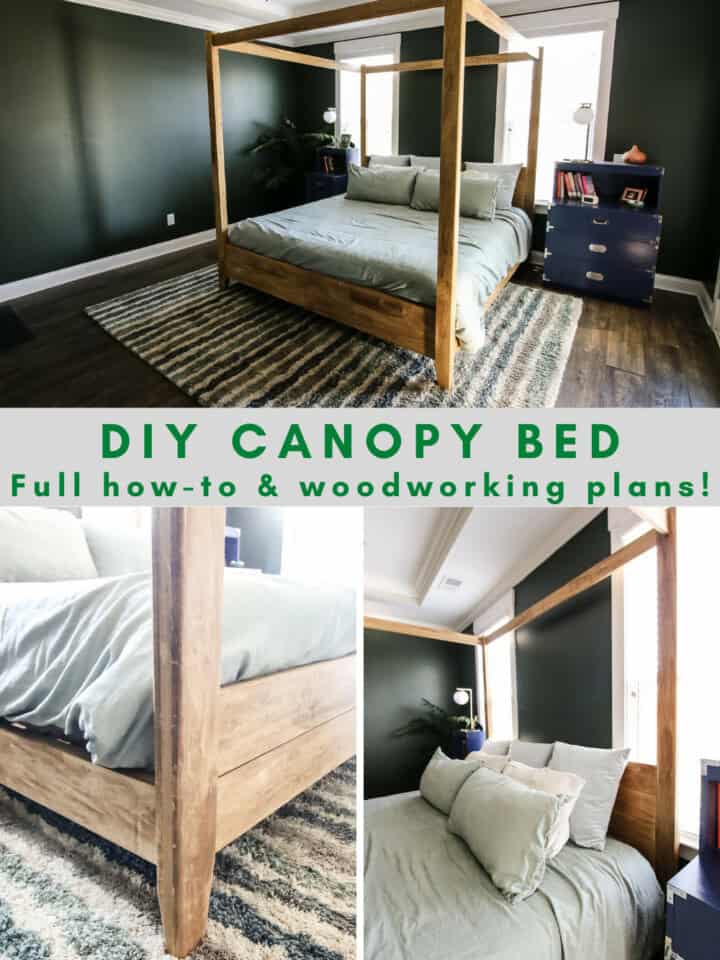
So, we decided to do something bold and build a king size canopy bed that would feel grand and be the focal point of our bedroom.
This post will give you the full overview, general steps, video tutorial and link to free woodworking plans for our DIY four poster bed!
Want to build a simpler bed? Here's our plans to build a DIY platform bed!
DIY four poster canopy bed
If you've ever wanted to know how to build a canopy bed, this is hopefully going to be the easiest tutorial you'll find to make that dream a reality.
We decided to build a wood canopy bed to replace the upholstered gray bed we had from our old master bedroom because we wanted it to feel grand and also bring in wood tones to match the rest of the space (coming soon!).
This post will break down everything you need to know to make your own canopy bed frame and make you feel prepared and confident to do it!
Click here to see our post on how to build a modern low-profile platform bed!
How do you make a four poster canopy bed?
Here's a general overview of what you need to make a four poster canopy bed for yourself.
Tools needed to build a DIY four poster canopy bed:
- Table saw
- Miter saw
- Cordless drill
- Kreg pocket hole jig (we used both the 720 Pro and the 520)
- Orbital sander
- Clamps... lots of clamps
Materials needed to build a DIY four poster canopy bed:
The full breakdown of exactly how many boards you need can be found in the downloadable PDF woodworking plans, but here's the overview.
- 2x4x8' pine boards
- 1x4x8' pine boards
- 1x4x8' hardwood boards
- 1x6x8' hardwood boards
- Wood glue
- 1 ¼" Kreg pocket hole screws
- 2 ½" Kreg pocket hole screws
- Wood stain
- Polyurethane
*note: this project can be done for a lot cheaper if you want to choose to use 2x6 boards for the rails and 4x4 posts for the posters. You can save a lot of money by choosing to go this route instead of gluing together hardwood boards. See the note in the woodworking plans for the full details on this option.
Steps to build a DIY four poster canopy bed
Here are the general steps needed to build your own homemade canopy bed. Remember that you can get the full breakdown of steps with computer model images for each step in the downloadable PDF woodworking plans!
Step one: Glue posts and rails together
Our canopy bed design features hardwoods found from the home improvement store. However, those boards only come in ¾" thickness. So we had to glue a lot of pieces together to make sure they were stable for a king sized mattress with two people sleeping in it.
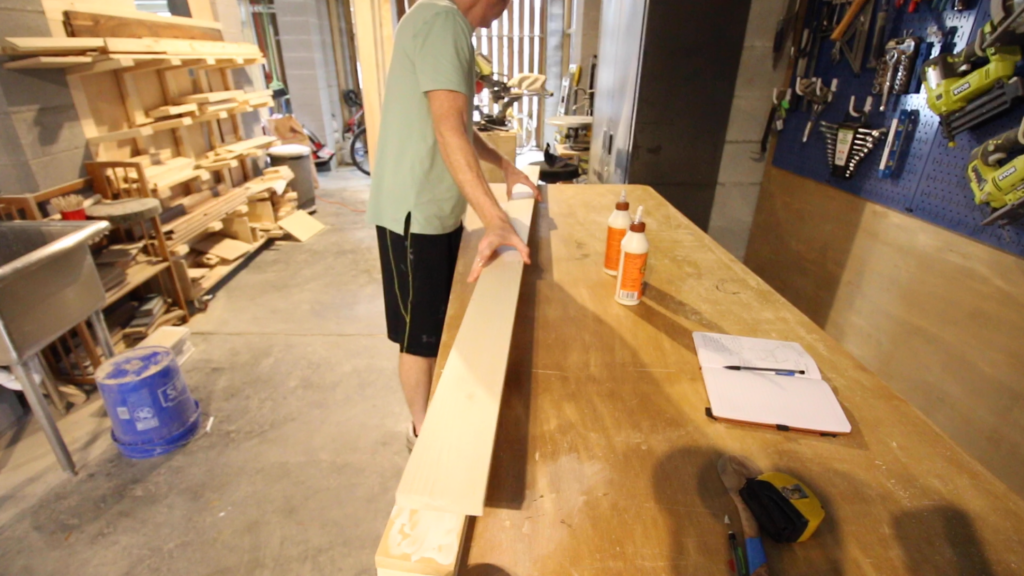
For the four posts, we glued three 1x4 boards together (like a sandwich) to make sure they were sturdy, as all of the connecting side rails and headboard and footboard rails would connect with them.
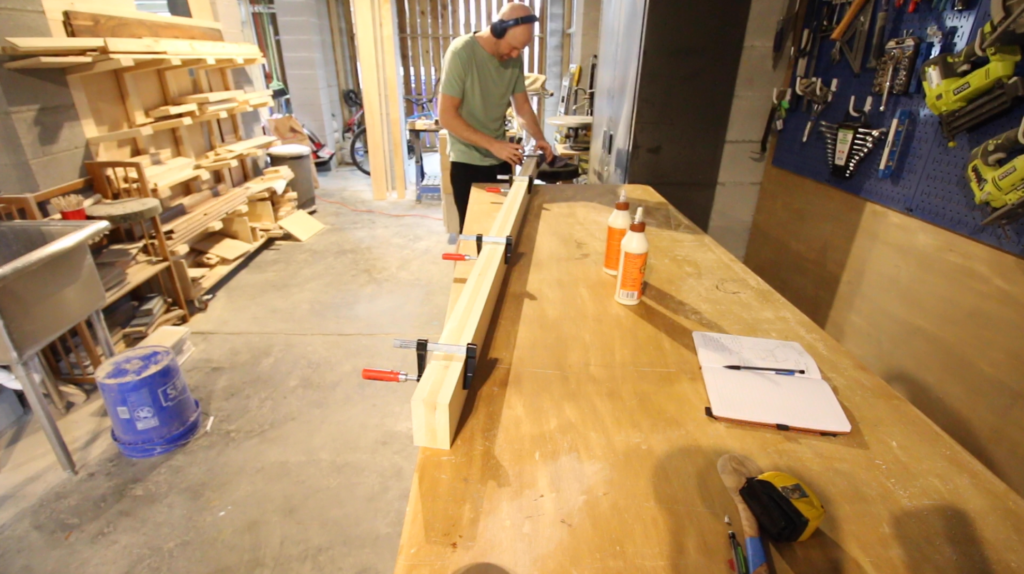
We also glued two 1x6 boards together to make our side rails around all four sides. For all of these, we spread a large amount of wood glue and excessively clamped for 24 hours to make sure they were all one solid piece.
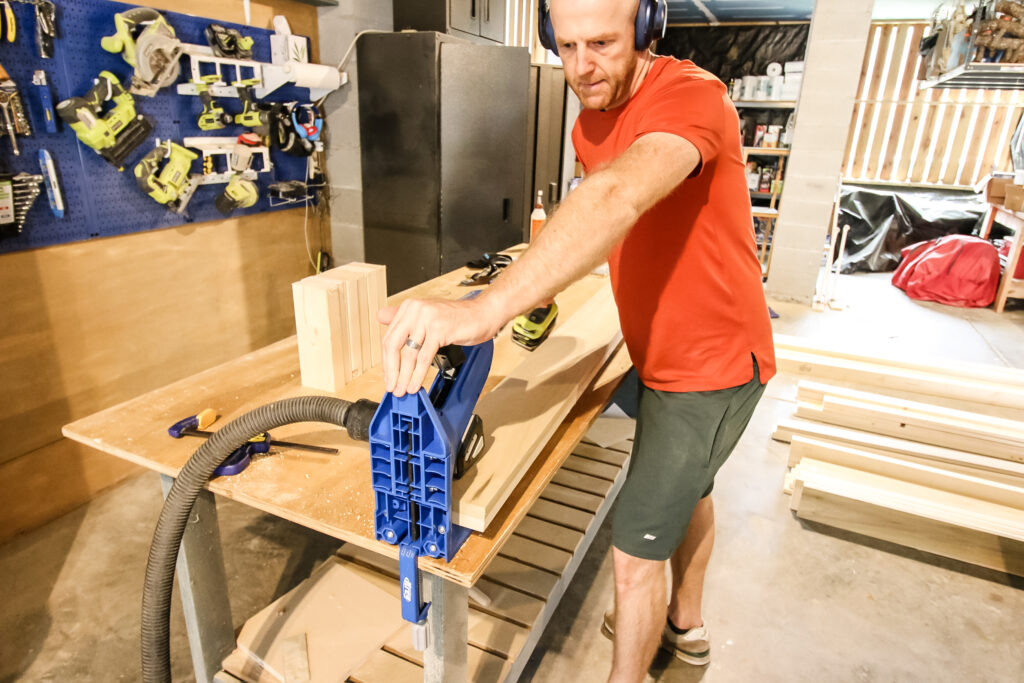
After everything we cut and glued together, we used our Kreg pocket hole jigs to drill pocket holes where necessary (full pocket hole placement in the plans!).
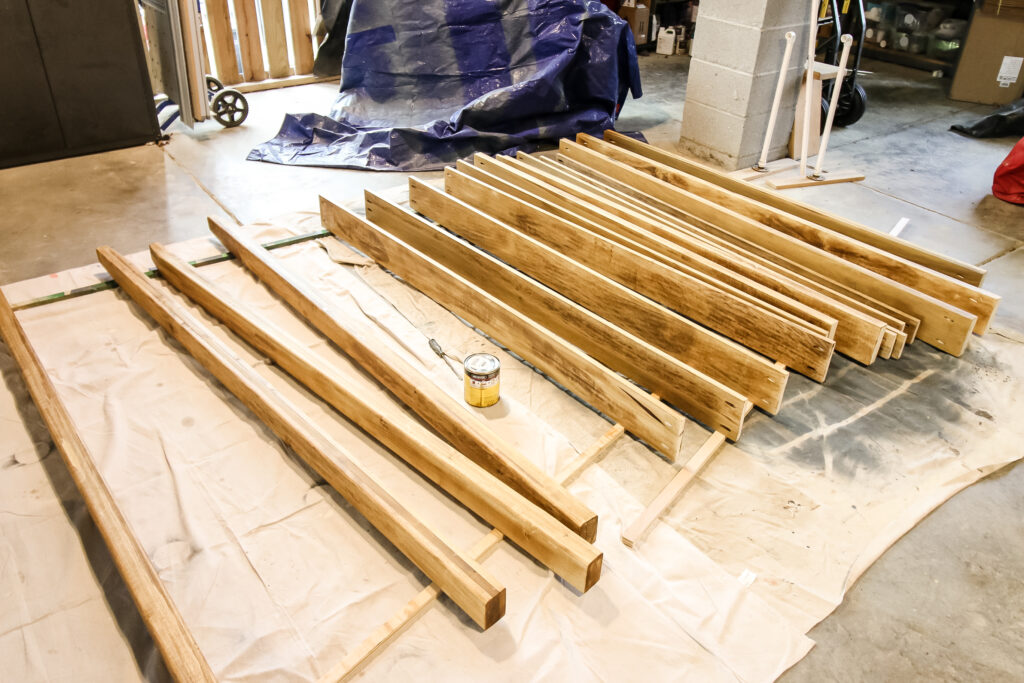
Finally, we sanded everything down and stained with Minwax Golden Oak.
Step two: Build headboard
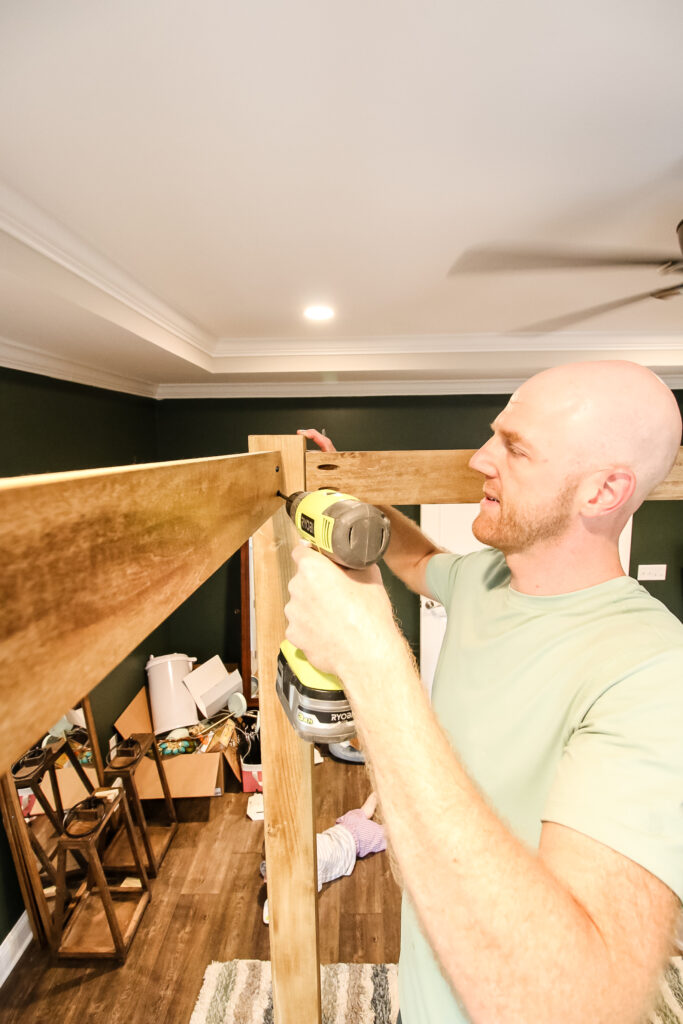
We started assembly by putting together the headboard. This was the first introduction that this is a two person assembly job.
It was impossible to lift up the headboard after screwing the boards to the posts because you literally cannot reach both sides, no matter what your wingspan is. Plus, it gets heavy.
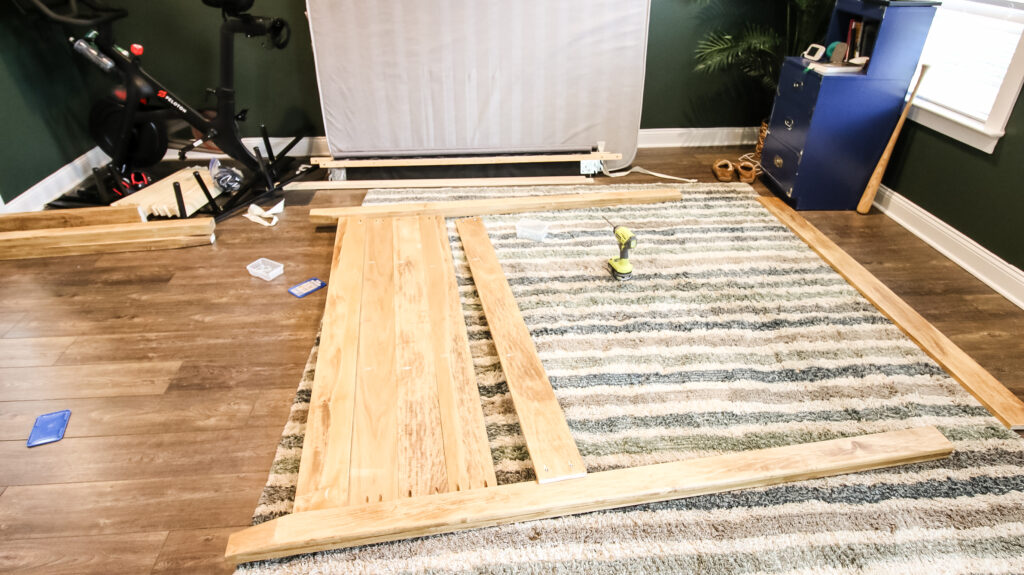
We attached the headboard rails to each post going up using Kreg pocket hole screws until they were all in place.
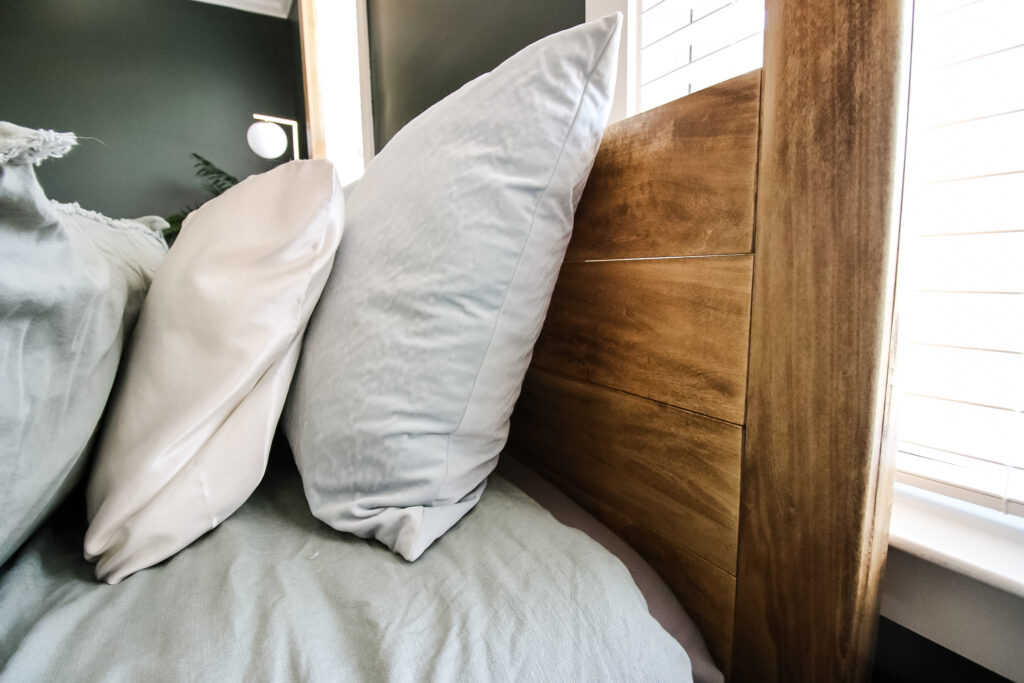
In the end result, the headboard looks great and is the perfect height for a set of pillows.
Step three: Build footboard
After assembling the headboard, we did essentially the same thing on the footboard, however there were only two sets of double thick boards on the footboard.
These were screwed in the same way to the posts with Kreg screws.

We didn't use wood glue on the joints because that would make this bed impossible to remove from the bedroom in the future - it is larger than the doorway.
If you were sure you were never going to move it (or didn't mind sawing it apart in the future), you could add wood glue in the joints for extra stability. However, we have been sleeping on it and our 2 kids have jumped all over it and there are no stability issues.
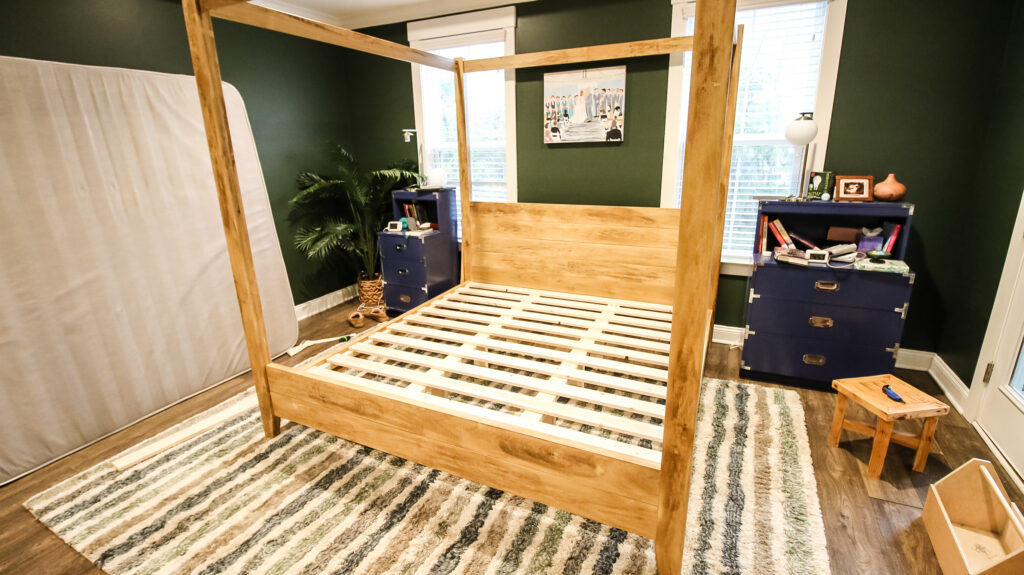
Step four: Attach headboard and footboard
Here again is why you need two people for this assembly. To attach the headboard and the footboard, you attach the side rails in between the posts on both sides.
Use a friend to help hold up the side rails as you screw one into place on the headboard post, then on the footboard post on the same side. Repeat for the other side.
Step five: Attach top rails
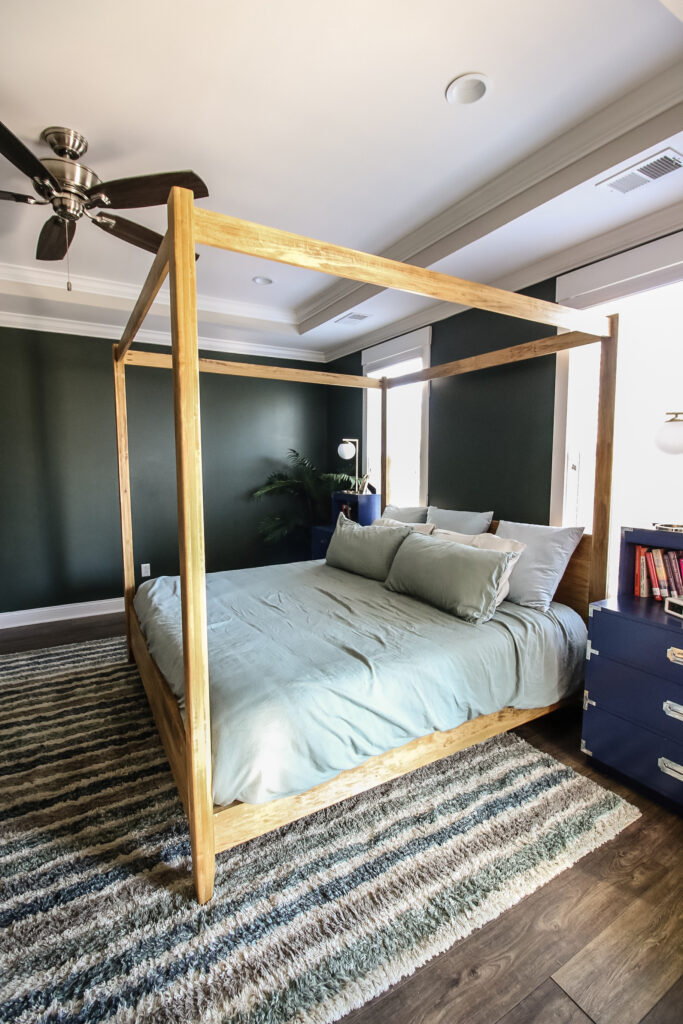
Now the bed is looking good. The next step was to attach all the top rails between the posts to take the bed from a traditional four poster style to a four poster canopy style.
We achieved this look by running a single 1x4 board between each post. These are essentially your curtain rods if you're planning to run an actual mosquito net or curtains of some kind around the bed. Ours are just for show.
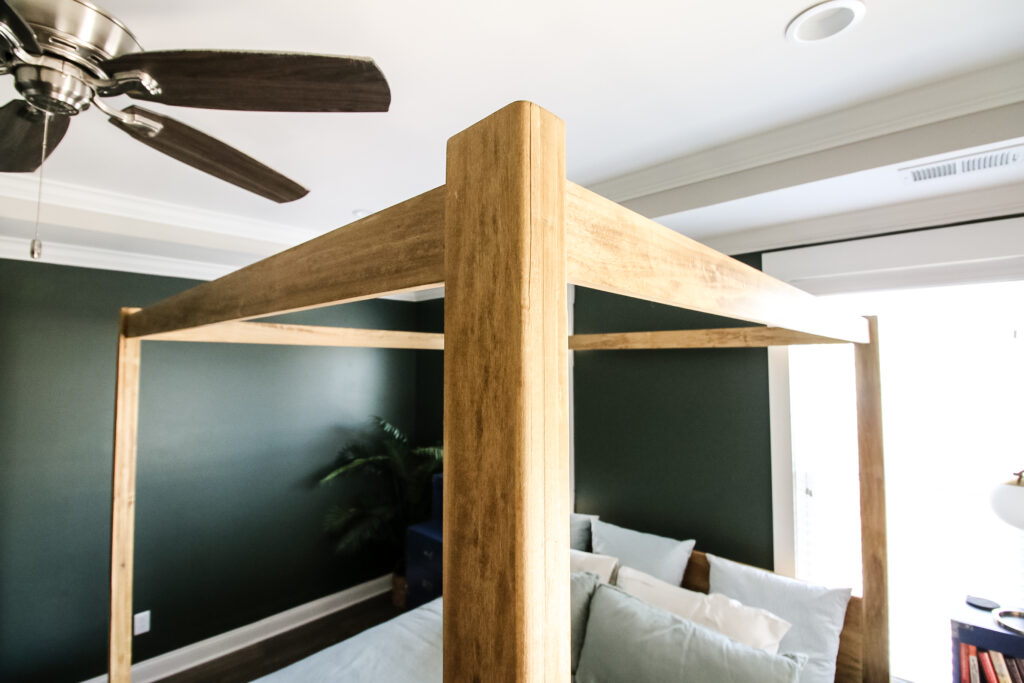
You can choose to run this flush with the top of the posts, but we dropped ours down one inch to give it a more modern look.
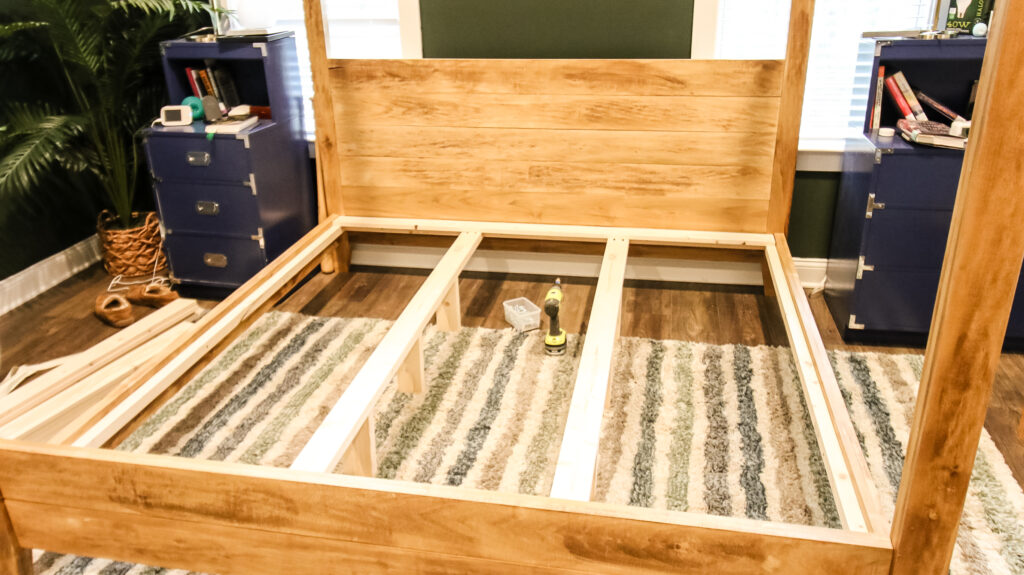
Step six: Add supports
Finally, we added the supports for the mattress and to pull the whole bed frame together.
We had glued and screwed supports to the side rails, headboard and footboard before installation, so this step involved two support beams down the middle (with legs glued underneath) and slats spanning the whole width of the bed.
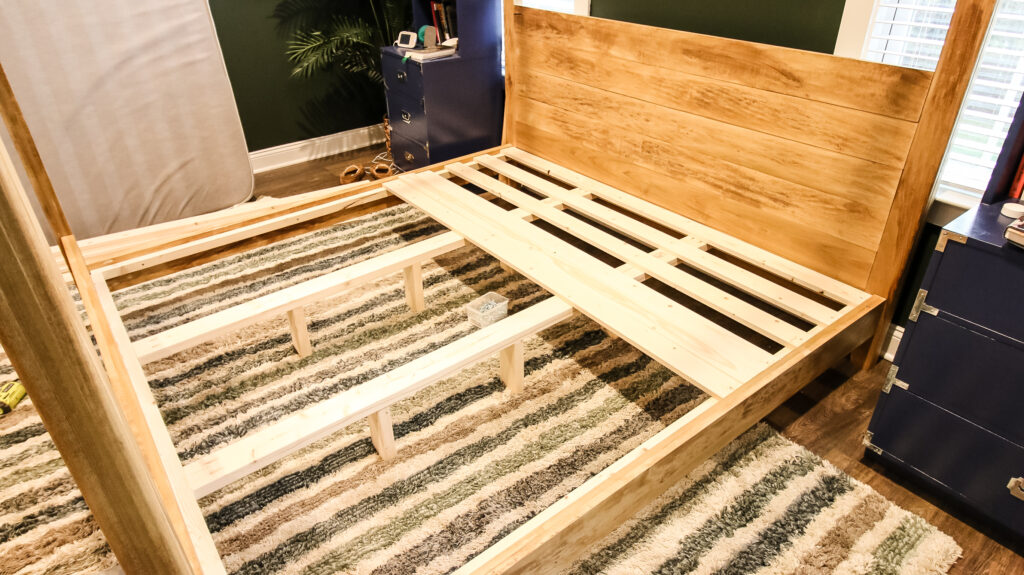
When we attached the slats, we used the new Kreg Quick Flip tool, which is an interesting way to save you from having to have two different drills with you.

The way the Quick Flip works is that it has a drill bit on one end that you can quickly rotate to have a square driver head on the other end. This allows you to drill the pilot hole, flip to the driver, and screw in the screw.
This worked great and gave us lots of support. Then we slid the mattress into place!
Step seven: Sleeeeeeeeeep
After a lot of hard work, it was finally time to test the bed out and give it a good night's sleep.
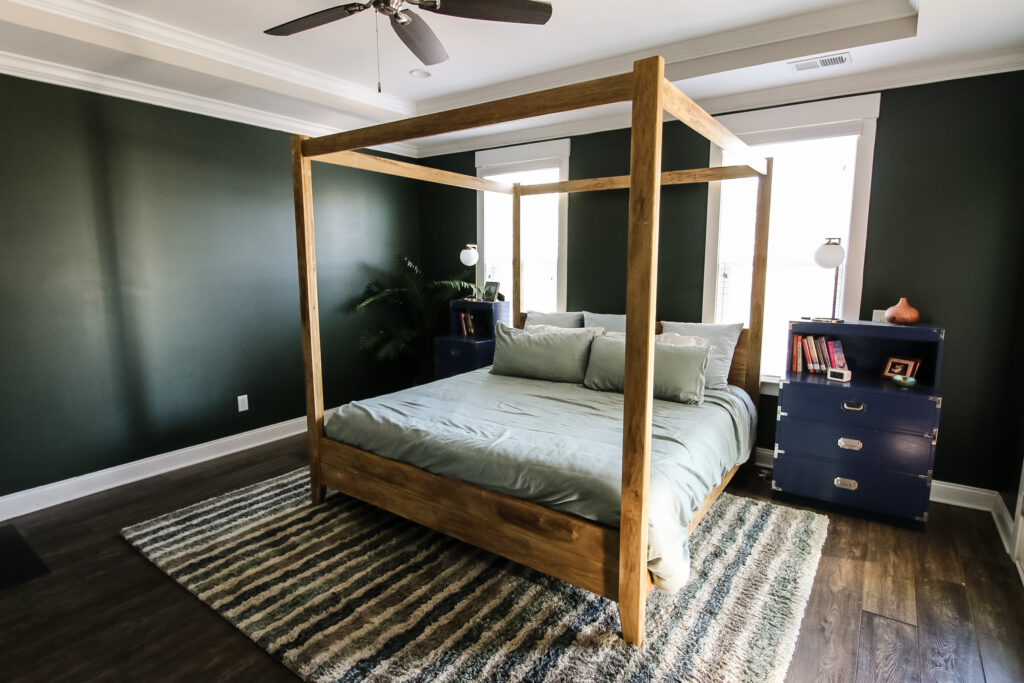
We love the aesthetic look of this DIY canopy bed frame and how it takes up space in our room. After we rotated the bed and sold our old dresser we had flipped years ago in our condo, we realized how big this bedroom actually was.
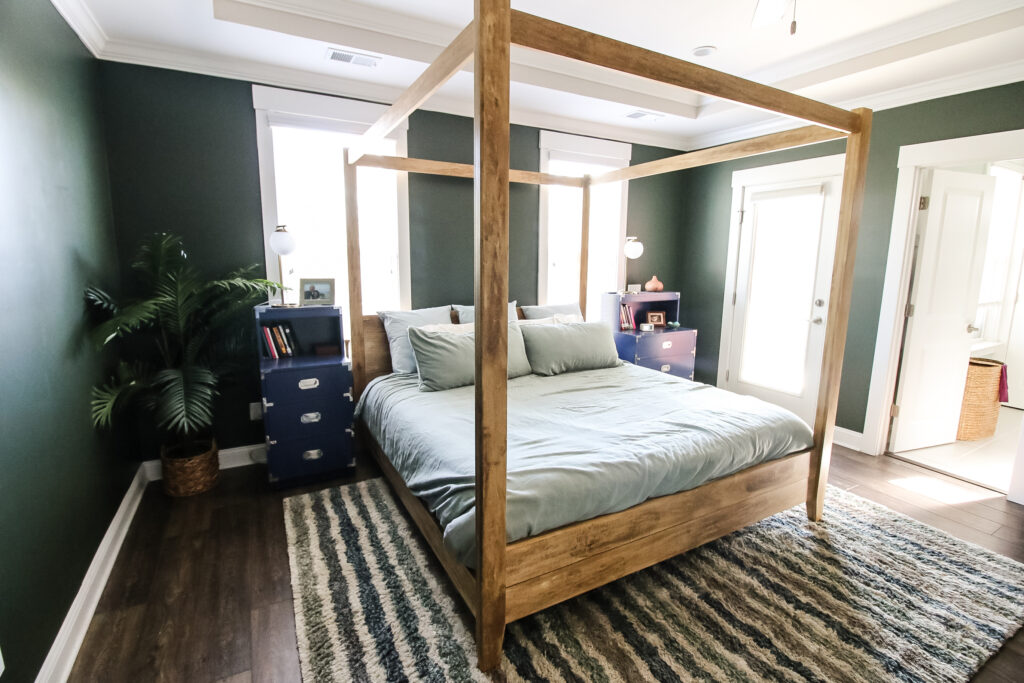
This canopy bed was the perfect way to create a statement feature you see centered on the wall opposite our bedroom door.
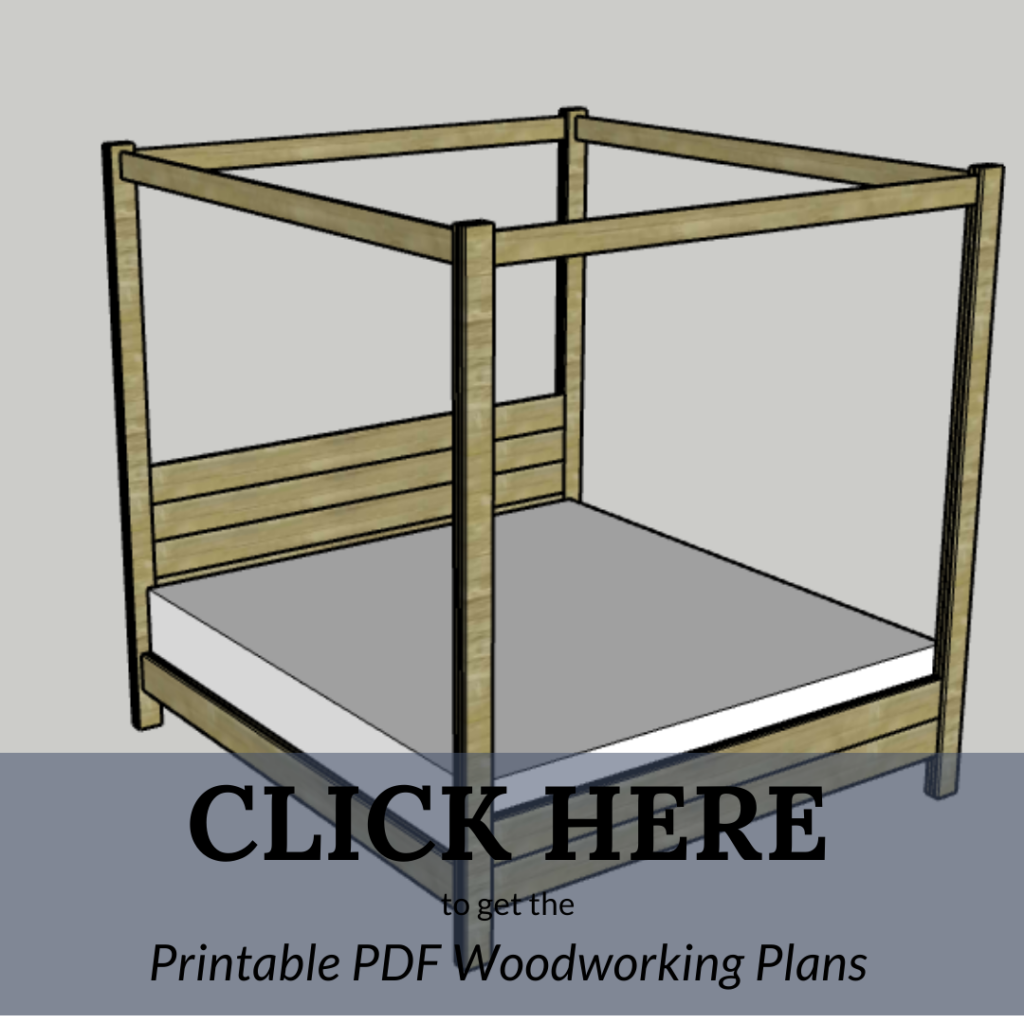
FREE woodworking plans for our DIY four poster canopy bed
If this project inspired you to build your own DIY four poster canopy bed, then make sure you grab the FREE woodworking plans to make it yourself!
Thanks to our friends at Kreg Tool, you can download the free plans on their site by clicking here. There, you'll find the full material list, cut list, and step-by-step instructions with computer model imagery to make this as process as crystal clear as possible.
While you're on the Kreg Projects and Plans page, make sure you search for any other projects that you've been thinking about doing in your home. Their library has hundreds of great plans for you to tackle (including lots more from us too!).
Here are a bunch of beds that you can build using a Kreg Jig!
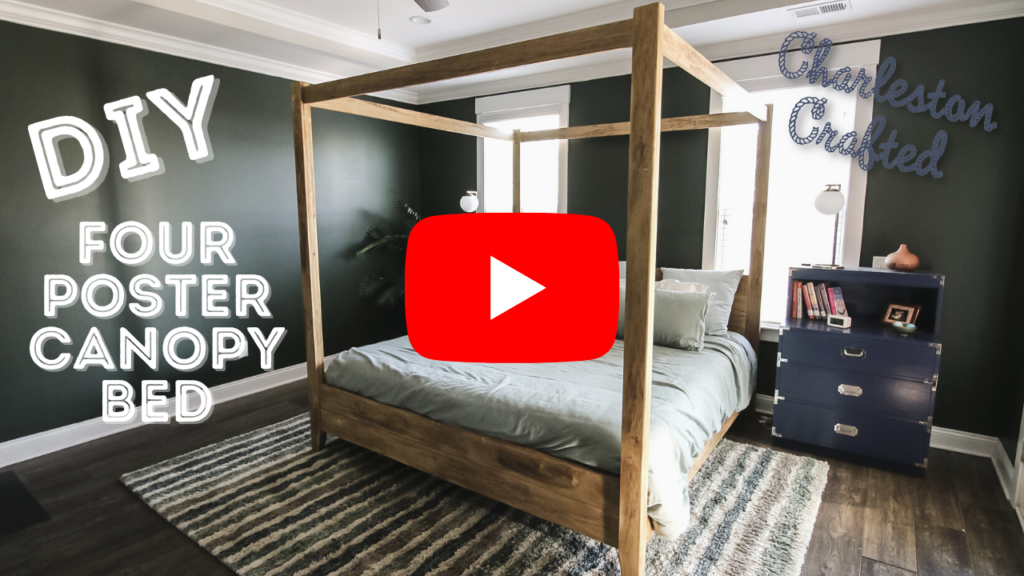
How to build a DIY canopy bed video tutorial
Want to see more of the action on this project? Make sure to check out our full video tutorial on how to build a DIY four poster canopy bed to help with your project!
Modifications for a queen size canopy bed
These plans are for a king size DIY canopy bed, but this project can easily be scaled for a queen-sized bed, full-sized bed, or twin sized bed.
After you download the free woodworking plans, adjust all of your cuts for the appropriate dimensions of whichever size you need comparatively to a standard 76"x80" king size bed.
We are hoping to put together plans soon with these modifications, so check back or email sean@charlestoncrafted.com to get on the wait list for the modified plans!
Here are some answers to some frequently asked questions about four poster canopy beds:
The point of a four poster bed is to bring a grand, elegant style to a room. There is no first world, modern day purpose for a four poster bed, other than the aesthetic look. A four poster bed will help you bring style to your space.
Originally, when four poster canopy beds were created, it was to drape a netting around the posters to create a bug shield at night when people had to sleep with the windows open before air conditioning existed.
The main difference between a four poster bed and a canopy bed is the railings that connect the four posts. A canopy bed had railings around the posters that are traditionally used to hang drapes to protect you from bugs while you sleep. A four poster bed just has the four posts extended in the corners.
Four poster beds are definitely not out of style! They are just for a specific type of style.
If you want to have a grand look to your bedroom, a four poster canopy bed is a perfect option. You can choose a modern design (like the one in this post) to still have a modern flair with the traditional look.
A four poster bed can make a room look smaller, but it becomes the focal point of a room. If you have a large primary bedroom, a four poster bed is a perfect choice to occupy some of the blank vertical space in the room. If you need your room to look larger or have low ceilings, you might want to choose a different look.
Basic woodworking information for every project
Here are some of our most popular woodworking articles!
Shopping for wood:
Woodworking project ideas
- 100+ of the best woodworking project ideas!
- 62 easy beginning woodworking projects
- Woodworking project ideas to make and sell
See all our printable PDF woodworking plans!
Our favorite tools + supplies
- See all our favorite tool reviews
- How to use a Kreg jig
- The ultimate wood stain guide
- The best wood fillers for your project
Remember to also always use safety equipment while woodworking and using tools. Make sure you have proper eye protection, ear protection and a good mask to keep yourself safe.

Looking for something?
We've been doing this since 2012 so we have a LOT of blog posts!
Search stuff like: Ceiling Projects | DIY Plant Stands | Thrift Flips

Hey there, I'm Sean, the woodworking enthusiast and builder behind CharlestonCrafted.com! Since 2012, I've been sharing the magic of turning raw materials into beautiful creations. I love teaching others the art and satisfaction of woodworking and DIY. I try to inspire fellow crafters to make something extraordinary out of nothing at all.


