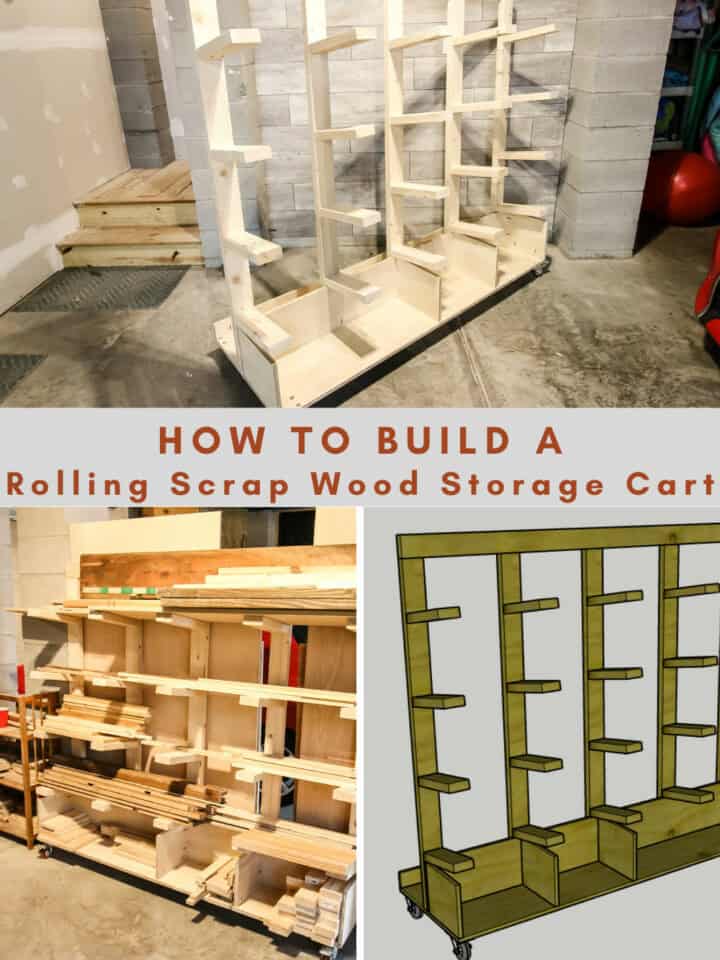
Have a lot of scrap wood that you need to get organized? Here's a step-by-step tutorial and woodworking plans on how to build a rolling scrap wood storage cart!
This post was sponsored by Kreg Tool, the makers of our favorite cutting and joining solutions. All opinions are our own. Thank you for supporting the brands that make Charleston Crafted possible!
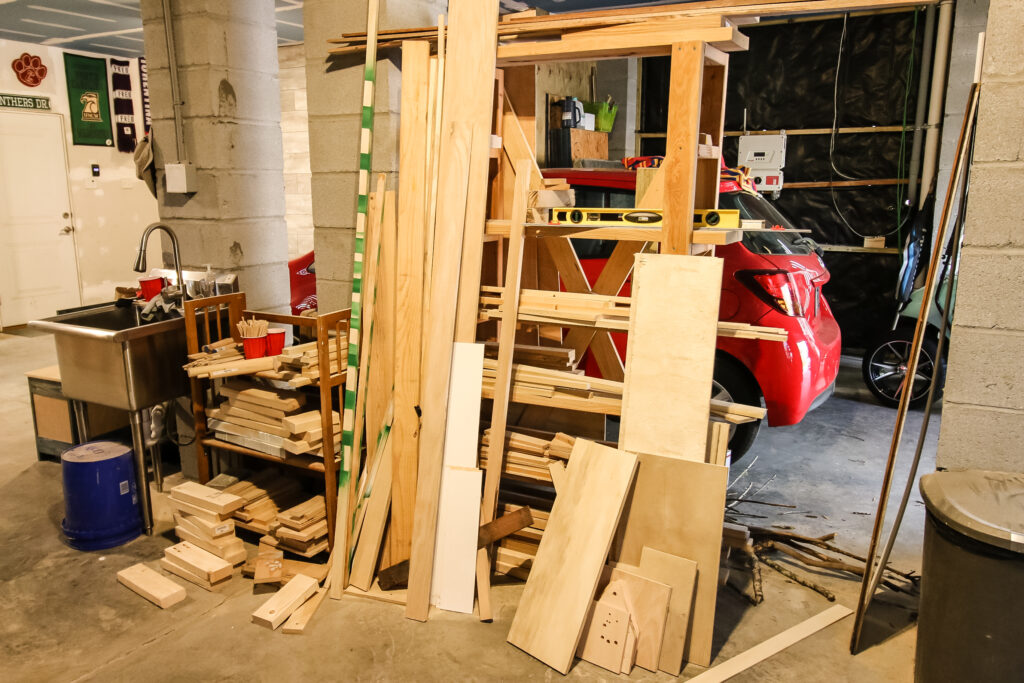
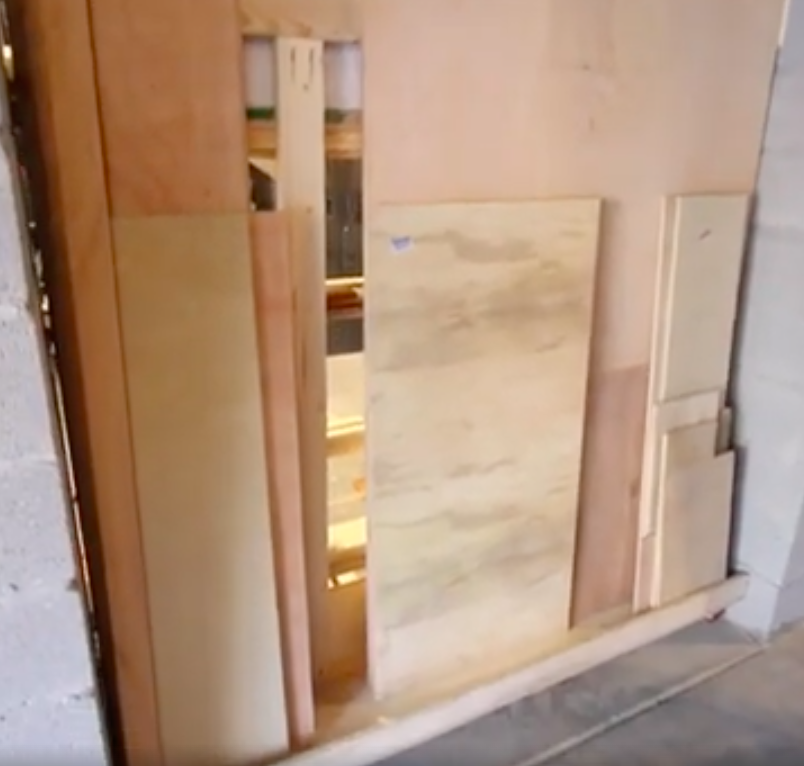
Our scrap wood pile has been an absolute mess since we moved into this house.
At our old house, we used to store wood on the wall with vertical scrap wood storage and we got rid of a lot of junky pieces when we moved.
In 2021, we finally got around to building out our garage workshop and organizing things more efficiently, but still didn't really come up with a good storage solution for pieces of wood in the shop.
For our space and the DIY projects we do, we often work with boards, plywood and small scraps, so we needed something that would accommodate all three and we wanted something on wheels for flexibility.
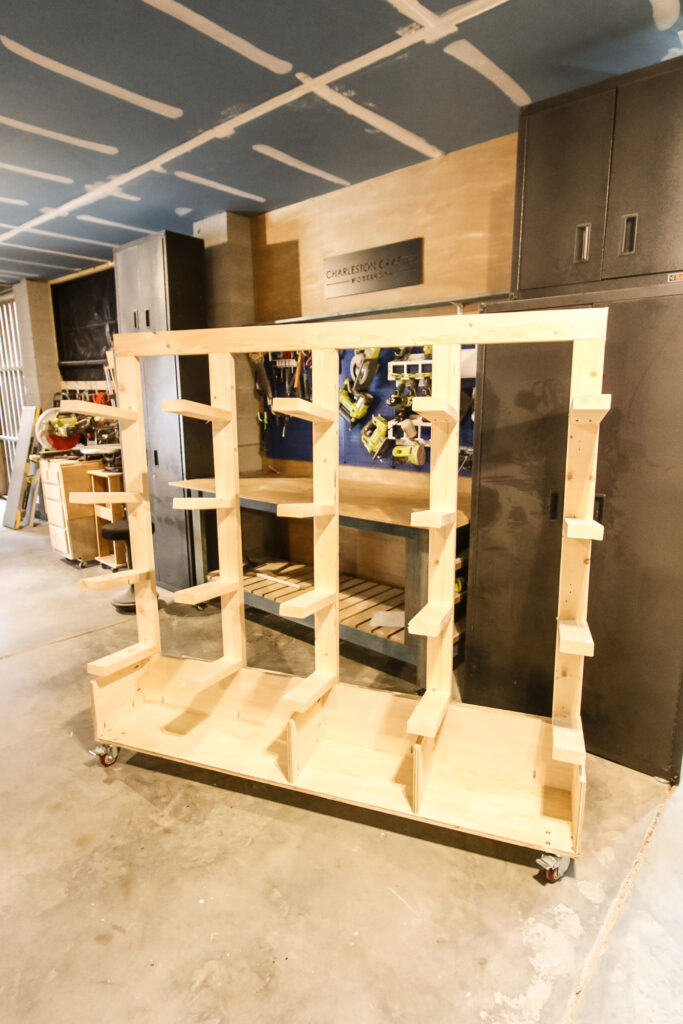
All that in mind, we designed this rolling scrap wood storage cart that has horizontal racks for long boards, small cubbies for scrap pieces and a section for large plywood sheets.
Let's dive into the best ways for you to determine what type of scrap wood storage you need and show you how we built our rolling scrap wood cart!
What's the best way to store lumber?
Storing wood horizontally is the best way to keep it straight and flat.
Never stack wood long-term on the floor, as it can get a build up of moisture which will lead to mold. You want a storage option that allows for air flow to prevent this.
There are a lot of vertical lumber storage ideas, with the most popular being lumber racks mounted directly on the wall or a rolling cart.
With our version here, we brought both of those two ideas together into one!
How do you store small wood scraps?
If you're anything like us, you don't want to throw anything away. Our general rule is that we keep anything that is 6" or more, which is a good starting place.
Previously, we've used boxes or a shelf on our workbench as a DIY wood storage bin, but we wanted something in this plan that would help better.
The best way to store small wood scraps is by grouping them together into similar categories. Ideas for that generally include
- Grouping by length, or
- Grouping by wood type
Depending on the type of work you generally do, you might have different small scrap wood storage ideas, but we think those are best.
For this rolling scrap wood storage cart, we incorporated small cubbies on the base to help organizer our small scraps by size. With our plans, you can easily adjust where you put the dividers to determine what works best for you!
How do you store sheets of plywood?
Plywood storage might be one of the most difficult things to figure out in any size workshop or garage.
When you buy a 4'x8' sheet of plywood, that takes up a huge amount of space in any workshop and is also cumbersome to work with for the same reason.
Inevitably, you need to store sheets of plywood, or at least smaller leftover pieces, somewhere.
Our rolling scrap wood storage rack incorporates a section on the back to lean sheets of plywood and accommodates anything from a small piece of plywood to a full sheet.
Plywood is best stored horizontally along the longer edge, if you have the space, but that's difficult to do unless you have a massive shop.
Store plywood with a slight lean to it so that it stands up but doesn't bend or sag.
How to plan your scrap wood storage
The most important thing about scrap wood storage is that it be designed to suit your needs. So, look at your wood supply and assess what you have.
Our rolling scrap wood cart is designed to hold long boards, small pieces, and sheets of plywood. If you have more or none of a certain type of wood, you will want to adjust your design to accommodate what you have.
Then, consider the space that you have to store wood. You might need something wall mounted or prefer the flexibility of a rolling cart.
How to build a DIY scrap wood storage cart
Here's how to build this easy DIY lumber cart! Scroll down to get our lumber storage cart plans and download them to build it yourself!
Tools needed to build a lumber and scrap wood storage cart
- Plunge saw/circular saw
- Miter saw
- Cordless drill
- Kreg 720 Pro pocket hole jig
- Kreg 520 pocket hole jig

Supplies needed to build a lumber and scrap wood storage cart
- Pocket hole screws
- ¾" plywood
- 8' 2x4 boards
- Rolling locking casters
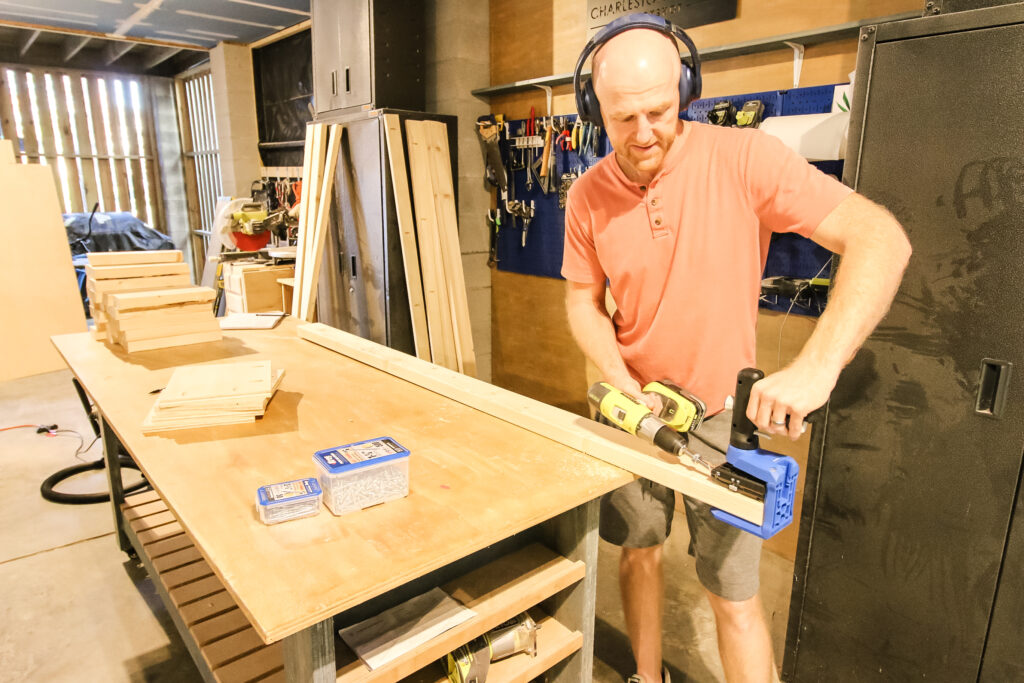
STEP 1: Make cuts and drill pocket holes
Time to get started! The first thing to do to build a scrap wood storage cuts is make all your cuts. We have all the cuts laid out in the free plans you can access below!
After the cuts are made, it was time to drill pocket holes. We needed this scrap wood storage cart to be very secure since it would hold weight in several ways, which is why we turned to our friends at Kreg Tool.
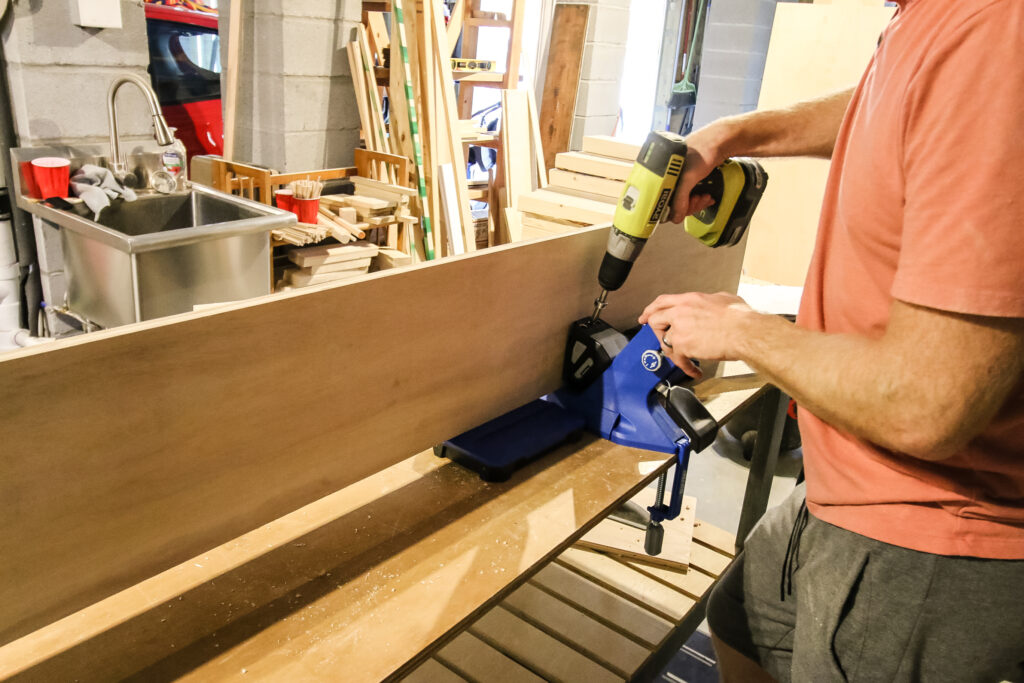
When drilling all our pocket holes, we used our new favorite tool, the Kreg 720 Pro pocket hole jig.
Get our full review of the Kreg 720 jig here!
We love how easy it was to switch from ¾" thick plywood to 1 ½" thick boards with their AutoMaxx Clamping System. Plus, cleanup was a breeze.
For the longer boards that would be our vertical pieces, we squeezed on the Kreg 520 pocket hole jig.
Get our full review of the Kreg 520 jig here!
The great thing about the Kreg 520 jig is that it has a squeeze trigger that is perfect for long or large boards. You just attach the jig directly to the board instead of having to load a large board into a jig.
We finished all those up and then got to assembly!
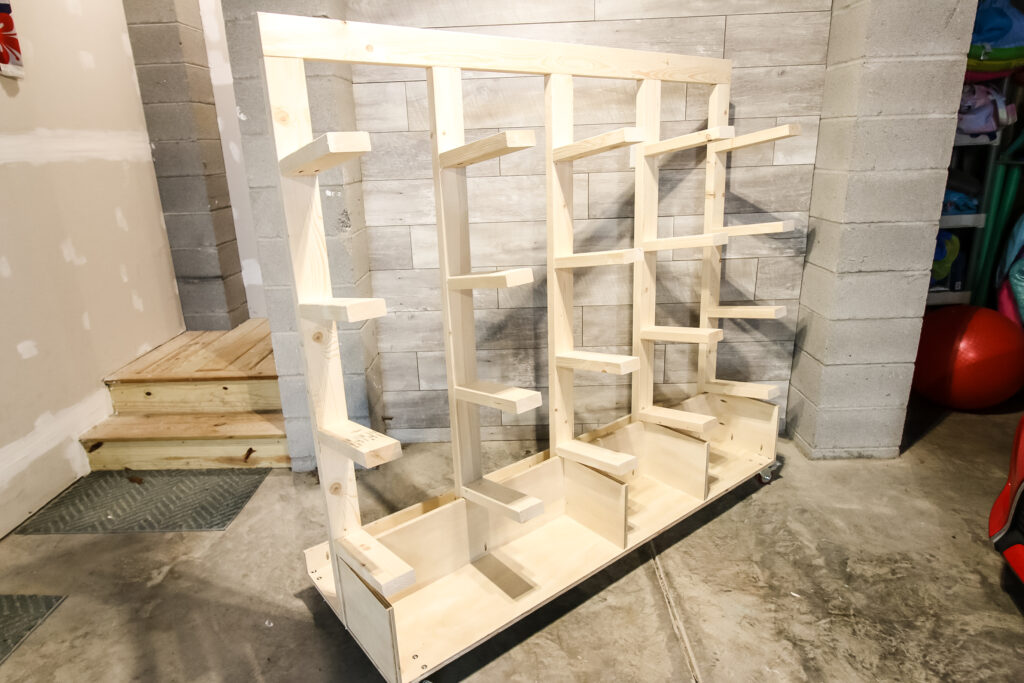
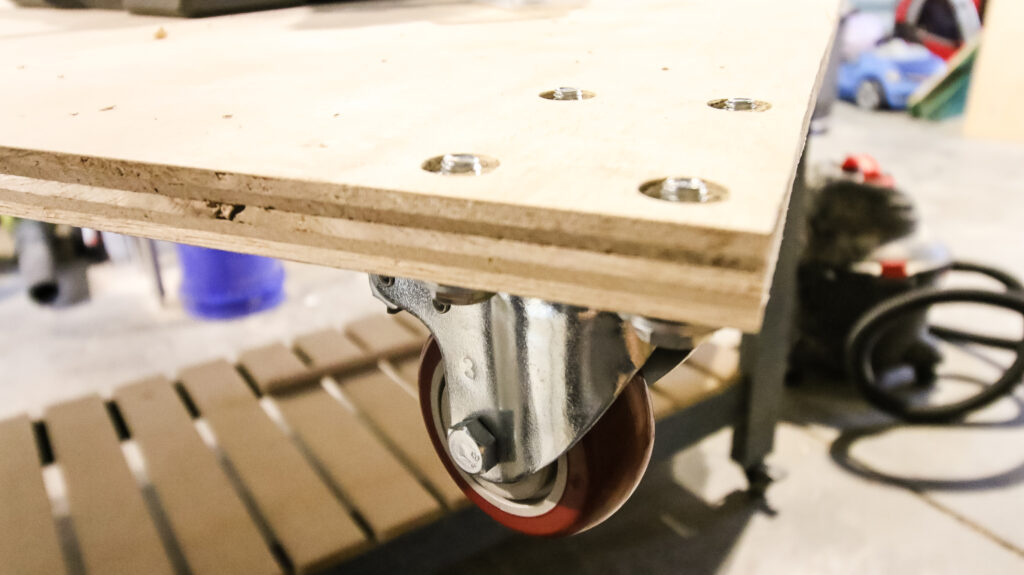
STEP 2: Build the base
After the cuts are made and the holes are drilled, the first step to building this DIY scrap wood storage cart is to build a solid base.
We wanted it to be mobile, so we attached four locking rolling casters to the base piece.
Then, we attached a plywood edge so that we could lean plywood on the back side of the cart.
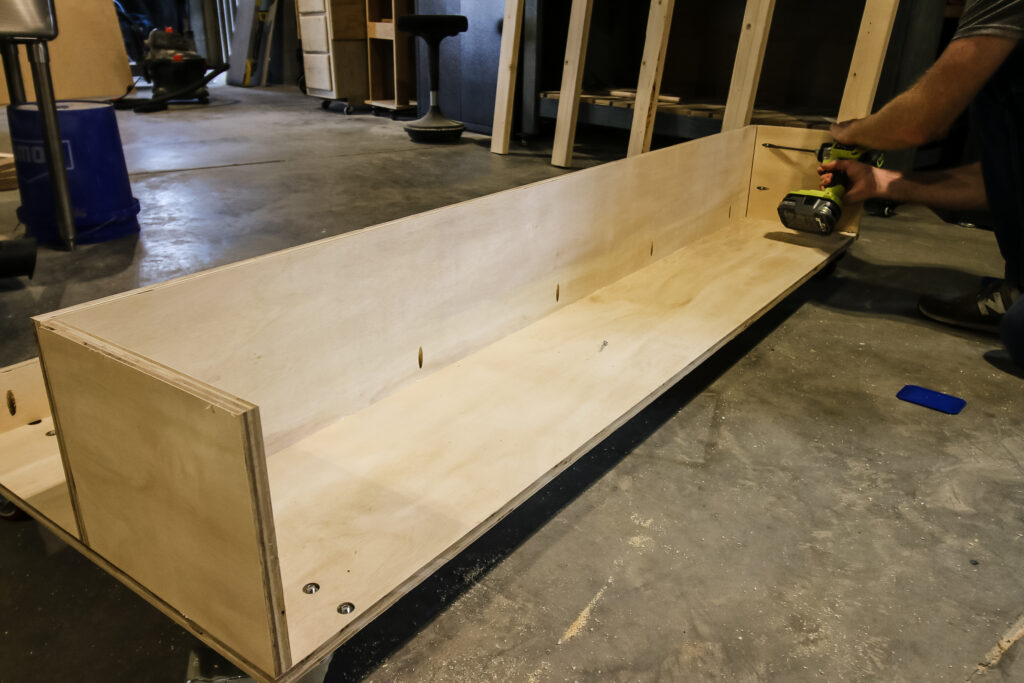
STEP 3: Create small scrap cubbies
Next, we attached the pieces to make small scrap cubbies.
As we mentioned before, we don't throw anything away that's more than 6", so we needed a place to put smaller scraps that wouldn't lay easily across the racks.
These cubbies are fully adjustable depending on your needs, including allowing you to use less or more.
These were attached with wood glue and pocket hole screws.
STEP 4: Attach wood racks
Now it was time to attach the vertical storage for longer boards.
We first built the vertical posts for the rack that would support the boards and plywood sheets.
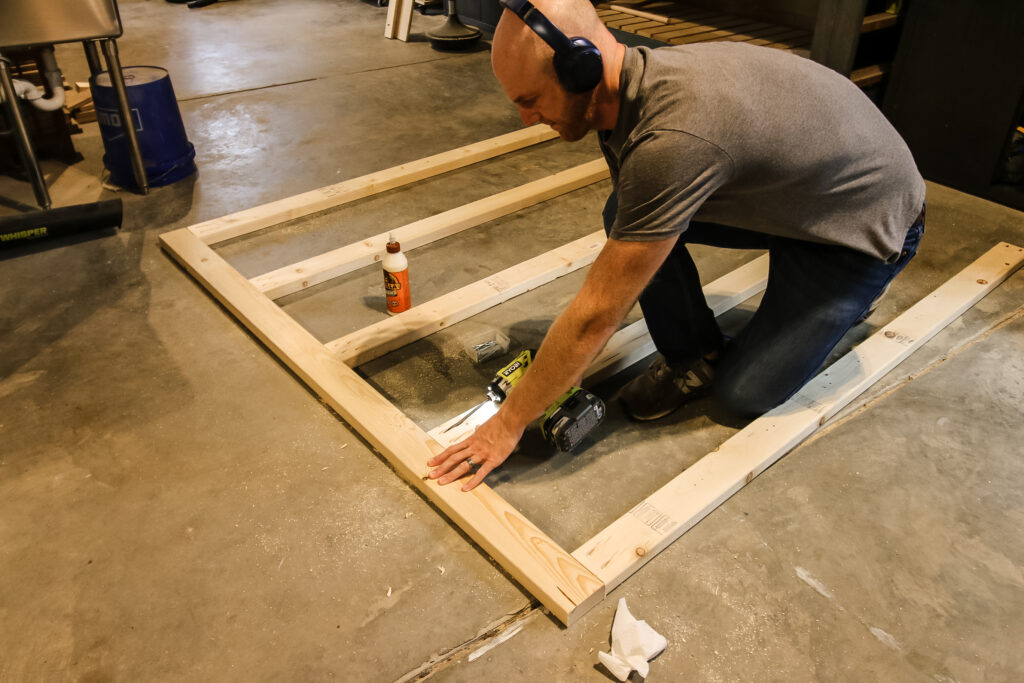
This was simply 2x4's attached together and then attached to the base with wood glue and pocket hole screws.
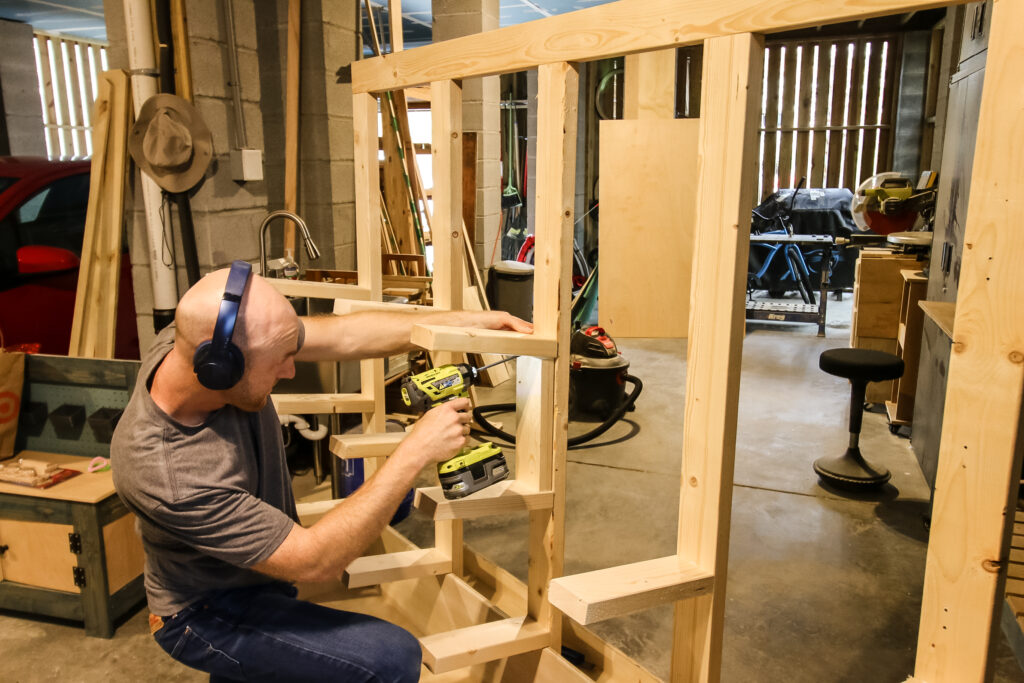
Finally, we added 20 slightly angled racks to hold our boards. Using a spacer, we evenly placed all the racks up each vertical beam so that we'd have plenty of storage for longer horizontal boards.
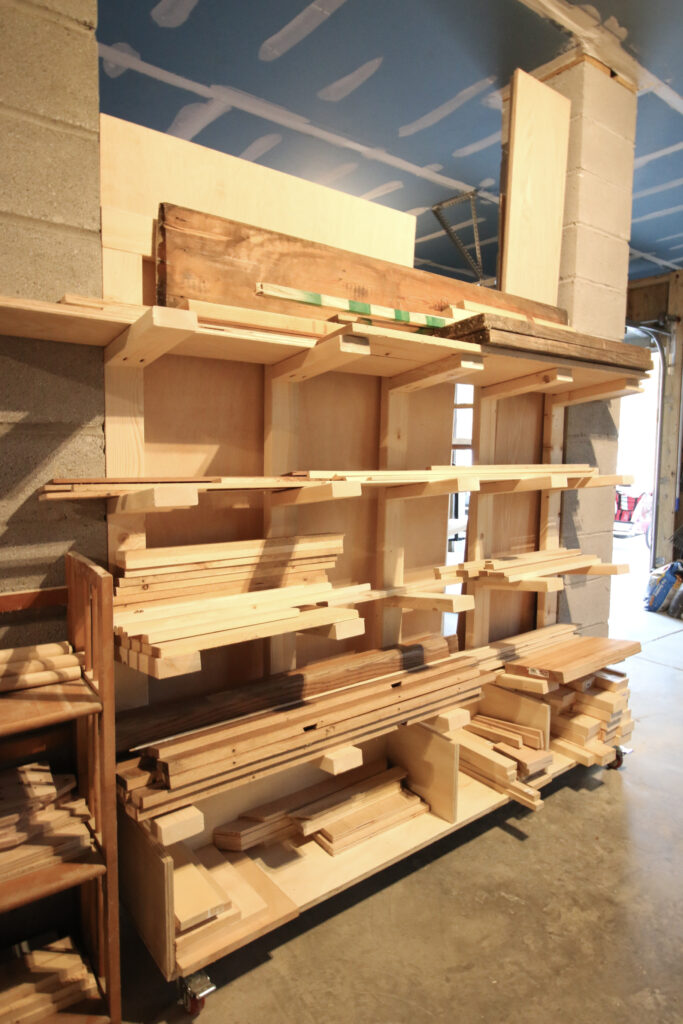
STEP 5: Load it up
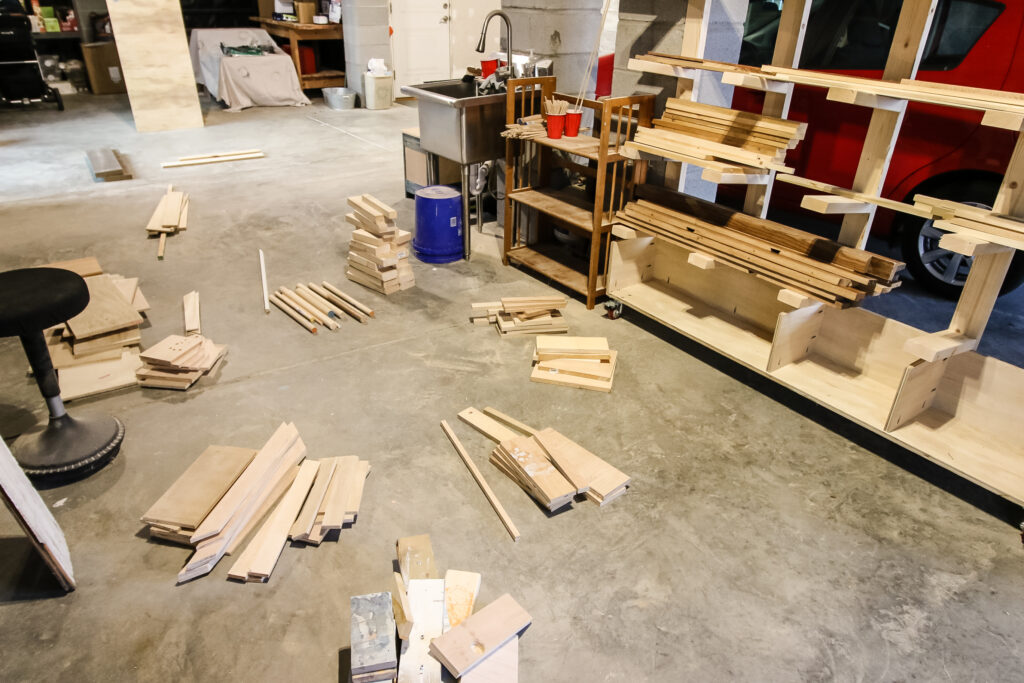
Loading this DIY rolling scrap wood storage cart might have been the most difficult part of this whole project.
We first had to go through all of our wood pieces from the old shelf and decide what we needed to keep and then put everything else into appropriate piles.
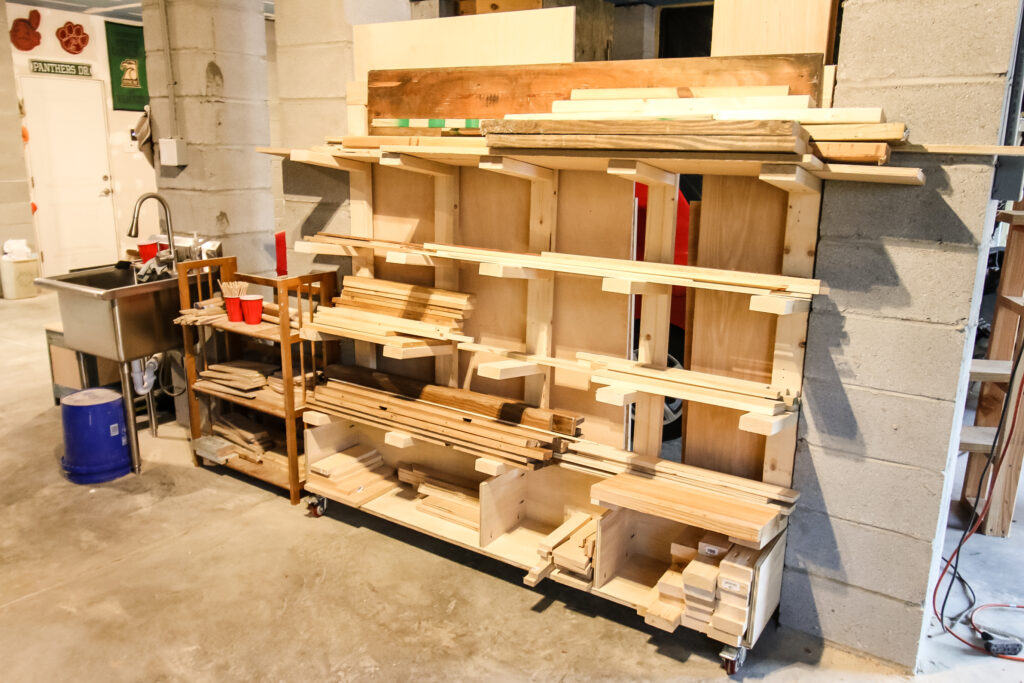
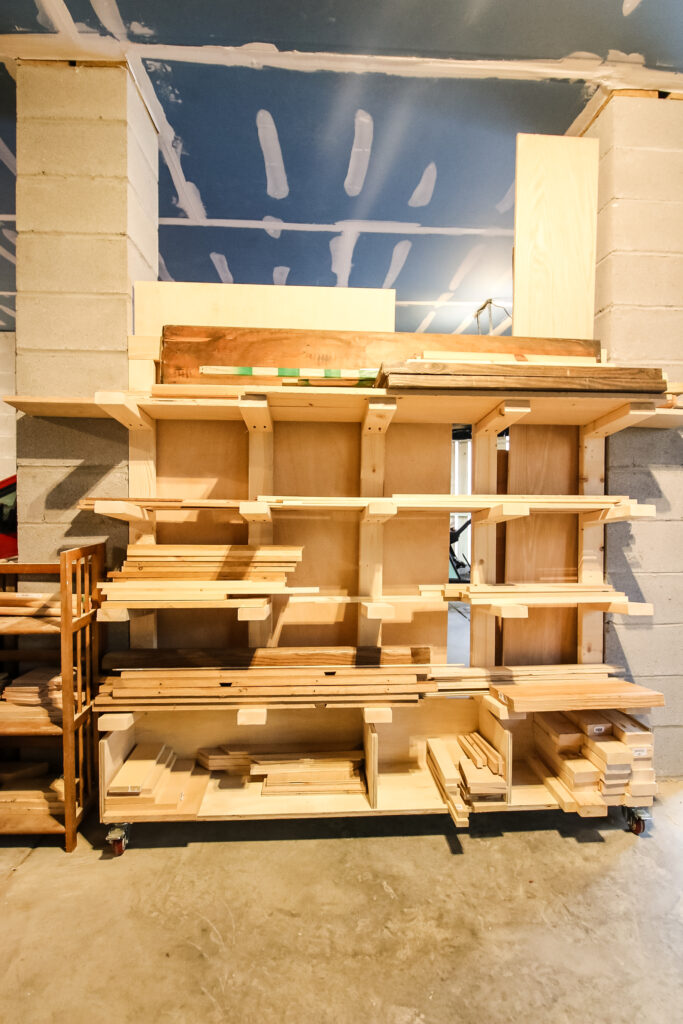
Once that had been decided, we loaded up long boards on the racks, small cutoffs in the cubbies and plywood on the back.
Now everything is easily accessible in the workshop!
Rolling Scrap Wood Storage Cart woodworking plans
We have partnered with Kreg Tool to share our step-by-step lumber storage cart plans!
Over on their site, we've uploaded our full plans with material list and cut list for how to build this scrap wood storage cart.
There's tons of other great garage storage and functional plans on their site as well, including several of ours.
Be sure to finish out your shop by building our mobile workbench made entirely from plywood!
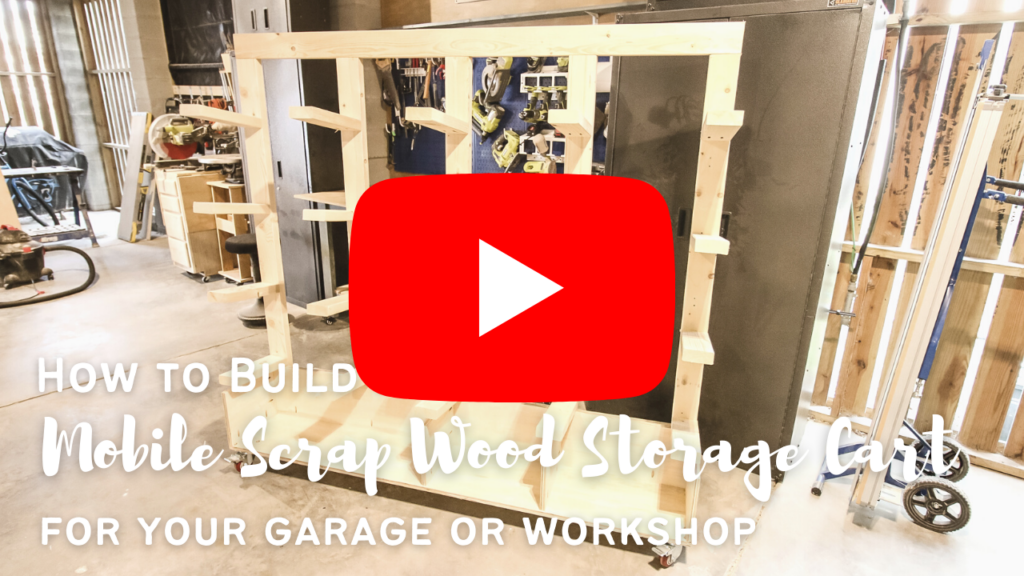
Video demonstration
Be sure to watch our video tutorial showing exactly how we made this scrap wood storage cart!
Any questions about how to build a scrap wood cart?
Interested in the Kreg Jig? Click here to read our full Kreg Jig review and to see all of our Kreg Jig projects.
New to the Kreg Jig? Here is a step by step guide on how to use a Kreg Jig!
OR grab our FREE Kreg Jig Cheat Sheet here! Download the cheat sheet!
Basic woodworking information for every project
Here are some of our most popular woodworking articles!
Shopping for wood:
Woodworking project ideas
- 100+ of the best woodworking project ideas!
- 62 easy beginning woodworking projects
- Woodworking project ideas to make and sell
See all our printable PDF woodworking plans!
Our favorite tools + supplies
- See all our favorite tool reviews
- How to use a Kreg jig
- The ultimate wood stain guide
- The best wood fillers for your project
Remember to also always use safety equipment while woodworking and using tools. Make sure you have proper eye protection, ear protection and a good mask to keep yourself safe.

Looking for something?
We've been doing this since 2012 so we have a LOT of blog posts!
Search stuff like: Ceiling Projects | DIY Plant Stands | Thrift Flips

Hey there, I'm Sean, the woodworking enthusiast and builder behind CharlestonCrafted.com! Since 2012, I've been sharing the magic of turning raw materials into beautiful creations. I love teaching others the art and satisfaction of woodworking and DIY. I try to inspire fellow crafters to make something extraordinary out of nothing at all.


