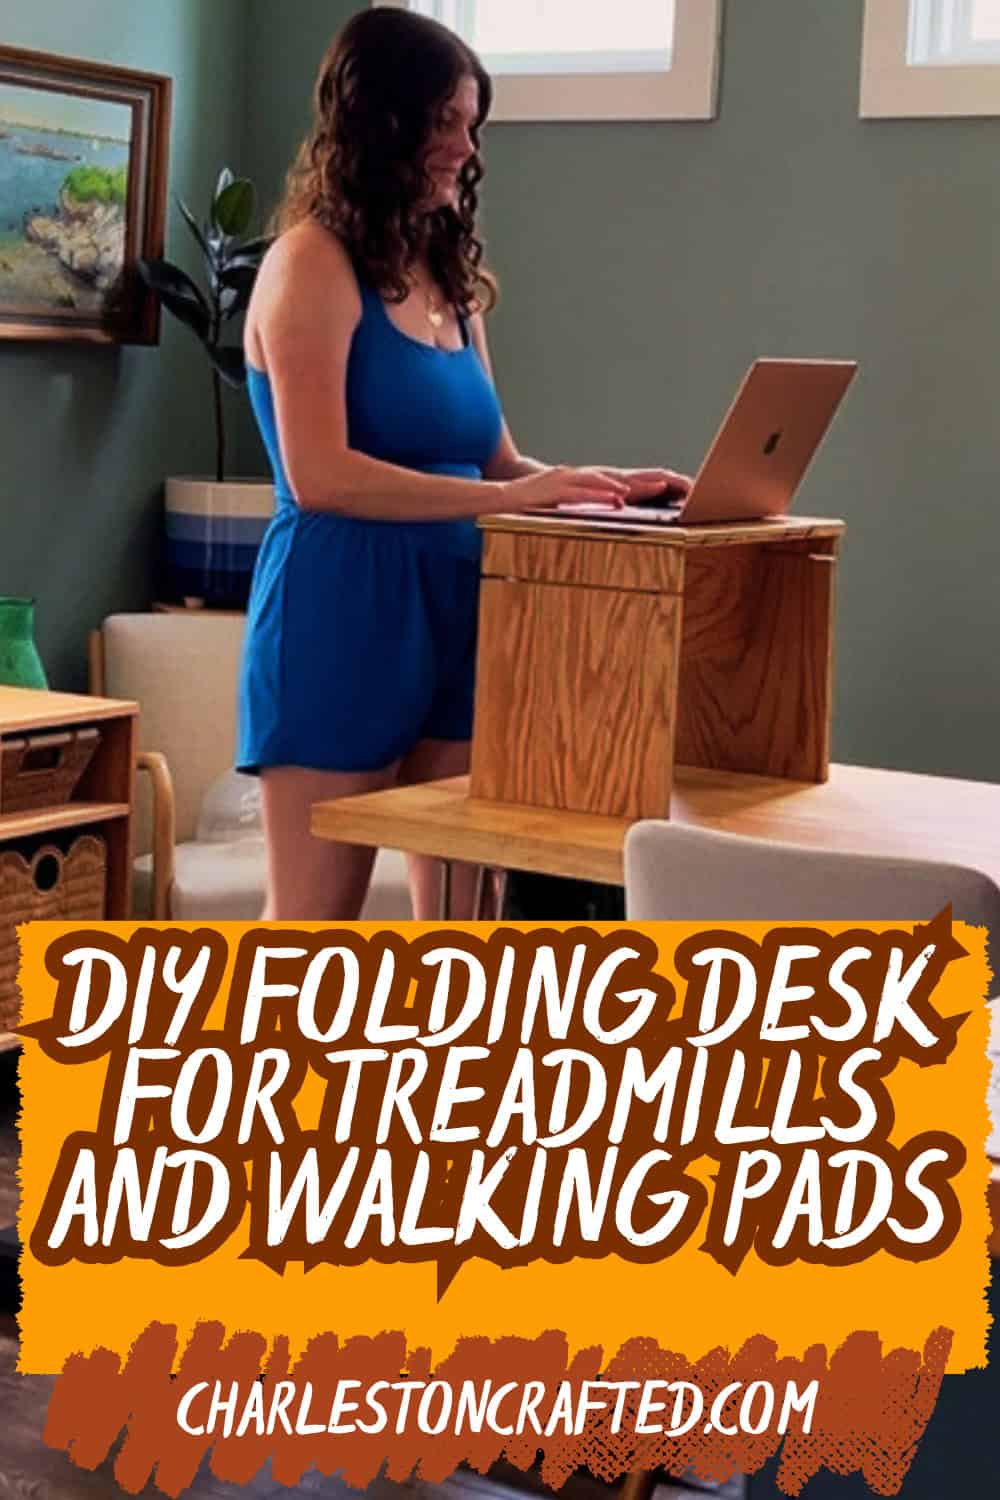
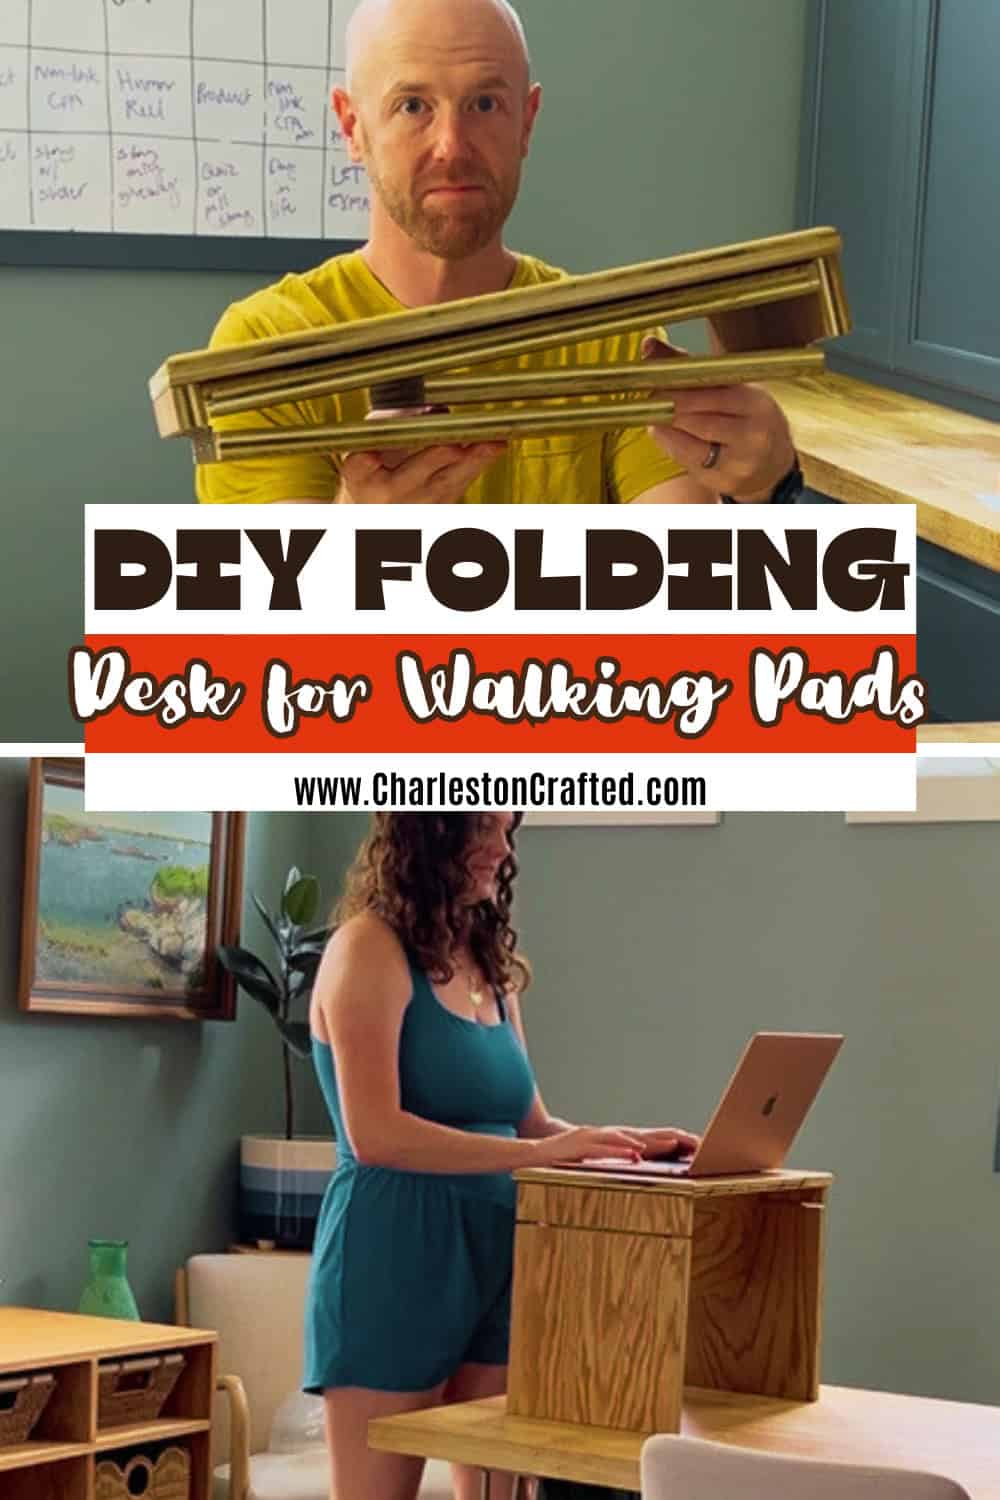
Want to work while on your walking pad? Build this folding tabletop desk that can sit on any flat surface for you to work while you walk!
In an effort to be a little healthier and get a few more steps in, Morgan recently purchased a walking pad. Her idea was that she could walk at a slow pace while doing computer work in our office.
However, we didn't have a solution for where the computer could be while she was walking. We renovated our home office a couple of years ago and didn't want some bulky standing desk out in the open.
So, our solution was to build this storage cube organizer to slide the walking desk under and then build a folding desk that could be set on top of our office desk while she walked and tucked away when she wasn't.
DIY treadmill desk
This DIY walking pad desk is fully customizable and so much better than working on top of a stack of books or an upside down basket like Morgan was doing.
You can build this with other hinges or make it taller, wider or deeper depending on your needs. This tutorial will show you the basics of what you need and how to build it!
Materials and tools needed:
Here's the materials and tools you'll need to build this treadmill desk!
- ¾" plywood
- Piano hinges
- 1 ¼" brad nails
- Wood glue
- Stain/oil
- Polyurethane
- Drill
- Brad nailer
Basic woodworking information for every project
Here are some of our most popular woodworking articles!
Shopping for wood:
Woodworking project ideas
- 100+ of the best woodworking project ideas!
- 62 easy beginning woodworking projects
- Woodworking project ideas to make and sell
See all our printable PDF woodworking plans!
Our favorite tools + supplies
- See all our favorite tool reviews
- How to use a Kreg jig
- The ultimate wood stain guide
- The best wood fillers for your project
Remember to also always use safety equipment while woodworking and using tools. Make sure you have proper eye protection, ear protection and a good mask to keep yourself safe.
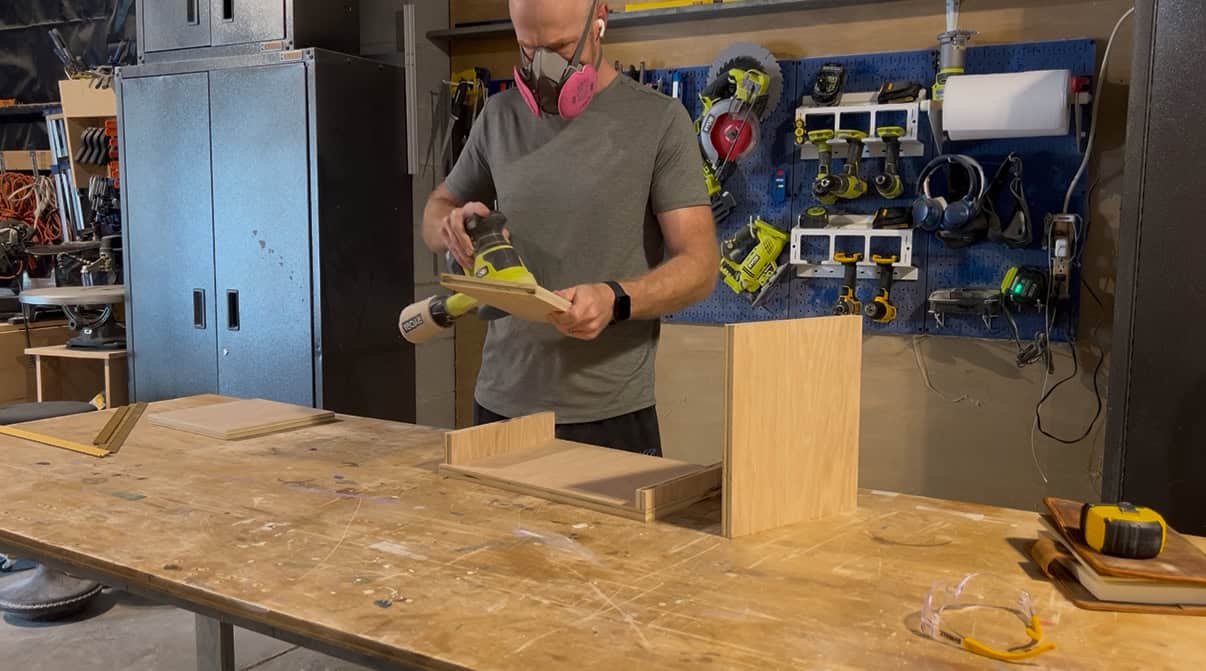
Step one: Measure and cut
Start by measuring what you need for your desk. You need to measure the total height from the floor that you want the top of the desk to be.
Then, subtract the height of your work surface to the ground to determine how tall your actual desk will be. Finally, measure for the width and depth of the top of the desk so that your computer will fit and if you need the mouse or a spot for your phone.
For me, my desk was 17" wide, 11" deep and 13" tall, which is from a standard desk height table.
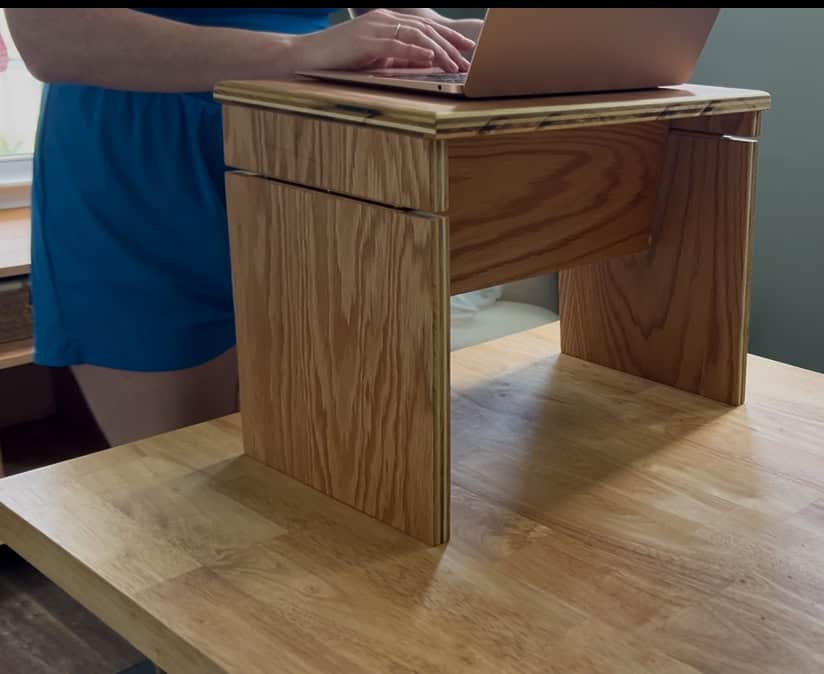
I cut pieces for the top and left and right sides, as well as a middle spreader board. Additionally, I cut two smaller pieces that would drop off each end and be fixed to the bottom of the top piece. These are 1" and 2" wide so that the sides and bottom can fold in on themselves and not be hindered.
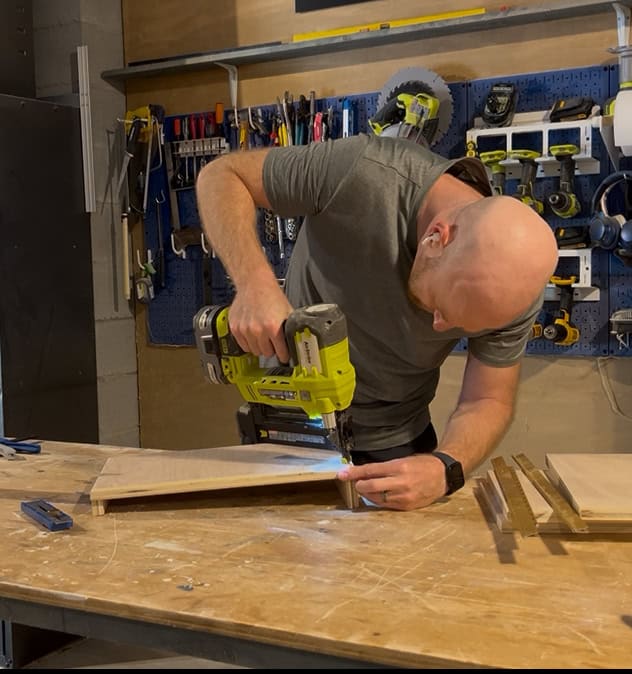
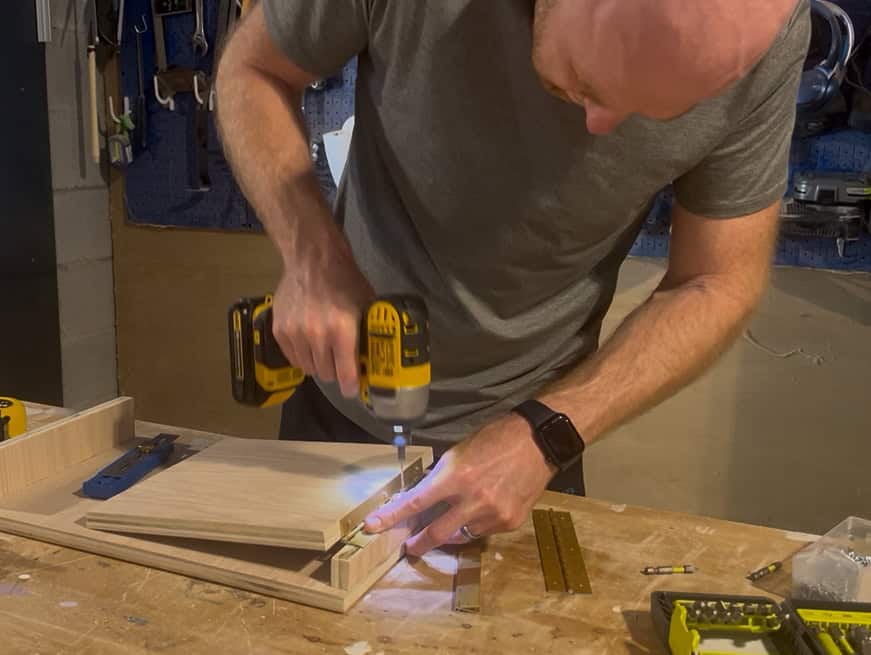
Step two: attach fixed pieces
I started by attaching those fixed pieces to the undersides of the top. I used wood glue along one of their edges then used nails to secure them in place.
For the shorter 1" board, I went through the bottom of the fixed board and into the top, but for the other one, since the nails weren't long enough, I had to go in from the top of the top board and down into the fixed board. I touched it up with a little wood putty.
Step three: attach hinged sides
Next I attached hinges to the two leg boards. One is shorter than the other because it attaches to the longer fixed board and vice versa.
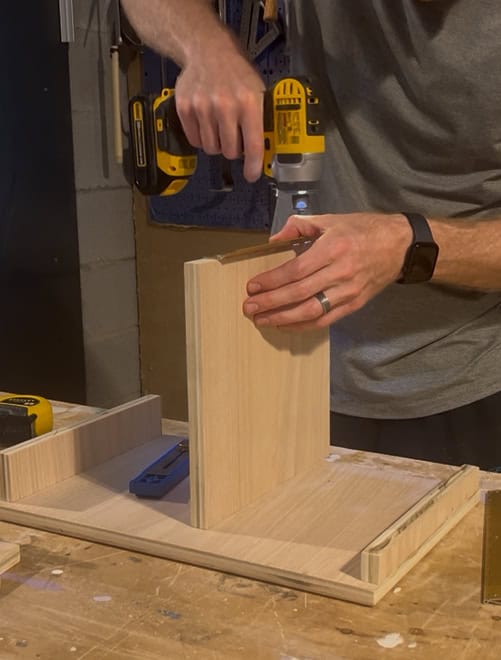
I had to cut my piano hinges down to length, then attached them to the leg board first using screws. Then, I attached the hinge to the fixed boards.
With these on the fixed boards, they can fold in on each other and not be sticking up. The top one can remain level with the entire project.
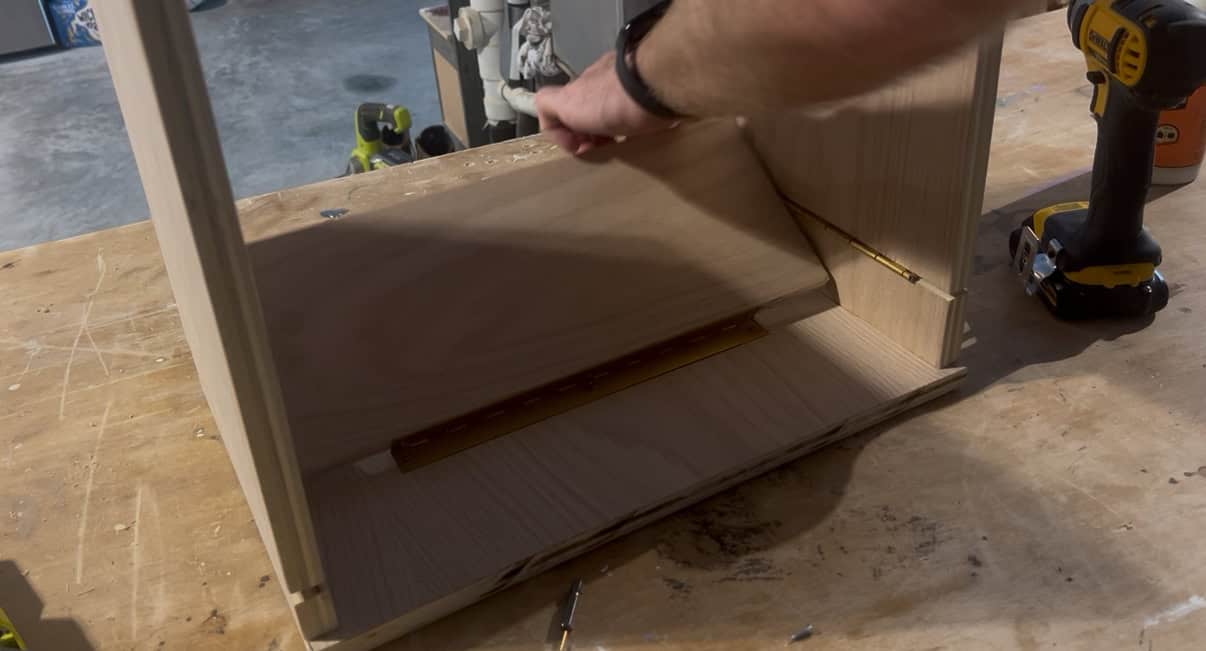
Step four: attach hinged spreader
Final bit of building was to attach the hinged spreader. I cut the spreader board to be the exact width between the two leg pieces and their hinges, then attached it to the underside of the top.
It turned out to be a little looser than I wanted because of the offset with the hinges, so I ended up tacking on a small bumper about ⅛" thick to the ends of the spreader so that it would fully touch the two sides when open.
Step five: stain and seal
I finished up by adding a bit of wood oil to the entire piece and then adding a protective coat of polyurethane on it just to be sure. I didn't want it to get worn down with my wife having her hands on it all the time and wearing it down.
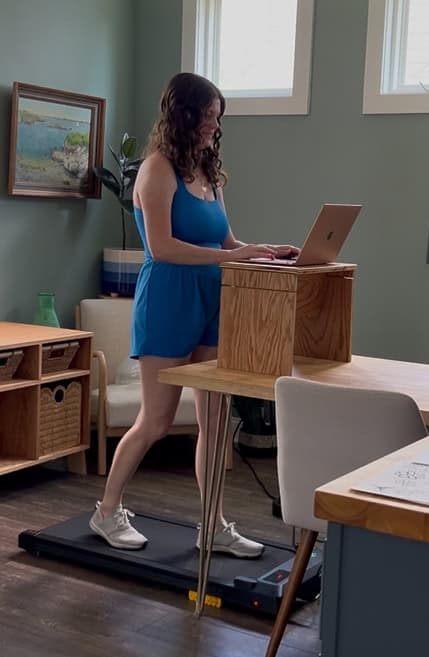
DIY folding tabletop desk
This folding tabletop desk is so much better than using an upside down basket on the table! It works perfectly with the walking pad.
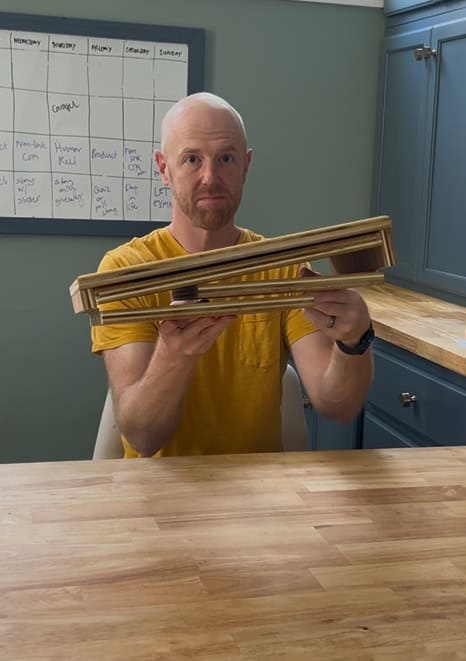
The folding design allows it to be opened when in use, then folded and tucked under a piece of furniture when not. It's perfect for when you need a little extra height for working!

Looking for something?
We've been doing this since 2012 so we have a LOT of blog posts!
Search stuff like: Ceiling Projects | DIY Plant Stands | Thrift Flips

Hey there, I'm Sean, the woodworking enthusiast and builder behind CharlestonCrafted.com! Since 2012, I've been sharing the magic of turning raw materials into beautiful creations. I love teaching others the art and satisfaction of woodworking and DIY. I try to inspire fellow crafters to make something extraordinary out of nothing at all.


