Want to turn a bed headboard and footboard into a bench? This is a super easy upcycle project! Here's a step by step tutorial and video!
I love thrifting and turning the furniture from something boring to something beautiful. However, our house is pretty full of furniture. So, I have decided to try my hand at flipping furniture.
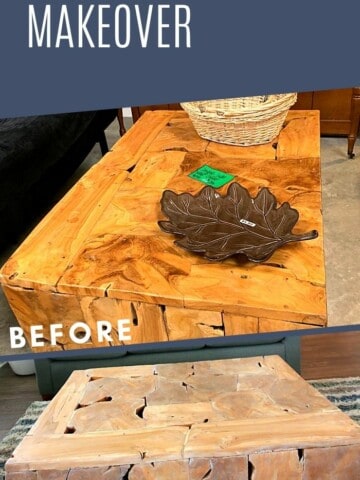
We did a bit of furniture flipping a few years ago when we partnered with Goodwill - we turned a sewing table into a bar, made over a bench, and updated a coffee table.
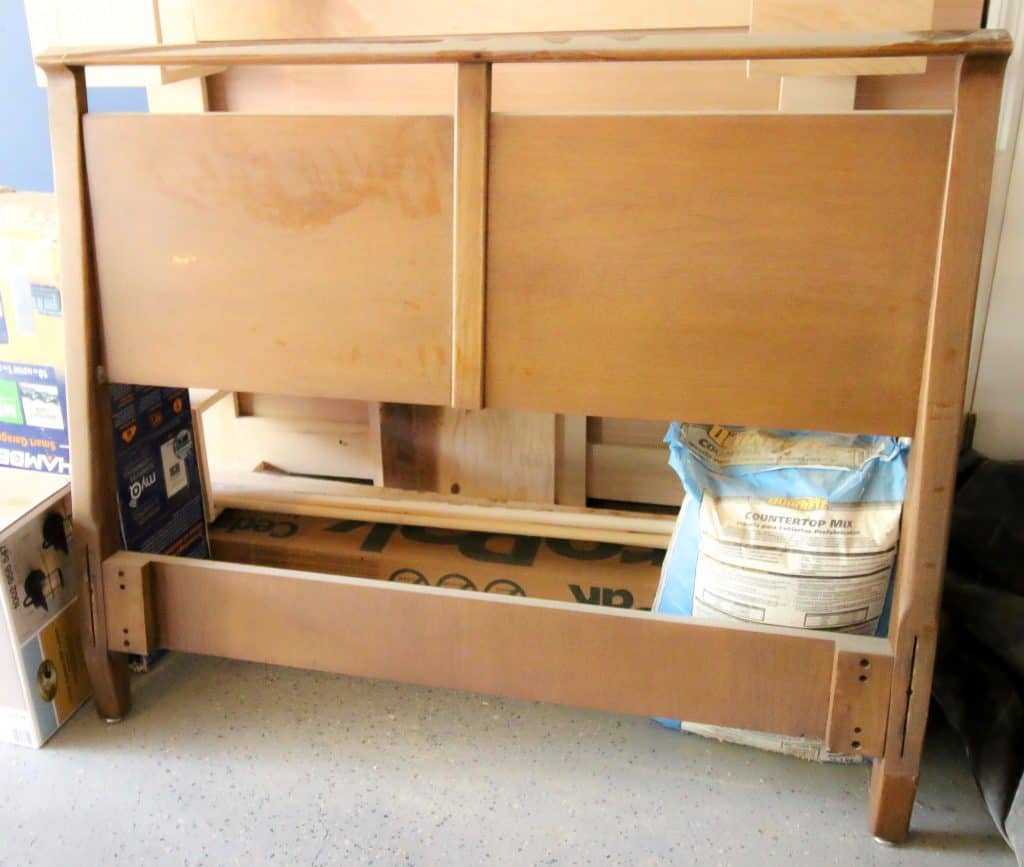
I was trolling the Goodwill thrift store looking for a piece to flip for a while. I wanted something solid wood with modern lines. The winner was when I spotted a twin bed headboard and foot board for $10.
See all of our favorite DIY entry bench ideas here!
But, I didn't see much flip potential in a twin bed. Who even sleeps in a twin bed? Plus there were no rails, so it wouldn't even really work as a bed.
However, I knew from crawling Facebook marketplace that benches sell really well and for a good price. Have you seen benches made from bed headboards before? They are sleek and simple but really beautiful!
If you are wondering how to build a bench from a headboard and footboard, this tutorial and how to video will walk you through it step by step.
How to make a bench from a headboard
This is a really fun DIY project and furniture makeover that you can do in a weekend. Here's what you need for this bed bench tutorial!
Supplies needed:
- Wooden bed frame - or a metal headboard if you have the saw to cut it
- 2x4 lumber to build seat frame
- ¾" thick lumber of choice to create seat slats
- Paint or stain and brushes to apply it
Tools needed:
- Circular saw
- Sander
- Kreg Jig pocket hole jig
The general idea of this flip is that the headboard would be the back of the bench and the foot board would be the arms.
I will not include measurements because your sizes will vary based on your headboard size. However, we found that 14" is a pretty standard bench seat depth.
Basic woodworking information for every project
Here are some of our most popular woodworking articles!
Shopping for wood:
Woodworking project ideas
- 100+ of the best woodworking project ideas!
- 62 easy beginning woodworking projects
- Woodworking project ideas to make and sell
See all our printable PDF woodworking plans!
Our favorite tools + supplies
- See all our favorite tool reviews
- How to use a Kreg jig
- The ultimate wood stain guide
- The best wood fillers for your project
Remember to also always use safety equipment while woodworking and using tools. Make sure you have proper eye protection, ear protection and a good mask to keep yourself safe.
How to flip a headboard into a bench
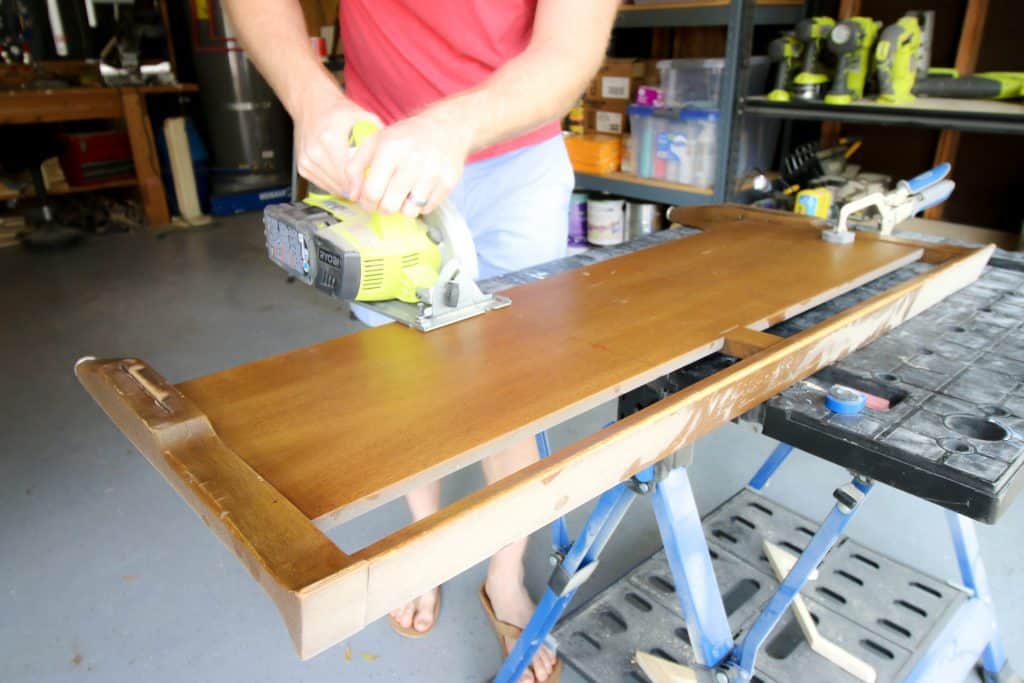
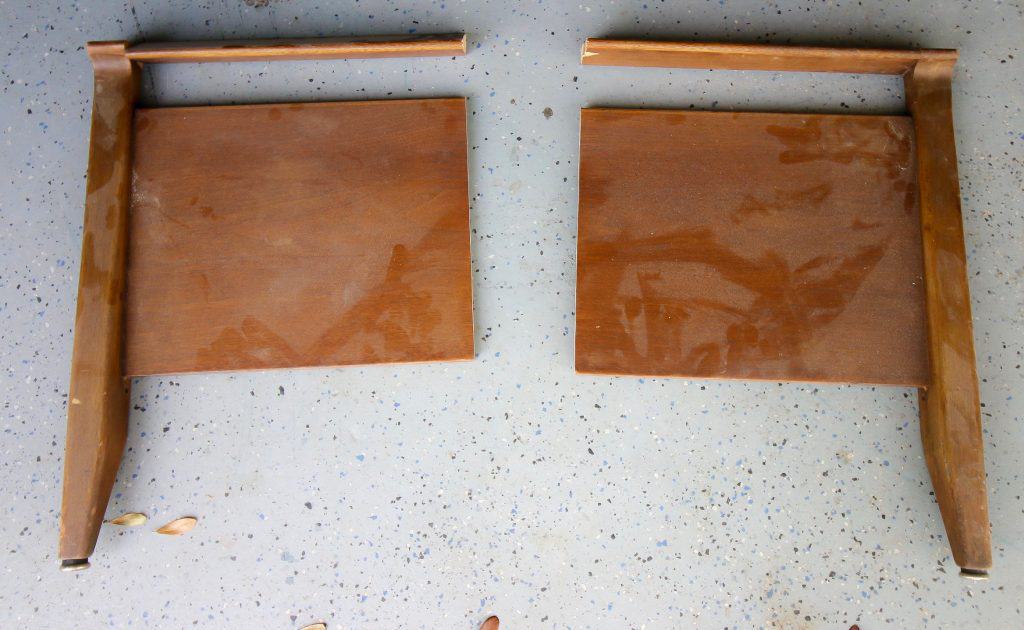
We started by cutting the foot board into two pieces using the circular saw.
Then we turned them sideways and attached them to the headboard by drilling pocket holes and with pocket screws.
Before getting into the rebuilding process, we painted the headboard and footboard and stained all the the boards we were going to use to build the seat.
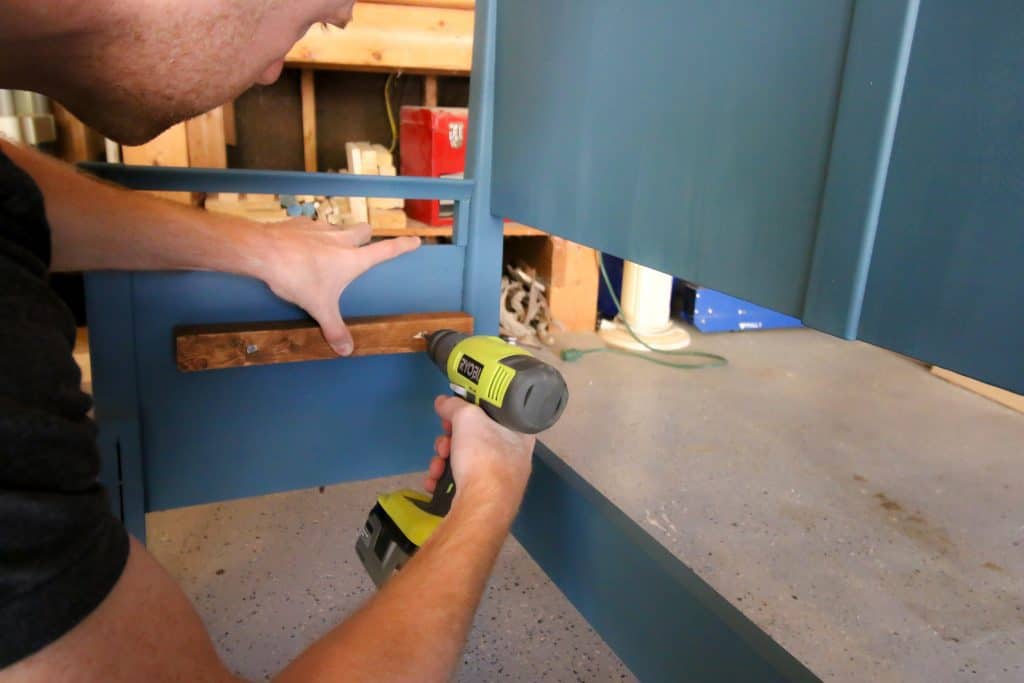
Then we cut boards to attach to the two footboard sides and secured them in place on the footboard sides with wood glue and screws.
Then we cut 2x4s down to the length of the headboard to span the gap between the two sides.
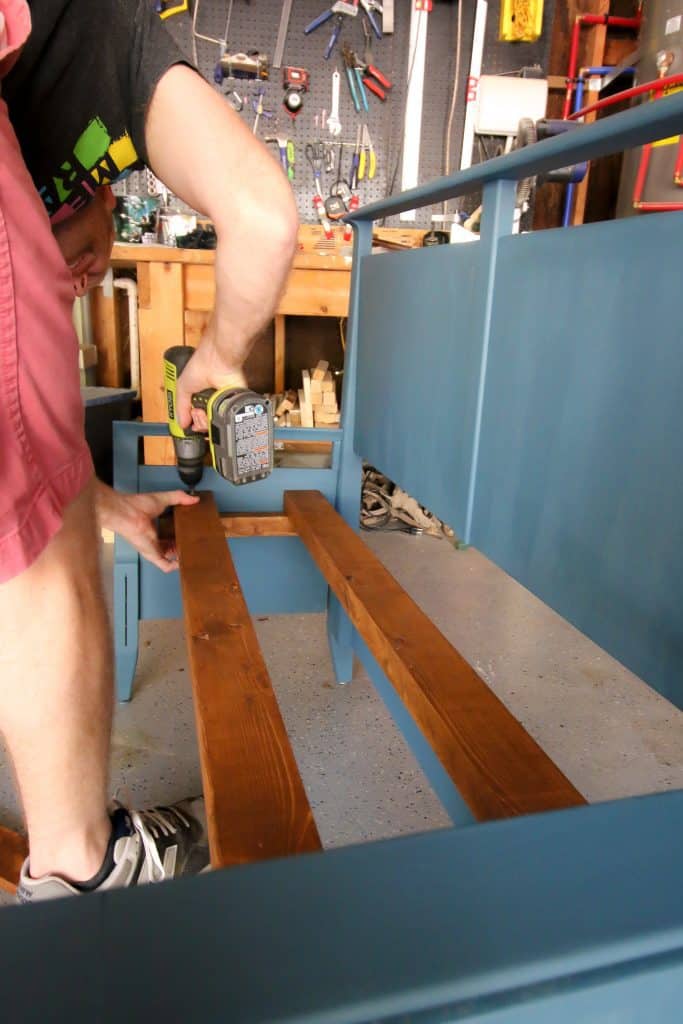
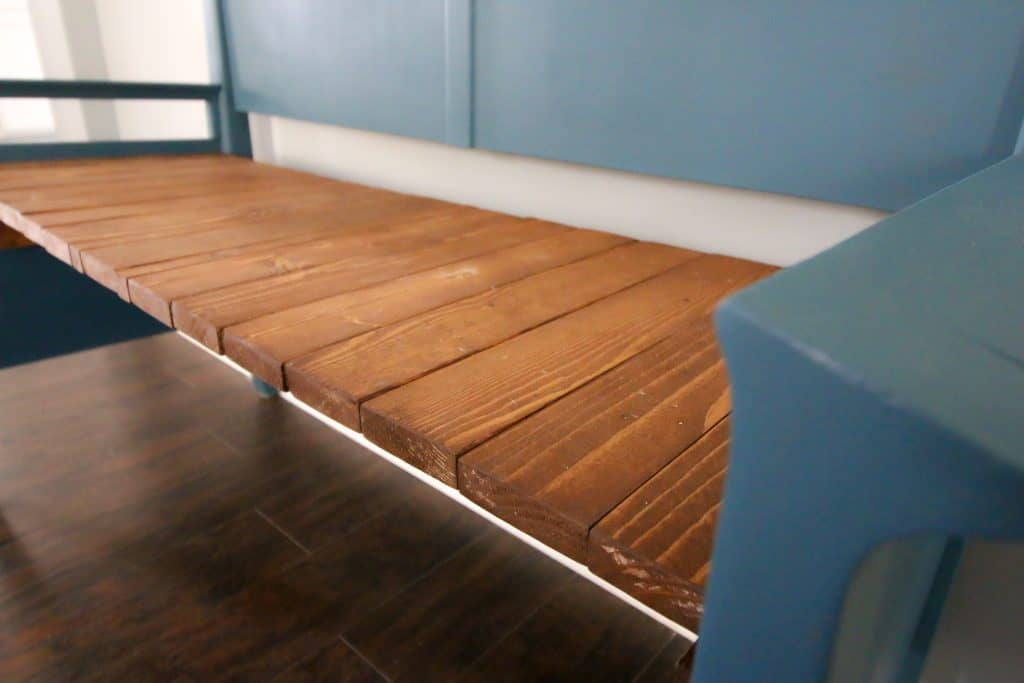
Then we finished it off with slats going perpendicular to the beams. We put a bead of wood glue down on the support beams and then nailed these into place.
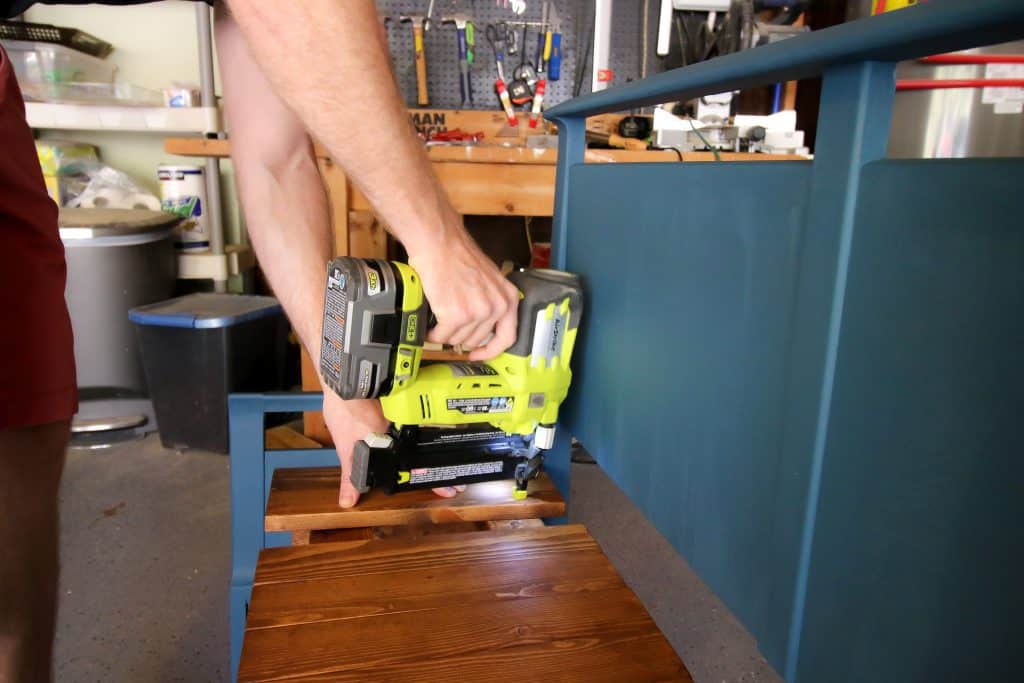
As you can see, we painted the bench and stained all the boards before doing those steps.
Be sure to check out all of our building projects!

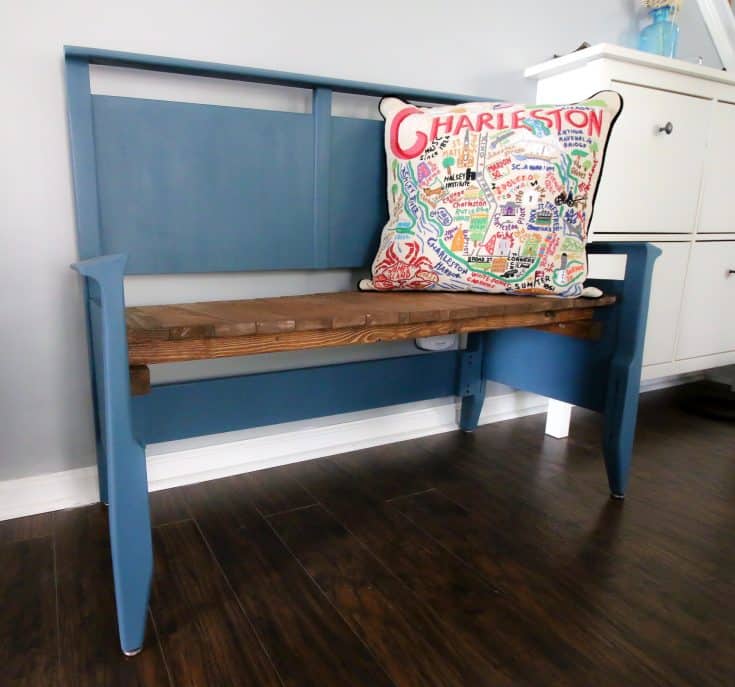
How to make a bench from a headboard
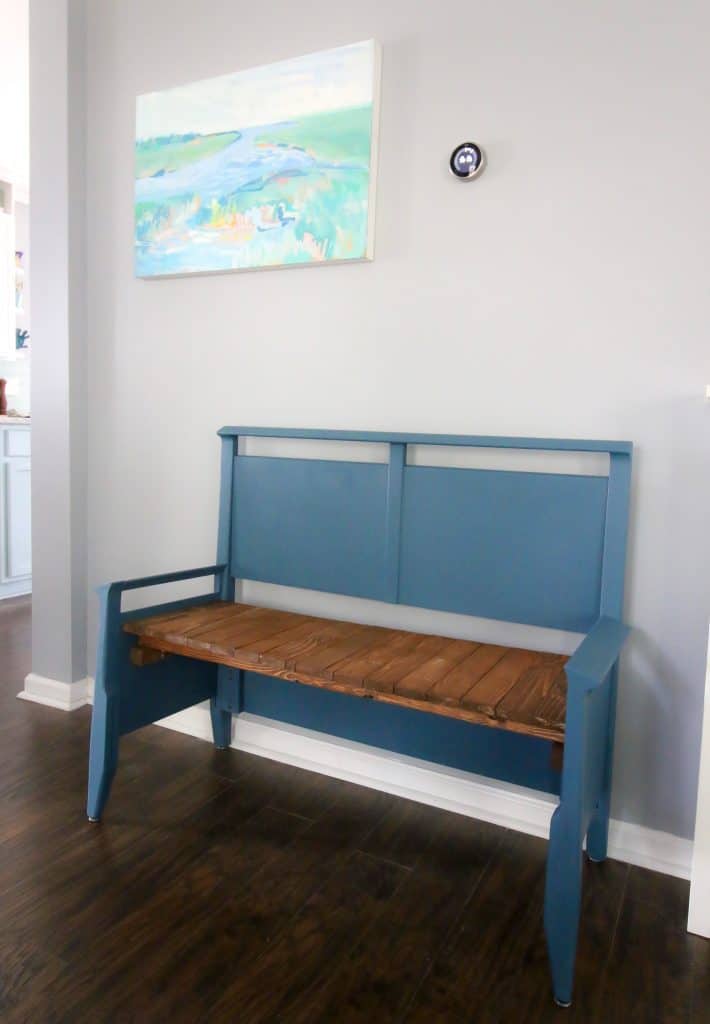
It's simple to flip a twin bed headboard and foot board into a gorgeous bench!
Materials
- Twin sized headboard + foot board
- 8' 2x4 wood
- 18' 1x3 wood
- Paint of choice + paintbrush
- Stain of choice + paintbrush/cloth
- Wood glue
- Wood filler
- Sandpaper/sander
Tools
- Circular saw
- Drill + screws
- Nailer + nails
Instructions
- Cut the ends of the foot board to make two identical pieces to attach to the headboard. Each piece should be about 15-16".
- Drill pocket holes to attach the foot board to the legs of the headboard.
- Paint this whole piece with your choice. Stain all the wood in the upcoming parts after you cut them but before you attach them.
- Cut two pieces of wood to attach to the foot board pieces.
- Cut two 2x4 beams and attach to the two braces on the legs.
- Cut 14" slats from the 1x3 and nail those onto the 2x4 beams.
The furniture flipping process
When you are looking for furniture to flip, you want things that are in working condition or that you can make work. Fixable surface damage is OK, but it needs to be functional to sell.
I like to look for solid wood furniture because I know how to refinish it. I have found that potential buyers often ask if something is solid wood, too!
How we sold the bench
We sold the bench on Facebook Marketplace using some of the strategies for successfully selling on Facebook Marketplace that we've used before. No one uses craigslist anymore.
How we priced the bench
We looked on Facebook Marketplace for benches within 20 miles. Prices ranged from $50-250. Wooden benches looked to be $100 or more, but a lot had been on the market for a while.
So, we decided to price our bench at $100. Our plan was to take it down to $90 in the first few days and $70 after a week if it didn't sell.
How did we do?
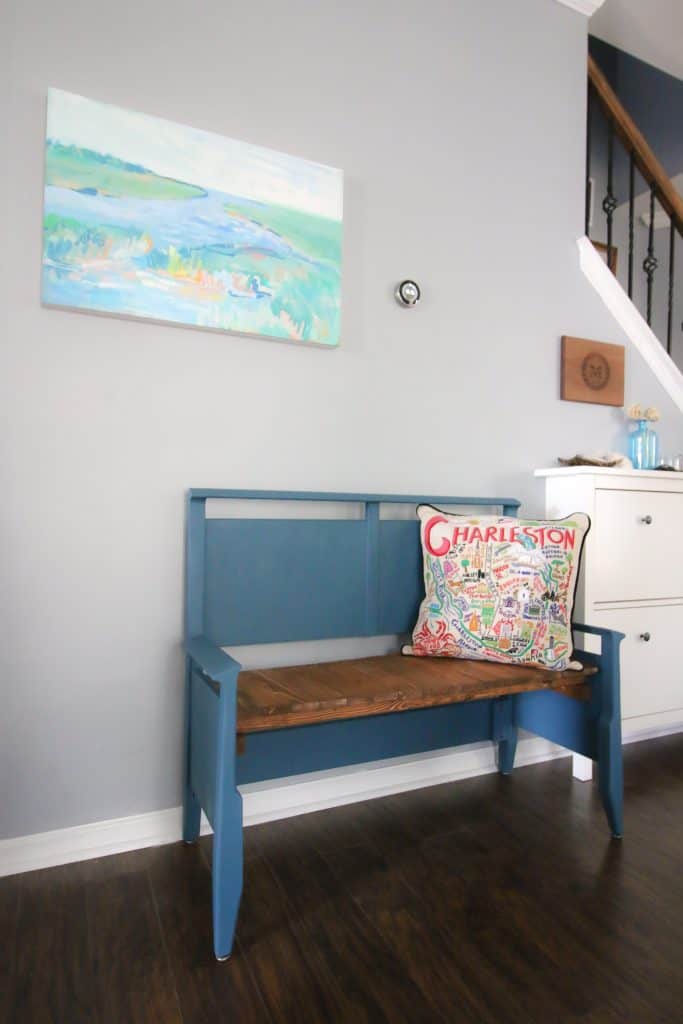
I love this bench and how it turned out and the people of Facebook Marketplace did, too.
We had a lot of messages immediately! We got an instant offer for $50 and we said no. It's important not to take a huge discount right away, unless you just need it gone.
We got an offer for $100 on day two, but we would need to deliver it to her 30 minutes away. We told her if it is still here by the weekend (it was Monday) that we would take that deal.
On day three, we got a full price offer! When he showed up, he tried to offer $90 instead.
I would have taken it, but he brought five $20 bills and I honestly didn't have change for him. That's a good lesson - if you want to make an offer, have exact change for what you want to offer!
I also knew that he had driven all the way to our house and that the bench was something his girlfriend picked out and sent him to get. He wasn't leaving without it!
Our headboard bench flip profit
I am going to give you two calculations for our profit. The first will be our actual profit.
Our actual profit:
- Selling price: $100
- Paid for headboard: $10
- Paid for supplies: $0 - had all on hand
- Our actual profit: $90
Your profit if you had to buy supplies:
- Selling price: $100
- Paid for headboard: $10
- Approximate price of lumber: $15
- Price of paint: $15
- Price of stain: $5
- Estimate for joinery (wood glue, screws, nails used): $10
- Profit if you had to buy supplies: $45
As you can see, flipping furniture is not going to be very profitable if you have to go out and buy tons of supplies and start from scratch each time you do a flip. Our accumulation of DIY supplies really makes a big difference.
I am so excited to find my next piece to flip. Of course, you have to have patience when looking for thrifted furniture. And, to make flipping make sense, you really need to get a good deal! I'll be out hunting and updating you on Instagram stories!
Want to learn to flip furniture for a profit? We have a whole resource library of files to help you get started! Sign up for free:
Headboard bench video demonstration
Any questions about how to make a headboard bench?

Looking for something?
We've been doing this since 2012 so we have a LOT of blog posts!
Search stuff like: Ceiling Projects | DIY Plant Stands | Thrift Flips

Hey there, I'm Sean, the woodworking enthusiast and builder behind CharlestonCrafted.com! Since 2012, I've been sharing the magic of turning raw materials into beautiful creations. I love teaching others the art and satisfaction of woodworking and DIY. I try to inspire fellow crafters to make something extraordinary out of nothing at all.