I am so hype about the coffee table that I am going to share with you today!
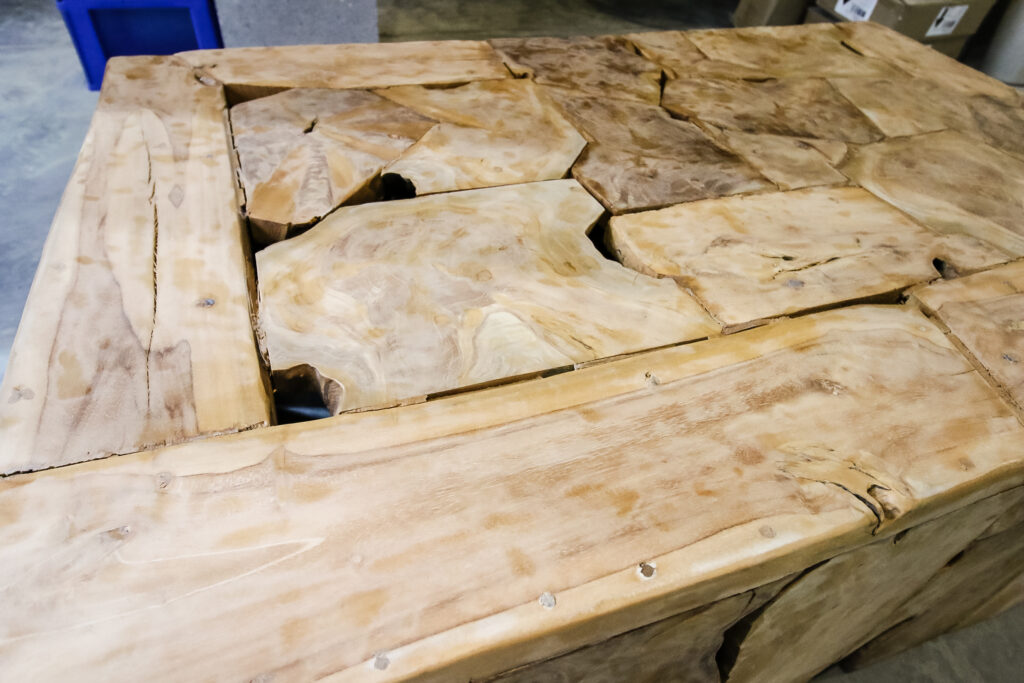
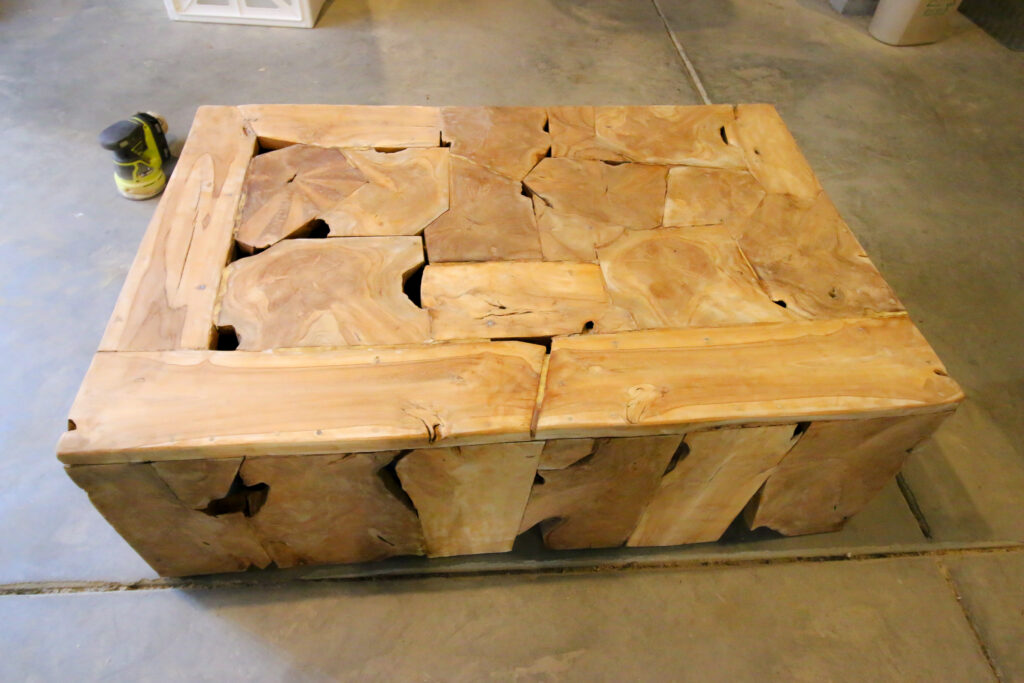
This is the coolest piece ever - it is a mosaic of live edge wood slices all attached together to form a modern, yet rustic, table.
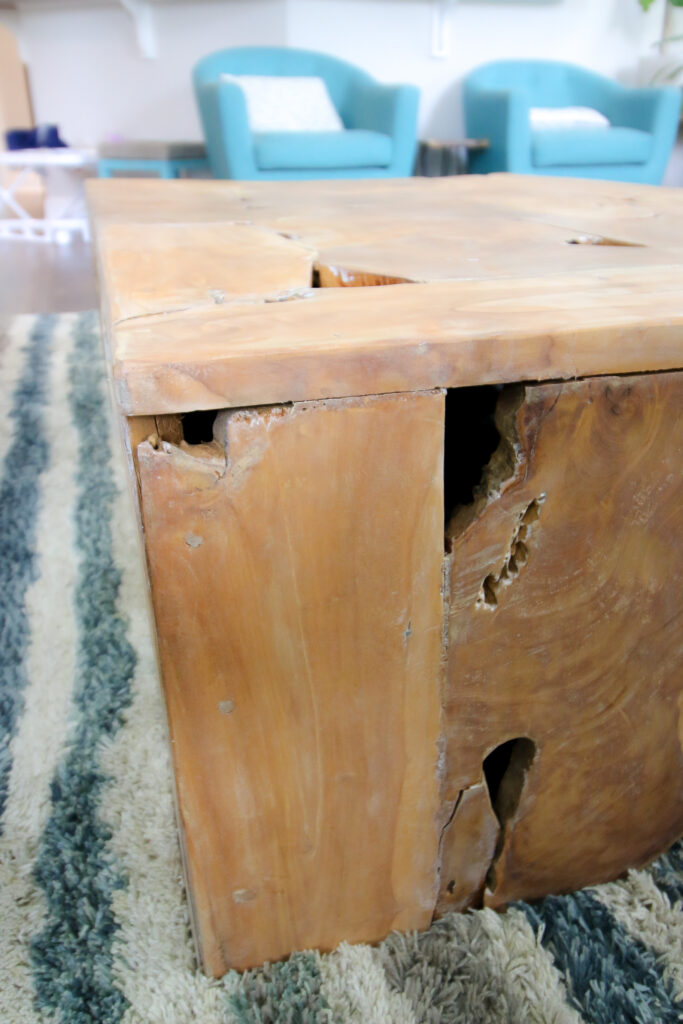
I did a little googling and it looks like it might be a teak slice block table - it's similar to this one - but I am almost positive that this was uniquely handmade by an artisan. You can tell by some of the exposed nails on the underside.
I picked this table up at the East Cooper Home Store, a Habitat for Humanity Resale store in Mount Pleasant, South Carolina.
It immediately caught my eye when I entered the store because it was so unique and different.
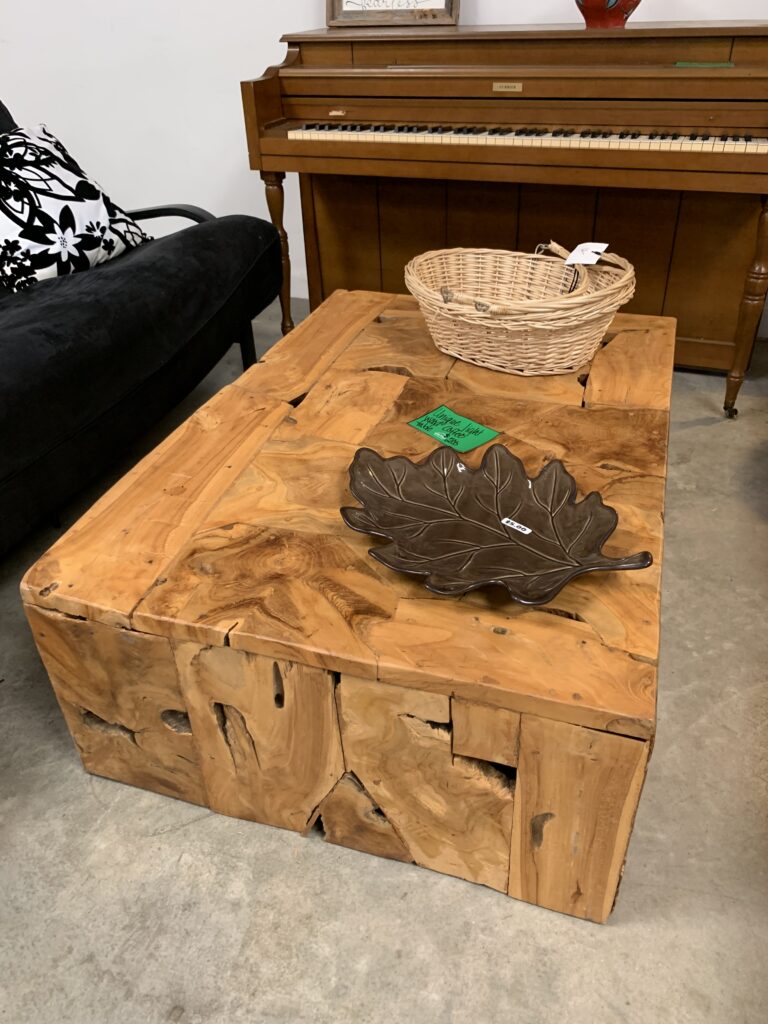
When the staff helped roll it to my car, they let me know that there was some damage to it - it was a little wobbly.
Nothing that we couldn't fix!
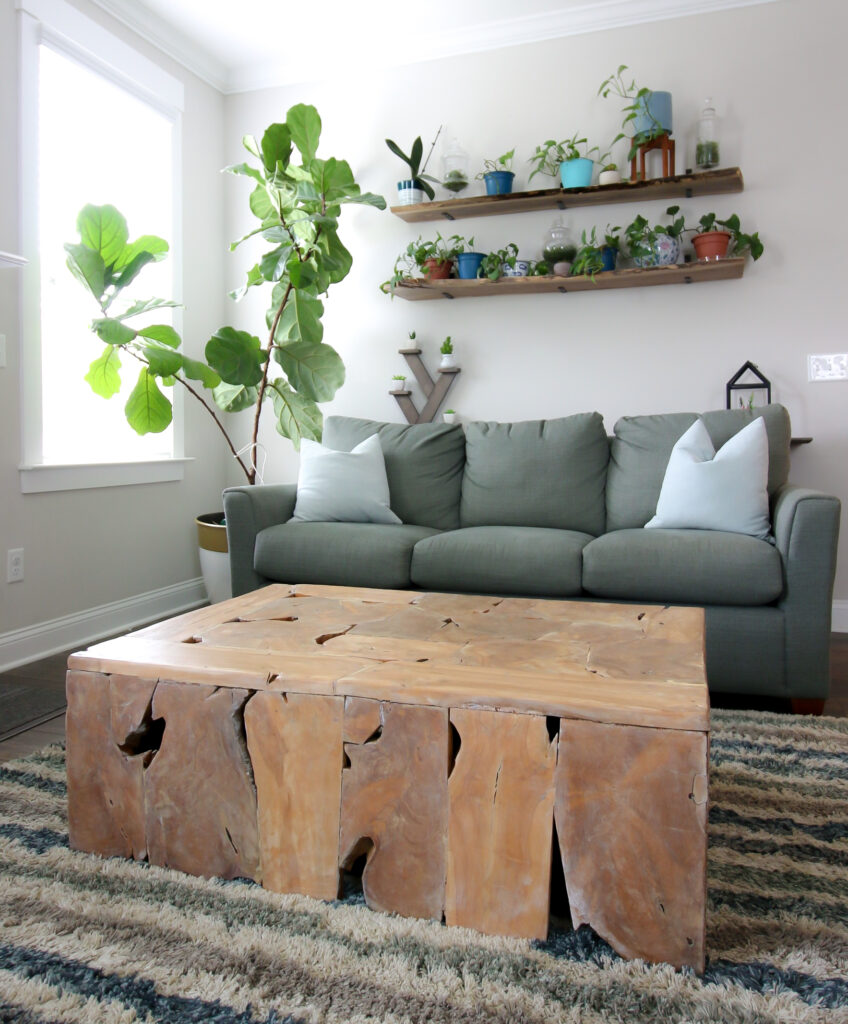
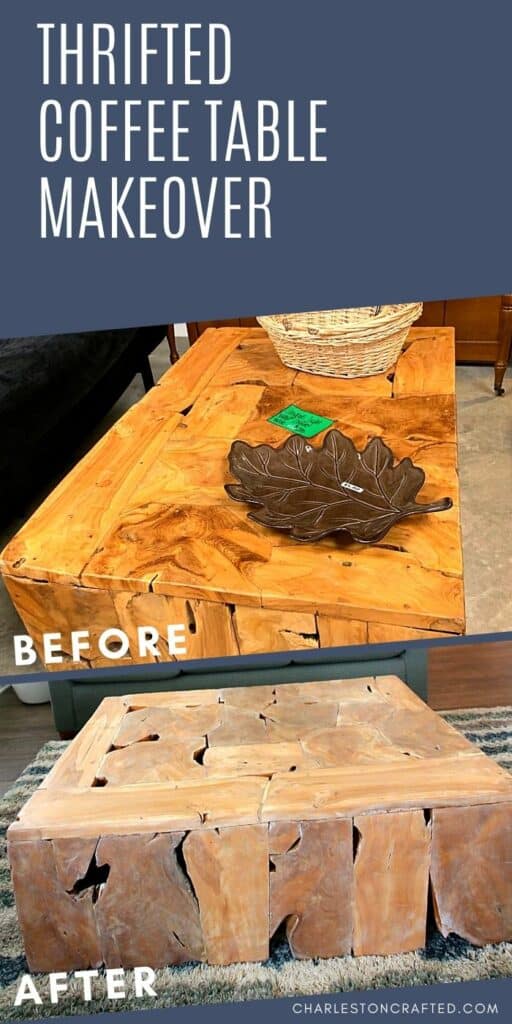
Once we got it home, Sean and I decided that we would repair it but also make it a little less orange and a little less shiny.
How to strip a wood table
The first thing that I had to do was strip the existing finish off of the table. This is not a hard process, but it did take forever!
Supplies and tools needed to strip a table:
- Sander + sand paper discs
- Varnish stripper
- Sponge brush or sponge to apply stripper with
- Rubber gloves
- Scraper or steel wool
- Clean, damp cloth or paper towel
How to strip a wood table
STEP 1: Apply the stripper
I actually sanded the table before applying the stripper because I thought I could sand all the varnish off. Wrong!
Apply stripper following the instructions on the bottle. It will need to sit for 15-45 minutes to fully soak into the finish. I used a foam brush to apply it.
STEP 2: Scrape
Scrape the finish off. You can normally use a paint scraper for this, but since my table has so many grooves and unevenness, I used steel wool. Scrub scrub scrub.
STEP 3: Wipe
Wipe clean with a damp rag or wet paper towels to get off any excess.
STEP 4: Sand
Sand first with a coarse sand paper and move your way up to smooth for a smooth finish. Your sand paper with get very gunky!
Wipe clean.
After stripping the table
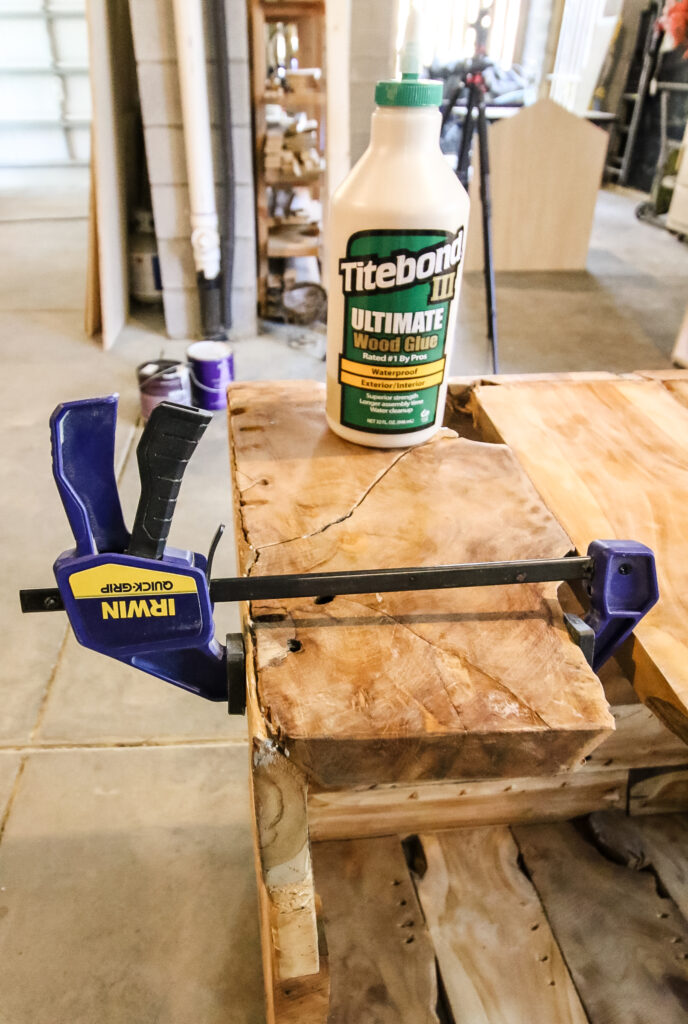
After we had fully stripped the finish off of the table, there was some repair work to be done.
Several of the boards were loose on their joints. So, we applied new wood glue and used clamps to hold it in place until it dried.
The table originally had wood filler in between the close gaps to help hold it together and look more continuous. In the places where it had cracked and chipped out, we scraped it fully out and replaced it with new wood filler.
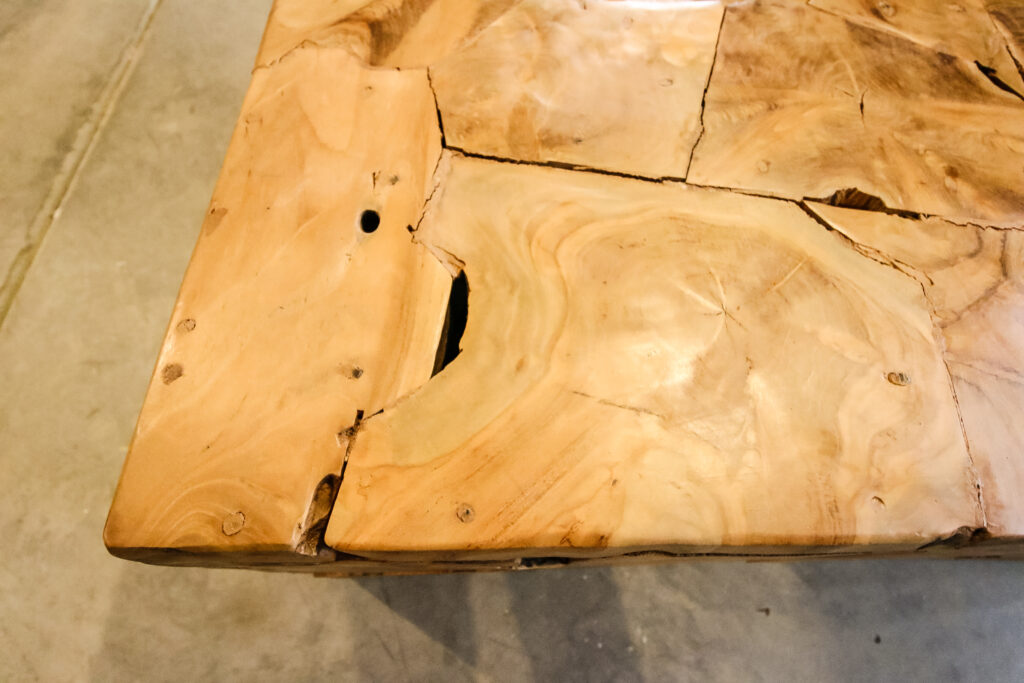
Then I sanded off the excess and used a golden oak stain to carefully stain the wood filler to color match those areas to the rest of the piece as best as possible.
Applying a finish
While I loved the raw wood, I decided that I wanted to tone down the yellow a bit more, so we added one coat of Minwax Simply White wood stain.
I applied it with a rag and immediately wiped it off with a second clean rag for a really faint look.
Then, I gave the entire piece 3 coats of matte polyurethane as a sealant.
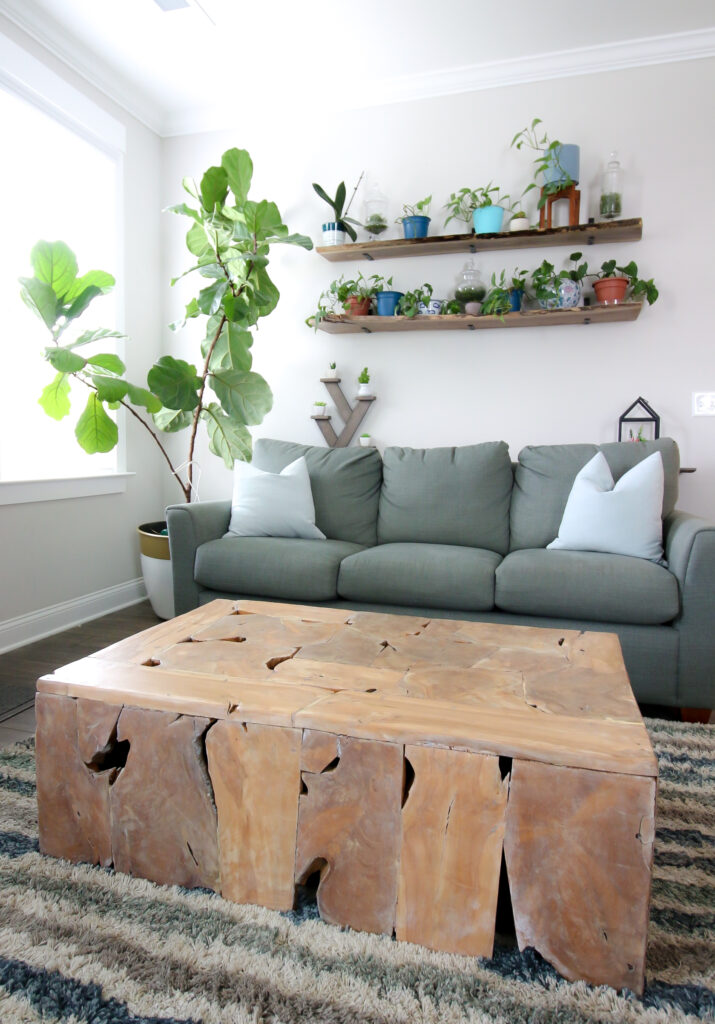
I love how this piece turned out! It was a labor of love, and it's not THAT much different from how it was at the store, but it is much more structurally sound now and I think the wood tone is more modern.
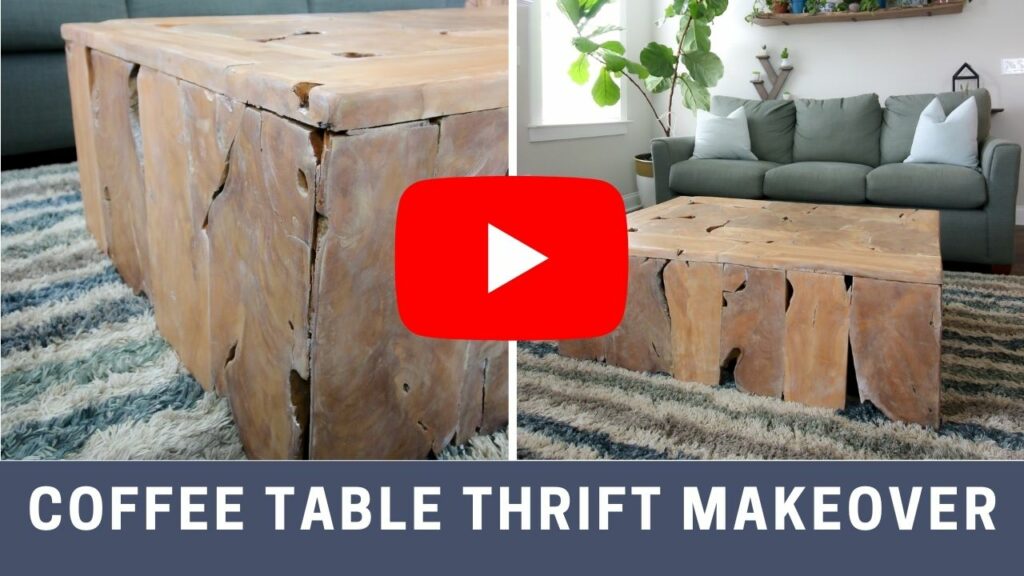
Video demonstration
Watch the full transformation in this video!
Be sure to check out some of our other thrift flips:

Looking for something?
We've been doing this since 2012 so we have a LOT of blog posts!
Search stuff like: Ceiling Projects | DIY Plant Stands | Thrift Flips

Hello, I'm Morgan, half of the creative force behind CharlestonCrafted.com! With a passion for DIY that dates back to 2012, I've transformed three homes and now I'm dedicated to helping others craft their dream spaces. Let's turn your house into a home together!