Check out how we completely transformed our living room by removing the builder-grade fireplace surround and mantel and installing a DIY shiplap fireplace and accent wall! This project is a must-do for anyone looking to make a huge impact on their home for not a lot of money!
You're about to read about the biggest DIY makeover we've undertaken in our house and it's a DREAM.
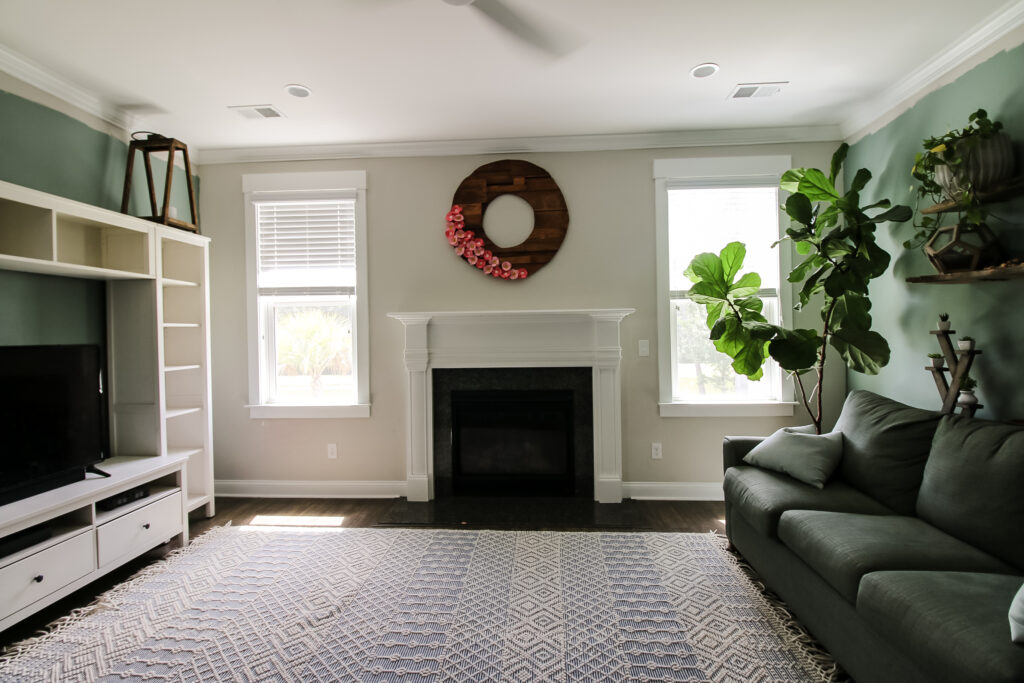
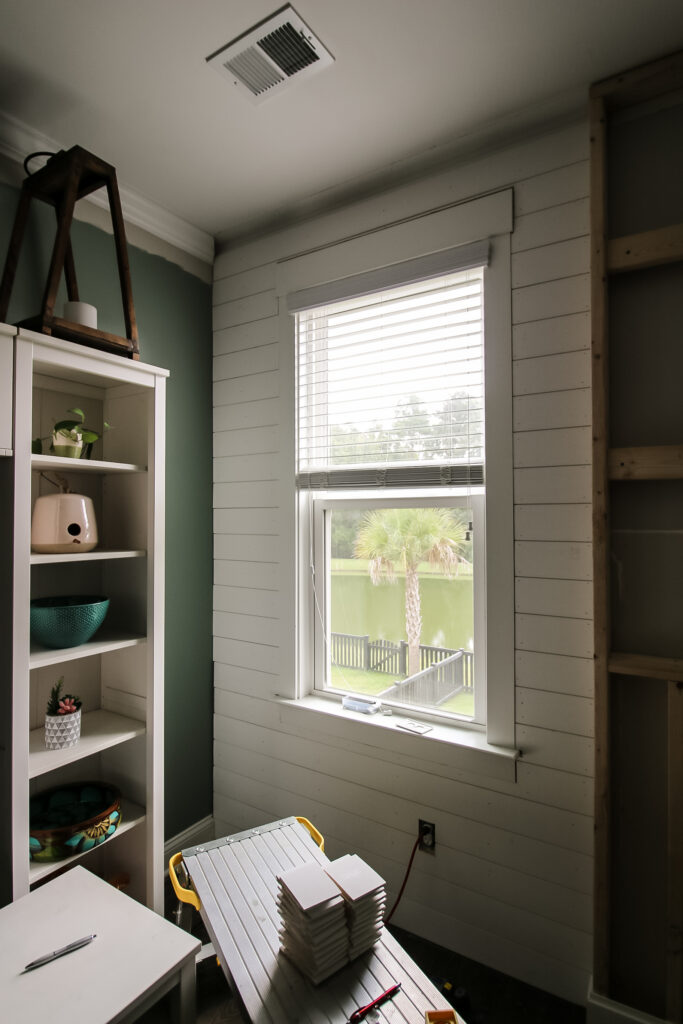
We love our new house and the open feeling in the main "gathering" area, which is the living room, kitchen and dining room. However, it's felt very blah ever since we moved in last year.
We really wanted to start tackling projects in this room to make it feel more grand and needed to add an amazing focal point for your eyes.
Enter, our DIY shiplap fireplace wall.
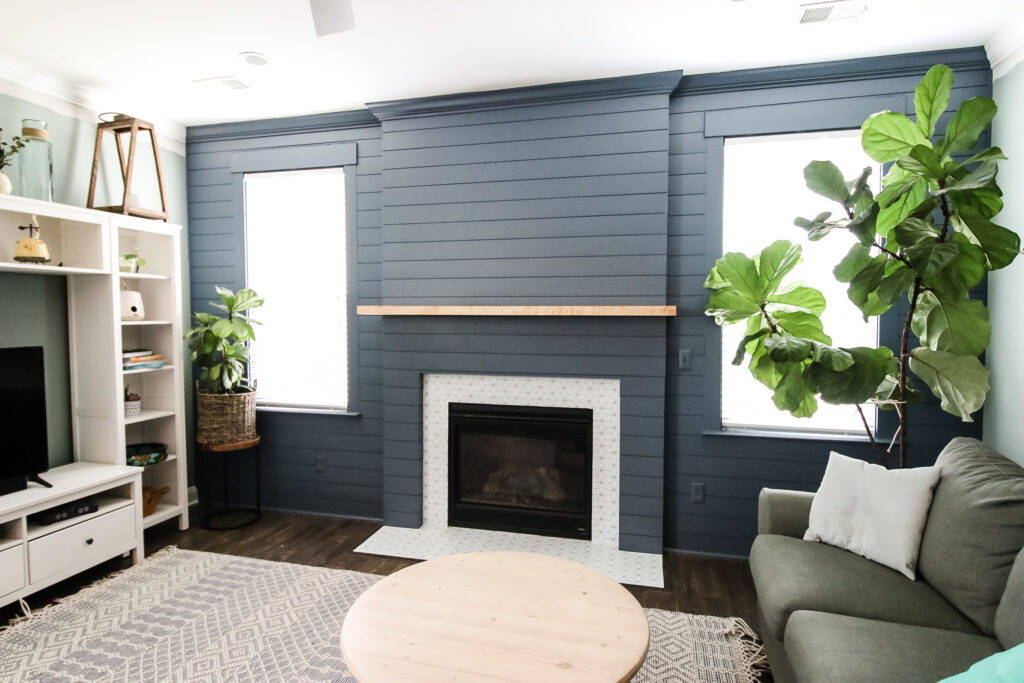
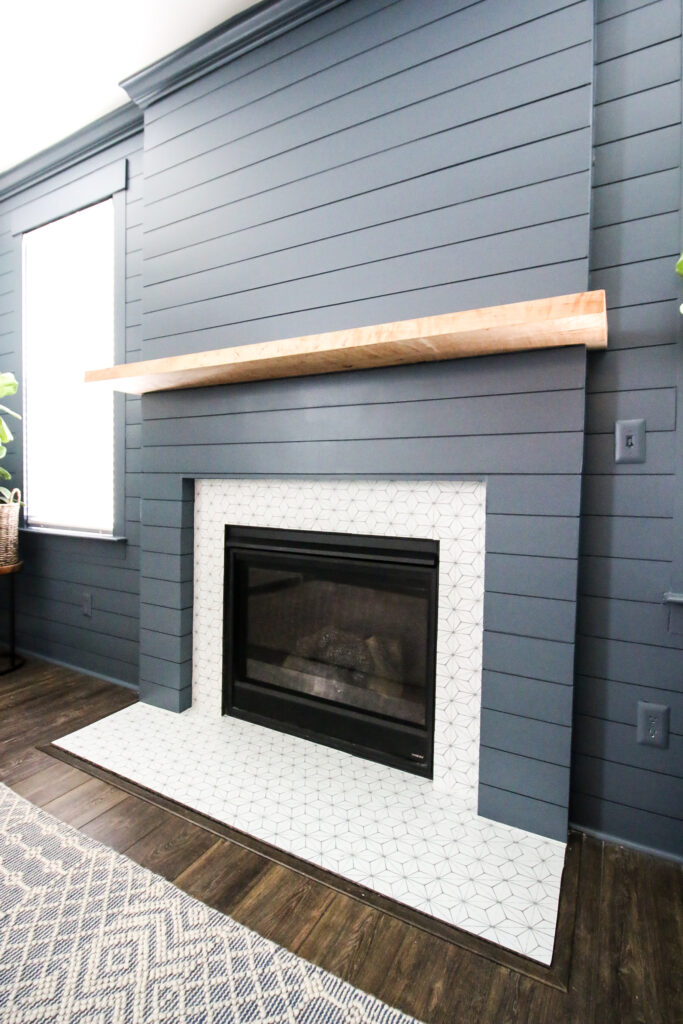
Our house has a gas fireplace insert and we upgraded the boring builder-grade fireplace surround and mantel with a shiplap accent wall and bumped out fireplace.
This is an intermediate level DIY project that can be done with a few tools and some time and it will have an amazing result that you can be proud of. Let's dive into it!
Shiplap fireplace makeover
This DIY shiplap fireplace makeover was not all that difficult to do and it has an incredible outcome.
Shiplap has been very trendy for several years because it is a user-friendly design that looks great with several different design styles.
This post will break down step-by-step how we removed our old fireplace surround, prepared the area for our accent wall, and completed the project.
Scroll through the whole post for all the details!
Materials needed to make a DIY shiplap fireplace
Here's a list of the general materials you'll need to install a shiplap fireplace wall in your home.
- 5 ¼" x ½" primed shiplap boards (the amount you'll need will depend on the size of your wall or if you're only doing the area around the fireplace, we used 23 12' boards)
- 8' 2x4 boards
- 10' 2x4 boards
- Reclaimed wood beam (purchased at a local wood shop)
- 3" screws
- 1 ½" brad nails
- Caulk
- Wood filler
- Floating shelf brackets
- Paint
Tools needed to make a DIY shiplap fireplace
Here's a list of the general tools you'll need to install a shiplap fireplace wall in your home.
You may have substitutes for some of these tools or be able to borrow or rent them instead of purchasing new.
- Miter saw
- Brad nail gun
- Cordless drill
- Caulk gun
- Level
How to remove a fireplace surround and mantel
The first step in creating any shiplap accent wall around a fireplace is to remove anything that is already there.
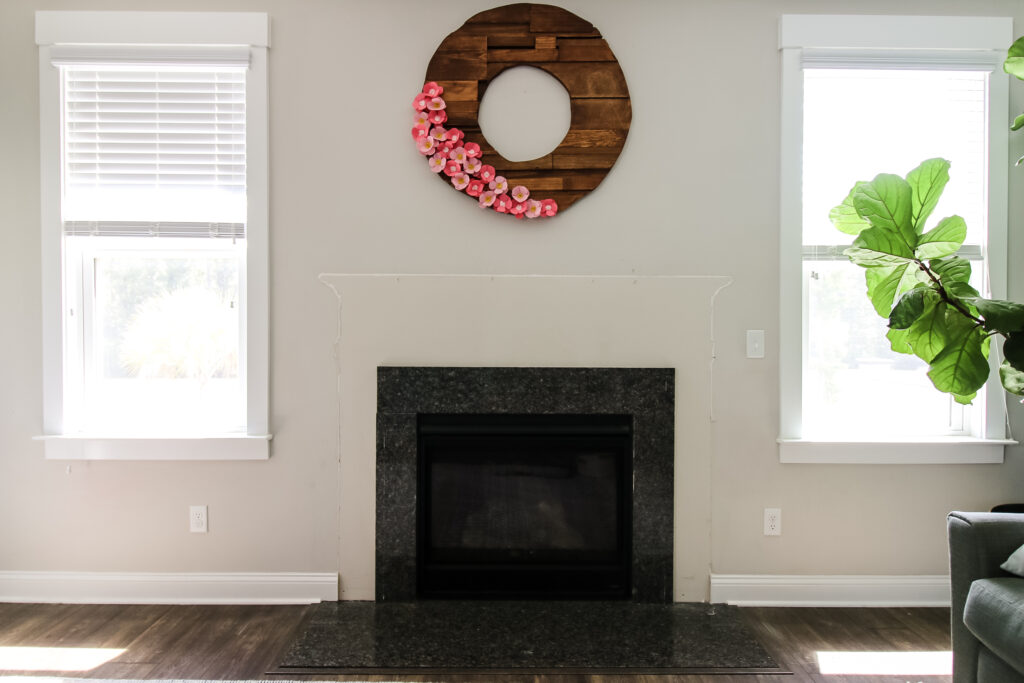
We had a standard, builder-grade fireplace on the wall that didn't fit our new vision for the space.
But the basics are that you score the caulk with a knife, remove all the caulk around the edges, then pry the mantel from the wall. It's probably hanging on screws or just has a few brad nails holding it in place.
Once the old mantel is removed, you can sell, donate or trash it and get to work!
Building a fireplace pop out frame
Depending on the overall style and look you're going for, this section can be adjusted or eliminated to fit your needs.
We wanted our fireplace to pop off the wall and look like a full floor to ceiling fireplace. Since we have a flat, gas fireplace, we had to build a frame with 2x4s that would allow for us to pop out the shiplap around the fireplace.
We won't provide measurements here because it will be entirely dependent on what you have in place at your house.
Things to take into consideration when building a frame are the size of your fireplace, if there's any stone around the actual fireplace, whether you have any light switches, outlets or windows, or anything that will impede on adding a physical structure.
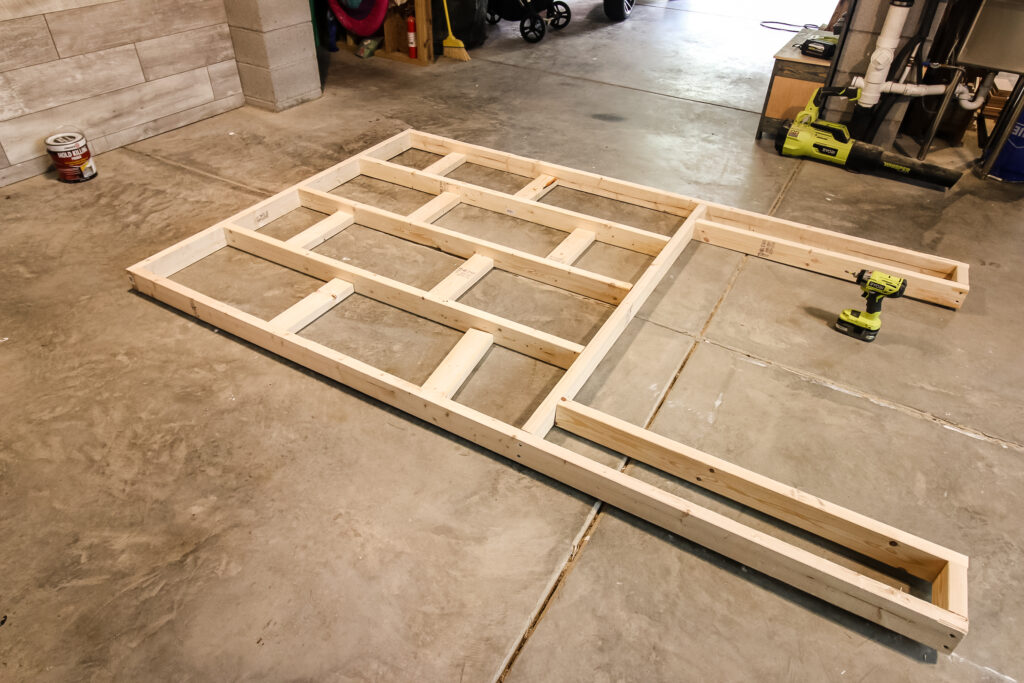
The 2x4 frame is fairly easy to build. We measured it to go floor to ceiling and be about 10" wider on each side of our fireplace.
We drew out the frame to make sure it had sides, vertical beams and 15 ⅜" wide spacers between each beam.
Ours has a cased opening for the fireplace, so the frame looks like it's sitting on two columns.
The entire thing was secured together with 3" screws and butt joints.
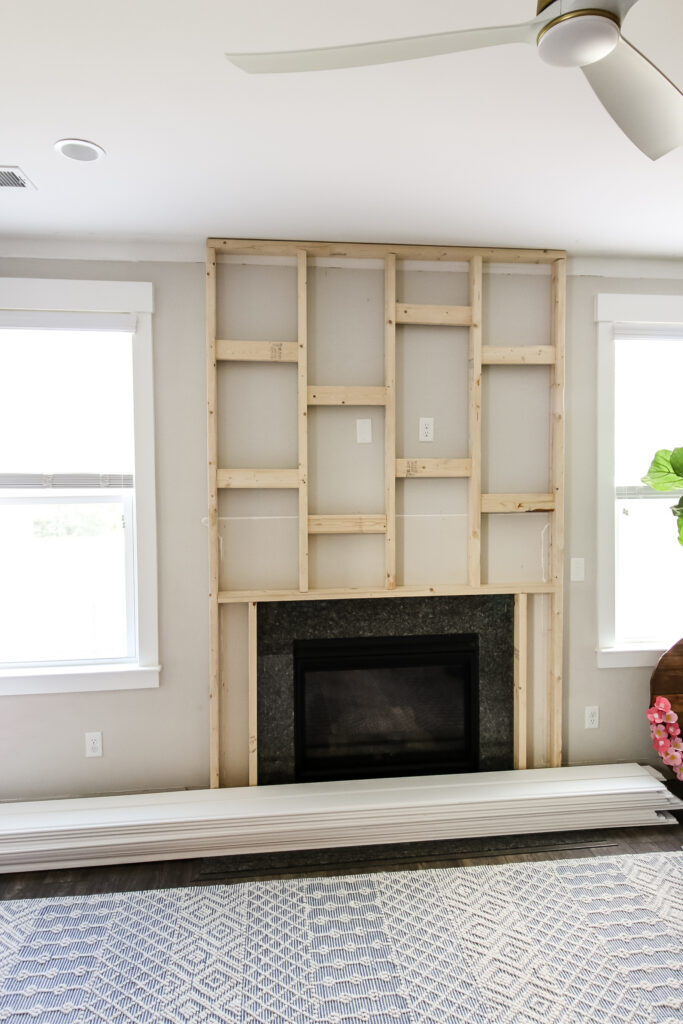
Once it was constructed, we pushed it up into place on the wall and temporarily secured it in place with some brad nails. It will also be tight between the floor and ceiling, so it will hold itself. Then we finished it off by screwing the frame into the studs in the wall.
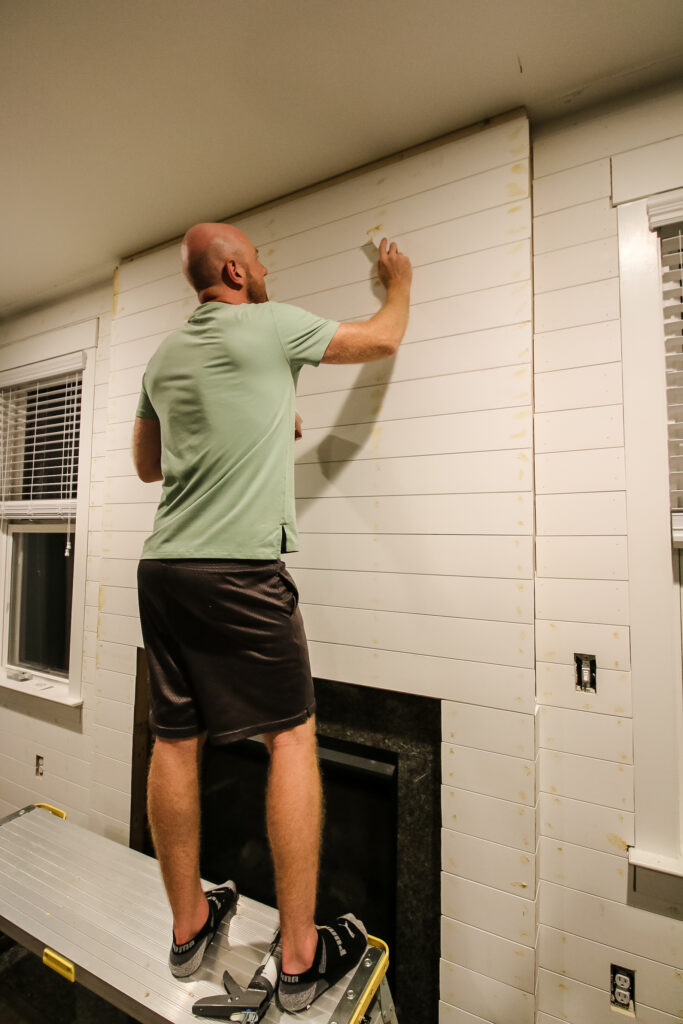
How to install shiplap on a fireplace
Installing shiplap on a fireplace or as an accent wall alone is a nice beginner friendly project, due to the easy tongue and groove construction of shiplap panels.
The best way to install horizontal shiplap is to start at the bottom of your wall and work your way up. This way, gravity is working with you and it's easier to make sure everything is level.
If you're going for a vertical shiplap look, you'll also want to start on the far left and work to the right.
Since we were doing two sections of wall and the fireplace, we worked in essentially three sections.
We started on the lower left corner with the first piece of horizontal shiplap on the wall.
This first piece will set the tone for the rest of your project, so make sure it is cut to length and is perfectly level. Once it's lined up, use brad nails along the entire length of the board to nail it into the wall.
Don't worry about the nails causing holes in the shiplap because you will have to paint. More on that later.
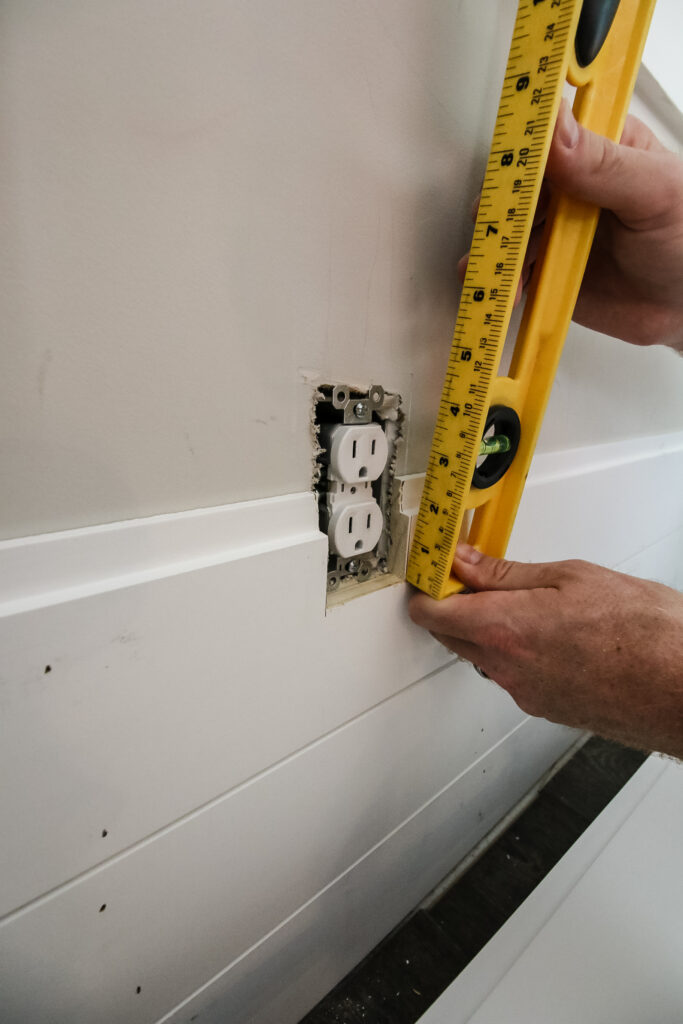
Continue to work up in sections as best you can. When you come to an outlet or window, measure and trace that cut out and use a jigsaw or other handheld saw to cut it out to fit.
We did the first side of our wall and then moved over to the other wall and completed the exact same process.
With the walls done, it was time to install the shiplap on the pop out we cut for the fireplace.
There are two ways to do shiplap on a fireplace pop out.
The easiest way would be to cut straight butt joints on the shiplap and have them meet in the corners, then cover the two corners with corner molding.
This is much easier for your sanity and requires a lot less precision and cursing.
Naturally, we went for a much more difficult option, which was to make perfect 45 degree miter cuts for the front fireplace boards and the sides so that they lined up.
Cutting all of these small 4" pieces of shiplap with an angle was by far the most time consuming part of this entire process.
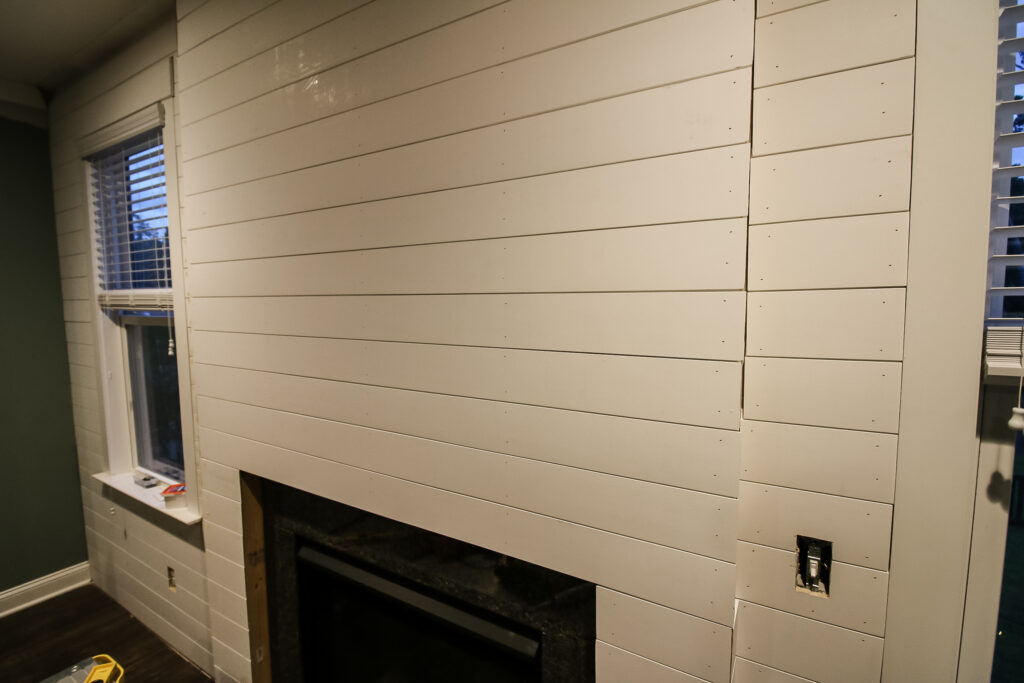
We nailed each piece of shiplap into the 2x4 studs and worked our way up the frame. This is a very satisfying process, especially at the end when there were no strange outlet or window cuts.
When we reached the end, it looked bad, but in a good way. Time to finish!
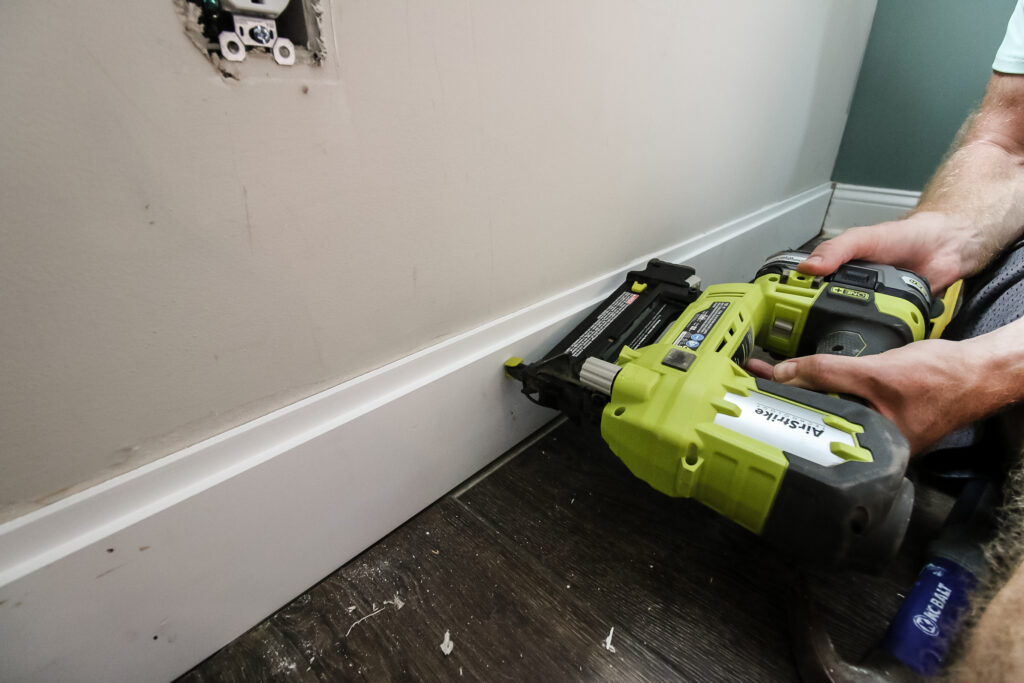
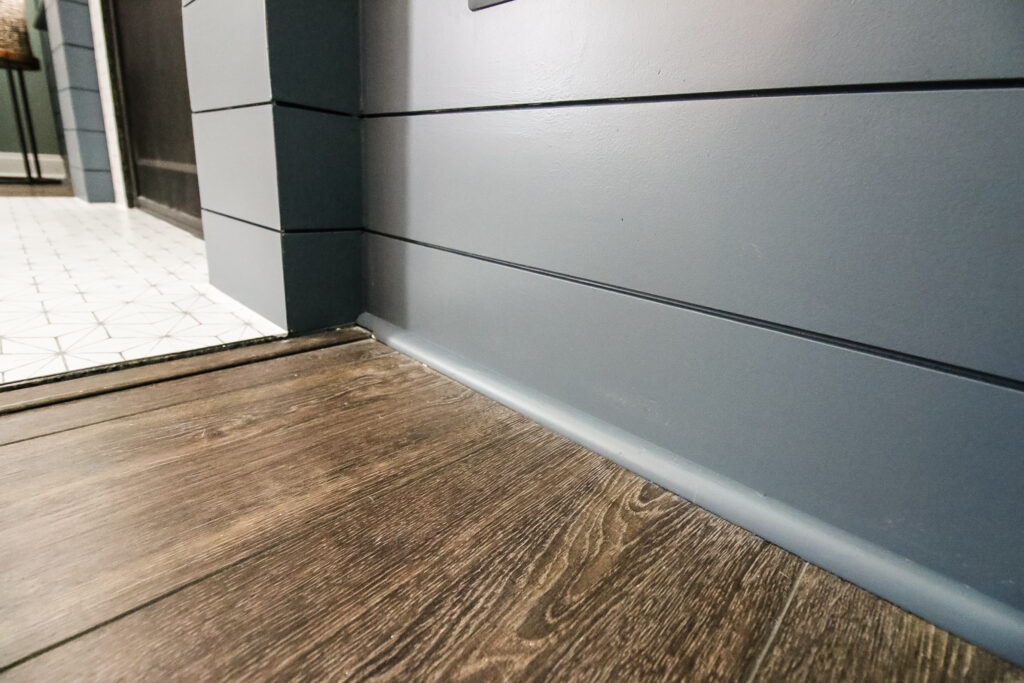
Adding finish moulding
You can take the moulding all the way to the ceiling if you like, but we added crown moulding back onto the top of ours to match the rest of the room.
With the pop out, you have to do the same angled cuts, but hopefully your miter saw came with crown moulding cutting instructions. If not, check out ours here.
Check out how we extended our old fireplace to the ceiling using just moulding and paint!
On the bottom, we didn't put base moulding back up because our base moulding was almost as tall as the first piece of shiplap. Instead, we just added a piece of quarter round along the floor.
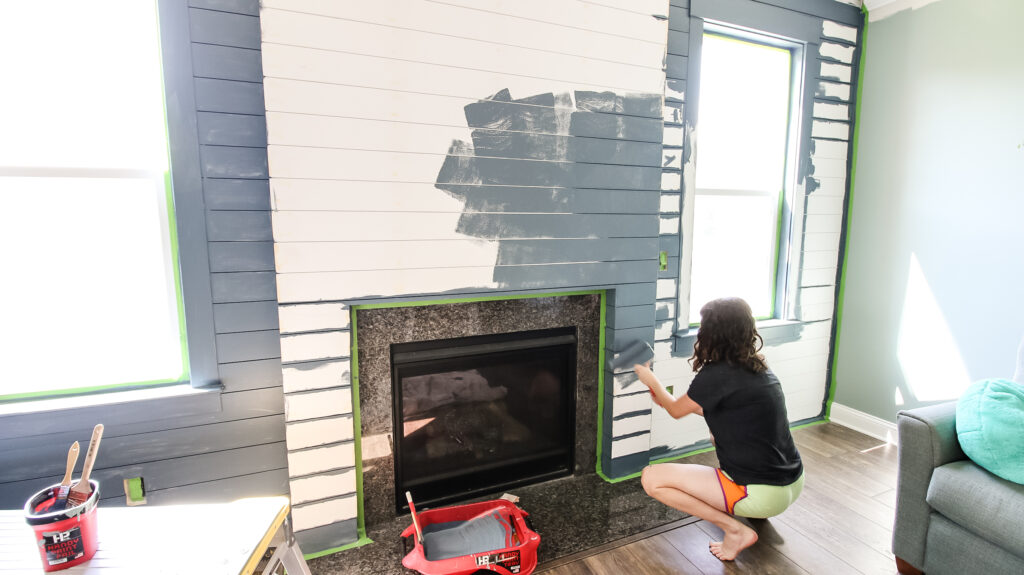
Finishing and painting
With everything in place, it was time to finish up the shiplap fireplace!
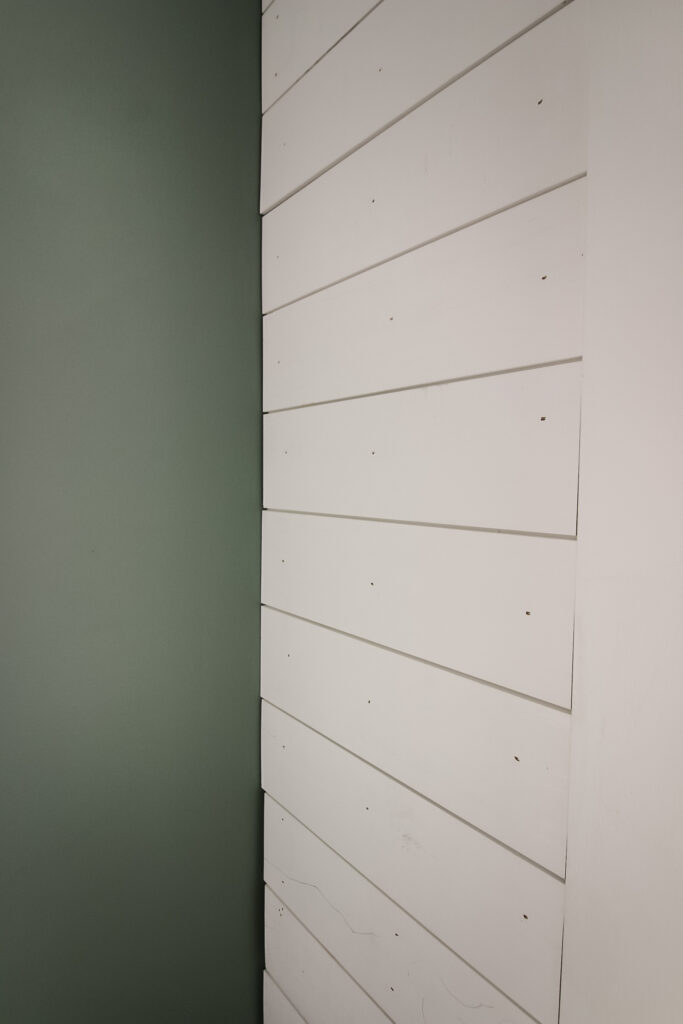
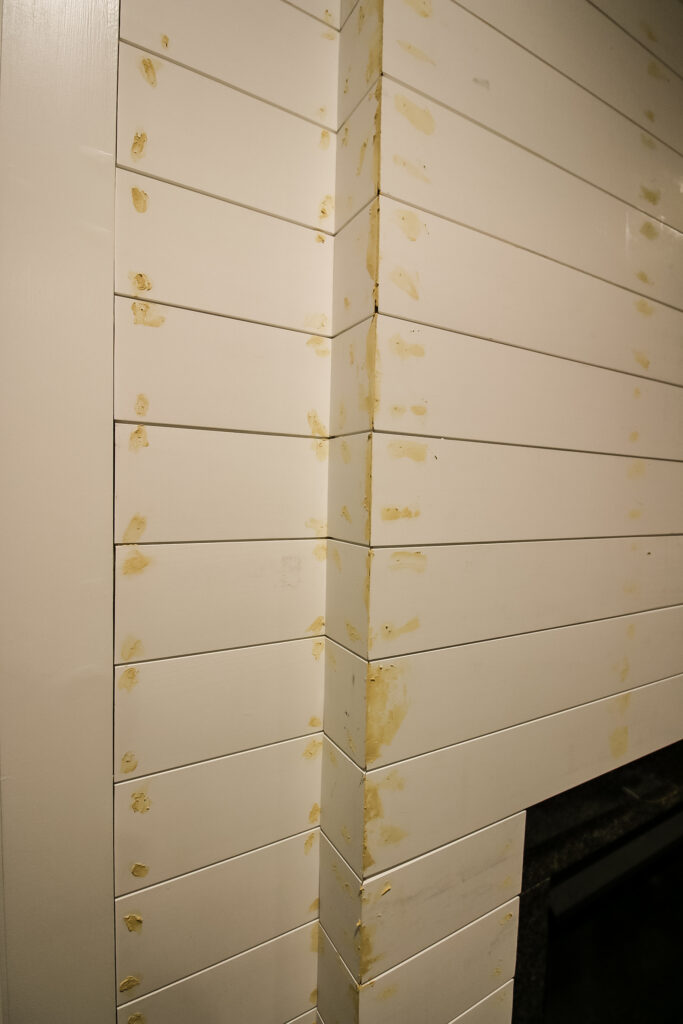
We used wood filler to fill in every single nail hole on all the shiplap. Use wood filler and not caulk because you can sand it smooth!Should I use caulk, wood filler or spackle?
Use caulk in the joints along the crown and base moulding and where the mitered angles come together on the fireplace corners. Caulk has some flexibility so using it in joints helps decrease the likelihood that you will have cracking down the road.
After everything is dry and sanded, add your paint.
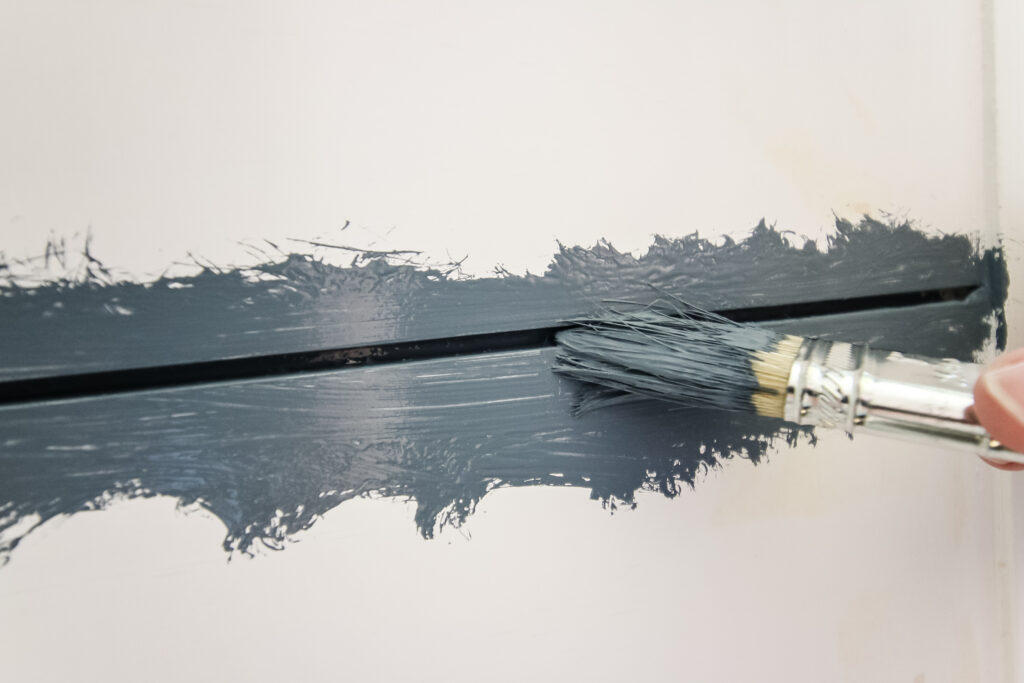
With shiplap, you'll need to either use a paint sprayer or a tiny brush to get into the small grooves between the panels.
We used a small brush and this was very tedious. In hindsight, we would have taken the time to tape off the windows and use the paint sprayer. But, the brush works if that's all you have.
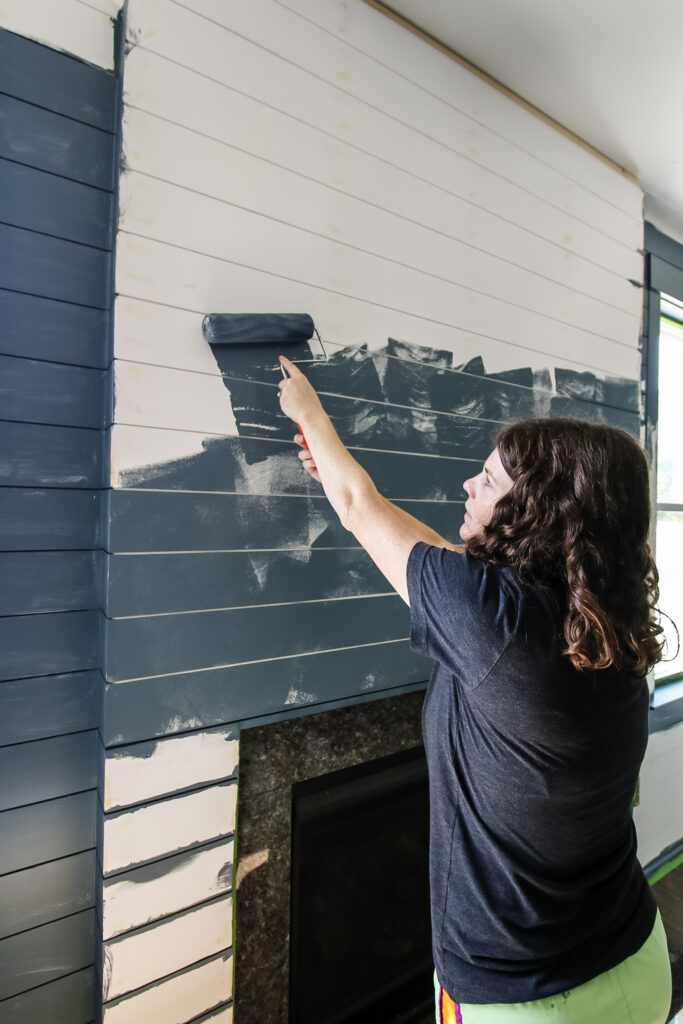
Then we used a roller to paint over all the shiplap and gave us our first look at the final product.
We also choose to paint the crown moulding, quarter round and our entire window boxes so that everything would be the same color and nothing would stick out.
Do you have to paint shiplap?
Yes, you have to paint shiplap.
It might look like white shiplap from the store is nice and ready to go once installed, but you have to paint it, even if you are painting it white.
Shiplap from the store is primed, but is going to be scuffed, even if you get a good piece, just from the way they ship it.
Plus, you have to fill the nail holes with wood filler after it is installed, so you need to sand and paint no matter what.
We used Behr's "NYPD," which is a navy color, and needed two coats of paint.
DIY reclaimed wood mantel
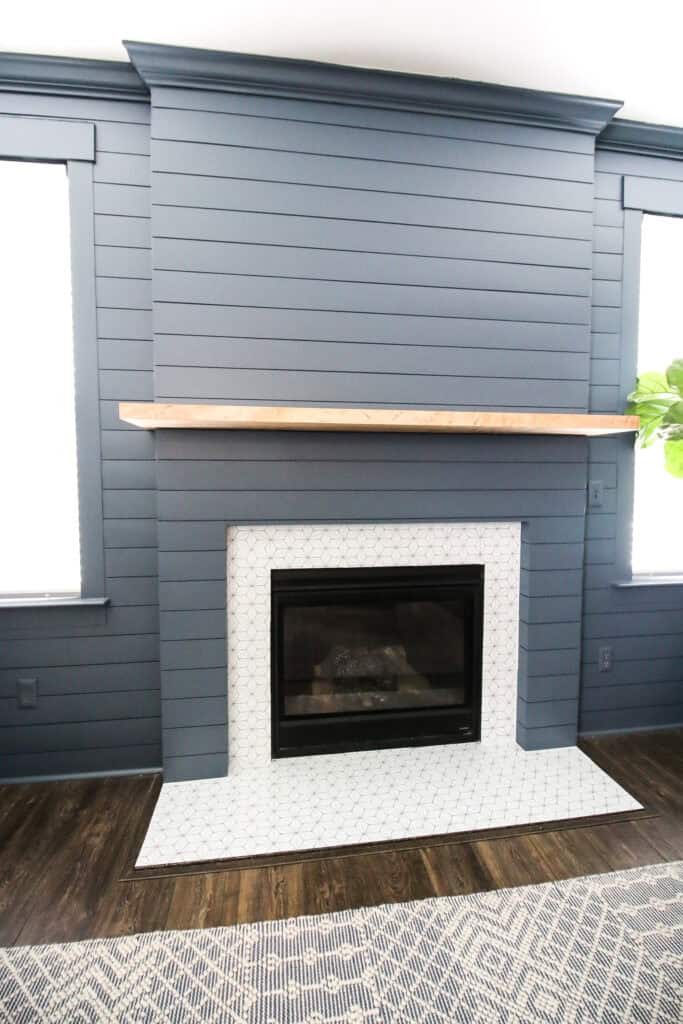
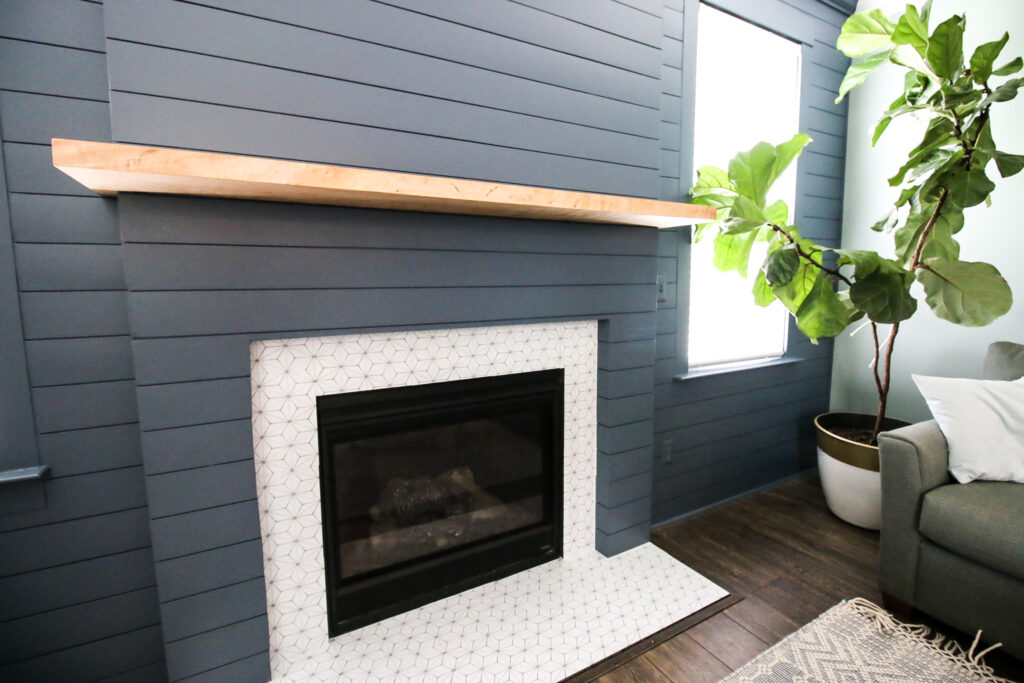
We really wanted this shiplap fireplace to stand out, so we added a reclaimed wood mantel.
There are a number of ways to add a mantel, including building a thick one from ¾" wood.
We went to a local hardwood store and picked out an incredible piece of curly maple that is 2" thick.
We trimmed it up on the table saw and sanded it down, then used Walrus Oil to bring out the color.
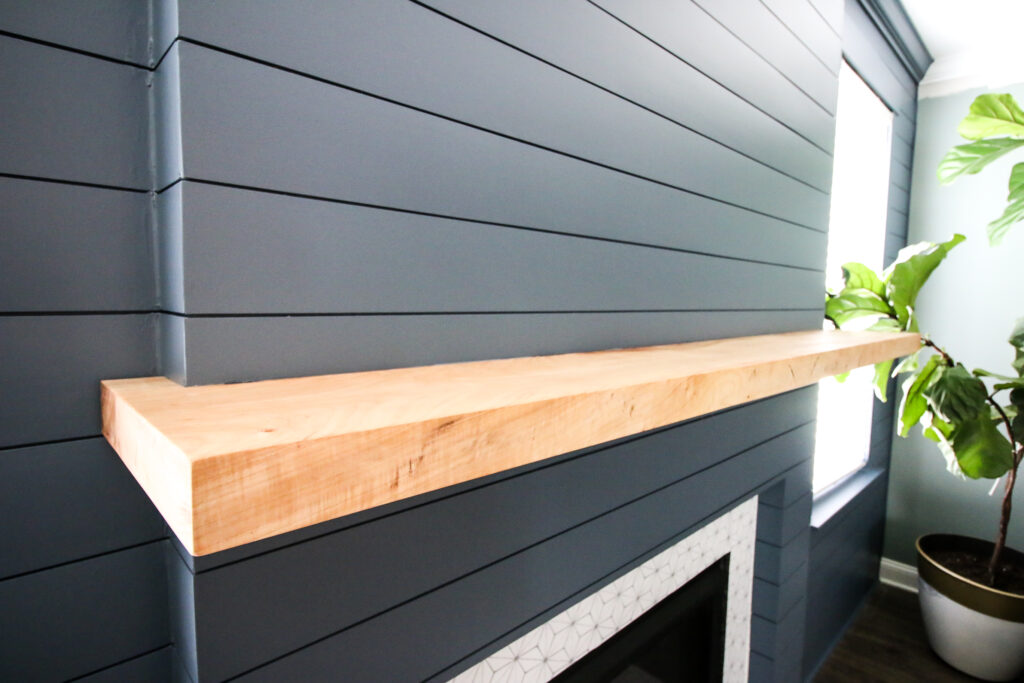
A reclaimed wood mantel is beautiful, but we didn't want to mess it up by putting bulky corbels or brackets. So, instead, we opted to install the mantel with floating shelf brackets.
These floating shelf brackets were simple to use as individual pieces. They require drilling a 6" deep hole in the wood to fit in.
You'll need a long drill bit, bit extender or drill press to drill a full 6" into the hardwood.
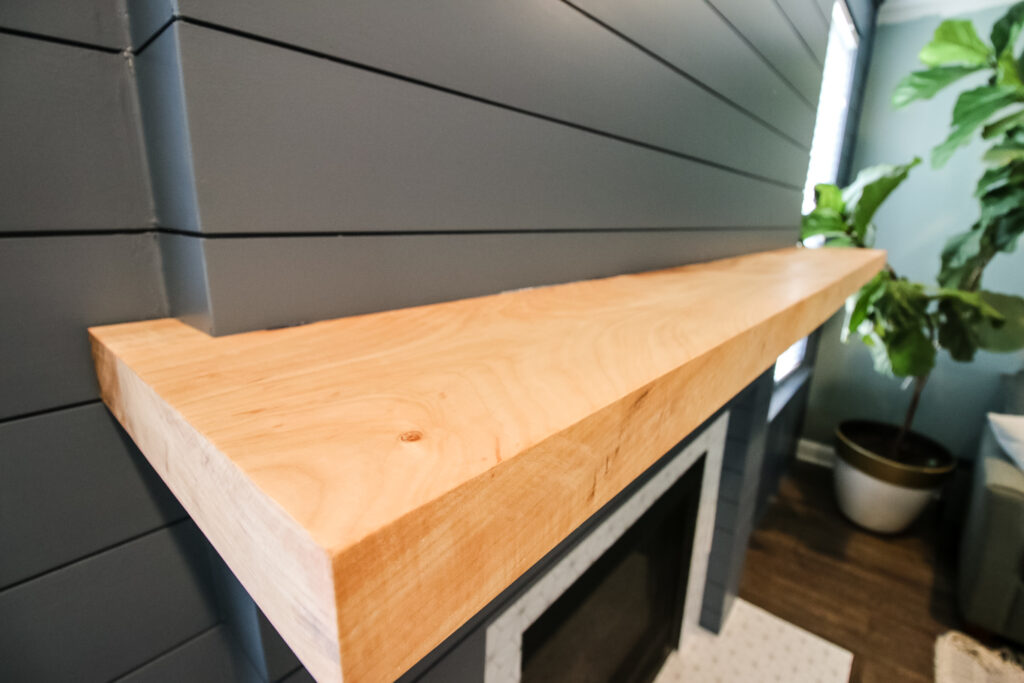
With the holes drilled, we attached the brackets to the studs in our new fireplace pop out. It's good to have a drawing with your measurements so you know exactly where the studs are.
Once the shelf brackets were installed, we slid the mantel in place.
How to install tile stickers on granite
Our fireplace was surrounded by a black granite that we didn't really like, especially with the new style.
We wanted something brighter and more modern to help bring out the blue of the fireplace and the lightness of the mantel.
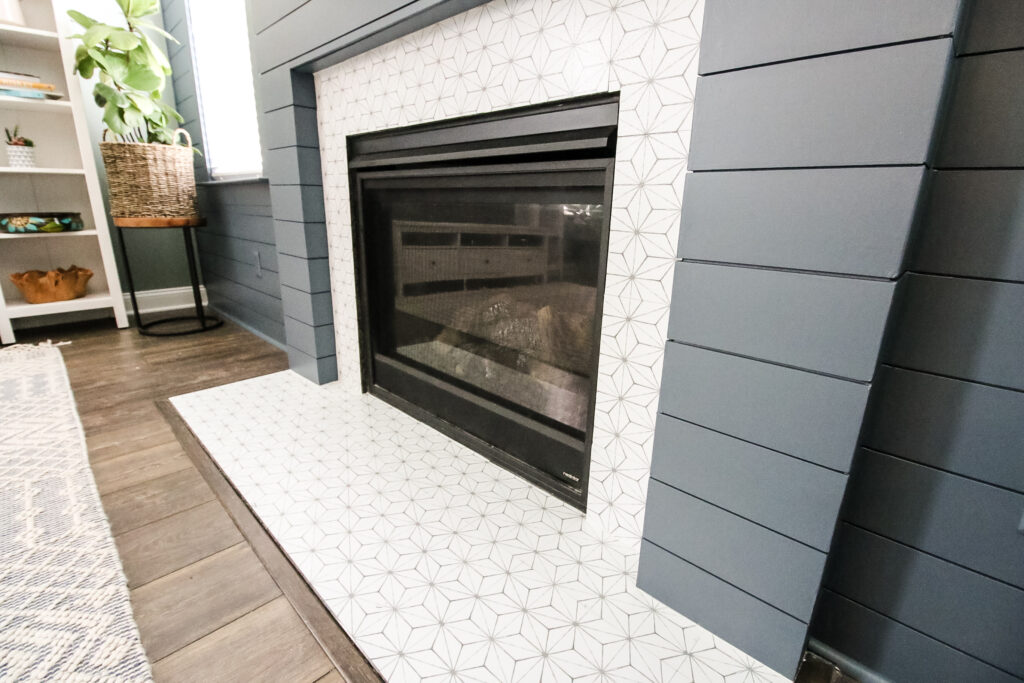
We ordered some tile stickers and cut these to size to cover the granite around the fireplace and on the floor.
Check back tomorrow for a full tutorial on how to install tile stickers on granite, but look how it turned out!
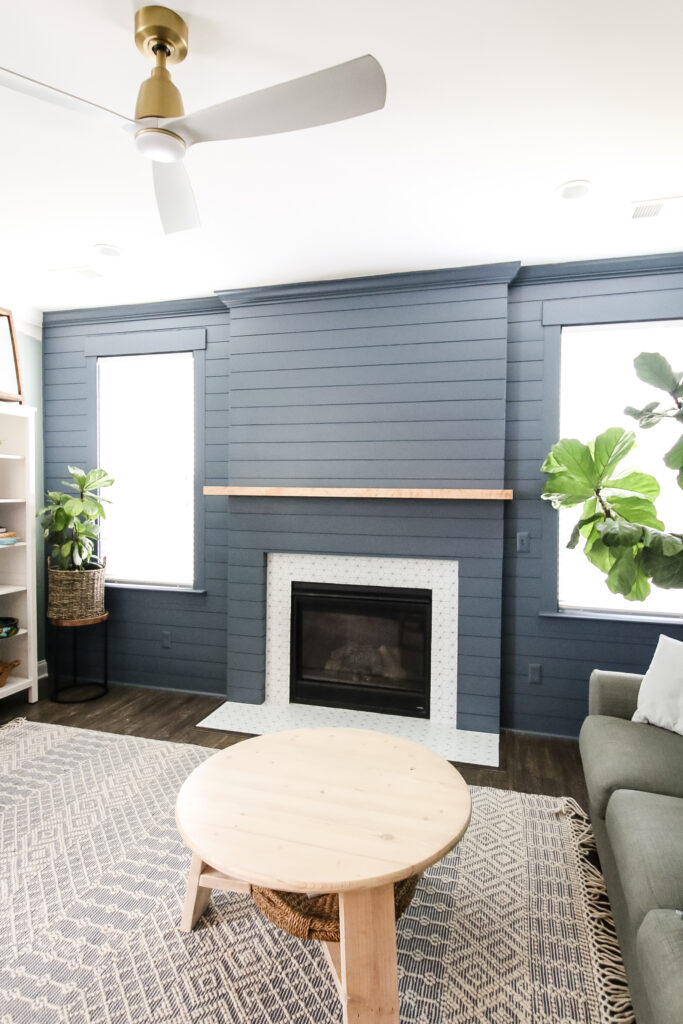
Final result
How incredible does this DIY shiplap fireplace look?!?!
This was a lot of work and definitely takes some time, but the impact is incredible.
We are so excited for this shiplap wall to be the focal point of our whole first floor for years to come. It's the first thing you see when you walk through the entry of our home and we love that we did it all ourselves!
How much does it cost to install a DIY shiplap fireplace
Creating your own DIY shiplap fireplace is actually a project that is very budget-friendly, considering the impact it has. That doesn't mean it's cheap, but it is low-cost for the aesthetic value.
The material cost isn't as bad as you would think, but it is all entirely dependent on how large of a space you're covering.
If you're only shiplaping around the fireplace itself, you'll save a lot of costs, compared to putting shiplap on the entire length of the wall.
Our pop out frame was 70" wide by 9' tall and our entire wall is 16' wide by 9' tall, with two windows.
Here's the overall cost breakdown for our shiplap fireplace and accent wall. We got everything at our local Home Depot, and costs will also vary based on your location or what store you choose.
- (2) 2" x 4" x 10' boards- $6.48 each
- (5) 2" x 4" x 8' boards- $3.48 each
- (23) 5 ¼" x 12' shiplap boards- $13.10 each
- (1) box of 3" screws- $9.50
- (1) box of 1 ½" brad nails- $10.98
- (1) tube of caulk- $2.82
- (1) tub of wood filler- $14.92
- 18' of crown moulding- $32.07
- 12' of quarter round moulding- $15
- 1 gallon of paint- $36.98
- Floating shelf brackets- $16.95
- Reclaimed hardwood mantel- $120
- (3) boxes of tile stickers- $10.19 each
Total cost for our shiplap fireplace- $621.45
Total cost without an expensive mantel- $501.45
Total cost to us with materials on hand- $546.25
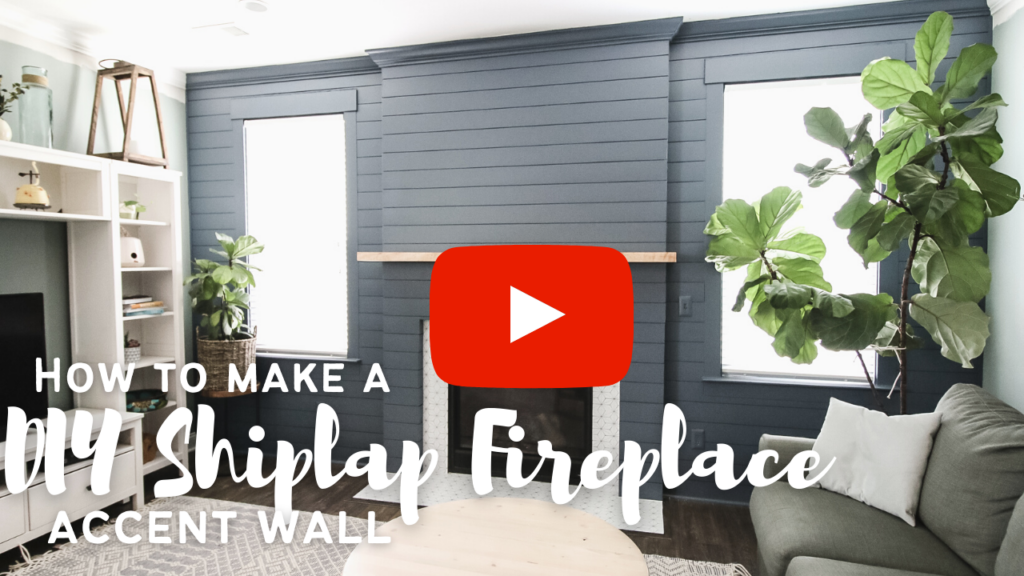
Video Tutorial
If a video would help you understand how to do this project better, you're in luck! We've got a full video showing each step of the process and hope it will help you understand how to make a DIY shiplap fireplace for yourself!
Basic woodworking information for every project
Here are some of our most popular woodworking articles!
Shopping for wood:
Woodworking project ideas
- 100+ of the best woodworking project ideas!
- 62 easy beginning woodworking projects
- Woodworking project ideas to make and sell
See all our printable PDF woodworking plans!
Our favorite tools + supplies
- See all our favorite tool reviews
- How to use a Kreg jig
- The ultimate wood stain guide
- The best wood fillers for your project
Remember to also always use safety equipment while woodworking and using tools. Make sure you have proper eye protection, ear protection and a good mask to keep yourself safe.

Looking for something?
We've been doing this since 2012 so we have a LOT of blog posts!
Search stuff like: Ceiling Projects | DIY Plant Stands | Thrift Flips

Hey there, I'm Sean, the woodworking enthusiast and builder behind CharlestonCrafted.com! Since 2012, I've been sharing the magic of turning raw materials into beautiful creations. I love teaching others the art and satisfaction of woodworking and DIY. I try to inspire fellow crafters to make something extraordinary out of nothing at all.


