Want to give your boring fireplace a grand look on a budget? Here's how to extend your fireplace with molding!
You might remember that we are participating in the One Room Challenge and are focusing on making over our front room.
It's the first thing people see when they come in. We removed some walls to open the space up in September, but we still had a big plain wall above the fireplace.
A lot of people put a TV above the fireplace, but we're leaving this room TV free. So we needed to do something.
We wanted to make the room look more regal, and truly formal since this is our "formal living room," so we decided to extend our fireplace to the ceiling. Here's what our other projects for the One Room Challenge have looked like so far!
- Week 1: The Plan
- Week 2: Painting and Large Furniture
- See the full room reveal + budget breakdown here!
Love simple DIY projects like this one? Sign up for our free email newsletter!
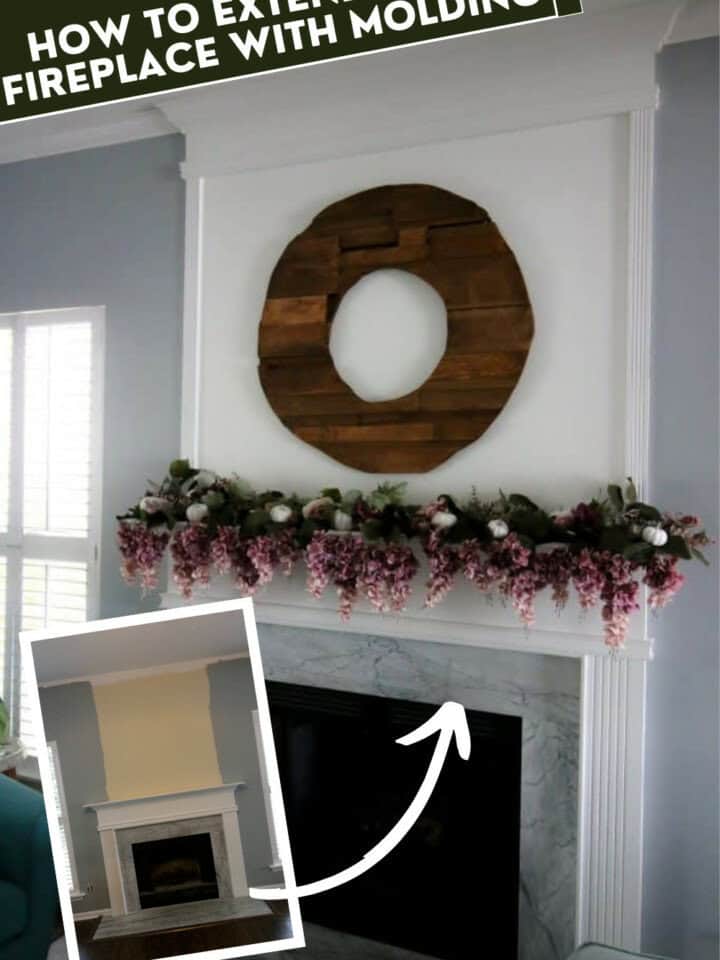
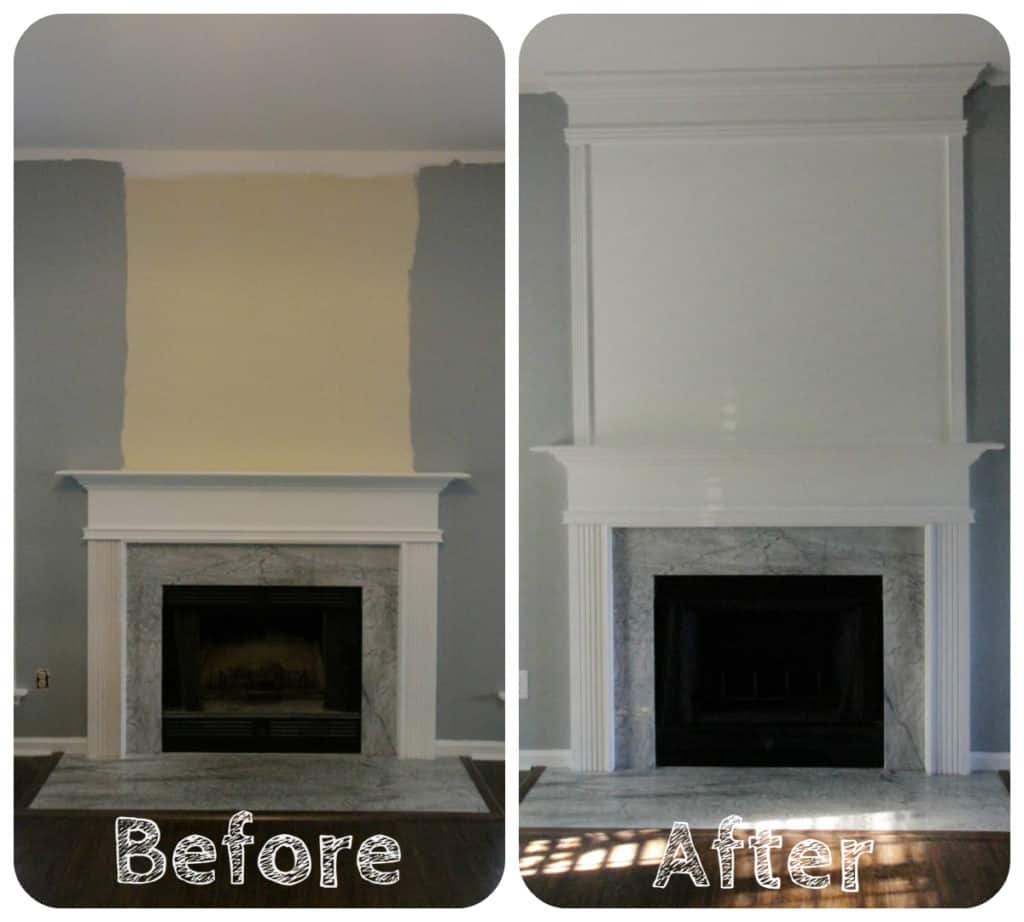
How to use moulding to extend your fireplace to the ceiling
This project was actually fairly simple, but took a little time. All it is is crown moulding and paint. Simple as that to make this look like a grand fireplace.
If you have a builder grade fireplace in your room with a blank wall above it, this is a really easy project to replicate and make your own style!
If you want a builder grade fireplace and want to remove it, here's how to do it!
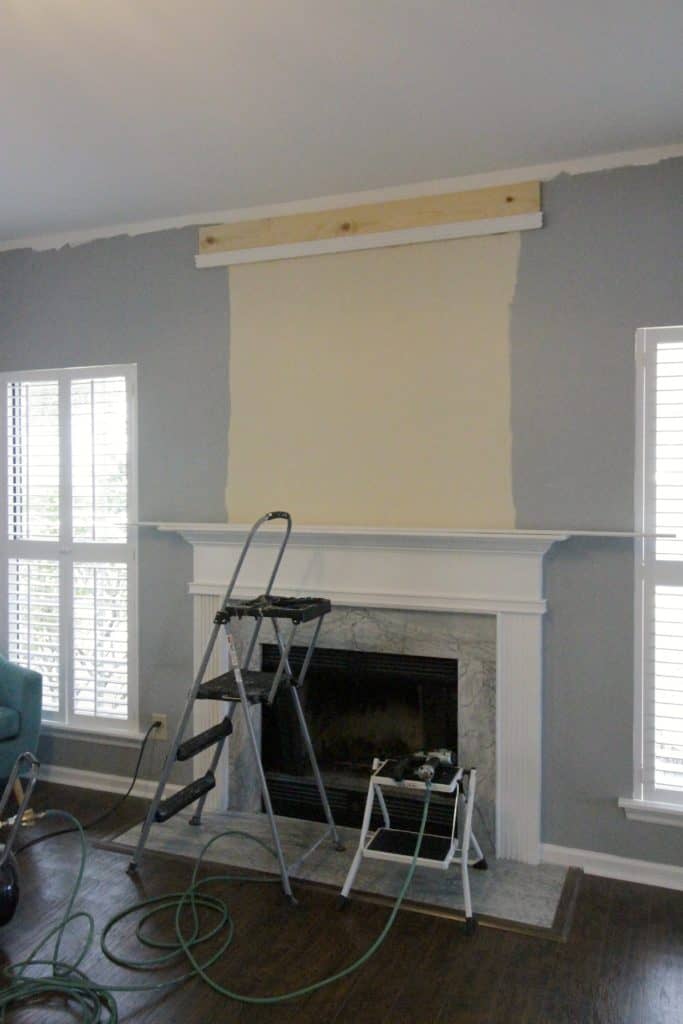
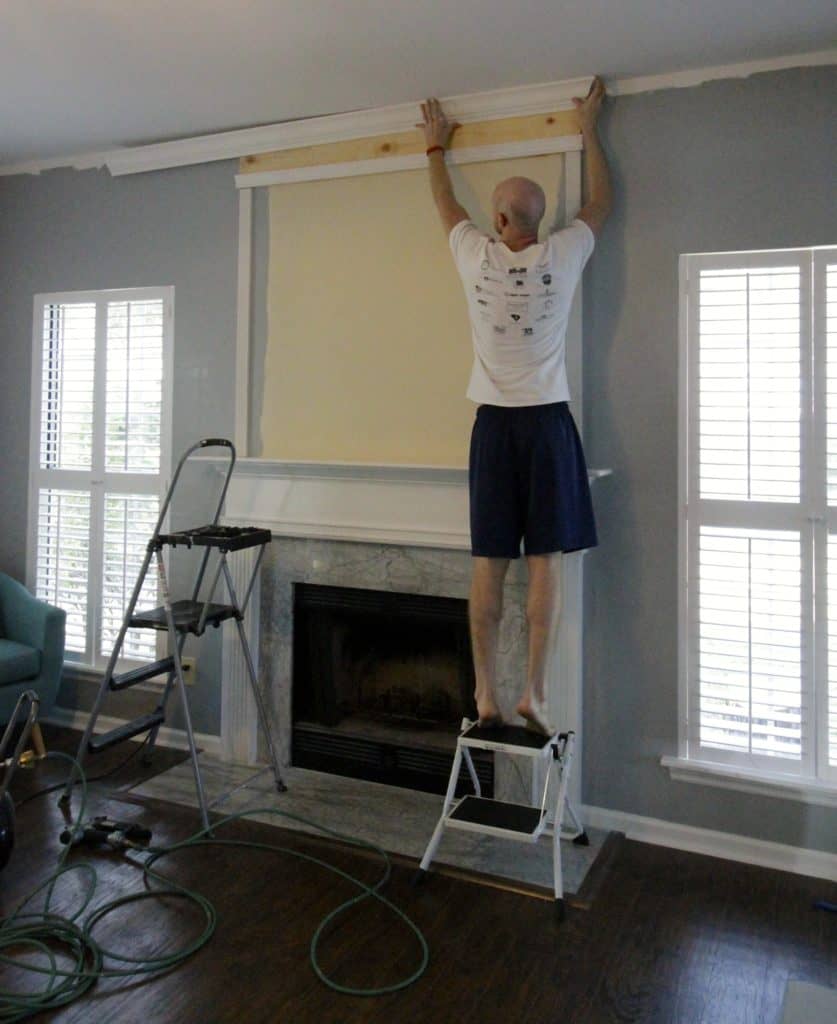
Step one: install crown backer
We started by measuring the the width of the fireplace and cutting a 1x6 piece of wood to that length.
You don't have to put up a board, but we wanted to have the crown pop out more three dimensionally. To do that, we needed to bump the top out a little bit so that the crown molding would wrap out and around it.
Next, we added a piece of wall moulding to the bottom of the board using a brad nailer.
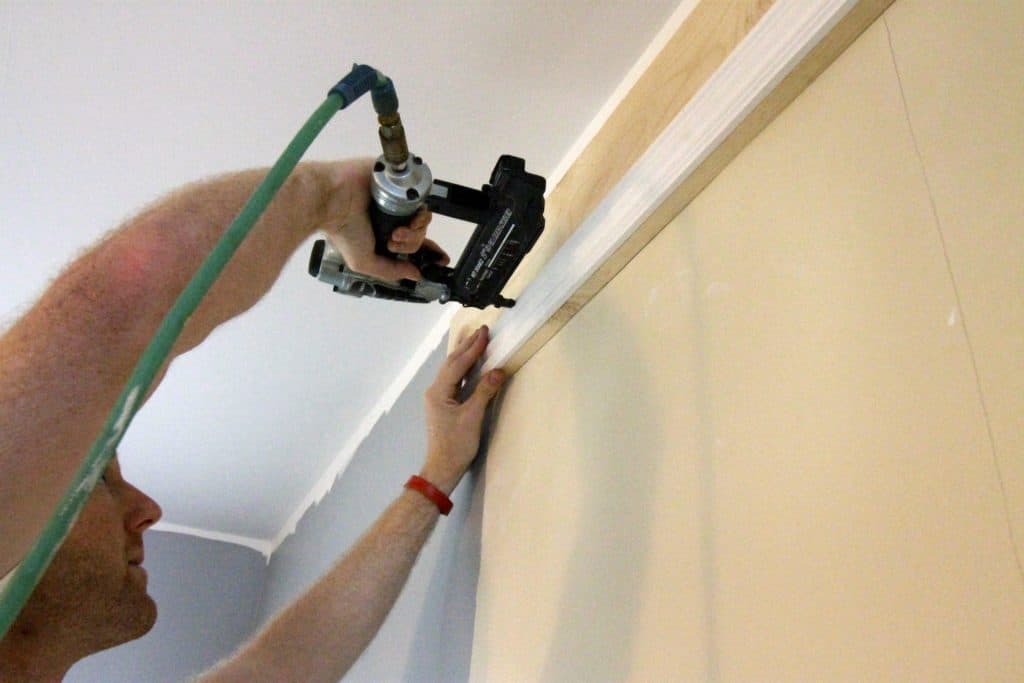
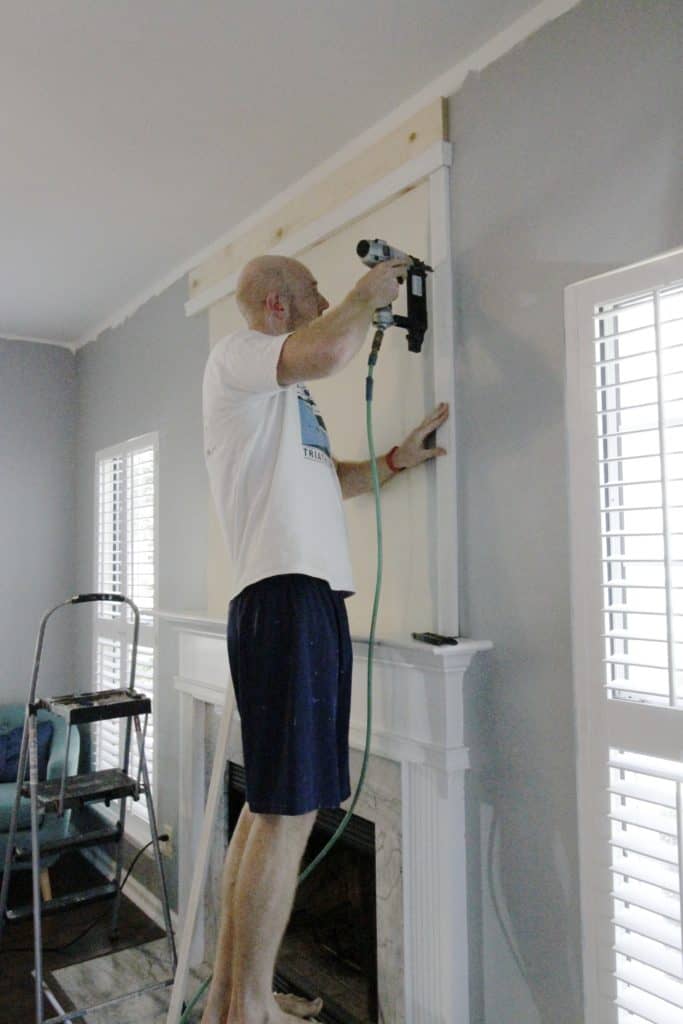
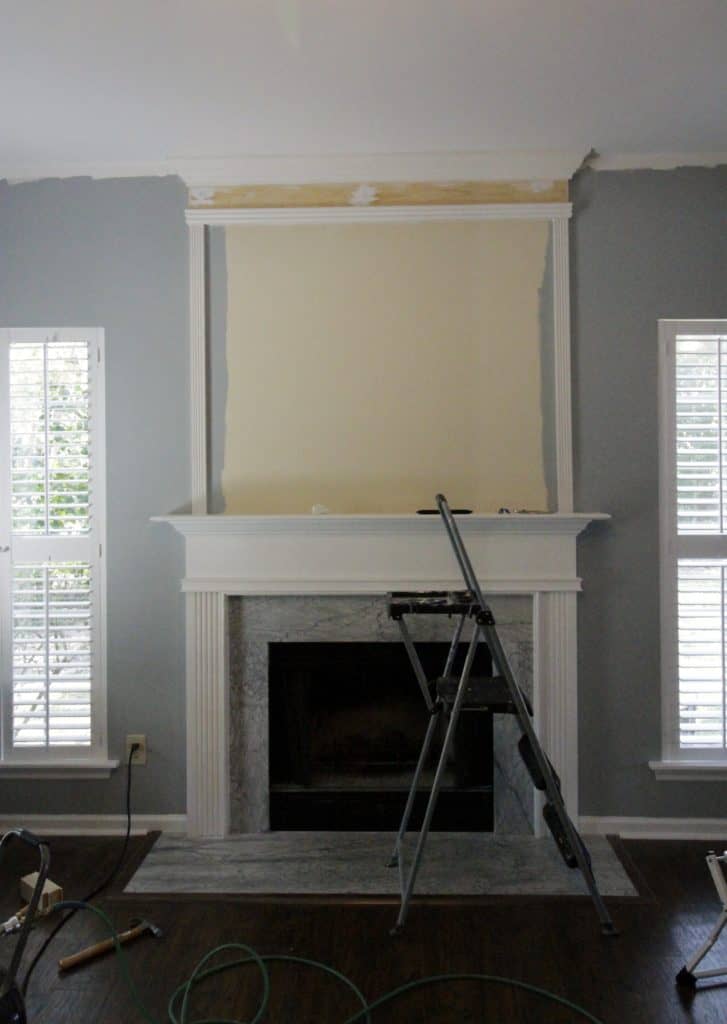
Step two: add vertical molding
Next, we added two pieces of wall moulding vertically on the ends of the board to give the extension feel. These boards frame the side of the extended fireplace, making it eventually look like a single fireplace unit that goes from floor to ceiling.
These were the easiest part of the project because they were flat cuts! Simply cut them to the exact length between the crown backer board and the top of the fireplace and then nail in place.
As a tip, remember to line it up with the vertical molding from the sides of the fireplace, not all the way out on the end of the mantel!
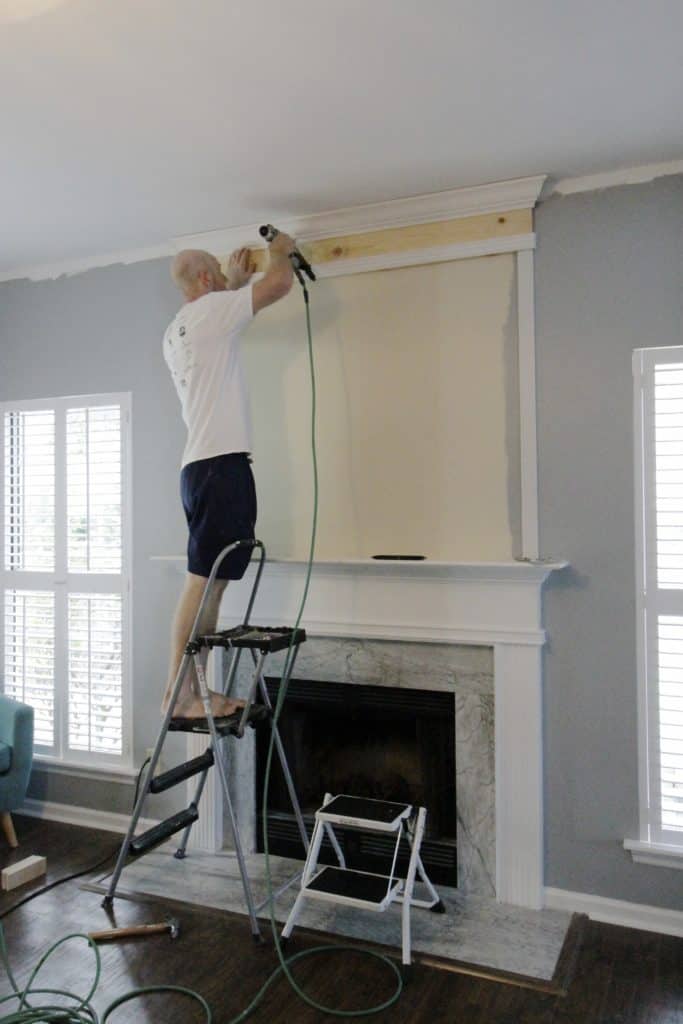
Step three: add crown molding
Finally came the thick crown moulding for the top. This part was hard. We've always heard that crown moulding was to hang, and it was for our first time.
We read the instructions from my miter saw and watched YouTube videos. Everything says to cut the crown moulding at an angle and upside down.
Well, that didn't work for us because the moulding was too thick and the blade wouldn't go all the way down. Sigh.
So, after much frustration, we decided to just try lying the crown moulding flat on the saw and making a compound cut plain and simple.
That means cutting with a bevel and a miter, to create two angles at the same time. It worked with no problem.
Since this project, we've learned a lot more about how to hang crown molding.
We hung the main piece and then cut the small pieces to go on the sides and hung those to make the crown at the top.

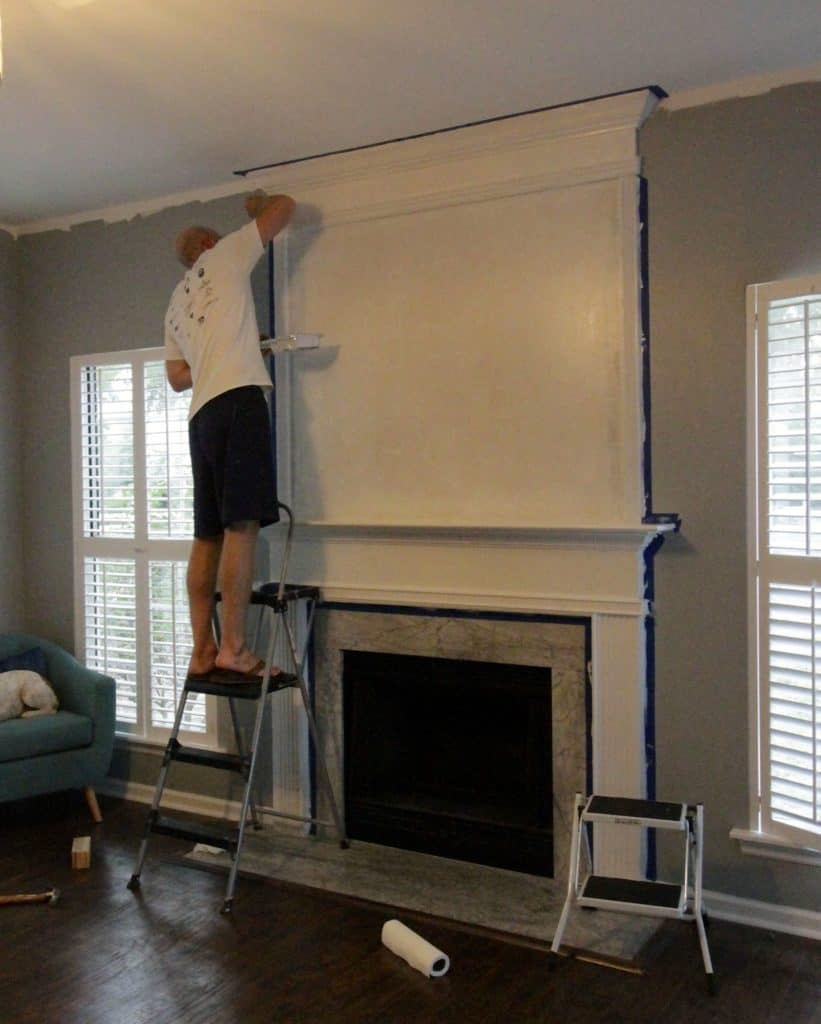
Step four: caulk and paint
Once everything was hung, we used caulk to fill in all the seams between each piece and applied wood filler to the nail holes.
The last step was paint. We were using semi-gloss trim paint, which took a lot of coats. We chose semi-gloss since we were using molding and wanted it to all match to look like an original piece.
We did a fresh coat on the pre-existing fireplace mantle, two coats on the pre-primed new moulding we hung, and FIVE coats on the wall in the middle. That stuff just doesn't cover well on drywall, but it looks great after.
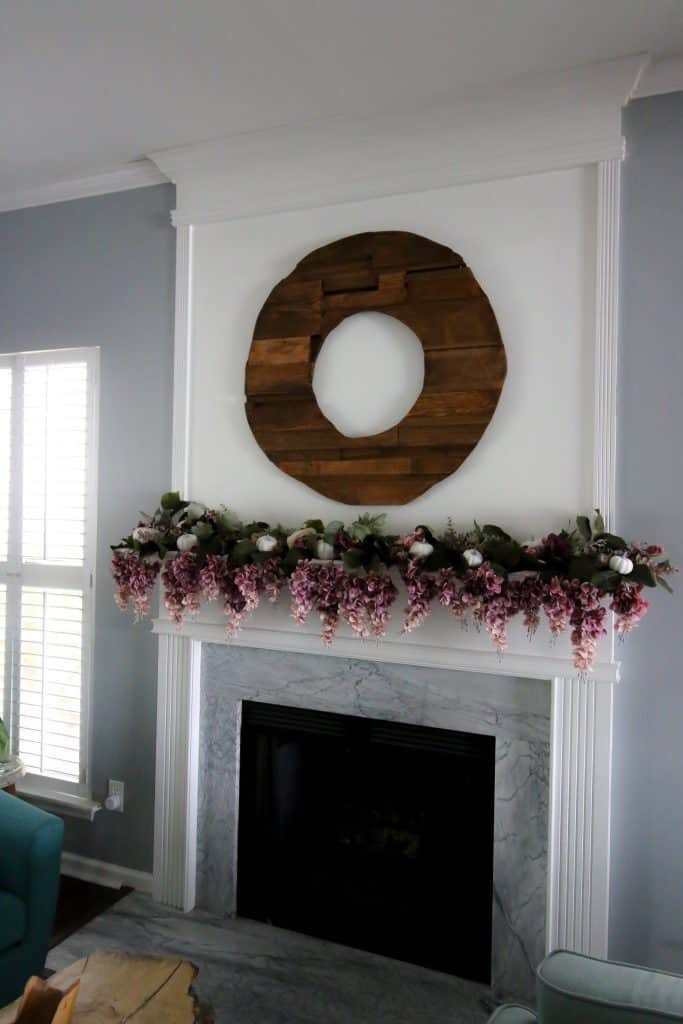
DIY fireplace extension upgrade
The room looks so nice and regal now! Later on, we hung up this DIY scrap wood wreath in the space above the mantel and it looks so nice with the mantel filled with a display.
Love this project? Check out our list of TONS of DIY fireplace makeover ideas!
Be sure to check out how we made a DIY shiplap fireplace at our new house where we removed the builder grade surround and created a whole pop out frame to shiplap!
That was our big update for the One Room Challenge for this week, but we have lots in store for the upcoming weeks! Stay tuned.

Looking for something?
We've been doing this since 2012 so we have a LOT of blog posts!
Search stuff like: Ceiling Projects | DIY Plant Stands | Thrift Flips

Hey there, I'm Sean, the woodworking enthusiast and builder behind CharlestonCrafted.com! Since 2012, I've been sharing the magic of turning raw materials into beautiful creations. I love teaching others the art and satisfaction of woodworking and DIY. I try to inspire fellow crafters to make something extraordinary out of nothing at all.


Rachel Bauer says
I love your fireplace transformation! I was actually considering doing something similar for my fireplace but had decided against it. But now, seeing how good yours looks, I'm reconsidering.
Morgan says
Thanks! It was seriously so simple and I am just swooning over it!
Thanks for stopping by 🙂
Andrea says
So amazing! can't wait to see the end result : )
Morgan says
Glad you like it 🙂 Thanks for stopping by!!
Jen @ Noting Grace says
Wow! Now that's a statement! I can't wait to see how it all turns out. It's going to be a stunner!
Morgan says
We really love ho it turned out! Thanks for stopping by 🙂
Connie says
Nice. Very nice, came out beautifully.
kristen says
Looks Great!
We did something similar with our bed - headboard
pgross says
Beautiful! It really classes it up. Not that it was bad before but like the right piece of jewelry can make a dress really pop.
Shirley says
Great job you did. Brilliant idea you came up with. What fun you’ll have decorating too.
merrybe says
I wonder whether you primed the wall and moulding before you applied the semi-gloss paint? I didn't see that process in your instructions.
Sean says
No, we did not prime.
Kathleen Citron says
This looks fabulous! I want to do something similar in our family room. I am curious if you eventually added crown molding all around this room? We already have crown molding and I am trying to figure out how to tie in to the ‘accent area’ (the area of crown that you added that stands out a bit).
Morgan says
Hey Kathleen, yes we did actually add crown molding around the entire room later on. Basically, when we tied into the accent we used the ol' "do your best and caulk the rest" motto. Since the molding wasn't the same size, we did our best to trace the rough shape of where the smaller molding would tie into the bigger accent piece and then used caulk to hide the imperfections. It really look seamless and worked perfectly.
Kathleen Citron says
Awesome! Thank you!
Ivory says
fabulous, fabulous, and I gotta have this. I love it!
Jenifer says
Lovely! I love the paint color on the walls as well. Can you tell us what color it is?
Morgan says
Online by Sherwin Williams 🙂
Vanessa says
So, I know this is five years ago know, but I found your pics when shopping for a fireplace mantel surround. Did you buy your surround from somewhere (where, what model?) and install or did you build it from scratch? It is exactly what I am looking for. I also like what you did with the moulding above as well. I'm thinking of doing something like that or shiplap.
Morgan says
Thanks Vanessa! If you mean the lower fireplace molding part, that was original to our house so we didn't buy it!
Jennifer says
How high is the ceiling??
Sean says
I believe they were 9 feet. We no longer live in that house though.