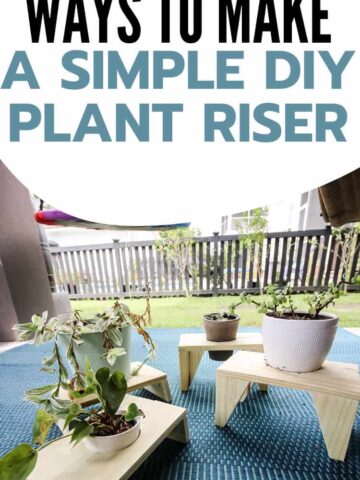
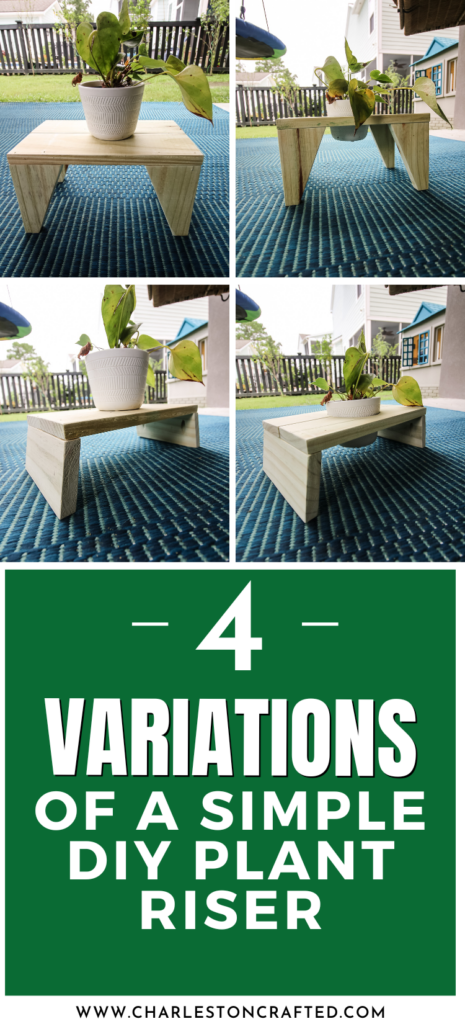
If your potted plant needs a little boost, here's 4 variations of a simple DIY plant riser that can help you get the look you need!
If you're a plant person, you're always looking for new pots, plant stands, plant risers and places in general to put your plants.
Sometimes, smaller plants need taller plant stands to get them elevated and get the light they need or to make them the accent piece you're looking for.
However, if you have a few potted plants that don't need to be up high, but you'd like to get up off the ground, you might just need a simple plant riser to give you what you need.
A plant riser doesn't have to be a big expense and is really a simple DIY project for indoor plants or outdoor plants.
If you have a big plant collection, coming up with different arrangements of small and large plants can sometimes be difficult, but adding different heights to your potted plants can help fix that.
So, we designed four variations of a simple DIY plant riser that can all be made with scrap wood and can help give you the different heights you need.
Check out some of our favorite outdoor plant stand ideas!
How to make a simple plant riser
A lot of plants can be better off with a tiered plant stand or plant riser to get them off the ground and give your corner a layered look you want.
If you want a plant riser or a plant riser with a hole to set the pot in, there are lots of different choice.
We recently enclosed our garage and had lots of 18" scrap boards leftover, so we made a few different projects, including all these plant risers.
Check out this hanging picket fence plant shelf we made with scraps too!
So grab some scrap wood and we'll show you how to make a cheap plant riser for your home!
What do you use to make a plant riser
To make a plant riser, you just need a few small pieces of wood.
A plant riser is a great scrap wood project because you can use smaller pieces of wood to get that little boost off the ground for your plant.
If you're building a plant riser for indoors, you should ideally use a wood that is naturally rot resistant, such as cypress or cedar. If building an outdoor plant riser, you can use pressure treated wood if you choose.
Here are some great DIY indoor plant stand ideas!
What you can also use as a plant riser is any items you have to get the plant off the ground. Indoors, you can use a stack of books as a decorative plant riser or outdoors use a couple of bricks. Whatever you need to fit your aesthetic.
For these plant stands, each of them is made with the following materials and then customized. Below we have the step-by-step instructions to make four plant riser variations for your favorite plant.
Materials needed:
- Roughly 48" in ¾" x 3 ½" boards (common 1x4s)
- Wood glue
- Nails
Basic woodworking information for every project
Here are some of our most popular woodworking articles!
Shopping for wood:
Woodworking project ideas
- 100+ of the best woodworking project ideas!
- 62 easy beginning woodworking projects
- Woodworking project ideas to make and sell
See all our printable PDF woodworking plans!
Our favorite tools + supplies
- See all our favorite tool reviews
- How to use a Kreg jig
- The ultimate wood stain guide
- The best wood fillers for your project
Remember to also always use safety equipment while woodworking and using tools. Make sure you have proper eye protection, ear protection and a good mask to keep yourself safe.
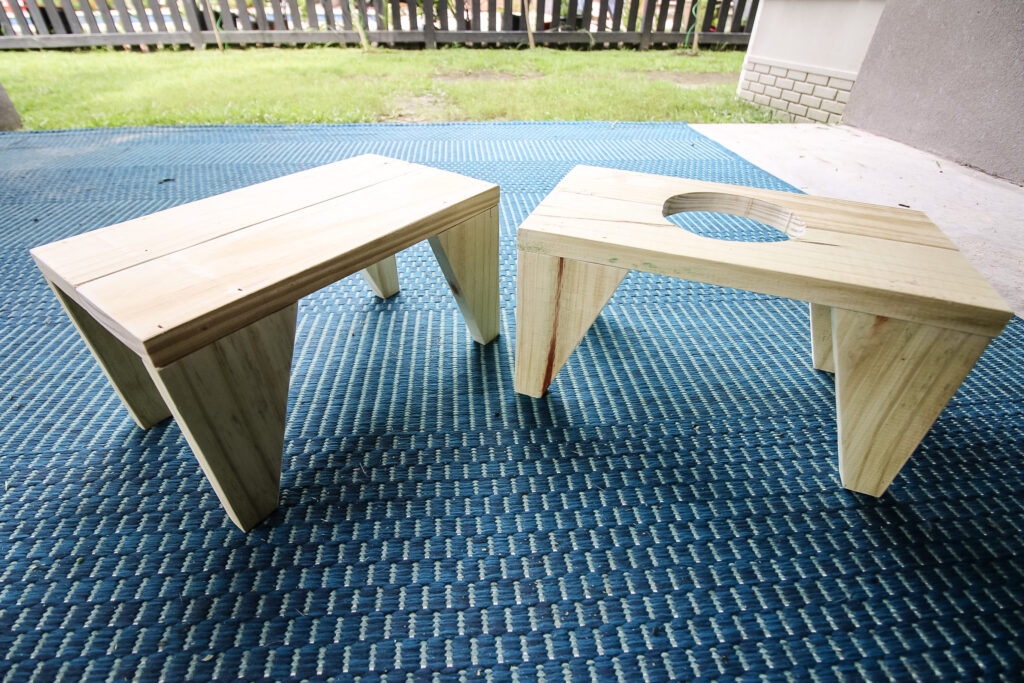
Variation 1: Simple plant stand with four legs
This first plant riser gives your plant a little height and a classic tapered leg design.
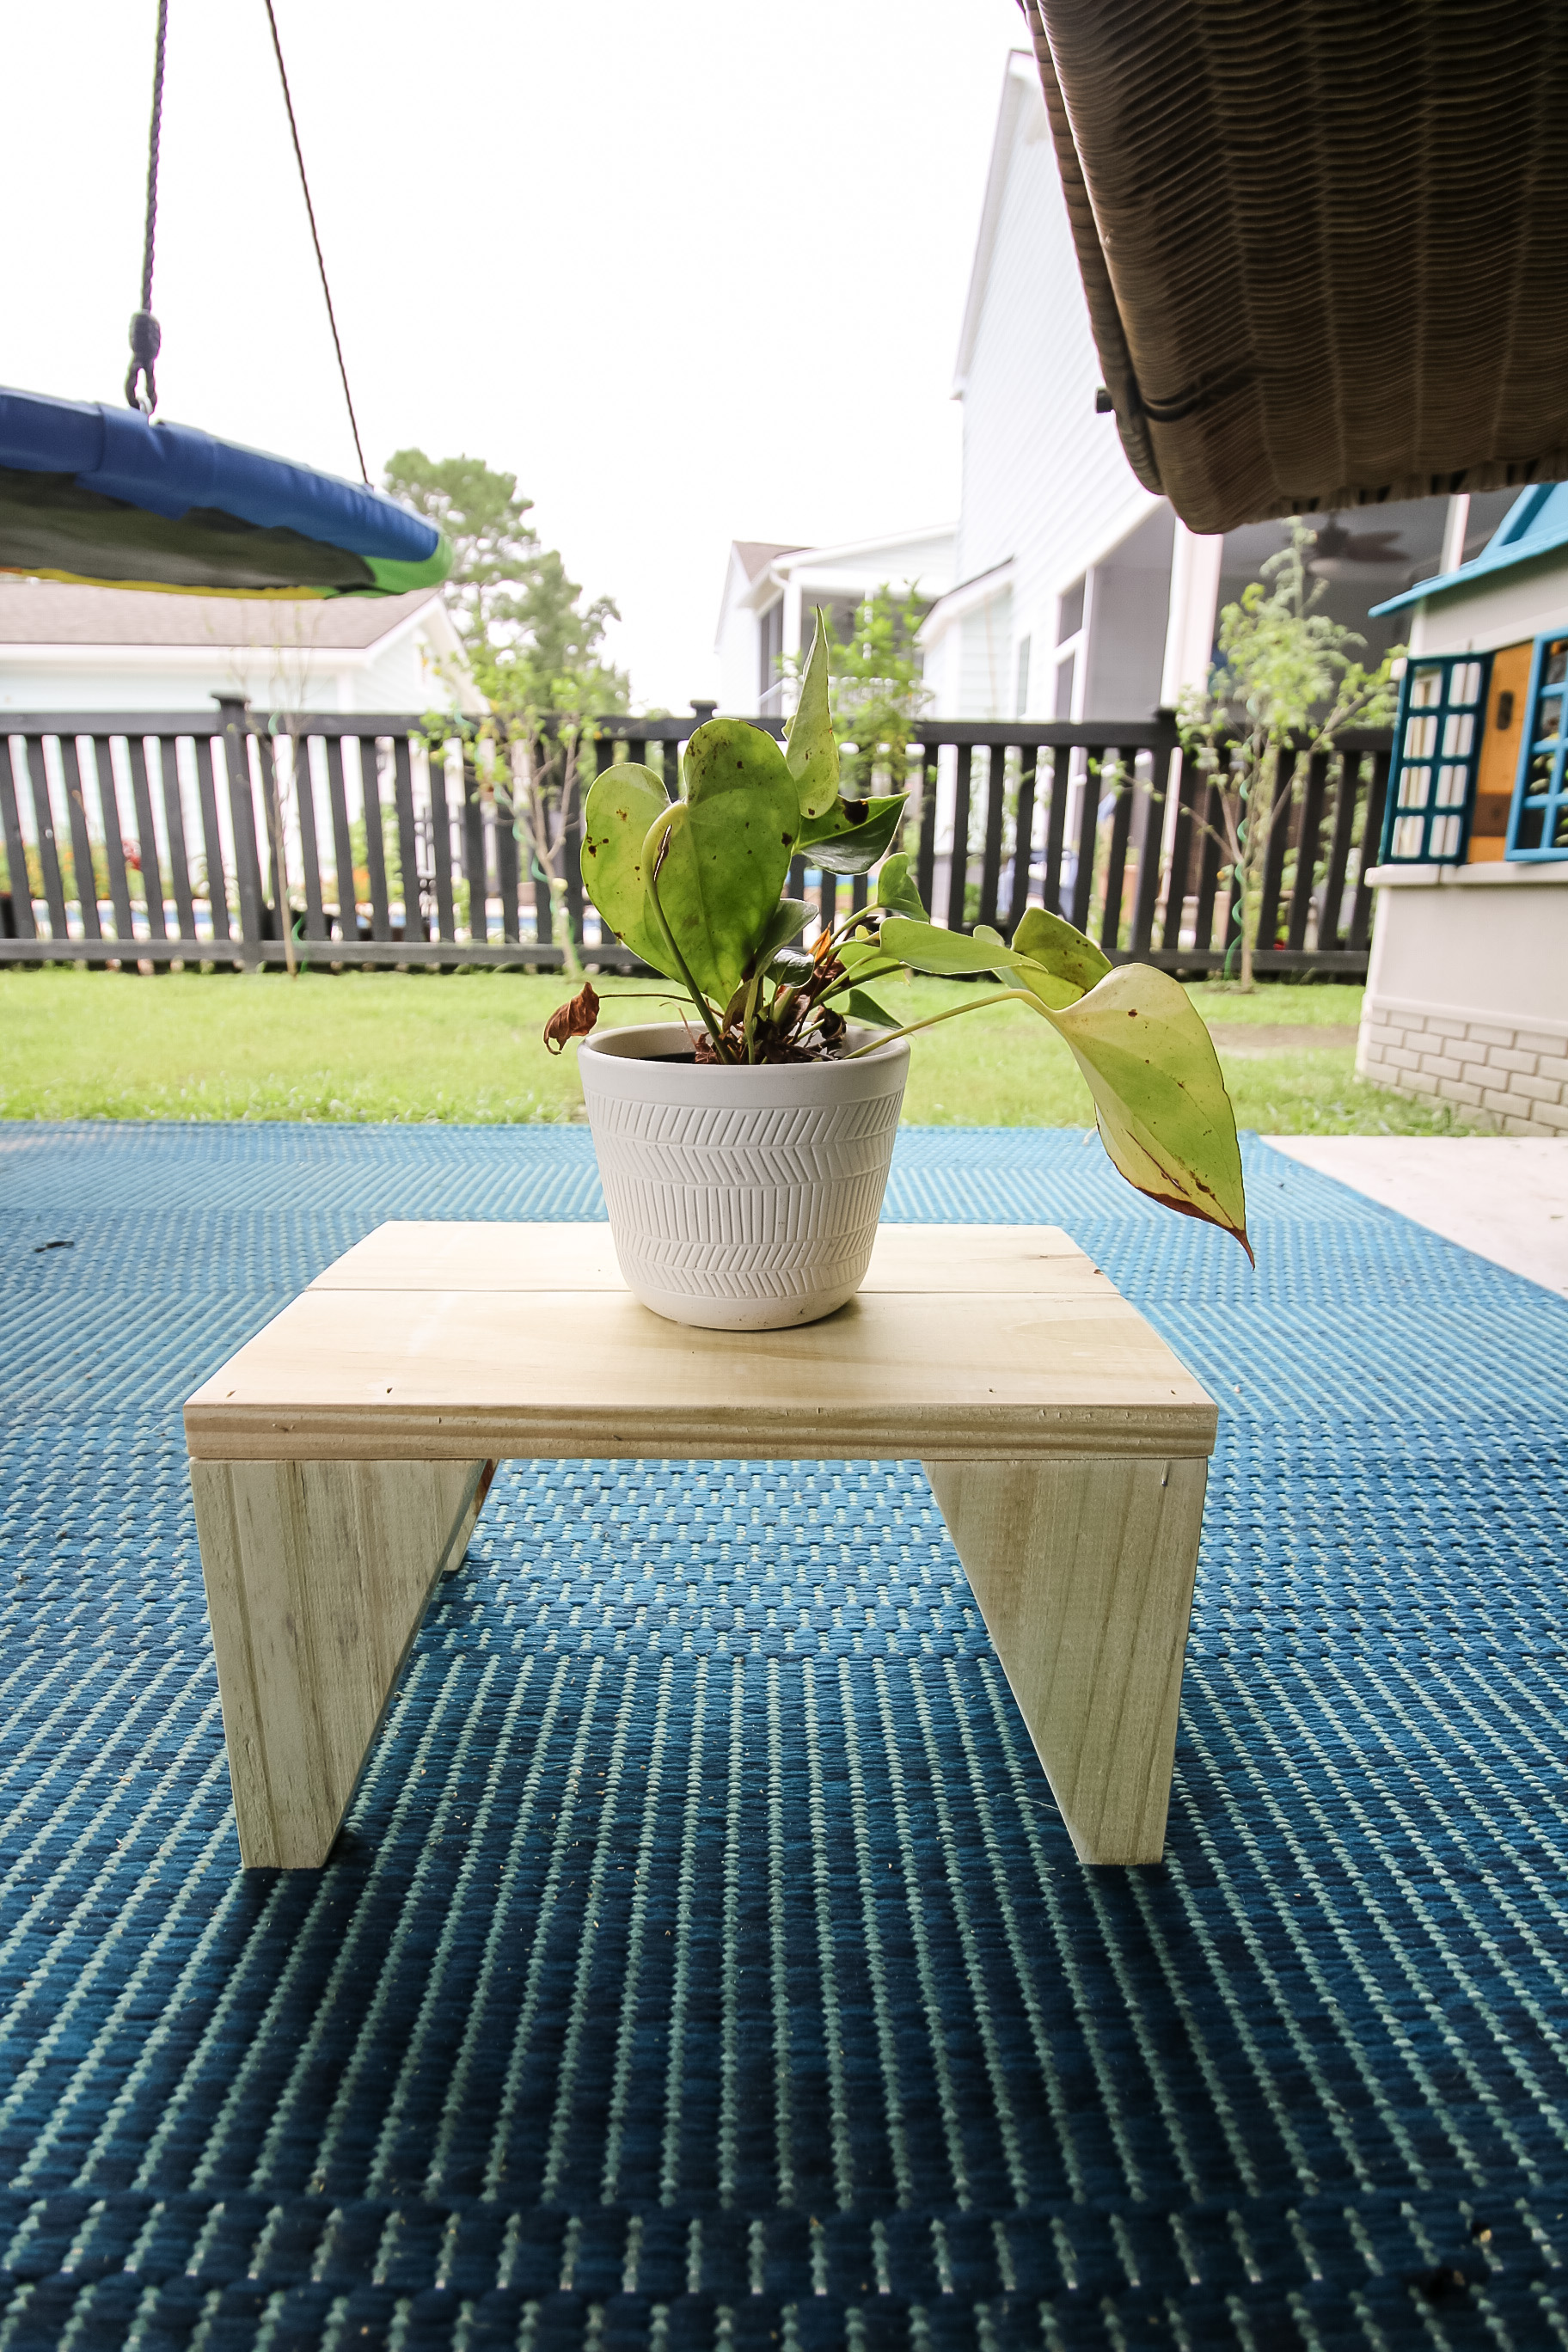
Cut two 12" pieces of wood to be straight as your top boards, then drill two pocket holes along one side of each and connect them together with wood glue and pocket hole screws. If you don't have a pocket hole jig, you can just use glue and clamp them together, but don't use too heavy of a plant later.
Then, cut four 6" pieces of wood with a taper from one corner to a point 1" in from the side on the other end.
Apply wood glue to the wide end of the legs and then place one in the corner of the top you created and nail it in from the top. Repeat for the other legs.
This will give your potted plant nice leverage with a classic design.
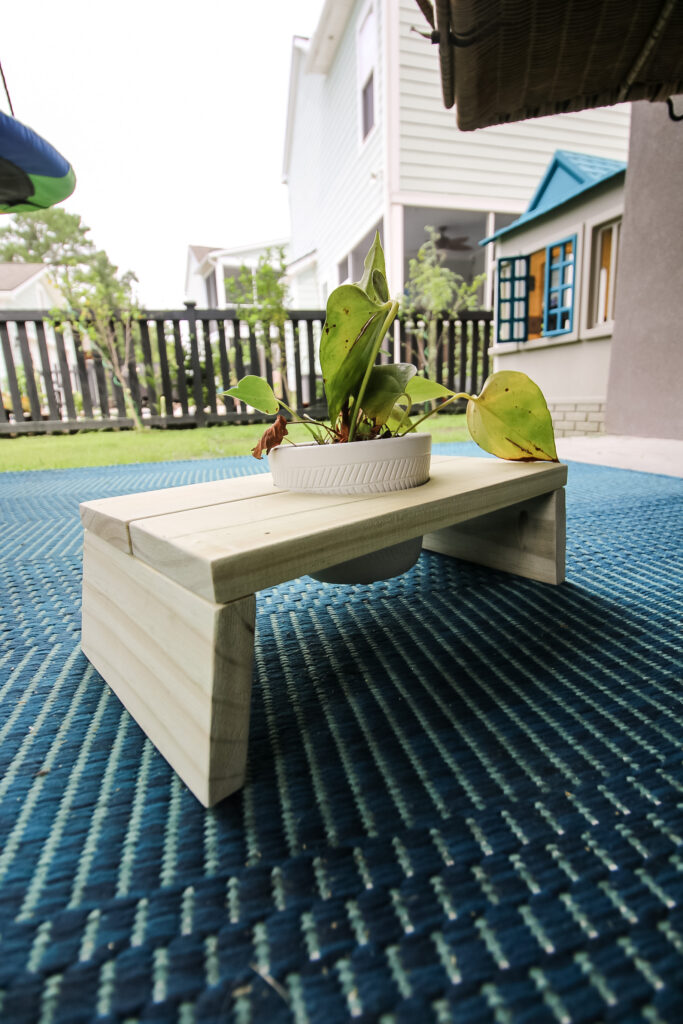
Variation 2: Simple plant stand with four legs and pot hole
The second variation of a simple plant riser is the same as variation one, but with a hole cut out for the pot to sit in.
Build the top the same way as in the first, but keep the pocket holes toward the outside edges.
Then, trace the pot you're going to put on the plant riser on the top of the boards and measure in about ¼" all the way around with a new circle. Make sure you're using a pot that is shorter than the plant riser itself.
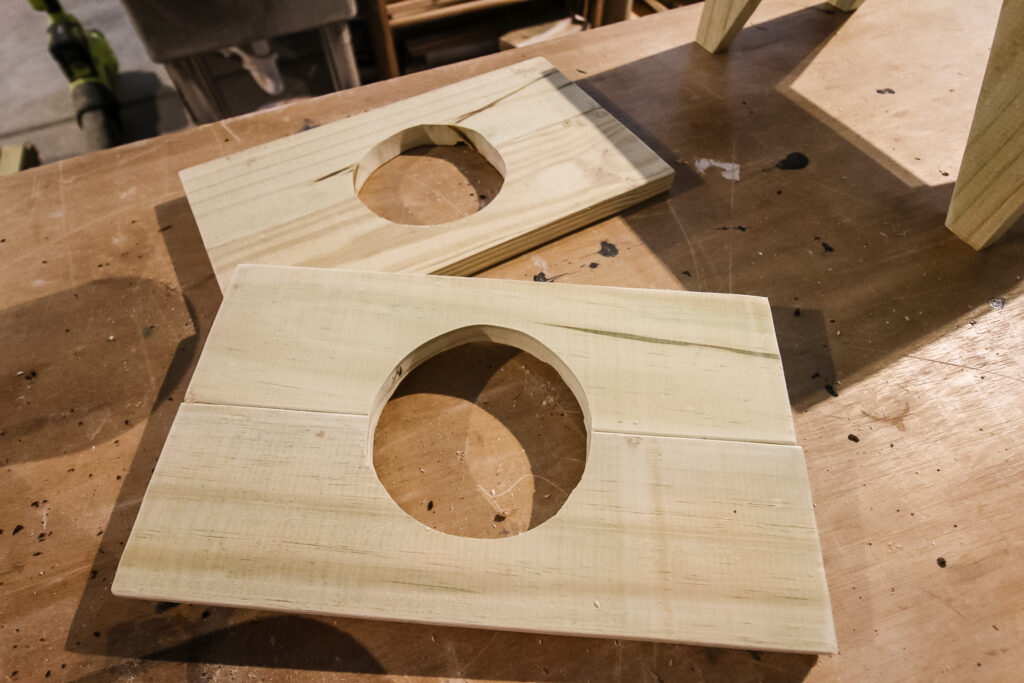
Use a jig saw or scroll saw to cut out the circle.
Assemble the legs the same way as the first one, then slide the pot into the hole on top. It should catch near the top of the pot and sit in the plant stand.
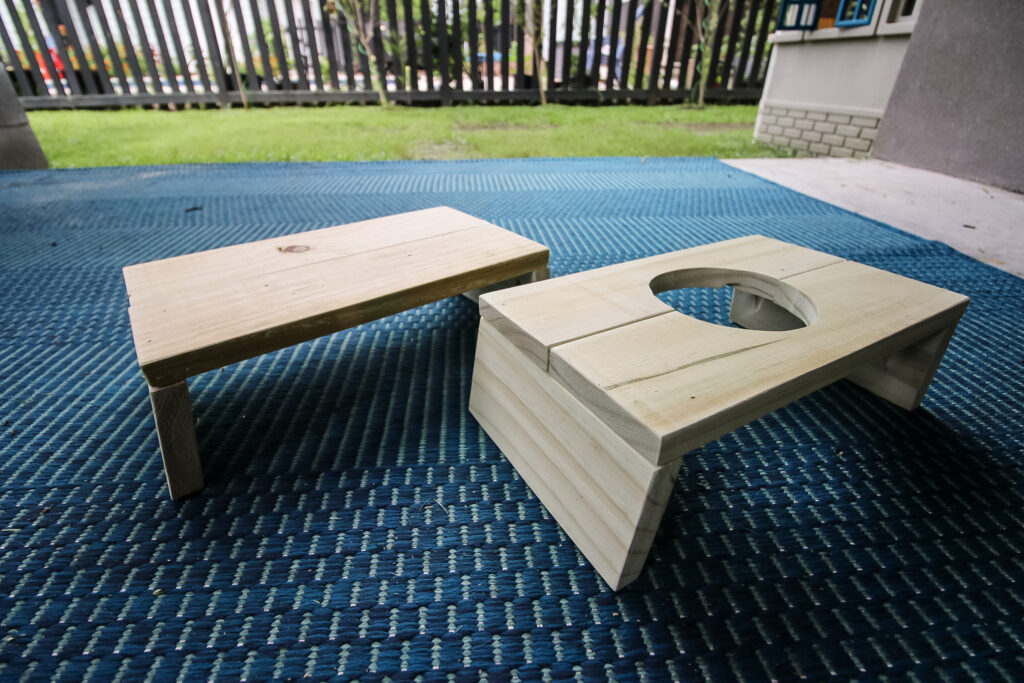
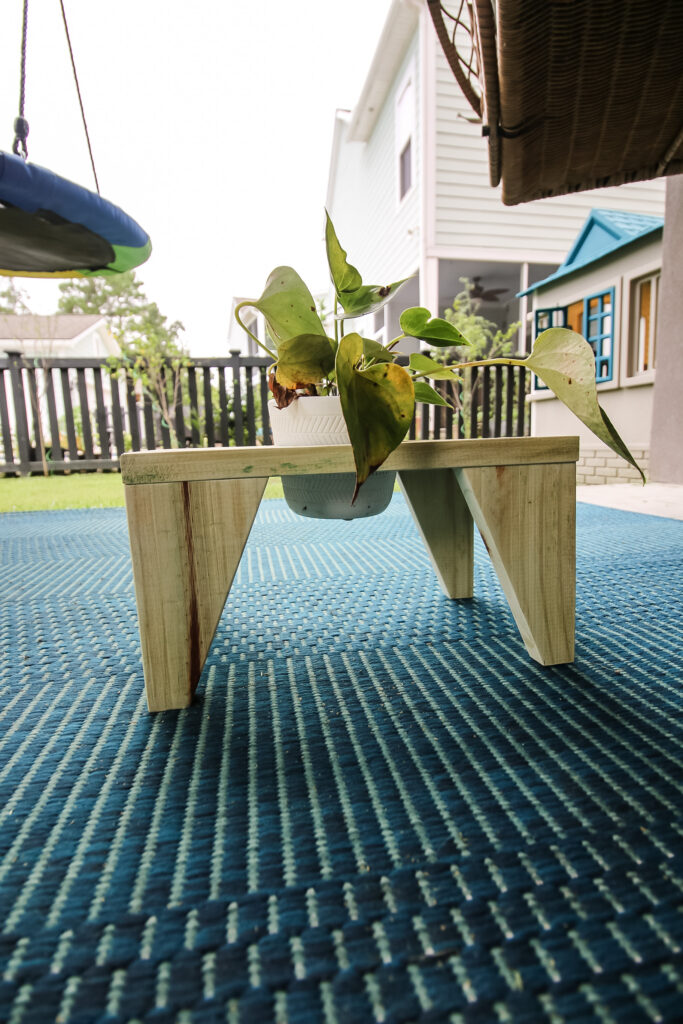
Variation 3: Simple plant stand with angled legs
The next variation of the simple plant stand is to do two angled legs on the ends of the stand instead of four legs on the faces.
For this, create the top the same way you did in variation one, using wood glue and pocket holes.
Then, cut two pieces of wood to 7" long. On their long edges, use a table saw to cut a 10 degree parallel bevel.
The 7" is the same length as the two boards for the top together, so these legs will lay sideways angled up to the top.
Using wood glue and either nails or pocket hole screws, attach the angled legs to the top so that the outer edges line up.
This variation is shorter than the first two, but has a modern angle look to it.
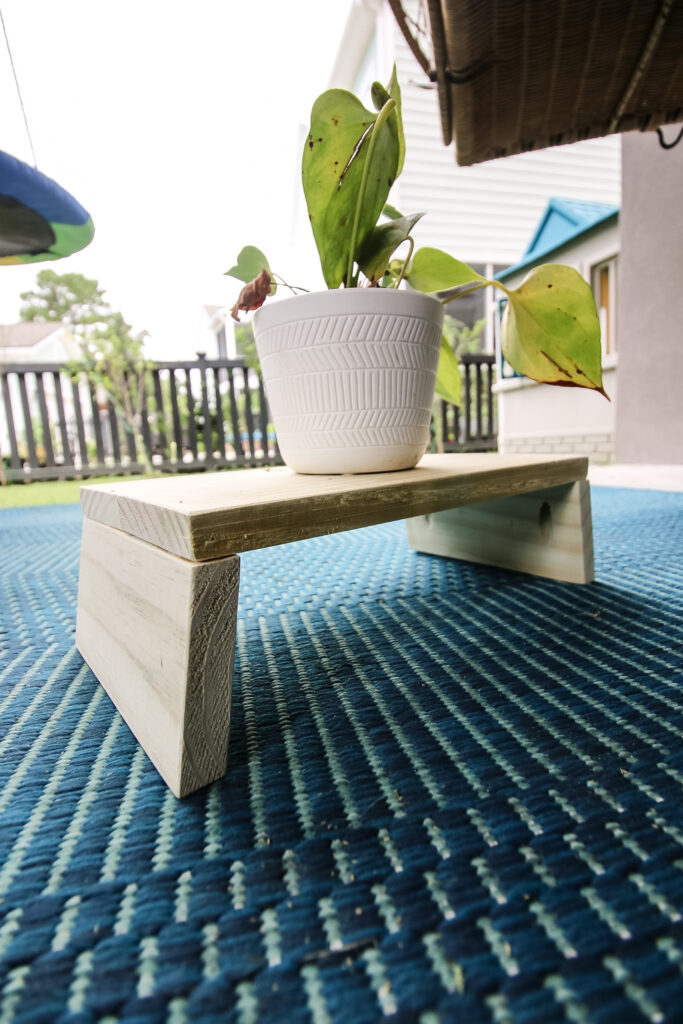
Variation 4: Simple plant stand with angled legs and pot hole
The last way to make this easy DIY plant riser is to do the same thing as variation 3, but cut a hole in the top like variation 2.
See? All of these plant risers use the same principles, but are slightly different.
Cut the hole for your pot in the top boards, but again, make sure the pot is no taller than the plant riser itself (4 ¼").
Attach the legs and slide the pot into the hole!
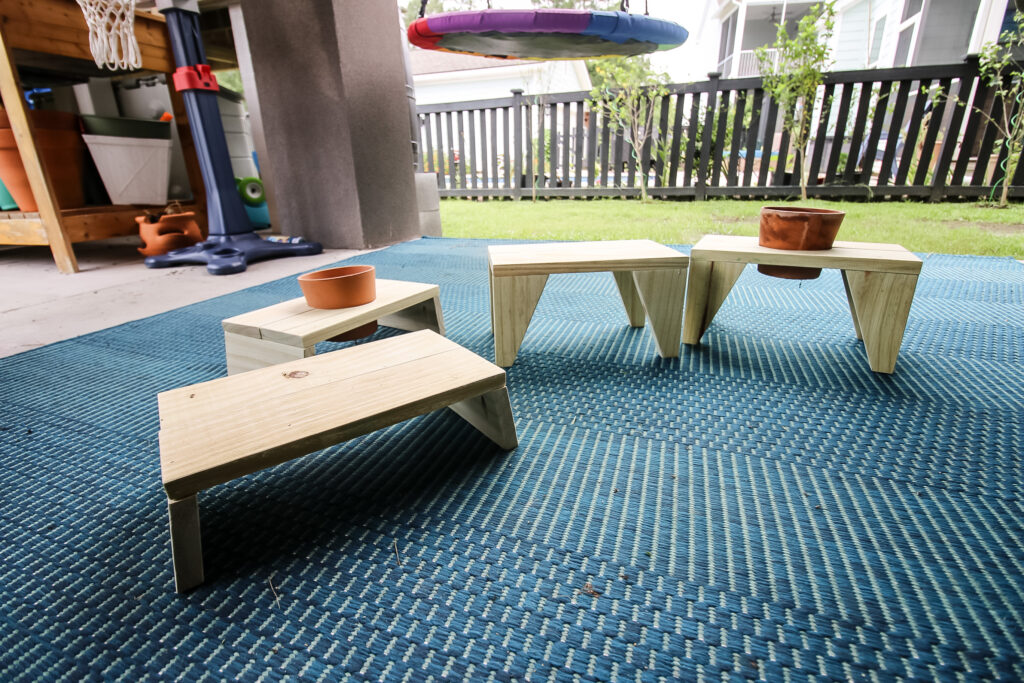
4 plant riser ideas
These four plant riser ideas are all based on the same idea and use about the same amount of wood.
Depending on how much you want to get your potted plant of the ground or what look you're going for, one of these will be a great option for you.
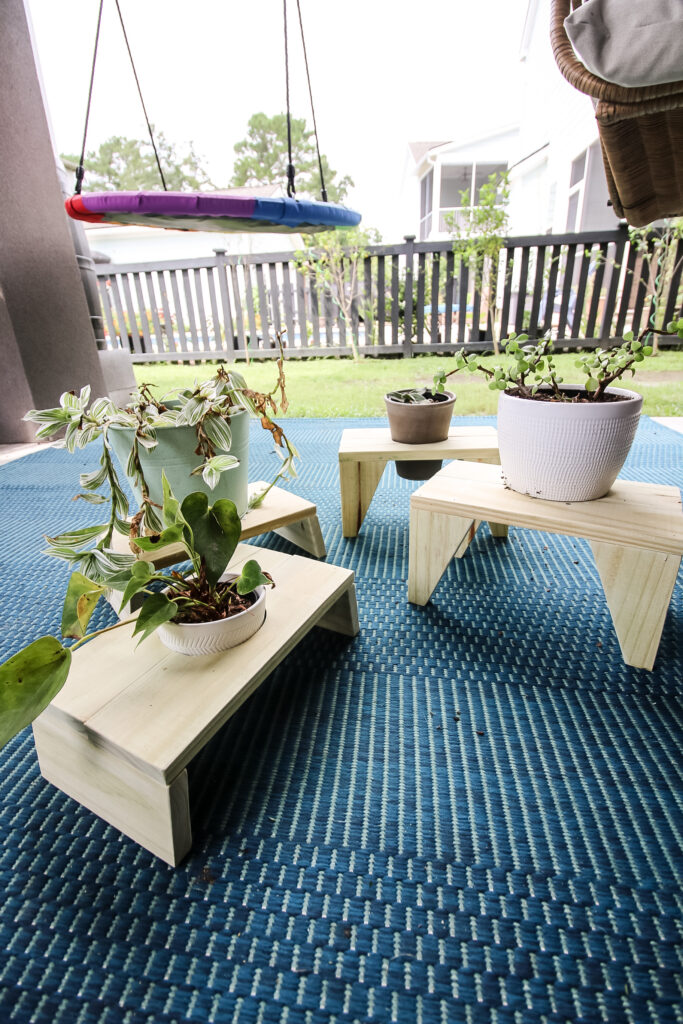
You can also paint or stain any of these plant stands to match the aesthetic you're going for, but we left them natural wood since they would be outside.
These are a great use of scrap wood, so next time you need to use up some boards, make sure to throw together a quick plant riser!

Looking for something?
We've been doing this since 2012 so we have a LOT of blog posts!
Search stuff like: Ceiling Projects | DIY Plant Stands | Thrift Flips

Hey there, I'm Sean, the woodworking enthusiast and builder behind CharlestonCrafted.com! Since 2012, I've been sharing the magic of turning raw materials into beautiful creations. I love teaching others the art and satisfaction of woodworking and DIY. I try to inspire fellow crafters to make something extraordinary out of nothing at all.


