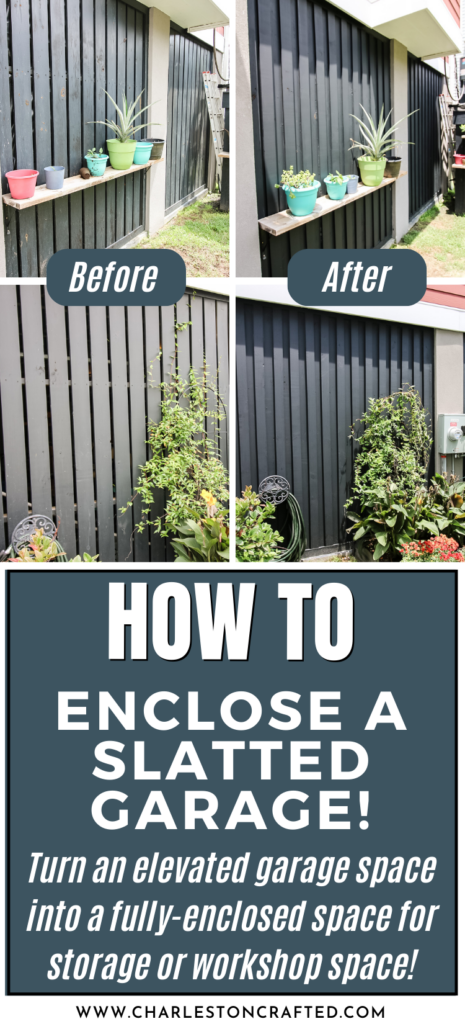
If you have an elevated house with a slatted garage underneath and want to enclose it, this is the best way to do it!

We absolutely love our house and one of the best parts is that it is raised, giving us essentially an entire unfinished floor of the house underneath.
In Charleston, it's pretty common to see elevated houses because so much of the area is in a flood zone.
Our house actually isn't in a zone that requires elevated houses, but the original builders were allowed to choose if they wanted to or not. One of our neighbors is raised, one is not. It was a personal preference by the original builders.
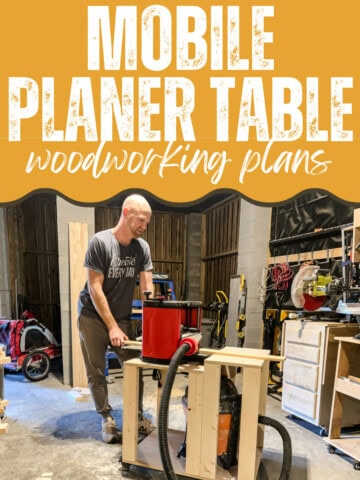
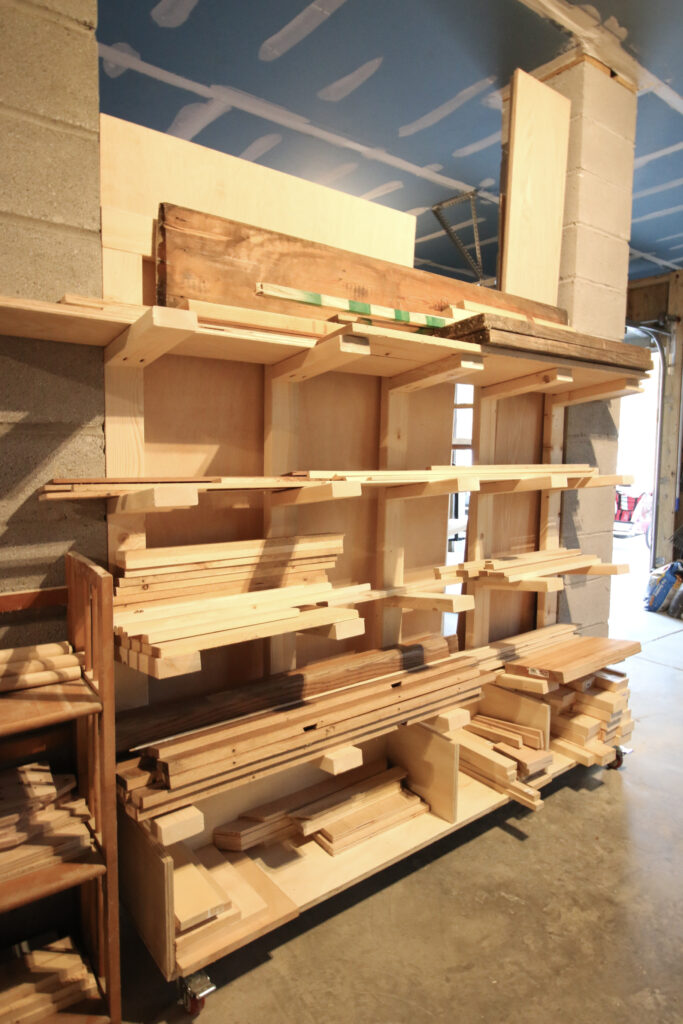
Since moving in, we've created several zones in the garage for toy storage, holiday decor storage, golf car parking, and, of course, our workshop.
Click here to see our full workshop reveal and all the projects that went into it!
Unfortunately, having an open, slatted, elevated garage does come with some downsides.

For one, we get lots or critters in between the slats. I had to buy (and use several times) this snake grabber tool after the first snake showed its face, and I had to buy these mouse traps after the mice crawled all over my tools for a few nights.
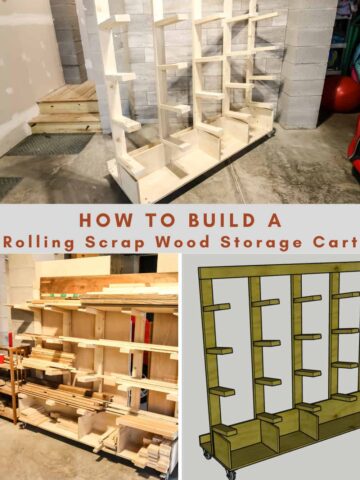
But also, the hot wet summers around here mean a lot of moisture in the air, which gets in through those slats and gets things in the garage moldy. We have a lot of scrap wood, hats, and drywall that had to be thrown away each of the last two summers from mold.
Click here for the plans for our rolling scrap wood storage cart!
So we decided to enclose the slats around our garage to keep these things out and give us a better place to work. Here's how it went down.
How to close gaps in elevated home garage
Garage spaces like this can be totally enclosed and converted into living spaces that can be air conditioned and totally livable. Turning a garage into a living space is a way to add functionality to your home and can definitely increase the value by adding on a lot of square footage.
But for us, we just wanted to get the garage to a point that it was like a standard garage in someone's house, like at our old house, where we just have full coverage and good storage space and workshop space.
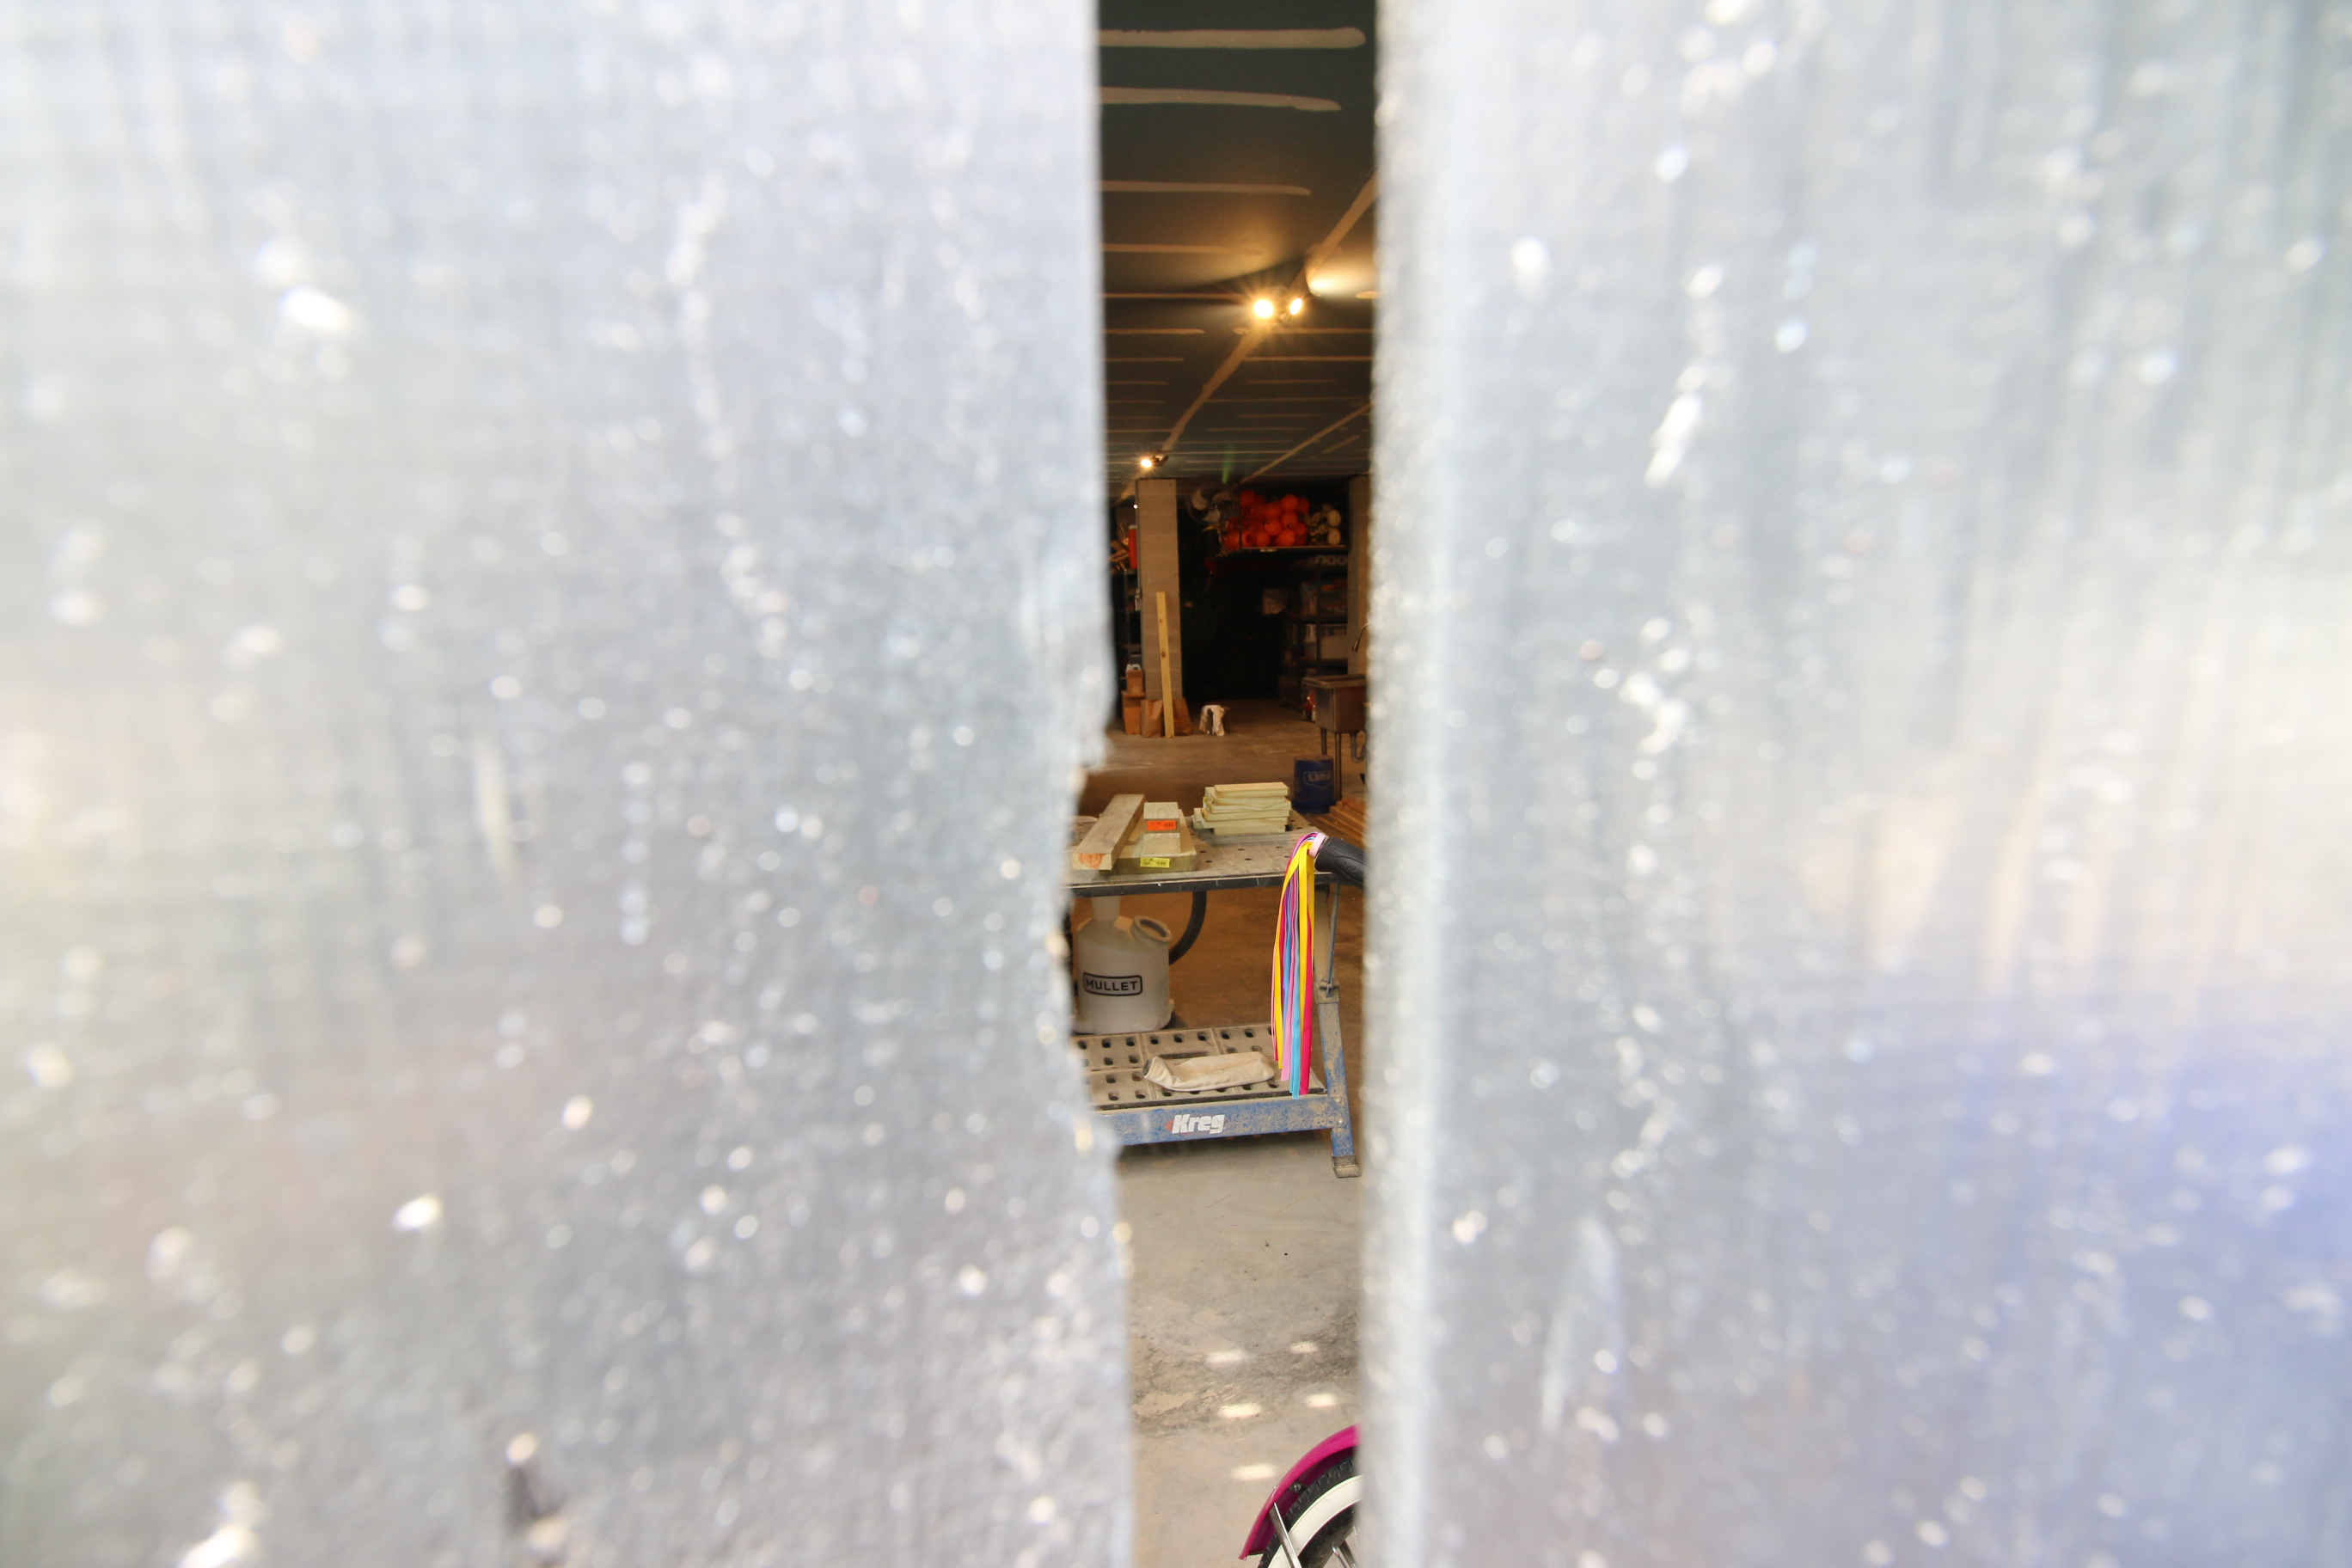
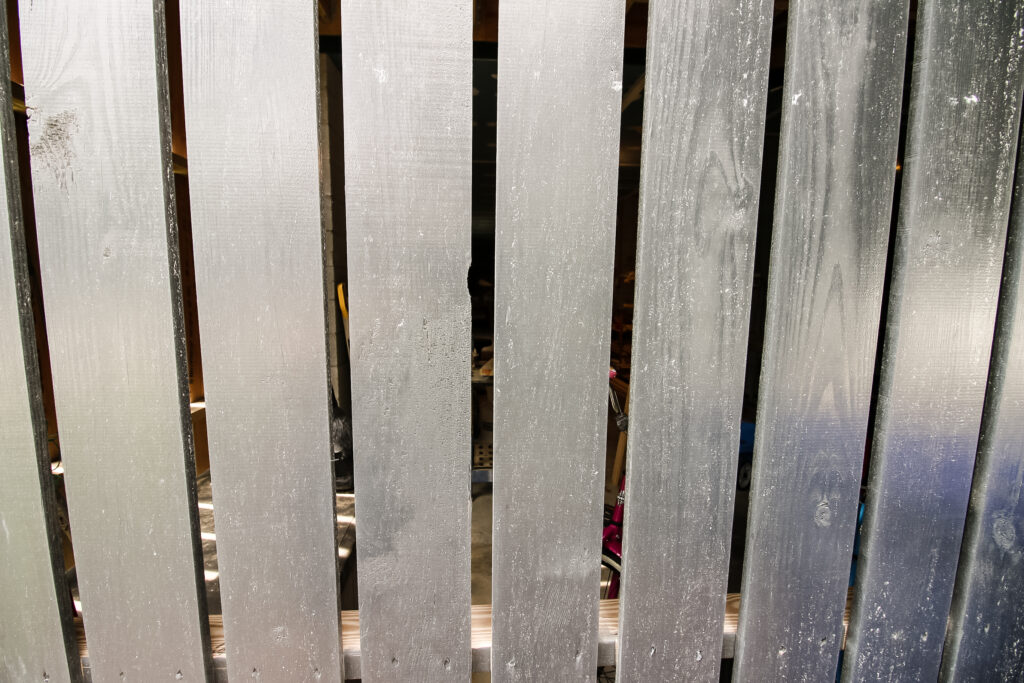
To do this, we needed to close up all the gaps in the slat wall and make it weather and critter proof.
click here for some great garage organization and storage ideas!
Why should you enclose your open garage?
You might want to enclose your garage if you are having problems with critters getting in or having rain and other weather that is messing up your stuff.
You might also want to enclose your garage to add square feet to your home, adding a living room, play room, bathroom or anything like that to the space.
That's not what we are getting into here as that is a much bigger project that requires garage conversion permits, raising the floor, adding vapor seals and insulation and an HVAC system, and converting your garage door into a non-functional unit.
Let's show you how we closed off the slats in our garage.
Step one: cut new boards
We started off by buying 156 pressure treated 1x4x10' boards from Home Depot to cover all the slats. The process was simple, but extremely time consuming. All the boards needed to be left out to dry in the sun for a couple of days to make sure they didn't shrink after we installed them.
That's an important step we only did halfway when building these trifold shutters!
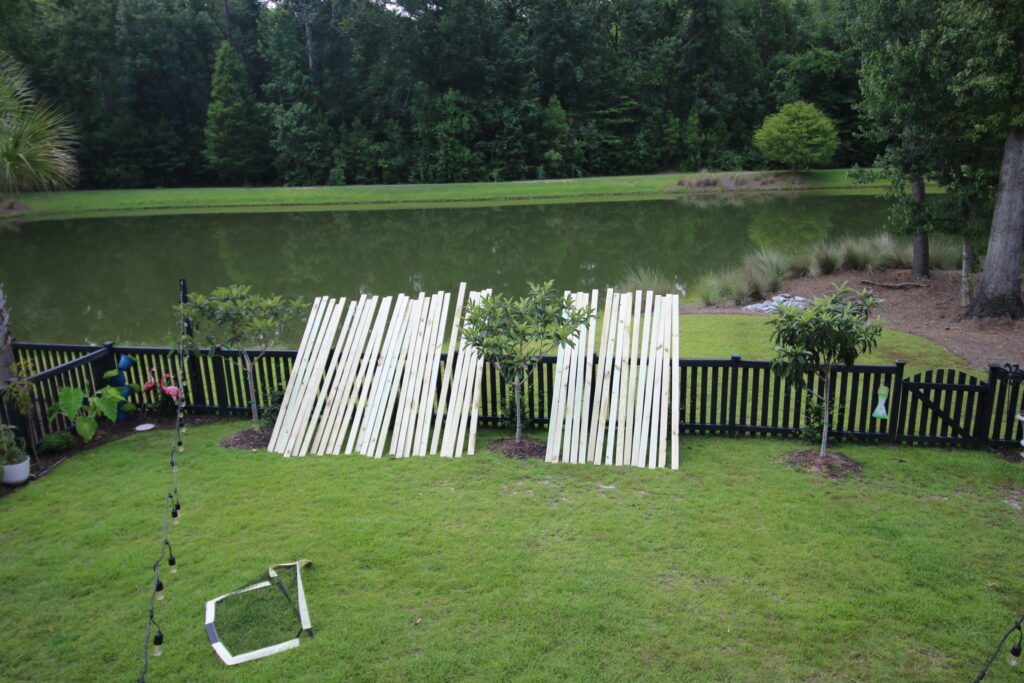
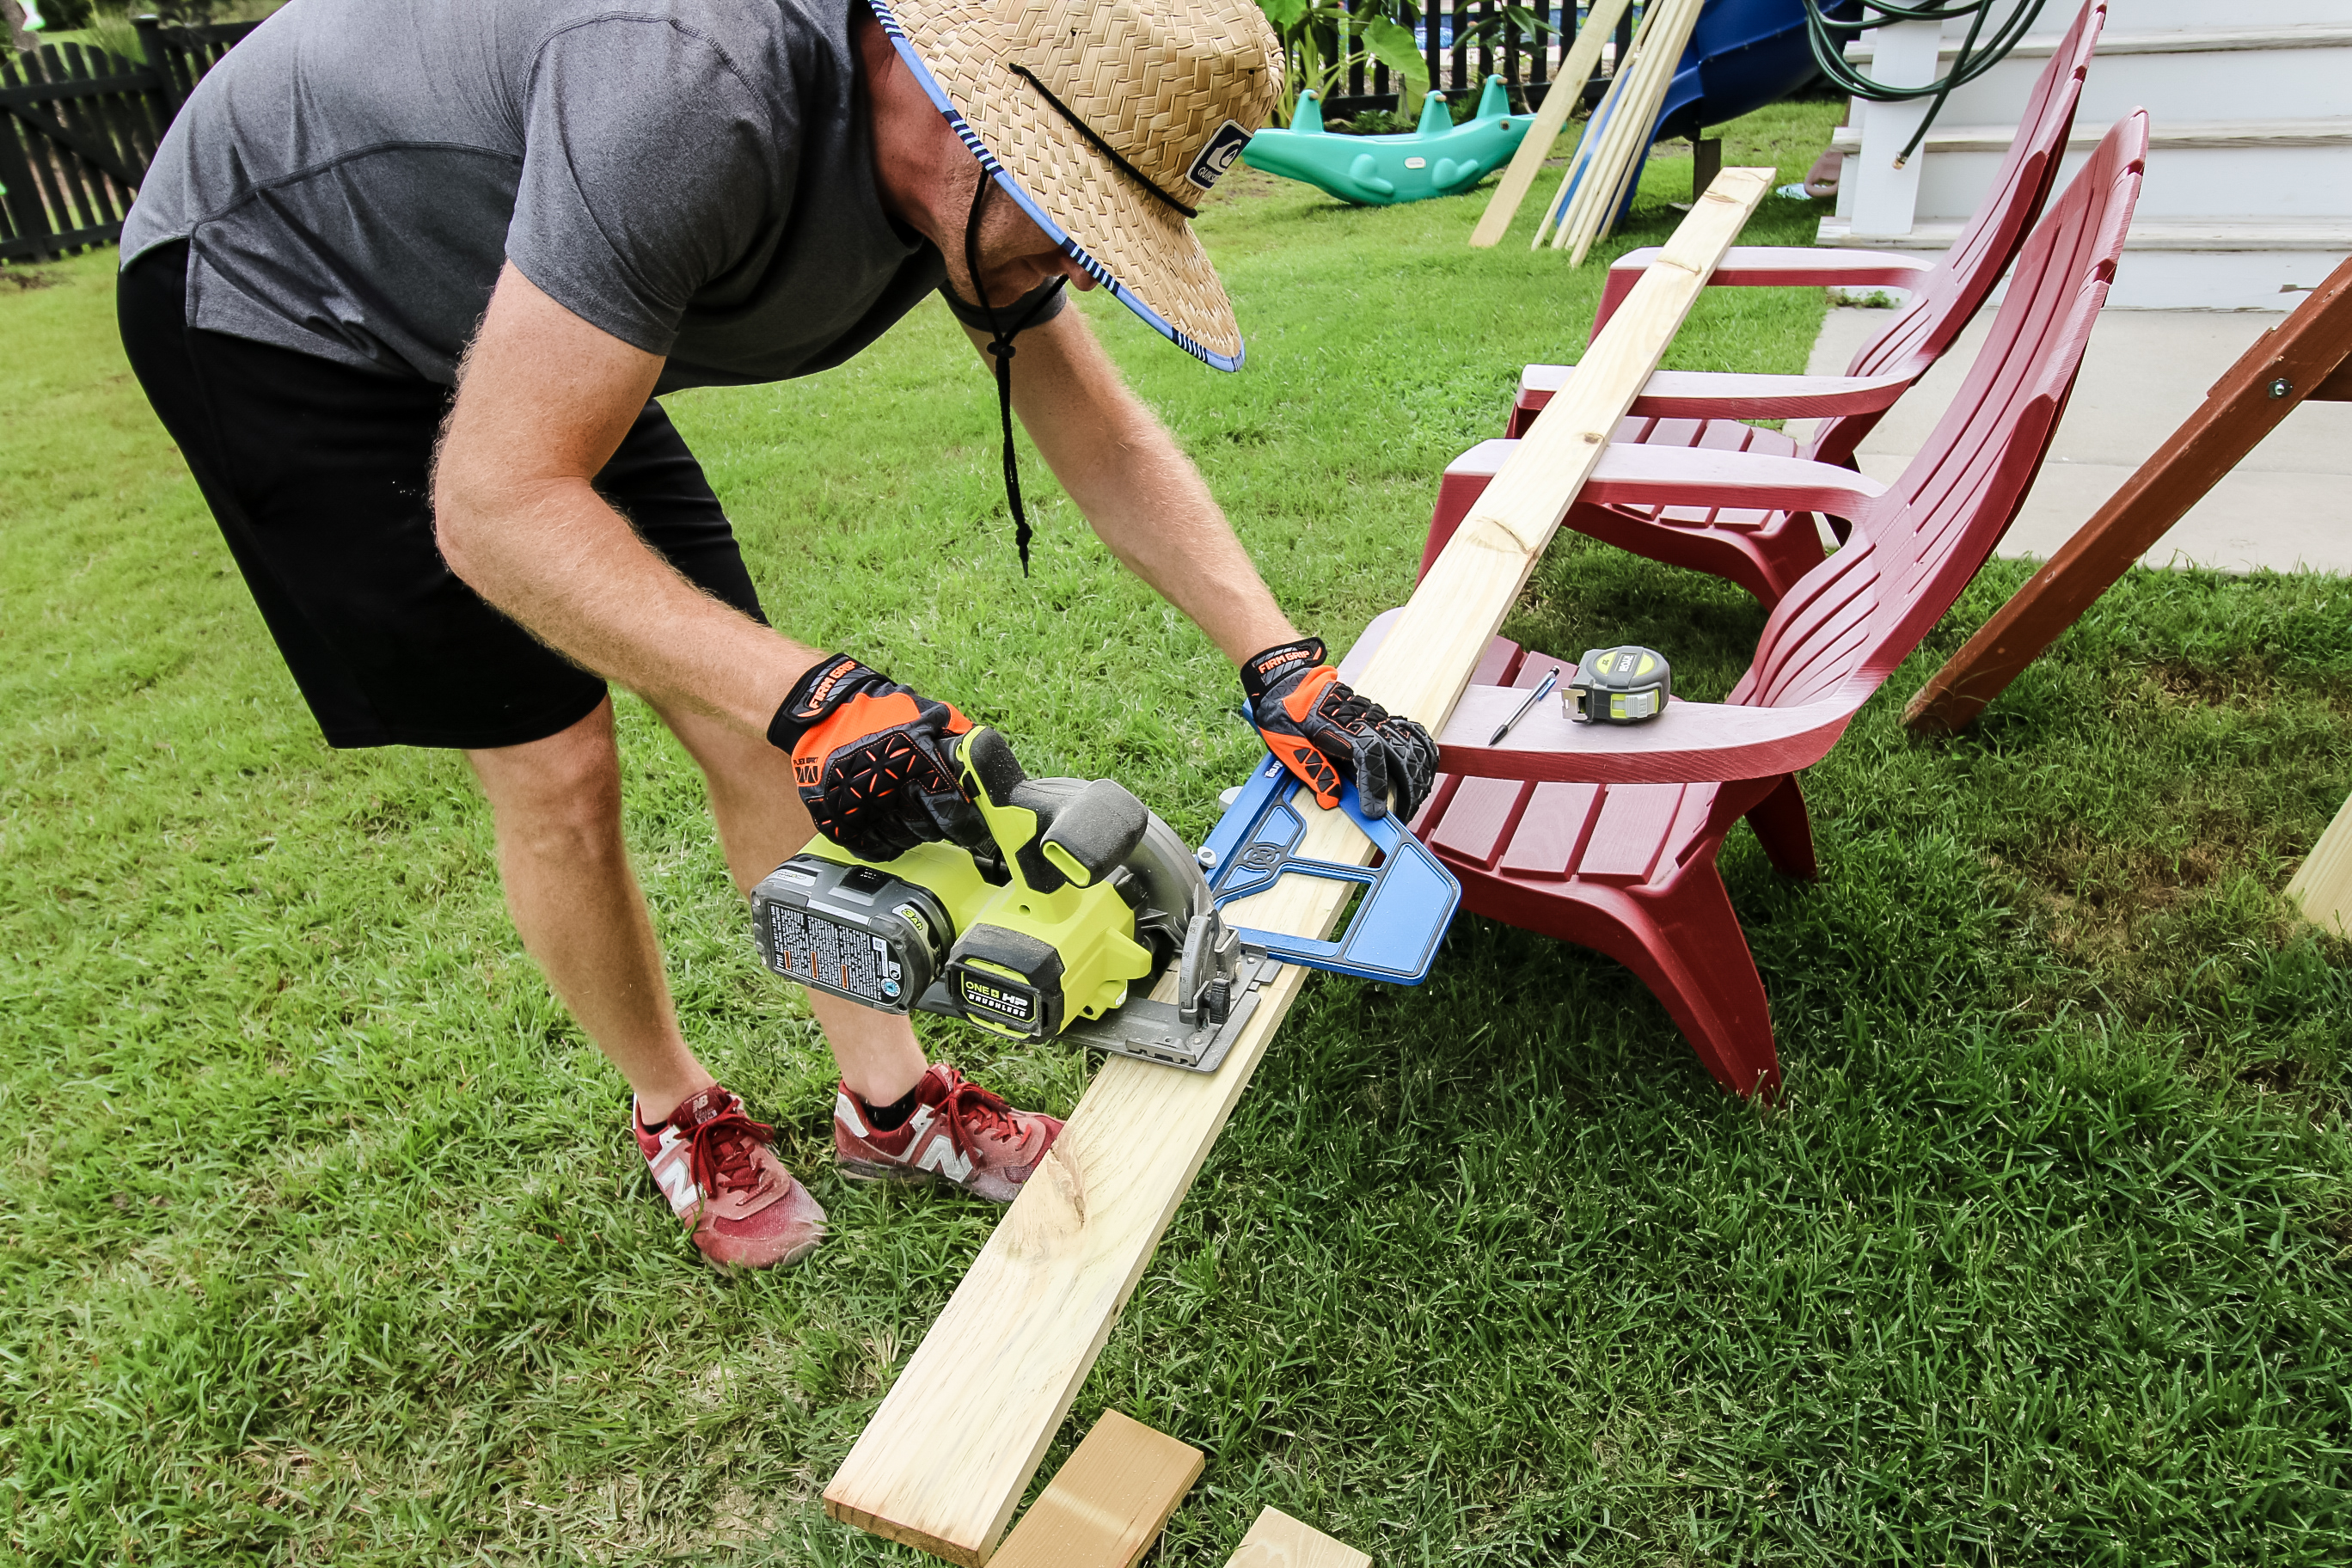
Since the gaps were 8 ½" tall, a standard 8' board wasn't enough, so I had to cut down 10' boards.
Not every single gap all the way around was exactly the same height, so I had to measure and cut 4-5 at a time, but I used the Kreg Portable Cross Cut and my circular saw to cut down boards to size until I had finished 1-2 panels. Little tip and trick, try to cut the boards just a fraction longer than the gap.
Step two: Nail boards over gaps between slats
When each board cut, we snapped it into place spanning over the gap. That's where the slightly longer cut comes into play. You can put the end of the board at the base, bend it in the middle until the top is in place at the top, then snap it into place in the middle and it holds itself.
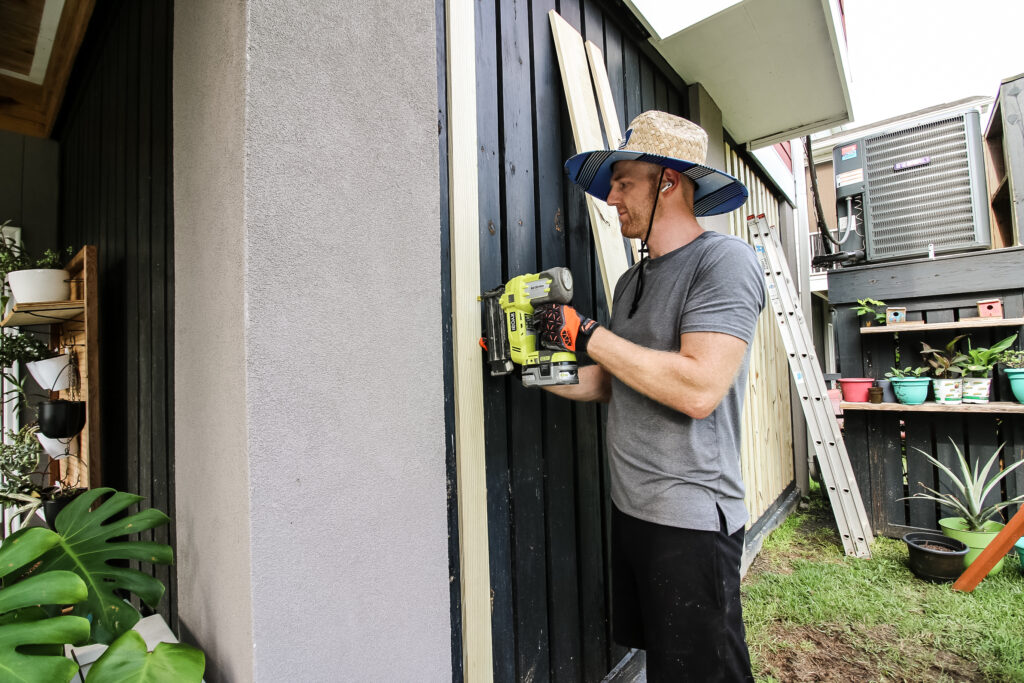
Then we used 1 ¼" nails and nailed the boards in place up and down each side.
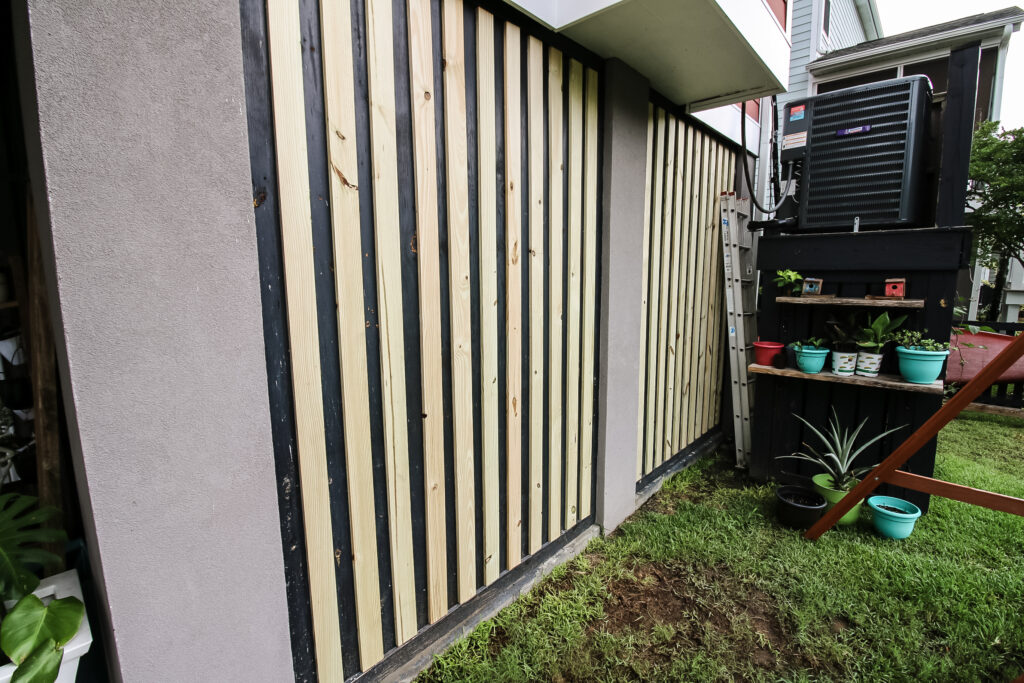
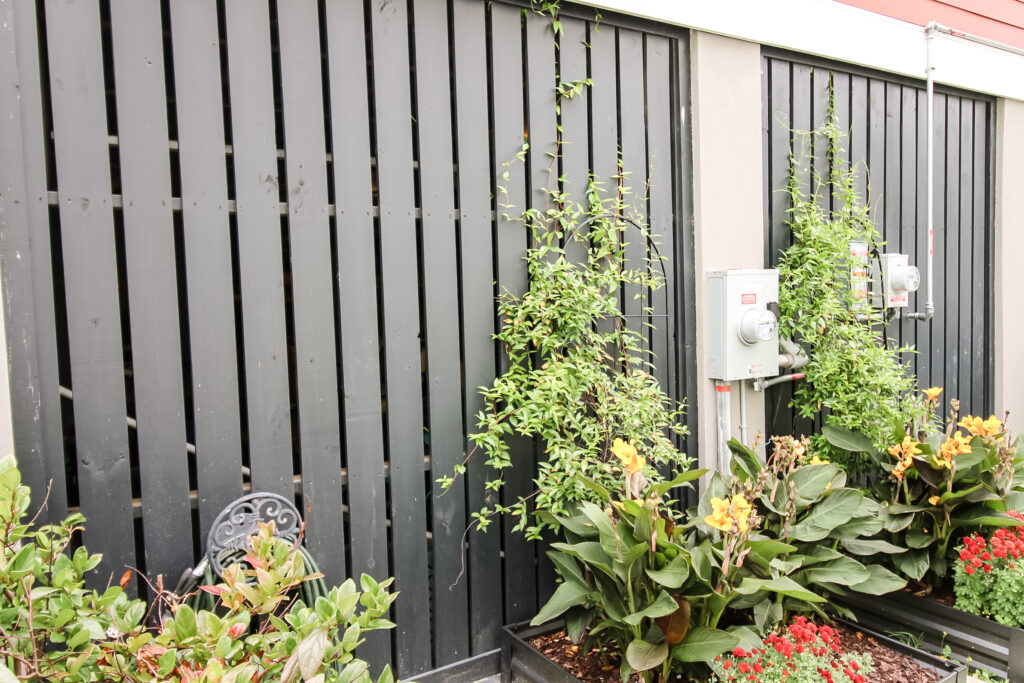
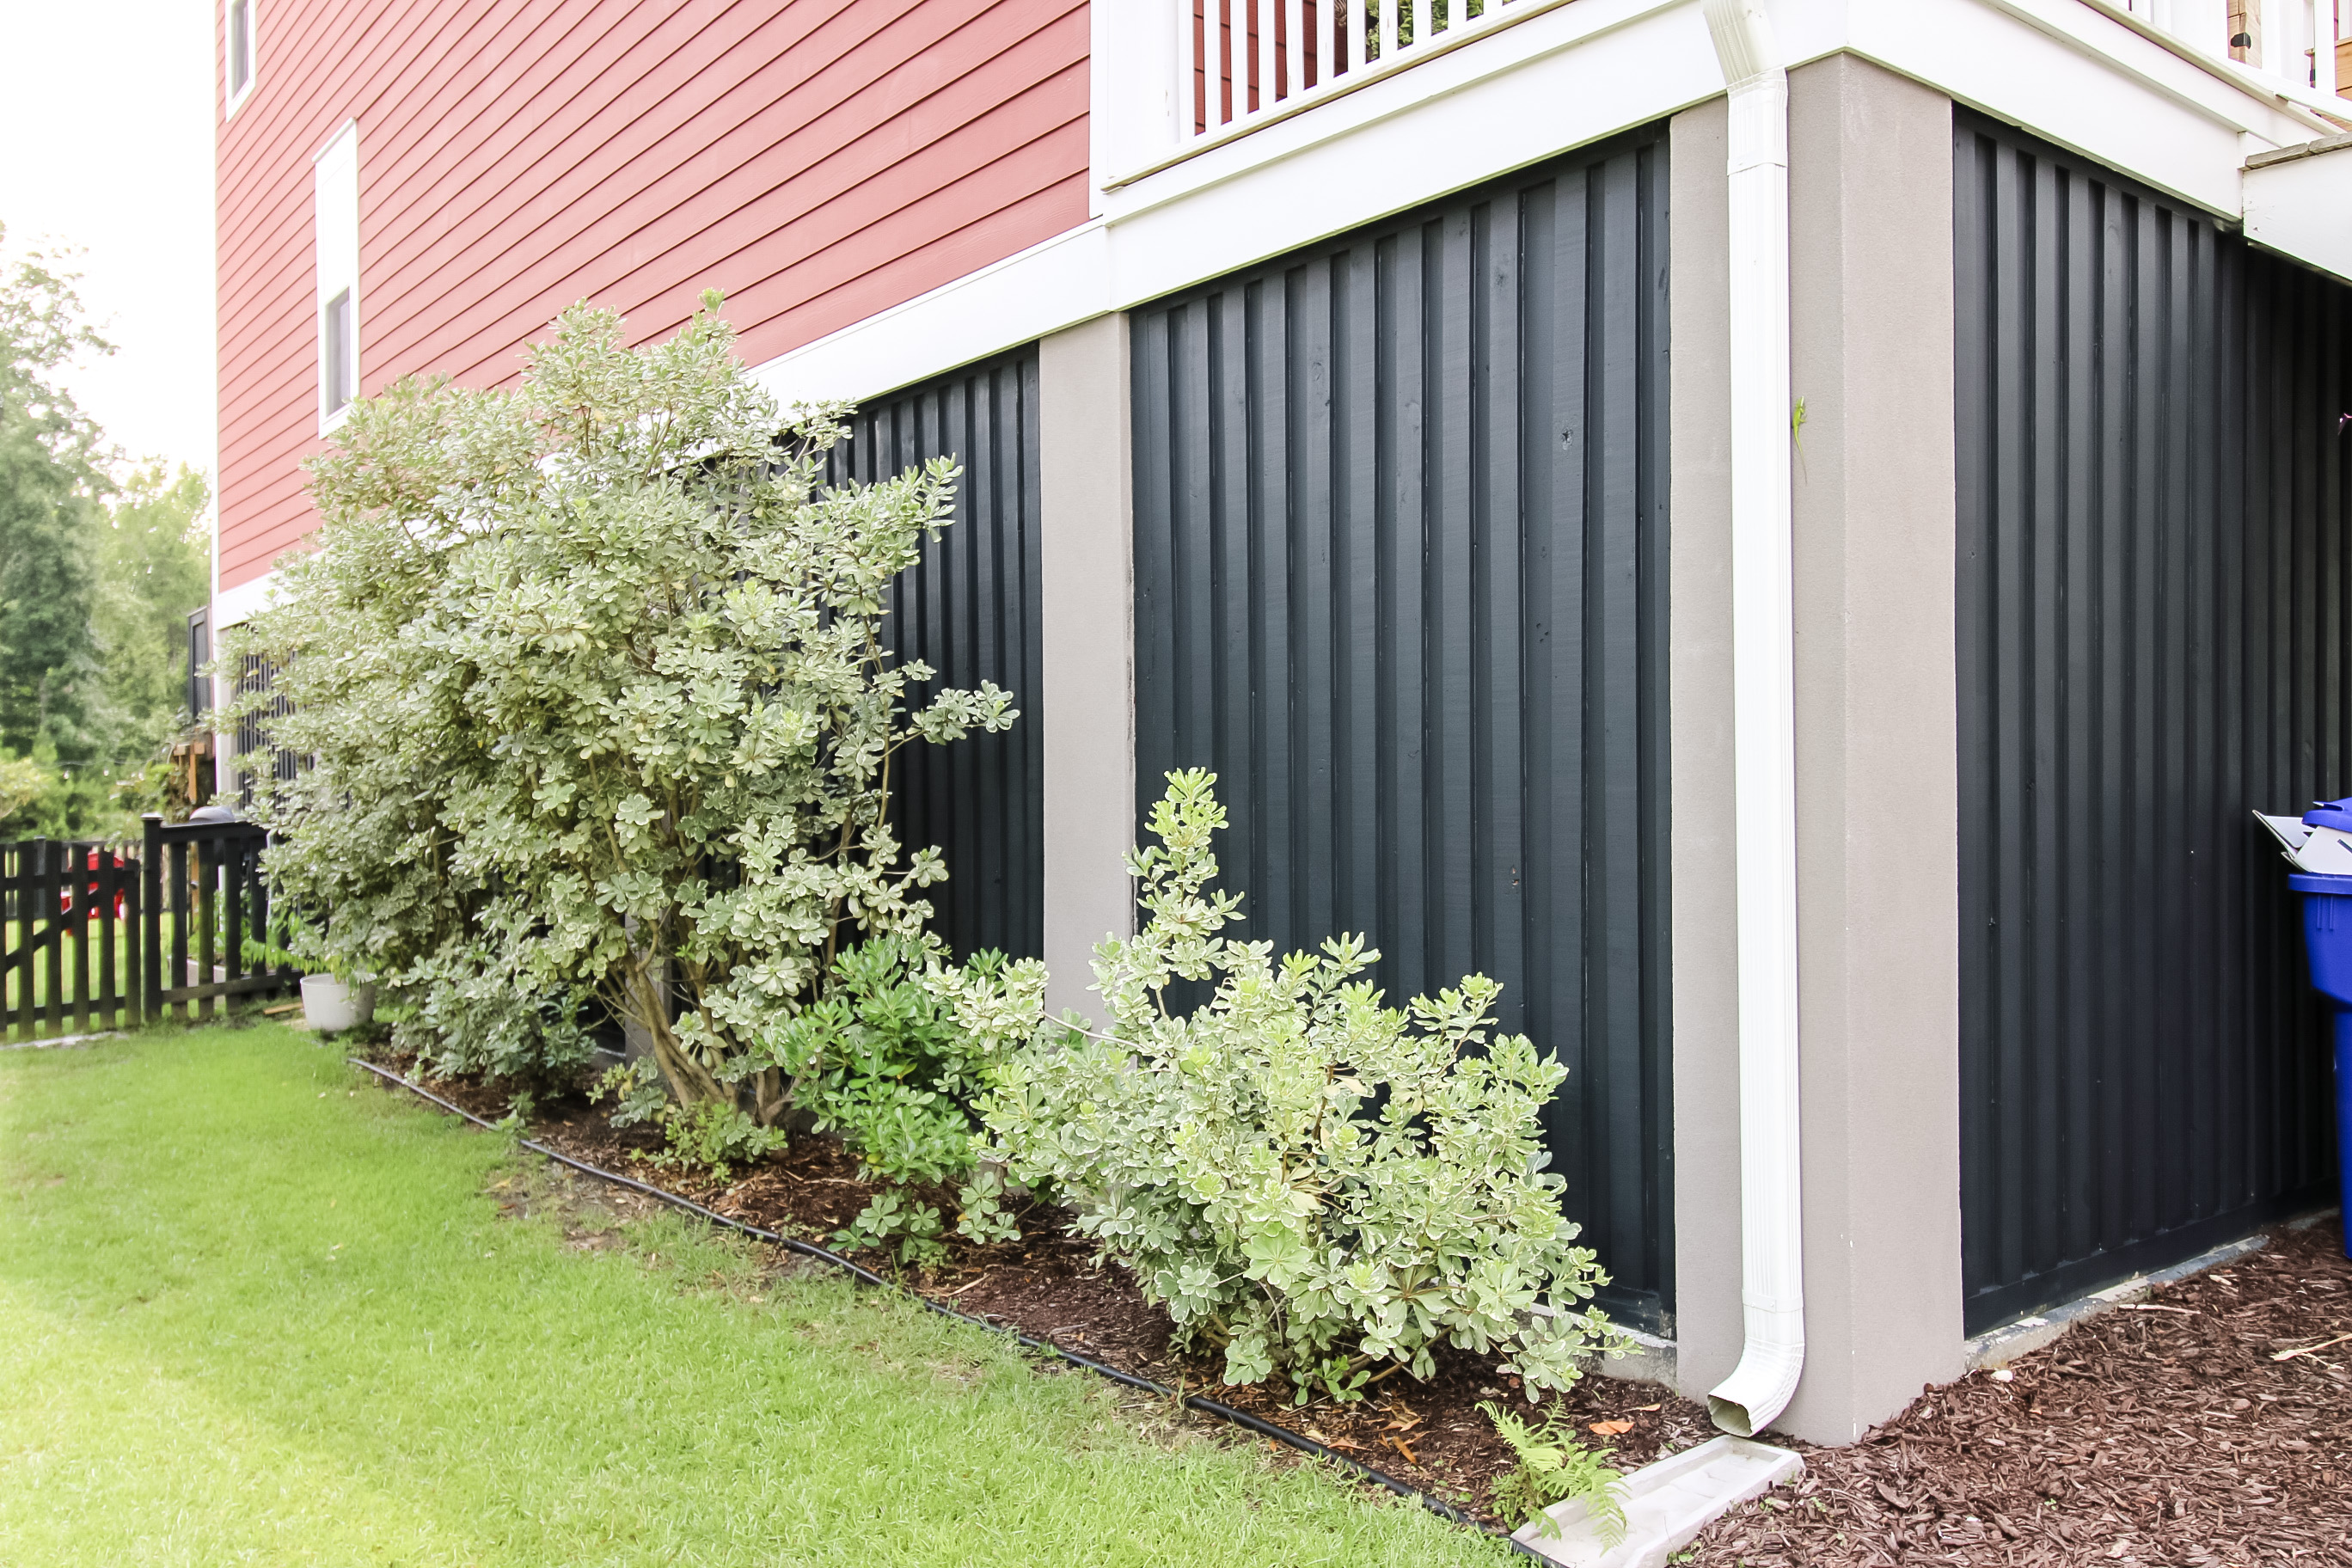
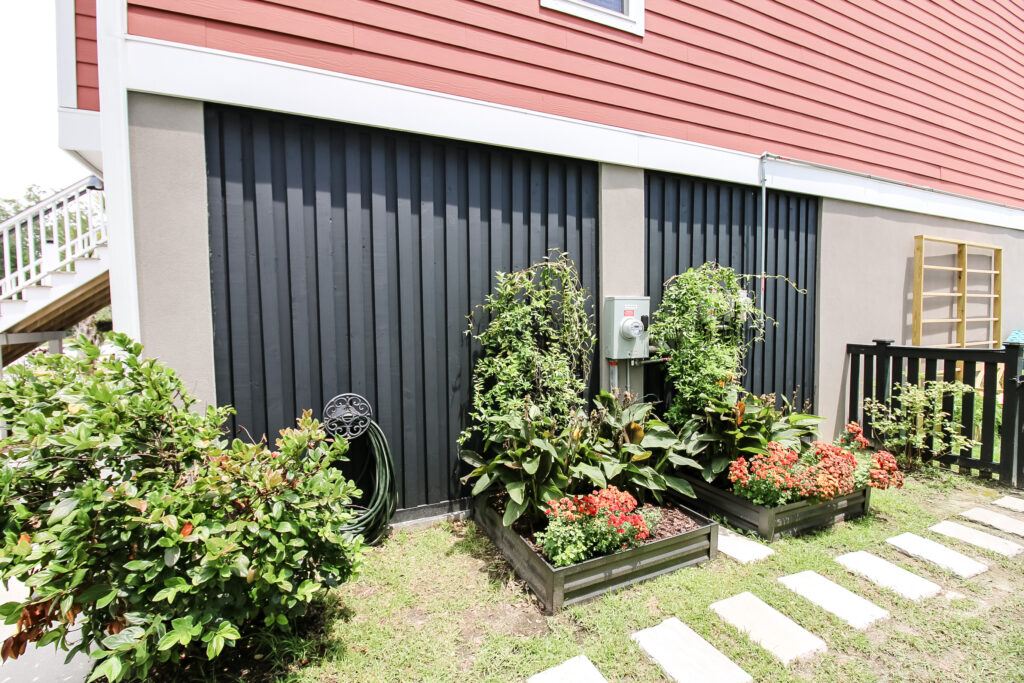
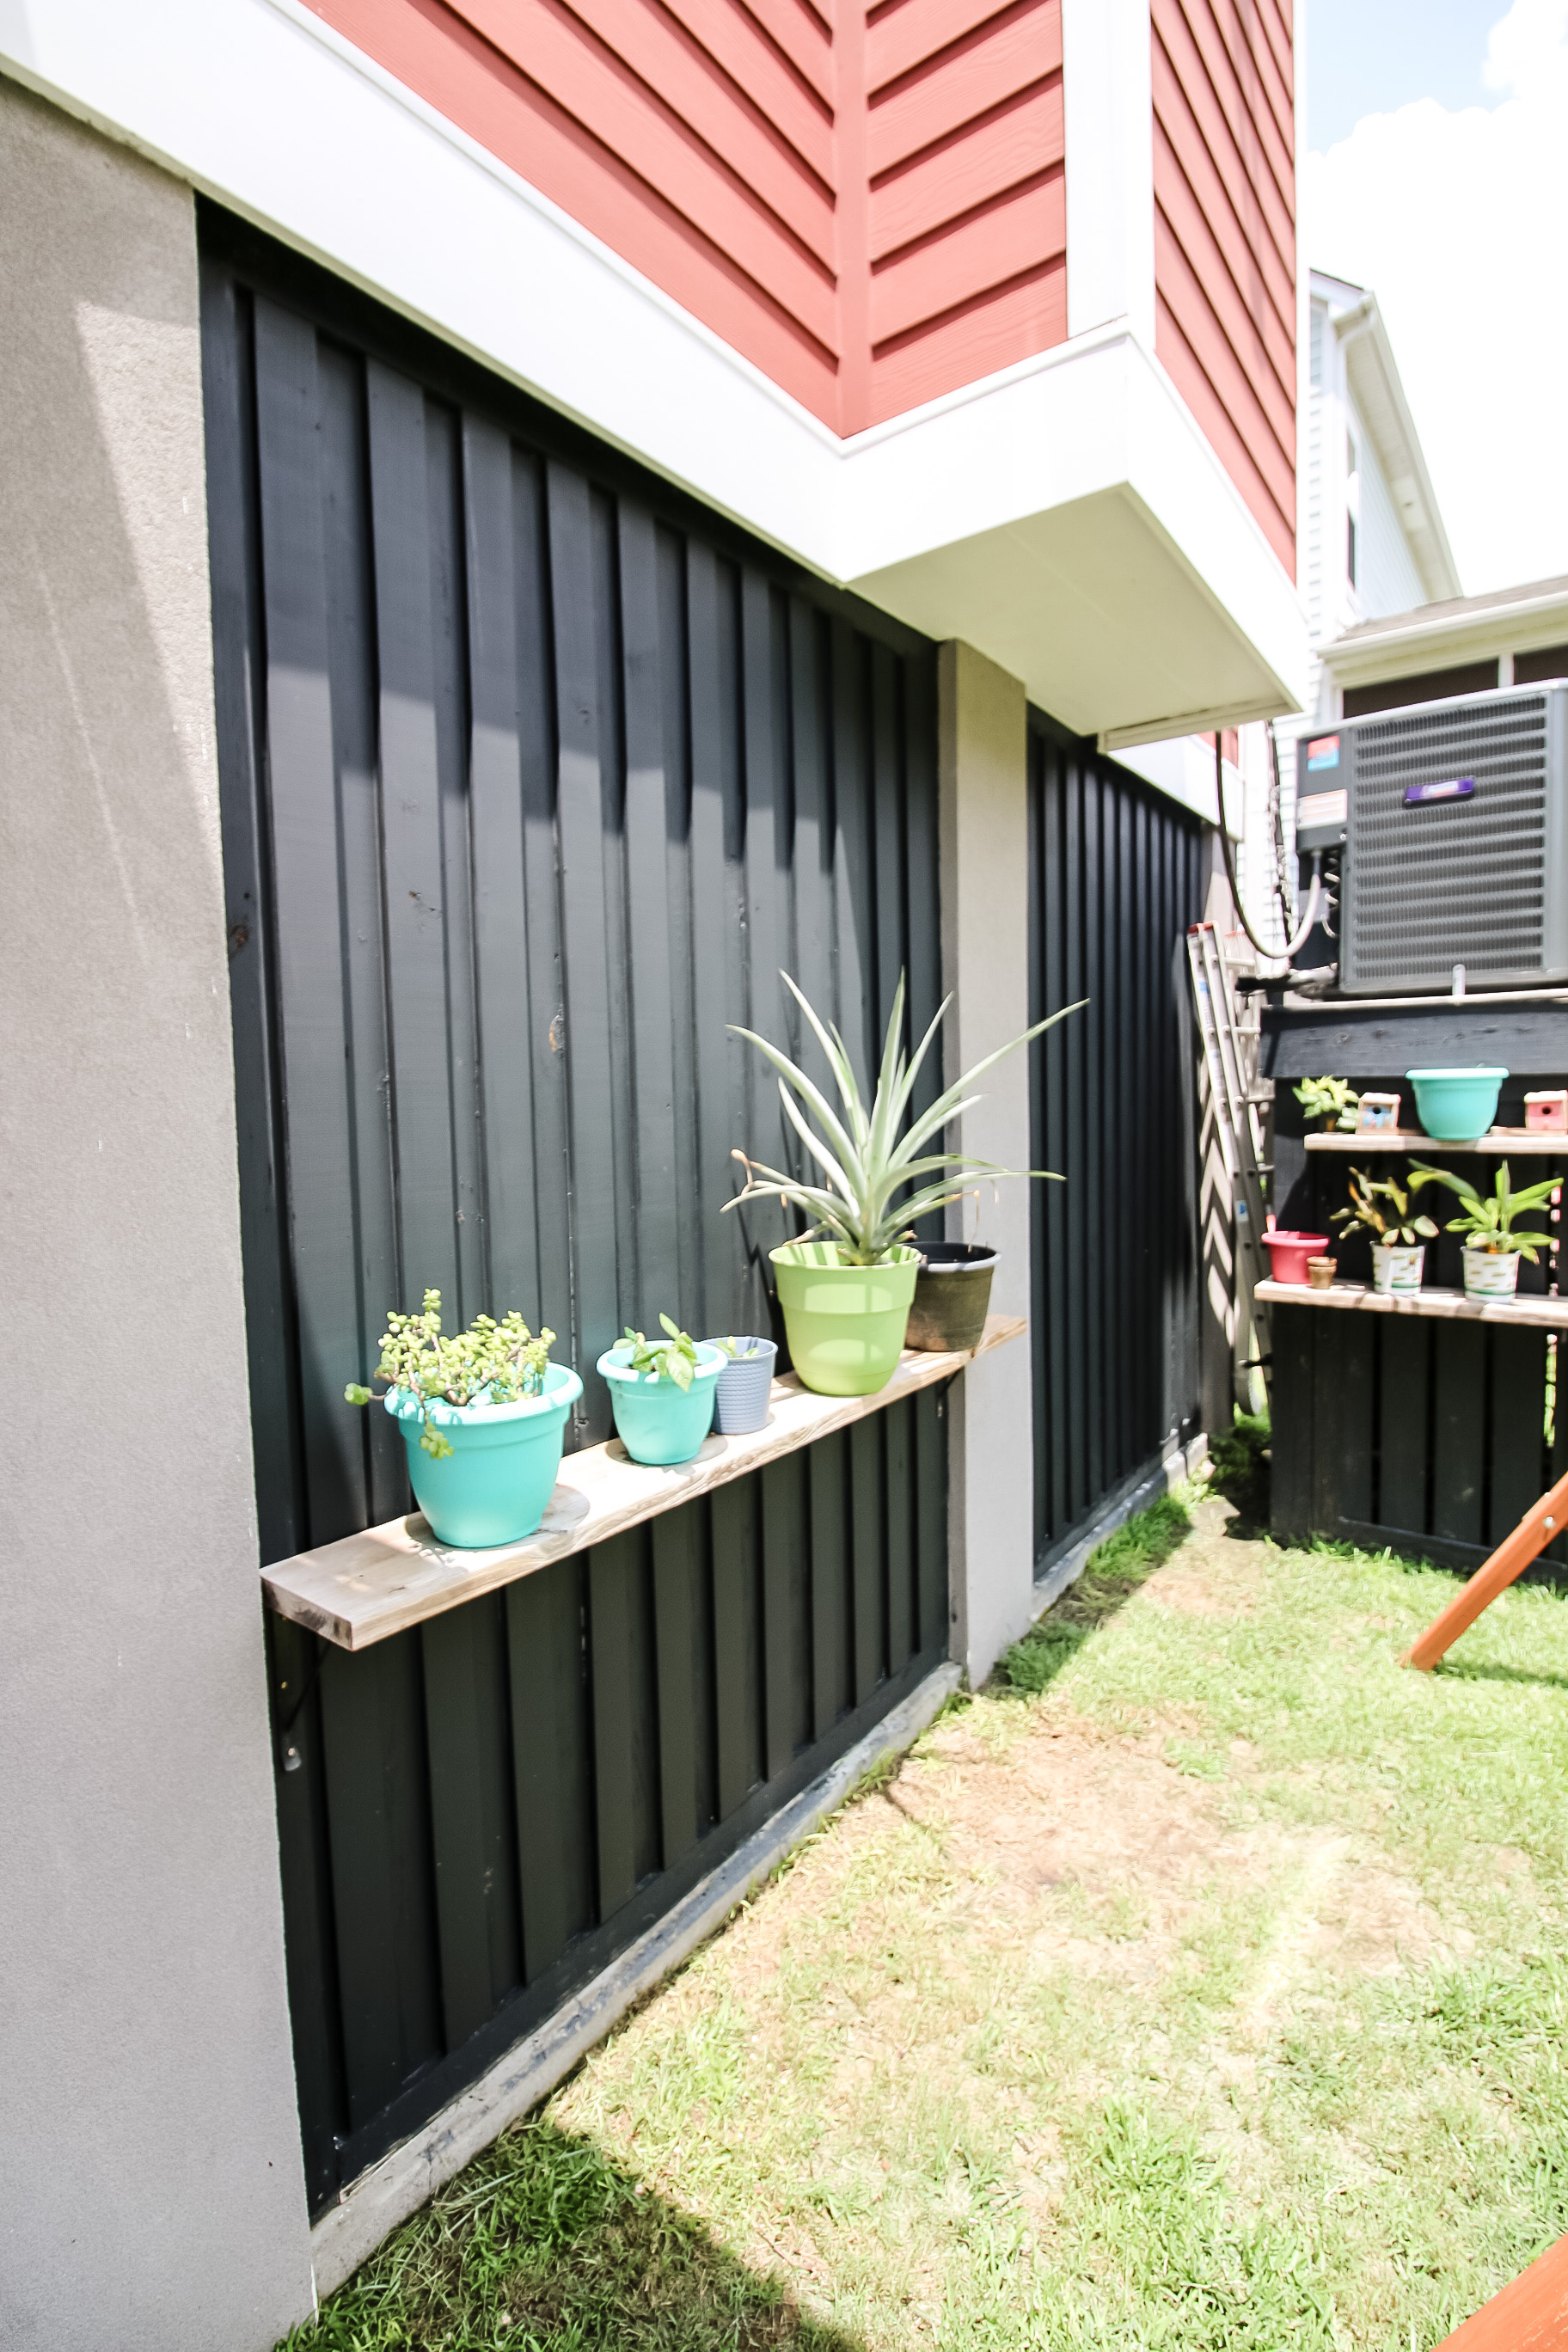
This was pretty straightforward and simple for a lot of the panels of our garage as they were whole boards that filled whole gaps. It got complicated when working behind bushes or having to cut things to size around our utility boxes, but in the end, we left minimal gaps anywhere.
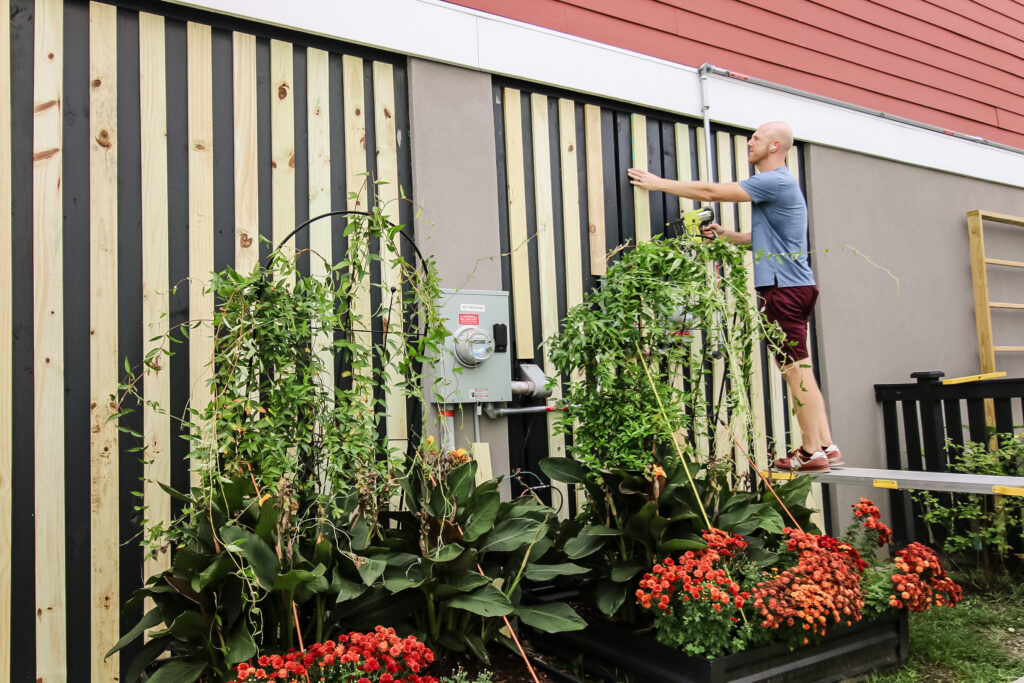
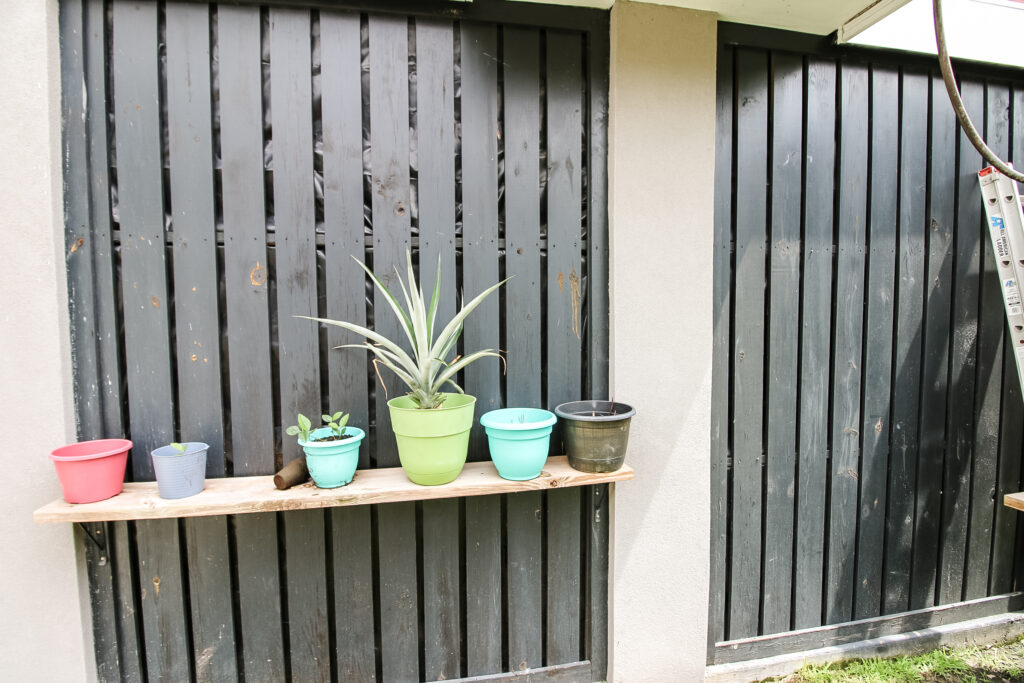
The hardest part was working behind these elevated planters and the electrical boxes!
Step three: caulk seams and gaps
To ensure a tight water and weather seal, we caulked the gaps between all the new boards and the old boards. This was another long and grueling process but it's worth it for the tight seal.
This ended up taking wayyyyy more tubes of caulk than I ever imagined. I initially bought 4 tubes thinking that was going to be overkill. In the end, I used around 15, basically one per section.
When you're traversing 8 ½" twice just to caulk one board, it goes quick.
We caulked and dried all those seams and then moved on.
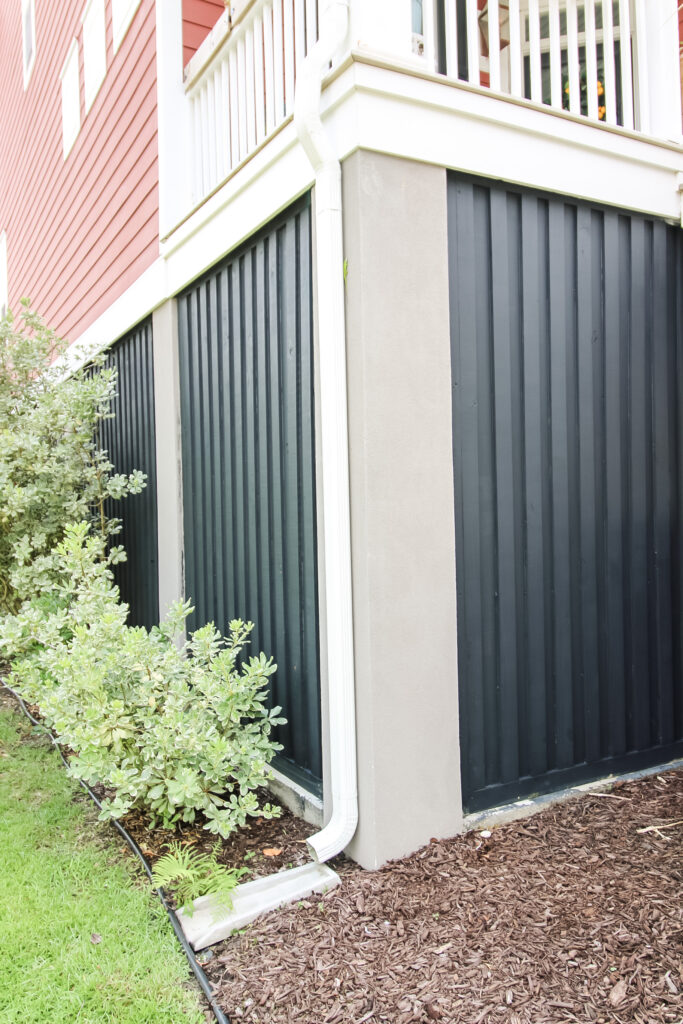
Step four: sand and paint
Almost done. We did a light sanding on the boards just to give them a smooth surface to take the paint.
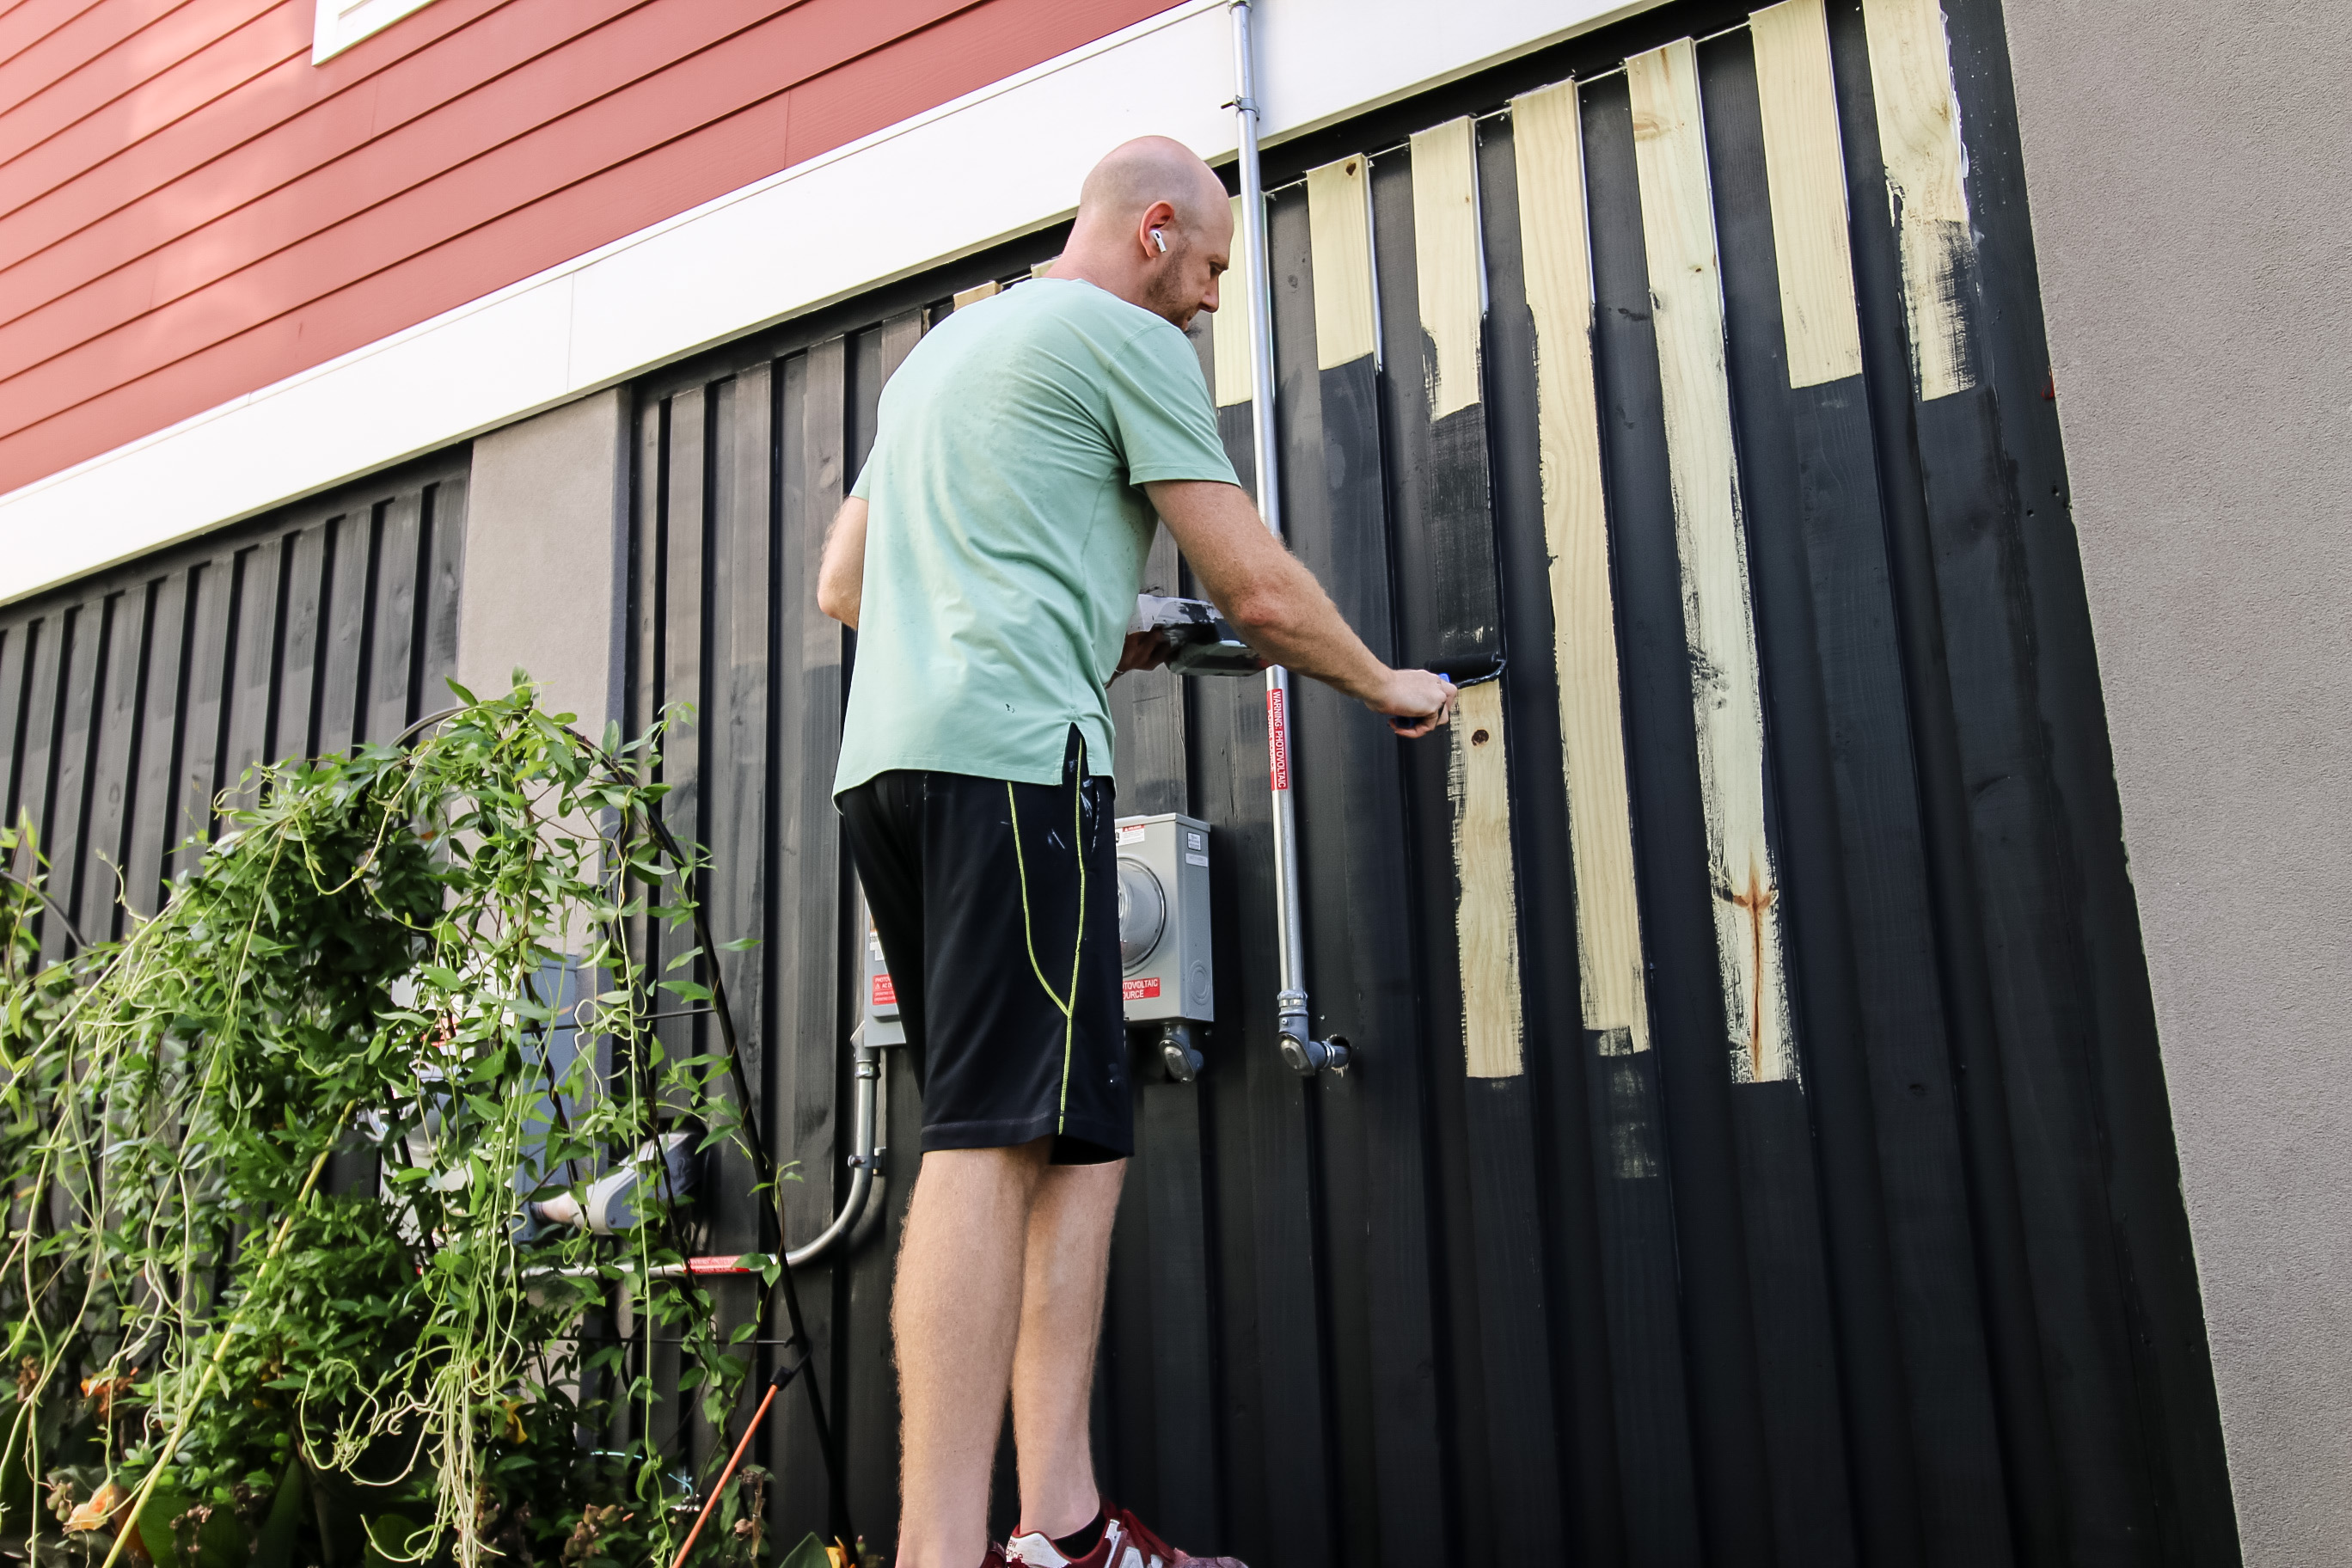
Then, we added exterior grade paint to match the old garage slats. We used a brush between the new slats and on the sides and a foam roller on the faces of the new slats.
One thing that this project made me realize was just how much the old garage needed painting anyways. I never would have noticed it needing it or done anything about it until putting new paint up.
Painting was another part that took a really long time, just because of the total area of the space.
When you're done with this project, build our paint storage rack for the excess paint!
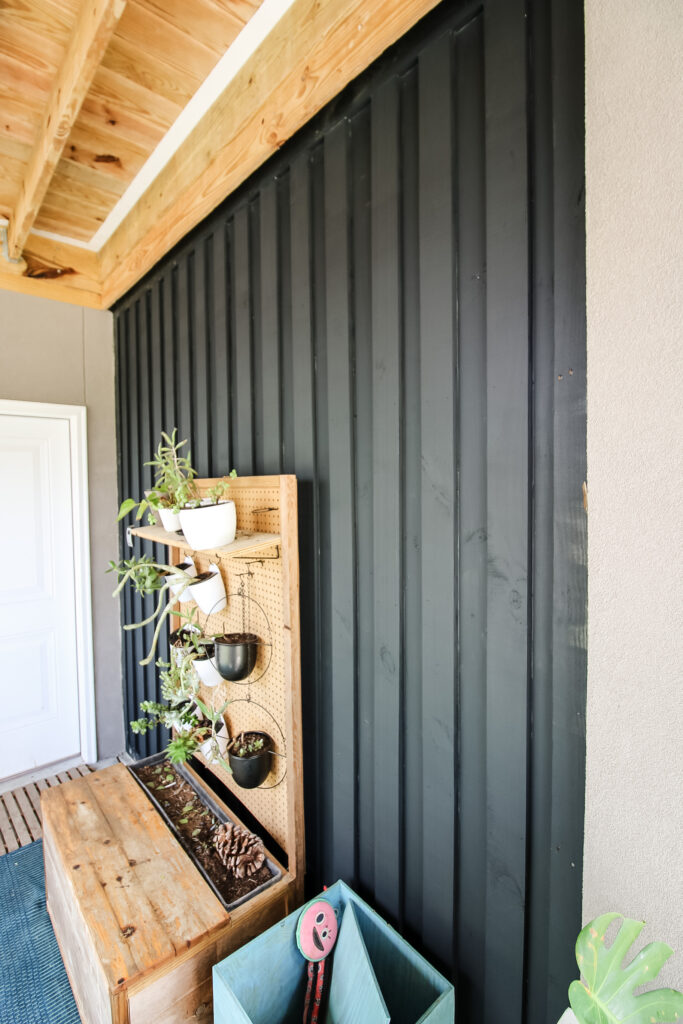
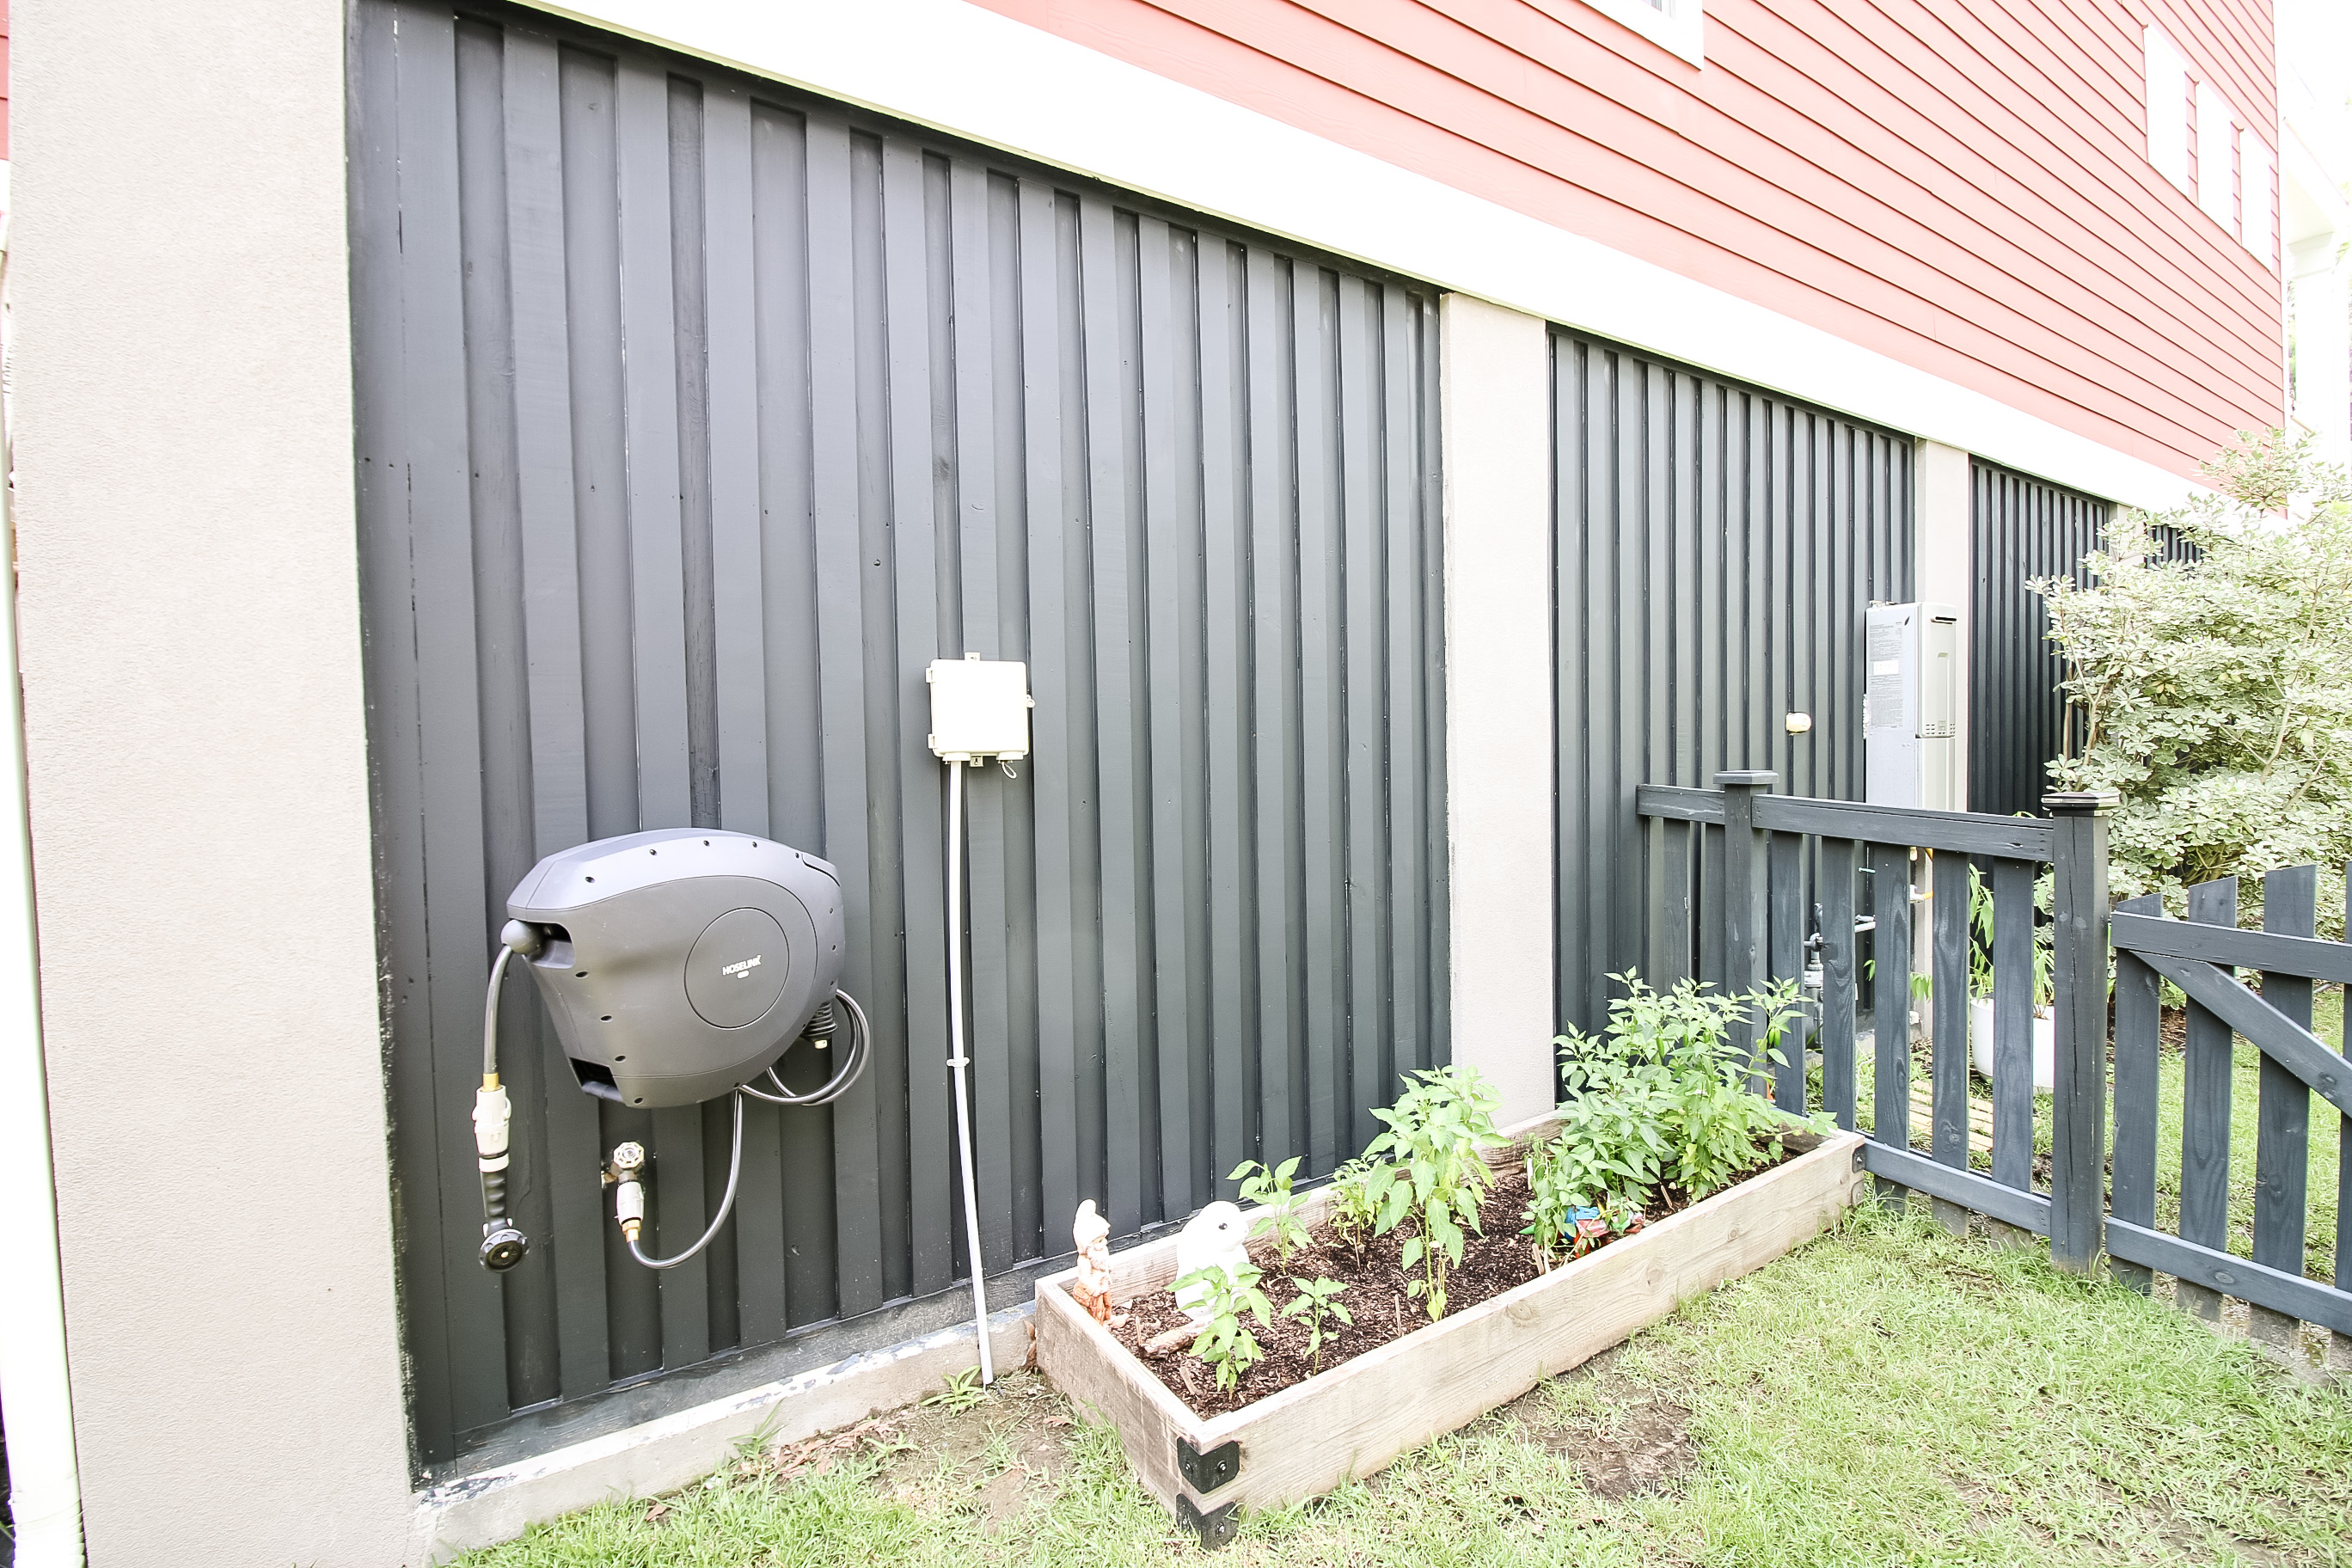
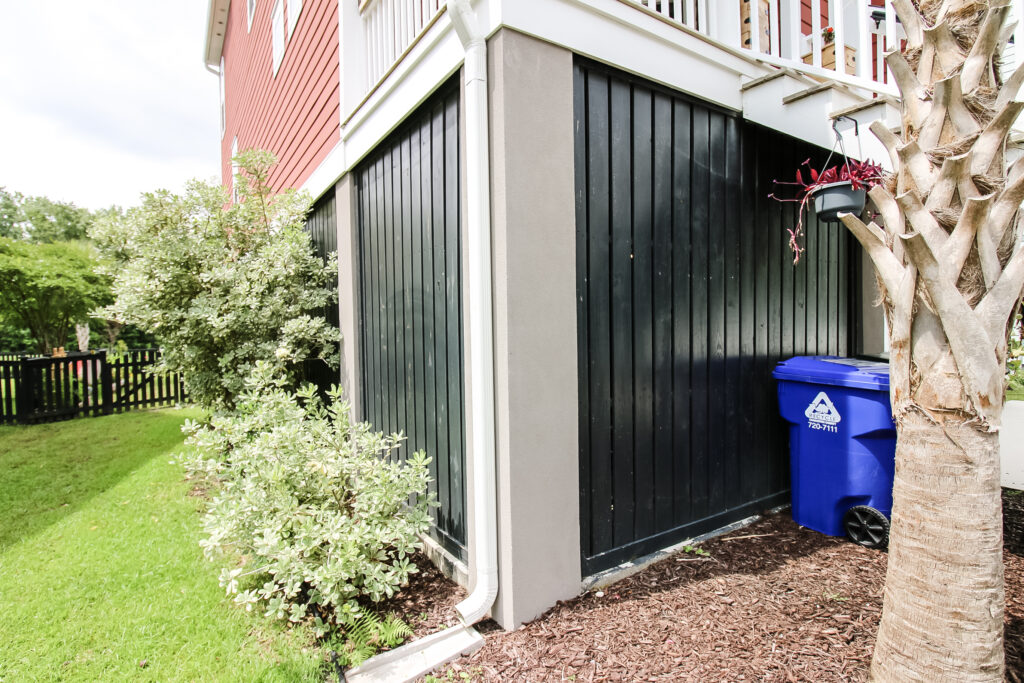
Fully enclosed slatted garage
In case you didn't realize throughout this post, this project took a ton of time. I worked on this pretty much full-time for like two weeks, so if you were doing it on the weekends, it will take a while.
I also chose to work in sections and I think that was a big help. Doing 2-3 panels at a time made the whole process much easier to tackle, versus doing all 156 boards first, then going back and caulking them all and then going back and painting them all.
But in the end, I think it turned out great. It's definitely one of those projects where when you look at the before and after, you don't easily notice a big difference. It seems like it always would have been this way.
But now, we are totally sealed off from critters getting in and crawling around our stuff and we hopefully won't have to throw away a bunch of wood anymore because it gets moldy.
This is a great project if you want to seal a slatted garage or close a raised garage to keep things out, gain privacy or just get a more finished looking space.

Looking for something?
We've been doing this since 2012 so we have a LOT of blog posts!
Search stuff like: Ceiling Projects | DIY Plant Stands | Thrift Flips

Hey there, I'm Sean, the woodworking enthusiast and builder behind CharlestonCrafted.com! Since 2012, I've been sharing the magic of turning raw materials into beautiful creations. I love teaching others the art and satisfaction of woodworking and DIY. I try to inspire fellow crafters to make something extraordinary out of nothing at all.