Here's how to make a DIY self-filling cat food dispenser. This is a great way to minimize the number of times you have to fill your cat's food bowl. This is an easy build and will be great for your furry friend.
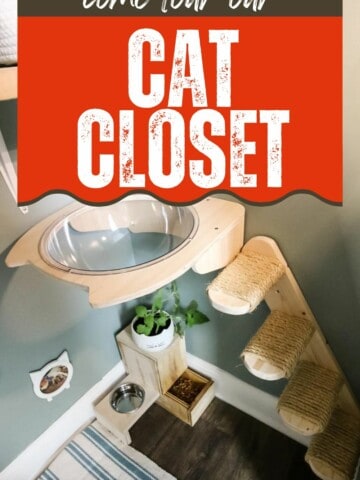
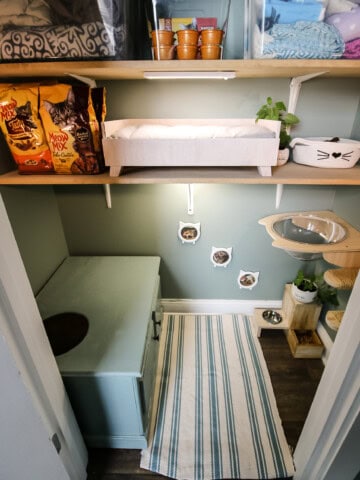
We recently tore out the wire shelves in our linen closet and replaced them with custom wooden shelves, which made the space so much more functional.
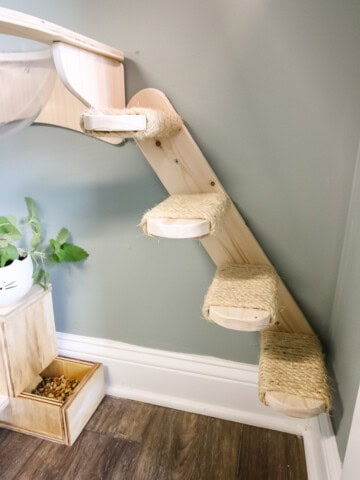
This linen closet doubles as both where we store our extra linens and where our cat's litter and food are stored.
When we first moved into this house, we rolled our old decorative litter box into the closet and the very first project in our home was to add a cat door to this door so our cat could access the space.
With everything looking great, we were ashamed that our cat was eating from the jankiest looking bowl holder you've ever seen. I'm not even going to link back to it on our blog because it was done way before we had any idea what we were doing.
So, we decided to upgrade to a DIY self-filling cat food dispenser that would better suit her needs.
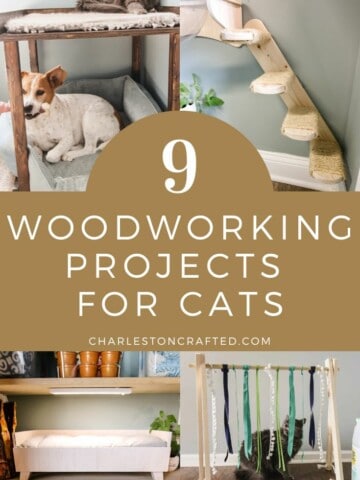
Check out tons of ideas for DIY projects for your cat!
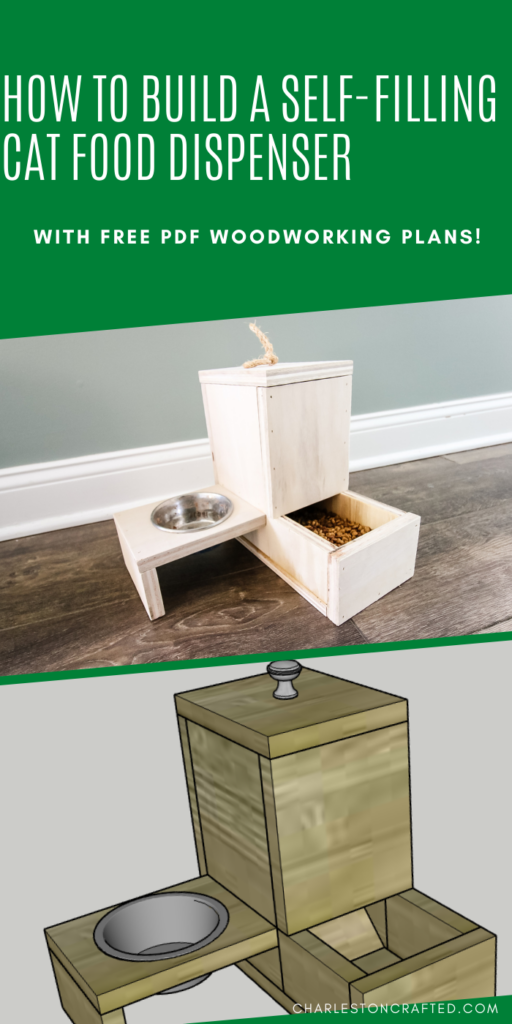
How to build a self-filling cat feeder
There are a lot of ways to build a pet feeding station to feed your cat, but you have to refill them frequently.
If your cat is a grazer, this is a great option to provide a large amount of food that can be eaten over time.
Here's how to build this DIY automatic cat feeder.
Materials needed:
- ¾" plywood
- 1 ¼" brad nails
- Short piece of rope
Tools needed:
- Table saw
- Brad nailer
- Orbital sander
Steps to build a DIY pet food dispenser
It's just a few steps to build a DIY pet food dispenser. This will show you the overall steps, but you can download our woodworking plans to easily replicate this DIY pet feeder for yourself!
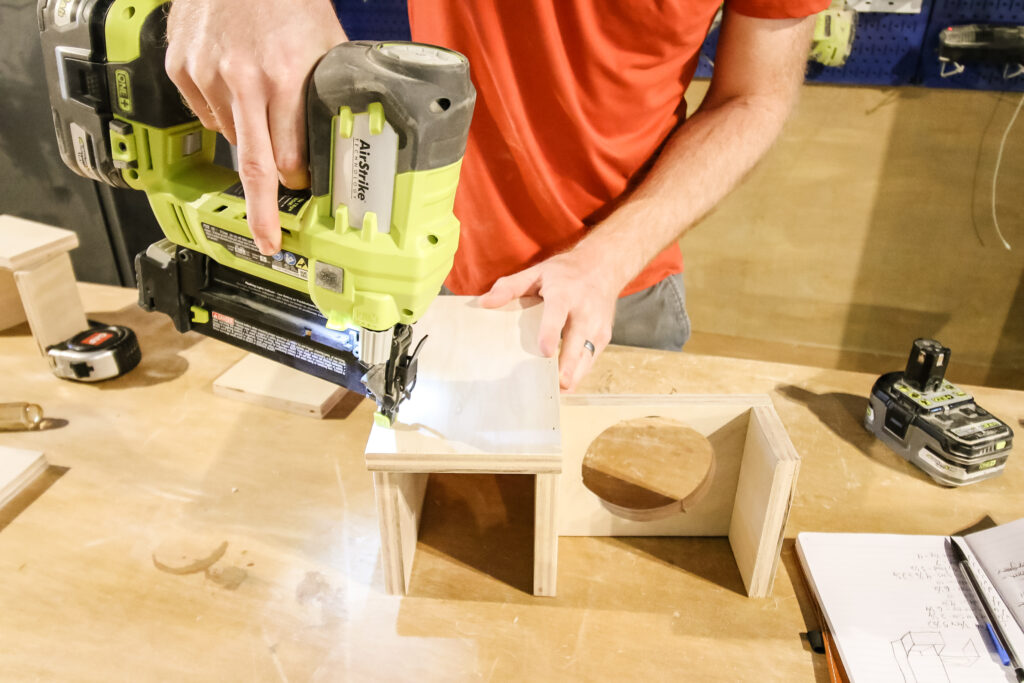
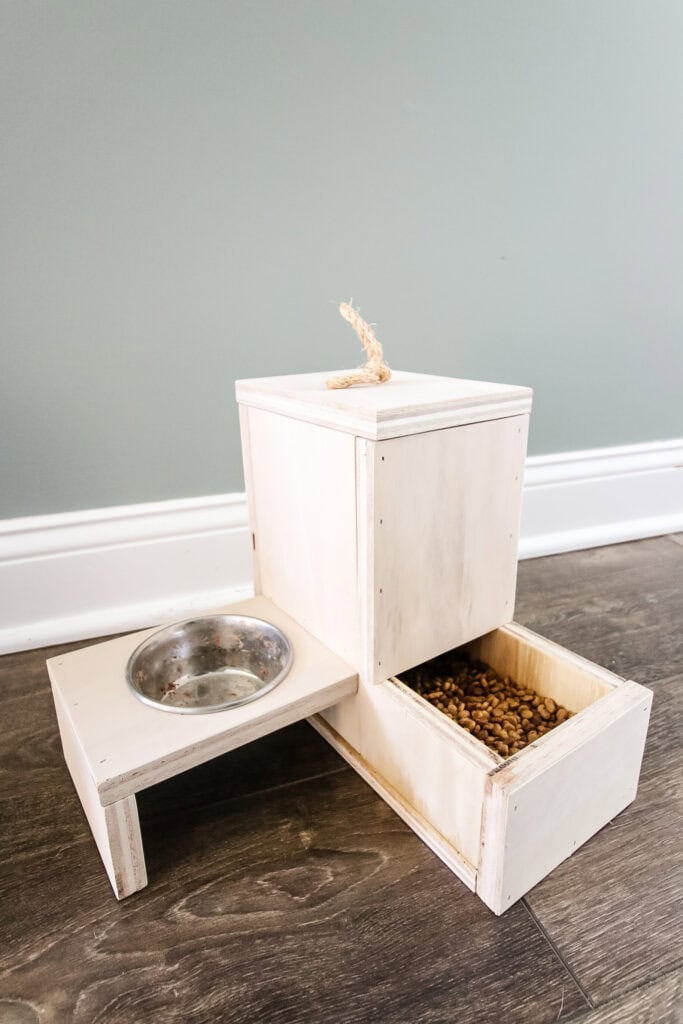
Step one: Build side bowl holder
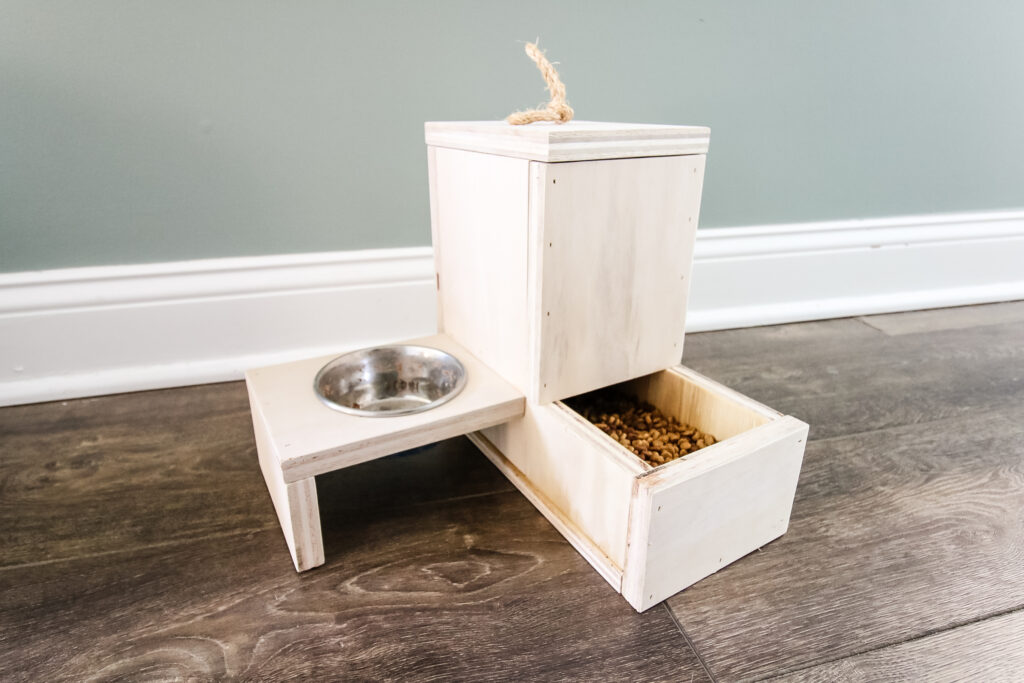
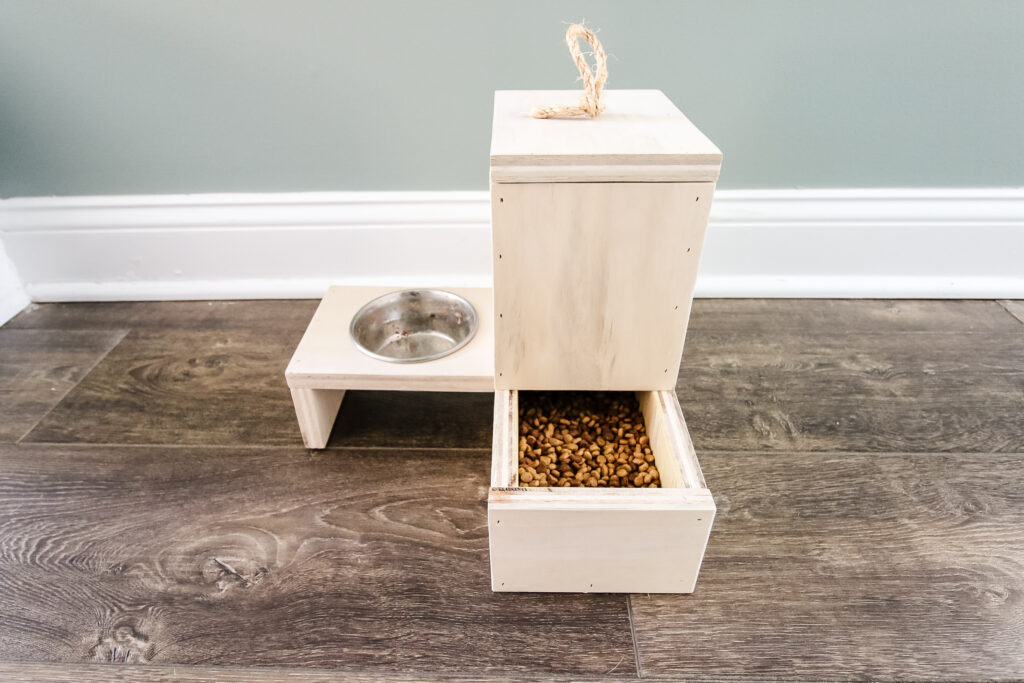
This cat food dispenser is designed for dry food, but it also offers an option for an additional bowl for wet food or water.
After making all the cuts, you'll use the pieces for the side and cut a hole in the top of one board for your bowl to slide into. It's easy to cut a hole with a jigsaw or scroll saw sized perfectly to the bowl you choose.
The side bowl holder is nailed into one of the side pieces and then you're ready to move on.

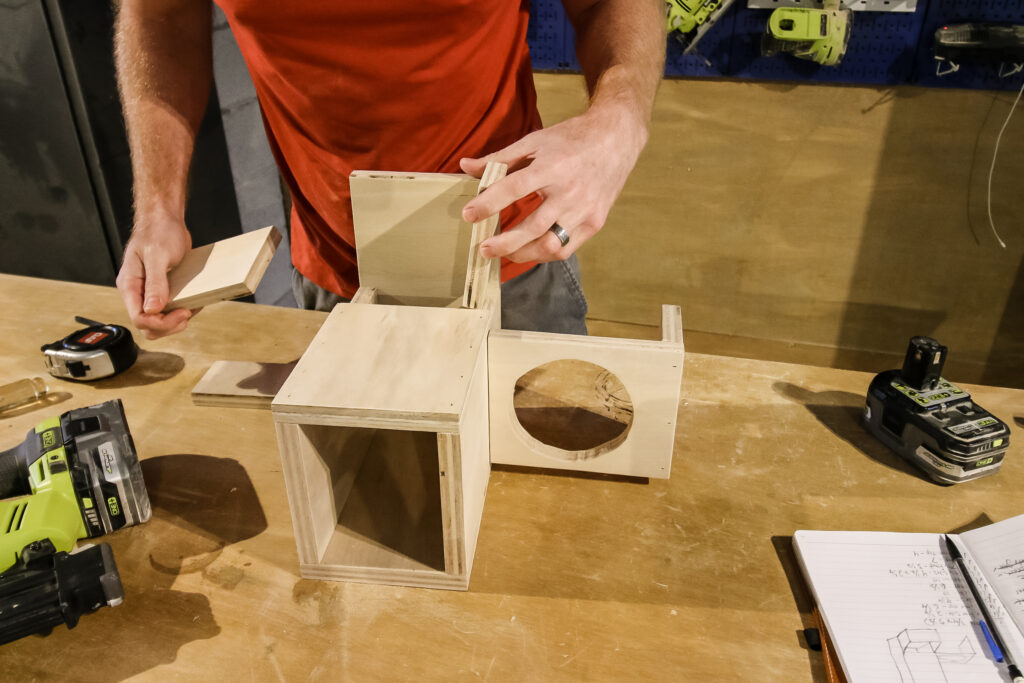
Step two: Assemble dry food container
The dry food container area is simply nailed together quickly and easily. It provides a good amount of space for extra dry food to work its way down.
At the bottom, there is a hole that is large enough to be similar to a standard cat food bowl.
Each of these pieces is labeled and directed in the full woodworking plans!
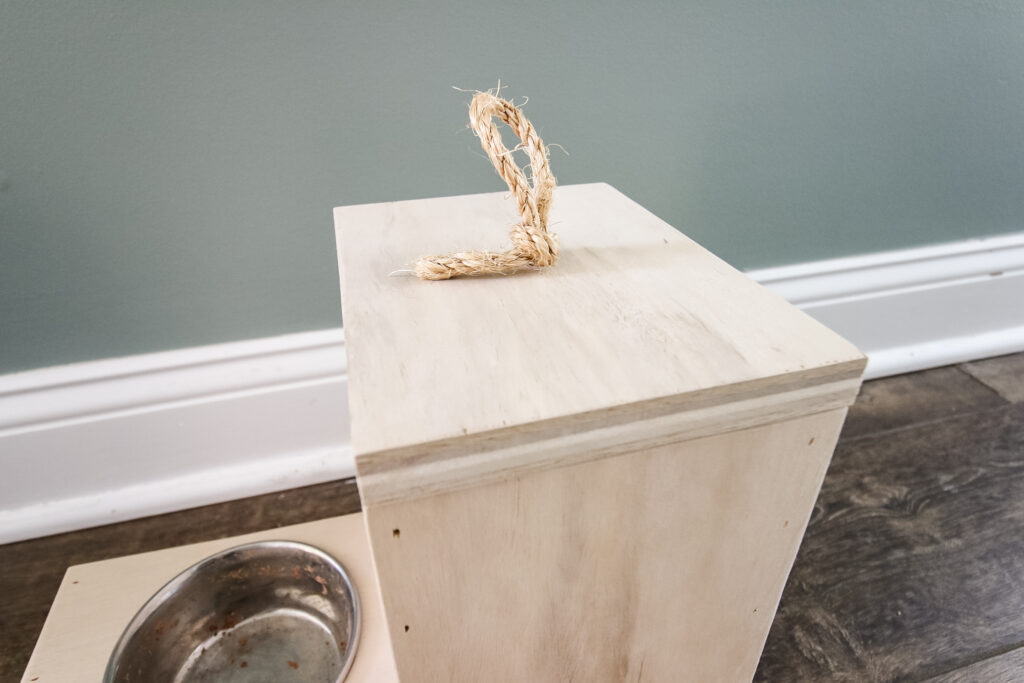
Step three: Assemble top
The top is two boards cut and glued together.
Then, we drilled a hole in the middle and threaded a rope through it. This is a good pull for lifting off the top to refill the container.
Step four: Fill up and enjoy!
When you fill up the dry food container with dry food, it filters its way down. As your cat eats the food, the rest filters down and fills it back up.
This is a great alternative to a puzzle feeder if your cat is not into that kind of thing.
DIY self-filling cat feeder woodworking plans
If you like our DIY cat food dispenser, make sure to grab the woodworking plans!
Our woodworking plans include a full material list, cut list, and step-by-step instructions with computer images.
Grab your plans to build your own DIY self-filling cat feeder today and make your cat the happiest on the block!
Basic woodworking information for every project
Here are some of our most popular woodworking articles!
Shopping for wood:
Woodworking project ideas
- 100+ of the best woodworking project ideas!
- 62 easy beginning woodworking projects
- Woodworking project ideas to make and sell
See all our printable PDF woodworking plans!
Our favorite tools + supplies
- See all our favorite tool reviews
- How to use a Kreg jig
- The ultimate wood stain guide
- The best wood fillers for your project
Remember to also always use safety equipment while woodworking and using tools. Make sure you have proper eye protection, ear protection and a good mask to keep yourself safe.

Looking for something?
We've been doing this since 2012 so we have a LOT of blog posts!
Search stuff like: Ceiling Projects | DIY Plant Stands | Thrift Flips

Hey there, I'm Sean, the woodworking enthusiast and builder behind CharlestonCrafted.com! Since 2012, I've been sharing the magic of turning raw materials into beautiful creations. I love teaching others the art and satisfaction of woodworking and DIY. I try to inspire fellow crafters to make something extraordinary out of nothing at all.