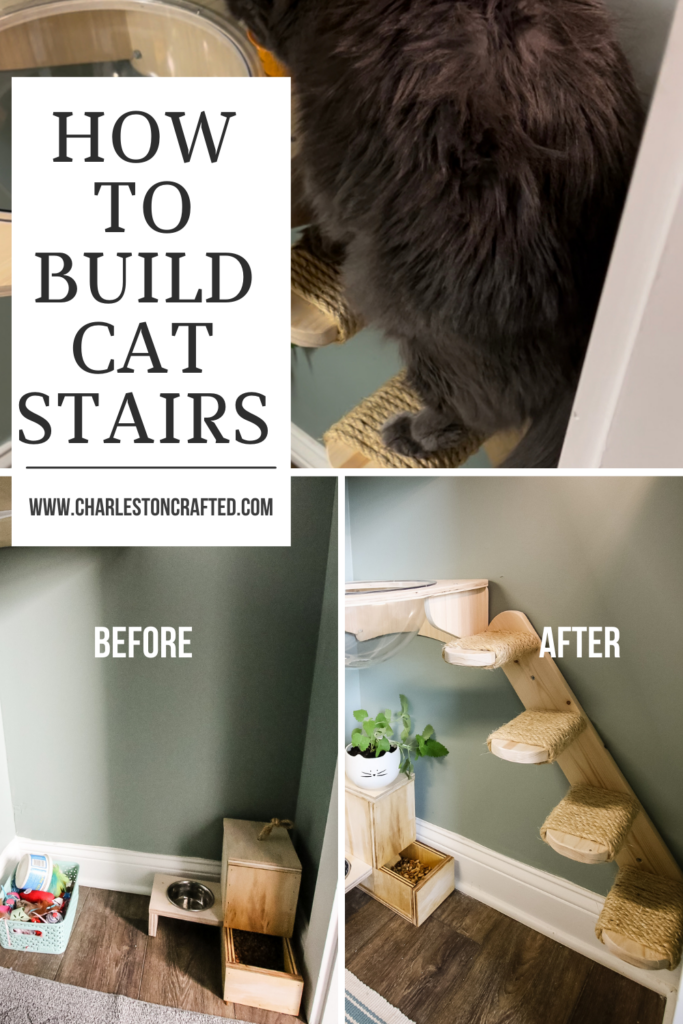
Want to help your cat access a space higher than they can jump? This post will show you how to build DIY wall-mounted cat stairs so your cat can walk up somewhere new!
In our busy lives of bustling toddlers and running our own business, the part of our lives that has fall to the bottom of the pecking order has definitely been our pets.
Our pets used to be our whole life, and we would build things specifically for them, like our pet bed "love bunks" or the cool hidden cat litter box we made to look like a piece of furniture in our old laundry room.
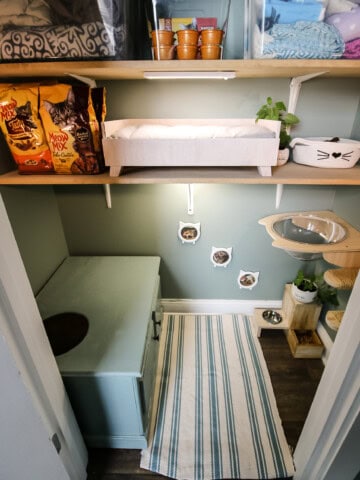
But when we moved to this how, we cut a cat door hole in the door to our linen closet, shoved the litter box and food bowl in there, had a baby 10 days later and then didn't do anything with the space until we renovated the room with custom shelving last year.
Our cat, Bear, has always been a bit of a loner during the day, only coming out when the kids are asleep and things are quiet. She often looks for refuge during the day and we wanted to update her space to offer her a little peace and quiet.
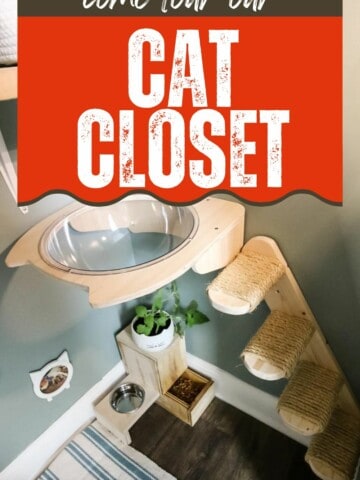
One thing we decided to do in the space was add DIY wall-mounted cat stairs so she can climb up to her new clear cat bed capsule. This was a simple build, so let's show you how to do it!
DIY floating cat climbing steps
DIY floating cat climbing steps are an easy project for any cat lover. This project requires only a few tools and a few materials, so anyone can do it!
These DIY floating cat steps can go in a tucked away space like ours, but they can also go in your sunroom or office or lead your cat to anywhere you want to help them access.
The rope on them also serves as a cat scratcher, so it's a great toy and activity that cats love.
Here's how to do the project!
How to build DIY cat stairs
Here are the supplies and tools you'll need to build DIY cat stairs and the steps to build them and mount them to the wall!
Tools needed to build DIY cat stairs:
- Miter saw
- Kreg pocket hole jig (our favorite for this is the Kreg 720!)
- Cordless drill
- Orbital sander
- Hot glue gun
Materials needed to build DIY cat stairs:
- 1x4 board
- Pocket hole screws
- Wood glue
- Rope
Step one: cut wood
Start by cutting out the base and each of the steps. The base of our DIY cat steps is 24" and each step is 7" long.
*Adjustment*- For our space, we only needed four steps, but you could add as many steps as you wanted, just adding about 6 more inches to the base for each step you want to add!
We also used a jigsaw to round one end of each step and both ends of the base to give it a cleaner look. This is an optional step, but we liked how it looked.
When all the cutting steps were complete, we sanded each board and moved on to step two!
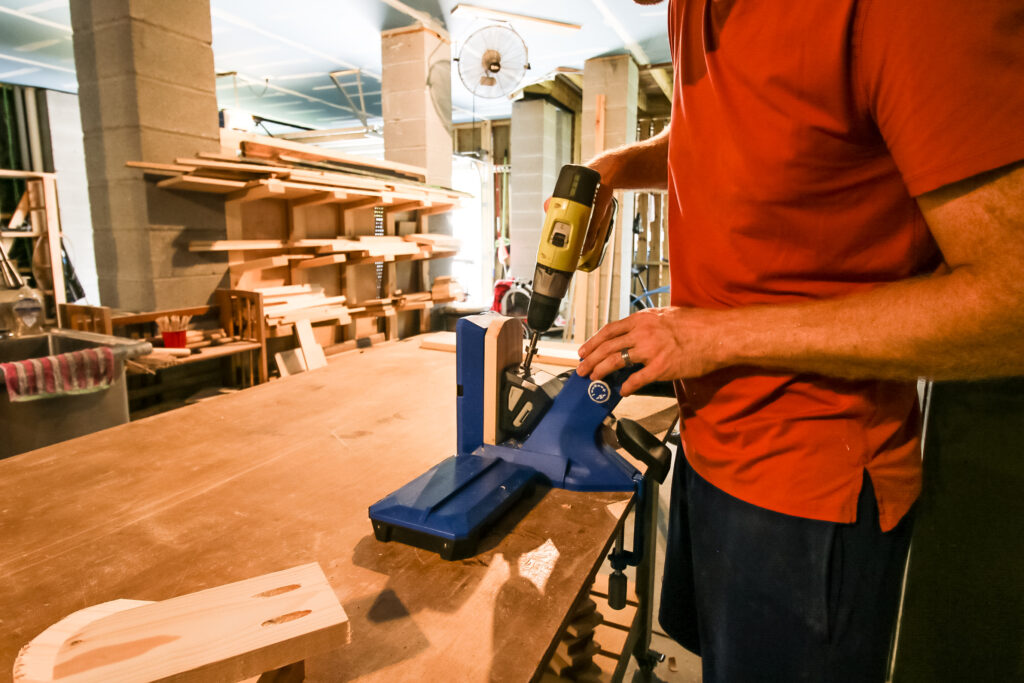
Step two: attach cat steps to base
Cats are pretty light, but you still want to make sure that your DIY cat staircase is sold and secure for your cat to move around on.
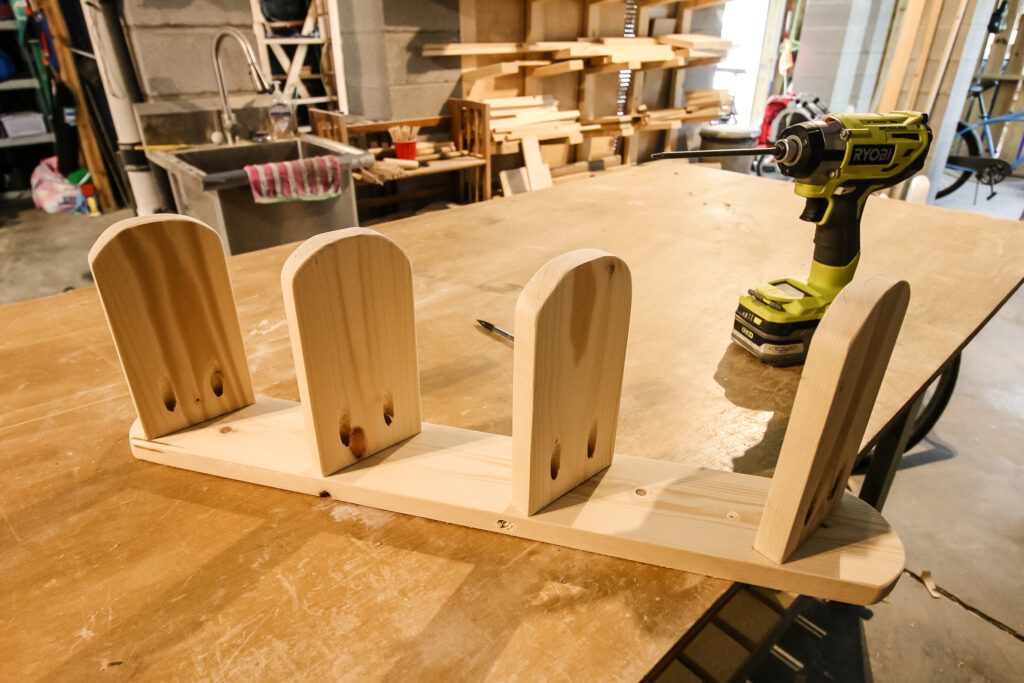
For that reason, we used wood glue and pocket hole joinery to secure the steps to the base.
Drill two pocket holes on the flat end of each step using your pocket hole jig. Then apply wood glue to the edge and screw it in.
No exact precision here because our steps might need to be at a different angle here, but evenly space the steps across the board. It might help to put one on each end, then add the two in the middle evenly spaced where they need to be.
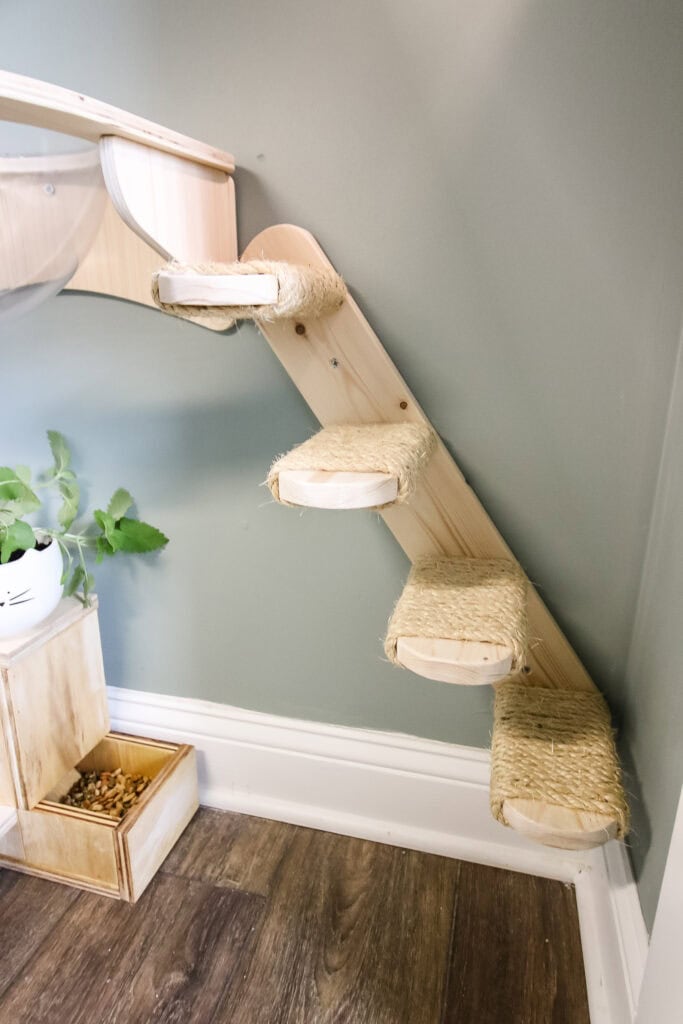
Step three: wrap cat stairs with rope
When the cat wall steps are built, add the rope. Rope is a good element for each step because it helps the cats grip as they climb, but also can serve as a cat scratcher when they are playing. Basically a scratching post on steps!
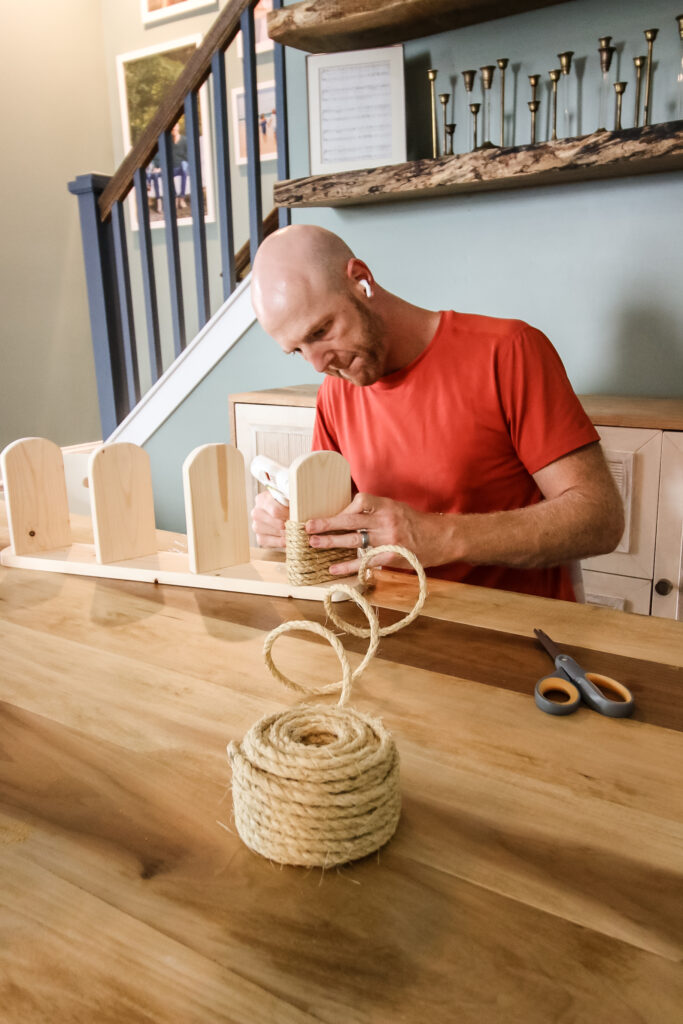
The best way to attach the rope to the steps is with hot glue. Start on the underside of a step and add glue to the seam where the step meets the base.
Then, just continuously wrap until you get to the rounded edge of the step! Cut the rope and glue underneath to finish.
Step four: how do I put cat steps on the wall?
Ok, so your cat steps look great, but now you need to mount DIY cat stairs on the wall.
Again, your cat might not seem very heavy, but it's important to properly secure the steps to the wall. Preferably, you can encounter at least one wall stud when mounting and put in a screw at that point.
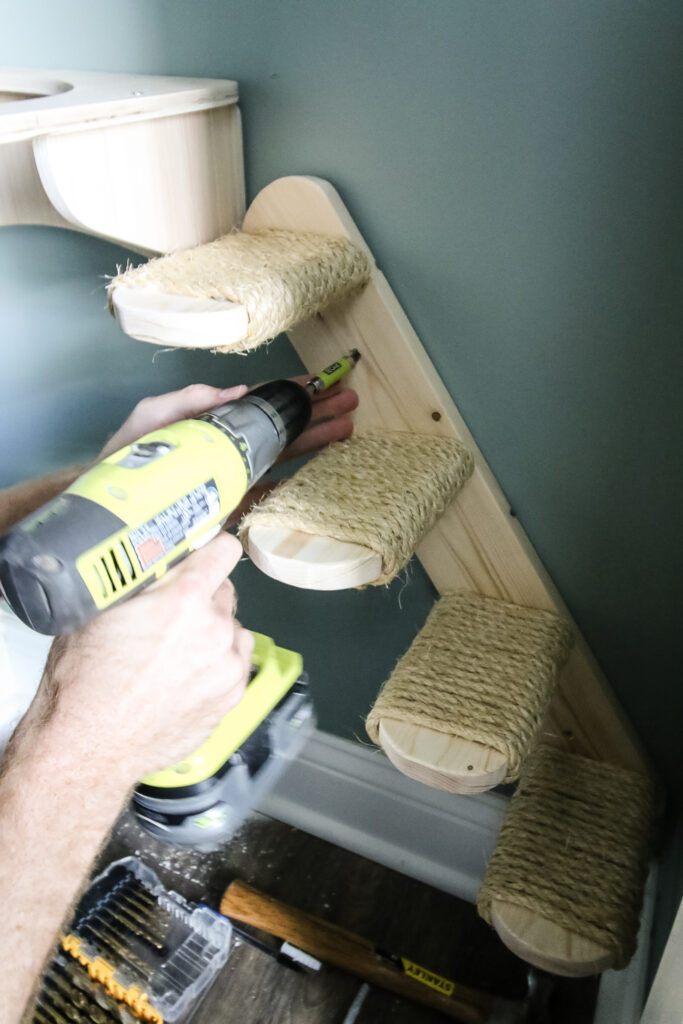
If not, use self-drilling drywall anchors that have a good weight limit. Attach the anchor to the wall, then drill the screw through the cat steps base and into the anchor!
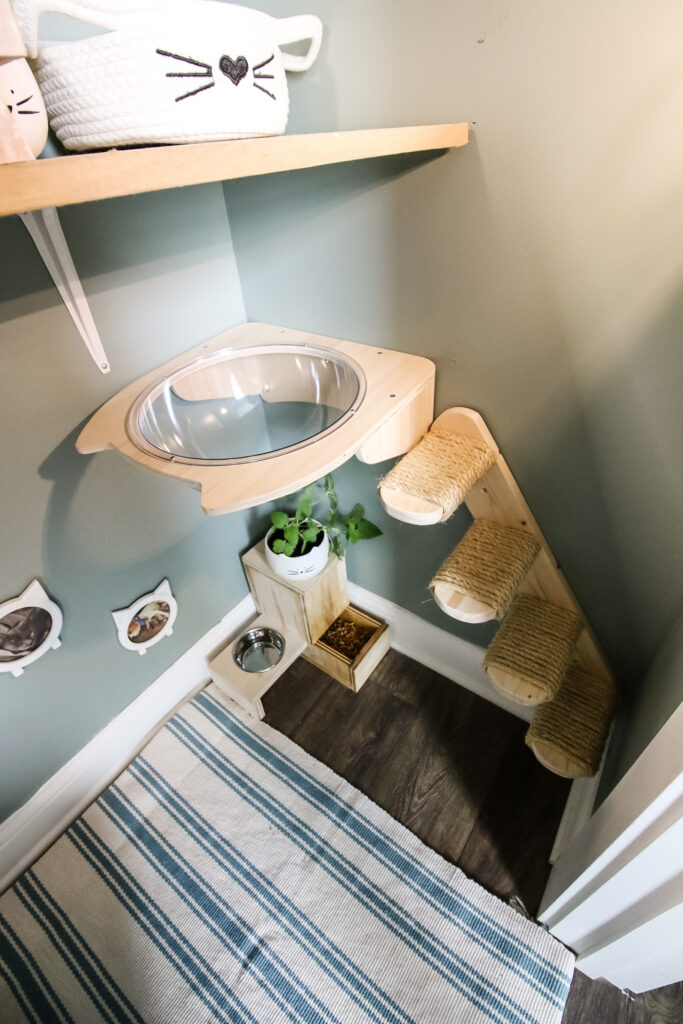
Step five: enjoy your DIY cat climbing steps!
Ta da! Now you and your cat can enjoy your DIY cat climbing steps! These wall-mounted steps make for some great fun!
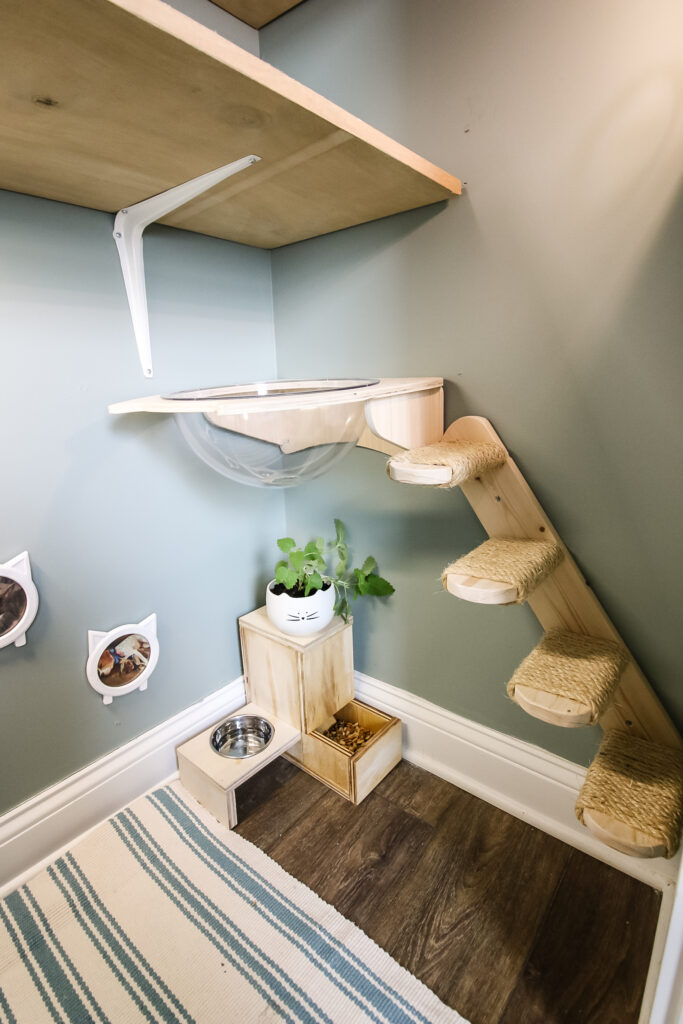
Our cat's steps lead to her new clear bottom cat bed that we also attached to the wall in her closet.
Now, when Bear wants space, she can go in her closet and climb up the steps to her new perch and catch a snooze!
DIY wall-mounted cat stairs woodworking plans
Use the instructions above in this post as your woodworking plans! These floating cat stairs are easy to make and replicate using our instructions.
We didn't make printable PDF plans for this project because you can make adjustments to the number of steps you use and the angle, so you have to figure that part out for yourself.
But, this post serves as the woodworking plans to make your cat some fun stairs!

Looking for something?
We've been doing this since 2012 so we have a LOT of blog posts!
Search stuff like: Ceiling Projects | DIY Plant Stands | Thrift Flips

Hey there, I'm Sean, the woodworking enthusiast and builder behind CharlestonCrafted.com! Since 2012, I've been sharing the magic of turning raw materials into beautiful creations. I love teaching others the art and satisfaction of woodworking and DIY. I try to inspire fellow crafters to make something extraordinary out of nothing at all.