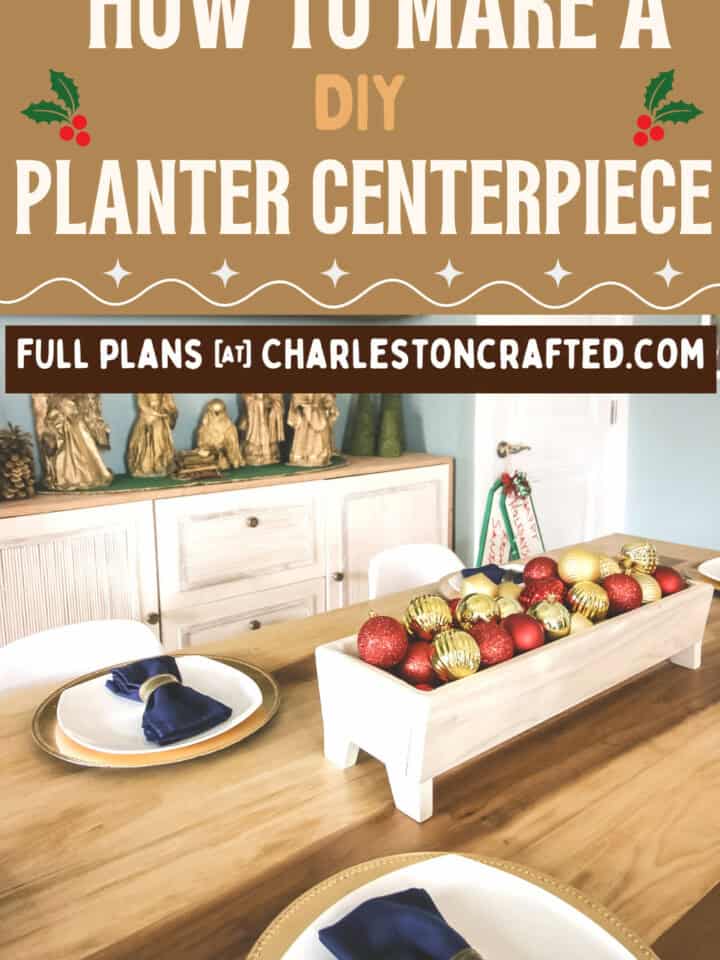
Brighten up your dinner table with this DIY elevated tabletop planter centerpiece. This is perfect for holiday decor or everyday use!
This post was sponsored by Kreg Tool. All opinions are our own and we love Kreg Tool. Thank you for supporting the brands that make Charleston Crafted possible!
We're getting ready to host for the holidays and we wanted to make sure we had something that would bring our table together.
So, we designed a DIY tabletop planter centerpiece that would allow us to add some holiday decor to our table but then swap everything out for each season of the year.
We were inspired for this project by an elevated planter available on Wayfair that looked elegant. It also is reminiscent of our wood-burned DIY trough style centerpiece we made a couple of years ago for fall decor.
This DIY planter centerpiece is one of those cool projects that you can make with just one board! That's right, a single board can do everything, so you don't have to worry about the cost of lumber... and it's certainly cheaper than buying one.
We used a 1x6 poplar board (aka ¾"x5 ½"x8' if you want to talk nominal versus actual dimensions) but you could use any type of wood that works in your home from rustic wood to exotic hardwoods to pine off the shelf.
Let's show you the quick and easy steps on how you can build one of these planter centerpieces and how you can get the full FREE woodworking plans to help you through it!
DIY planter centerpiece
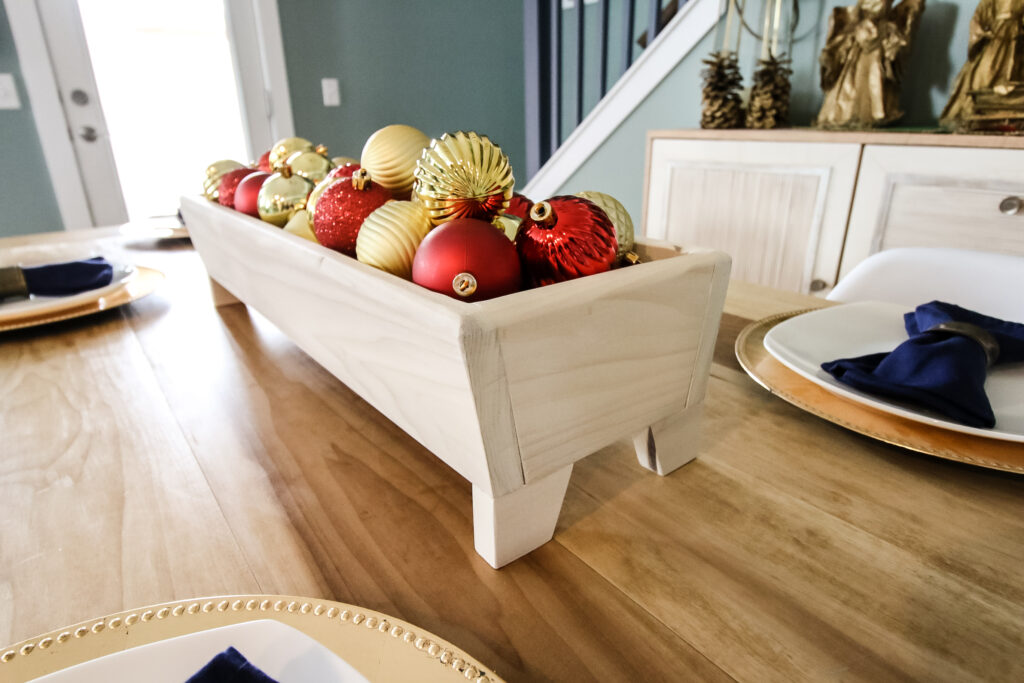
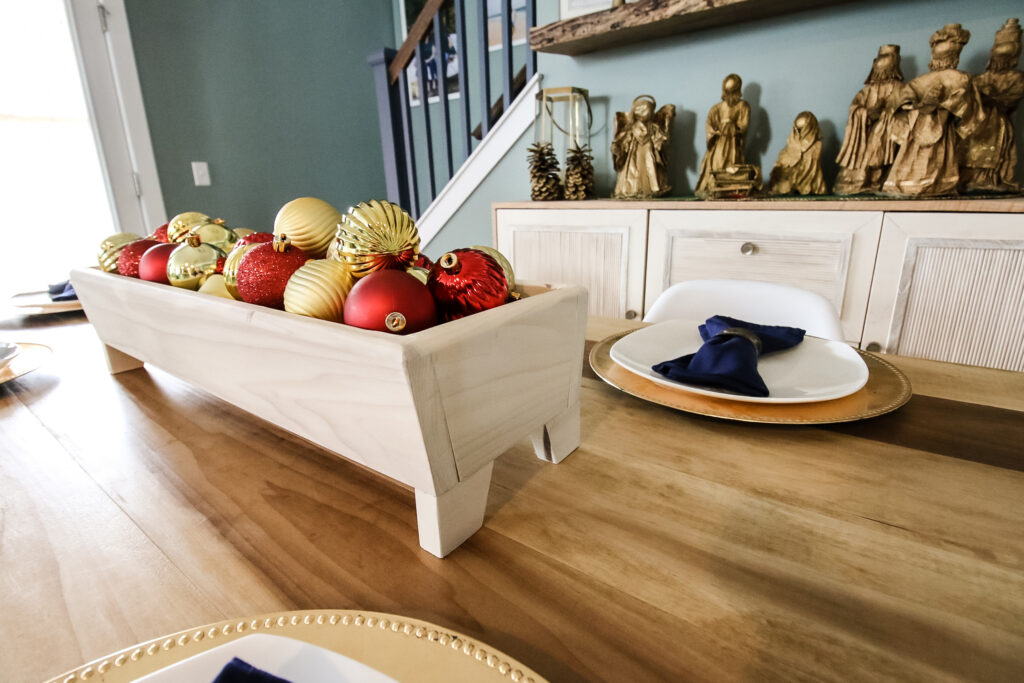
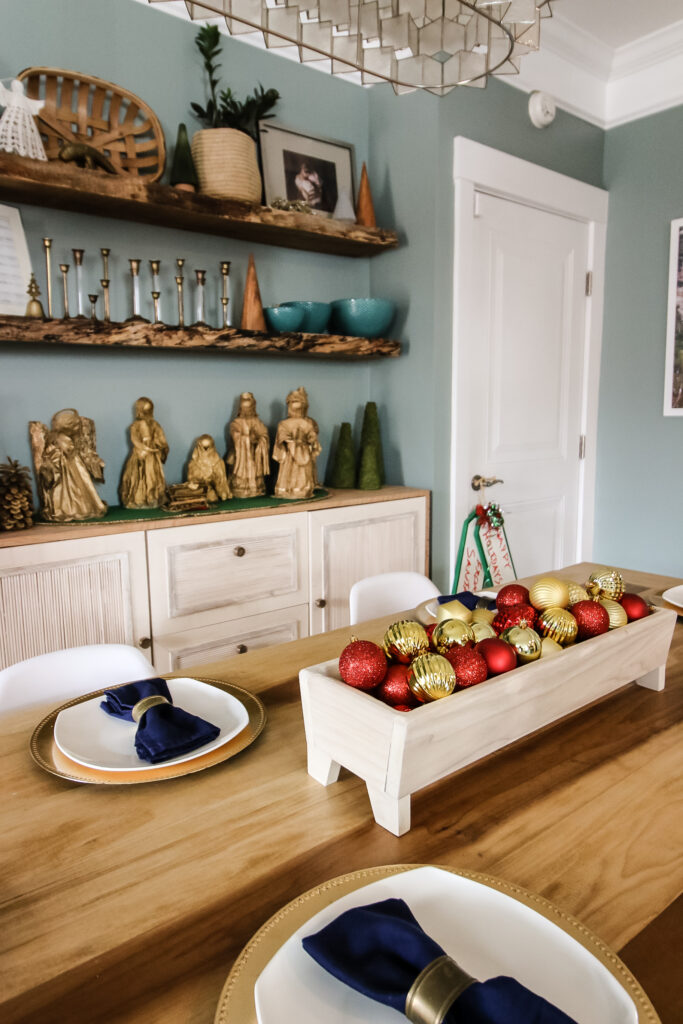
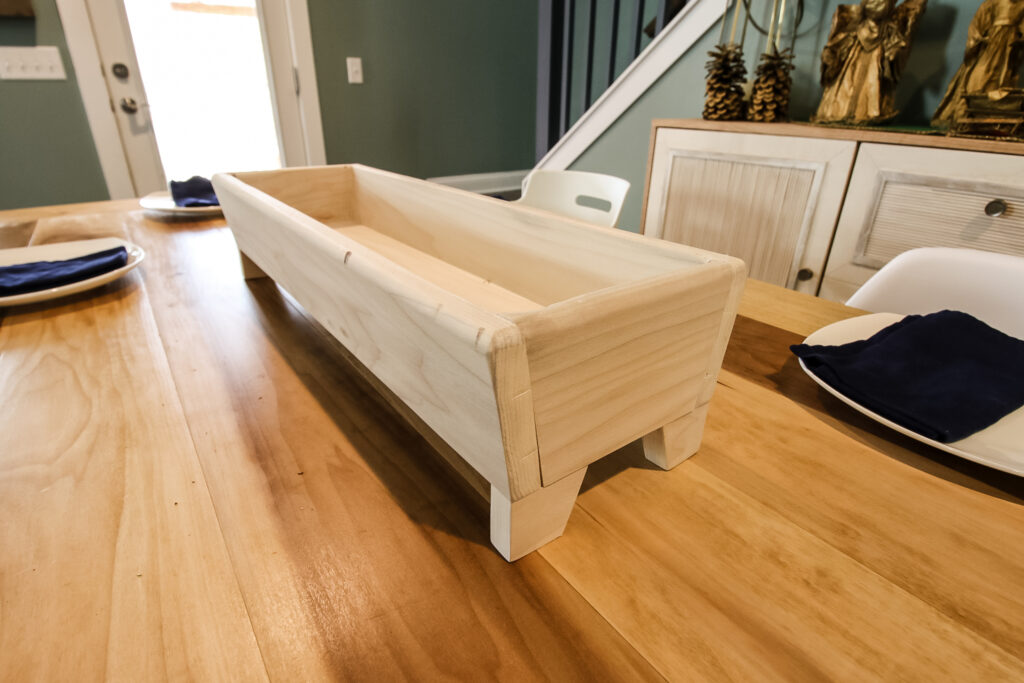
We love this DIY centerpiece because it is long and low. With a long rectangular dining table, this looks perfect on top and doesn't block your view when talking to your fellow diners.
This centerpiece looks great on our DIY angled base dining table!
Wooden box centerpieces are great for swapping out decor for seasons and keeping things low profile. That's why we designed this to fit anything from Christmas ornaments to mason jars to candles to plants.
Basic woodworking information for every project
Here are some of our most popular woodworking articles!
Shopping for wood:
Woodworking project ideas
- 100+ of the best woodworking project ideas!
- 62 easy beginning woodworking projects
- Woodworking project ideas to make and sell
See all our printable PDF woodworking plans!
Our favorite tools + supplies
- See all our favorite tool reviews
- How to use a Kreg jig
- The ultimate wood stain guide
- The best wood fillers for your project
Remember to also always use safety equipment while woodworking and using tools. Make sure you have proper eye protection, ear protection and a good mask to keep yourself safe.
DIY planter box centerpiece tutorial
Here's the general overview on how to make this DIY wooden trough centerpiece, but make sure to grab the full downloadable PDF plans!
Step one: drill pocket holes
Start by making all the cuts in the woodworking plans, including the 10 degree angled sides and bevels. A compound miter saw and table saw make this easiest.
After you make all the cuts, make your pocket holes. You can use any pocket hole jig you have access to, but this was our first time trying out the Kreg Foreman.
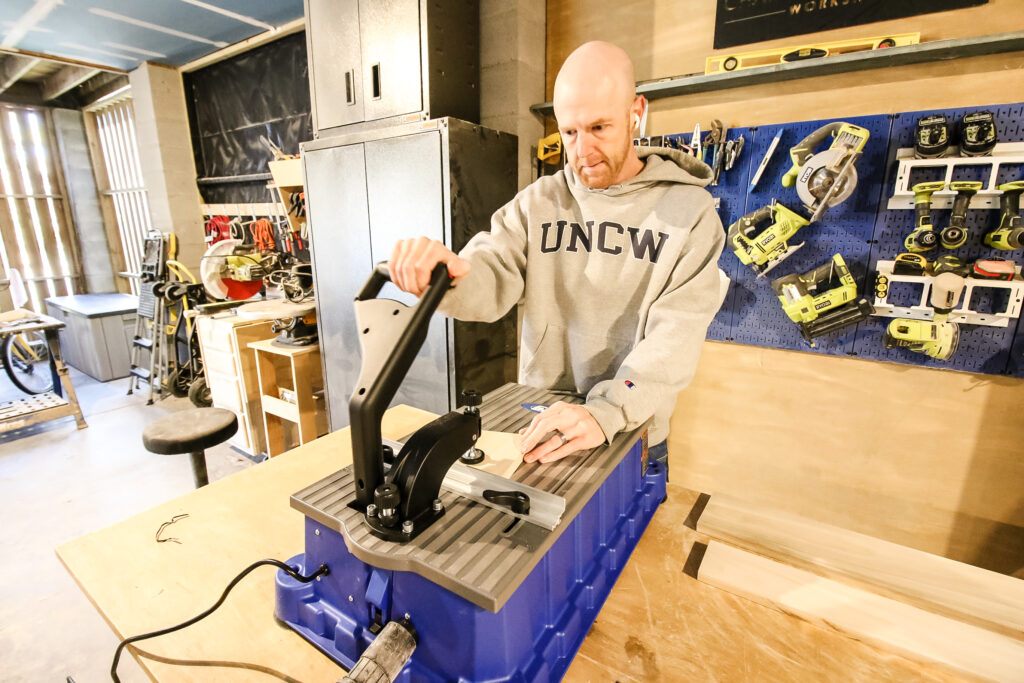
We've always used the Kreg 720 Pro, but the Foreman is a much different animal. It has a huge steady base and can make pocket holes super fast.
After we set up the Foreman in about 10 minutes, we got to work drilling. The pull down handle makes it easy to drill holes quickly and not have to adjust anything.
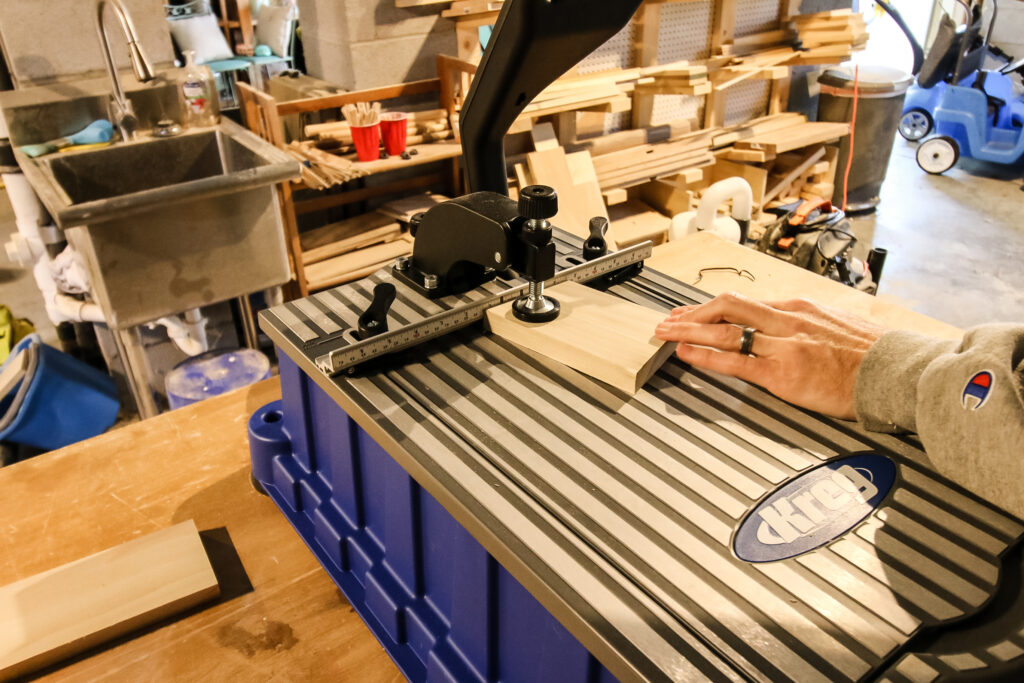
For this project, we needed 12 holes on the base and 8 on each of the short sides. Once all the holes were drilled, we sanded everything smooth and got to work.
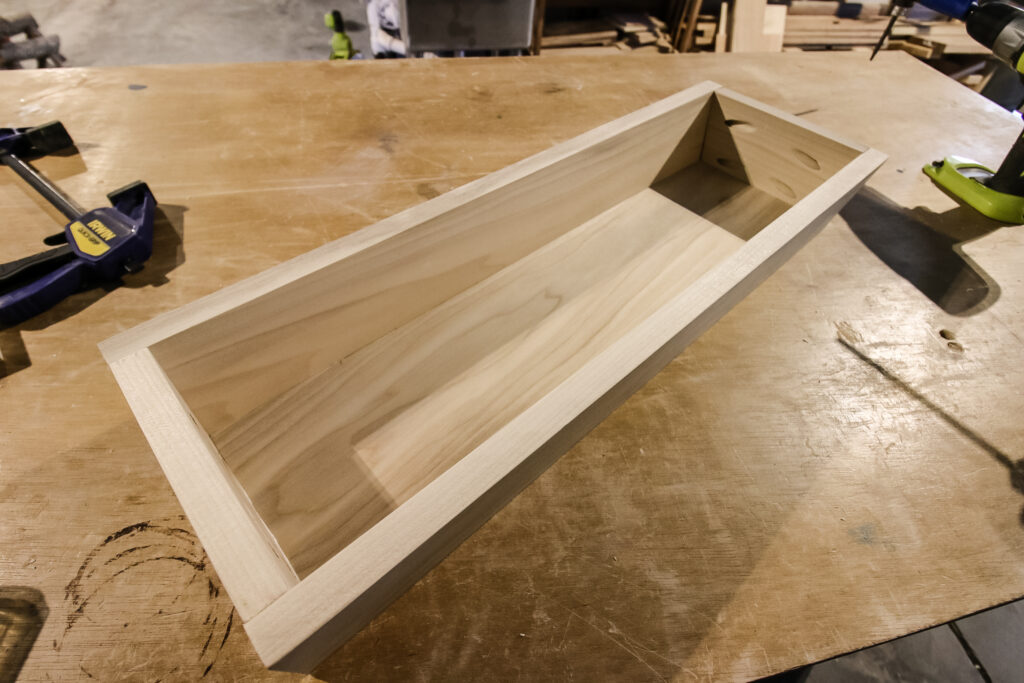
Step two: attach side pieces
We started by attaching the two short sides using wood glue and pocket hole screws with the small end of the sides lined up with the base.
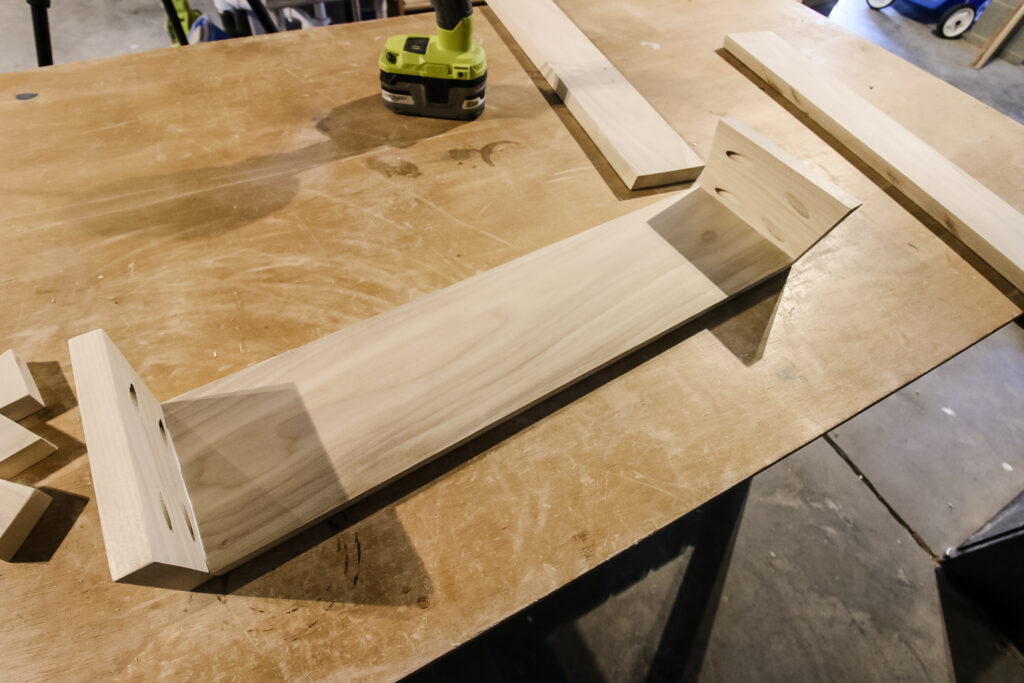
Then, we added the long sides, again using wood glue and pocket hole screws. The long sides are attached from both the base and the short sides to pull everything together and hold it tight.
It was a little tight to do the screws on the short sides, so we used our Kreg 90 degree driver to help fit in that small space.
Step three: attach feet
After the body of the planter was built, we wanted to add the legs. These legs are a little taller because we wanted to have the planter be a little more elevated off the table.
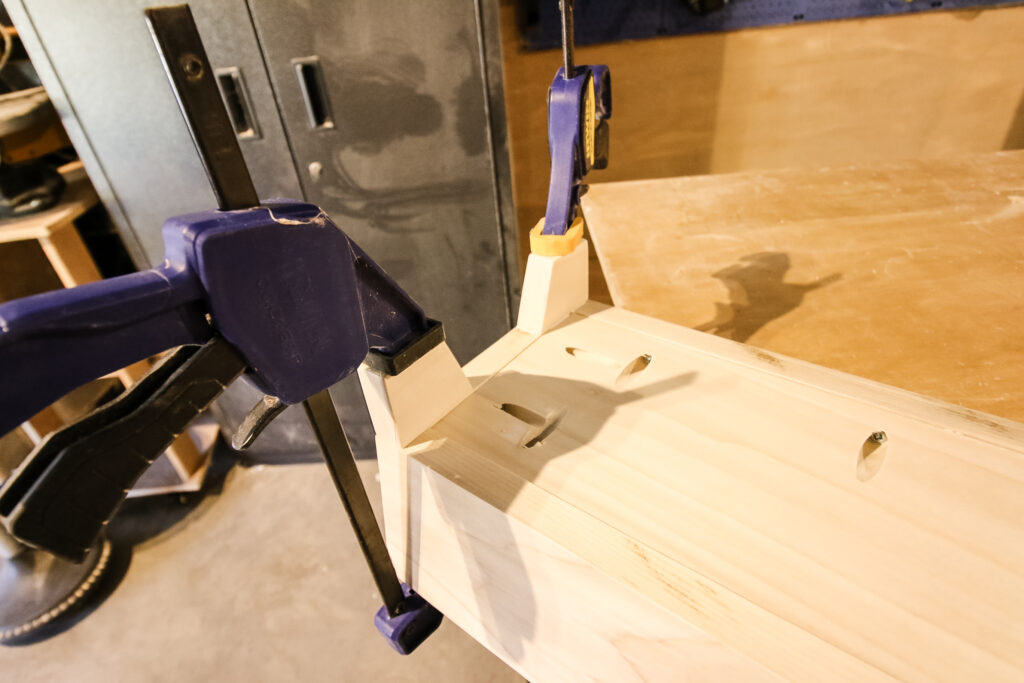
The legs are cut with a 20 degree angle on one side to give them a modern tapered look. Once the legs were cut, we used wood glue and clamps to attach them to the underside of the planter.
Step four: round edges
We didn't love the harsh sharp angles on the top of the planter, so we opted to round them off using our Kreg bench top router table. You could also use a handheld router or even aggressively sand.
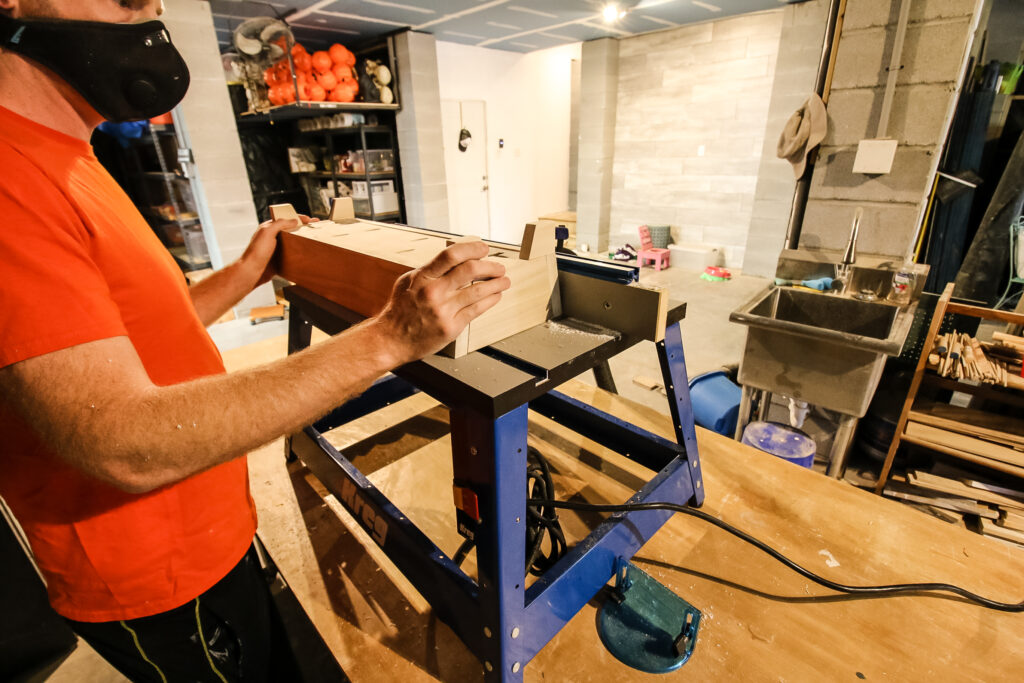
We used a round over bit to smooth the outside and inside edges of the top of the box, then used a fine grit sandpaper to make everything even.
Step five: finishing touches
Before taking it up to the dining room, we added a whitewash stain and polyurethane to protect it.
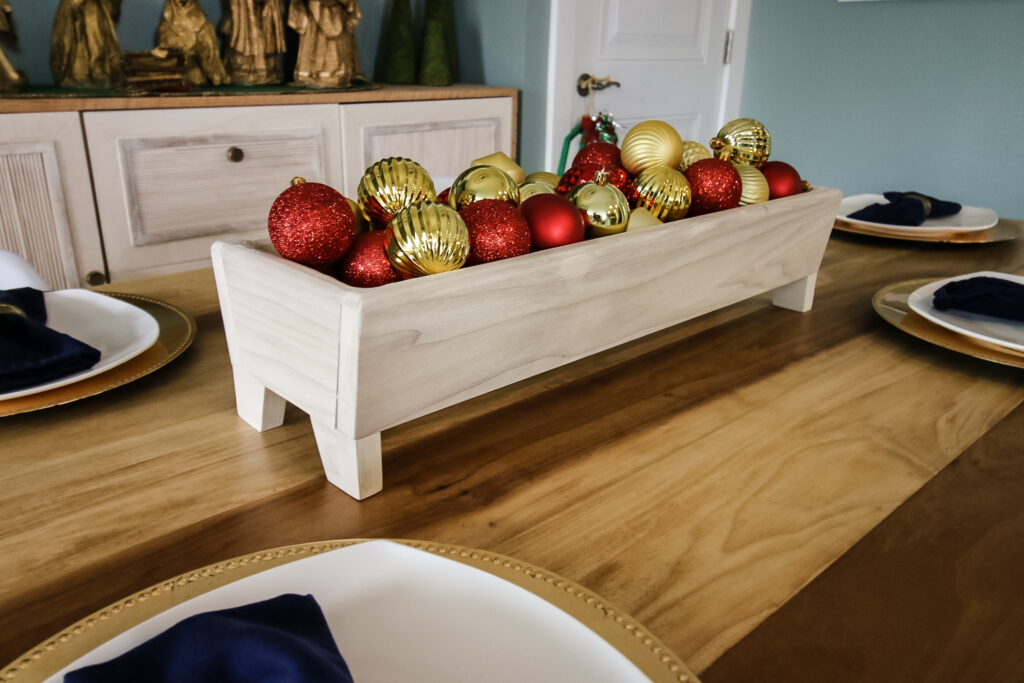
Since it's the holidays, we filled the planter with red and gold ornaments for a festive look! This is going to look so great for holiday hosting!
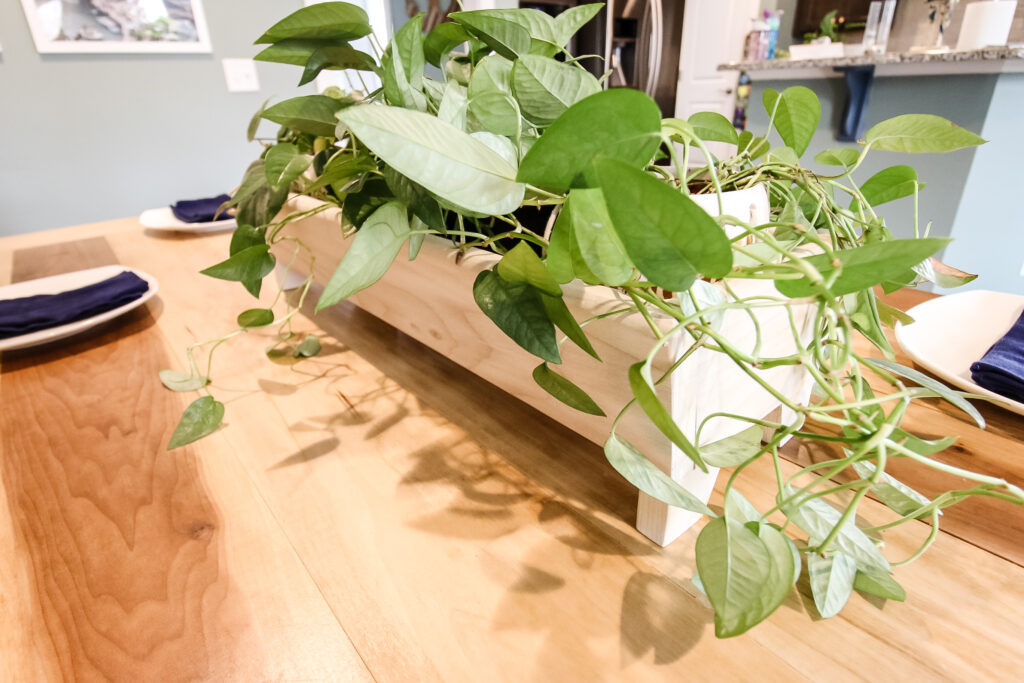
But also make sure to take a look at how it can look with plants dripping over the sides. This is a great option for the rest of the year and you can do any plant in here you want.
This DIY elevated planter would also work on the back of a couch table or entryway if you don't have a rectangular dining table.
DIY tabletop planter centerpiece woodworking plans
If you loved this project and want to get the full dimensions and detailed steps to make our DIY wood centerpiece, make sure you download the FREE printable PDF plans!
Thanks to our friends at Kreg, we are bringing these plans to you for free over on their Projects and Plans page. We have lots of other plans there too, so search around.
The plans have a full material list, cut list and step-by-step instructions with computer imagery to make this and easy DIY project for your weekend!
Interested in the Kreg Jig? Click here to read our full Kreg Jig review and to see all of our Kreg Jig projects.
New to the Kreg Jig? Here is a step by step guide on how to use a Kreg Jig!
OR grab our FREE Kreg Jig Cheat Sheet here! Download the cheat sheet!

Looking for something?
We've been doing this since 2012 so we have a LOT of blog posts!
Search stuff like: Ceiling Projects | DIY Plant Stands | Thrift Flips

Hey there, I'm Sean, the woodworking enthusiast and builder behind CharlestonCrafted.com! Since 2012, I've been sharing the magic of turning raw materials into beautiful creations. I love teaching others the art and satisfaction of woodworking and DIY. I try to inspire fellow crafters to make something extraordinary out of nothing at all.


