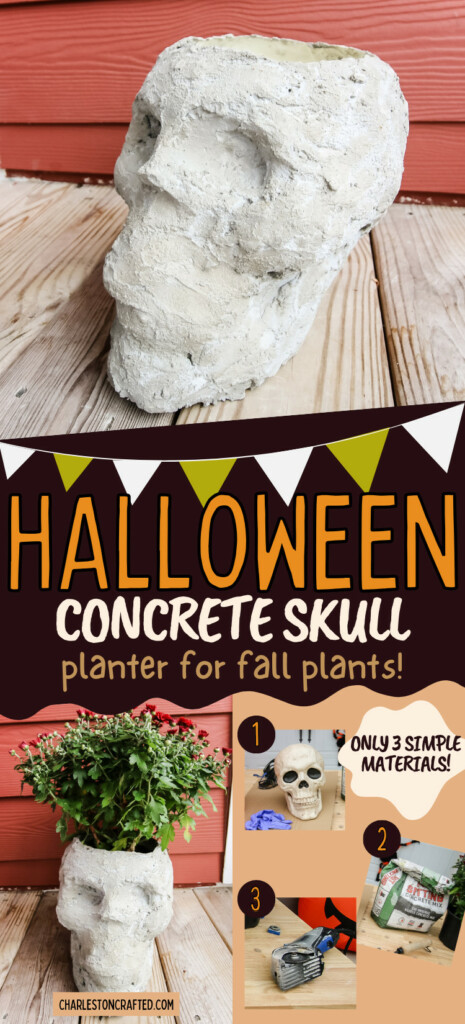
Even plant lovers enjoy spooky season! Mix your hobbies and make a DIY concrete skull planter to show off your fall flowers while spooking guests!
If you're a plant lover that also loves Halloween crafts, this is the perfect project for you!
We made a simple DIY skull planter with concrete to hold a mum we grabbed from Home Depot and it looks so perfect this time of year!

Halloween spooky season is a great excuse to work in pumpkins and skeletons wherever you can, so making a planter that looks like a skull is a really cool way to display your plants!
This DIY concrete skull planter is a really fun and easy Halloween project that doesn't take long and can be used in a number of different ways.
Let's dive into how we made it and talk about what you need!
DIY skull planter
There's all sorts of skull cement planters available to purchase, but you can have the satisfaction of making your own for cheaper by just using a couple of materials.
This way, you can also decide exactly what size you want for the plant you want to use, so it's a very customizable project.
How do you make a skull planter
Making a DIY skull planter out of concrete is a really easy project. The basics are that you buy a plastic Halloween skull, cut a hole in the top for your plant, coat the entire skull in concrete and let it dry.
But, the good news for you is that we've done this project twice now, so there are some simple tips and tricks we learned the hard way that we can tell you about right now.
Let's dive into what you need and how to make the concrete head planter.
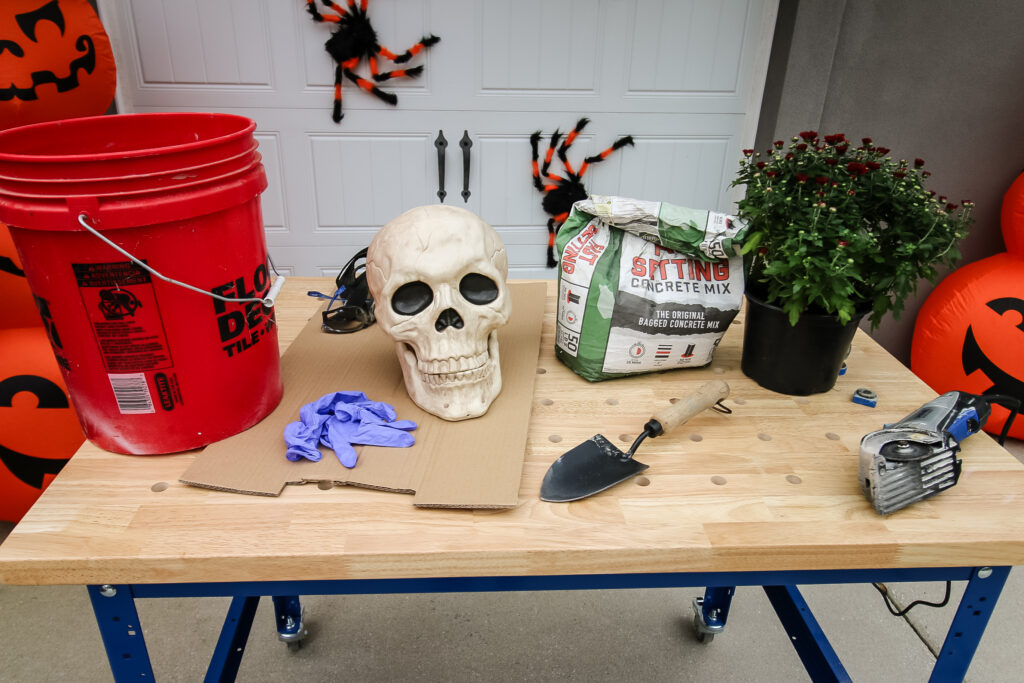
Materials needed to make a concrete skull planter
Here are all the materials you need to make a DIY concrete skull planter:
- Plastic Halloween skull
- Concrete mix
- Sifter
- Saw
- Plant
What is the best concrete mix for DIY planters?
The best concrete mix for making the DIY concrete skull planter is one that sets quickly but is smooth.
You can buy concrete mix in different consistencies, some with more rocks and some with less. The more rocks help make it set fast and strong, which is why it's usually used for setting fence posts.
However, you don't want a bunch of rocks in your mix for this planter. Trust me, that's what we did the first time and it just didn't look right at first.
You can spend extra money to buy a smoother grade concrete mix, or use a small sifter to sift out rocks from a cheap bag of quick setting concrete mix.
Our favorite Halloween projects
Here are some of our favorite Halloween DIYs from the past!
Indoor Halloween Decor
- How to put up fake spiderwebs the right way
- Spider staircase
- DIY halloween village display
- Embroidery hoop Halloween wreath
- Spiderweb Halloween mantel
Outdoor Halloween Decor
- DIY concrete pumpkins
- How to pose skeletons in your yard
- DIY plastic pumpkin topiaries
- How to make a light up pumpkin arch
- Skeleton beach day yard display
- Skeleton pirate yard display
- Skeletons being chased by dogs yard display
Step one: cut plastic skull
Start by deciding where you need to cut the top of the plastic skull. This is where the plant is going to go in.
Easiest way to do this is to pull your plant out of the container it comes in and flip that container upside down. Trace that line around the top of the skull.
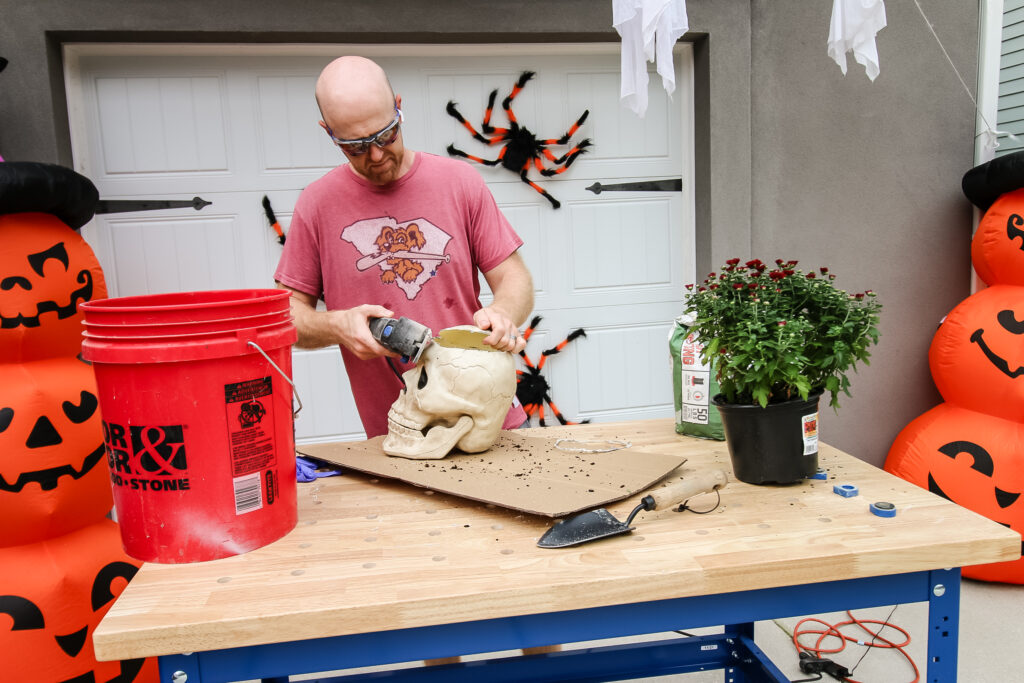
Next, grab a saw and cut out that hole. You can use a number of different saw types depending on what you have. We used a quick Dremel SawMax, but you can use a jab saw or hack saw as well.
Once you've cut off the top, test that the plant fits, then lightly sand the edges of the cut.
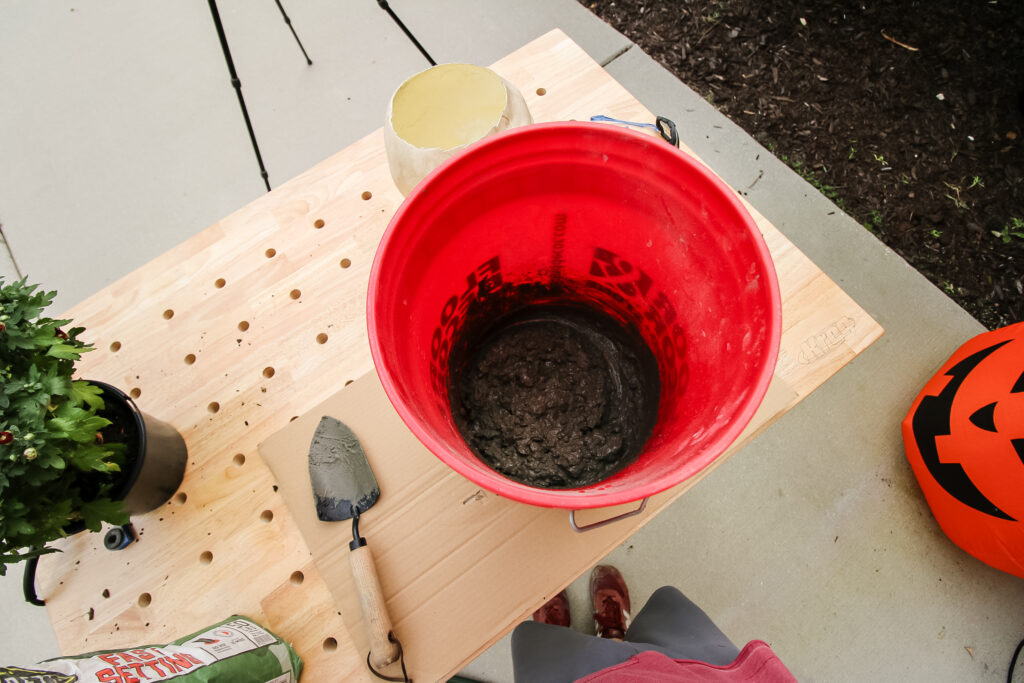
Step two: mix concrete
Now, mix the concrete. You don't need a ton here, but make sure you have enough.
Again, use a smooth consistency of concrete without rocks. It's important to use no rocks. Here's a look at our first attempt where we didn't sift out the rocks.
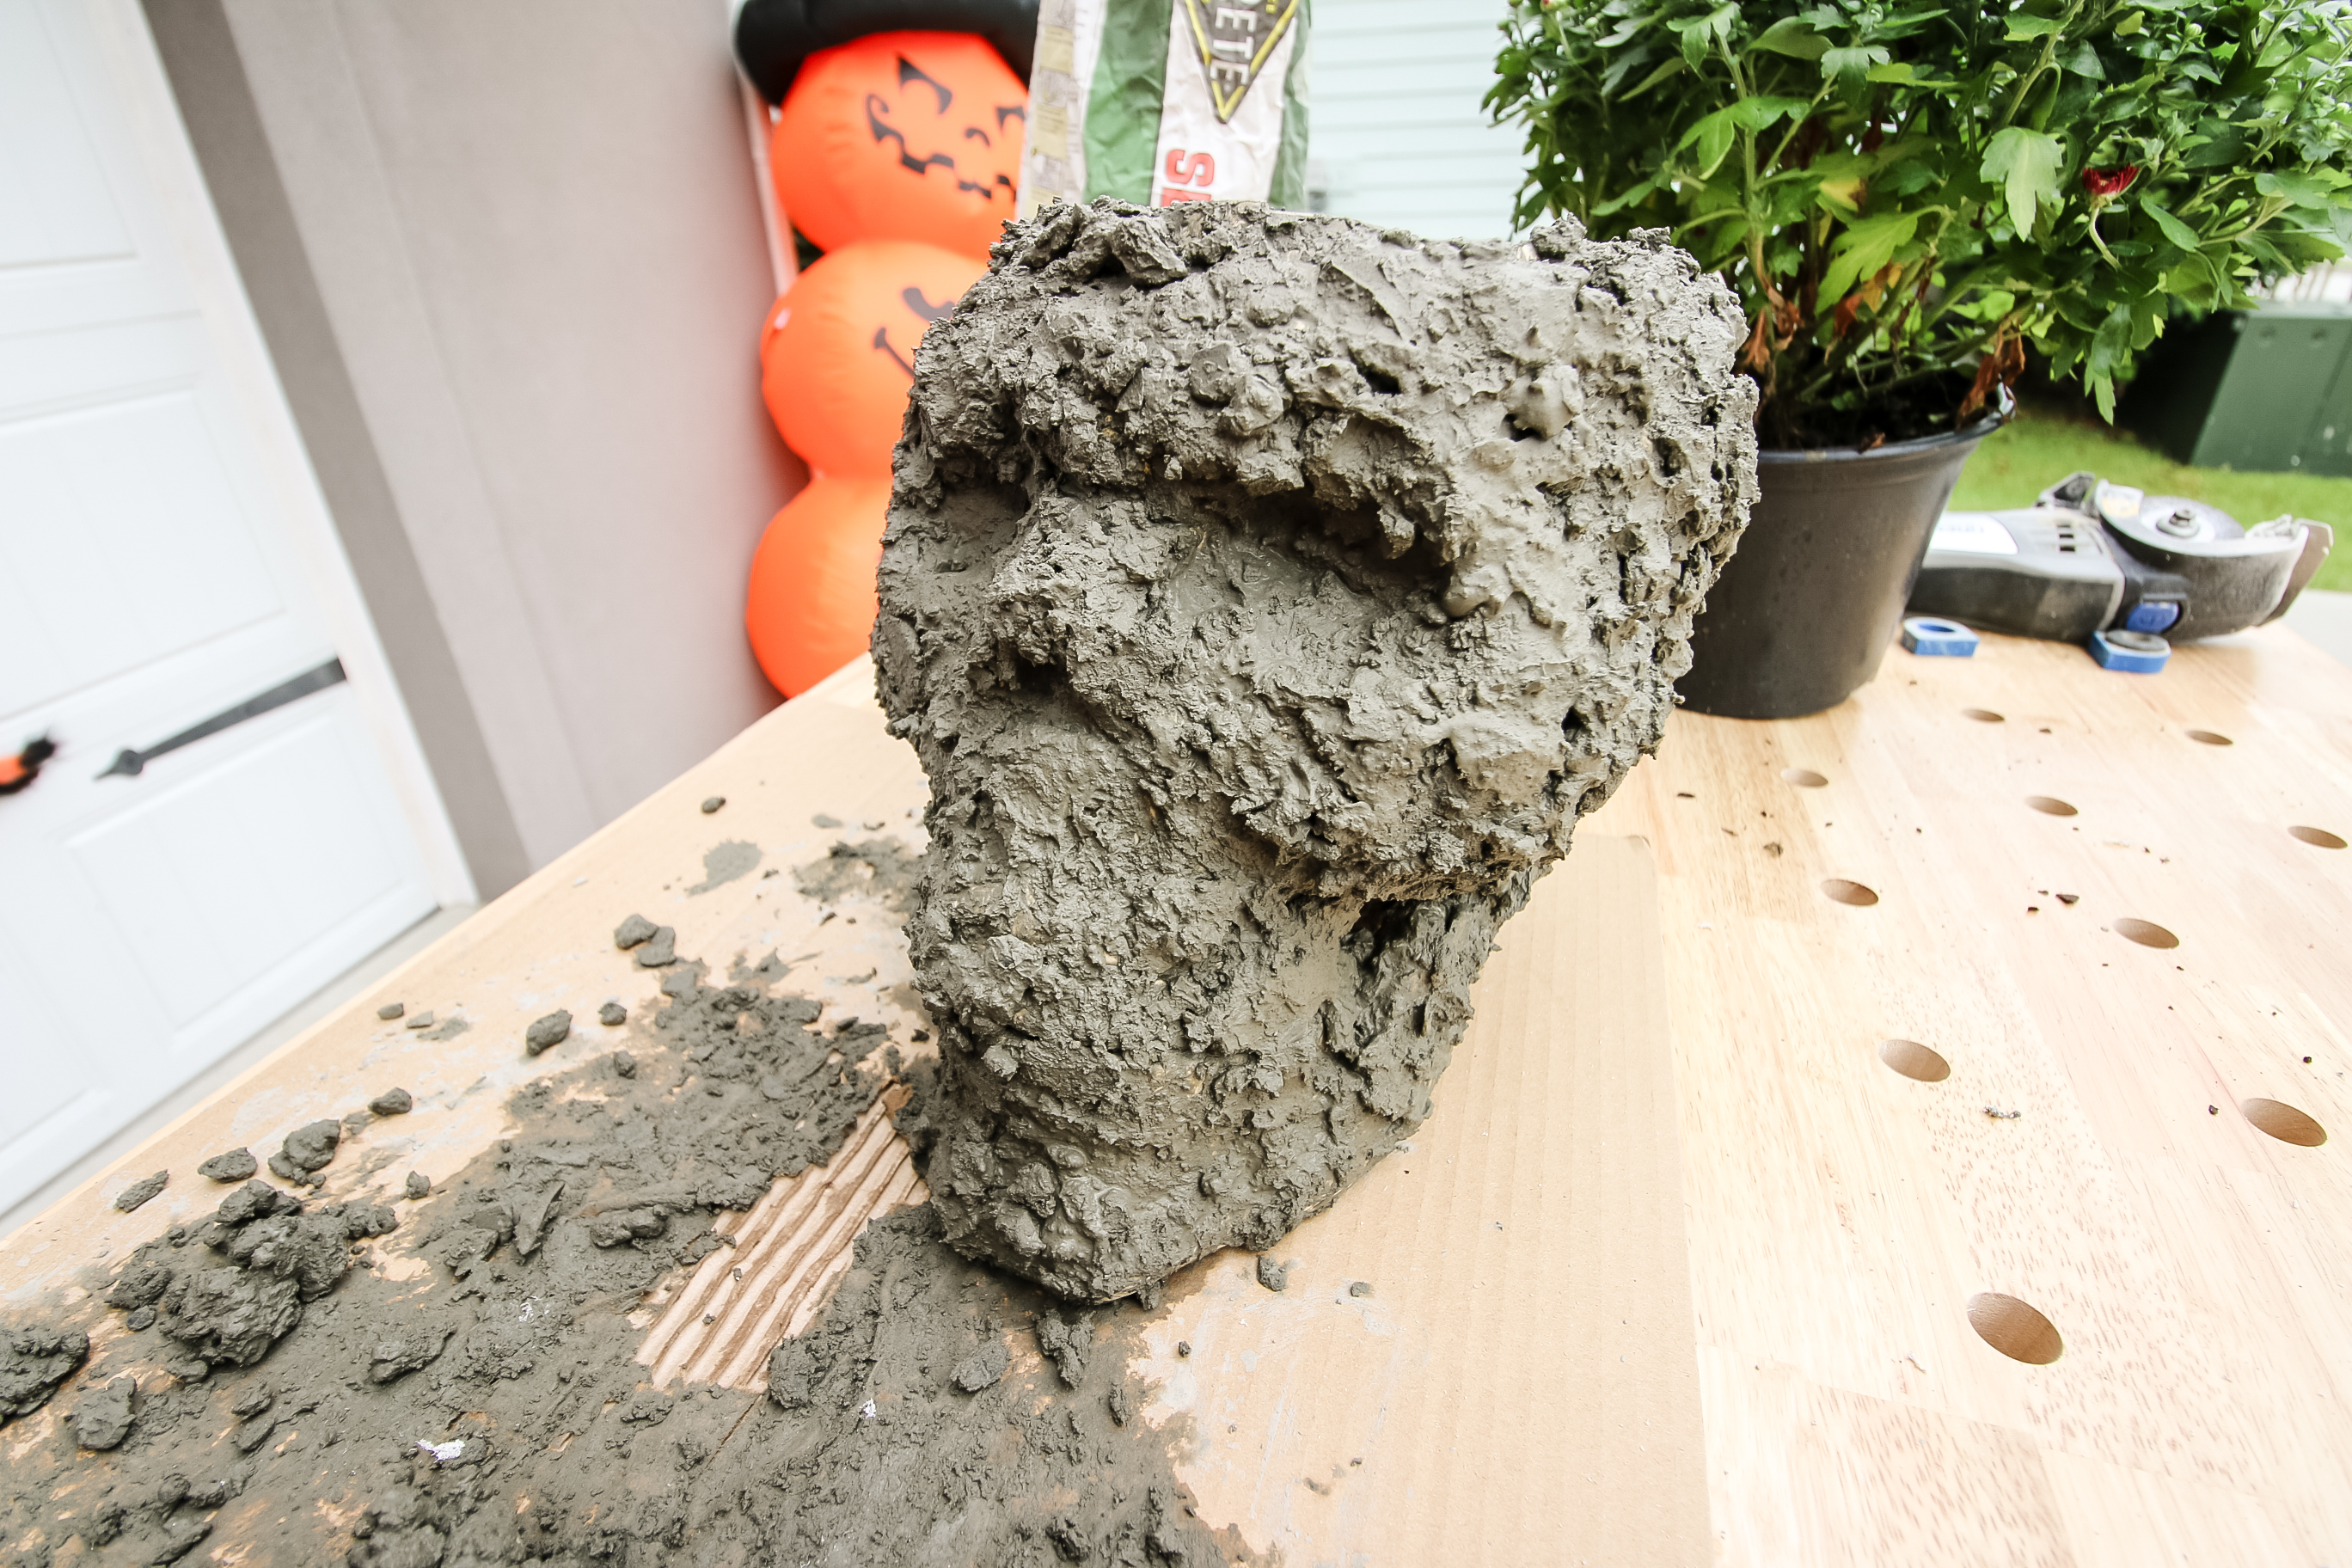
See? It doesn't look right being so bumpy. It was also really difficult to put the concrete on smoothly because of the big rocks.
The rocks kept falling off and made it difficult to get into the little grooves.
Mix your cement mix with water and get it to the consistency of runny peanut butter. You want it to be really smooth so it's easier to spread over the skull.
Step three: coat skull in concrete
Now it's time to spread the concrete. Make sure you're wearing some rubber gloves so you can really get your hands into all the cracks and spaces.
Grab handfuls of the concrete mix and spread it over the entire surface of the skull making sure you have full coverage.
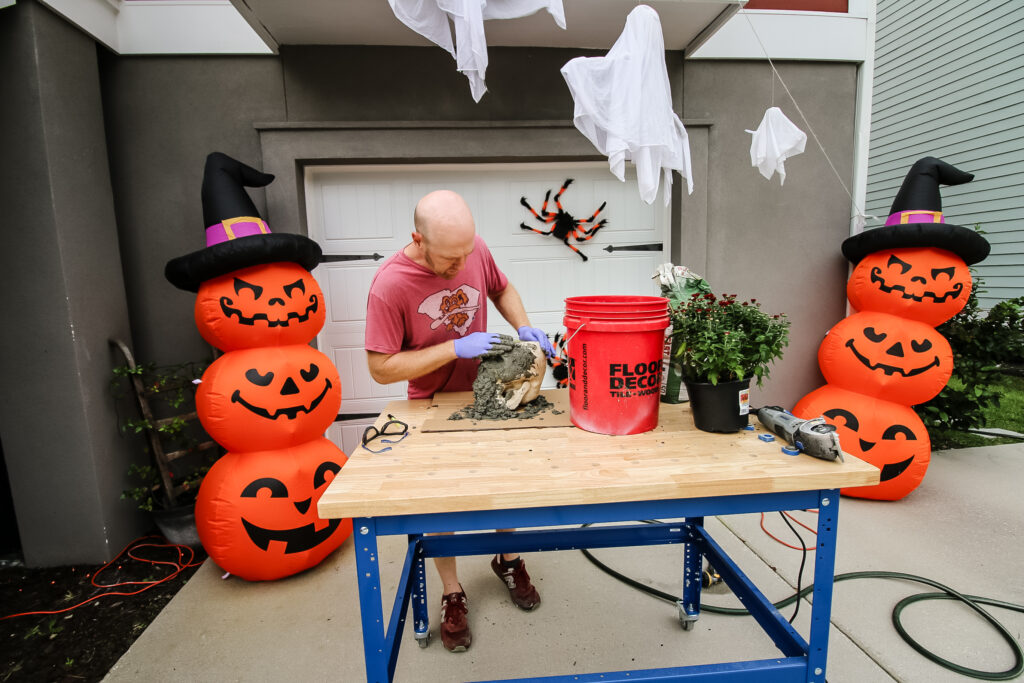
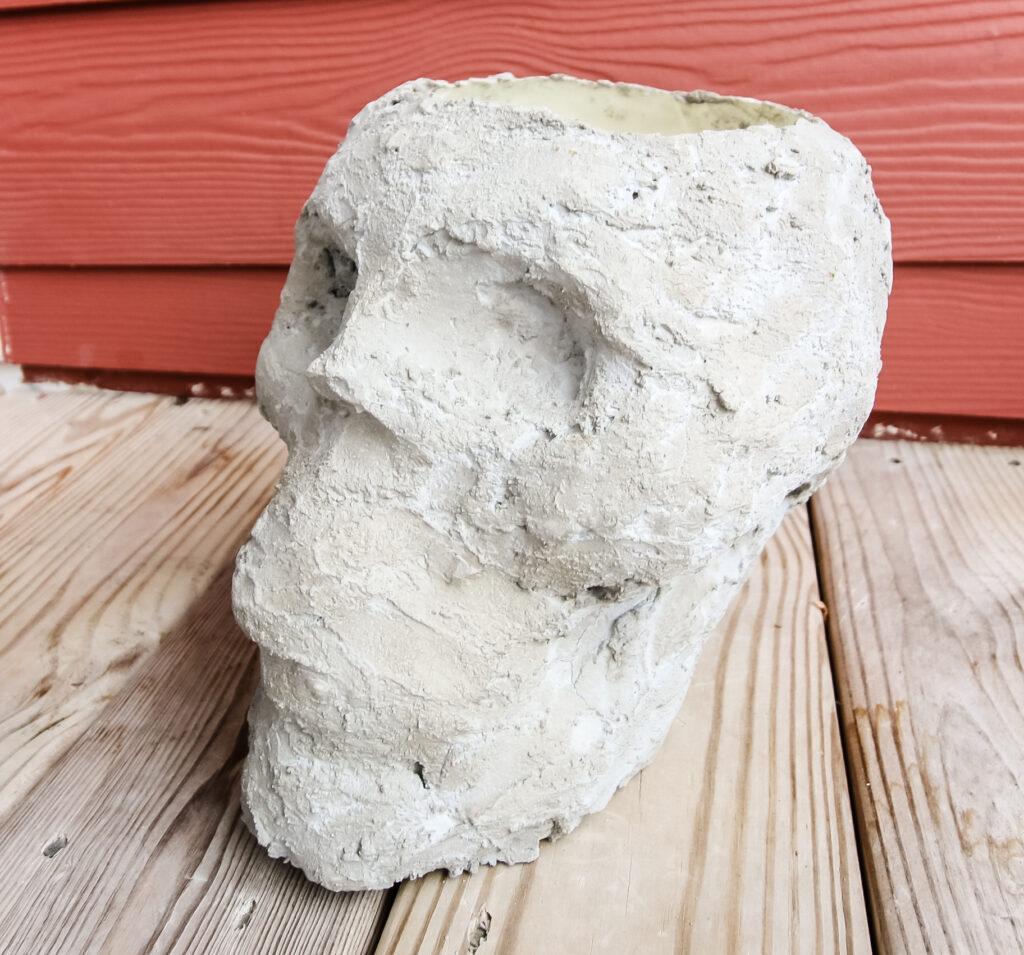
After you've got all the surface covered, use your thumbs to smooth it out as best you can and make sure that you still leave the distinguishing features, like the eye sockets, nose socket and mouth, easy to see.
Let the skull fully cure for 24 hours until it's completely dry before you try to move it or put your plant in.
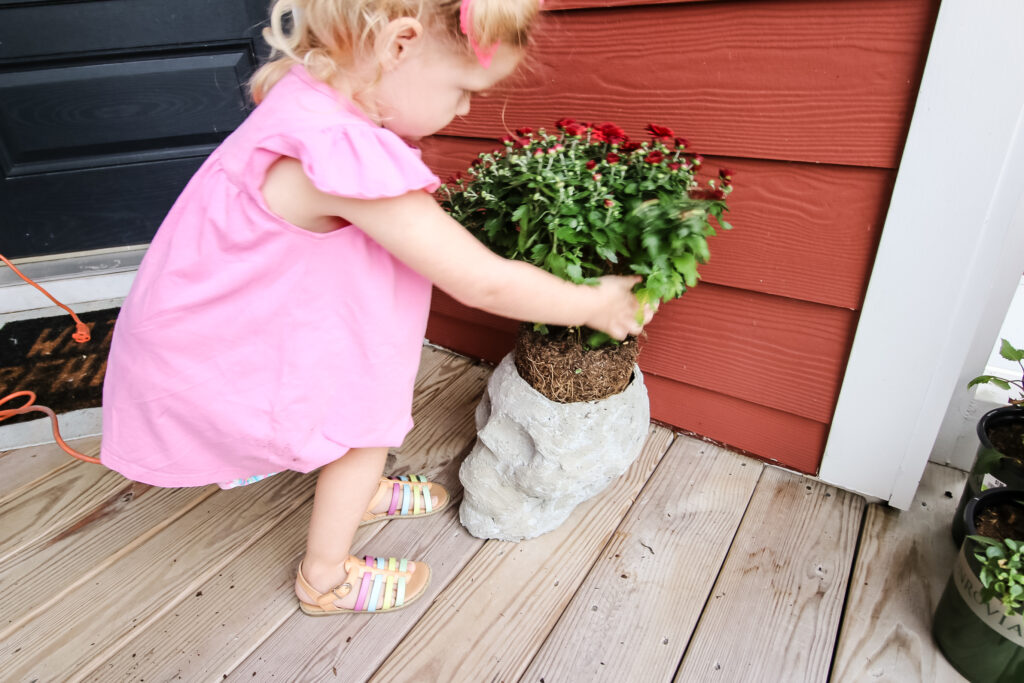
Step four: add plants
After it's dry, you might want to run a rough piece of sand paper over the entire skull to smooth down some of the sharp areas.
It's also good to drill a drainage hole into the bottom to allow for water to escape.
Move your skull planter into place and add some dirt to the bottom before dropping your plant into place.
Since the planter is made of plastic and concrete, it won't have any problems with you watering it!
DIY cement skull planter
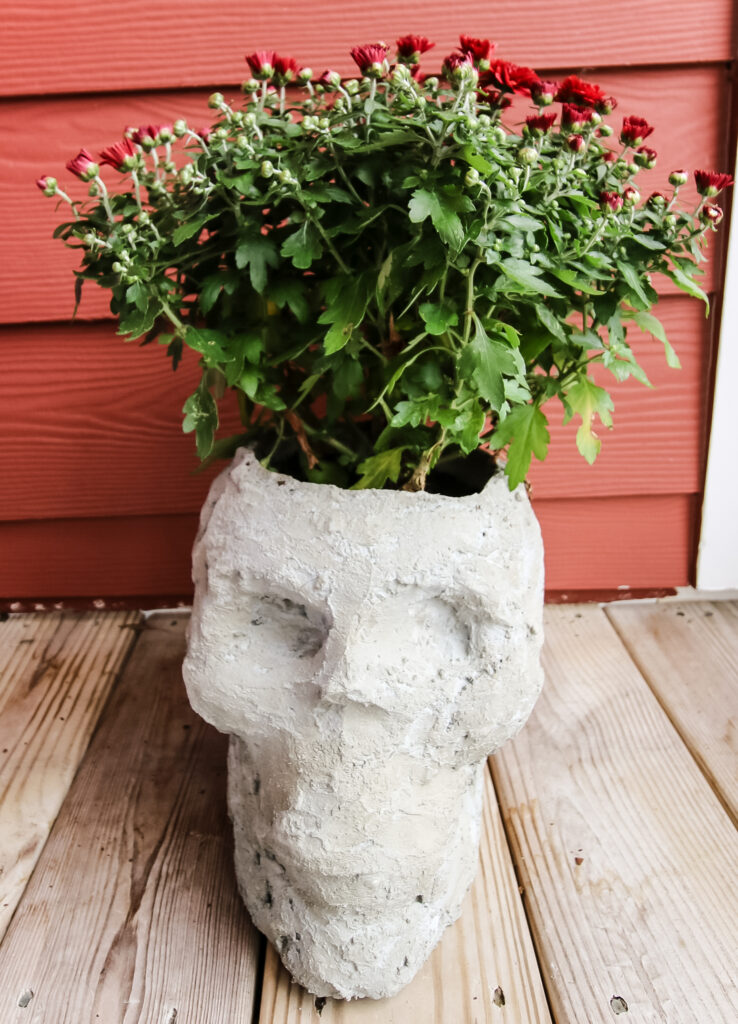
This DIY concrete skull planter is so fun and spooky! It really adds to the ambience of the Halloween season!

This skull planter would look great on your front porch and is a great addition next to the candy bowl to spook your trick or treaters!
A concrete skull planter is a really fun and easy Halloween craft idea so we hope you'll make one too!
Before you go...
This is just one project you can do with concrete. It's a really inexpensive and versatile material. Check out some of our other DIY concrete projects that you can do with the leftovers!
- How to make a concrete and plywood desk
- How to make concrete pumpkins
- How to make a concrete terrazzo side table

Looking for something?
We've been doing this since 2012 so we have a LOT of blog posts!
Search stuff like: Ceiling Projects | DIY Plant Stands | Thrift Flips

Hey there, I'm Sean, the woodworking enthusiast and builder behind CharlestonCrafted.com! Since 2012, I've been sharing the magic of turning raw materials into beautiful creations. I love teaching others the art and satisfaction of woodworking and DIY. I try to inspire fellow crafters to make something extraordinary out of nothing at all.