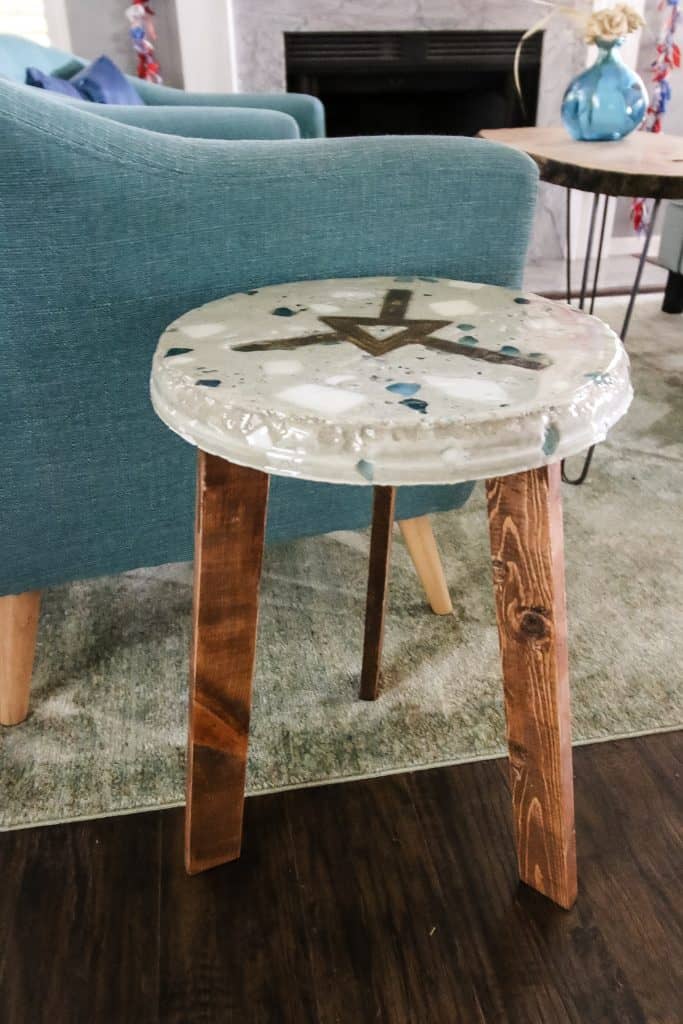
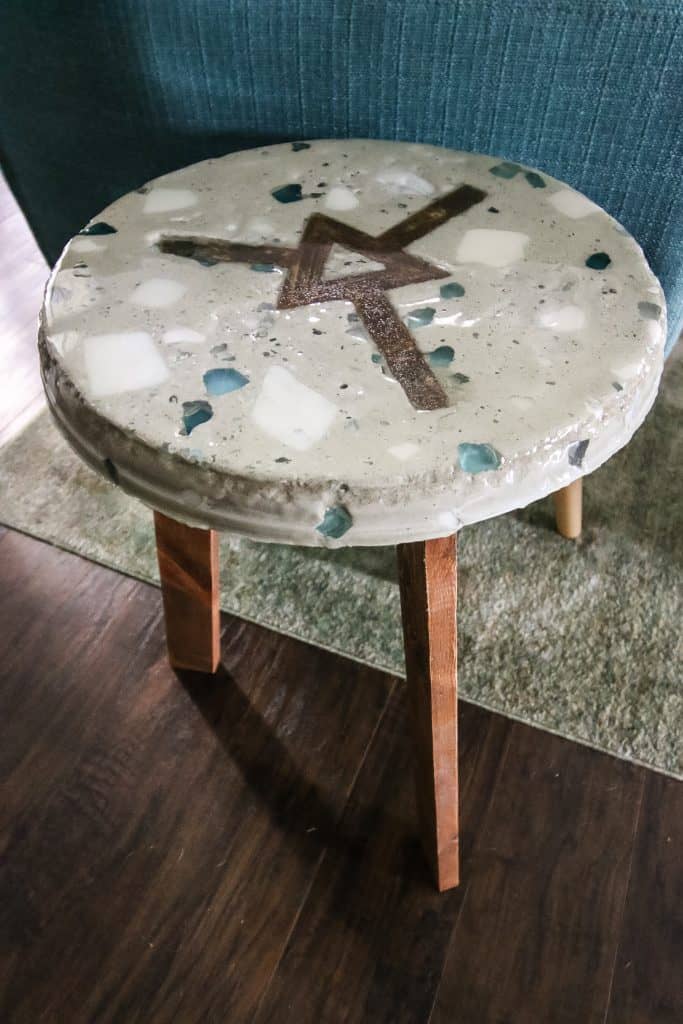
We recently experimented with three new techniques to create a terrazzo side table. We were entering a contest with QUIKRETE to create something unique and decided to go all out. In the end, we love how this terrazzo side table turned out! It's very reminiscent of our kitchen countertop, so the vibe really works.
DIY Terrazzo Table
The three unique elements to our entry for this contest were a DIY terrazzo top, having the wooden base show through the terrazzo top, and an epoxy finish.
What is terrazzo?
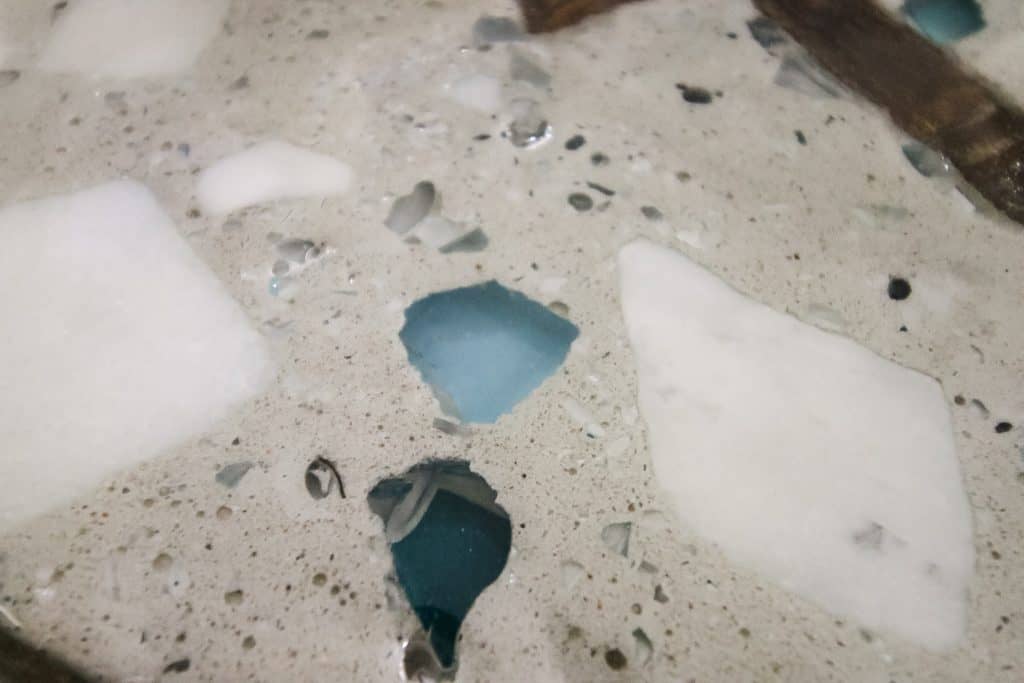
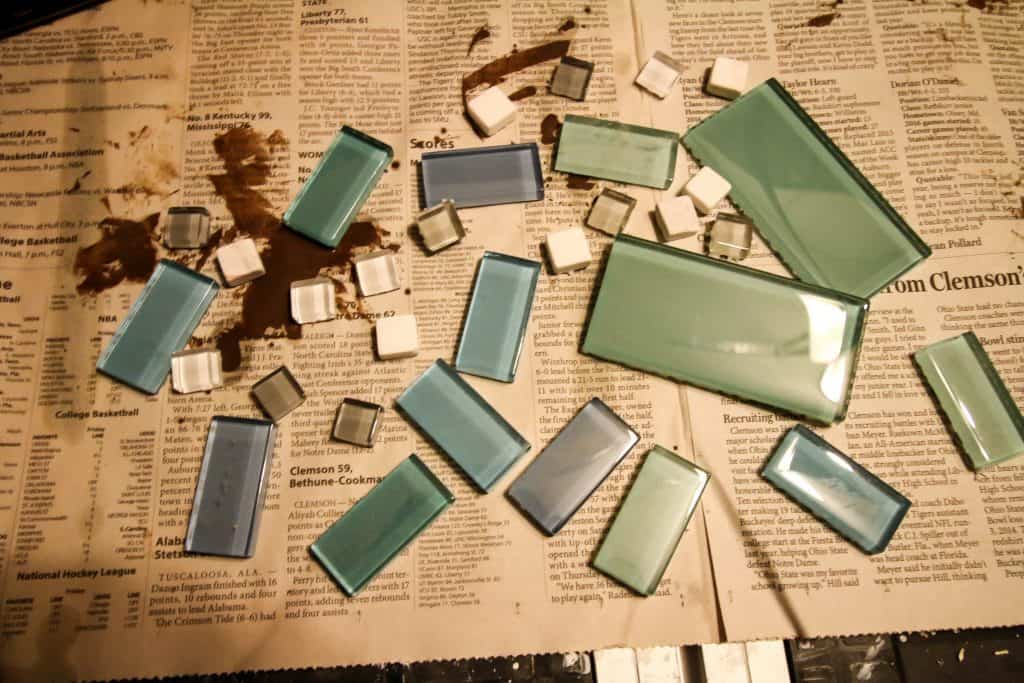
Terrazzo is typically a composite material that has pieces of glass, stone or tile showing through it. We used QUIKRETE countertop mix as our binding material. To create the terrazzo effect, we broke up glass tiles and stone. Then we placed them in the bottom of a round mold.
A big tip is that you are going to want to use flat pieces of stone or glass. That's why tile was perfect for this. You can buy single tiles (or single square feet of smaller tiles) at the hardware store.
We mixed the concrete and added some teal dye to the water to give our terrazzo a slight color in the composite. Then, we poured the concrete into the mold.
Wooden Base
The second experimental technique we used in this side table was to build a unique wooden base and have it show through the terrazzo top.
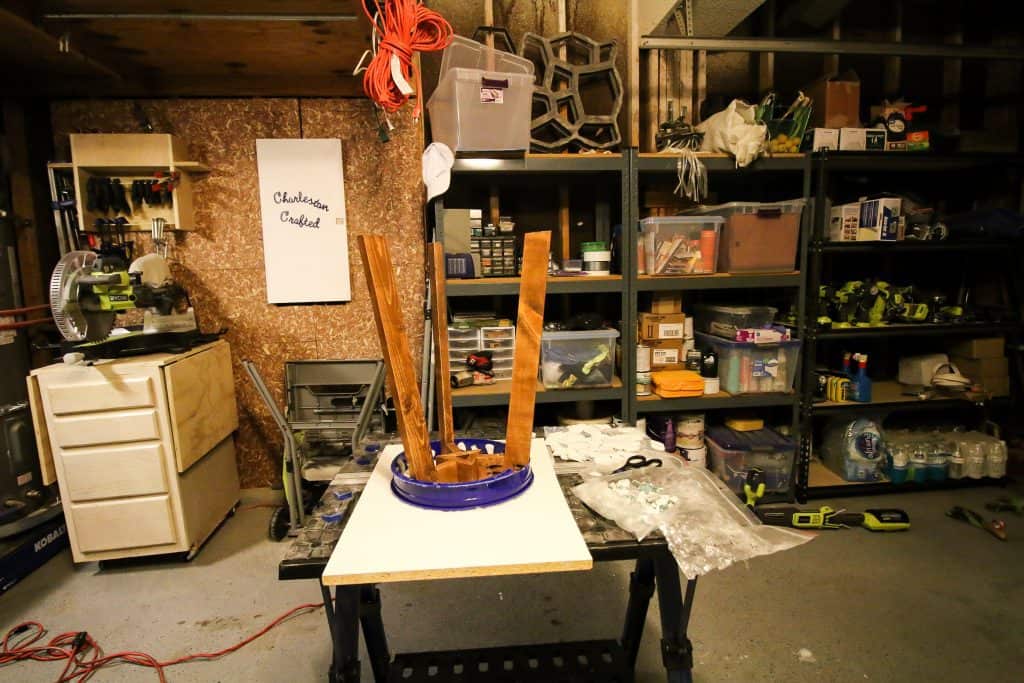
We built the base using three legs that were 28 inches long with parallel 10 degree miter cuts. Then, we created a triangle with 60 degree angles and glued them together.
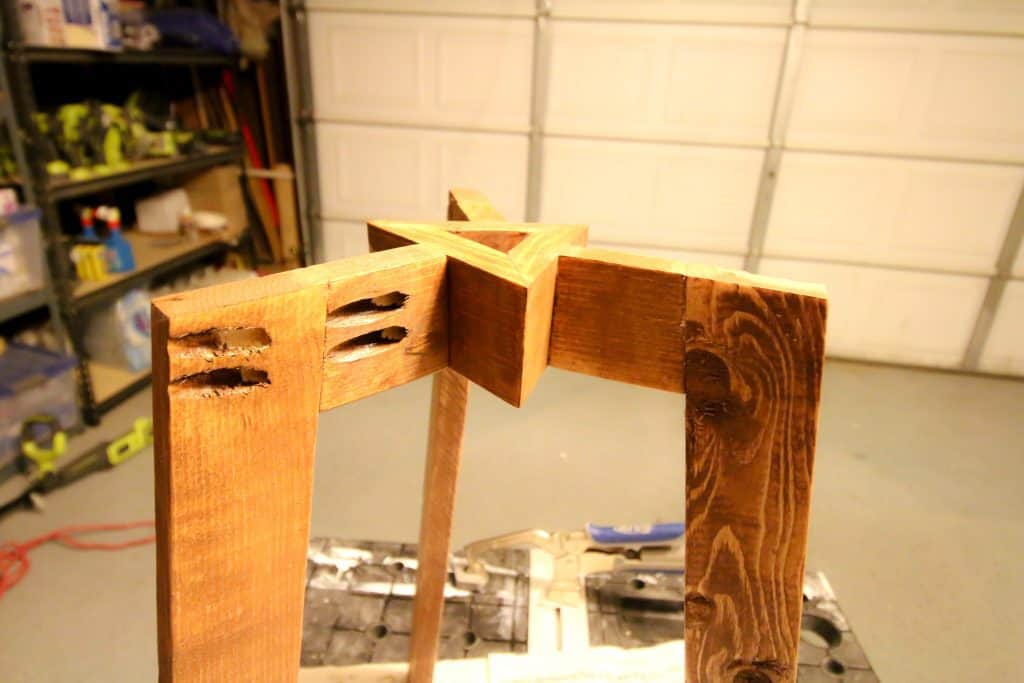
Finally, the legs were connected to the triangle using short pieces of wood and pocket holes.
We put the wooden base directly in the center of the mold and put the stones for the terrazzo around it. When we poured the concrete, we also used a piece of metal mesh in the center of the pour and around the wooden base to add stabilization.
Finishing the Top
After 24 hours, we removed the mold and flipped the piece and allowed another 24 hours for the top to fully cure. Then we sanded the concrete using 80, 120, 220 and 400 grit sandpaper to reveal all of the broken glass and stone.
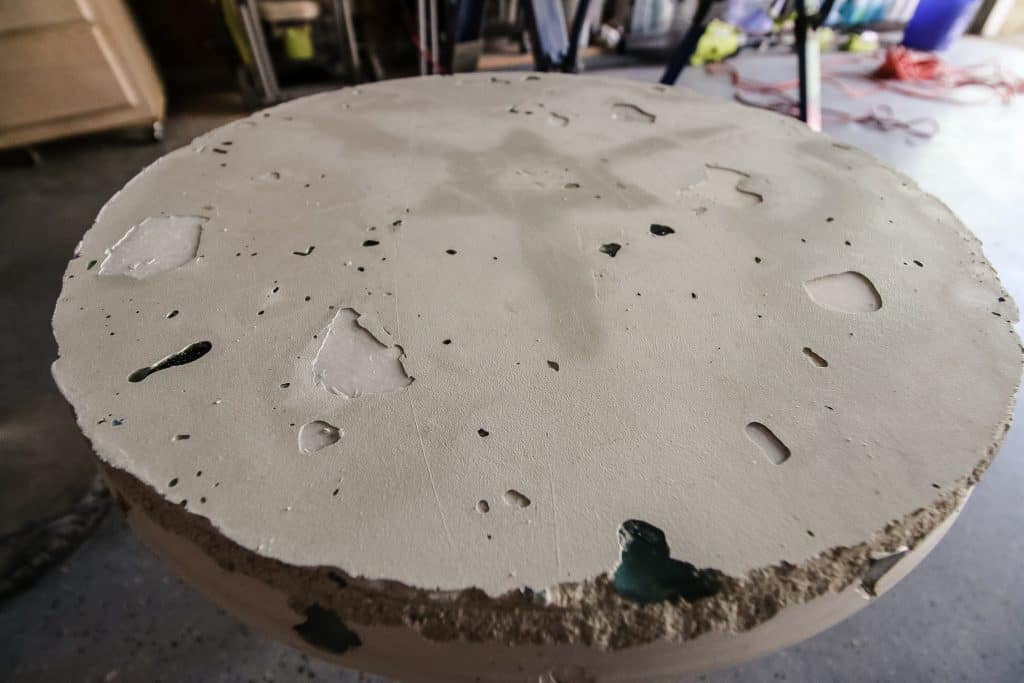
We also had to do a little chiseling to fully reveal the wooden structure through the top as it had sunk about ⅛th of an inch down.
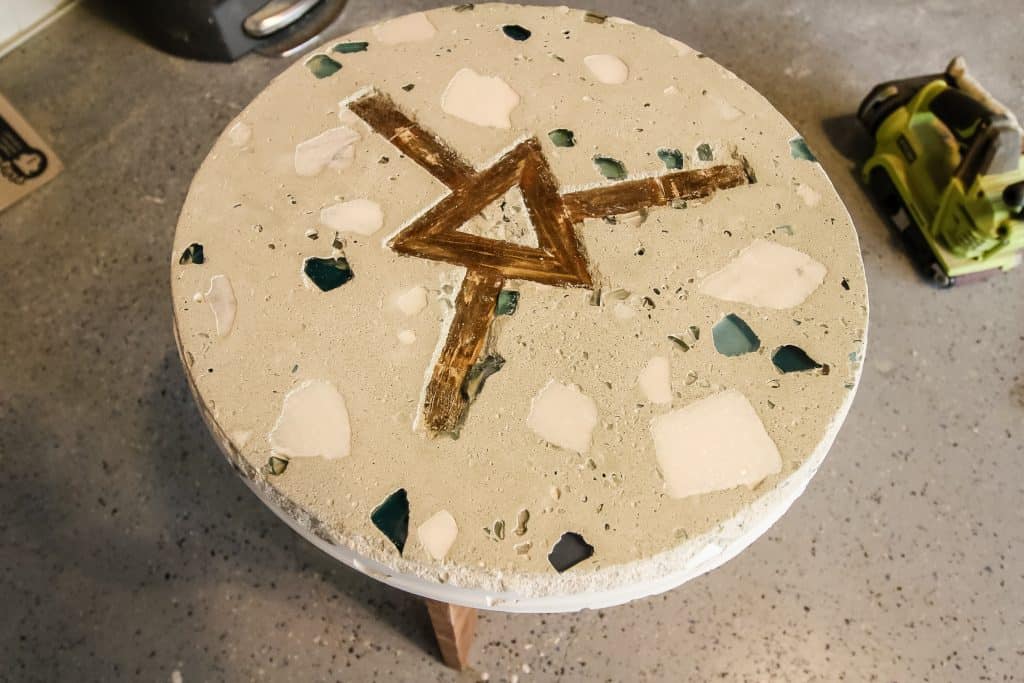
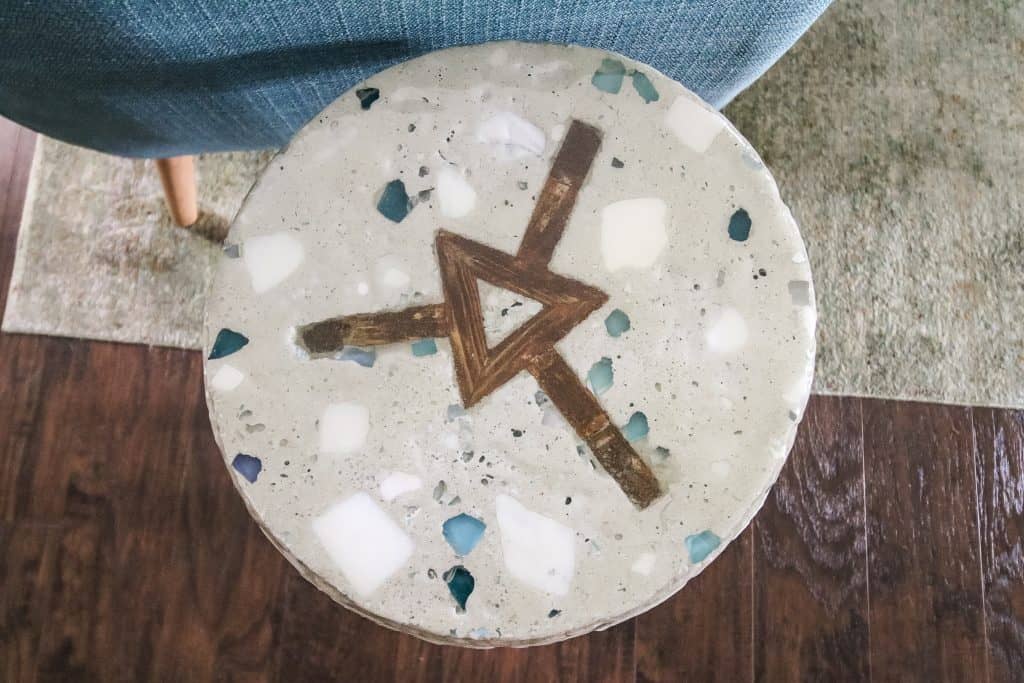
We finished the top by pouring a layer of epoxy over the whole thing. This gave it a smooth, level surface and protected and sealed the concrete. We also liked the wet, beachy look this gave to the terrazzo.

Results
We're in love with how this DIY terrazzo side table turned out. We were nervous trying three different experiments all at once, but the results were fantastic.
Love side tables? Here are all of our DIY side table projects!
- DIY side table with arches - woodworking plans
- Upcycled chair into a modern side table
- DIY concrete terrazzo side table
- Media side table with hidden storage and tile top
- DIY Mid Century Modern Side Table - woodworking plans
- Campaign side table makeover
- Side table from counter top scraps
- Our first side table makeover
- DIY River table with epoxy
- Spray paint side table makeover
- Waterfall style slim side table
Things to keep in mind when doing terrazzo:
- use lots of broken pieces to take up lots of space
- use different grit sandpaper to make it smooth
- use mesh or wire in the middle to make it stable

Interested in the Kreg Jig? Click here to read our full Kreg Jig review and to see all of our Kreg Jig projects.
New to the Kreg Jig? Here is a step by step guide on how to use a Kreg Jig!
OR grab our FREE Kreg Jig Cheat Sheet here! Download the cheat sheet!

How to make a terrazzo side table
Terrazzo is a beautiful material. Here's how to make your own terrazzo side table with an inlaid base and an epoxy coating.
Materials
- 1x3" lumber
- Wood glue
- Wood stain
- Melamine board
- Bucket for mold
- Quikrete countertop mix
- Glass tile
- Stone tile
Tools
- Miter saw
- Kreg Jig
- Drill
- Sander
- Hammer
Instructions
To make the base:
- Cut wood legs to be 28" long with 10 degree miter cuts.
- Create a wooden triangle with 60 degree angles and glue together.
- Stain base and allow to dry
To make the mold:
- Create a circular form using a bucket and hot glue onto melamine.
- Place broken pieces of glass, tile and stone in the bottom of the mold. Hot glue small pieces to the side of the mold as well to get on the side of the table top.
- You can either place your wooden base into the mold to have the concrete form around it, or you can attach the top to the base later.
To make the table top:
- Mix your concrete until it is the consistency of wet peanut butter. Add colored dye if you'd like.
- Pour into your mold and push into corners and crevices to eliminate air bubbles.
- About halfway through, add a piece of metal mesh cut to your form, then add more concrete on top.
- Let dry for 24 hours and remove the mold. Flip the table top and let dry another 24 hours.
- Sand the concrete to reveal the broken glass. Use higher and higher grit sandpaper to make it smooth.
- Add an epoxy coating on top or leave as is.
Recommended Products
As an Amazon Associate and member of other affiliate programs, I earn from qualifying purchases.


Looking for something?
We've been doing this since 2012 so we have a LOT of blog posts!
Search stuff like: Ceiling Projects | DIY Plant Stands | Thrift Flips

Hey there, I'm Sean, the woodworking enthusiast and builder behind CharlestonCrafted.com! Since 2012, I've been sharing the magic of turning raw materials into beautiful creations. I love teaching others the art and satisfaction of woodworking and DIY. I try to inspire fellow crafters to make something extraordinary out of nothing at all.


