Want to make a simple, recycled ornament? I made these starburst ornaments for free! Here's how to make toilet paper roll starburst ornaments!
I have been enjoying crafting up some new holiday ornaments this year. But, even simple ornaments can be pricey to make.
These ornaments are made using toilet paper roll tubes - which, if you have an easy way to collect them - are absolutely free.
They use paint, glue, and twine, all things many crafters have on hand. Add scissors and a paint brush and you are good to go!
So, these are an easy ornament that you can probably make for completely free. They are easy to make in bulk and easy enough that older kids could make them, too!
Here's how I made these DIY starburst ornaments from toilet paper rolls!
How to make toilet paper roll starburst ornaments
Supplies needed:
- 1 toilet paper roll tube (1 per ornament)
- Scissors
- Ruler
- Pen
- Craft paint
- Paint brush
- Craft glue
- String or twine for hanger
Steps to make:
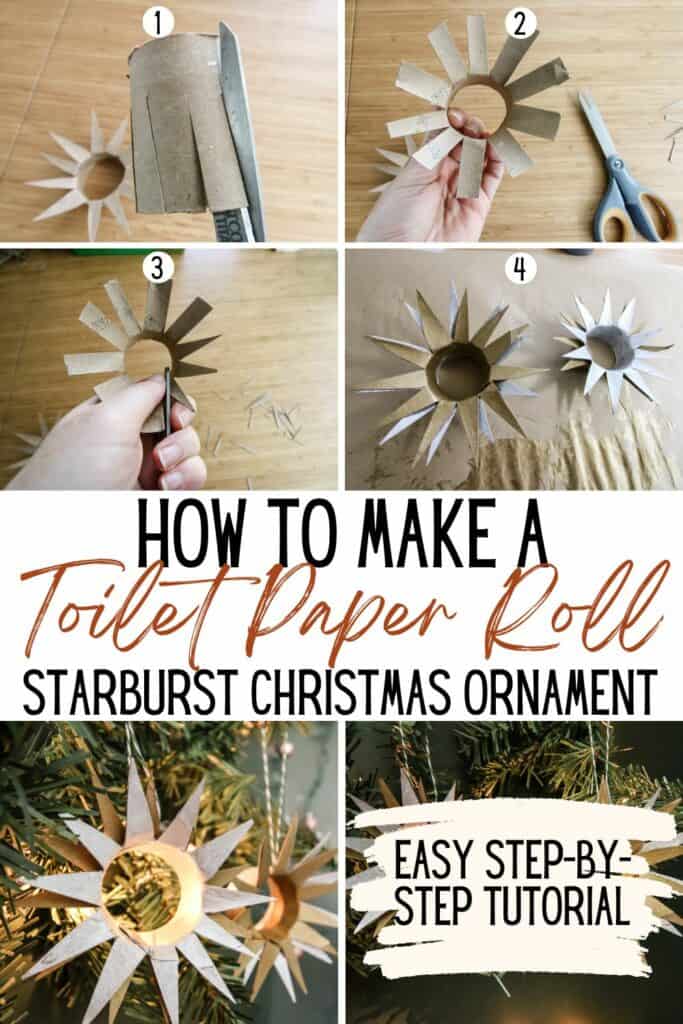
STEP 1: cut the toilet paper roll in half
Cut each toilet paper roll in half to have two equal sized rings.
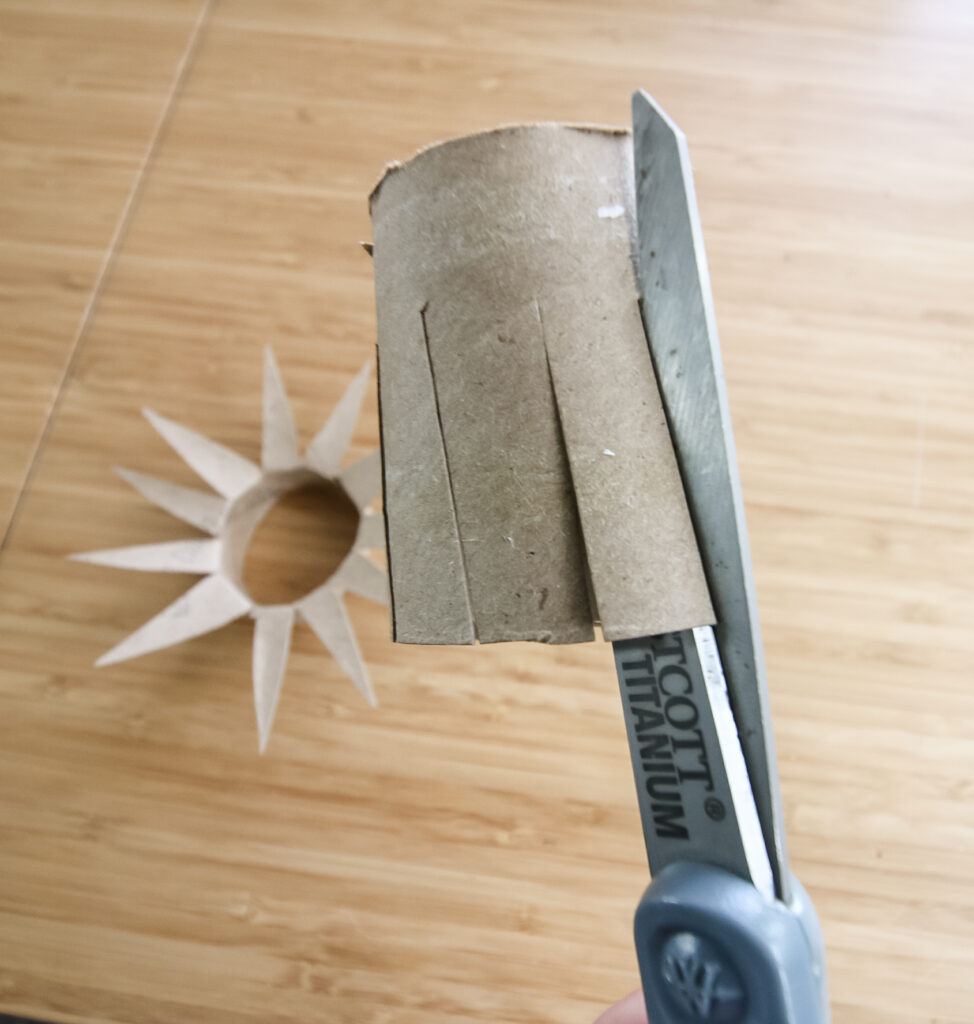
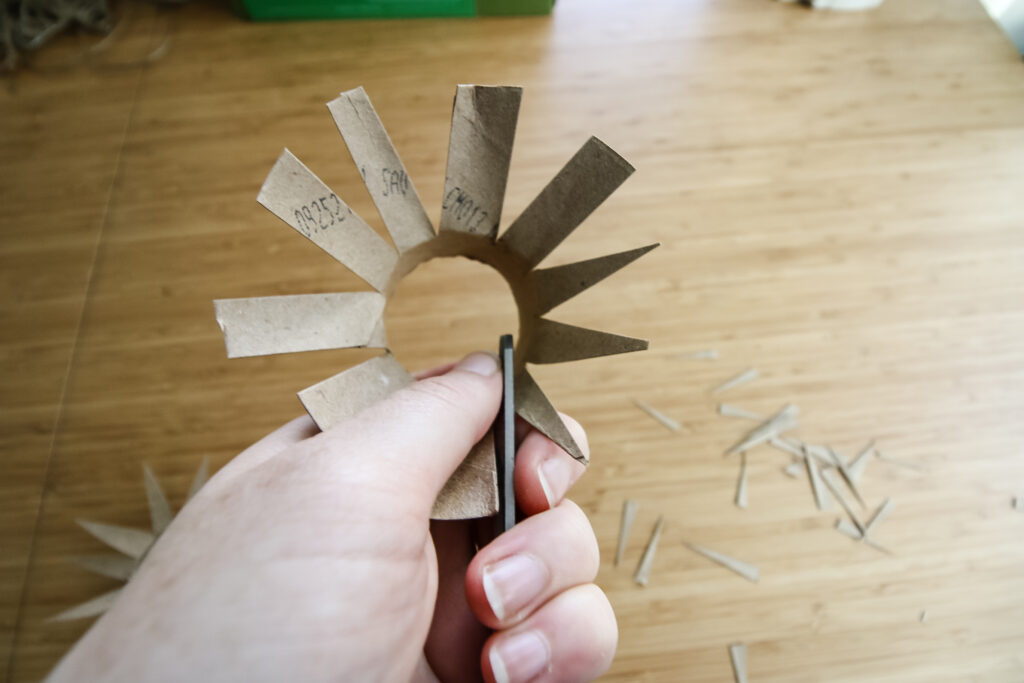
STEP 2: cut slits
Measure ½ inch up from one flat side of each half-roll and mark with a pen.
Cut slits around the whole roll up to the ½" mark - you should have long slits and a short ½" ring with no slits at the end. Cut slits approximately ½" apart.
STEP 3: shape the slits
Fold the slits out to sit horizontally. Use scissors to cut each piece to a pointed shape.
You can leave them flat for more of a floral look, but a pointed end gives them more of a star burst vibe.
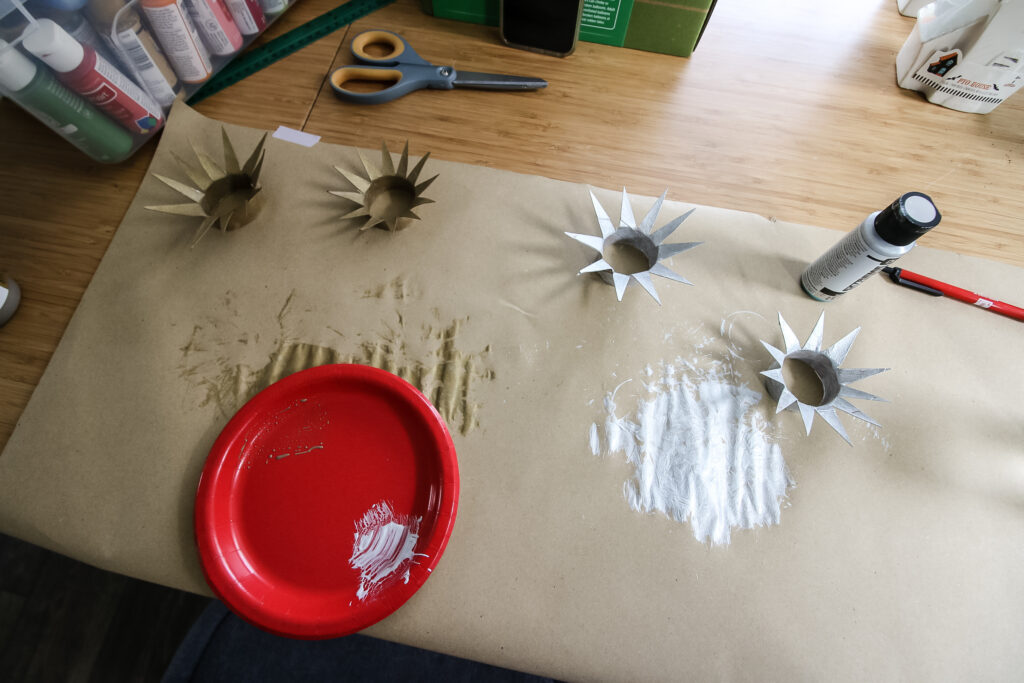
STEP 4: paint
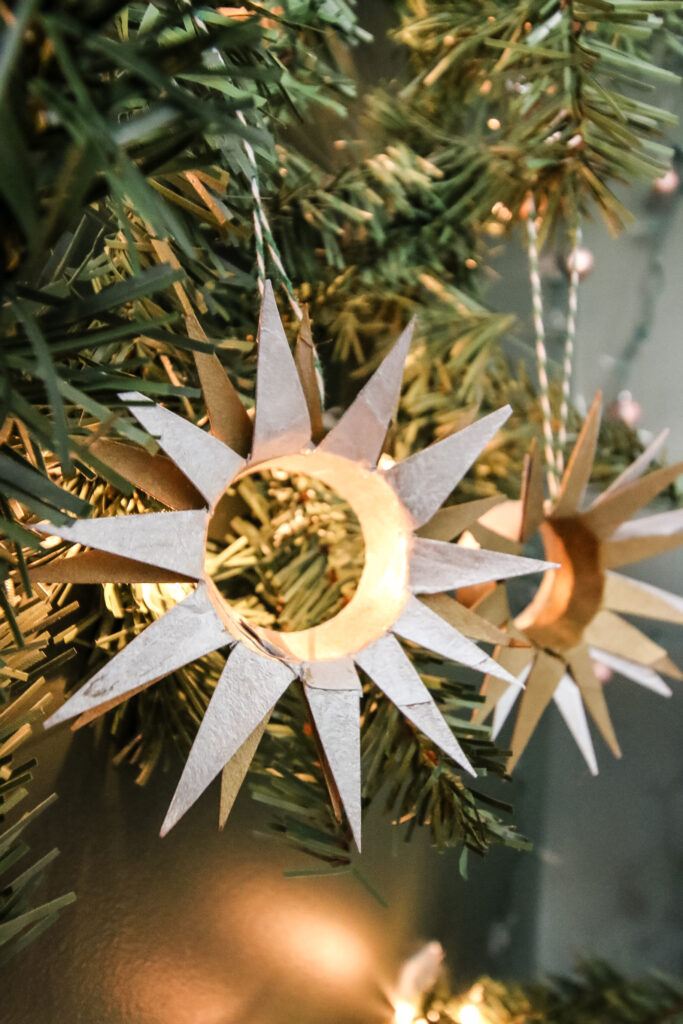
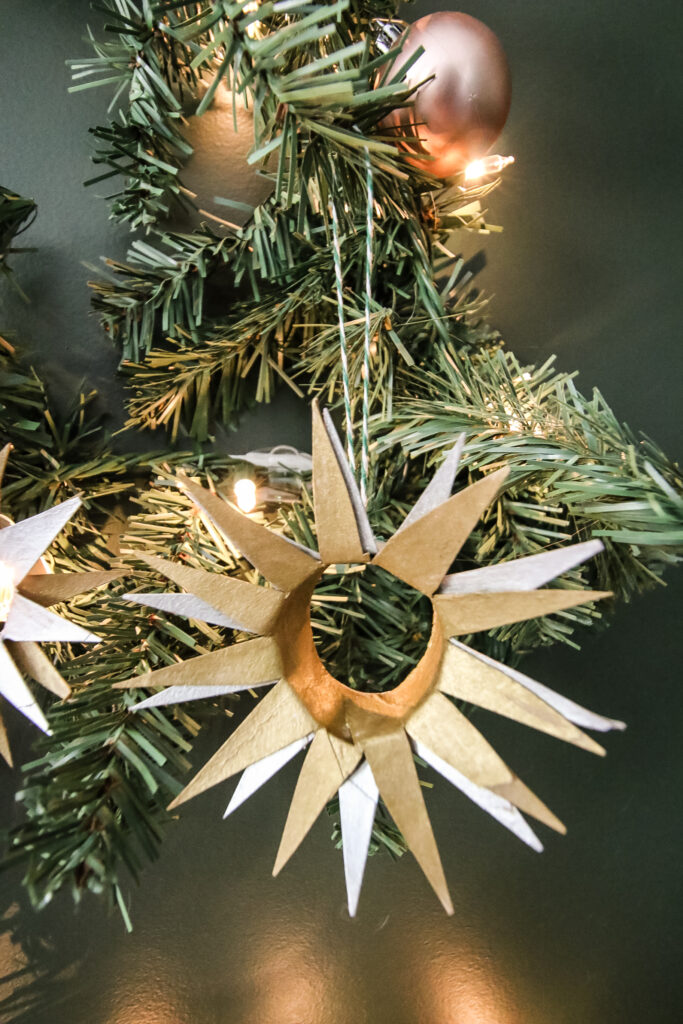
Paint as desired. Cover front back and inside. I chose to do one half silver and one half gold. You can use any color, two toned or monotone.
Let dry.
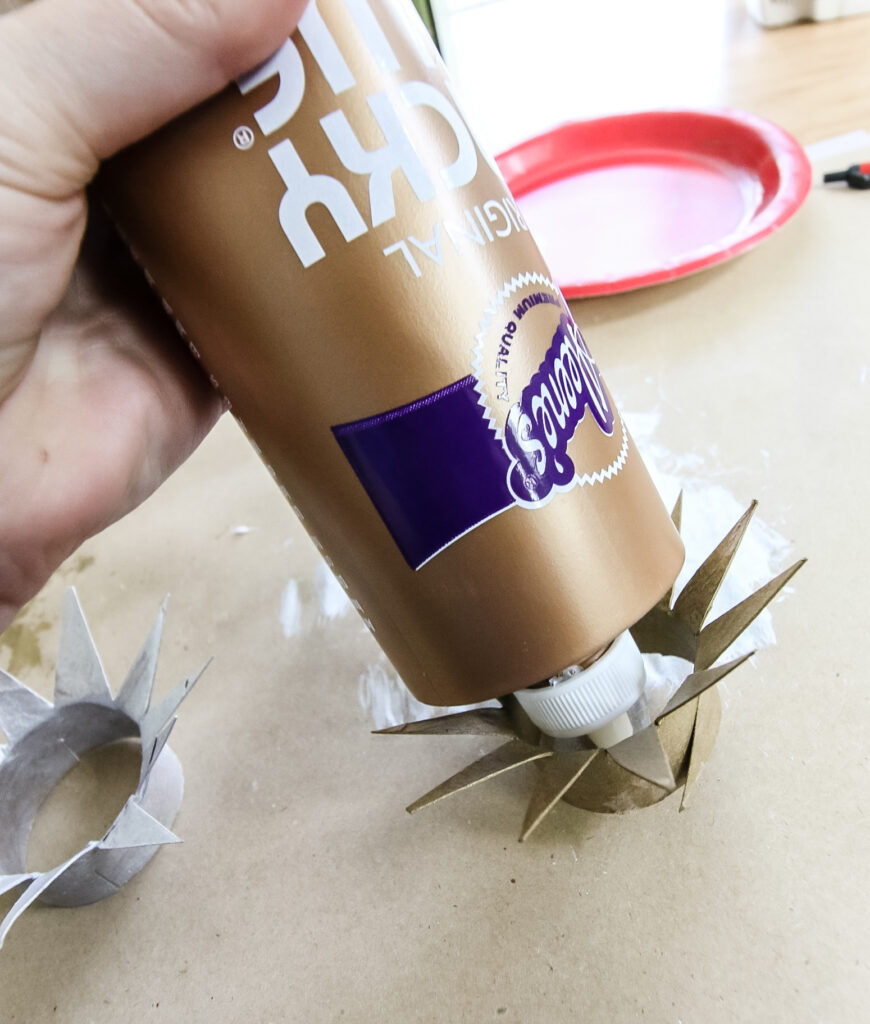
STEP 5: glue
Once dry, arrange one starburst inside the other. You may need to cut small slits on the sides to accomodate this.
Apply craft glue between the rings and allow glue to dry.
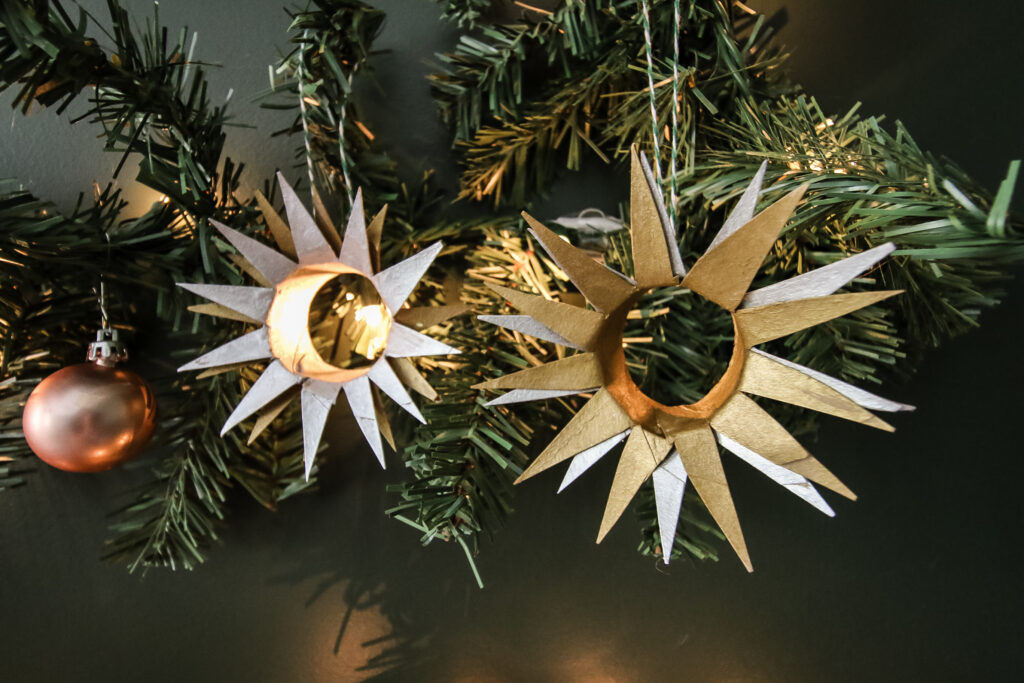
STEP 6: add hanger
Add a loop of string or twine to use as a hanger. You can poke this through a hole in the cardboard, apply tape, or glue it in place.
Hang on your tree, garland, or wreath and enjoy! These look great clustered and are about as free as you can get - you can't beat that!
See all of our handmade ornament ideas:
- How to make photo ornament balls
- DIY sea glass ornaments
- Sand ball ornaments
- How to make beach ornaments
- DIY pier post nautical ornaments
- Fur ball pom pom ornaments
- DIY snowball ornaments
- Citrus felt ornaments
- Mink snowman ornament
- Deviled egg felt ornament
- Metallic dipped textured ornaments
- Paper ball 3D ornaments
- Toilet paper roll starburst ornaments
- Bottle brush tree terrarium ornaments
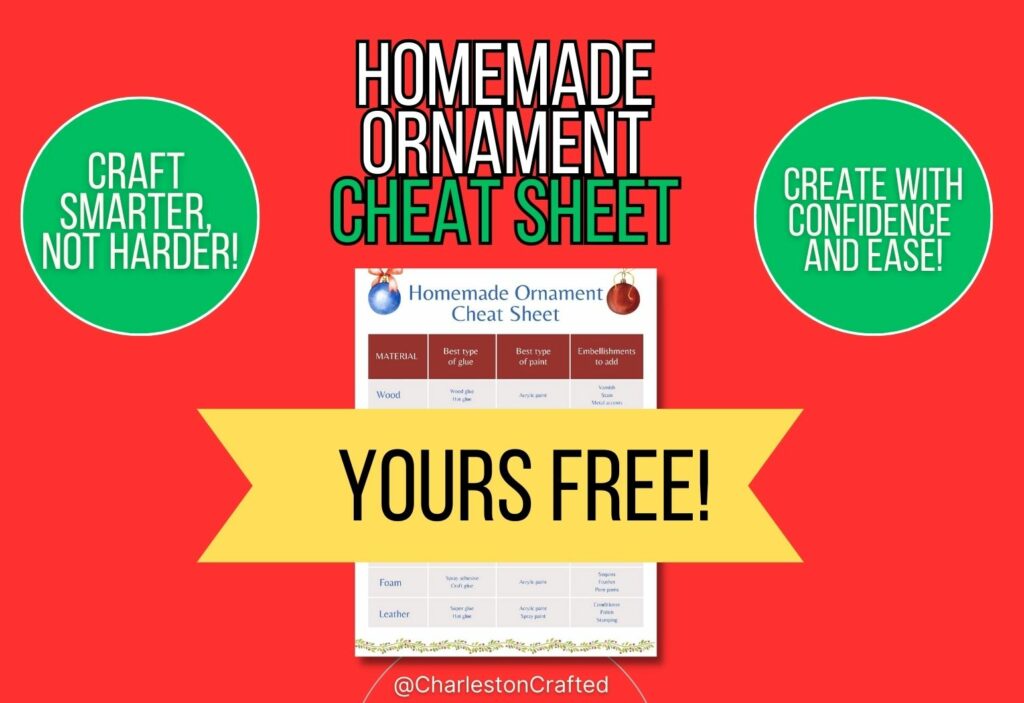
Simplify your crafting journey and eliminate guesswork with our free ornament crafting cheat sheet – your essential guide to selecting the right materials and tools with ease! Click here or the image below for the free download!
I think that these ornaments would make a great "filler" in any color combination on your tree. They would be great if you don't have a ton of ornaments but want your tree to feel full, without spending a ton.
You could make a lot of these and put them throughout the tree. Then, add your favorite special ornaments to be focal points.
Anyways, I love how these turned out. It's a great opportunity to make recycled ornaments that still look beautiful and not trash-y!
Any questions about how I made these toilet paper roll starburst ornaments?

Looking for something?
We've been doing this since 2012 so we have a LOT of blog posts!
Search stuff like: Ceiling Projects | DIY Plant Stands | Thrift Flips

Hello, I'm Morgan, half of the creative force behind CharlestonCrafted.com! With a passion for DIY that dates back to 2012, I've transformed three homes and now I'm dedicated to helping others craft their dream spaces. Let's turn your house into a home together!