This post will show you how to make fence post caps the DIY way. Make your own fence post caps and save some money!
If your fence has been in place for awhile, you've likely needed to make different repairs or replacements over the years. Some of the most common fence repairs include repainting, changing rotten boards, or fixing a sagging gate.
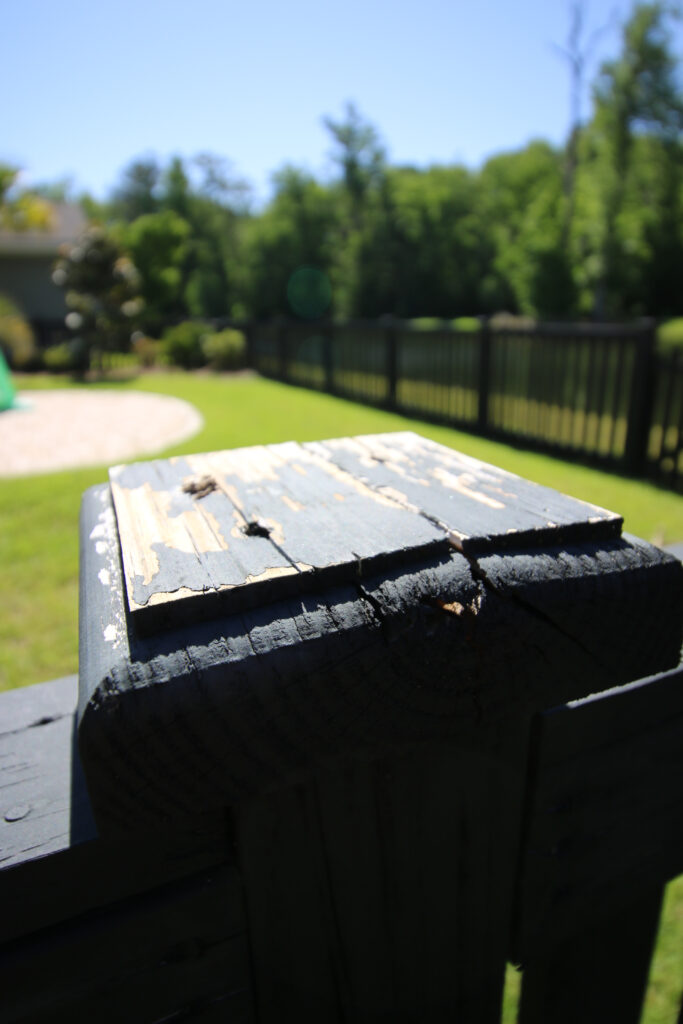
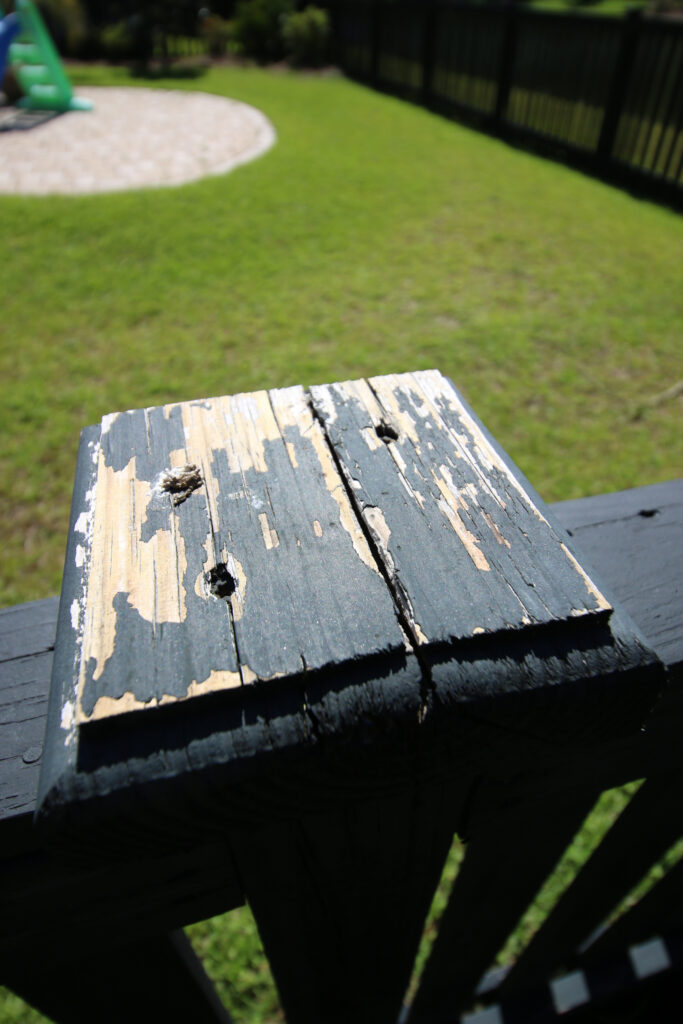
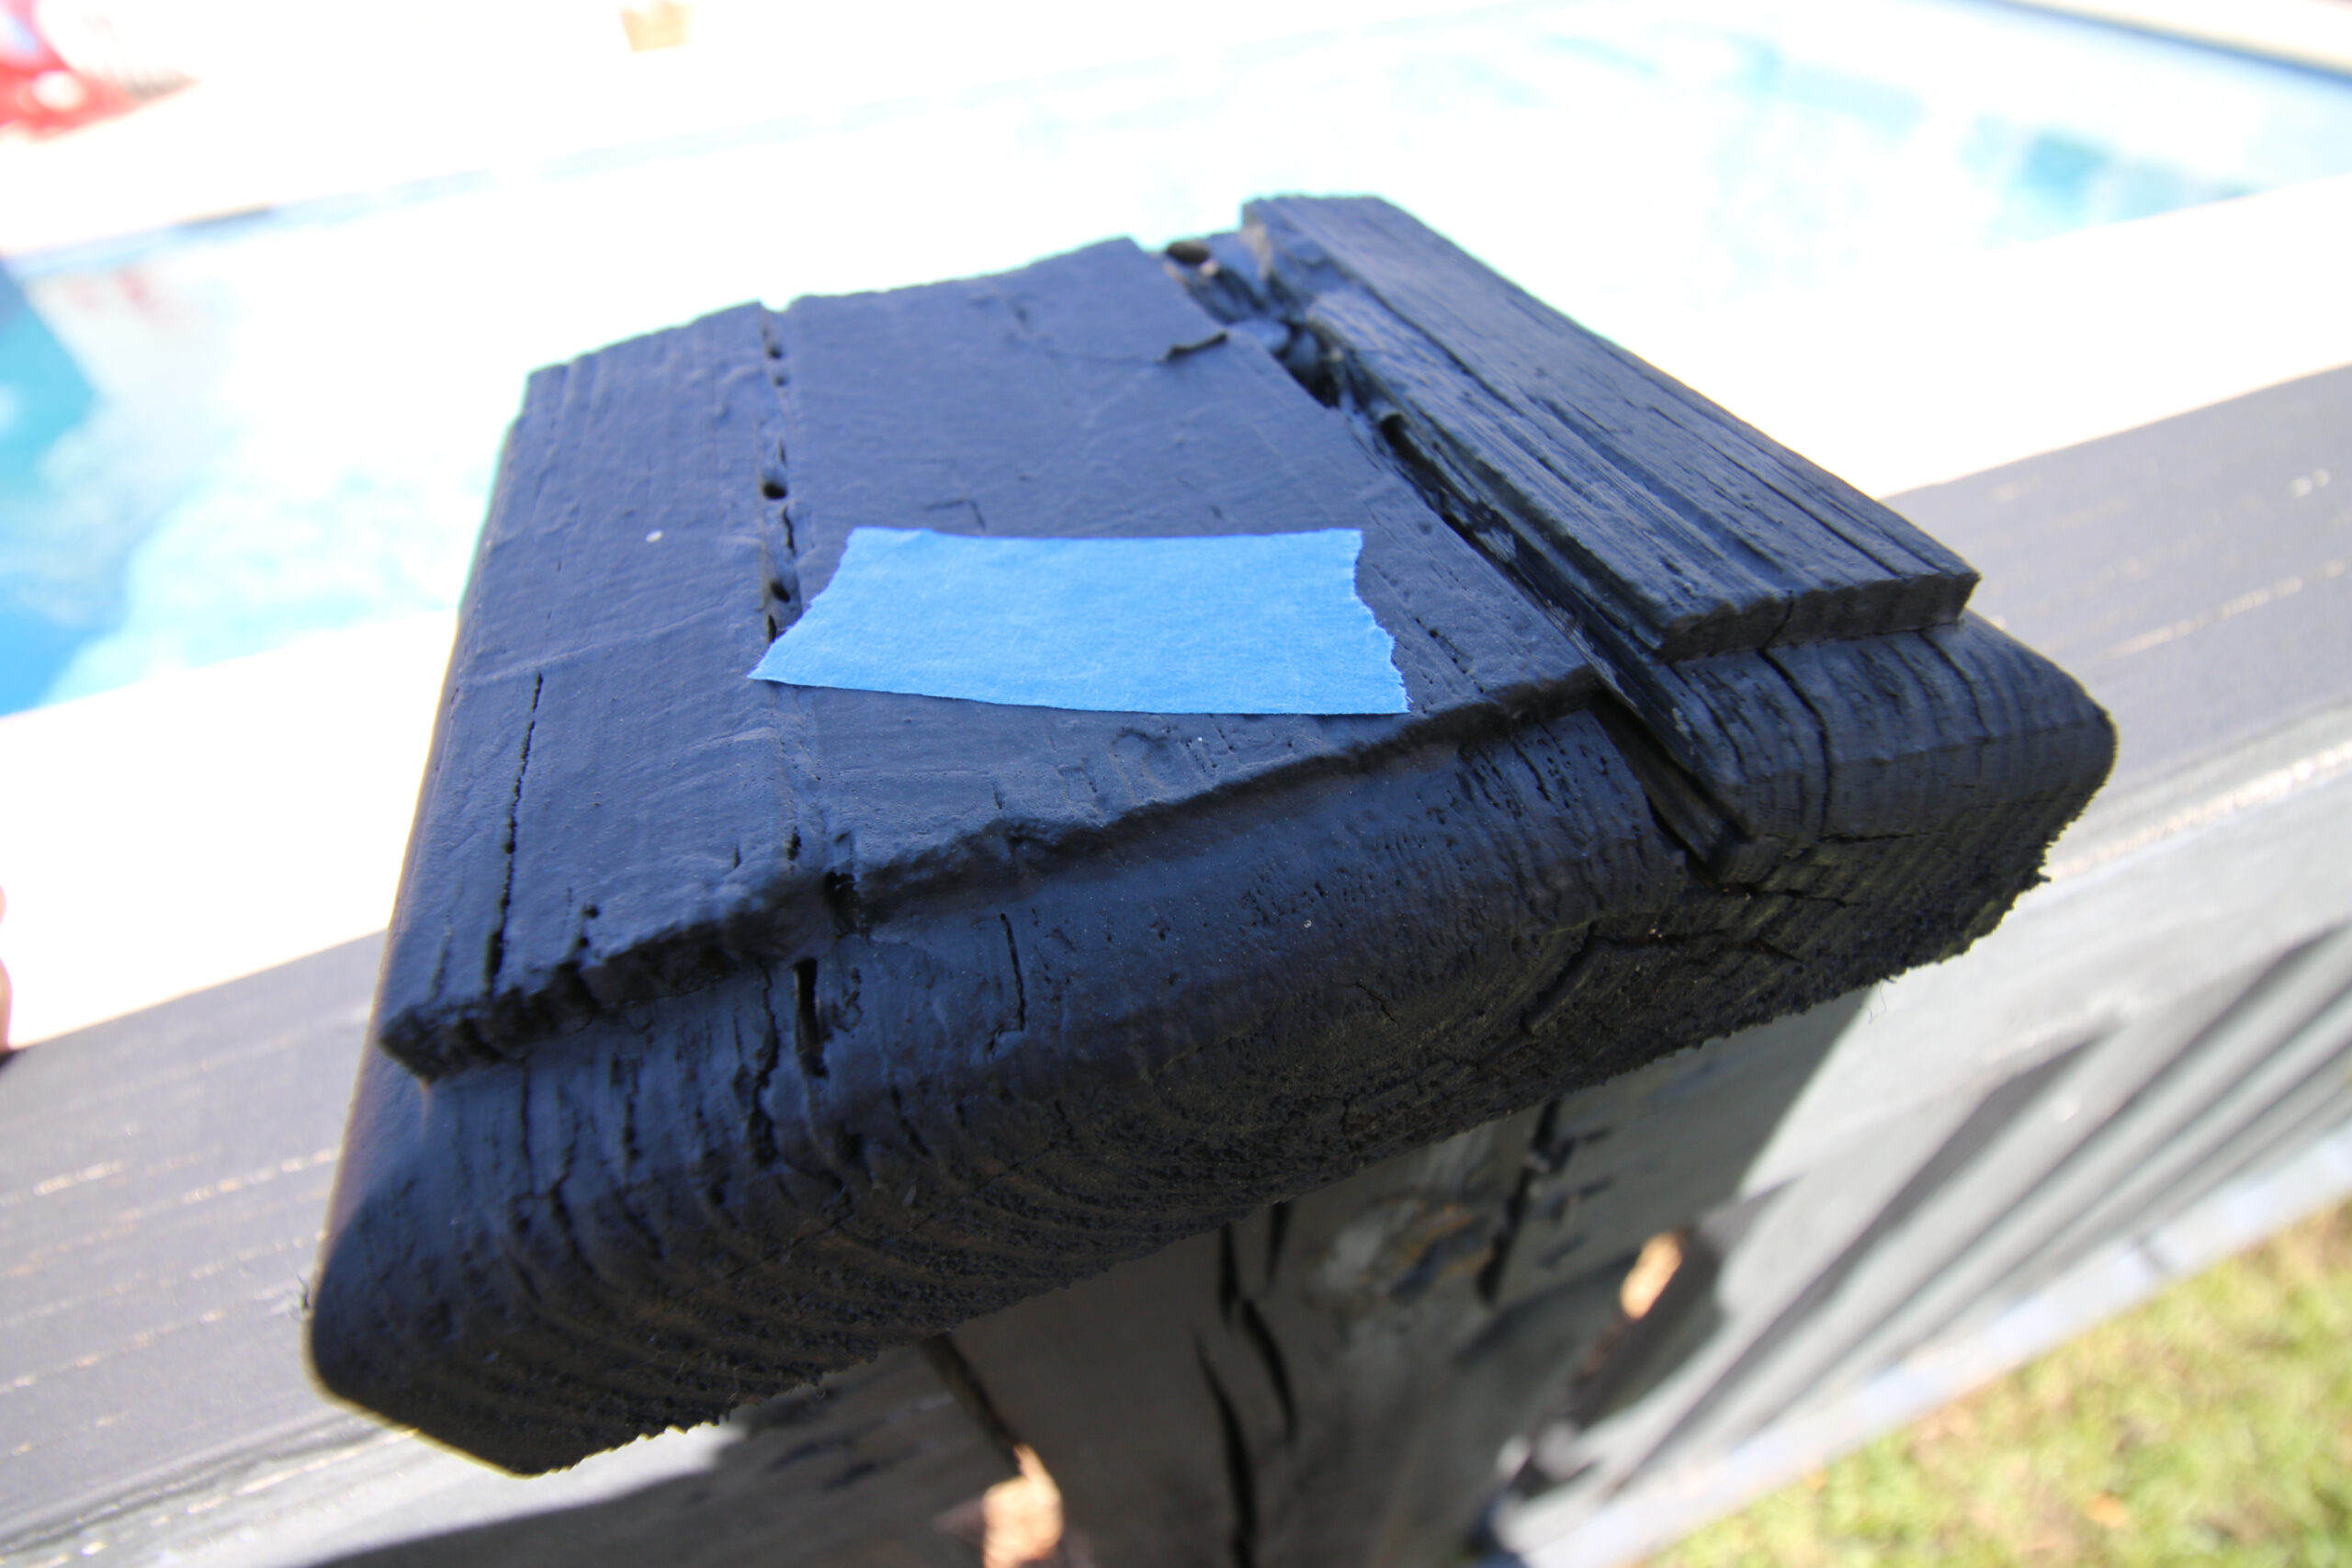
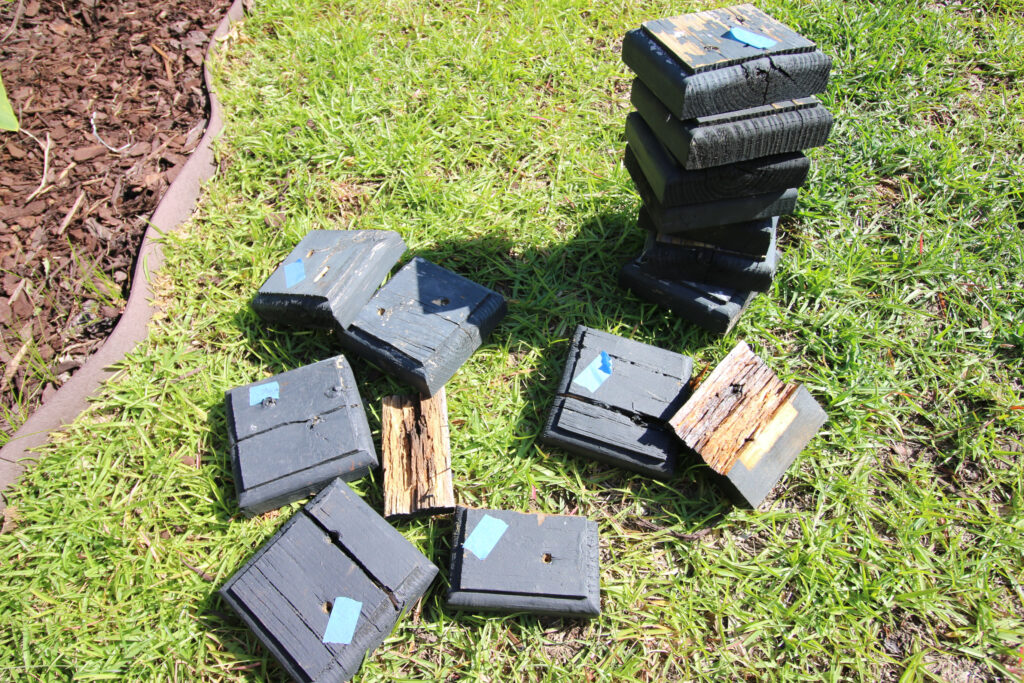
One problem that we have been having in the last year is that all of our fence post caps are rotting out.
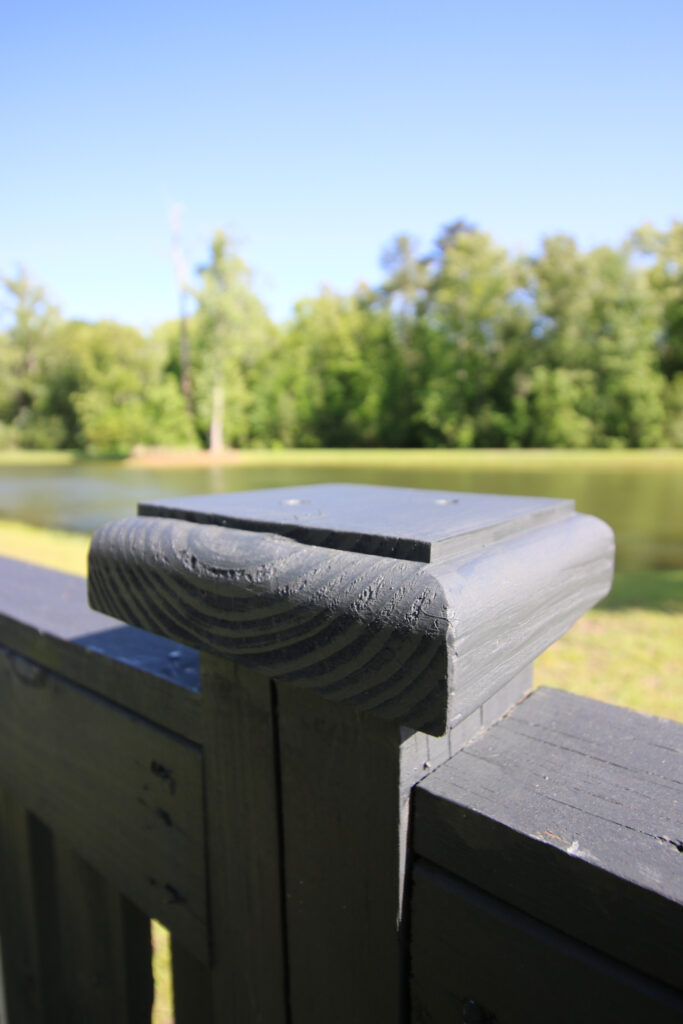
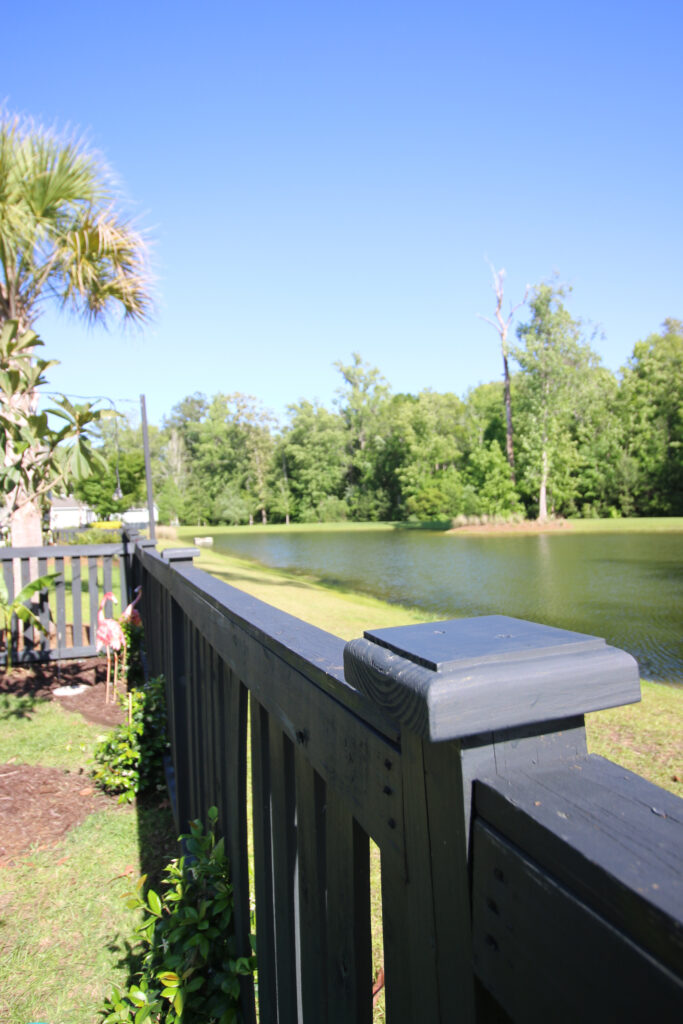
Fence post caps are the square pieces of wood at the top of a fence post in between each panel of fence. The vertical fence post column, usually 3 ½" x 3 ½" is topped with a post cap to protect the end grain from direct exposure to the elements and to give a decorative look.
It is important to have some sort of fence post cap in place to help protect the wooden posts from damage from water or other issues.
Ours had completely rotted out along our fence and we needed to replace them. While you can buy wooden fence post caps, it's certainly more affordable to make your own.
Making your own DIY fence post caps is an easy process and can be done in an afternoon (literally, that's how long it took me from start to finish). Let's dive into the process and talk about how to make new fence post caps for your yard!
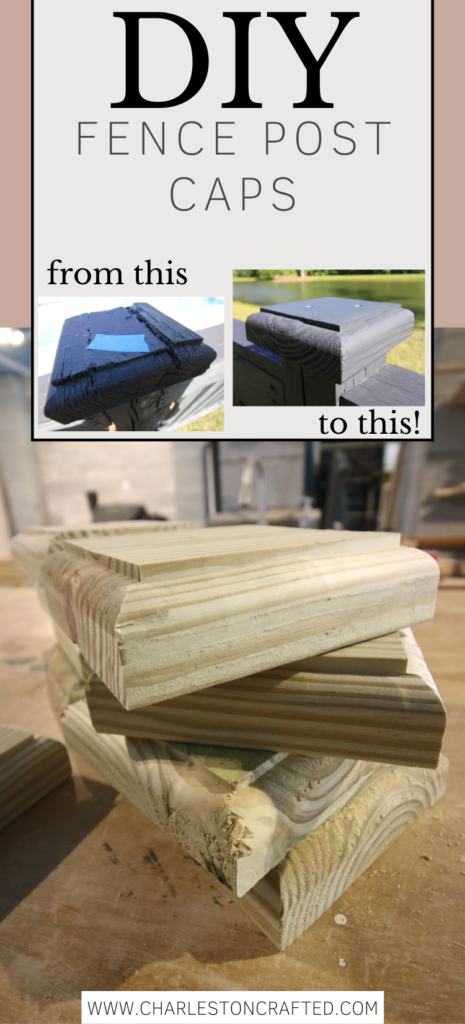
DIY fence post caps
Last year, we removed post caps on our front stairs and replaced them with solar post cap lights. We liked this look on our front steps, but didn't want it all the way around our backyard. It's also important to remember that any changes you make to a fence you share with neighbors should be cleared with them.
However, in this case, I was replacing something rotten with the exact same thing in fresh wood. If we wanted to change the look, I'd need to get their agreement. They didn't even notice.
Making new DIY fence post caps works for 4x4 and 6x6 posts, you just have to customize yours to size. We had 4x4 posts and had existing caps to copy, so this was an easy process!
Materials needed to make fence post caps
You don't need many materials or tools to make your own fence post caps. This is what makes them so easy to customize and cheaper to make than buying your own.

The materials and tools you need to make DIY fence post caps include:
- 2x6 pressure treated boards
- Paint to match your fence
- 3" exterior screws or nails
- Miter saw or circular saw
- Router
- Drill
Basic woodworking information for every project
Here are some of our most popular woodworking articles!
Shopping for wood:
Woodworking project ideas
- 100+ of the best woodworking project ideas!
- 62 easy beginning woodworking projects
- Woodworking project ideas to make and sell
See all our printable PDF woodworking plans!
Our favorite tools + supplies
- See all our favorite tool reviews
- How to use a Kreg jig
- The ultimate wood stain guide
- The best wood fillers for your project
Remember to also always use safety equipment while woodworking and using tools. Make sure you have proper eye protection, ear protection and a good mask to keep yourself safe.
How to make post caps
Here are the steps for how to make new fence post caps for your yard. This is a great way to bring new life to your fence!
Step one: how do you measure for post caps
Start by measuring your post caps. If you are replacing old ones, it's easy, just measure what you already have. If not, you'll need to come up with the new measurement.
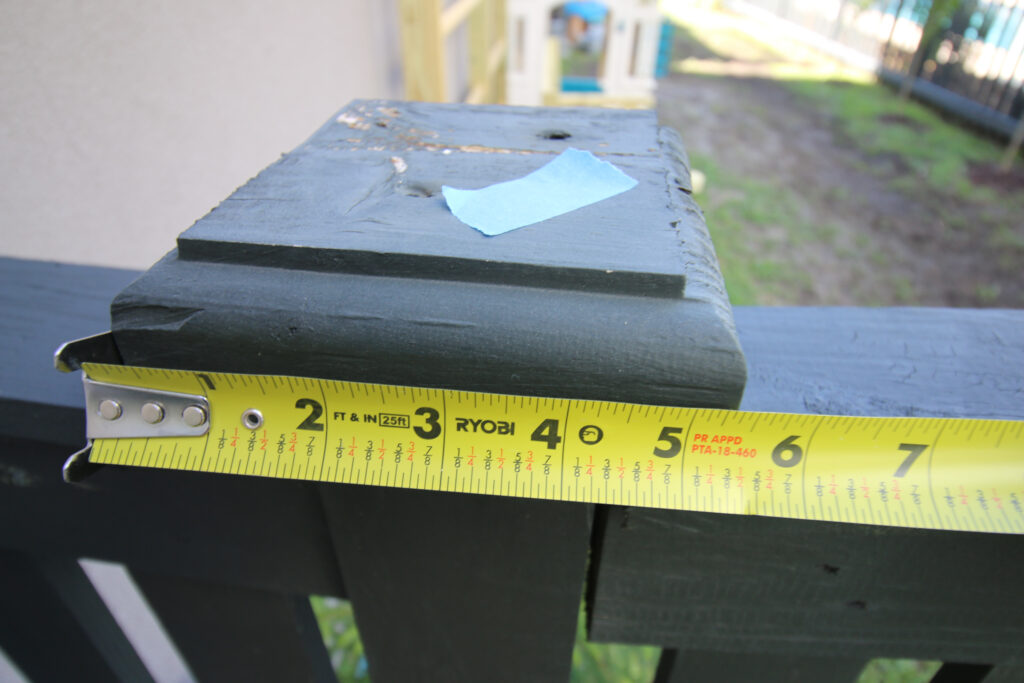
Post cap size is determined by the post size itself. A standard wooden post cap for 4x4 posts is 5 ½" x 5 ½" and a standard wooden post cap for 6x6 posts is 7 ¼" by 7 ¼". This means you can use a standard 2x6 board to cut new caps for 4x4 posts and can use a standard 2x8 board to cut new caps for 6x6 posts.
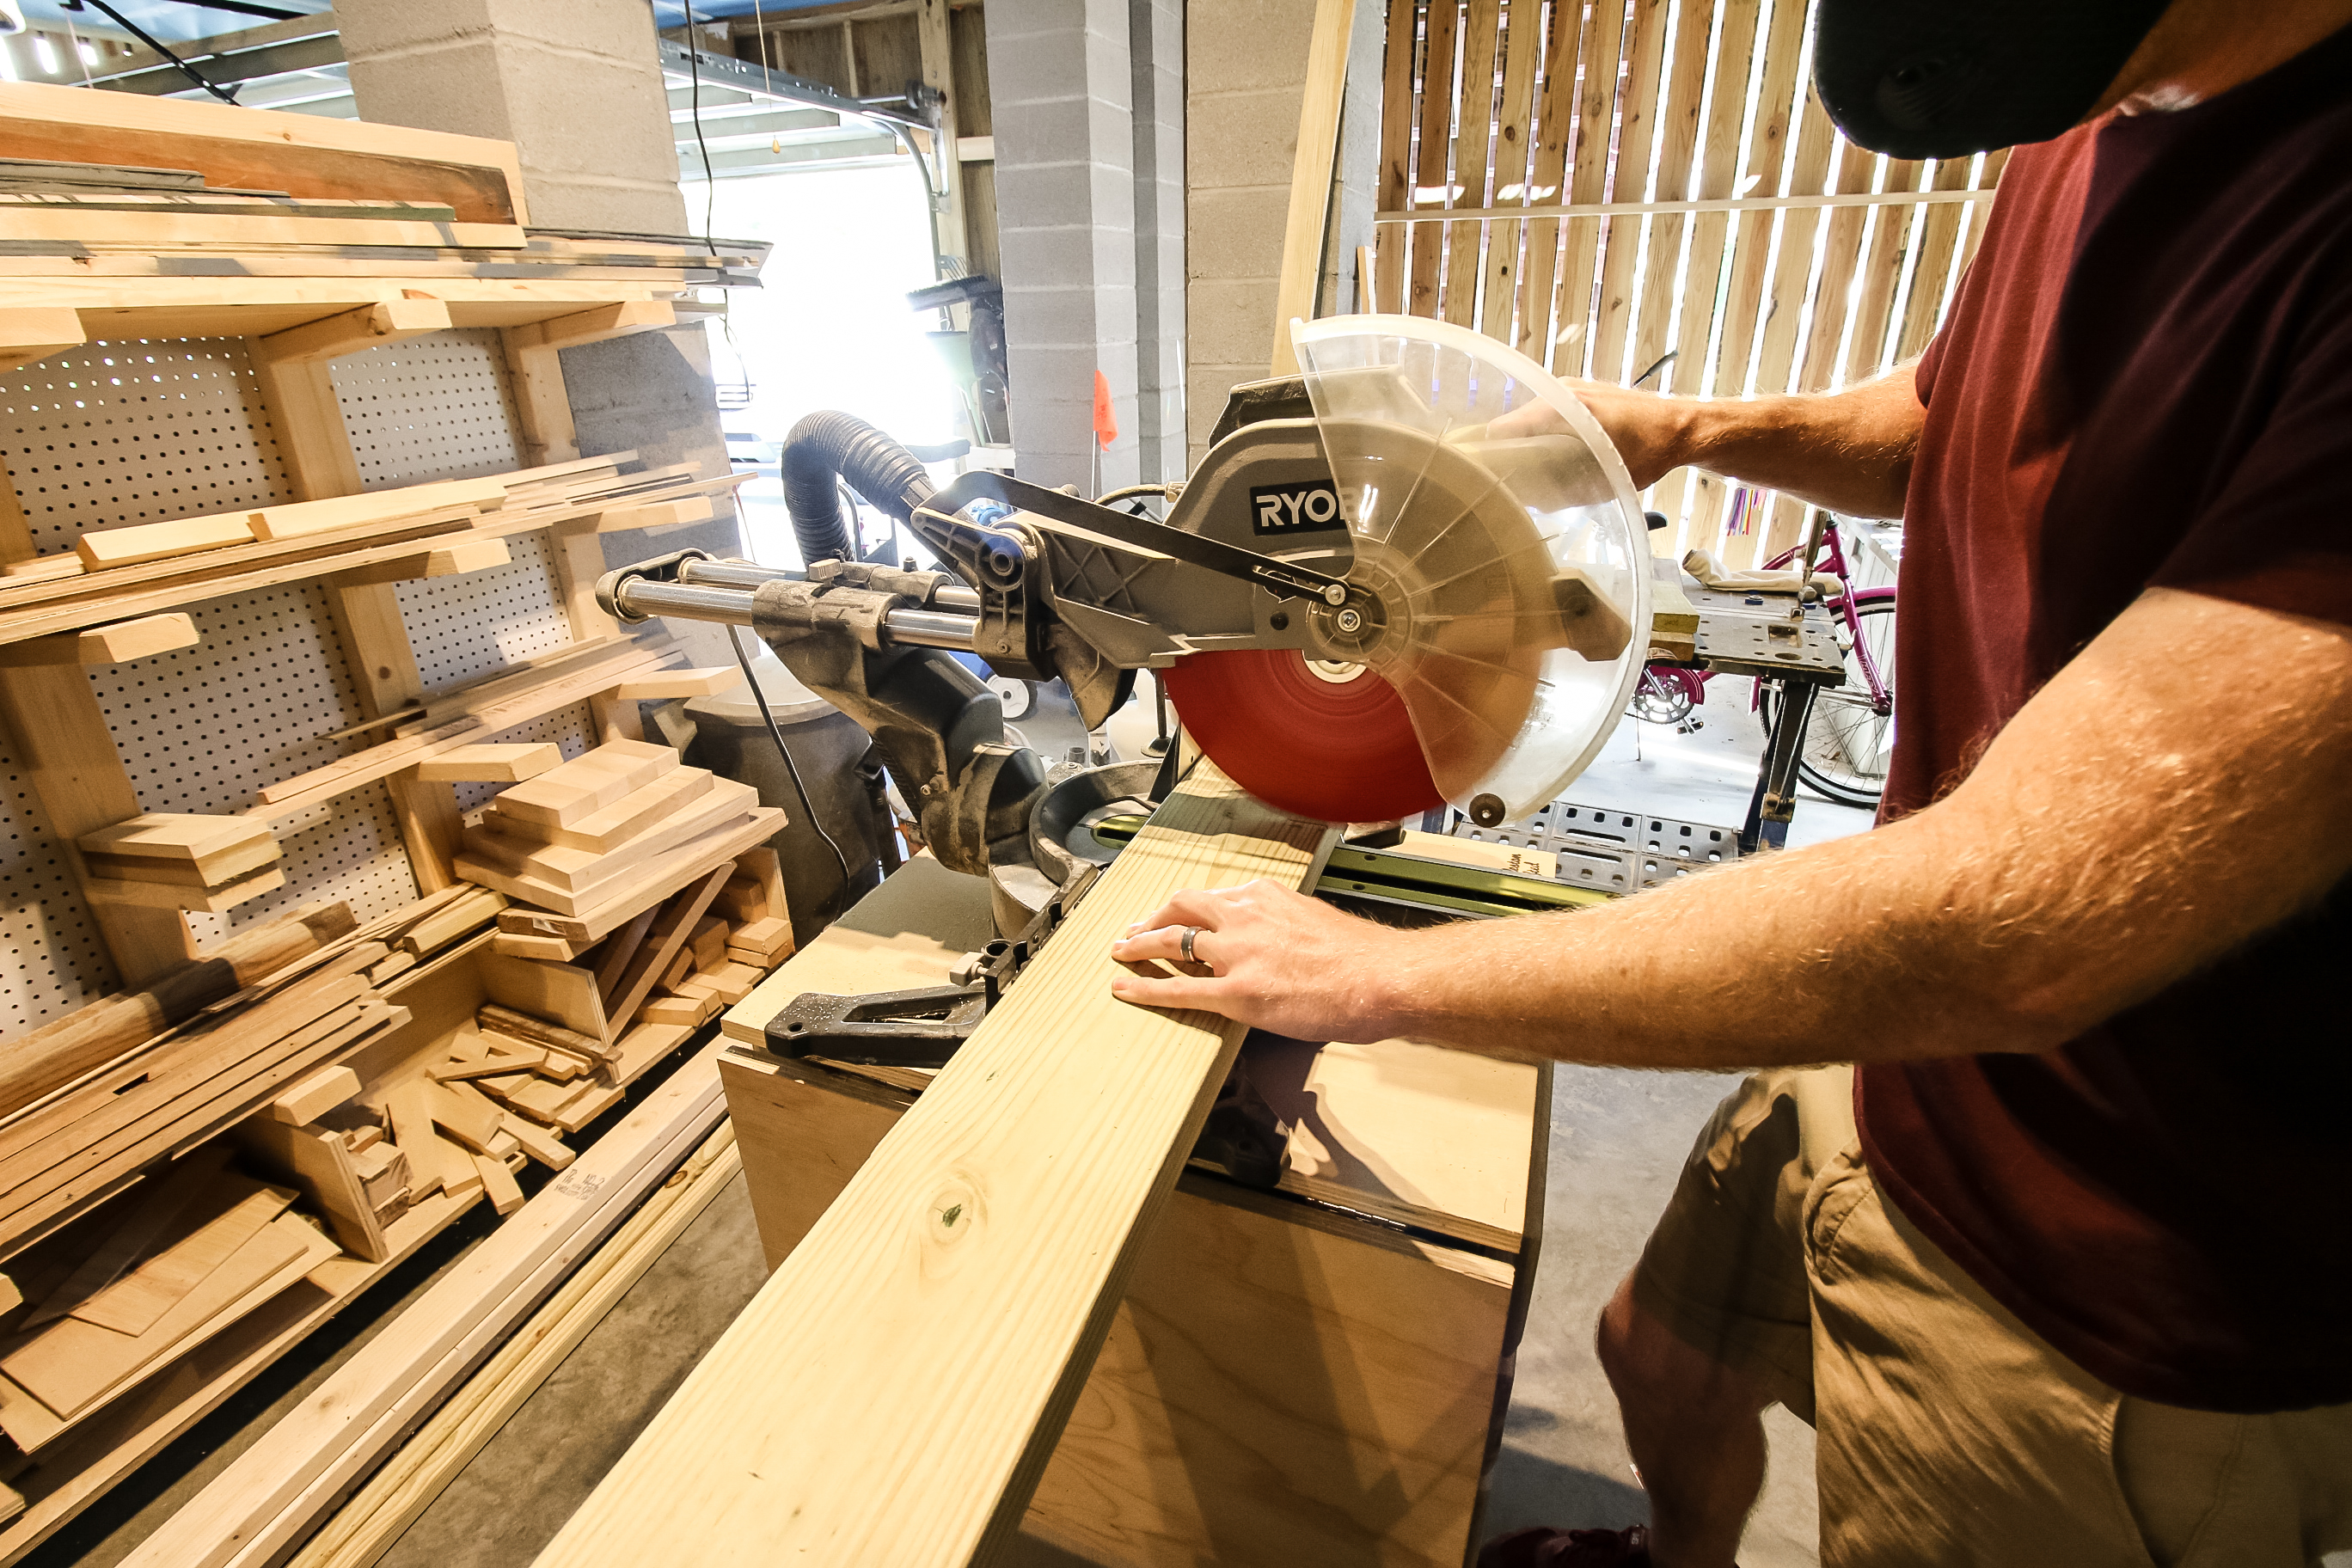
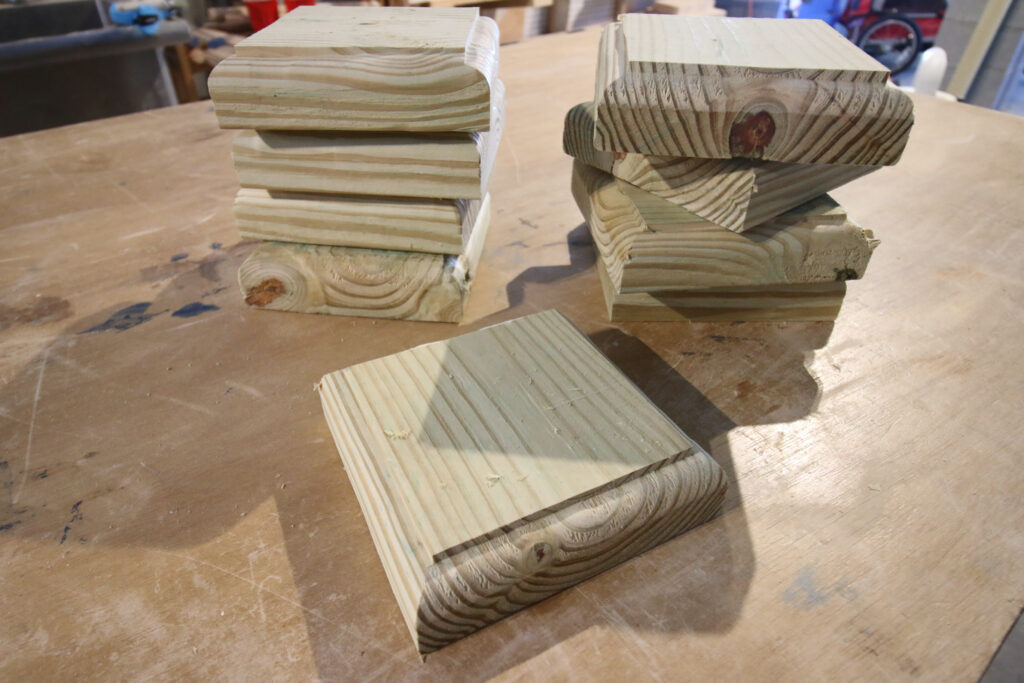
Step two: cut new wood post caps
Once you have your measurements, cut the new caps. You should be able to get 16 new caps out of a single 2x6x8' boards if replacing 4x4 post caps like we did. Make life easier on yourself by setting up a stop block on the saw to make repeatable cuts quickly.
Step three: add decorative edge around post caps
This is where you can customize your post caps to be exactly what you already have or to make your own design if starting from scratch.
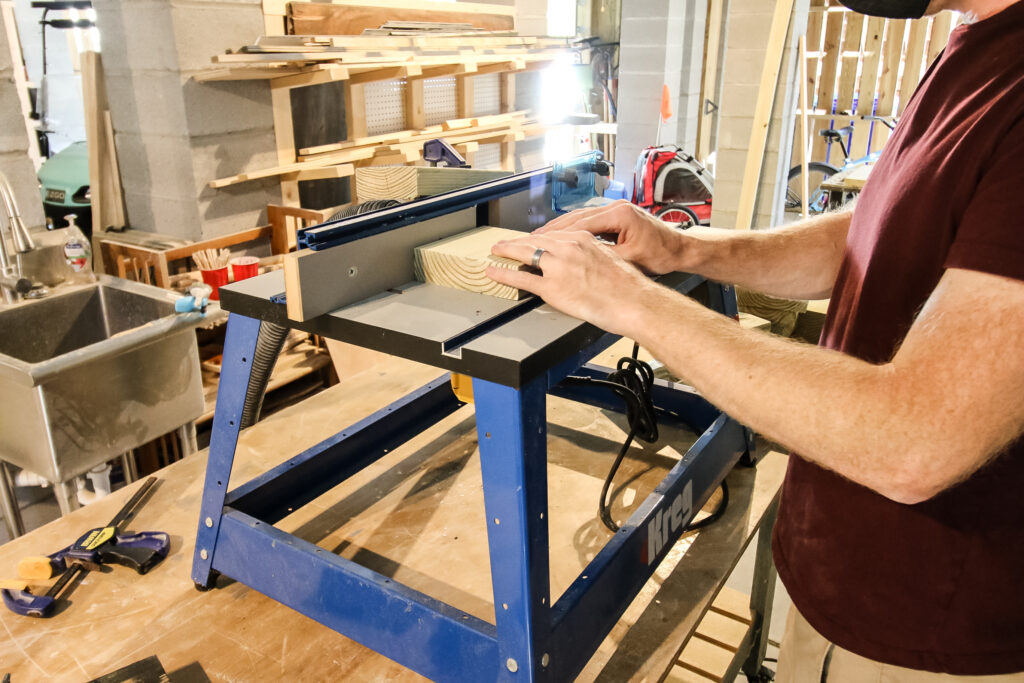
Take a look at your existing post caps and determine the design. Usually, the post cap design will match a standard router bit, whether it be a round over bit, chamfer bit or another specialty design.
Grab a new set of router bits here!
We figured out exactly which bit we needed, then set the depth on our tabletop router table to match the exact depth on the old caps.
While we did use a router attached to our router table, you can also use a palm router to add the edge, just make sure you clamp the wood down so it doesn't move while you do the routing.
When you're done with all of them, do a light sanding to remove any sharp edges or corners.
Step four: remove old post caps
Next, remove all the old post caps you'll be replacing. If your post caps are screwed in, you can simply find a matching bit and then back the screws out no problem.
If your old post caps are nailed in or the glue is still holding them down, you'll need to pry them off.
Our best tip for doing this is to get a good pry bar or trim puller (we use this one from Zenith tools all the time, including when we added the solar post caps!) and a mallet or hammer.
Just get the pry bar between the cap and the post and tap it in with the mallet. Use leverage to pry the old cap up and off, but be wary of rusty old nails. If old nails get stuck when the rotten wood comes off, use the back end of a hammer to pry them out!
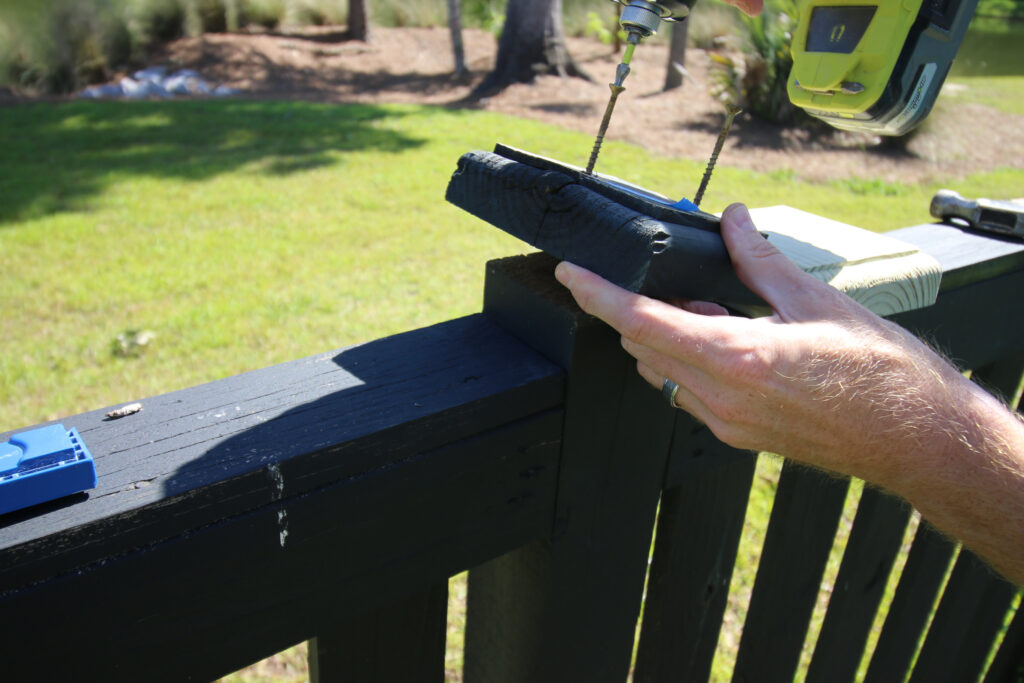
Step five: attach new post caps to fence
There's often a question of do you nail or screw fence post caps into the post. I'll tell you that on our property, it's been done both ways (nailed on the stairs, screwed on the fence).
Screwing wood post caps into the top of the posts makes for much easier removal in the future if they rot again or you want to replace with something else. However, some people would say nailing is easier.
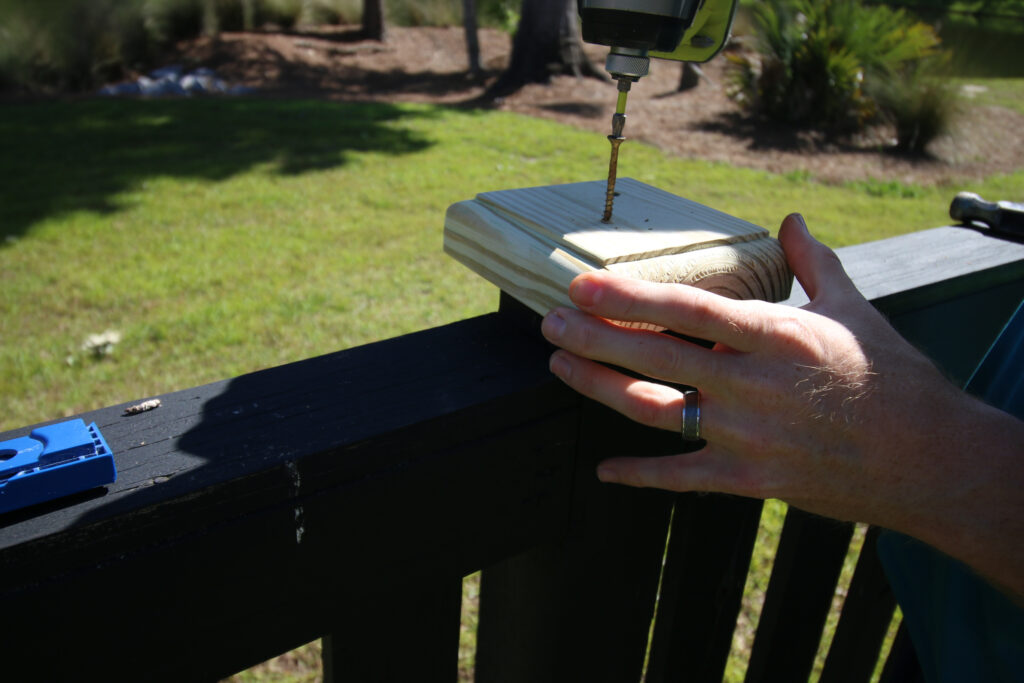
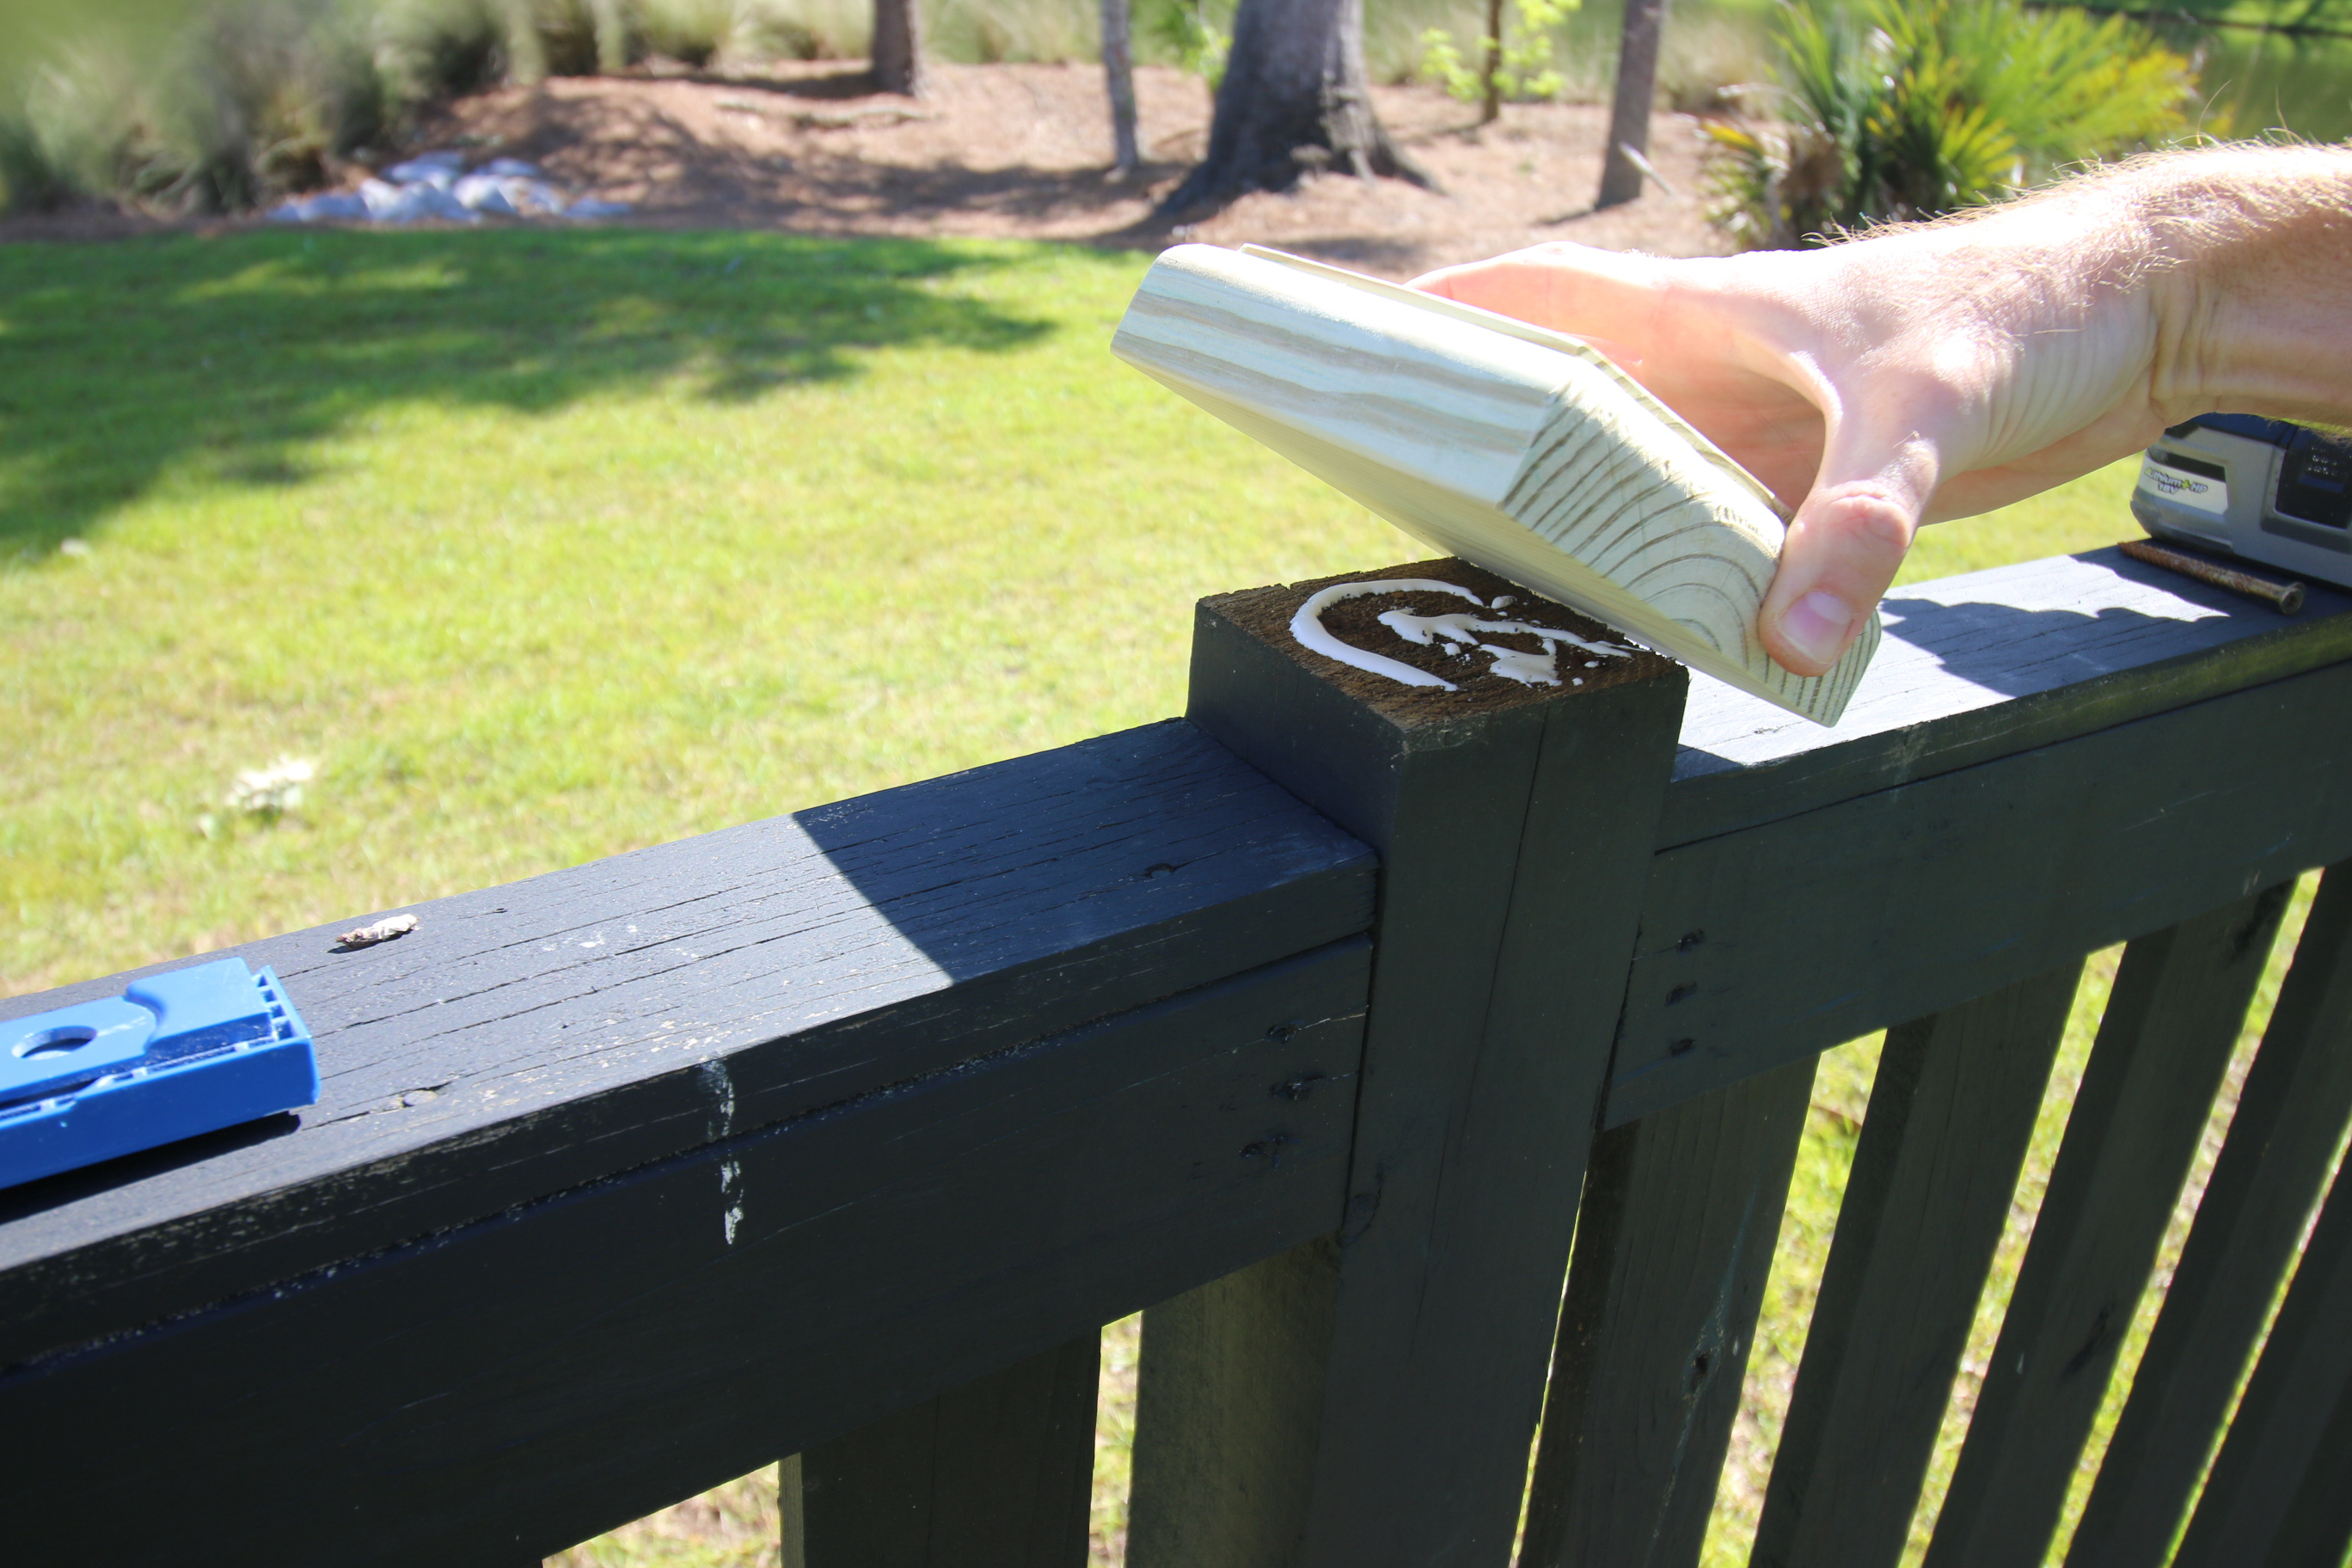
Since our old caps were screwed on, we just used those same screws to screw the new post caps into place. We added a circle of glue to the top of the fence post, lined up and centered the new post cap, then screwed it in place.

Repeat for all the post caps you need to replace.
Step six: paint or stain
We decided to paint all our new post caps in place. You could do this before hand, but then you have to paint, let dry, flip, and paint again. If you do it in place, it's much quicker.
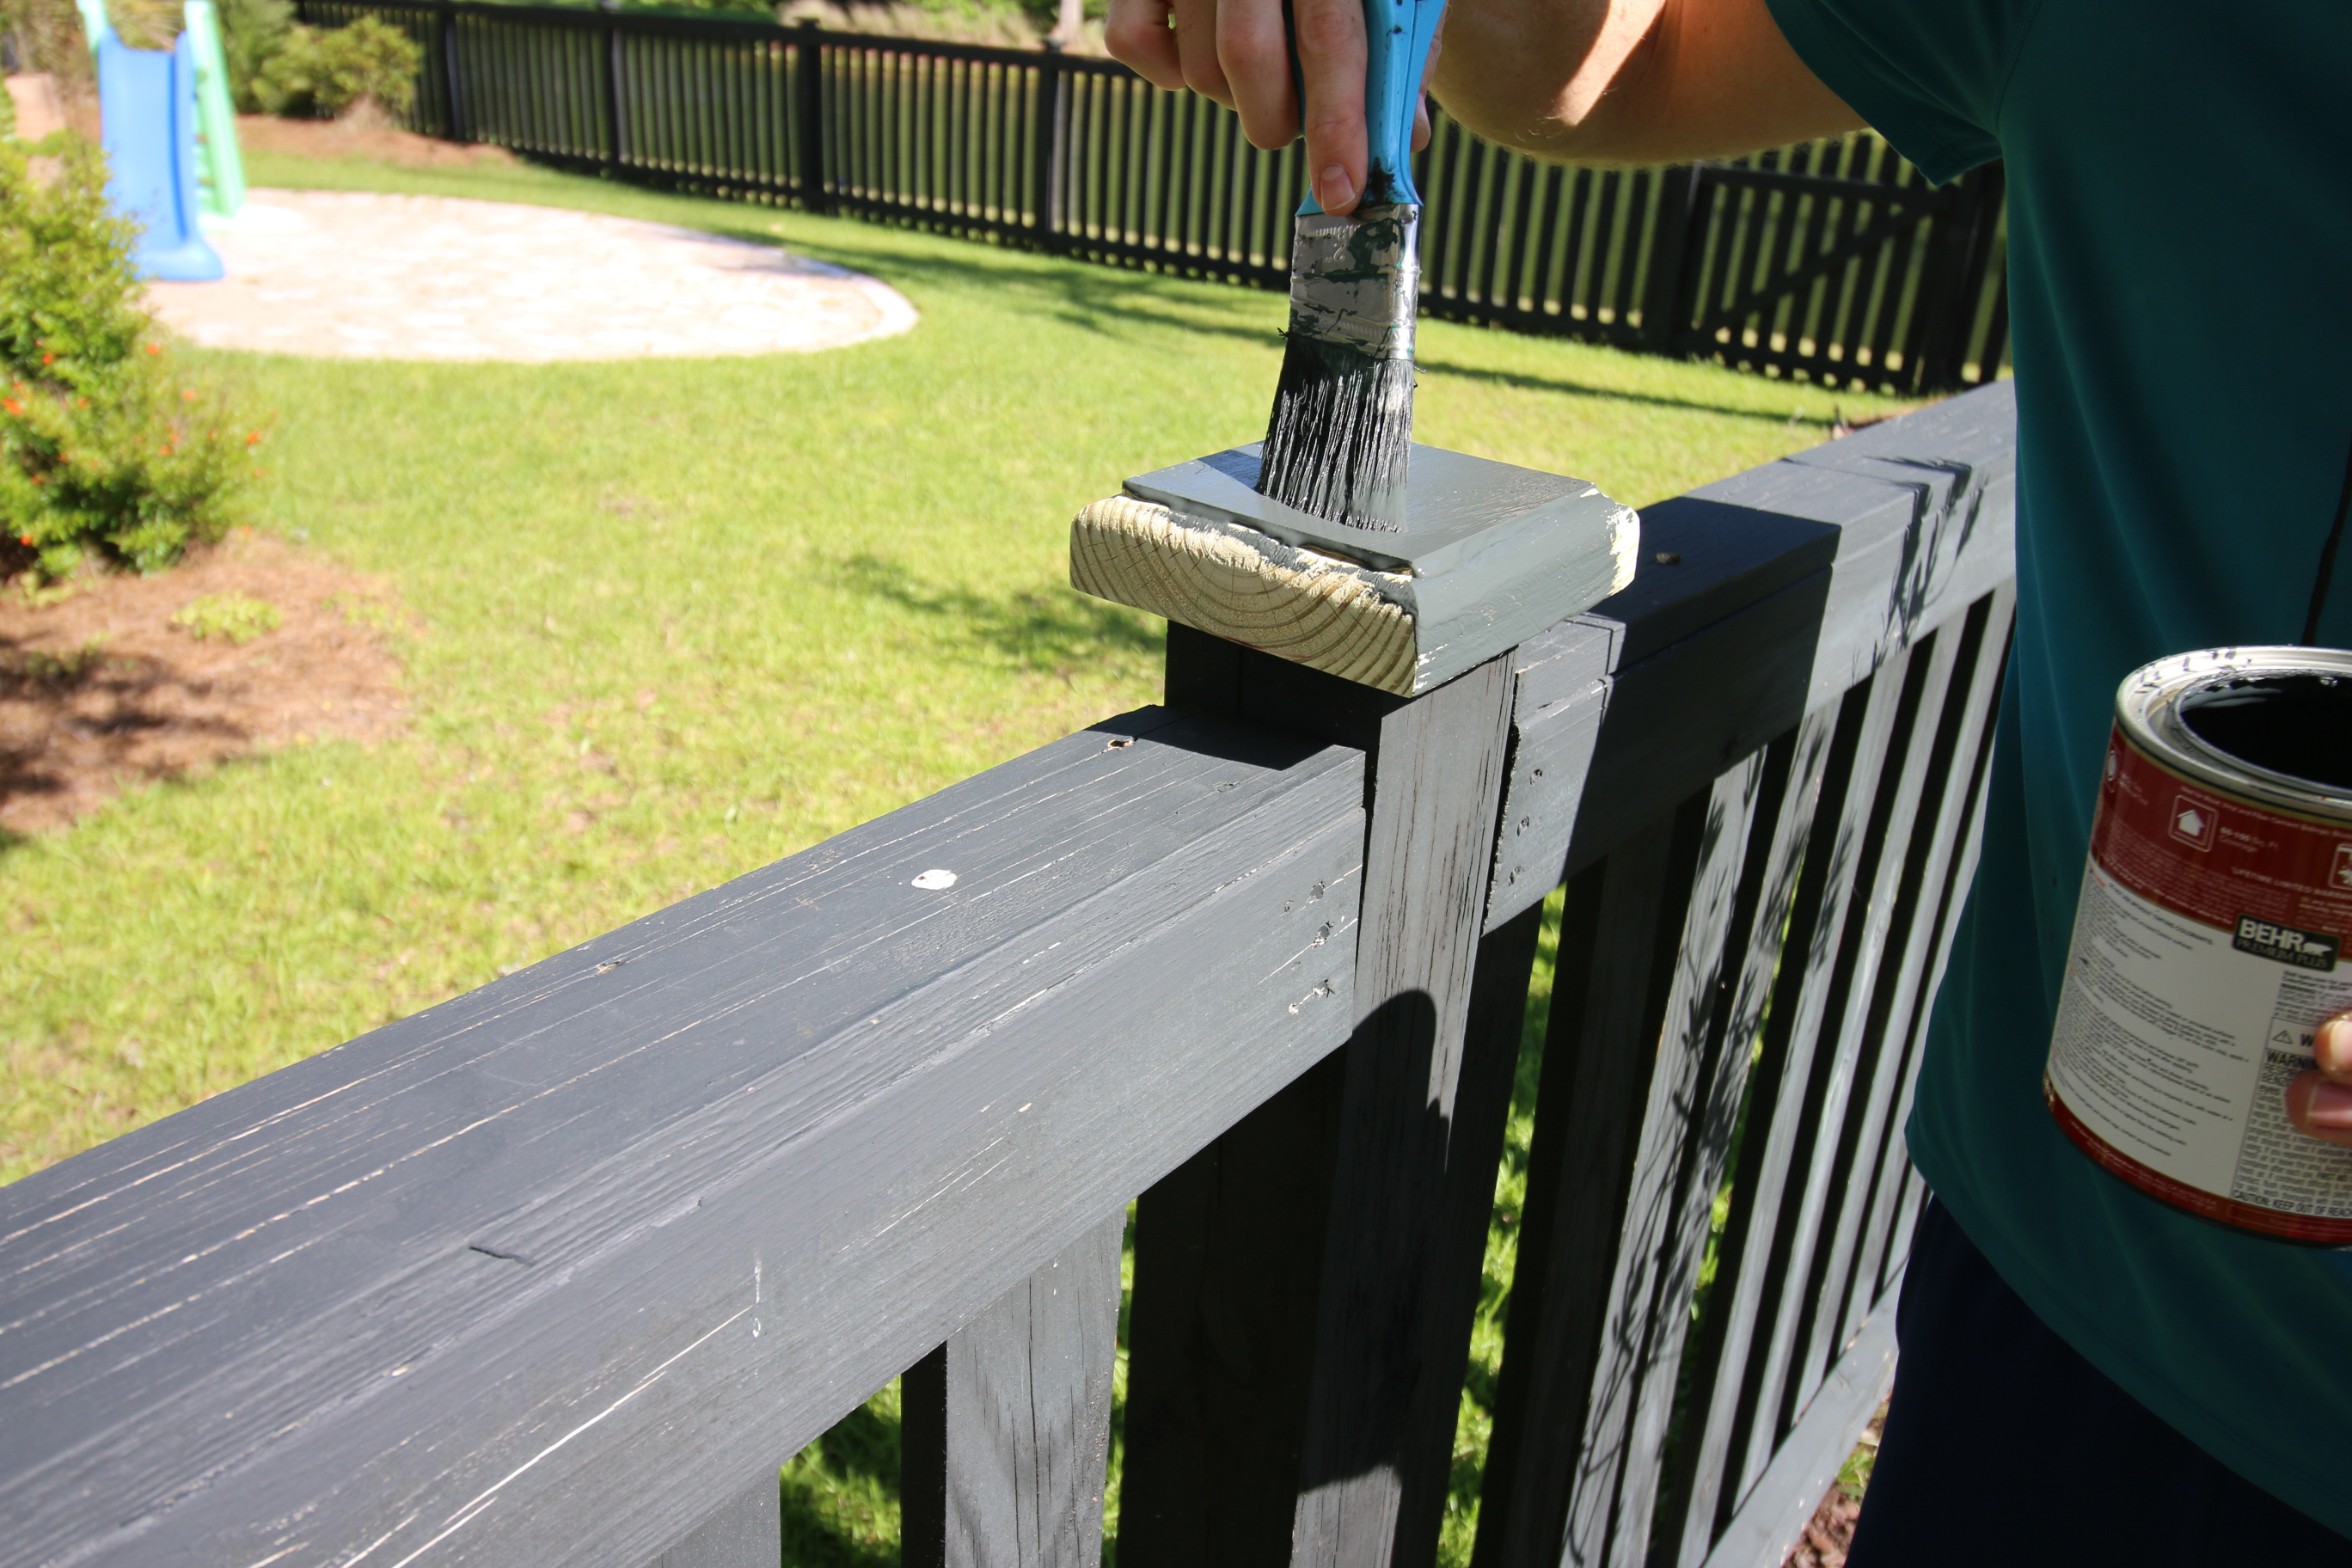
Make sure you use a matching paint or stain to make it look like the new cap has always been part of the fence!

Painting your fence post caps is the best way to keep them in good shape long term. While you have to paint them now, painting them with a fresh coat of paint ever couple of years will keep them protected from water and sun over time. Same goes for the fence itself.
Should you put caps on fence posts?
Yes, you should put caps on fence posts in order to protect the integrity of the post for a long time and to give your fence a finished look.
The post cap keeps water from going directly into the end grain of the post and helps it last longer. This is what happened to the balusters on the deck railing we had to rebuild and replace. The water got in on the end of the balusters and caused them to rot out and become a safety hazard.
You can also attach a metal or stainless steel post cap to the top of your wood fence or add solar lights, but those you have to buy and can't make on your own. Vinyl post caps are another choice, but these typically work best for vinyl fences and aren't going to look as great on wood fences.
Recap of how to make and install DIY fence post caps
Making and installing DIY fence post caps is an easy process. You just need a board and a few simple tools.
Once you cut the caps to size, add a custom routed edge and replace the old rotten caps with the new one. It's a simple DIY project that can be done in an afternoon and will make your fence look much nicer!

Looking for something?
We've been doing this since 2012 so we have a LOT of blog posts!
Search stuff like: Ceiling Projects | DIY Plant Stands | Thrift Flips

Hey there, I'm Sean, the woodworking enthusiast and builder behind CharlestonCrafted.com! Since 2012, I've been sharing the magic of turning raw materials into beautiful creations. I love teaching others the art and satisfaction of woodworking and DIY. I try to inspire fellow crafters to make something extraordinary out of nothing at all.