Here is a simple way to make a hanging plant shelf for your home! Hanging a plant from the ceiling adds vertical interest to your home and is a great way to display trailing plants!
Around this house, if you don't like plants, you can get out.
We have so many house plants that it has become a battleground for shelf or floor space if you are a plant.
One thing that has always been a question has been what to do with long trailing plants to show off their length and really help them thrive.
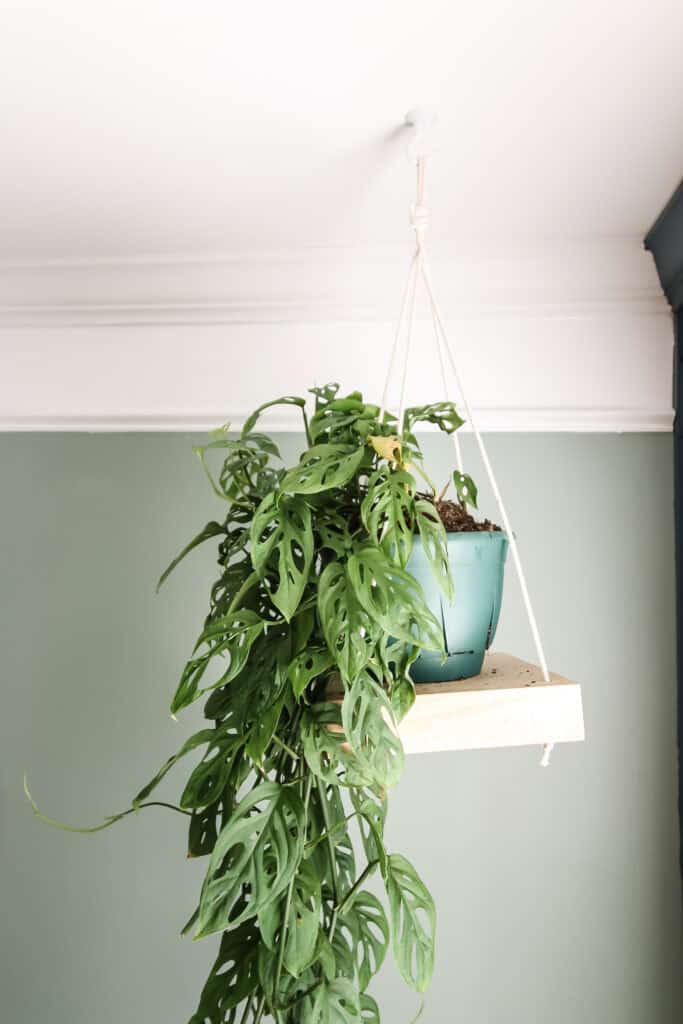
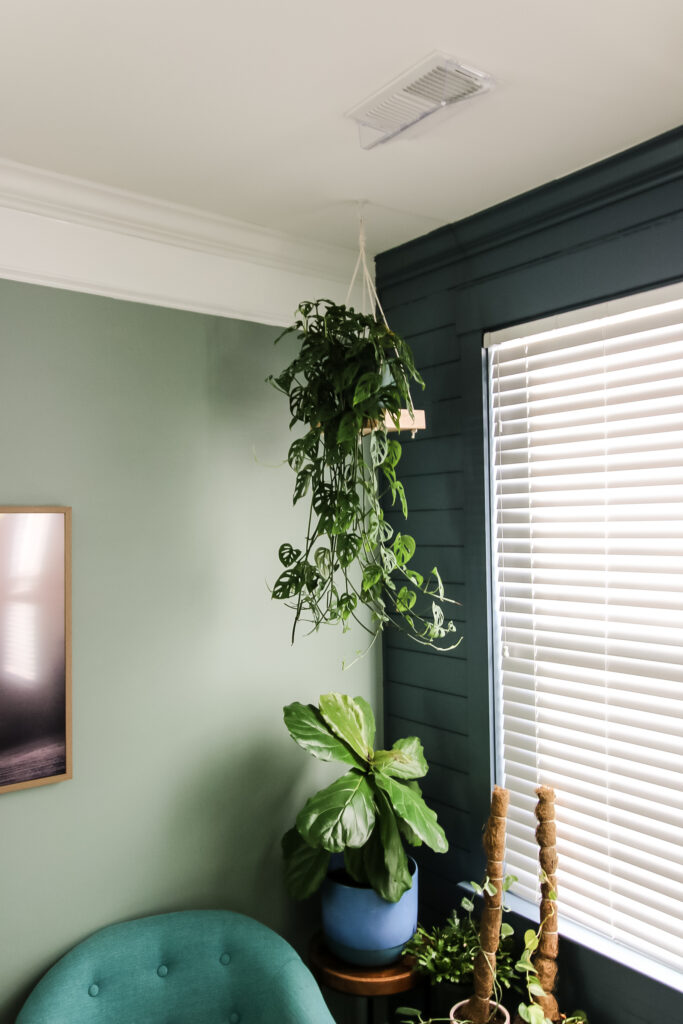
A couple months ago, Morgan bought a swiss cheese plant from a local plant shop that has gorgeous holes and trails several feet. It's a beautiful plant and she wanted to hang it from the ceiling.
We picked up a simple ceiling plant hook from Home Depot after she bought it and installed that in the corner of our living room in front of our shiplap fireplace accent wall, right after our total renovation.
However, the plant was living in the ugly green hanging pot that it came in all that time. So, for Christmas, I worked on a making a DIY hanging plant shelf in secret in the garage as a secret present.
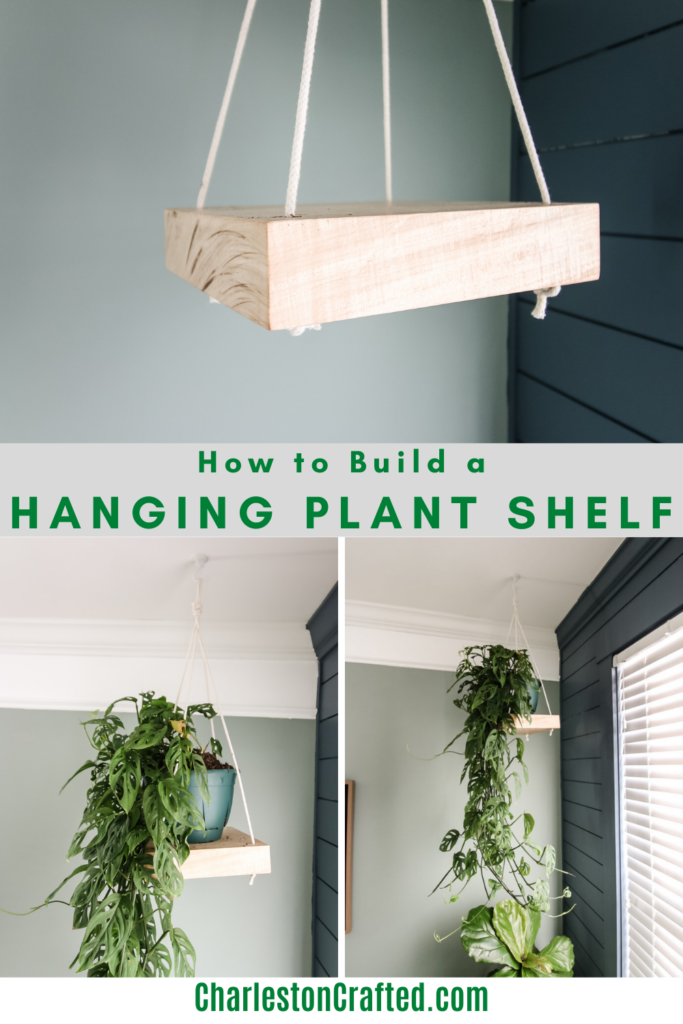
This hanging plant shelf turned out great and looks so good in the space, especially because I used a leftover chunk of wood from the mantel we installed just a few feet away.
This is a simple DIY project that anyone can do with minimal supplies and tools. Get the full list of items needed and steps below!
Check out how we made DIY wooden hoop hanging planters!
DIY hanging plant shelf
Our DIY hanging plant shelf is specific to hanging a single plant, but I was reminded while making this project of the hanging nautical rope shelving we installed in our half bath at our old house.
There, we used the same basic steps and features to this hanging plant shelf, except we anchored the rope to the wall using cleats.
That three tiered hanging rope shelving would is also a great solution for hanging lots of plants on a wall or in front of a window.
Supplies needed to make a hanging plant shelf
Here are the supplies you need to make a hanging plant shelf for your home.
- Slice/slices of scrap wood
- Rope at least ¼" thick
- Oil or stain
- Ceiling plant hook
Tools needed to make a hanging plant shelf
Here are the basic tools you'll need to make and hang a hanging plant shelf in your home.
- Saw
- Scissors
- Cordless drill
- Step stool
Instructions to make a hanging plant shelf
Making a hanging plant shelf for your home is incredibly easy and has a stunning look in your home. Here are the basic steps to make one yourself!
Step One: Cut wood for shelf
The first step to making your own hanging plant shelf is to cut the wood for the shelf itself.
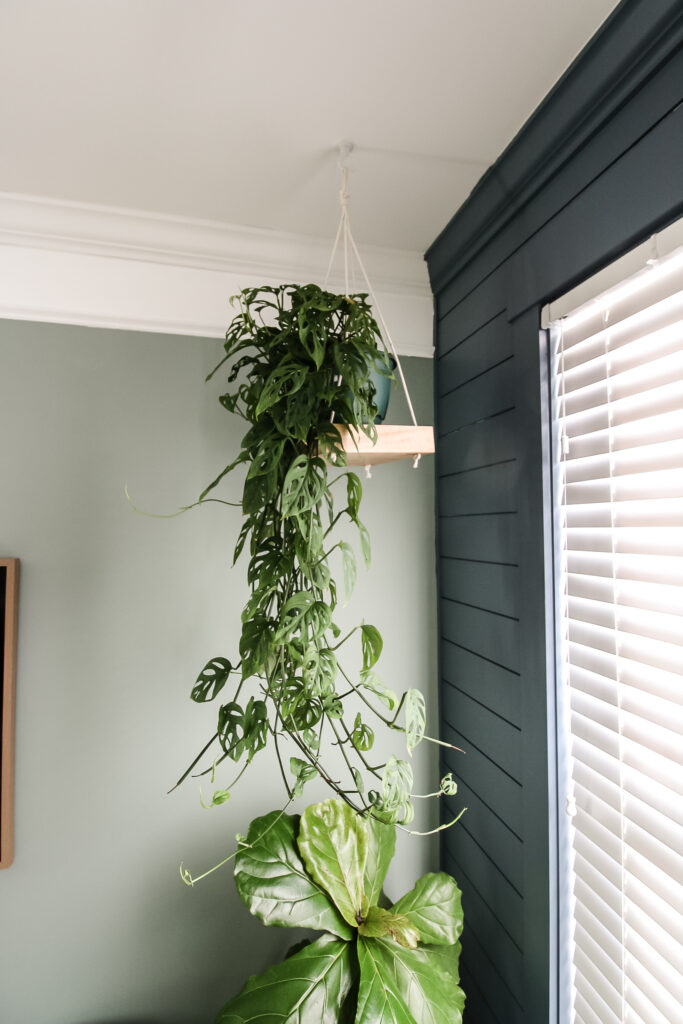
Important things to remember when cutting the wood is to make sure it will be thick enough to hold the pot you're going to be using and have it be slightly wider than the top lip of your pot, not the base. That's because the rope will angle toward the hook and needs to be on the outside of the entire pot.
You can choose any scrap wood you have or buy something like a ¾" thick board at the store.
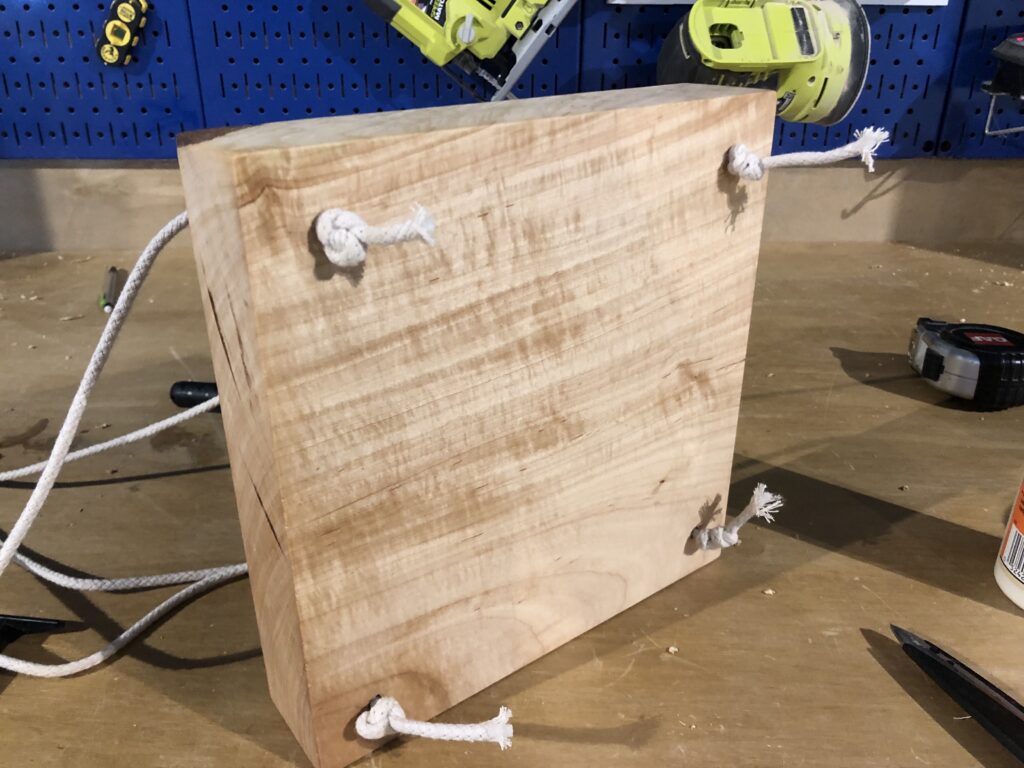
For ours, I used a cut off chunk of curly maple that was leftover from the mantel we installed on our shiplap fireplace accent wall a couple months before.
This piece of wood was hefty, even though it wasn't that big, because it is 1 ½" thick.
I cleaned up the edges on the miter saw to give it a perfect square shape.
Step Two: Drill holes in wood
The next step was to drill four holes in the board.
To make this hanging plant shelf, you'll next thread rope to hold the board in place and level.
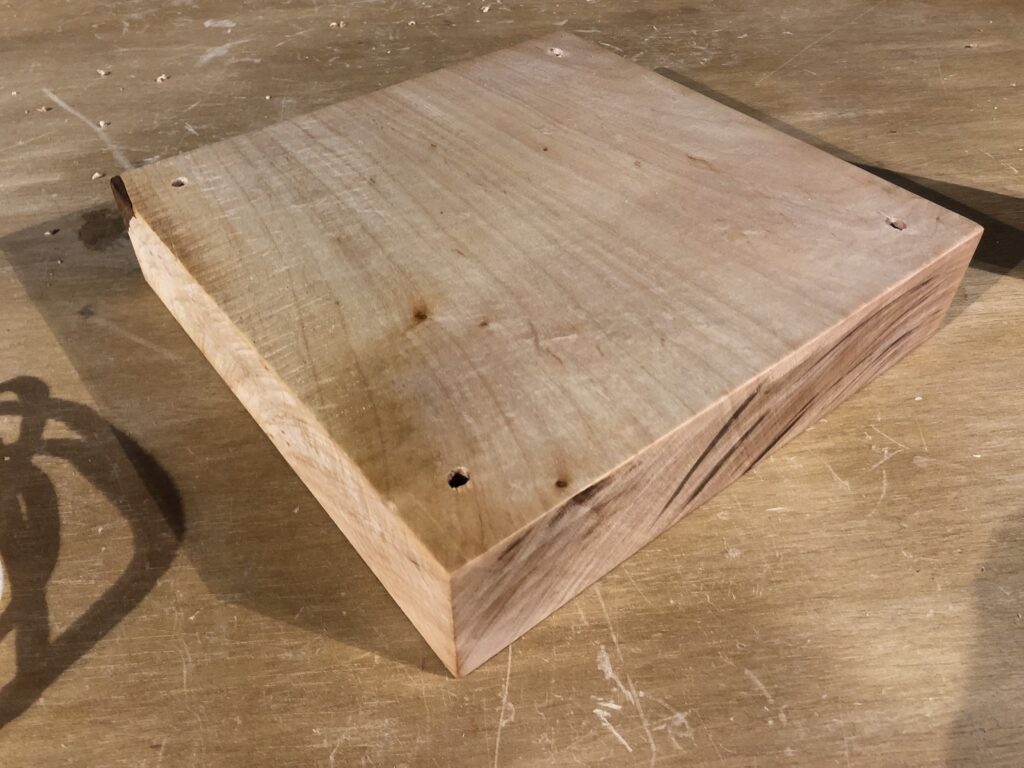
Mark a point 1" in from each corner and drill a hole that is slightly bigger than the thickness of the rope you'll be using to hang it.
I used ¼" thick natural cotton rope, so I drilled ⅜" wide holes.
Step Three: Sand and stain
Once the board is cut and drilled, sand it smooth with fine grit sandpaper and then add your finish.
If you're using plywood or a softwood from the hardware store, you'll probably want to choose a stain color that coordinates with your home.
If you're using a fine hardwood or a natural cut of wood, an oil finish will bring out the best pop for you.
Step Four: Thread rope
Threading the rope properly is definitely the most difficult part of making a hanging plant display.
Why? Because everything has to be perfectly even to ensure the board remains level and your plant doesn't fall to the floor.
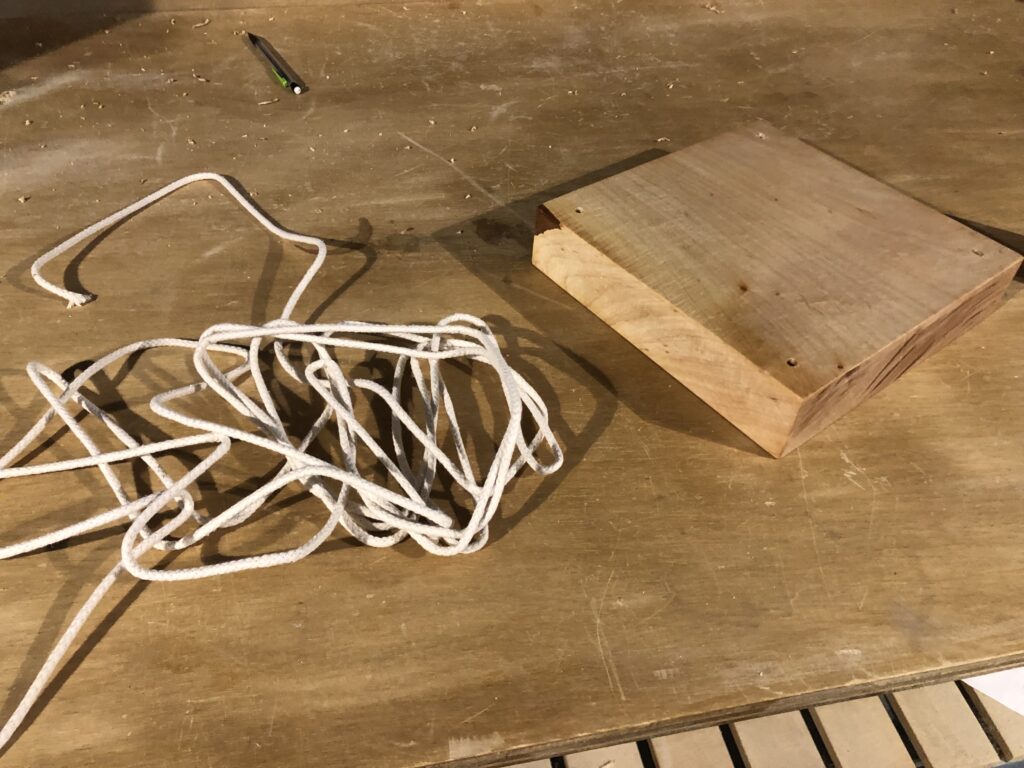
Determine the length of how much you want the shelf to hang down and pull out a little more than double that length in rope. Cut a second piece the same length.
Start with threading one end of a piece of rope through one of the pre-drilled holes from step two. Then, tie off a knot underneath the board.
Then, thread the other end of the rope through the other hole on the same side and tie that off the same as the first.
Grab the other piece of wood and thread it through one of the remaining holes and tie that off the same as the first two.
Here's the tricky part. In order to ensure that the hanging planter stays level, this last knot needs to be tied off at the exact same length as the other side.
So, after threading the other end through the last hole, hold onto the end that was threaded through and hold the two loops at the top.
Figure out where the knot needs to be tied off so that the board is level and tie it there.
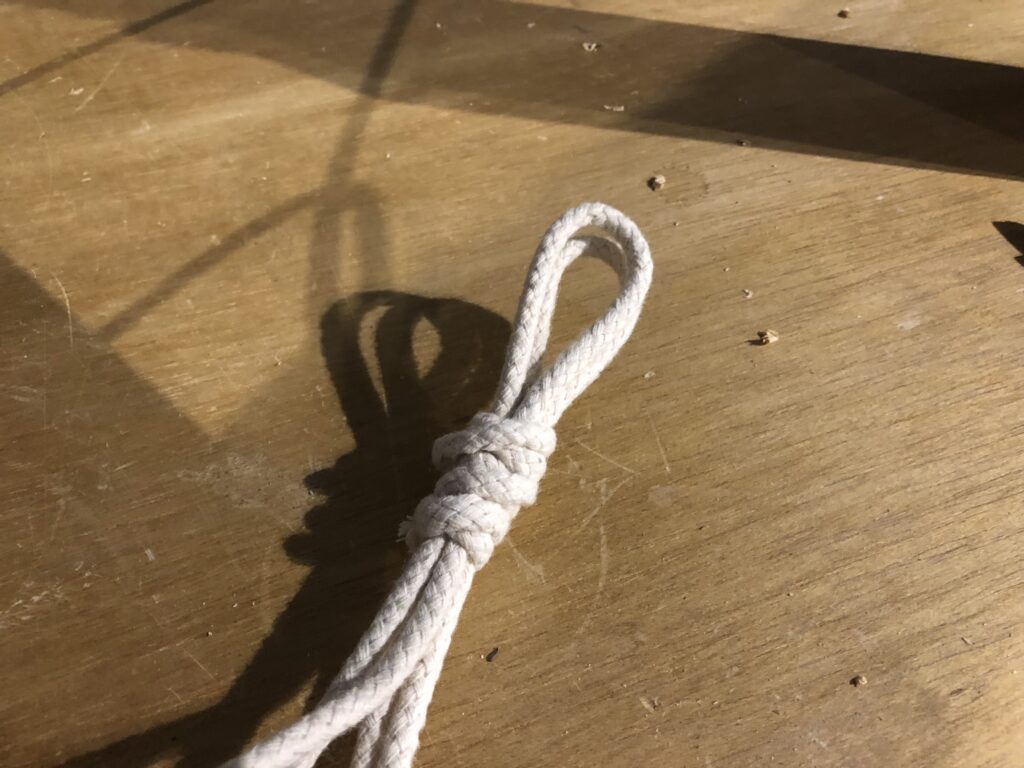
Finally, put the two loops at the top together and wrap a short piece of rope around them to keep them together.
Step Five: Install ceiling hook
These ceiling hooks we used are available online and at Lowe's and Home Depot and are super easy to use and sturdy.
To install, simply drill a ½" wide hole in the ceiling where you want the plant to hang from, then thread the wing anchor through the hole and twist until it is firm.
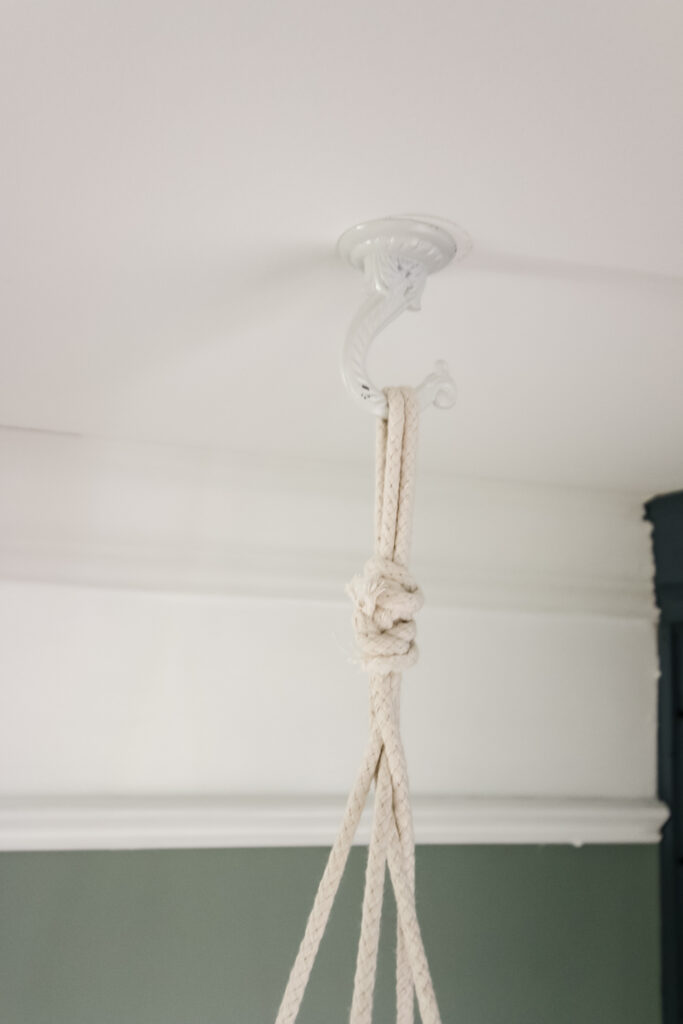
The diagrams on the packaging make it easy to complete this step!
If you want to hang your DIY plant stand directly in a window instead of in front of it, make sure you secure it to the inside the window frame where you will just need a hook and not a ceiling anchor.
Step Six: Hang and enjoy!
Finally, hang the shelf and add your plant.
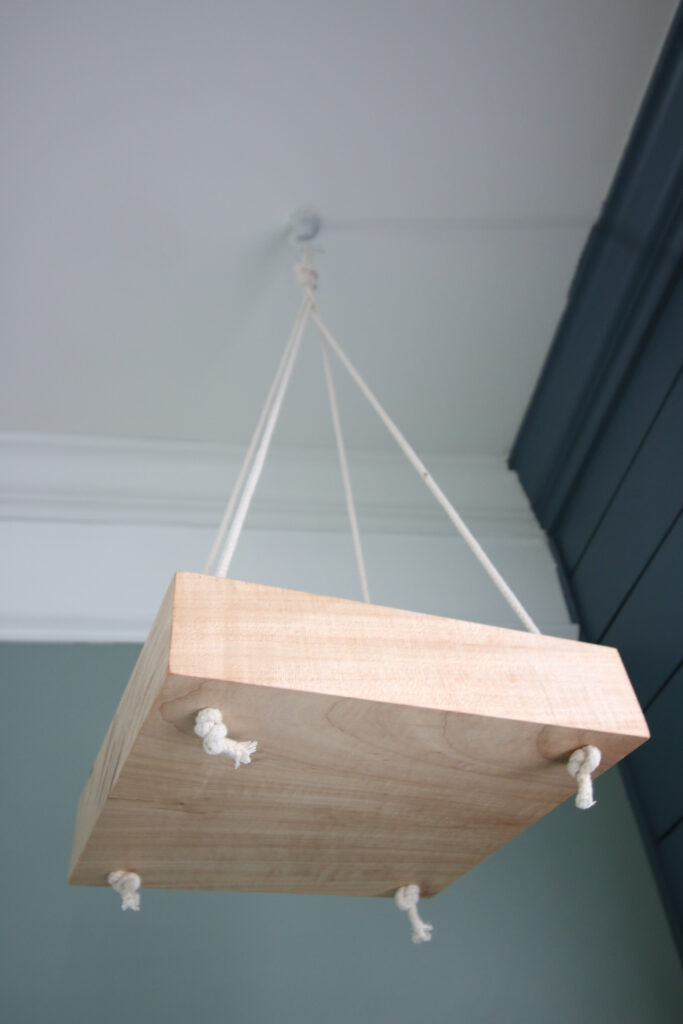
The vertical look to a hanging plant shelf adds interest and draws the eye upward, making your room look larger and your ceilings taller.
Plus, a hanging plant shelf frees up space elsewhere and allows a trailing plant to hang freely.
What are the best plants to use on a hanging plant shelf?
The best plants to use on a hanging plant shelf are usually trailing plants. These plants can then show off their length by hanging down.
You can hang any plant that looks nice, but refrain from using plants that grow tall because they won't be able to thrive growing up. Trailing plants or small plants work best on a DIY plant shelf.
If you're using this as a DIY window plant shelf, also make sure to choose plants that will thrive hanging in front of an indoor window. Depending on what direction your window faces, and therefore how much light it gets, will determine the best plants to hang.
Considering those tips, some of the best types of plants to hang on a DIY hanging window plant shelf are:
- Pothos
- Swiss cheese plant
- Philodendron
- Mican
- Thanksgiving cactus
- Hoya
- Spider plant

Other DIY plant stand ideas
Here are some of our other favorite DIY plant stand ideas. Many of these wooden plant stands can easily be built with scrap wood or by purchasing wood for a low price.
- DIY slatted plant stand
- Three tiered corner plant stand
- Outdoor rolling plant stand
- Angled tabletop plant stand
- Chair plant stand for single potted plant

Looking for something?
We've been doing this since 2012 so we have a LOT of blog posts!
Search stuff like: Ceiling Projects | DIY Plant Stands | Thrift Flips

Hey there, I'm Sean, the woodworking enthusiast and builder behind CharlestonCrafted.com! Since 2012, I've been sharing the magic of turning raw materials into beautiful creations. I love teaching others the art and satisfaction of woodworking and DIY. I try to inspire fellow crafters to make something extraordinary out of nothing at all.


Ivory says
Again, you two never stop amazing me. I do love this diy a lot. This summer I will be making three of these. Thanks for sharing
Sean says
Can't wait to see how it turns out!