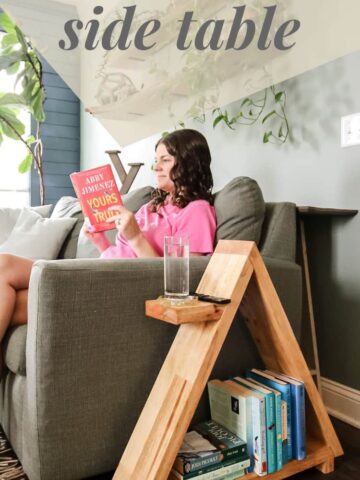
Check out how we built this simple DIY modern triangular side table with a place to display your books and set your drink. It's a great rustic modern look you'll love!
This post is sponsored by Kreg Tool. All opinions are our own and our opinion is that we love Kreg Tool. Thank you for supporting the brands that make Charleston Crafted possible!
I've never met a good side table project I didn't love. There are so many options!
We've made everything from traditional style side tables to midcentury modern side tables and even to floating bedside tables. They are all great and functional in their own way.
After filling in the wall between our kitchen and office, we expanded the pantry and built up our home office, both of which used butcher block for the countertops.
Butcher block is not cheap, so we saved all the pieces we could from those projects and finally had a time to put them to use!
We have an empty side of our couch in our living room and wanted a place to display some books and set a drink, so we designed a triangular pyramid side table that would do just that!
This is a great project that you can do with any chunky wood or adapt to use what you have on hand!
DIY triangular side table
We are huge fans of the mountains and thought that this design was a nod to the place where we spend a lot of time.
The triangular shape lends it self to the mountain form, giving it a rustic feel, especially with the chunky wood.
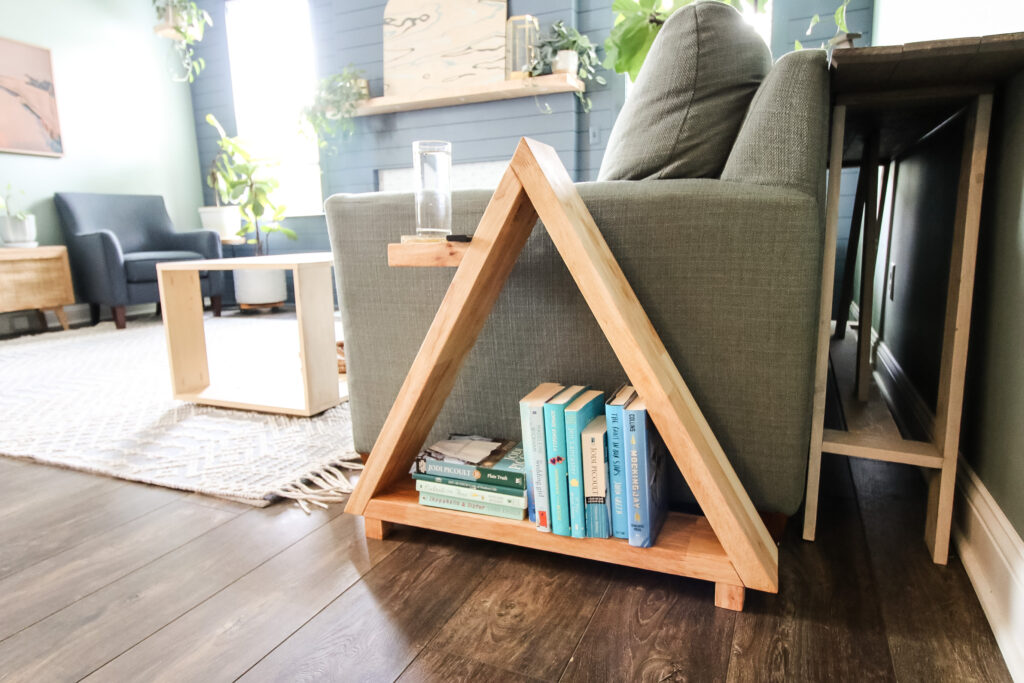
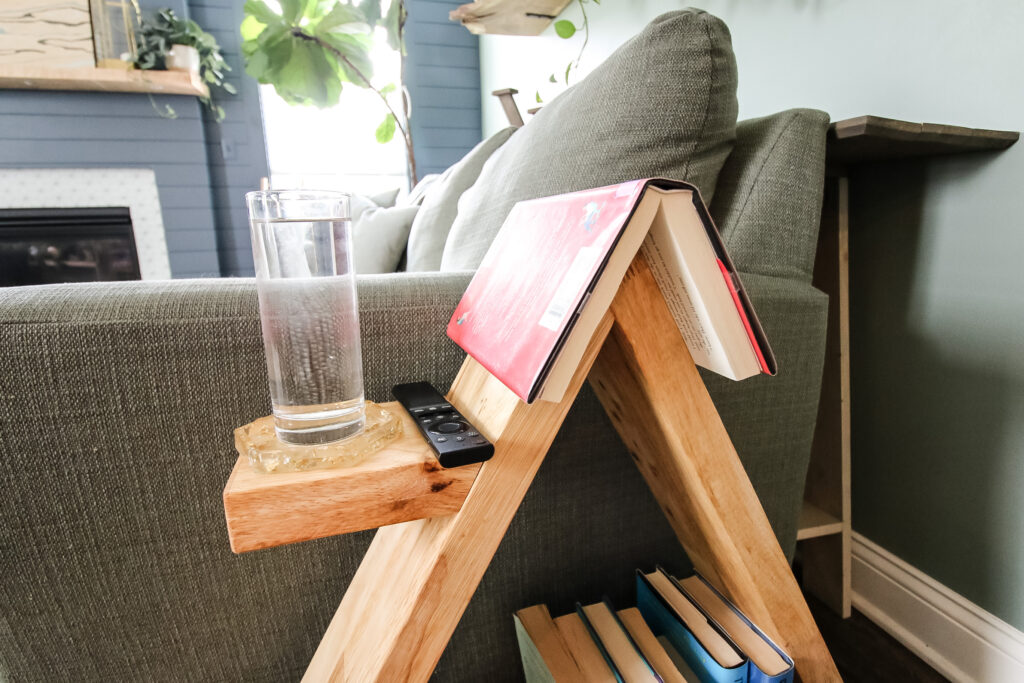
The best part of this triangular side table is that it has three ways to be used- as a book shelf, a drink holder, or a bookmark!
If you're reading on the couch, you can set your open book down on top of the peak of the mountain and it will hold your place!
There's a lot of ways to use this table so let's look at how to build this side table.
You might love the triangle embedded in the middle of this DIY concrete terrazzo side table!
How to build a triangle side table
We'll break down the main steps for this DIY modern side table in this post, but you can get the full material list, cut list and step-by-step instructions with the downloadable plans we put on Kreg Tool's website!
Kreg's project and plans website has tons of great plans for anything you're looking for, and all the plans on their site are free. But here's the overall idea on what you need and how to make a triangle table.
This triangle side table really helps break up the cube design of our DIY coffee table!
Materials needed:
- butcher block (or any chunky wood)
- 2 ½" Kreg pocket hole screws
- Wood glue
- Tung oil
Interested in the Kreg Jig? Click here to read our full Kreg Jig review and to see all of our Kreg Jig projects.
New to the Kreg Jig? Here is a step by step guide on how to use a Kreg Jig!
OR grab our FREE Kreg Jig Cheat Sheet here! Download the cheat sheet!
Check out the bedside tables with arches we made for our room!
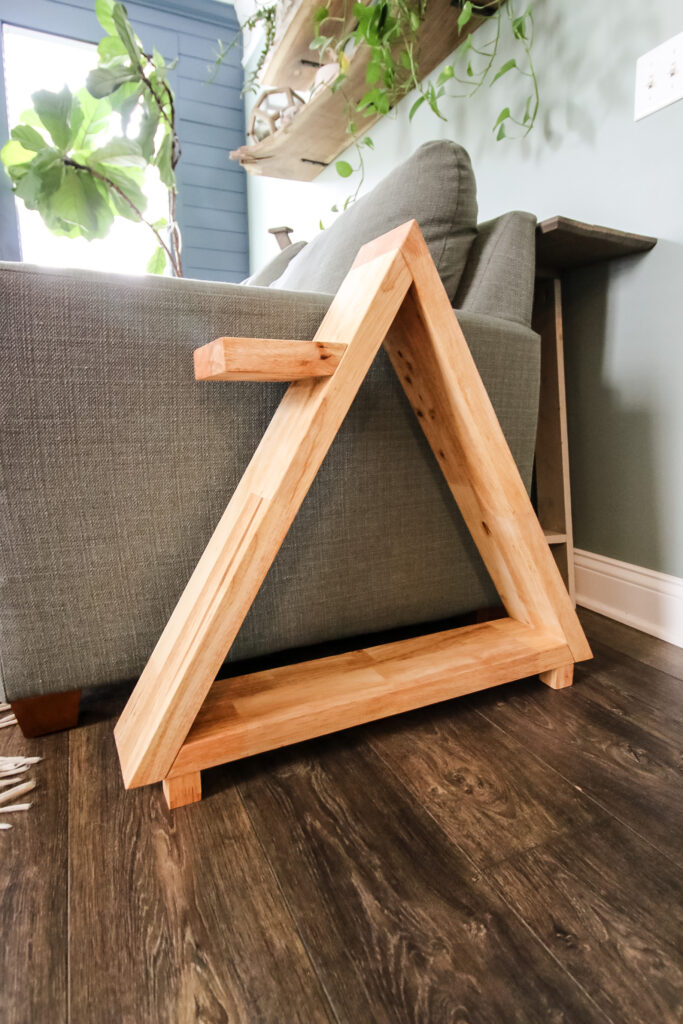
Step one: make cuts
Start by making all the cuts as listed in the woodworking plans.
When cutting thicker wood like butcher block, make sure you push the wood slowly through the table saw so as not to bind up the saw as it tries to cut all the way through. You might even be better off only cutting halfway through and flipping boards over.
And be careful cutting the feet here as they are smaller boards and whenever you're working with smaller pieces.
Step two: drill pocket holes
Next, drill your pocket holes. For this project, we used our Kreg 720 Pro, which is our favorite pocket hole jig.
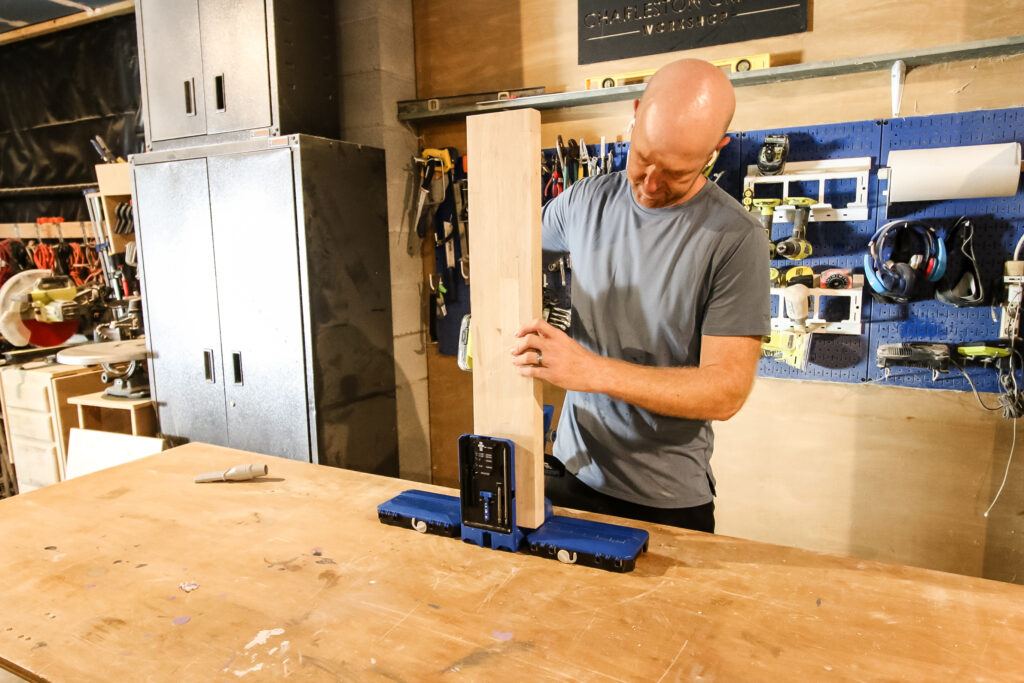
I think the Kreg 720 is great for this project because we're using big, thick pieces of wood and the stable body of the Kreg 720 is the best for holding that in place.
Here's our full review of the Kreg 720 Pro!
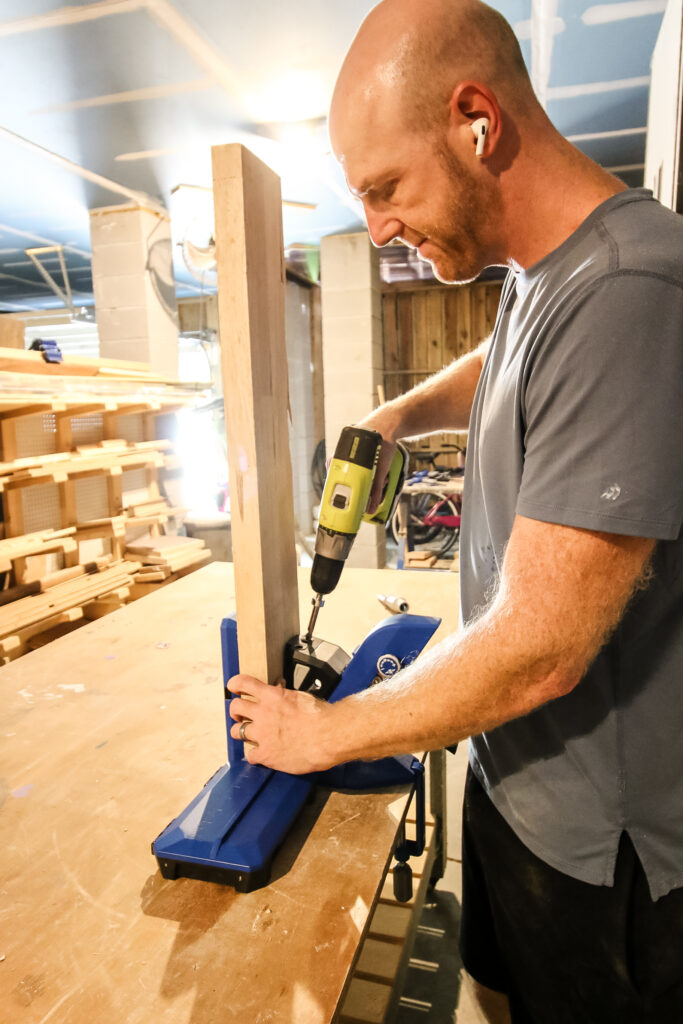
The Kreg 720 auto adjusts to the thickness of the wood, so you only have to adjust the thickness on the drill bit stop collar.
The pocket holes make it easy to hold this triangle shape together and attach the drink holder later.
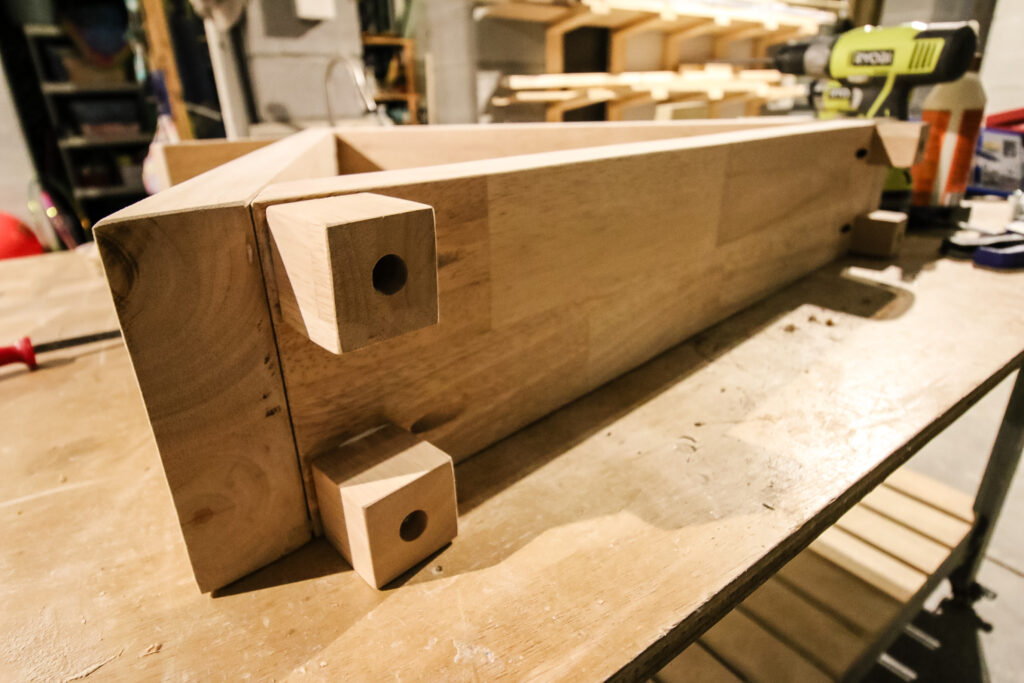
Step three: connect sides of triangle
Using wood glue and pocket hole screws, attach all the sides of the triangle together.
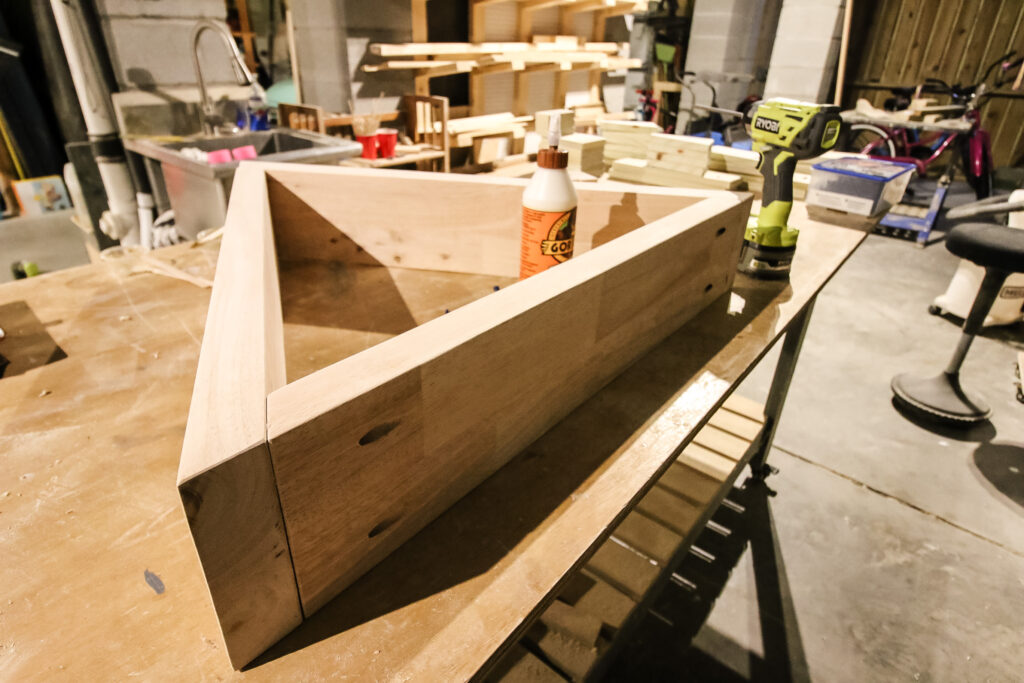
The base piece easily connects to the two sides and one of the sides slides into the other at the peak of the triangle easily.
If you have any trouble making a perfect connection, remember you can always sand down any edges and add wood filler to the joints to make them more seamless.
Here's how to make some DIY wood fillers using your own sawdust!
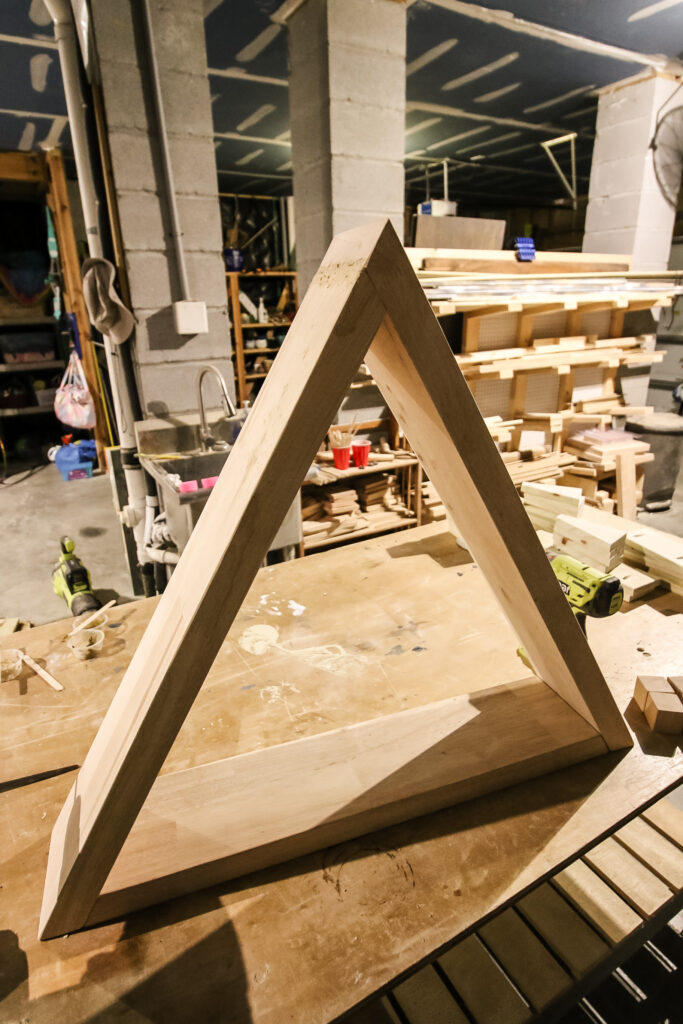
Step four: add shelf and feet
Finally, attach the drink shelf and feet!
The drink shelf can be attached anywhere you want and on either side of the triangle. I think it's best to determine what chair you'll have this table next to so you can determine the best height for the drink shelf.
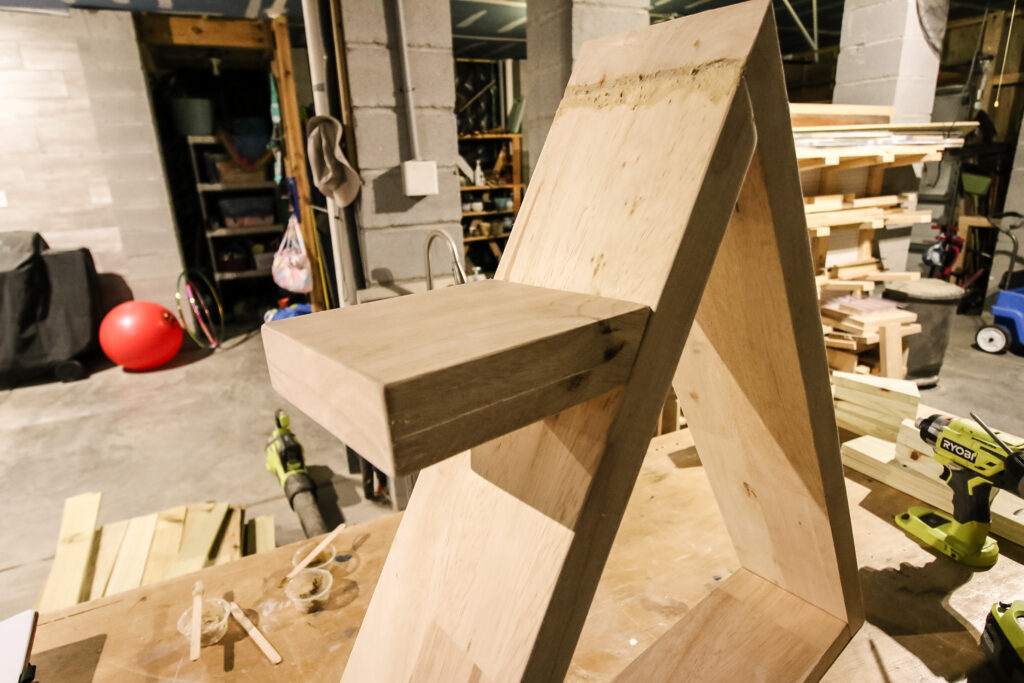
The feet are easy to attach, using wood glue and screws.
We actually used pocket hole screws for these and just drilled them straight through the bottom of the feet and counter sunk the screw heads.
Once it's all said and built, make sure to add your favorite oil or stain to make the wood pop!
Triangular side table with shelf
We absolutely love how this DIY side table turned out!
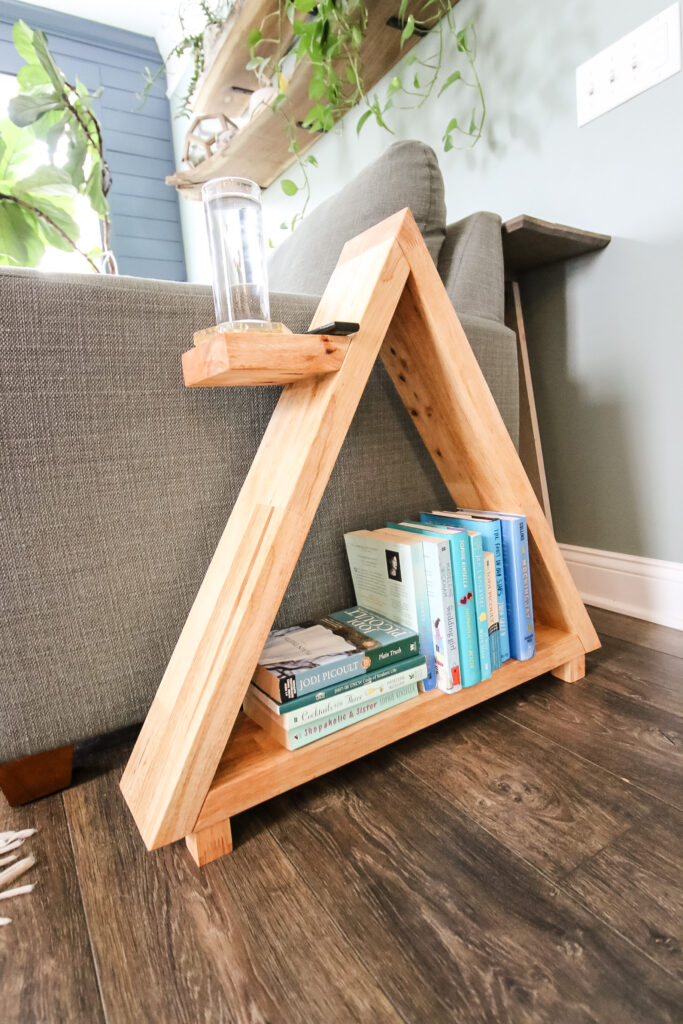
It has great rustic vibes, but looks very modern with the open feel and triangle shape.
There's so many ways to use this piece of furniture, from displaying books and decor to holding your drink.
DIY triangle side table woodworking plans
Love this DIY project and want to make one for yourself? Lucky for you, we have FREE woodworking plans available for you!
Thanks to our friends at Kreg Tool, we are bringing you the plans for this project free on their website. You can click over to get the material list, cut list and step-by-step instructions to make your own.
While you're there, you can check out a lot of our other free plans we've done for them and find something else for your room!

Looking for something?
We've been doing this since 2012 so we have a LOT of blog posts!
Search stuff like: Ceiling Projects | DIY Plant Stands | Thrift Flips

Hey there, I'm Sean, the woodworking enthusiast and builder behind CharlestonCrafted.com! Since 2012, I've been sharing the magic of turning raw materials into beautiful creations. I love teaching others the art and satisfaction of woodworking and DIY. I try to inspire fellow crafters to make something extraordinary out of nothing at all.


