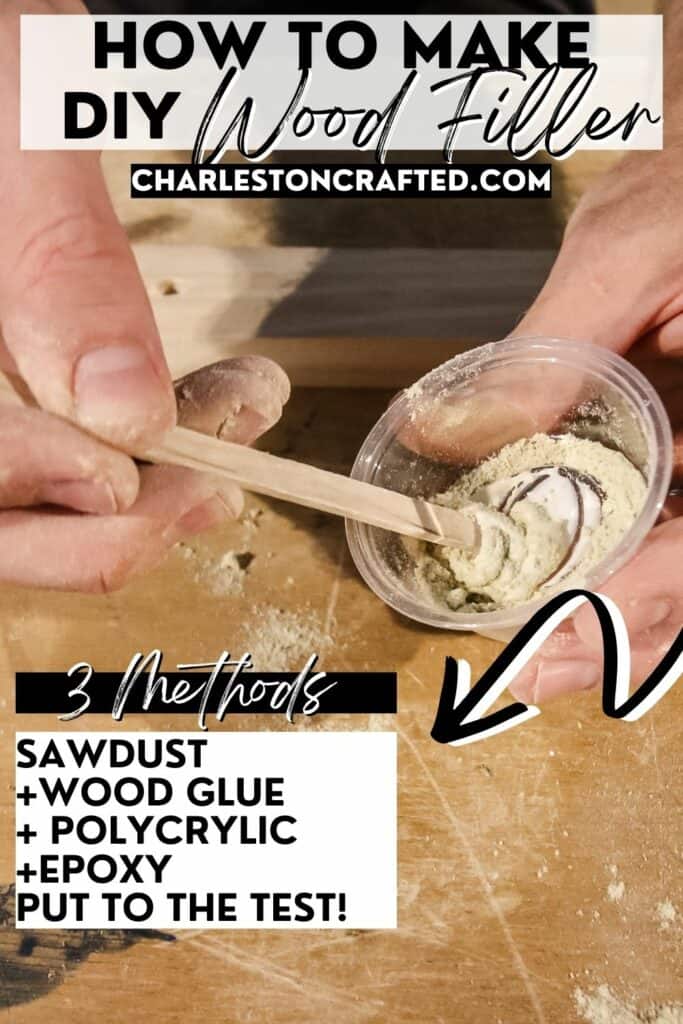
Want to make homemade wood filler? Here are 3 different methods for making DIY wood filler, and tips and tricks for success!
When you are building wood furniture, holes and cracks in the wood are just a natural part of the process.
Unless you are going for a rustic look, it makes sense to try to fill those holes before staining or painting.
You can purchase wood filler from the store, but you can also make homemade wood filler.
We have a whole post comparing the four best wood fillers on the market!
Homemade wood filler is versatile, very inexpensive to make, and completely customized to your project.
Let's dive into everything you need to know about DIY wood filler - including 3 different DIY wood filler recipes!
Understanding DIY Wood Filler
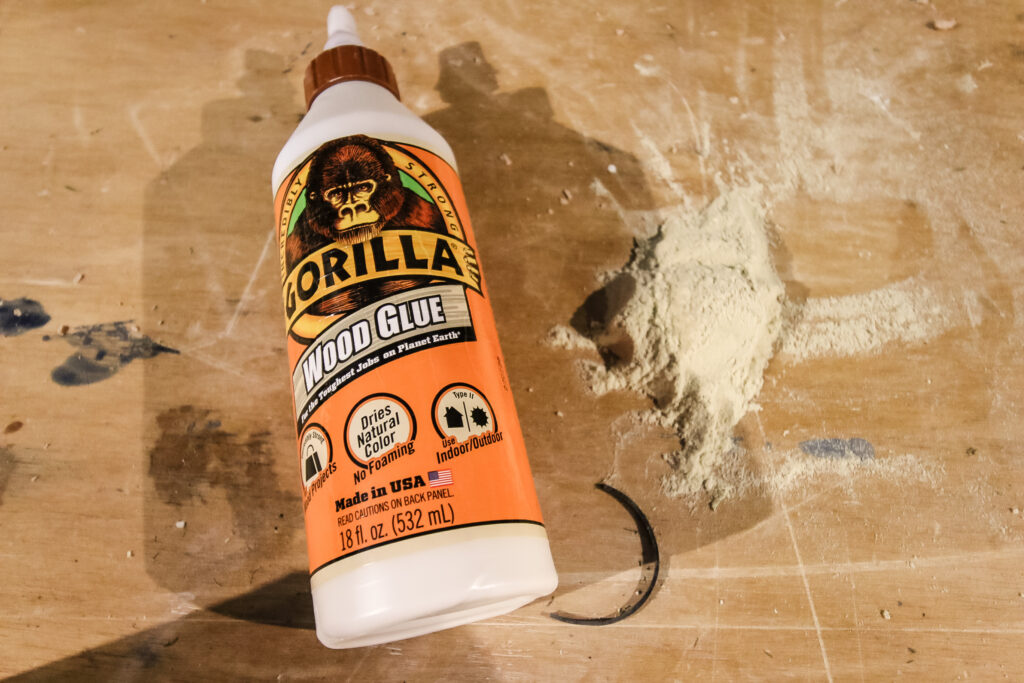
DIY wood filler is typically made with wood particles (usually saw dust) and a binding agent.
By mixing the two, you get a stainable, spreadable, sandable wood patching product.
The big benefit of using sawdust from your actual wood piece to make wood filler is that you will get an exact match to your wood - which is important when trying to achieve a seamless, hidden patch job.
In addition to being totally custom, DIY wood filler can be free, if you already have the saw dust from your project and a binding agent on hand.
So, this is a budget friendly way to do a woodworking project and cut back on supply costs.
Finally, it's just fun. We love experimenting with making homemade wood stains and creative DIYs. So, of course we like to experiment with DIY wood filler, too!
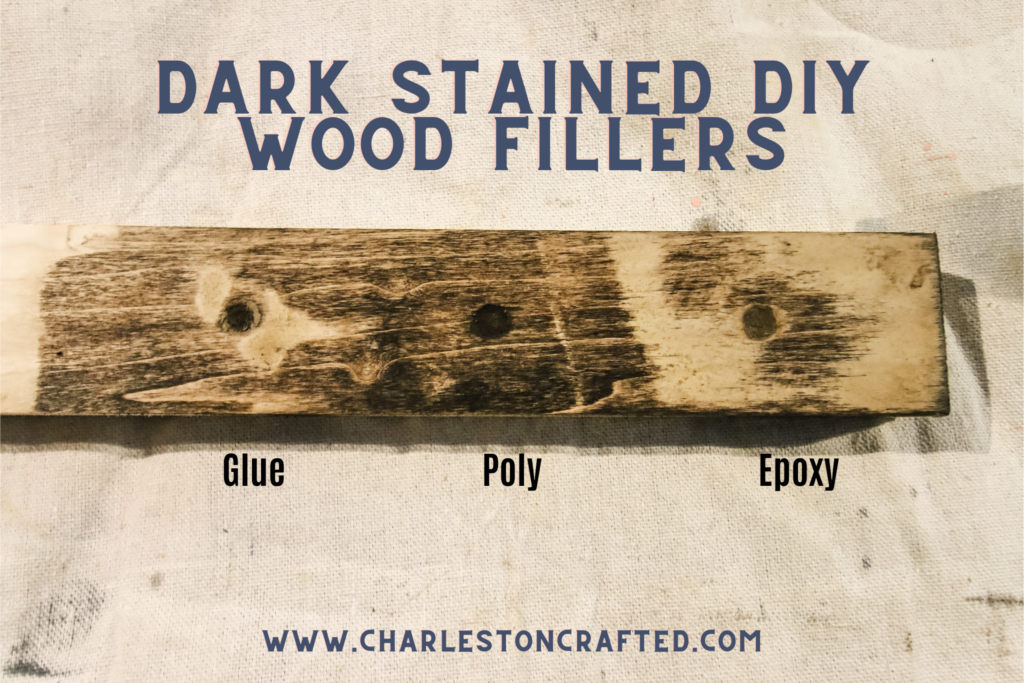
Typically wood filler is best used in small nail holes or in thin seams at joints between two boards, so it's barely even noticeable. For the purposes of this post, we put them in larger holes to show a more drastic impact.
How to make DIY wood filler
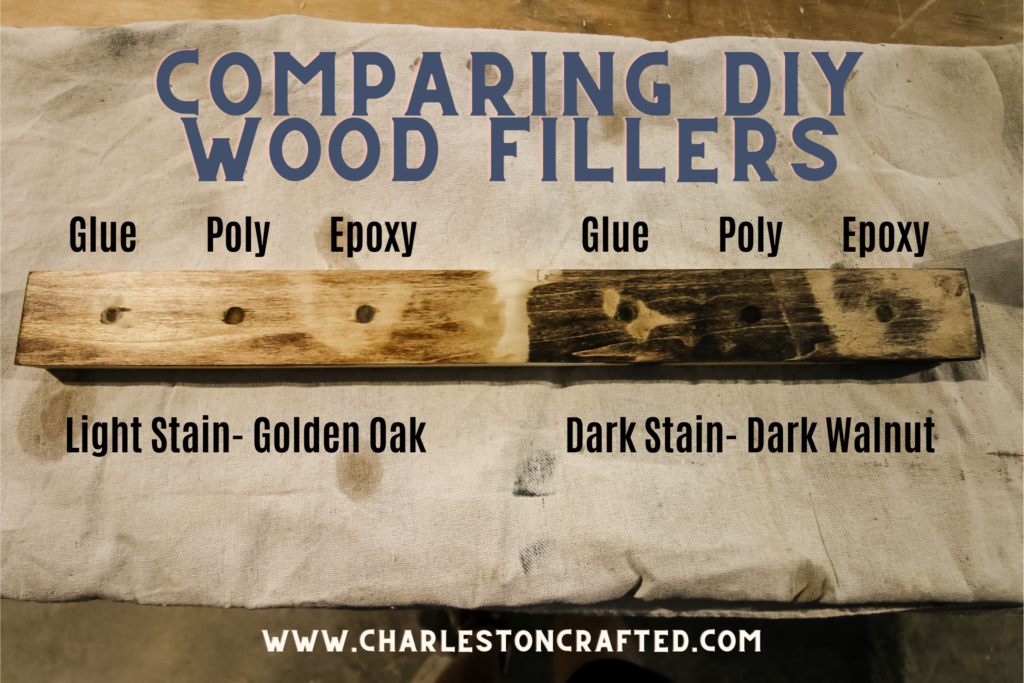
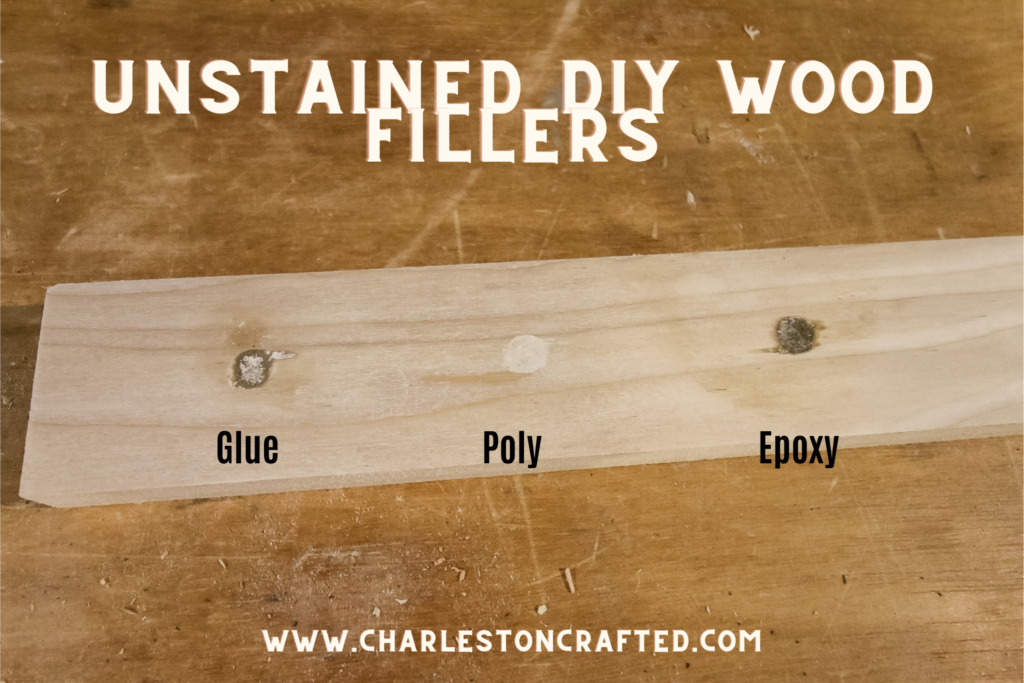
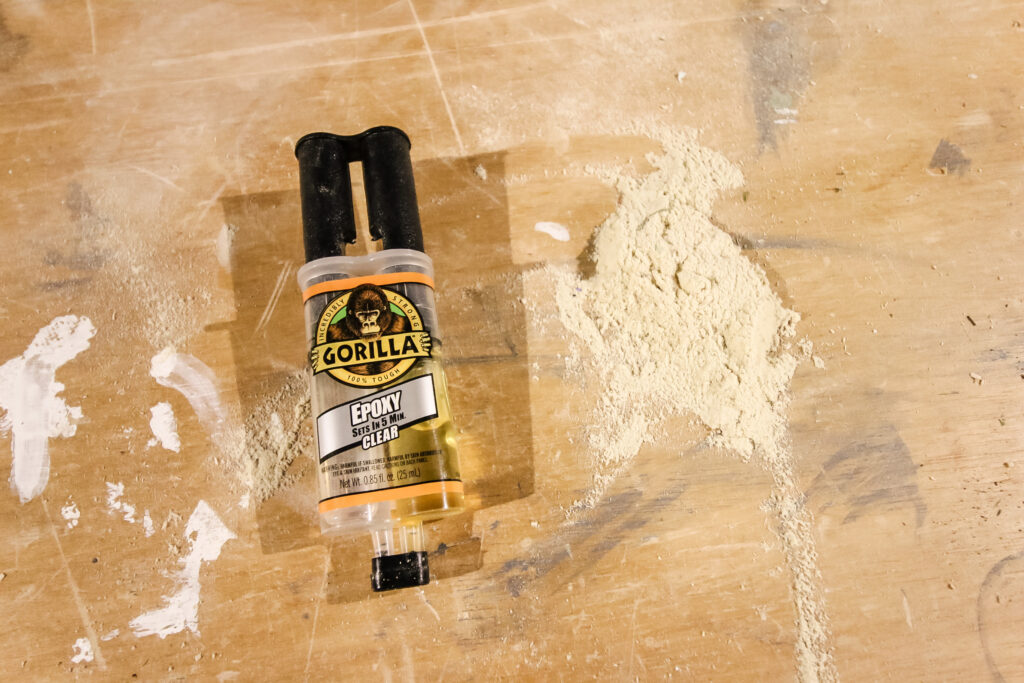
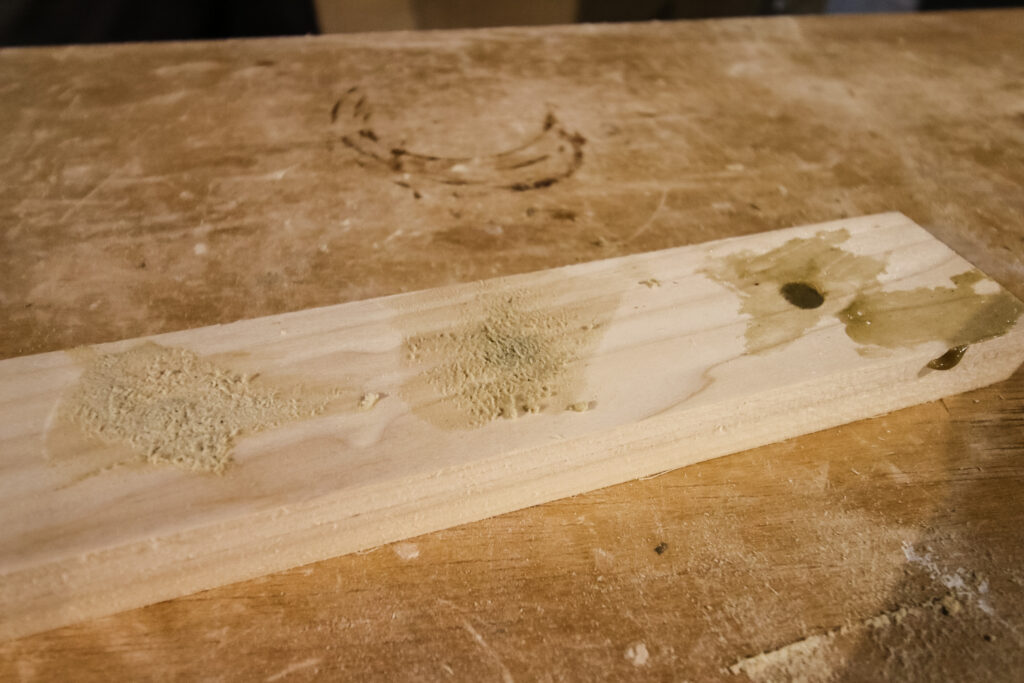
We decided to test out 3 different methods of making sawdust wood filler by trying out 3 different binding agents: wood glue, polycrylic, and epoxy.
Supplies used:
- Sawdust (from the piece of wood you are filling)
- Binding agent of choice (wood glue, polycrylic, or epoxy)
- Cup to mix in
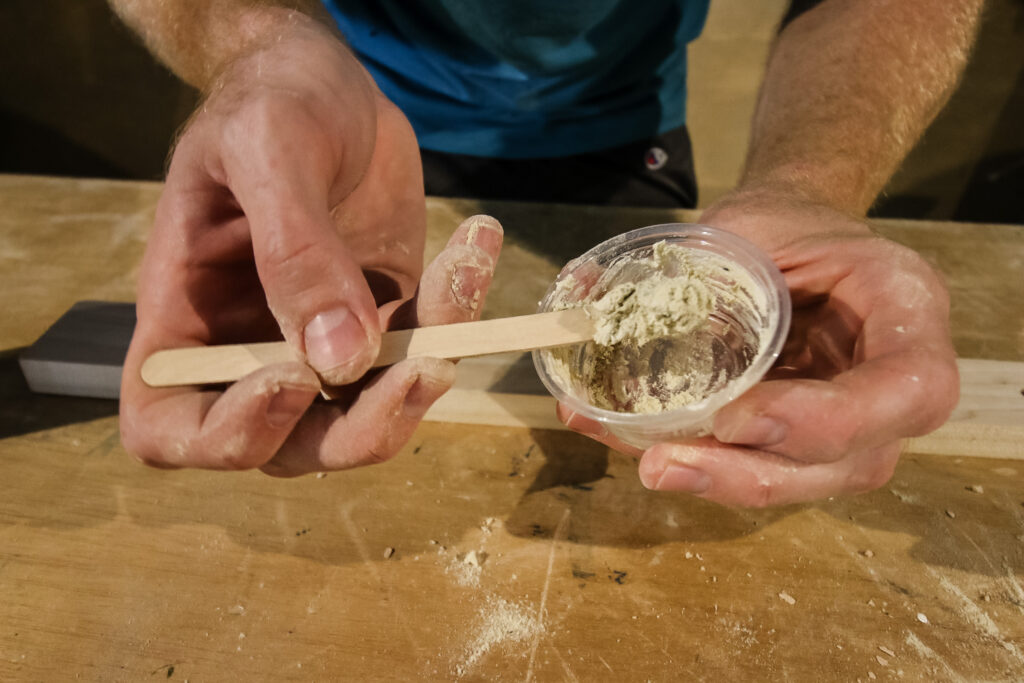
- Mixing stick (we used popsicle sticks)
- Sand paper (220 grit)
Steps to make homemade wood filler:
Here are the steps to make homemade wood filler for your next woodworking project!
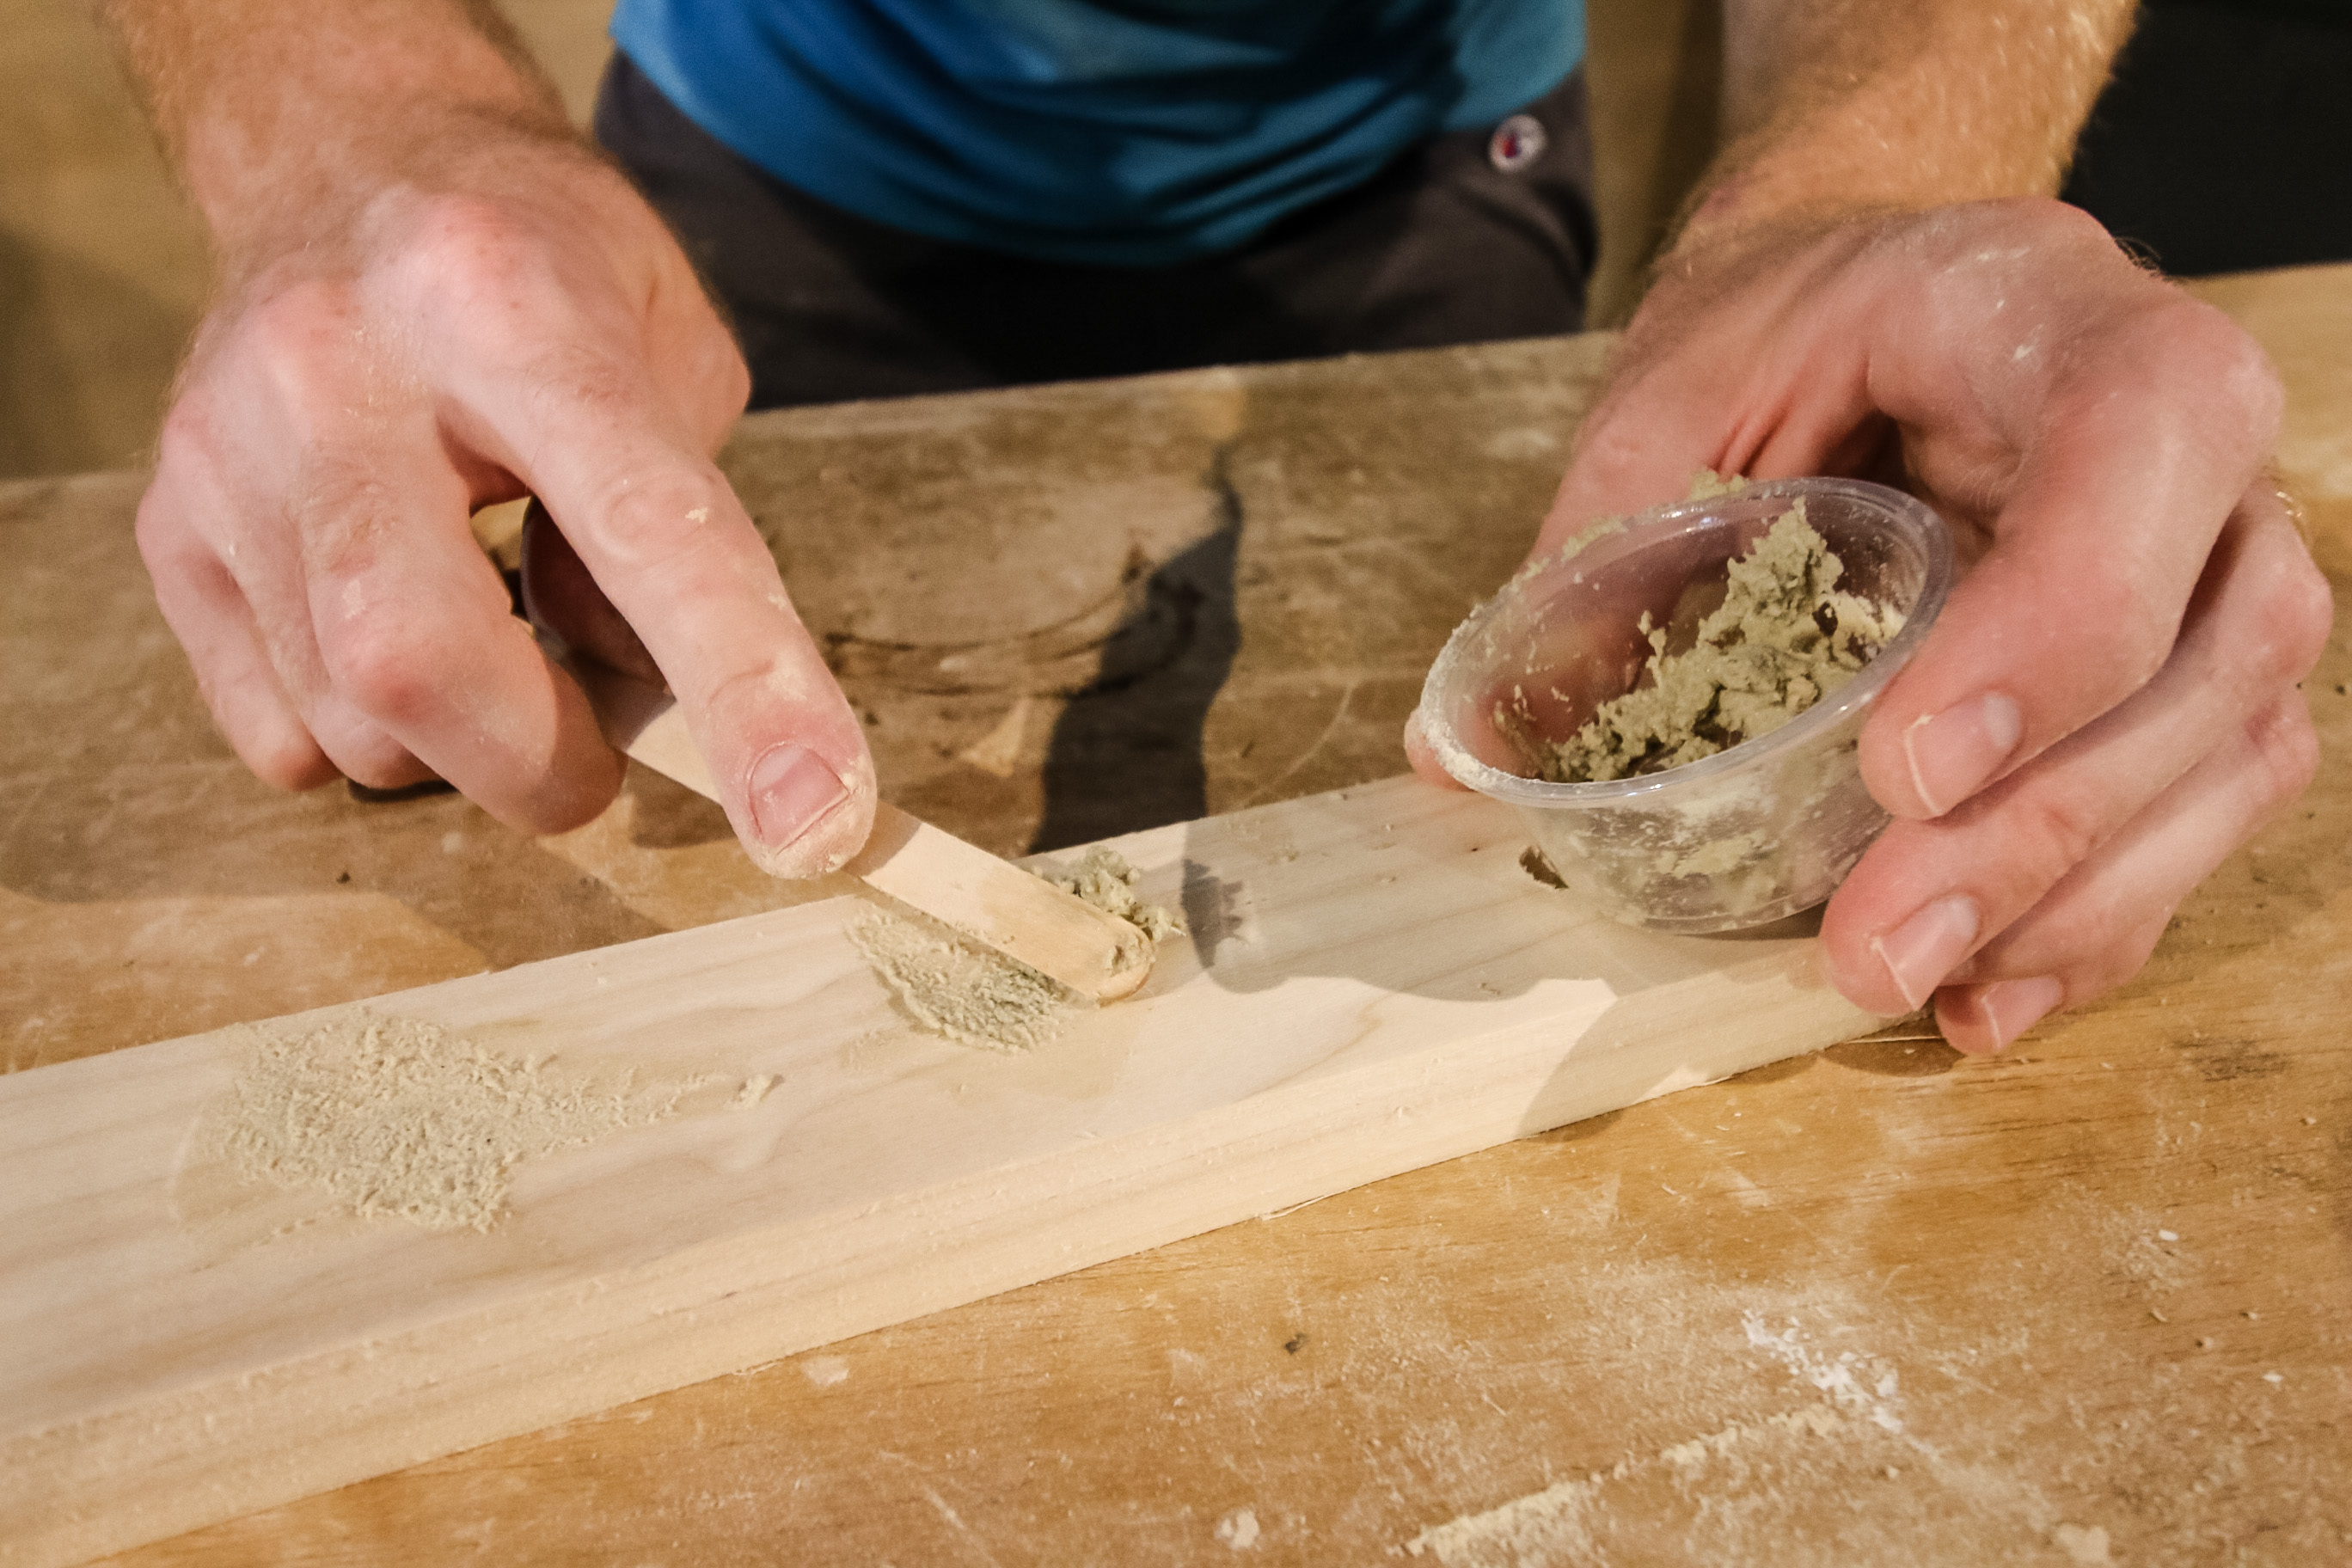
STEP 1: Add your binding agent to the cup
Add a small amount of your binding agent to your mixing cup. This will of course depend on how much you want to make. Aim to pour in about ½ as much as you want the final quantity to be. Remember to work in small batches if you are working on a larger project.
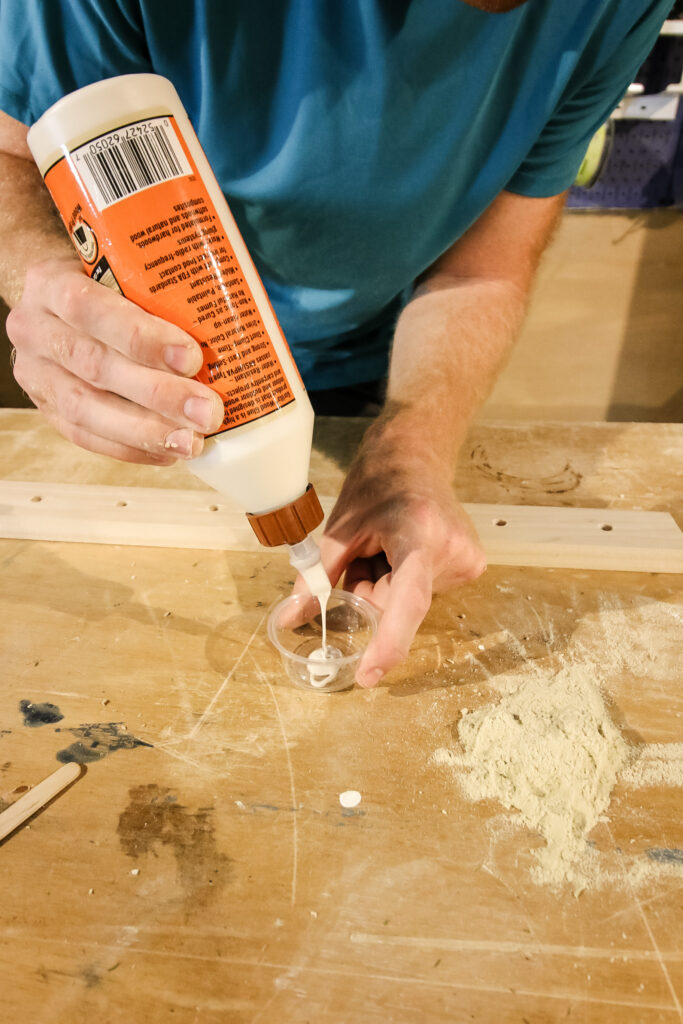
If you are using 2 part epoxy, combine the 2 parts according to package instructions thoroughly at this time.
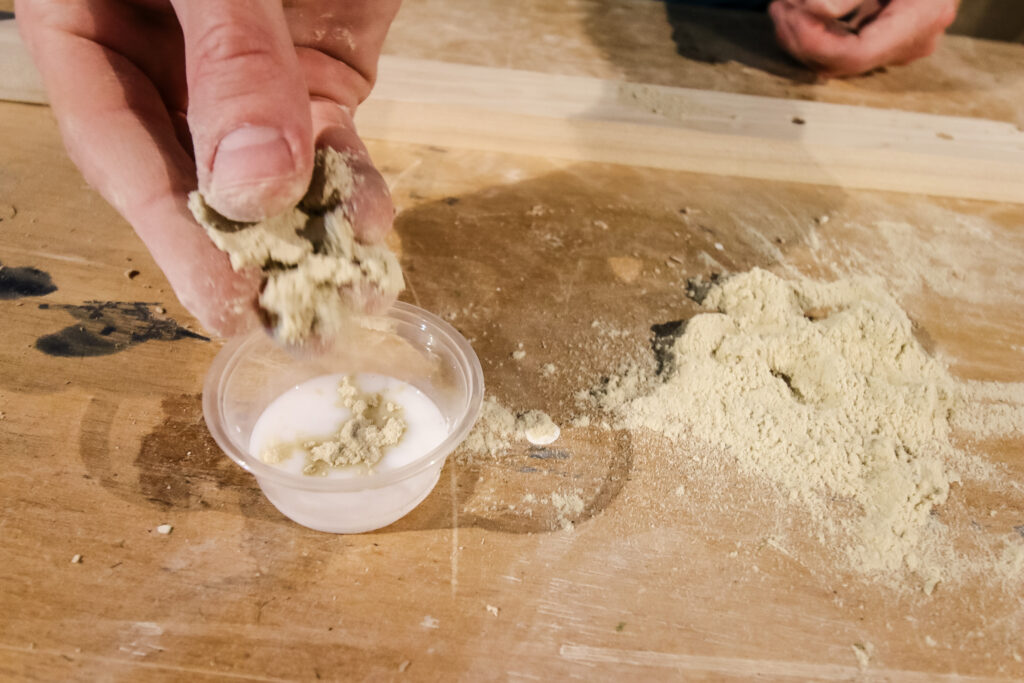
STEP 2: Slowly add sawdust
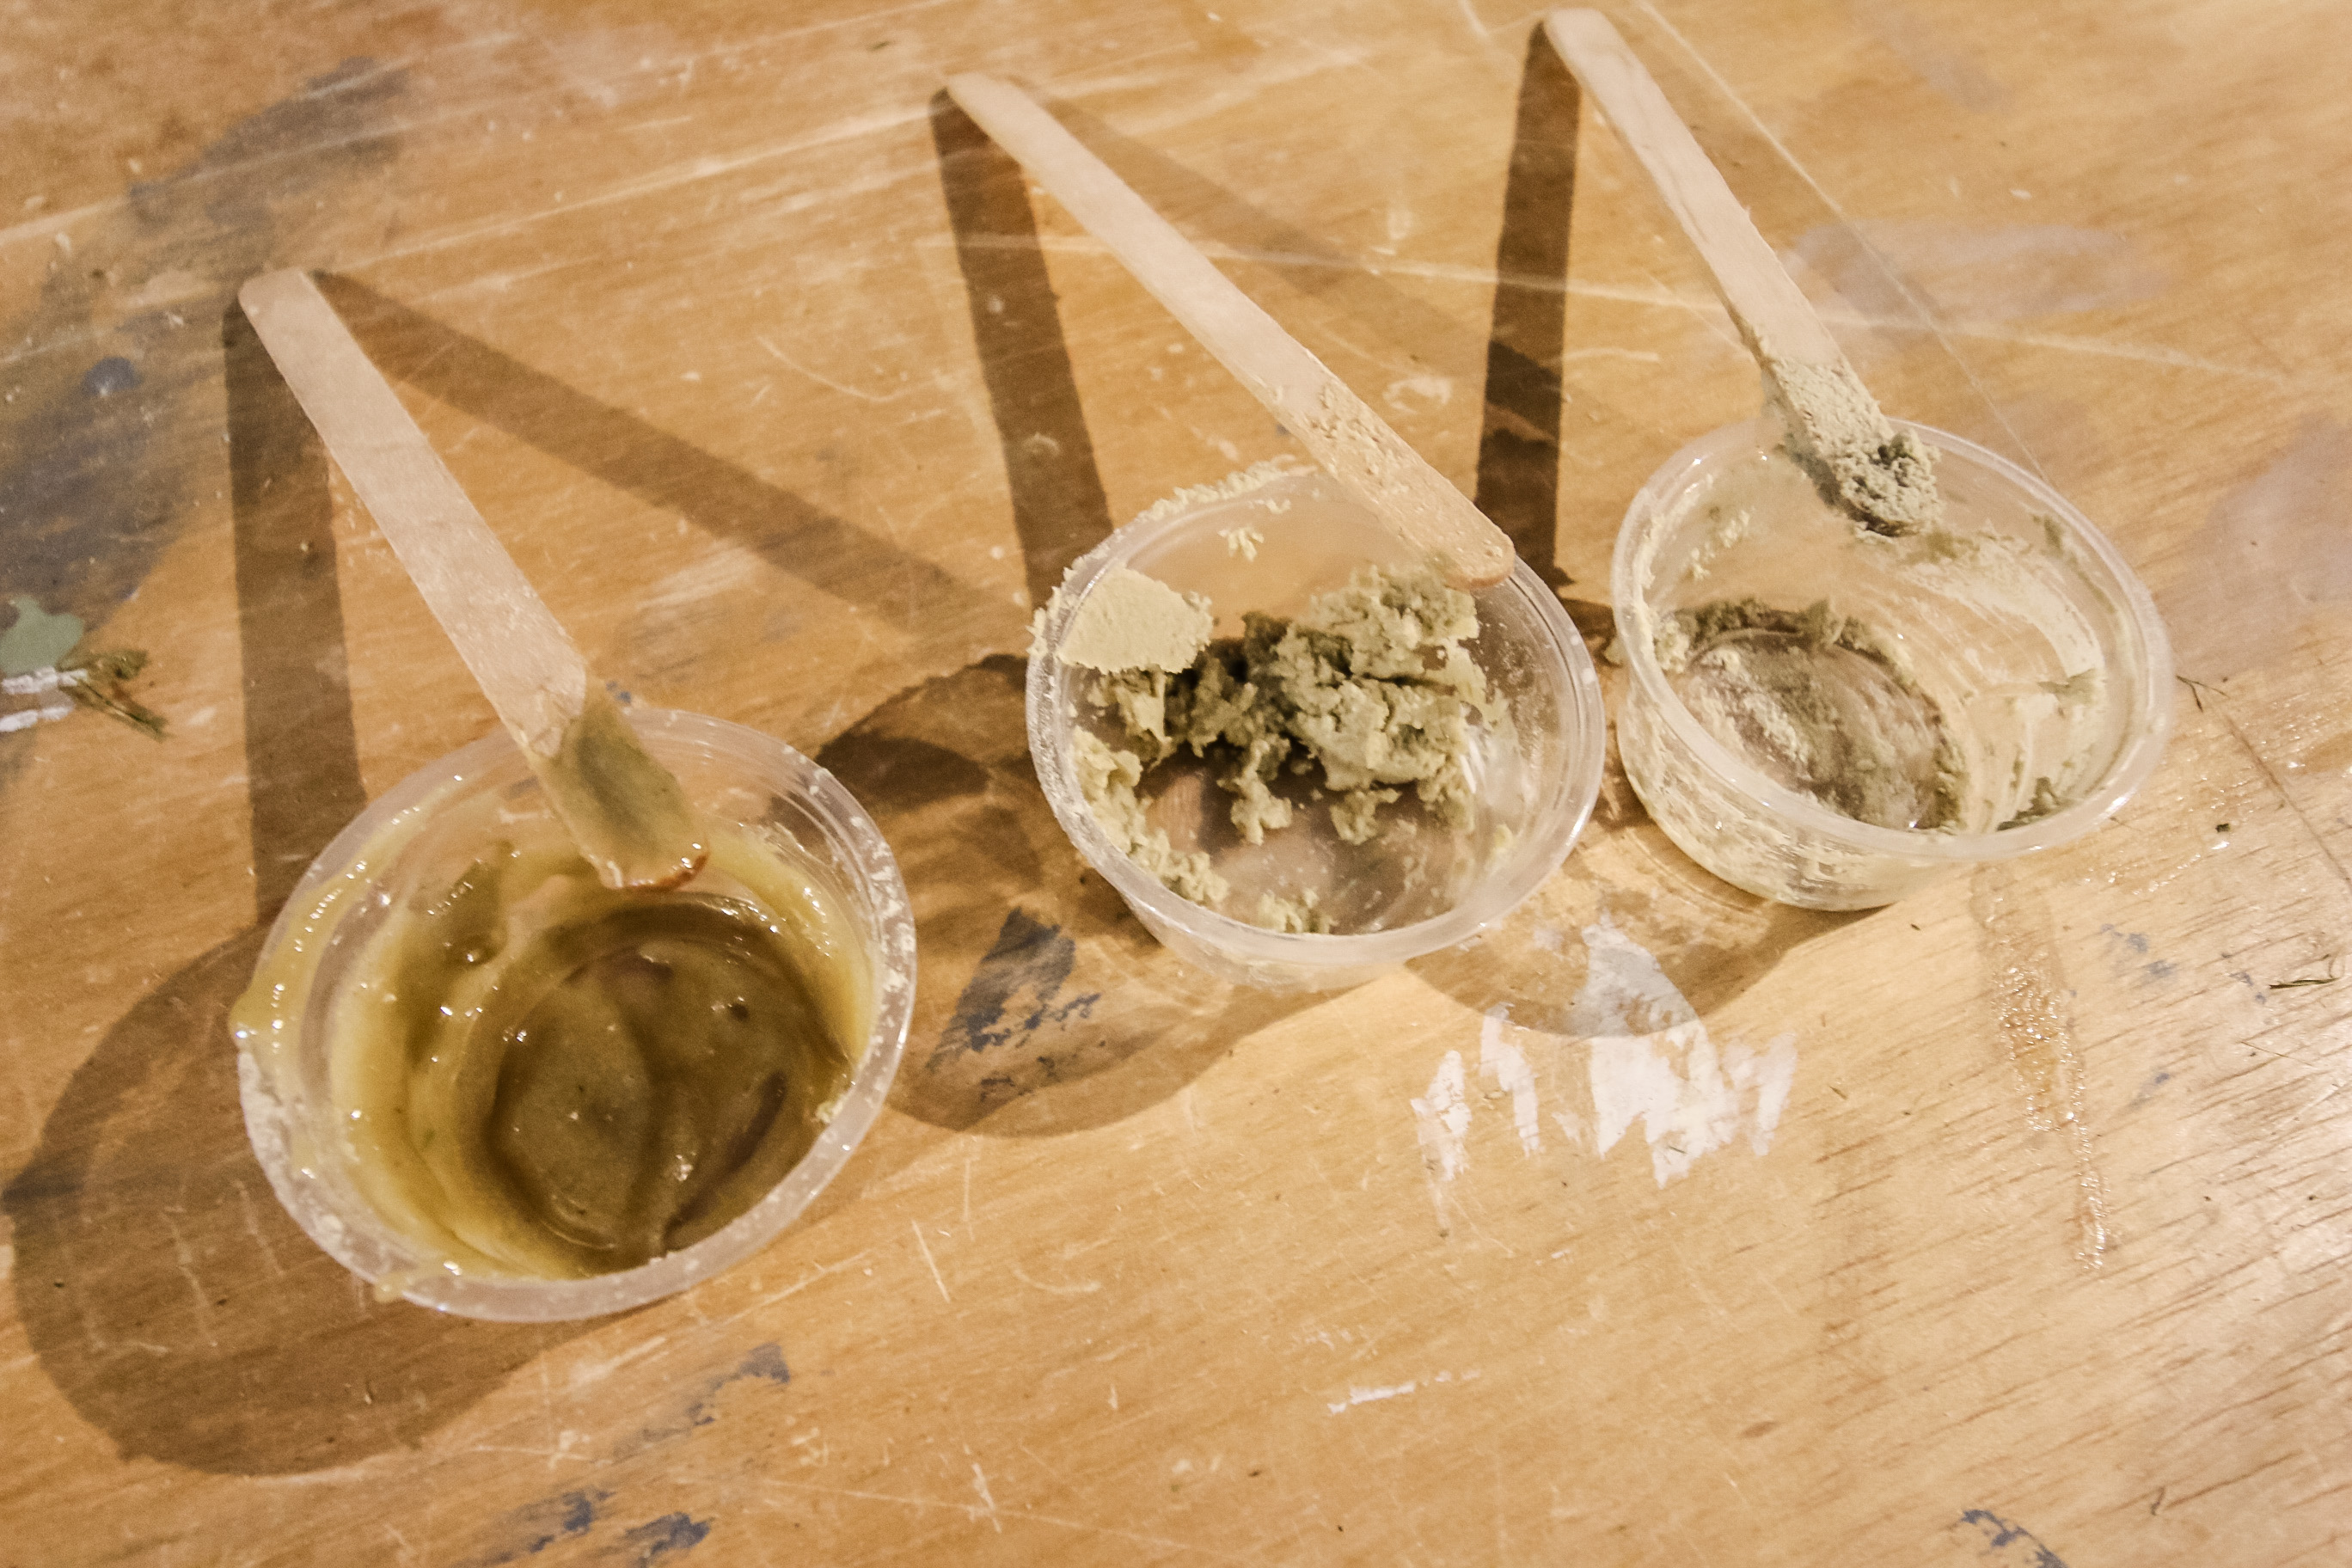
Add saw dust a pinch at a time with the end goal of a play dough like consistency.
You want to make sure you have a good amount of sawdust in the mix because this is what will actually take the stain when you are doing the project. The binders won't stain, so if you don't have enough sawdust mixed in, it won't stain to match.

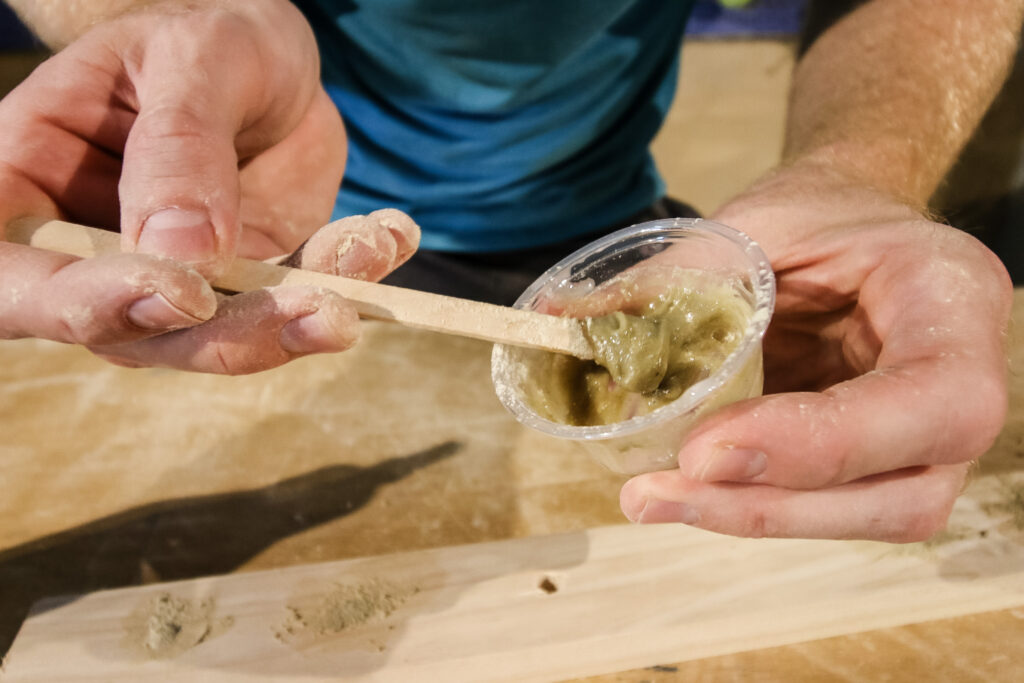
STEP 3: Mix
Mix thoroughly. Constantly stir in the sawdust into the agent until you think it is thoroughly mixed.
Not mixing enough can lead to uneven sections in the mix of too much dust and not enough of the binder.
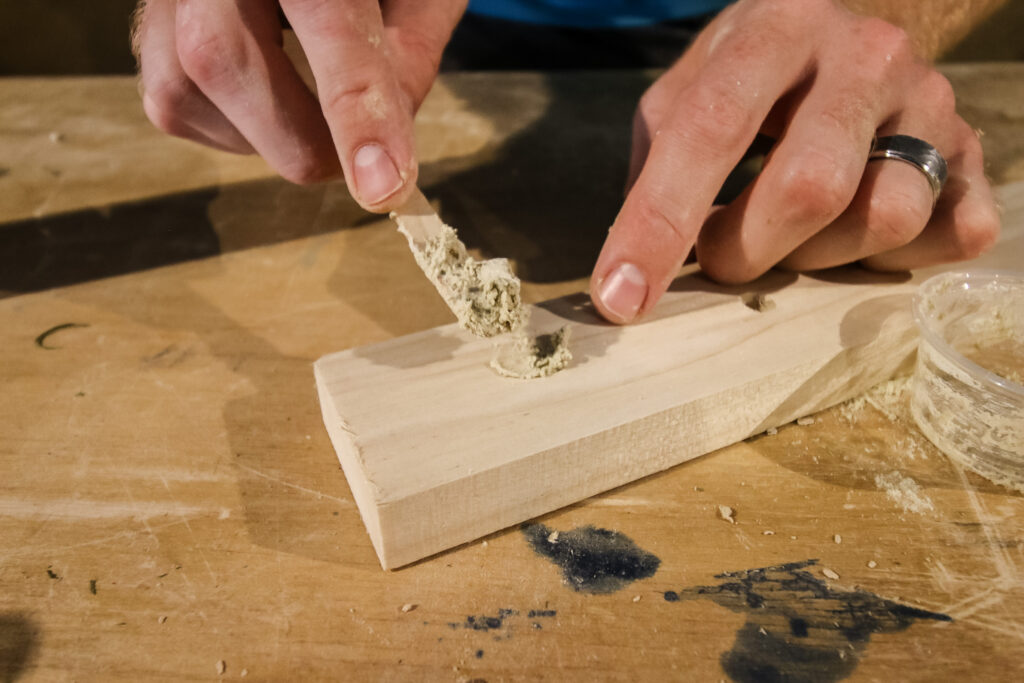
STEP 4: Apply to hole
Use your stir stick or your finger (with a glove) to apply to the hole. Press in deeply to fill any air bubbles, which can lead to cracks down the road. Fill completely.
You want to have a little bit of an excess coming out of the top, but try not to apply to much to the surrounding area. The more excess on the wood, the harder it will be to sand off and get the smooth finish, as you'll see later.
STEP 5: Rub smooth
Use your finger or stick to smooth the top of the hole to be flat, smooth, and flush with the top surface.
With the epoxy, after it sat for about an hour, the mix actually sunk down in the hole and we had to add a second coat to get it back up to be level with the board, so keep an eye on that.
STEP 6: Let dry
Let it dry completely. It should be dry after 1 hour, but the epoxy probably won't be ready to sand for 24 hours. It's best to let it all wait a day if you can.
STEP 7: Sand
Use 220 grit sandpaper to smooth in the direction of the wood grain until flush. If it's a larger area, try to feather the filler out on all sides to make it as seamless as possible with the surrounding wood.
If you don't sand it all off, the stain won't take. This can be tough to see because it might even look completely sanded when there is still excess. Again, you can see in our pictures how that happened with the glue and epoxy.
STEP 8: Stain or paint
Wipe clean and apply stain or paint as desired.
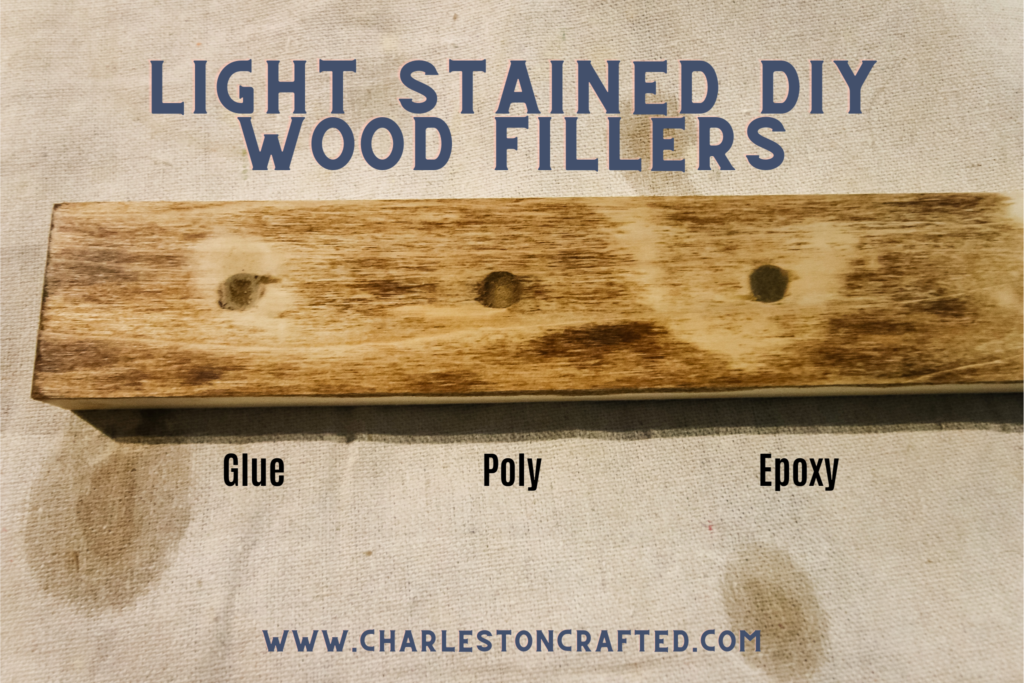
As you can see, it's very important to make sure there is no excess left around the hole. The excess epoxy wood filler on the dark stained wood really didn't take well, whereas the poly had no extra residue around the hole.
STEP 9: Apply topcoat
Finish it off with a topcoat of your choice. I suggest something matte to best disguise any inconsistencies in the texture.
Our thoughts on each homemade wood filler option
Here are our thoughts after testing homemade wood filler with 3 different binding agents!
Wood glue + sawdust wood filler
Consistency: this mixture made the most typical wood-filler texture, sort of play dough consistency. It's easy to rub in and rub smooth. It's also most naturally going to go in joints anyways, so this is a good choice.
Sandability: this wood filler was easy to sand smooth. However, if you don't get it entirely sanded smooth on the surrounding area, any product left will not stain properly, so you need to make sure it is completely smooth.
Stainability: wood glue wood filler stains well, but stains a little darker than the surrounding wood. If only used on joints or nail holes, you probably wouldn't notice, but on larger areas, you will.
Durability: Wood glue wood filler holds up strong as wood glue dries very solid.
Color: The color is going to change depending on the sawdust you mix into it, but overall it will likely be a tan color that is similar to the glue itself with a little tint.
Polycrylic + sawdust wood filler
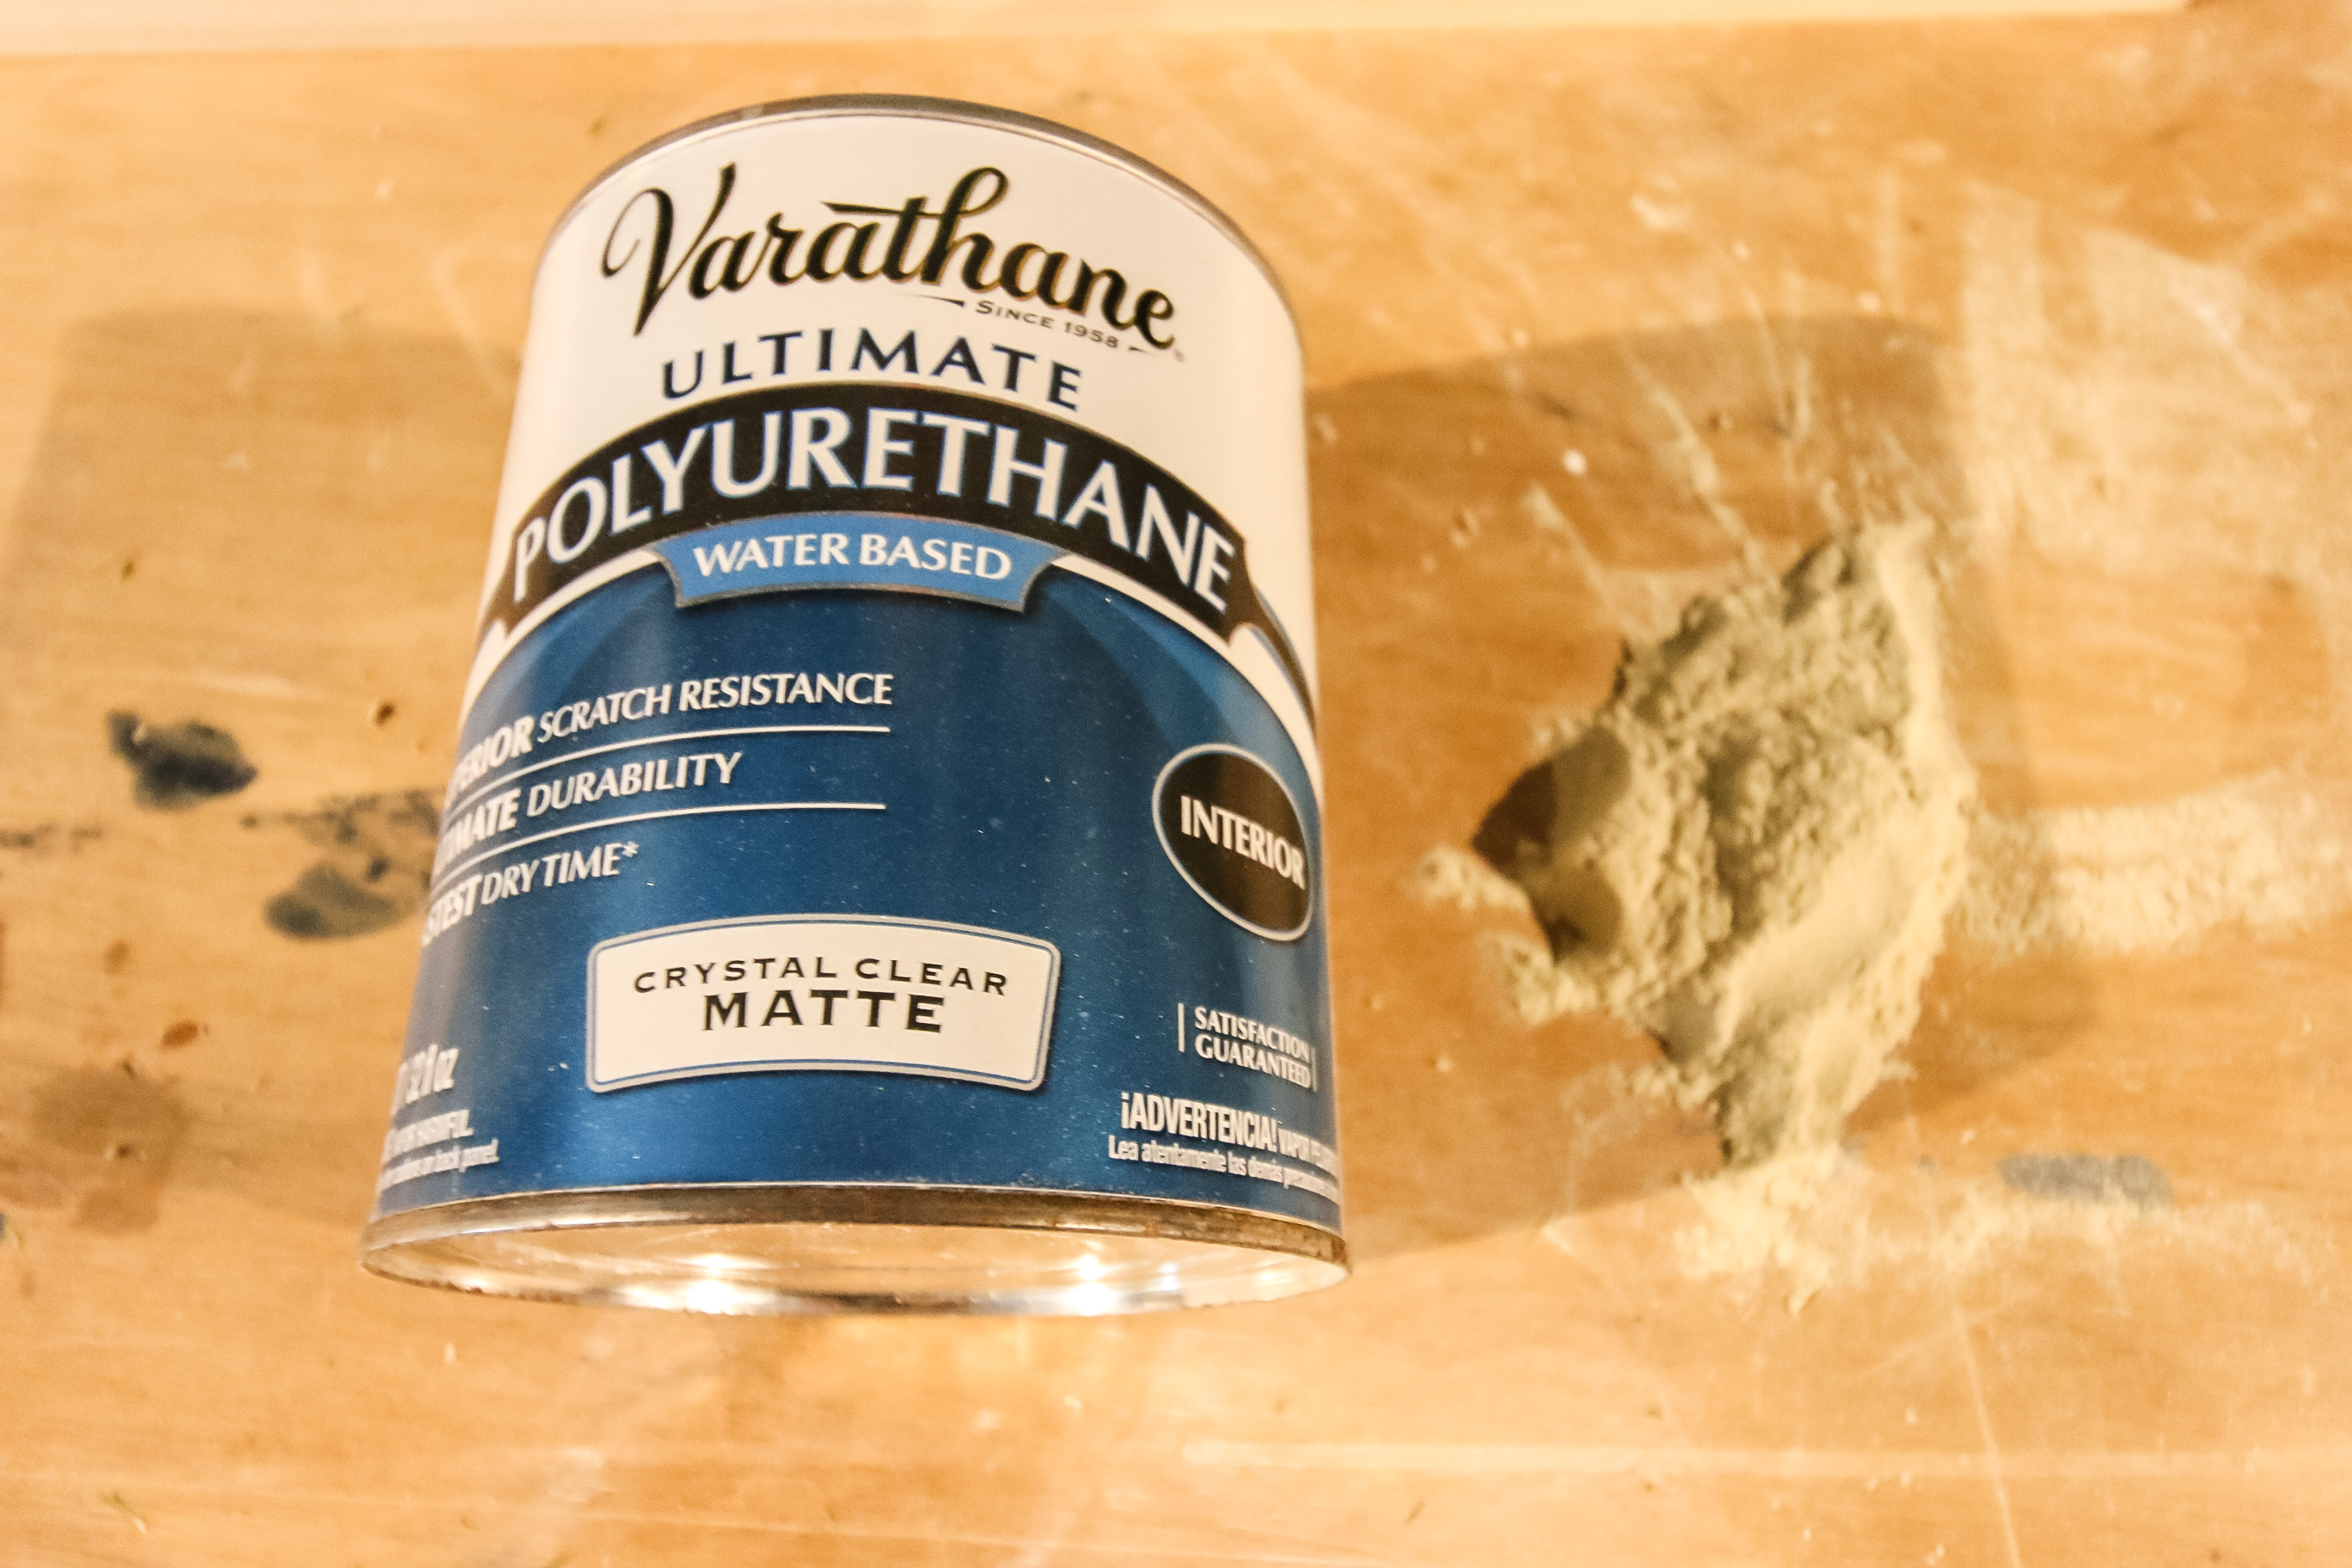
Consistency: This mixture was much runnier, which is no surprise since poly is liquid. It took almost twice as much sawdust compared to the other two to get the consistency right as it just soaked in.
Sandability: This was the easiest DIY wood filler to sand. It was water based and very smooth (as you would want poly to be) and sanded off the smoothest of all. It also didn't leave any residue around the hole we drilled so the staining was consistent.
Stainability: I was surprised to see that this mixture absorbed stain the best and nearly disappeared into the wood. This was definitely the best for staining!
Durability: This mixture stayed a bit soft for a long time. I'd call it the least durable, best for smaller nail holes and similar.
Color: The color was similar to wood glue, with a tan consistency, but it is going to lighten over time as poly does (starting out white and drying clear).
Epoxy + sawdust wood filler
Consistency: The consistency of DIY epoxy wood filler was a lot gummier than the others. It was thick, but didn't end up drying as well for some reason. Even though we mixed the two parts beforehand, it didn't dry quickly. This was unexpected because when we have previously added paint to this two-part epoxy on this simple river table, it actually accelerated the drying time.
Sandability: the DIY epoxy wood filler didn't sand great either. It was still really gummy after 24 hours so it gunked up our sandpaper a lot. It also was impossible to get completely gone, even with multiple grits of sandpaper, so it stained poorly around it. The actual hole stained pretty dark.
Stainability: The actual hole stained pretty dark. However, the area around it looked really bad. It would be really difficult to get every bit of this mix off the surrounding area and get a clean sand.
Durability: I expected this mix to be the hardest because of my experience with two part epoxy, but that just wasn't the case. For some reason, mixing in the sawdust made it not bond as well and it didn't harden properly.
Color: This mix came out a lot more brown than the others.
Tips and Techniques for Applying DIY Wood Filler
- Prepare the Surface: Before applying DIY wood filler, ensure the wood surface is clean, dry, and free from any debris or finishes. Sand the area around the repair to improve adhesion.
- Mix the Filler Thoroughly: If using a two-part filler like epoxy, follow the manufacturer's instructions and mix the components thoroughly to ensure a consistent and smooth texture.
- Apply in Thin Layers: For best results, apply DIY wood filler in thin layers rather than thick globs. Allow each layer to dry before adding more filler. This prevents excessive shrinkage and cracking and leads to a more durable finish.
- Use the Right Tools: Choose appropriate tools, such as putty knives or spatulas, to apply the filler smoothly and evenly. For intricate or small repairs, opt for a small putty knife, while larger repairs may require a larger one.
- Sand and Blend: After the filler has dried, sand the repaired area gently in the direction of the wood grain. Feather the edges of the filled area to blend it seamlessly with the surrounding wood.
Finishing Touches and Aftercare
Once your wood filler is dried and sanded, wipe it clean. You can now apply stain or paint the piece and the wood filler should blend seamlessly with the surrounding wood.
You can read our tips for how to stain wood filler and how to paint wood filler here!
I always suggest adding a clear top coat to protect your wood surface. We love matte polycrylic!
Inspect the wood-filled spots periodically. If there is any cracking or dings, you can lightly sand it, touch it up, and re-do the finish.
Any more questions about DIY wood filler?

Looking for something?
We've been doing this since 2012 so we have a LOT of blog posts!
Search stuff like: Ceiling Projects | DIY Plant Stands | Thrift Flips

Hello, I'm Morgan, half of the creative force behind CharlestonCrafted.com! With a passion for DIY that dates back to 2012, I've transformed three homes and now I'm dedicated to helping others craft their dream spaces. Let's turn your house into a home together!


