Check out this waterfall edge cheese board that is customizable for your home and will wow your guests. Make your elegant serving platters look even better with this custom waterfall edge cheese board!
With the holidays coming up, you might be planning to host people for parties and family gatherings.
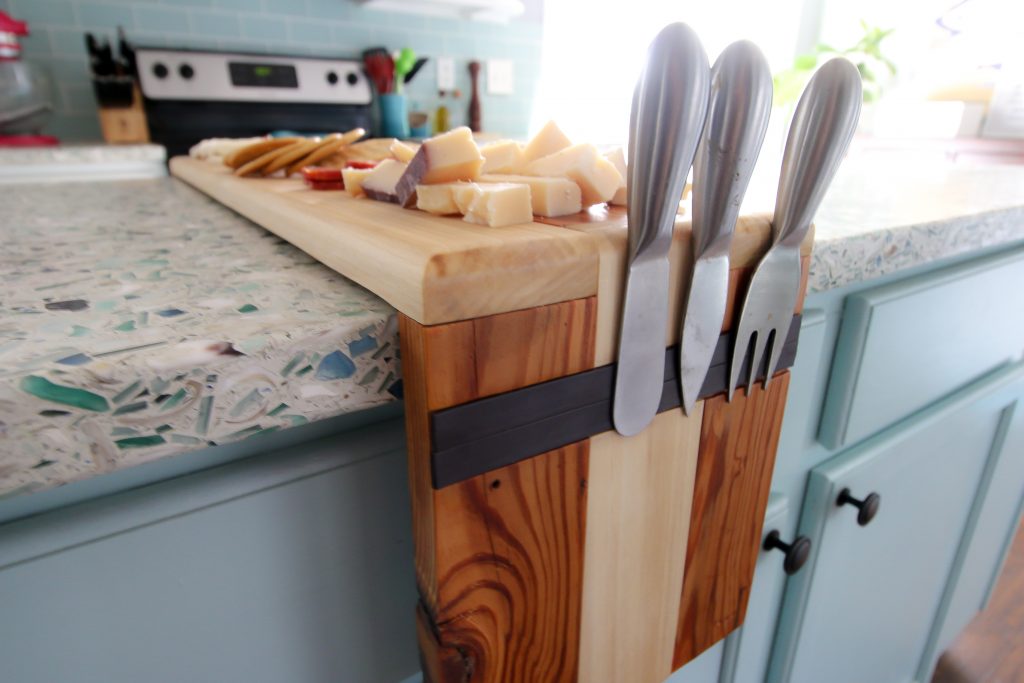
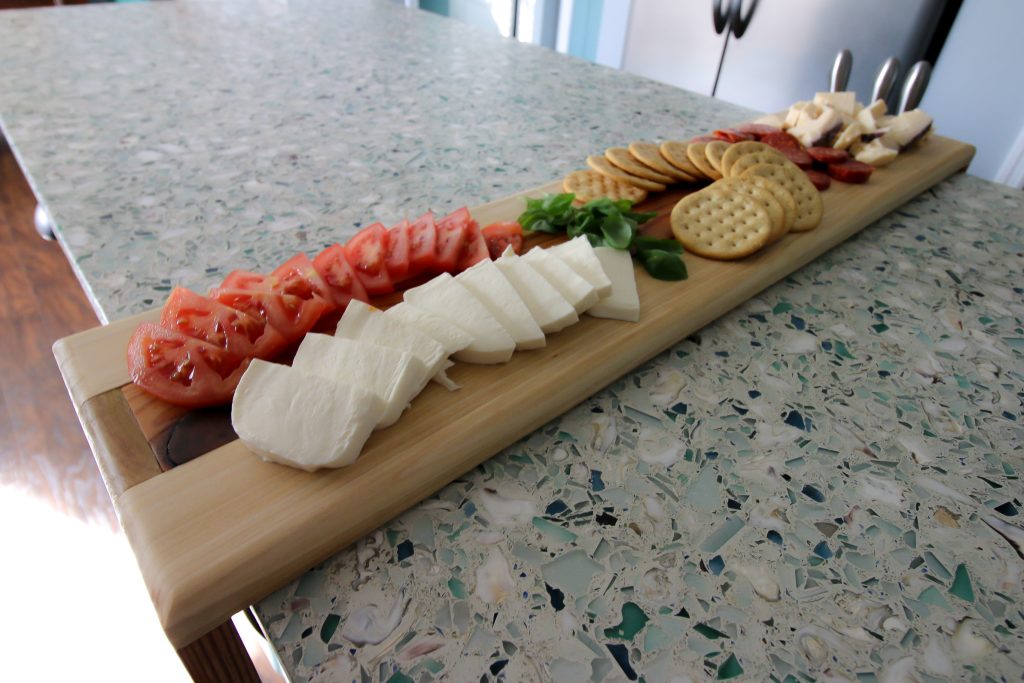
One of the best food items to serve for a large group is a cheese or charcuterie plate. Having a spread of cheeses, meats, crackers, fruits and nuts is a great way for guests to graze on snacks all evening.
If you want to make a real impact on your guests, try building this waterfall edge cheese board custom for your kitchen island!
Custom Cheese Board
One of the best things about this project is that it is completely customizable for your needs. The idea behind the waterfall cheese board is to size it custom for your kitchen island or peninsula.
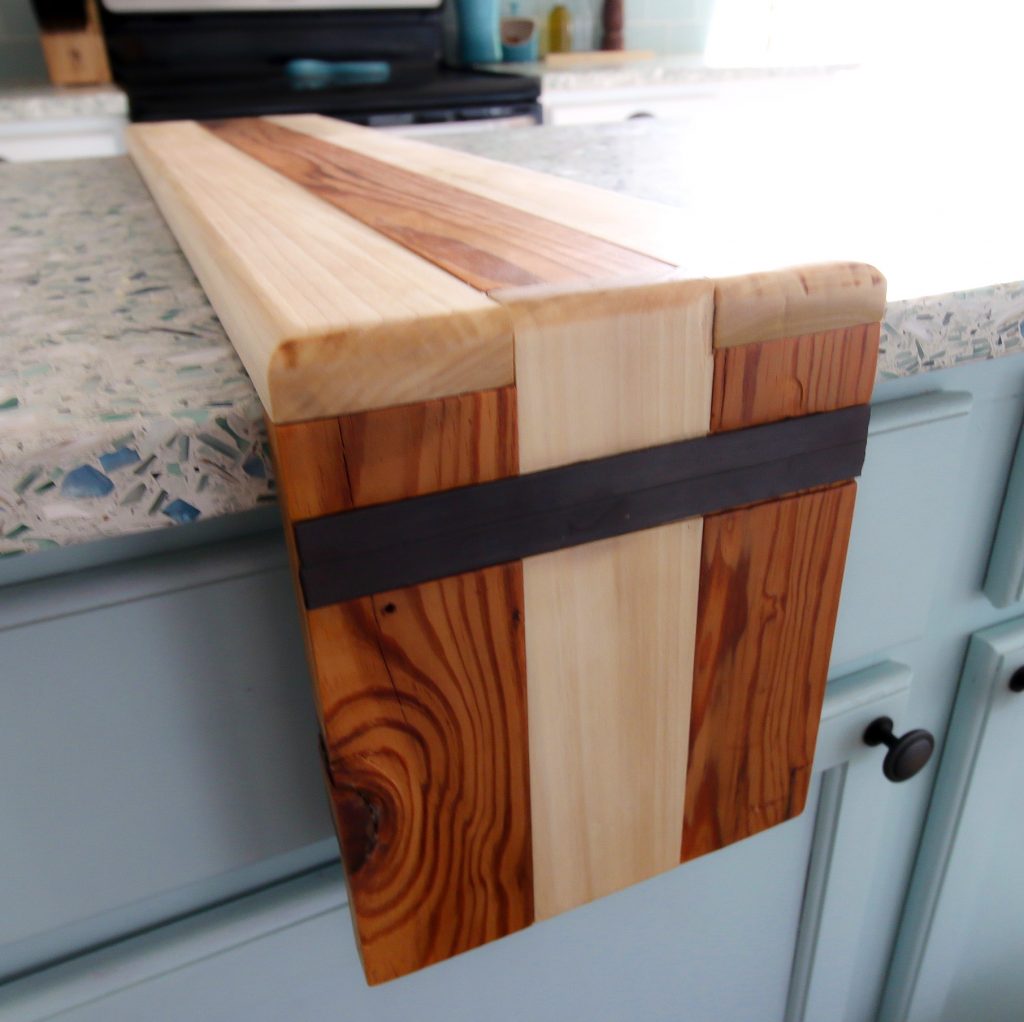
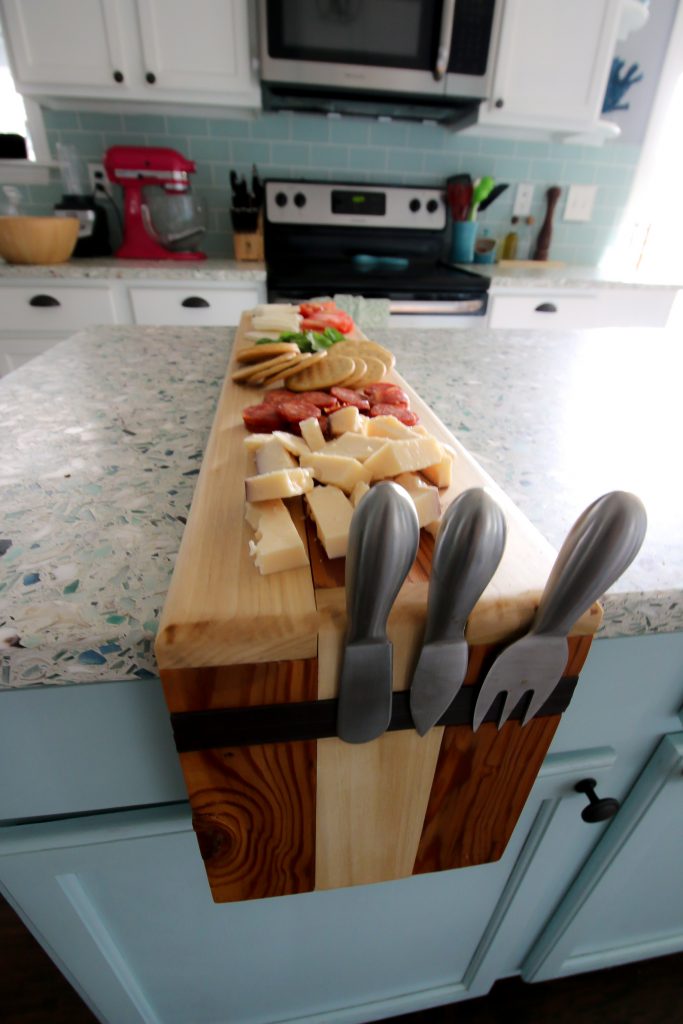
The bulk of the cheese board is on top of the surface, then waterfalls down over the edge to help keep the board in place.
You can also customize it with any specific wood species you'd like.
Basic woodworking information for every project
Here are some of our most popular woodworking articles!
Shopping for wood:
Woodworking project ideas
- 100+ of the best woodworking project ideas!
- 62 easy beginning woodworking projects
- Woodworking project ideas to make and sell
See all our printable PDF woodworking plans!
Our favorite tools + supplies
- See all our favorite tool reviews
- How to use a Kreg jig
- The ultimate wood stain guide
- The best wood fillers for your project
Remember to also always use safety equipment while woodworking and using tools. Make sure you have proper eye protection, ear protection and a good mask to keep yourself safe.
Construction
To build this waterfall cheese board, you'll need to plan to have three rows of wood and enough to be an inch beyond the edges of your surface, plus however much you want to hang down.
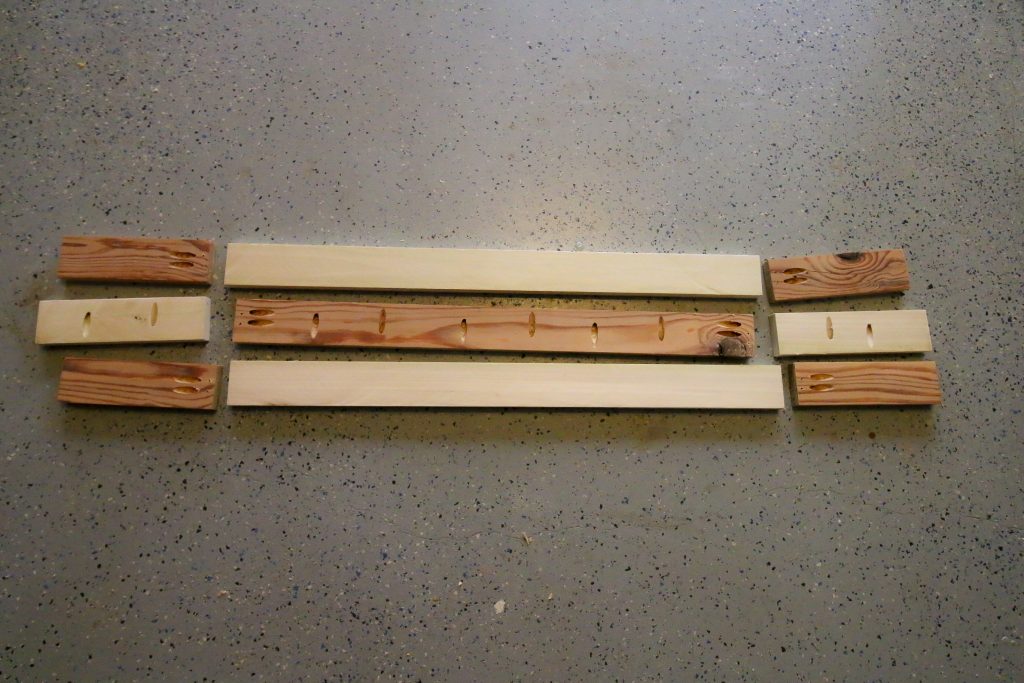
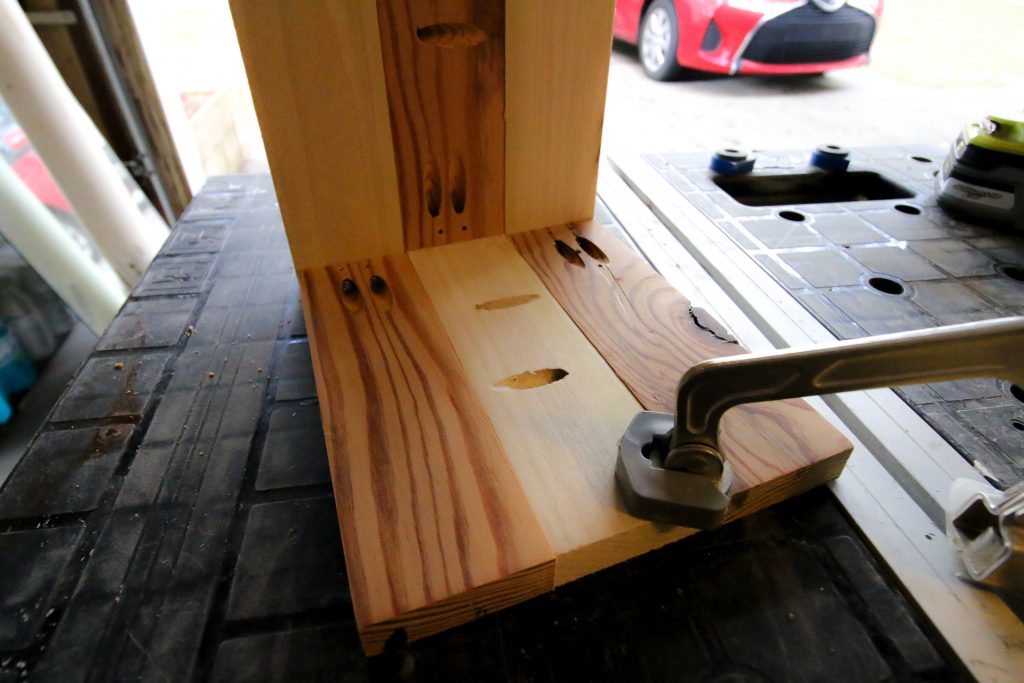
We constructed it by drilling pocket holes with a Kreg pocket hole jig. We started by creating the top, which consisted of three long boards where the center board was a half inch more than the width of the counter surface and the outside boards hung over by an inch.
We drilled pocket holes in the middle board to connect the outside boards, leaving space to attach the waterfall edges.
Next, we did the same thing with the two waterfall edges, opposing the types of wood we used. We used cherry and poplar for this build, but you could use any variety of wood you'd like.
We finished off by using our Kreg jig to drill more pocket holes and connect the edges to the middle piece. Then we used a palm router to round off the edges and sanded everything smooth.
Accessorizing
Before we were finished, we used the router to carve out a strip on one of the sides. In here, we attached adhesive magnetic strips. This will be useful to hold cheese knives or magnetic markers.
Finally, we oiled the whole thing down with cutting board oil that we really like to bring out all the dark, rich colors of the wood.
The Plans
We partnered once again with our good friends at Kreg Tool to bring you the full plans for this waterfall edge cheese board. Using Kreg pocket holes makes this project extremely study and durable.
You can use a Kreg 720 Pro and 1 ¼" Kreg screws to make this project. The uniformity and precision of using a Kreg system for a project like this is crucial.
We put the entire set of project plans for this cheese board on BuildSomething.com where you can get our step-by-step cuts, measurements and pocket hole placements.
So head over to Kreg’s BuildSomething.com to get the free plans for how to build a custom cheese board and much more.
Their website is full of easy, helpful plans from lots of amazing builders. We’ve got lots of other plans on there (like our geometric coffee table, quick and easy ottoman, under bed storage, plywood desk and many more), so be sure to check them out.
Interested in the Kreg Jig? Click here to read our full Kreg Jig review and to see all of our Kreg Jig projects.
New to the Kreg Jig? Here is a step by step guide on how to use a Kreg Jig!
OR grab our FREE Kreg Jig Cheat Sheet here! Download the cheat sheet!
This post is sponsored by Kreg Tool. All opinions are our own and our opinion is that we love Kreg Tool. Thank you for supporting the brands that make Charleston Crafted possible!

Looking for something?
We've been doing this since 2012 so we have a LOT of blog posts!
Search stuff like: Ceiling Projects | DIY Plant Stands | Thrift Flips

Hey there, I'm Sean, the woodworking enthusiast and builder behind CharlestonCrafted.com! Since 2012, I've been sharing the magic of turning raw materials into beautiful creations. I love teaching others the art and satisfaction of woodworking and DIY. I try to inspire fellow crafters to make something extraordinary out of nothing at all.