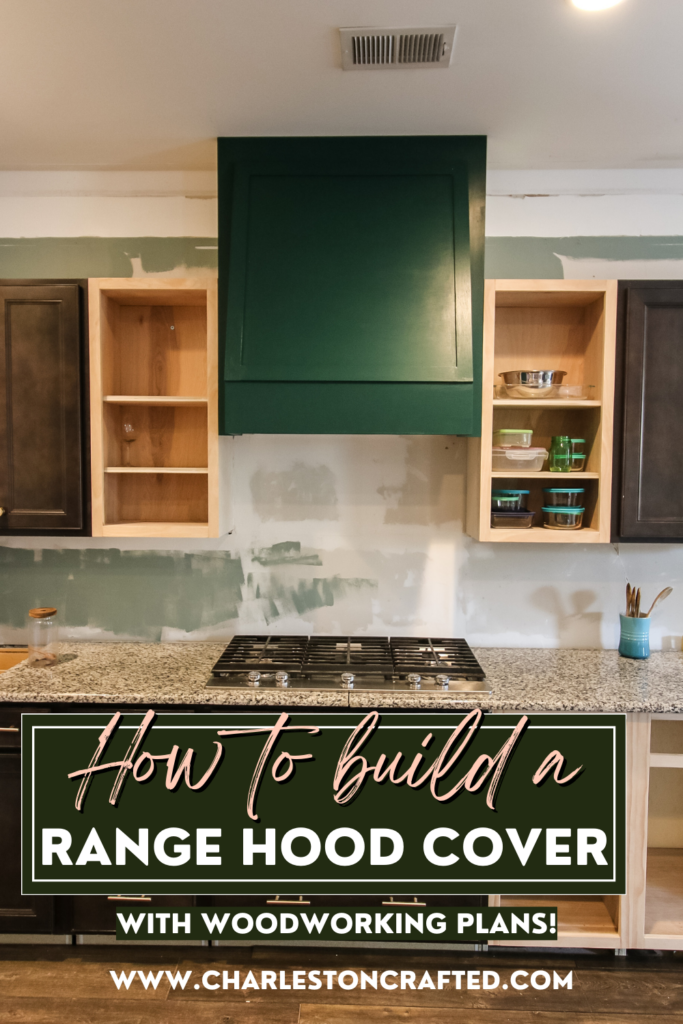
We had to build a new range hood cover for our kitchen renovation so we made this one and wanted to share the process. Here's how to do it!
This post was sponsored by Kreg Tool. All opinions are our own and our opinion is that we love Kreg products. Thanks for supporting the brands that make Charleston Crafted possible!
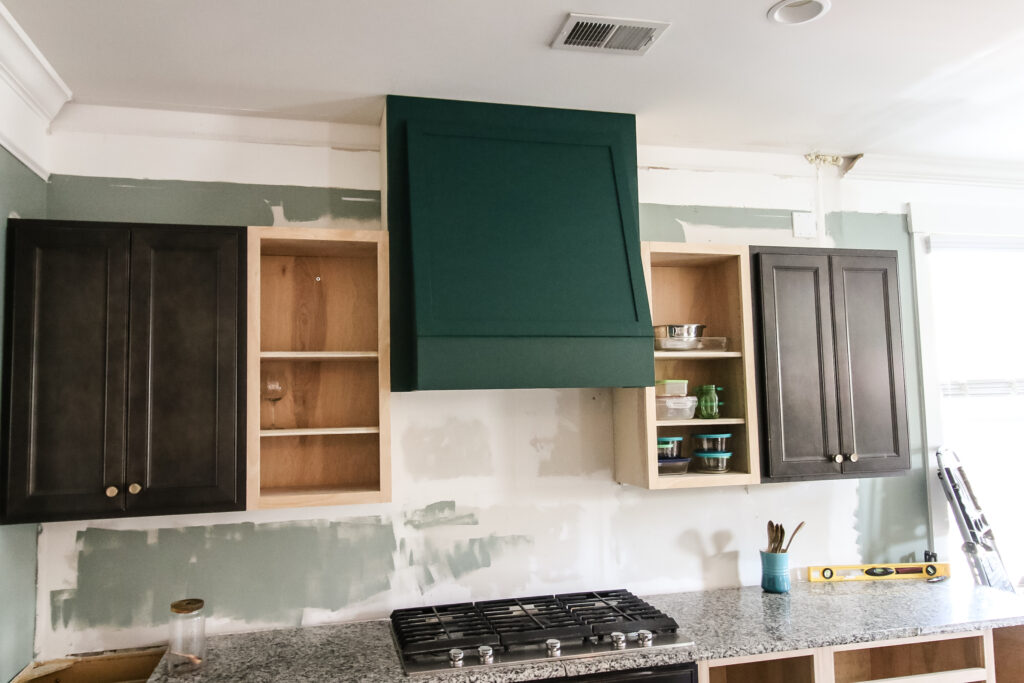
We're deep into our kitchen renovation project and after all the demolition, we had to install some new elements. One of those was a new DIY range hood cover.
Honestly, I don't really know if this is called a range hood cover or a hood vent cover, so I'm going to use those two terms interchangeably throughout this post, but they mean the same thing.
We had a pre-fabricated one in place as part of the old kitchen layout, but we wanted a more modern one that we could tie in some other elements from our kitchen into, so we decided to make our own. We also needed to replace the hood vent itself, so this was a good opportunity to make ourselves a fresh one.
It was a little intimidating trying to figure out the angles on this project at first, but we did all the hard work for you so you can enjoy and build one yourself with our woodworking plans!

How to make a DIY hood vent cover
We built a couple of cabinets for this kitchen renovation too, but overall we tried to use as much of the existing cabinetry as we could. Mostly just rearranging it in a better way on the back wall and making an island instead of a peninsula.
But the old hood vent cover was in a more traditional molding style that matched the cabinet doors and we wanted something more modern.
Here's the overview of everything we did to make our own DIY range hood cover!
Materials needed to build a range hood cover
Here's what you need to build this DIY range hood cover:
- ¾" plywood
- ¼" plywood
- 1 ¼" Kreg pocket hole screws
- 1" brad nails
- Wood glue
- Wood filler (here's where we compared the 4 most popular brands!)
- Paint or stain
- Range hood (our woodworking plans for this project will fit this one exactly!)
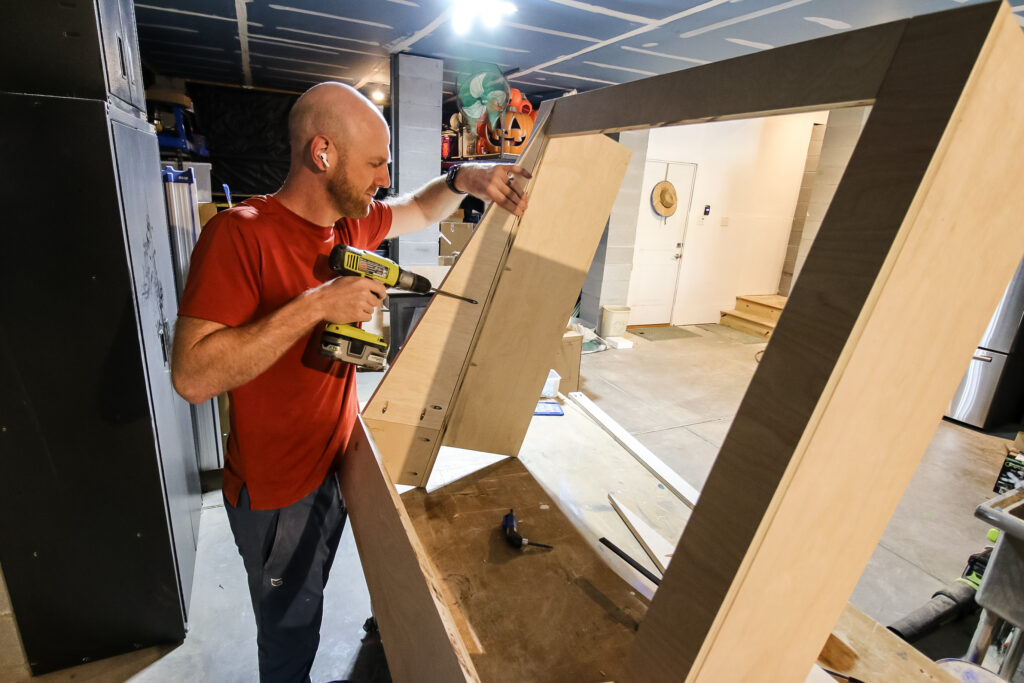
Step one: make cuts and drill pocket holes
We started by making all the cuts and drilling all the pocket holes up front. I find it to be a lot easier to do all this up front and sand everything down first before starting building.
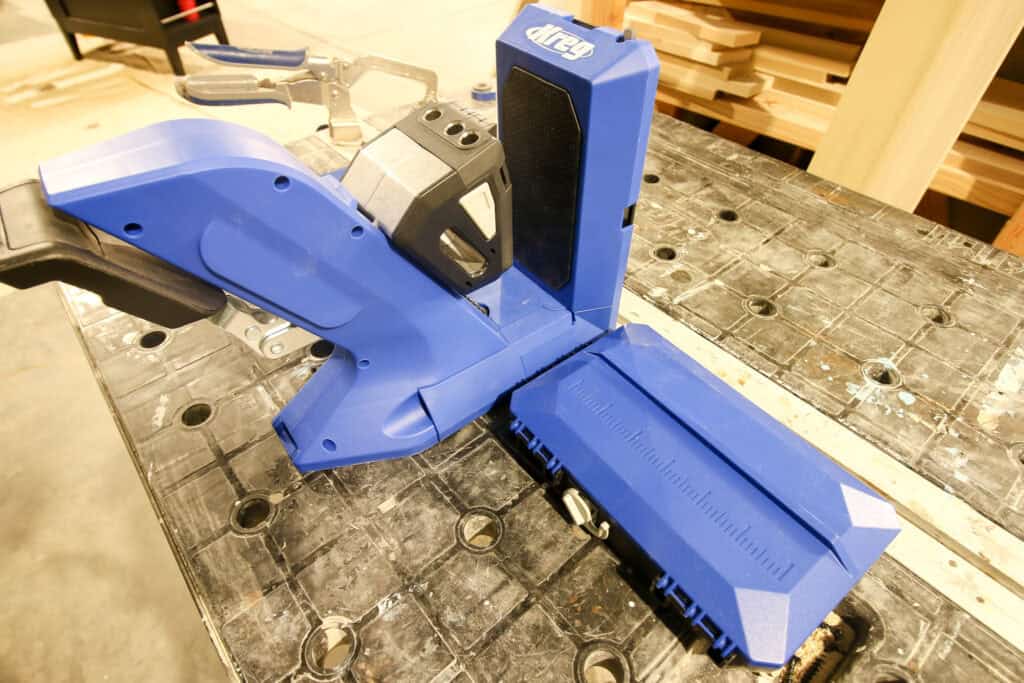
To cut down this plywood, I used my Kreg Adaptive Cutting System saw and track. This made it really easy to rip everything down, especially when I got to the angled cut on the sides. I lined up the cut and went diagonal across the board- don't know how to do that with a table saw!
For our pocket holes, we used our Kreg 720 Pro pocket hole jig. This is my favorite pocket hole jig, especially for working with medium sized boards since it has the wide base to support the boards.
I've got all the pocket hole placements in my DIY range hood cover woodworking plans you can get here!
Read our review of the Kreg 720 Pro here!
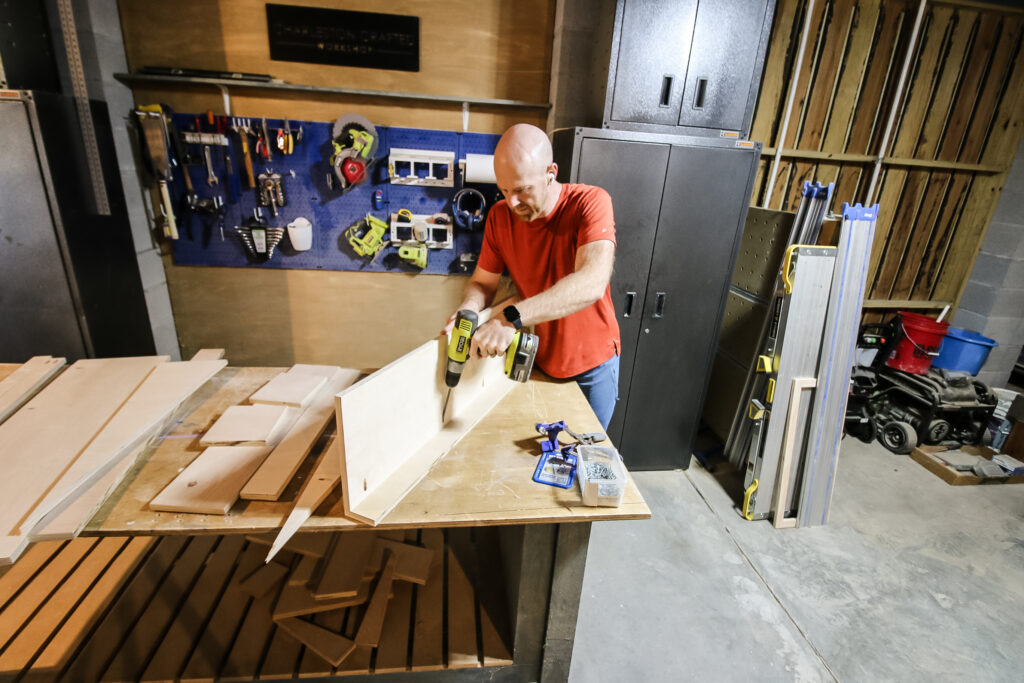
Step two: assemble back frame
I started off by assembling the back frame of the hood vent cover. This included attaching the two side pieces to the spacers on the front of the cover.
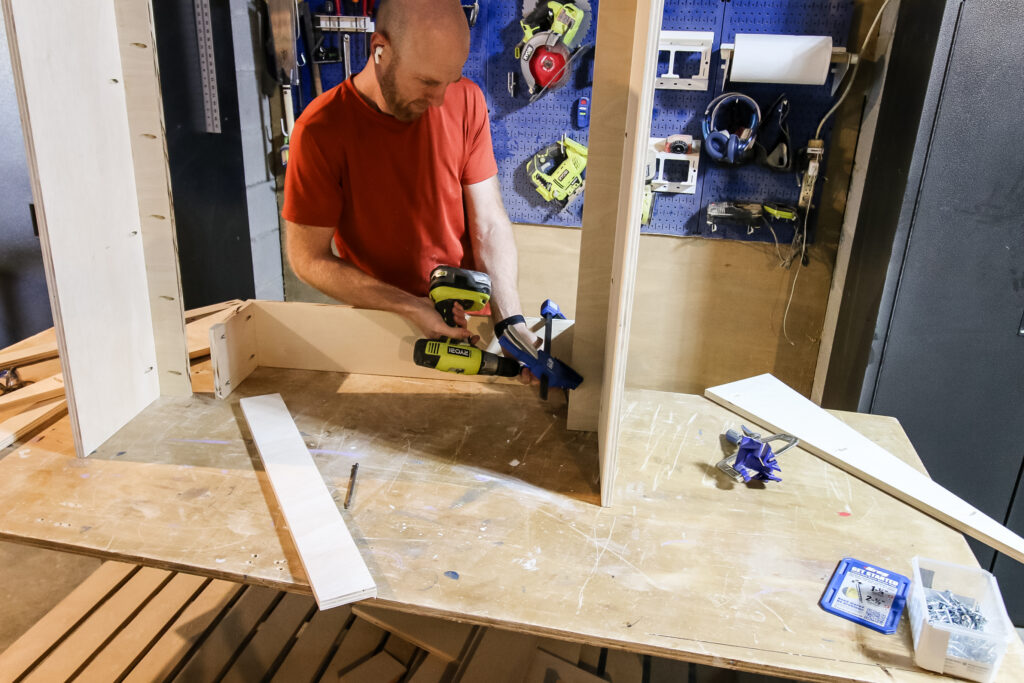
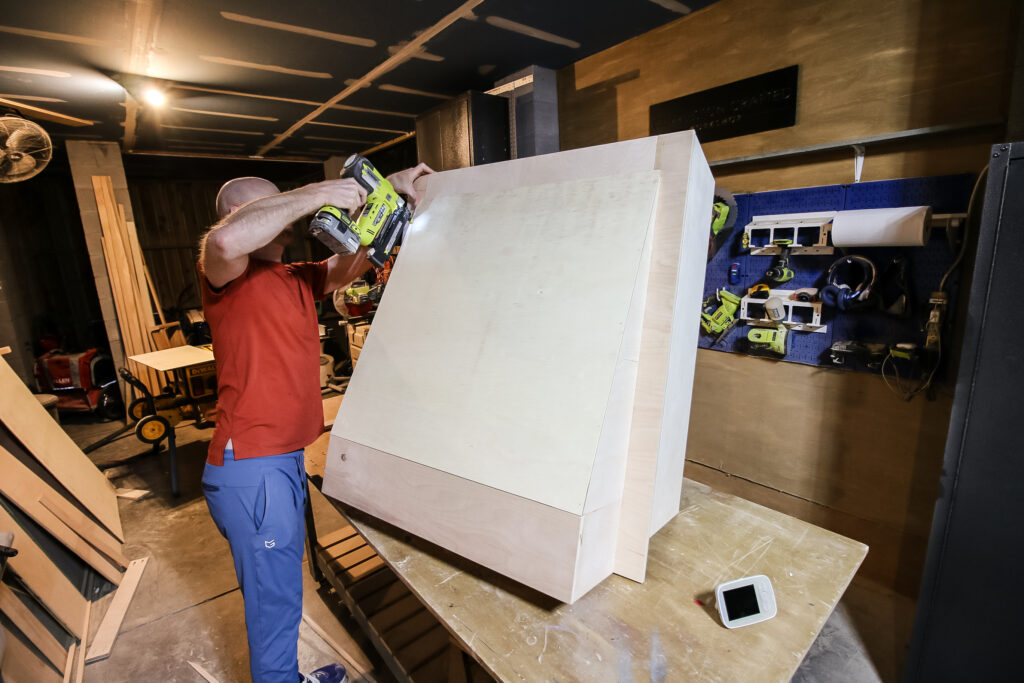
Step three: attach front casing
Next, I built a simple three sided rectangle that is the size of the range hood I bought. This will wrap around the outside of it and hold the two sides of the hood cover together.
Then I attached the front casing to the two side pieces I made in step two.
Step four: attach hood cover
Next I built up the hood cover itself. As I mentioned, I cut two angled boards with my Kreg ACS that I attached to the front hood wrap and the sides.
After those were attached, I cut a piece of ¼" plywood the size of the angled area and nailed that into place with 1" nails.
I also added strips of ¼" plywood around the outside edges as molding that matches what I'm going to do around our island.
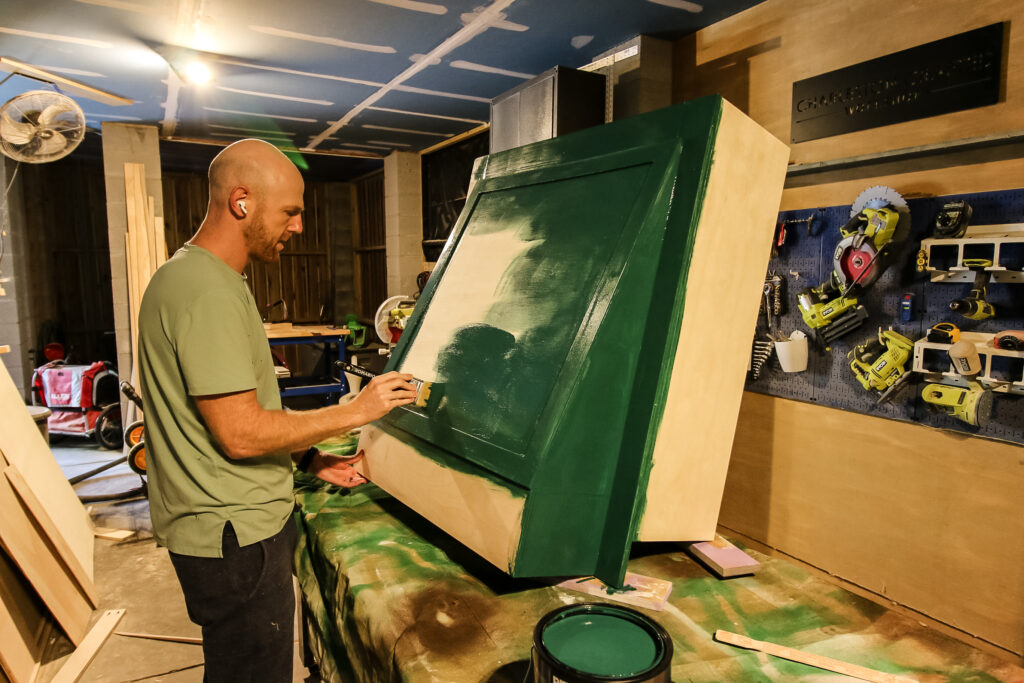
Step five: paint or stain
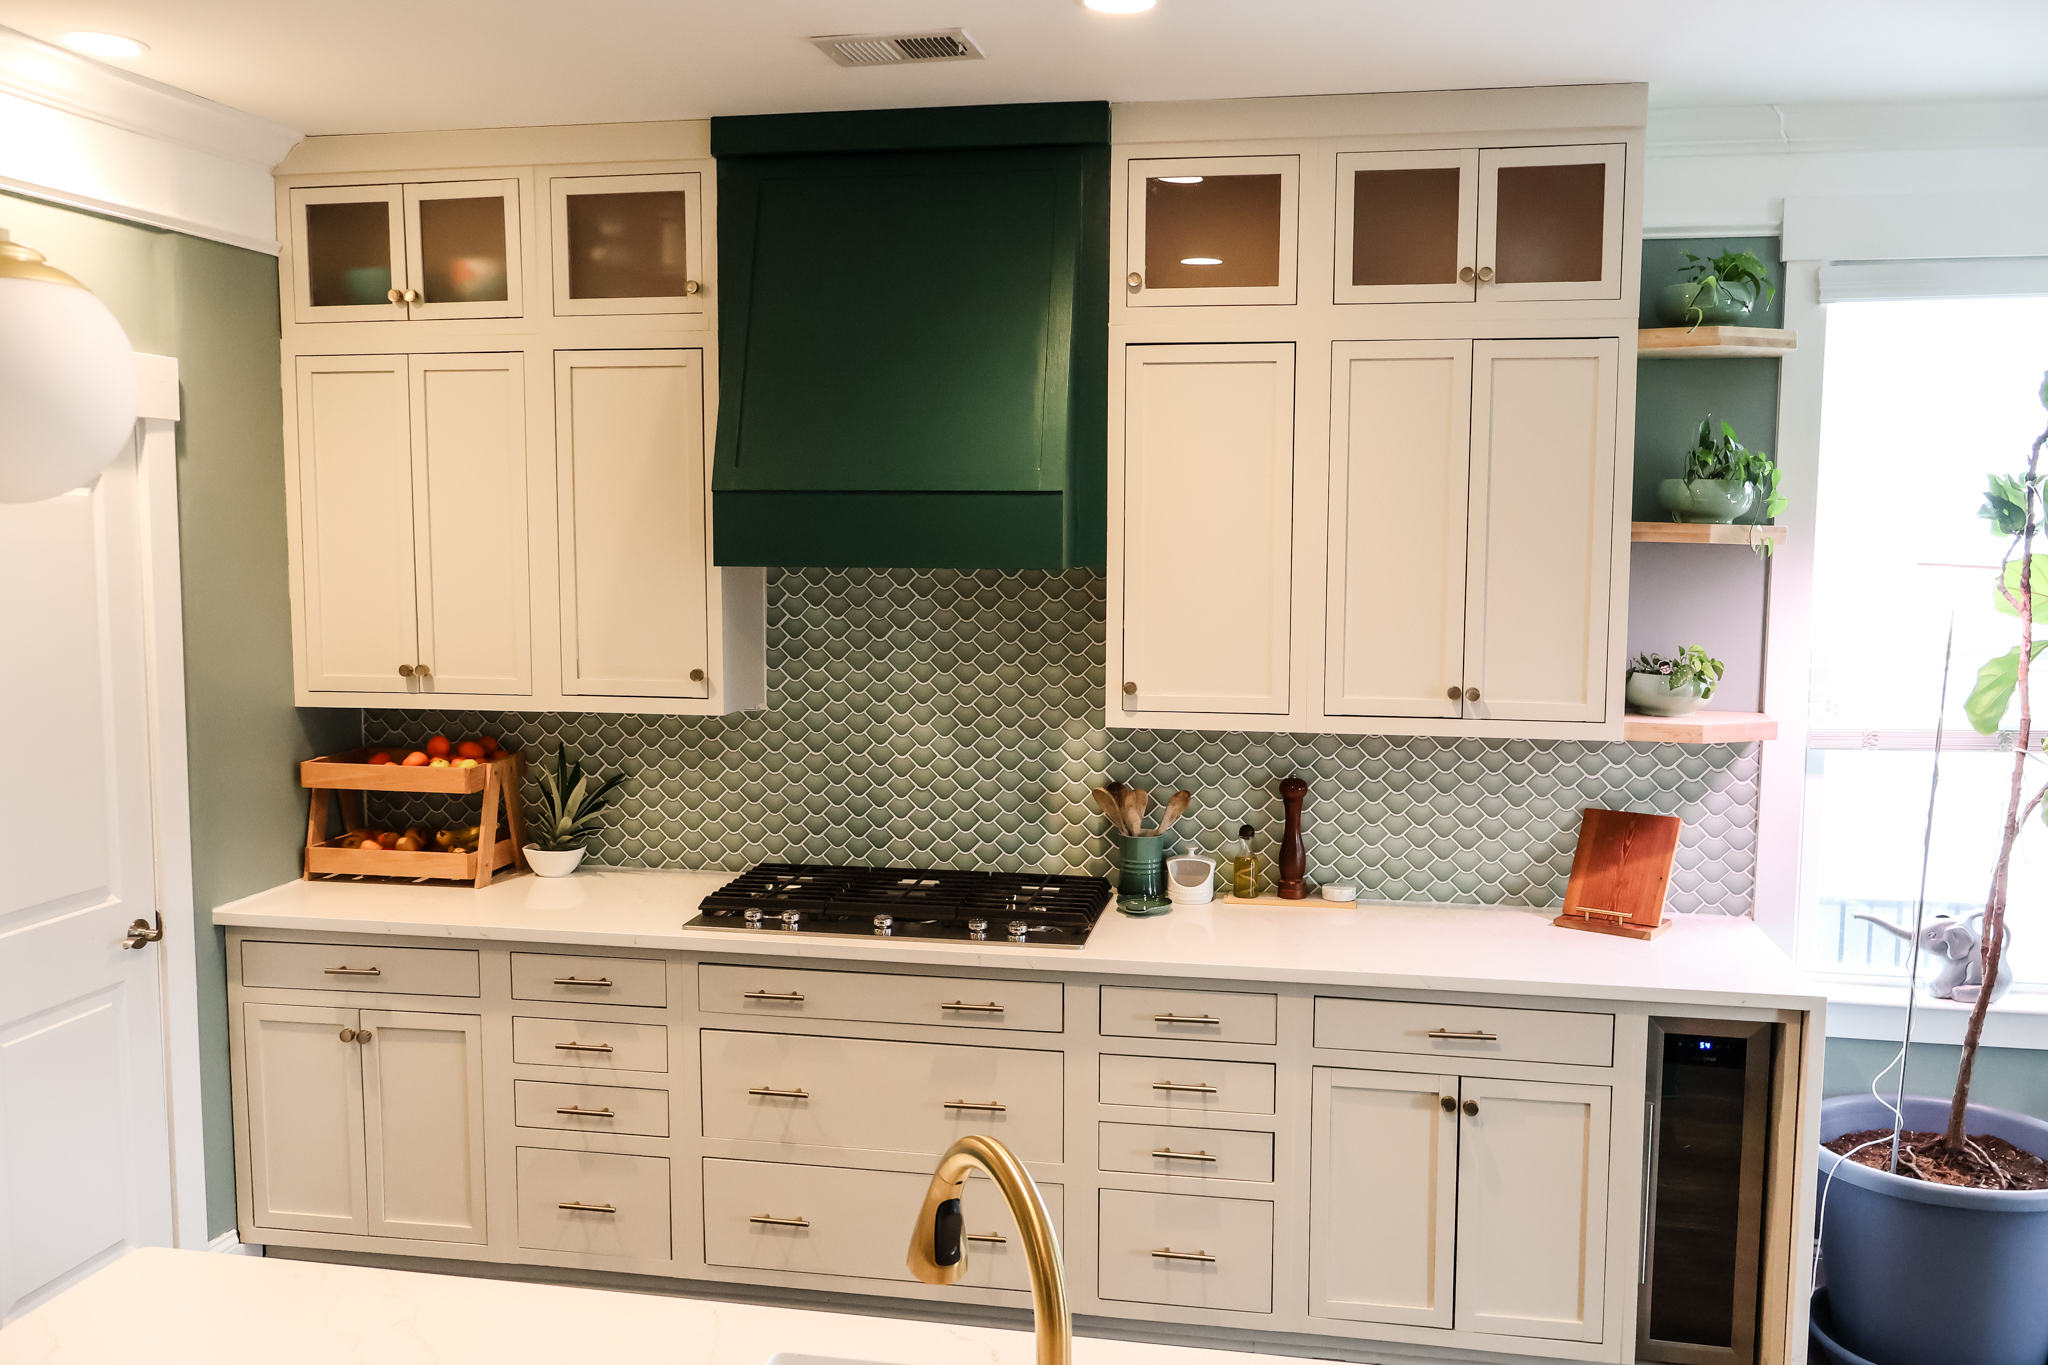
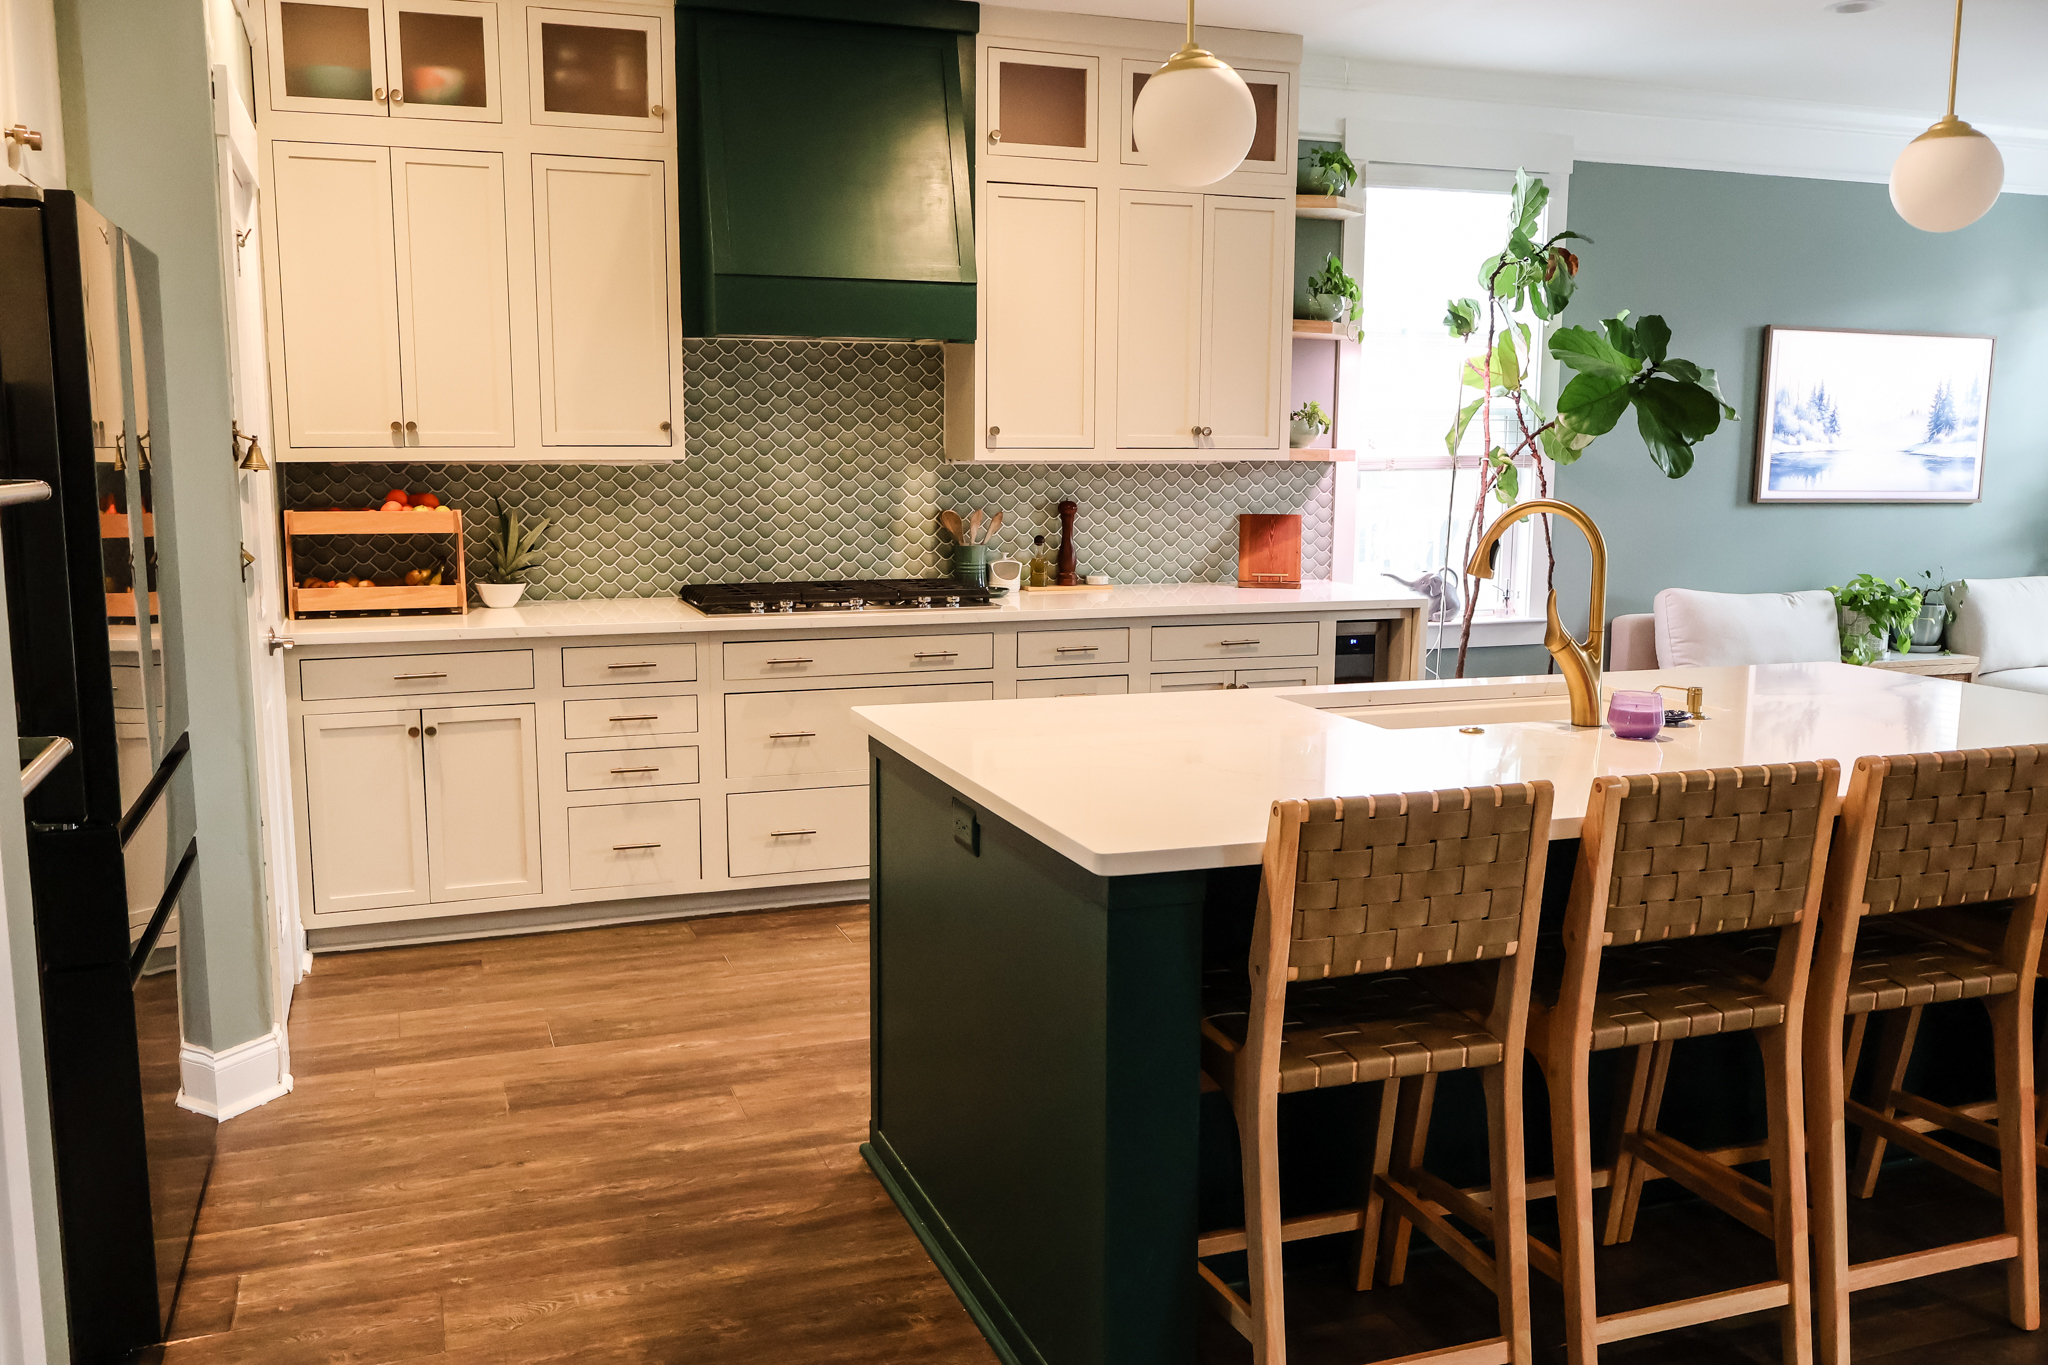
Next you can paint or stain your hood vent cover to match your aesthetic. We opted to paint ours with Behr Dark Everglade paint. This is the paint we used in our guest bedroom that we liked so much!
It's smart to use cohesive colors in a few areas of your home so it looks intentional. We're going to paint the island this color too and it matches the panel covers we installed on our Samsung Bespoke fridge.
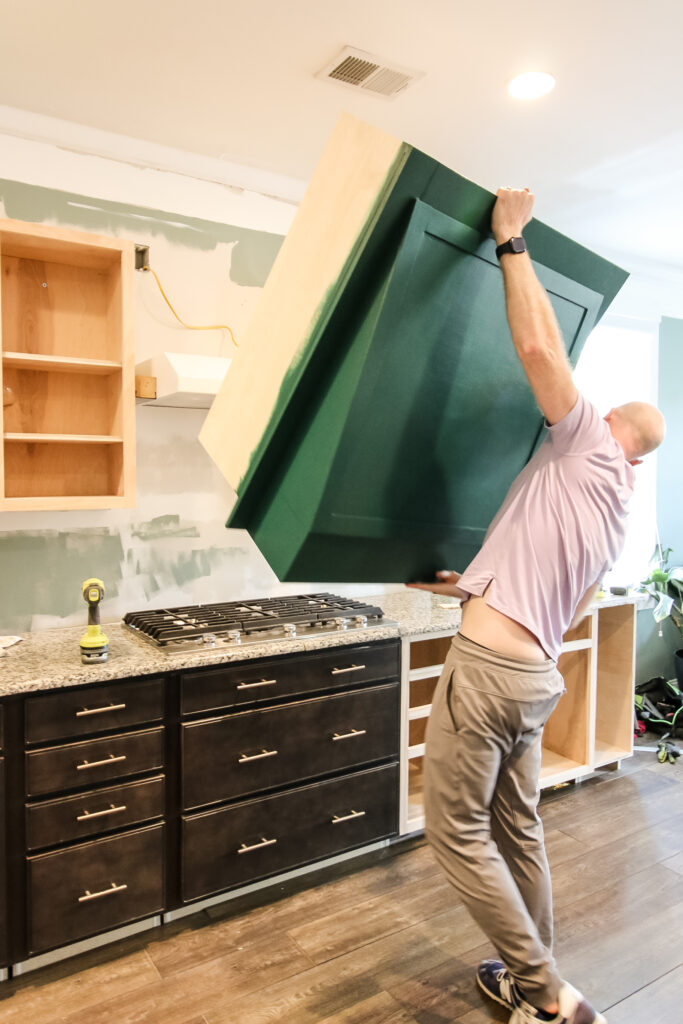
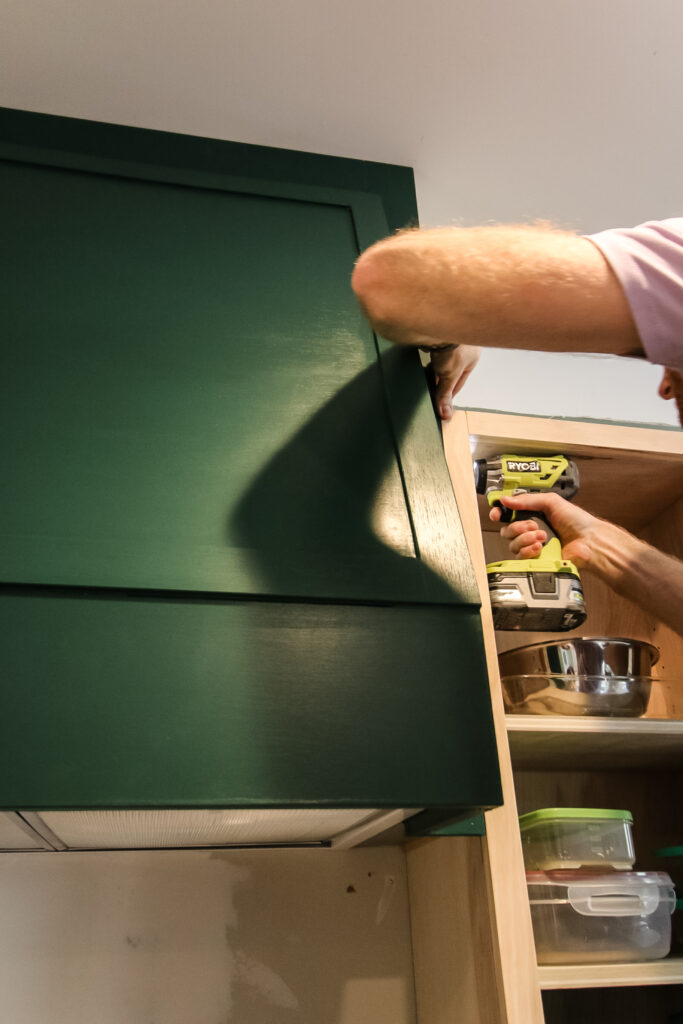
Step six: hang in place
Finally, we hung it in place. We screwed it in through the cabinets on the sides of it, but will also add more support when we get in the upper upper cabinets.
DIY wood hood vent
This DIY range hood cover looks SO GOOD in place! It's going to look even better when we actually finish the kitchen and paint the rest of the cabinets a coordinating color!
DIY range hood cover woodworking plans
Want to build your own hood vent cover? We've got woodworking plans!
Thanks to our friends at Kreg Tool for making the plans for this DIY range hood cover free to you! Our plans include a full material list, cut list and step-by-step instructions to help you make this.
You may have to make some modifications depending on the size of your range hood area or the specific shape of it, but you can adjust easily.
And make sure to check out our tutorials and plans for a base cabinet with drawers, base cabinet with drawer and doors, and kitchen island! Or, you can get a bundle of our five core kitchen woodworking plans for a discounted price!
Before you go...
Make sure you check out these other great ways to upgrade your kitchen!

Looking for something?
We've been doing this since 2012 so we have a LOT of blog posts!
Search stuff like: Ceiling Projects | DIY Plant Stands | Thrift Flips

Hey there, I'm Sean, the woodworking enthusiast and builder behind CharlestonCrafted.com! Since 2012, I've been sharing the magic of turning raw materials into beautiful creations. I love teaching others the art and satisfaction of woodworking and DIY. I try to inspire fellow crafters to make something extraordinary out of nothing at all.


