Planning to repair a piece of wood furniture and then stain it? Here are the best stainable wood fillers and everything you need to know to use them!
I absolutely love finding old furniture and making it over to give it a new life. Sean loves to build wooden furniture from scratch.
One thing that both of these processes have in common is frequently needing to use wood filler.
Whether you are repairing an old piece of wooden furniture or building something new, wood filler can be the key to filling cracks, gaps, or holes in your wood surface.
If you plan to stain your furniture when you are done repairing or building it, then it is essential to select a wood filler that is stainable.
Only stainable wood fillers will absorb wood stain.
Other wood fillers or wood patching products will have to be painted or left in their natural state.
Today we wanted to chat about stainable wood fillers, share the four that we have used, and talk tips and tricks for getting the best results when using wood fillers.
What is Stainable Wood Filler?
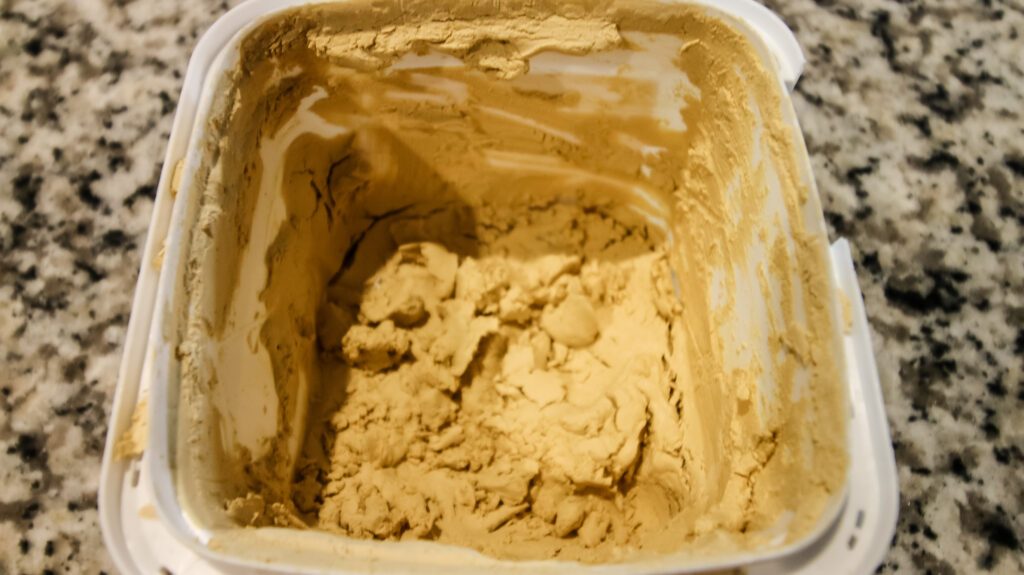
Stainable wood filler is a category of wood fillers that are specifically created to absorb wood stain. They can be used to fill holes, cracks, and gaps in wood surfaces and are designed specifically and exclusively to be used on wood surfaces.
But what makes stainable wood fillers different from all other wood fillers – and a lot of other wood patching products – is that they are designed to absorb stain.
By making a wood filler stainable it makes it a lot easier to blend the repaired portion of the wood in with the surrounding wood surface.
Stainable wood fillers are typically made from a combination of wood particles or sawdust and a binding agent, such as latex, epoxy, or cellulose.
These binding agents enable the filler to bond with wood surfaces and provide a sturdy, durable repair. The wood particles are what makes the filler absorb wood stain.
Benefits of Using Stainable Wood Filler
One of the big benefits of filling, damaged wood with wood filler is the fact that wood filler is often stainable. This is because it is made with wood, dust, and particles in it, which will absorb the stain to mimic actual wood.
If you want to patch wood and leave it wood–looking, then you will definitely want stainable wood filler.
If you plan to paint your piece, then you can use stainable or non-stainable wood filler. You might even want to look into wood putty, or another filler option if you want an even more durable finish.
Selecting the Best Stainable Wood Filler
When you are shopping for wood filler, it's not necessarily a one size fits all type situation. There are variables that can mean one is better than another on a project by project basis.
Consider the type of wood and the specific project requirements when choosing a stainable wood filler. Be sure to check the label for stain compatibility.
| Feature | Water-Based Wood Fillers | Solvent-Based Wood Fillers | Epoxy-Based Wood Fillers |
|---|---|---|---|
| Environmental Friendliness | Environmentally friendly | Higher VOC content | Varies (some are eco-friendly) |
| Clean-Up | Easy clean-up with water | Requires solvent for clean-up | Requires solvent for clean-up |
| Drying Time | Quick drying | Longer drying time | Longer curing time |
| Odor | Low odor | Strong odor | Varies (some may have odor) |
| Stainability | Can be stained | May or may not be stainable | May or may not be stainable |
| Durability | Suitable for small repairs | Versatile, suitable for various projects | High strength, ideal for structural repairs |
| Indoor/Outdoor Use | Mostly for indoor projects | Suitable for both indoor and outdoor projects | Can be used outdoors |
| Weather Resistance | Limited weather resistance | Some weather resistance | High weather resistance |
| Two-Part System | No | No | Yes |
| Shrinkage | Minimal | Some shrinkage | Non-shrinking |

Top Features to Look for in Stainable Wood Filler
- Staining Ability: it is essential that the wood filler that you choose is stainable. Check the label. Even with an brands they have certain varieties that are stainable and certain varieties that are not stainable. Typically anything with epoxy in it will be less likely to be stainable. The stainable wood filler is generally have wood dust in them which will absorb the stain to mimic actual wood.
- Sanding and Finishing: It is usually easy to sand stainable wood filler for a smooth, even surface. For small spots, you can use sand paper or a sanding block but for larger areas, an orbital sander is best.
- Minimal Shrinkage: Water-based wood filler generally shrinks as it dries. This means if you feel it flush to the top of your surface, then it will shrink to leave a divot behind. That is why I always suggest over filling, and then sanding smooth. Some wood fillers are labeled as minimal shrinkage – if you are worried about shrinkage, this could be the right option for you.
- Low VOC and Environmental Considerations: Certain wood fillers, especially those with epoxy or similar solvent bases, are very stinky and definitely not low VOC. If you are worried about chemical exposure or environmental concerns, you will want to look for a wood filler that is marked as low VOC. There are plenty of them just check the labels.
Application Tips for Stainable Wood Filler
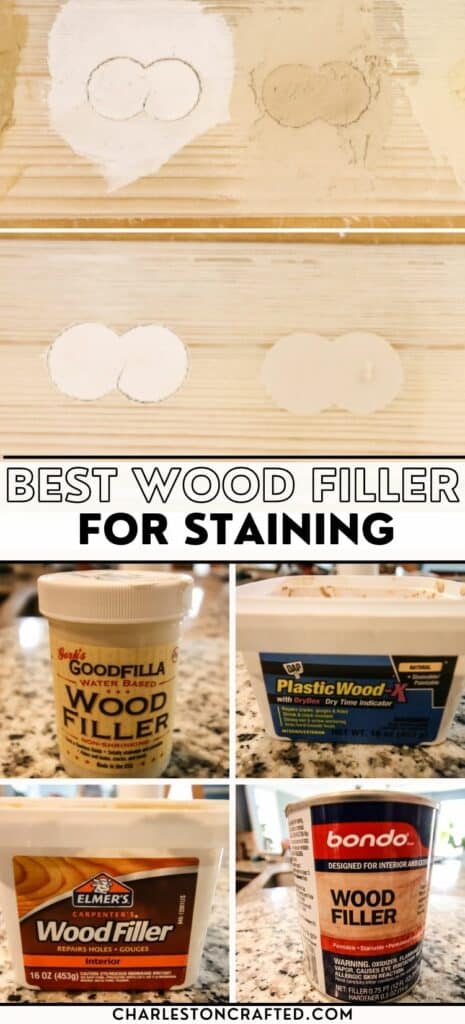
When using wood filler, surface preparation is super important. Sand your damaged area and then clean it very well before applying the wood filler - you can use a shop vac then wipe clean with a cloth.
Apply wood filler with a putty knife. Really work in it deep so there are no air bubbles which can lead to cracks.
Once dry, sand your wood filler. Work in the direction of the surrounding wood grain and feather your sanding outward to help blend it on all edges into the surrounding wood.
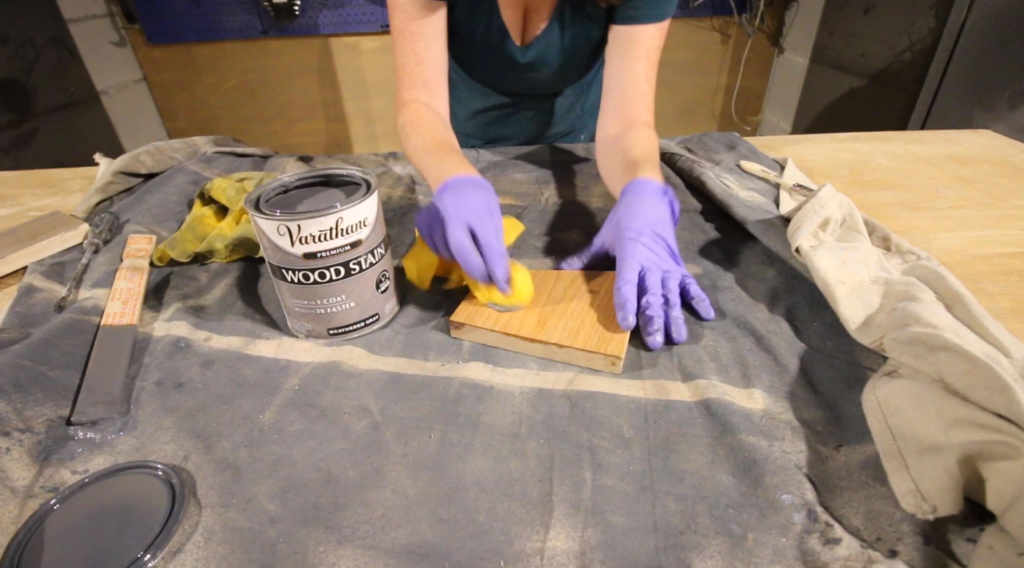
Once the wood filler is sanded, you will need to clean it very well again before applying the stain.
I like to apply my stain with a lint free cloth, but you can also use a paintbrush. Apply in the direction of the wood grain to mimic the surrounding grain.
Try to avoid getting it on any of the wood that is already stained or you will get a dark ring. If this happens, you might need to lightly sand it.
Once the stain has dried, and you're happy with the color and the blending, don't forget to add your topcoat.
I like to use a polycrylic in a matte finish. This will help to protect your wood filler from cracks, dings, or any other damage.
If your piece does get damaged down the line, then you can lightly sand the damaged area and reapply the stain and topcoat.
If it is a large area that is damaged, you might be better off sanding down the entire surface and re-staining it for consistent look.
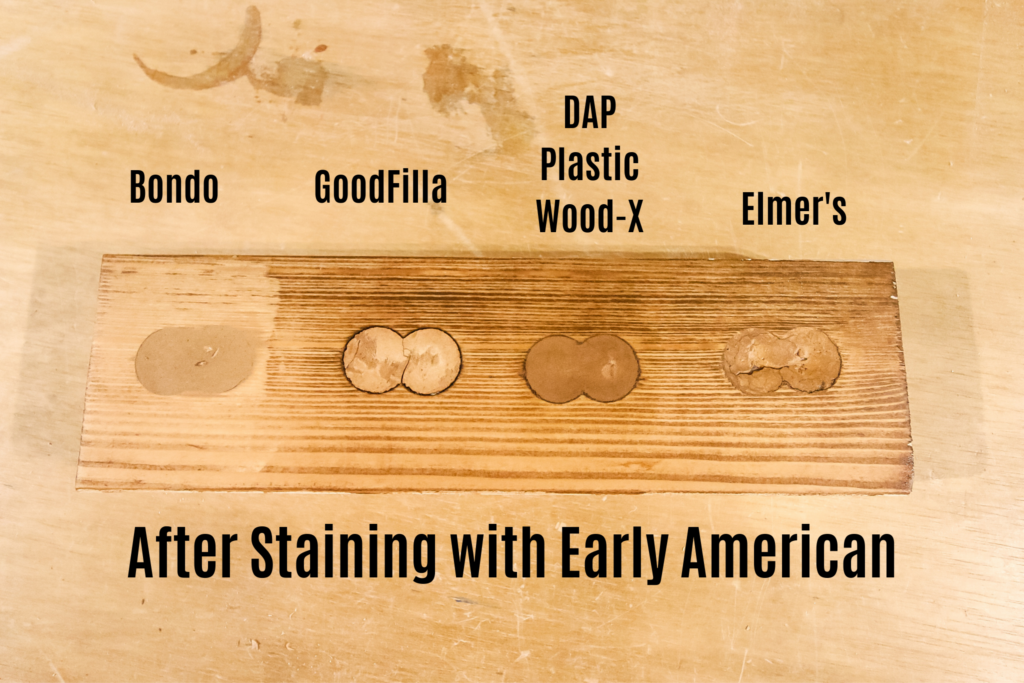
Popular Stainable Wood Filler Brands
1. DAP Plastic Wood-X
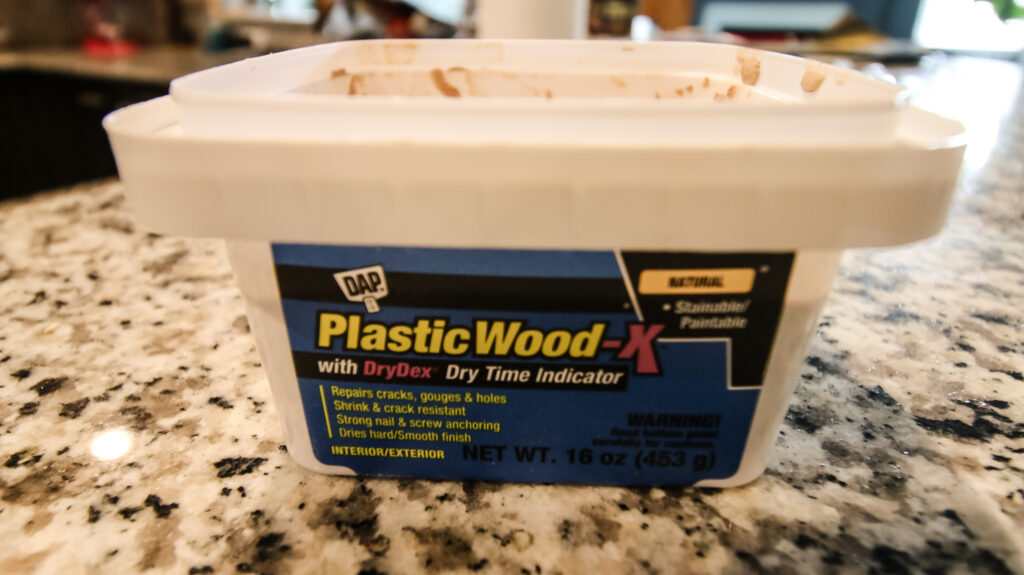
Base: Solvent based
Consistency: Very "putty" like, goes on like thick pancake batter.
Best used for: Rubbing into smaller holes and sanding smooth.
Dry time: One hour
Application: interior/exterior
Color: Goes on pink, turns tan when dry.
Pros: Color change is nice to determine when dry, however it isn't totally necessary. Easy apply with a nice consistency.
Cons: Feels less natural. Says it works on exterior applications, which is ok in small batches, but not on a large hole.
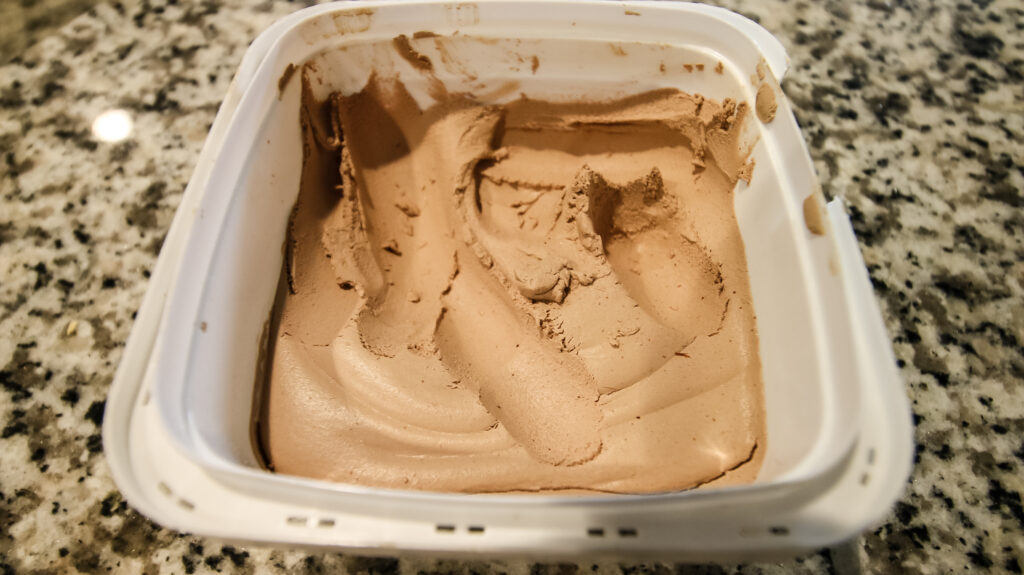
2. GoodFilla Wood Filler
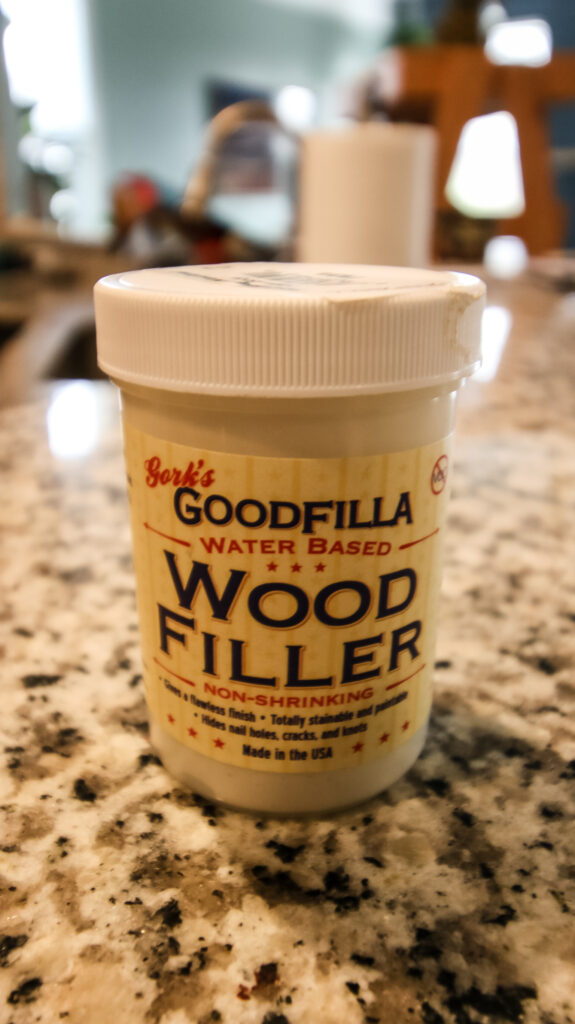
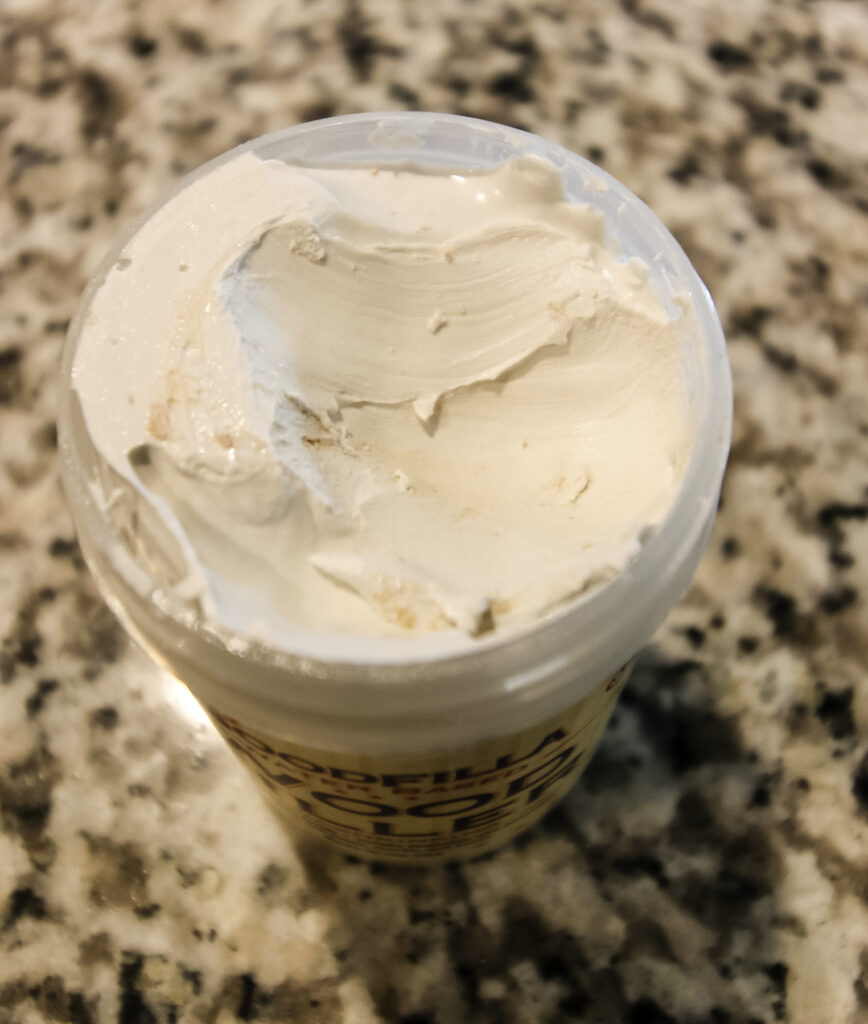
Base: Water based
Consistency: Smooth and tacky
Best used for: Grain filler, shallow hole filler, filling in larger grooves in floors or furniture.
Dry time: 15 minutes to dry, 24 hours to fully cure.
Application: Interior
Color: White for the regular color, but specific colors available to match wood.
Pros: This is a tacky substance, but it spreads very easily and smoothly across surfaces. No shrinks or cracks and easily reconstitutes when dried out. However, twist top container makes it very easy to keep from drying out.
Cons: Smaller package for slightly higher cost per ounce.
3. Elmer's Carpenter's Wood Filler
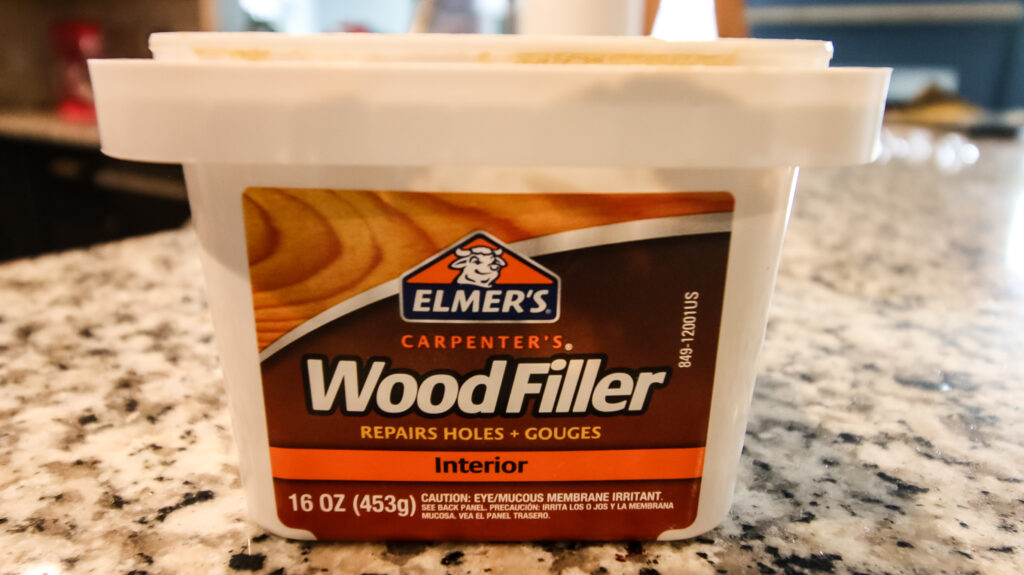
Base: water based
Consistency: Thicker, like grout and more dry
Best used for: Rubbing into smaller holes and sanding smooth.
Dry time: One hour, full in 12-24 hours
Application: Interior
Color: Yellow
Pros: Can be rubbed in smoothly but is a little drier than other applications. Ideal for wiping into small holes but not spreading over large cracks.
Cons: Dries out very easily in packaging, so don't plan to store over a long period of time.
4. Bondo Wood Filler
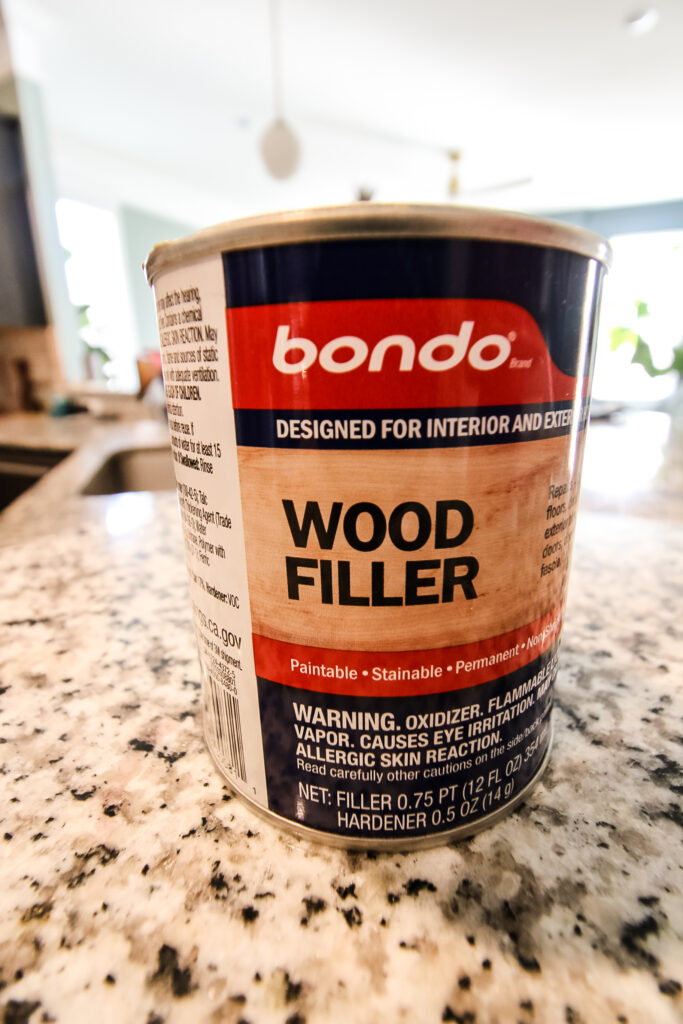

Base: Solvent based
Consistency: Very goopy
Best used for: Outdoor projects
Dry time: 15-30 minutes
Application: Claims interior and exterior, but don't use indoors.
Color: Tan
Pros: Bondo Wood Filler is extremely hard and firms extremely quickly.
Cons: Bondo Wood Filler smells so bad that it is impossible to use indoors, even though it says it can. It also hardens too quickly to use much, which means you have to make the mix several times to do even a fairly small project. Bondo doesn't work into small holes very well due to it's goopy texture and is hard to sand because it is so hard when set.
Troubleshooting Staining Issues
Here are a few common misconceptions or difficulties you may encounter when staining wood filler.
Stain Won't Absorb Properly
Some people may believe that stainable wood filler won't absorb stain like real wood, resulting in an uneven or unnatural appearance.
Solution: Choose a high-quality stainable wood filler that is specifically designed to accept wood stains. Follow the manufacturer's instructions for application and drying times to ensure proper stain absorption.
Inconsistent Stain Color
You may encounter issues where the stainable wood filler appears to take on the stain differently from the surrounding wood, leading to color inconsistencies.
Solution: Before applying the stain, use a pre-stain wood conditioner on both the wood filler and the surrounding wood. This will help ensure even stain penetration and color consistency.
Stain Blotching
Stainable wood filler can sometimes blotch or create uneven color patches after staining.
Solution: Prior to staining, apply a wood conditioner or a pre-stain sealer to the entire surface, including the wood filler. This will help the wood absorb the stain more evenly, reducing blotching.
Filler Doesn't Match Wood Tone
You may find that the stainable wood filler doesn't precisely match the color of the surrounding wood, making the repair stand out.
Solution: Consider using a tinted wood filler that closely matches the wood's color before applying stain. This will create a seamless blend between the filler and the wood.
Filler Can't Be Stained at All
Some people may believe that stainable wood filler can be stained but only to a limited extent.
Solution: High-quality stainable wood fillers are designed to take on stain similar to real wood. Ensure you choose a suitable filler and follow proper staining techniques for optimal results.
Difficulty in Staining Hardened Filler
You might face challenges in staining wood filler that has hardened and dried.
Solution: If the filler has already hardened, lightly sand the surface before applying the stain. This will open up the wood pores and allow better stain absorption.
Stain Won't Adhere to Filler
You may believe that stainable wood filler doesn't provide a good surface for stain adhesion.
Solution: Make sure the surface of the wood filler is clean and free from any dust or debris before applying the stain. This will ensure better adhesion and a more even finish.
Over-application of Stain
You may inadvertently apply too much stain on the wood filler, leading to a dark or uneven appearance.
Solution: Apply stain in thin, even coats using a brush or cloth, and wipe off any excess stain after a few minutes. This will prevent over-application and allow for better control of the color intensity.
Stain Interaction with Filler Binder
You may find that the stain interacts with the filler's binder, causing it to look different from the surrounding wood.
Solution: Select a stainable wood filler with a compatible binder material, such as latex or epoxy, that reacts well with the wood stain. Test the stain on a small area of the filler first to ensure a good result.
Stainable Wood Filler Always Looks Unnatural
Some people may believe that no matter what, stainable wood filler will never achieve a natural wood look.
Solution: Large areas of wood filler are never going to have the exact texture of wood. But, if you choose a high-quality stainable wood filler with wood particles in the composition, you will have the best chances of decent stain absorption and a more natural appearance.
Maintenance and Touch-Ups
Once your wood piece is stained, you might still need to touch it up over time.
Clean the stained wood filler surface regularly with soap and water to remove dirt and grime. Avoid abrasive cleaners that may damage the stained finish.
Steer clear of harsh chemicals or solvents that could strip away the stained finish. Use gentle cleaners and test any new product on a small, inconspicuous area before using it all over.
Protect the stained wood filler from excessive moisture exposure by using coasters, placemats, or tablecloths. Wipe up spills promptly to prevent water damage or staining.
If there are any chips or scratches, address any issues promptly with touch-ups or refinishing as needed.
If the piece is heavily used, consider reapplying a protective finish, such as a clear sealant or topcoat, to extend its longevity and protect the stained surface over time.
Any questions about the best stainable wood fillers?

Looking for something?
We've been doing this since 2012 so we have a LOT of blog posts!
Search stuff like: Ceiling Projects | DIY Plant Stands | Thrift Flips

Hello, I'm Morgan, half of the creative force behind CharlestonCrafted.com! With a passion for DIY that dates back to 2012, I've transformed three homes and now I'm dedicated to helping others craft their dream spaces. Let's turn your house into a home together!