There are lots of different types of shelves, but floating shelves are always popular. Learn how to build and install simple DIY floating shelves with our tutorial and plans!
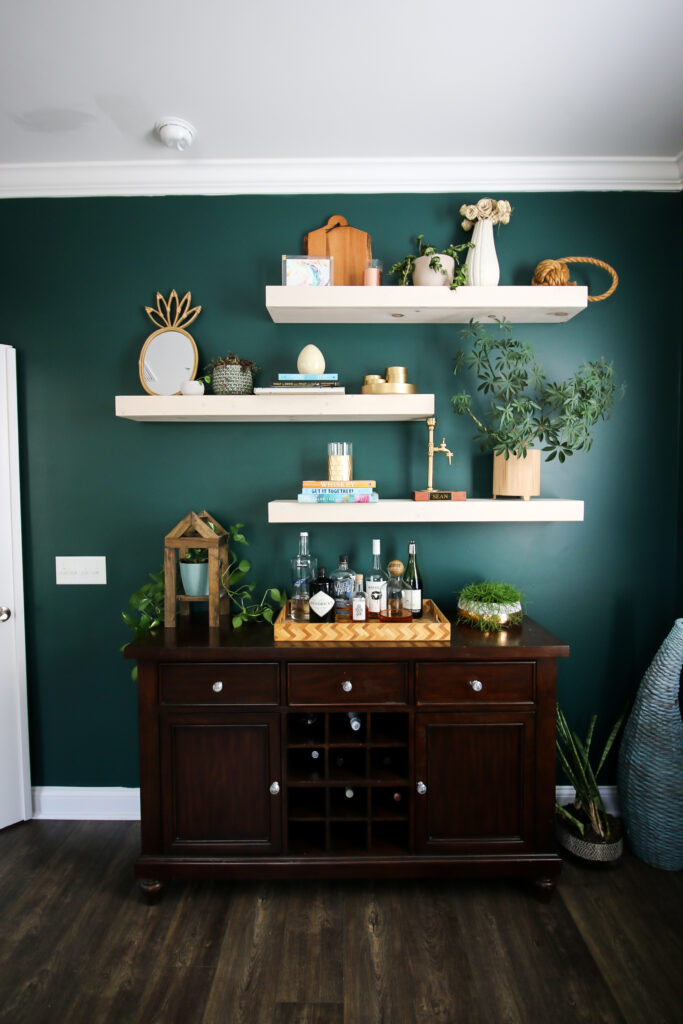
In working on the design for our guest bedroom makeover, we had to figure out what to do with the big empty wall above our bar that previously just had a random iron pipe that the old owners hung up.
No idea what the old bar was supposed to be for and they drilled at least twice as many holes as they needed before they got it in place (with no anchors or studs), but it had to go.
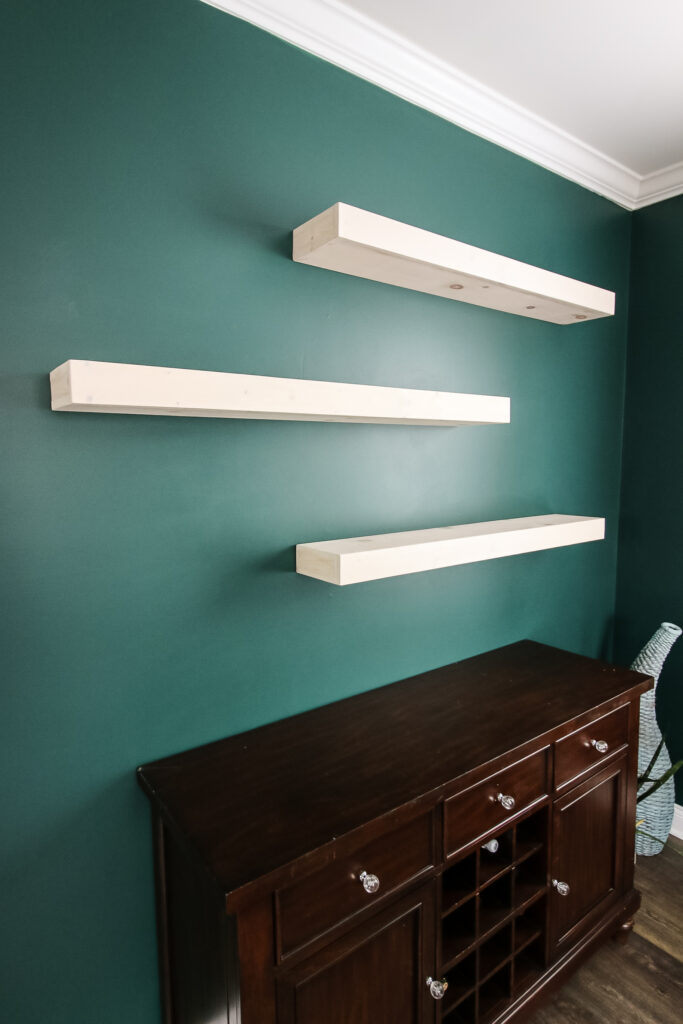
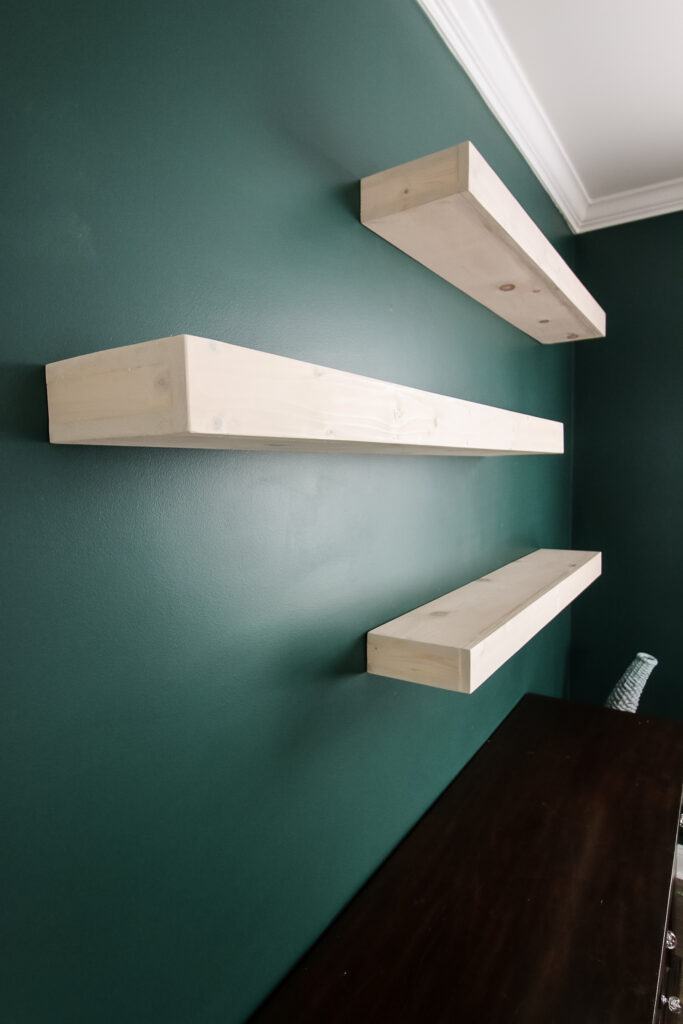
We decided to add some true floating shelves to the space in an offset pattern that we thought would allow for some aesthetic looks and also be functional to get some decor off the bar.
We've previously hung a floating shelf for a mantel on our shiplap fireplace that was made of a solid piece of thick curly maple and even tried installing floating shelves in our old master bathroom directly to the studs.
These easy DIY floating shelves are simple to replicate and easy to build, by building a nice box for the shelf and a bracket to install the the wall. Let's show you how to do it!
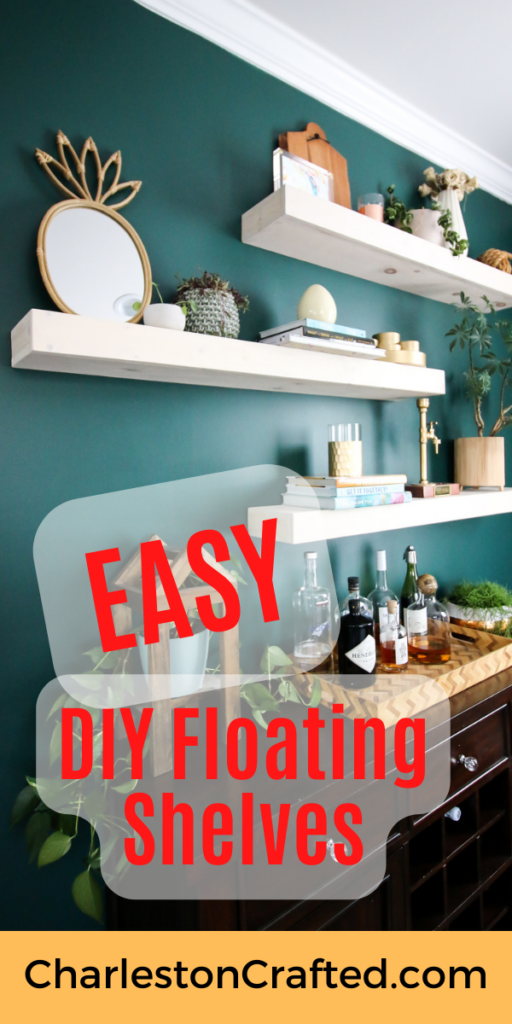
Easy DIY floating shelves
Knowing how to make floating shelves is a great skill to have because they can be used anywhere in your home.
Floating shelves are always in style because they look great without the visible hardware.
These easy DIY floating shelves are simple to build and we'll show you how to do it!
How to build floating shelves
Here are the general steps for how to build simple DIY floating shelves! Make sure to download our woodworking plans to get the complete dimensions and step-by-step instructions to copy them completely!
Materials needed to build floating shelves
- 1x8 boards
- 1x4 boards
- Wood glue
- Brad nails
- 2 ½" screws
- Wood stain
What wood do you use for floating shelves?
There are lots of options for wood to use for floating shelves. The key overall is to choose a wood that fits your aesthetic and/or budget.
You can build floating shelves out of any wood that you have or want to. It's possible to use either soft wood, like pine, or hardwood like oak, depending on what look you want.
You can also build floating shelves with plywood, which gives you more options for depth, but you will have to figure out how to cover the plywood edge if you don't want that showing.
Steps for building a floating shelf
Here's the steps required for building floating shelves. If you think this is something you want to replicate, make sure to grab our woodworking plans!
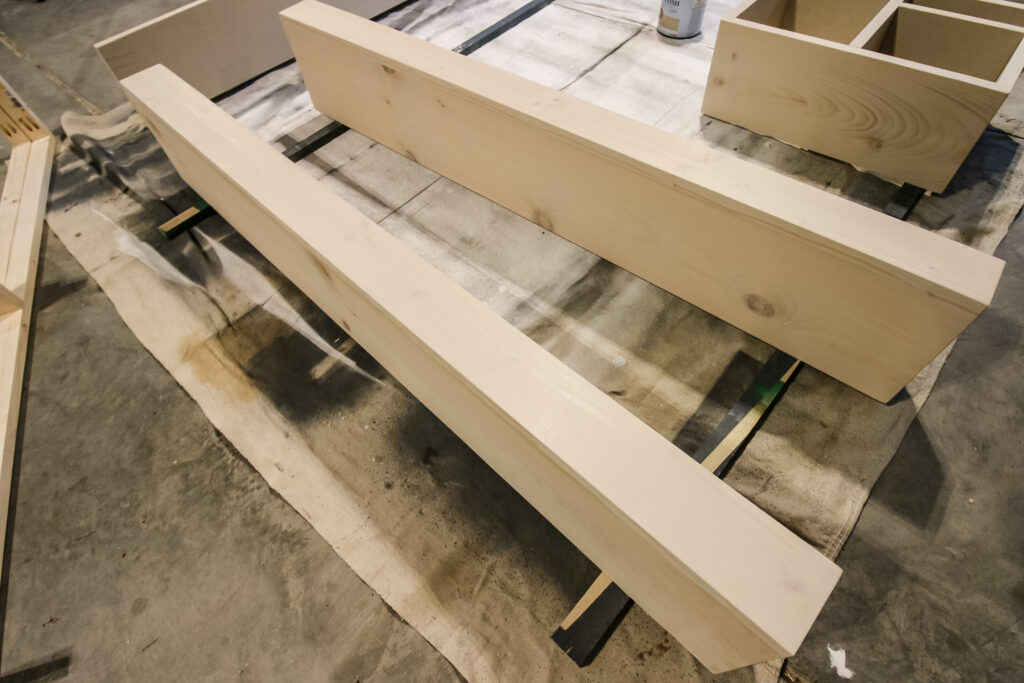
Step one: Cut, but don't sand
Start by making all your cuts, but don't bother sanding. Once the shelf is assembled, you'll have to fill in nail holes and gaps, so it's best to just wait and sand the outside all at once.
Step two: Attach sides to base
Using wood glue and nails, attach the two side pieces on top of the ends of the base piece of wood.
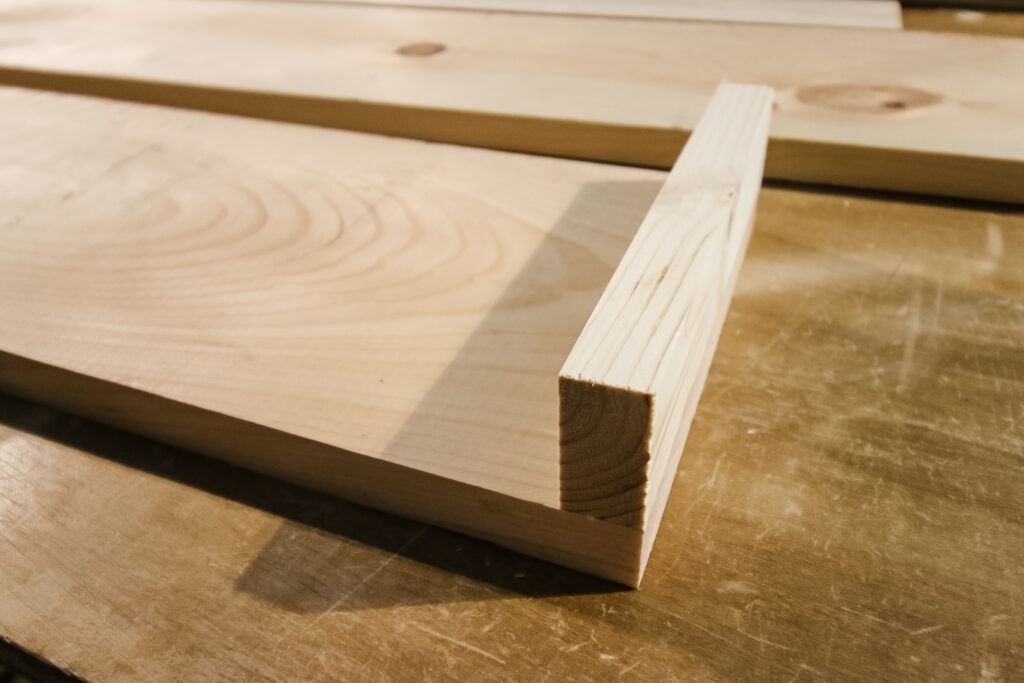
Step three: Attach front
Next, use wood glue along the front edge of the base and sides and attach the front board with nails.
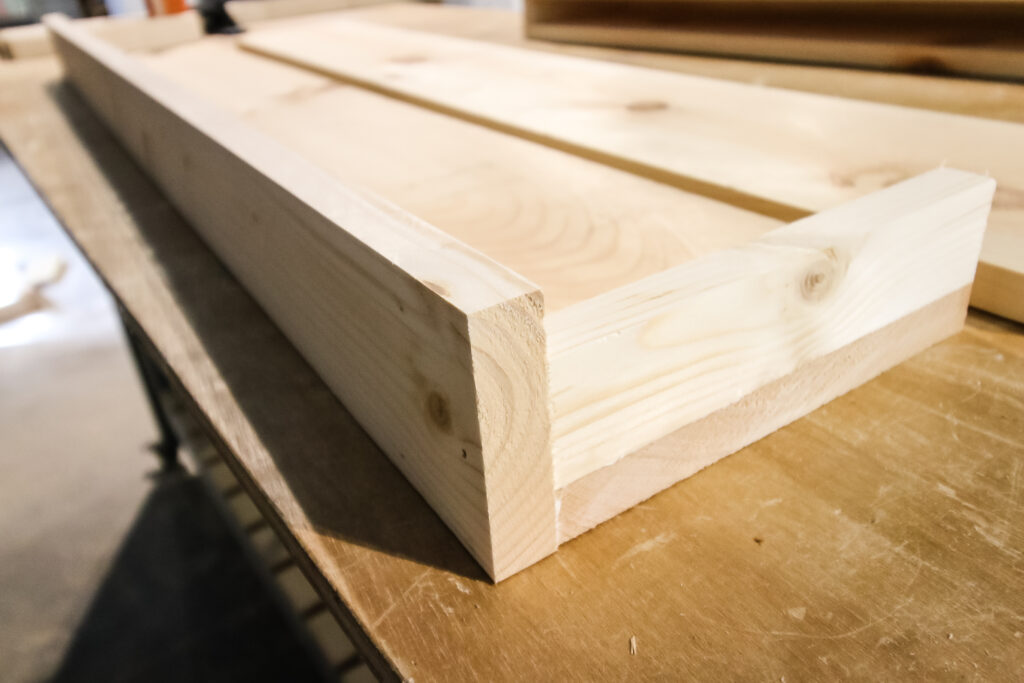
Step four: Attach top
Apply wood glue to the top of the sides and inside of the front piece and then attach the top board with nails.
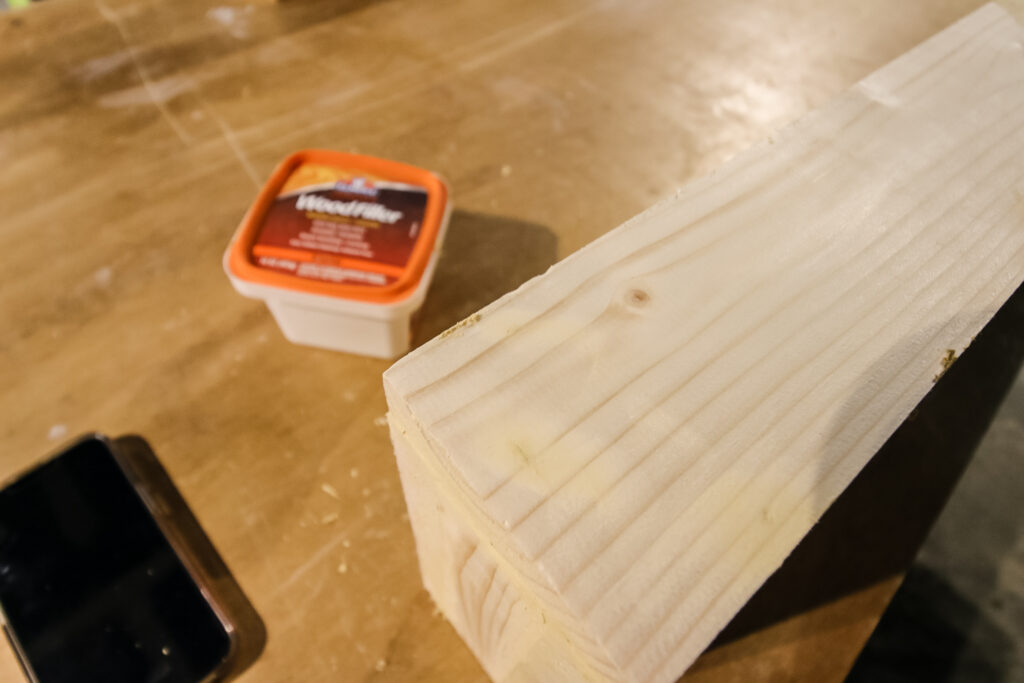
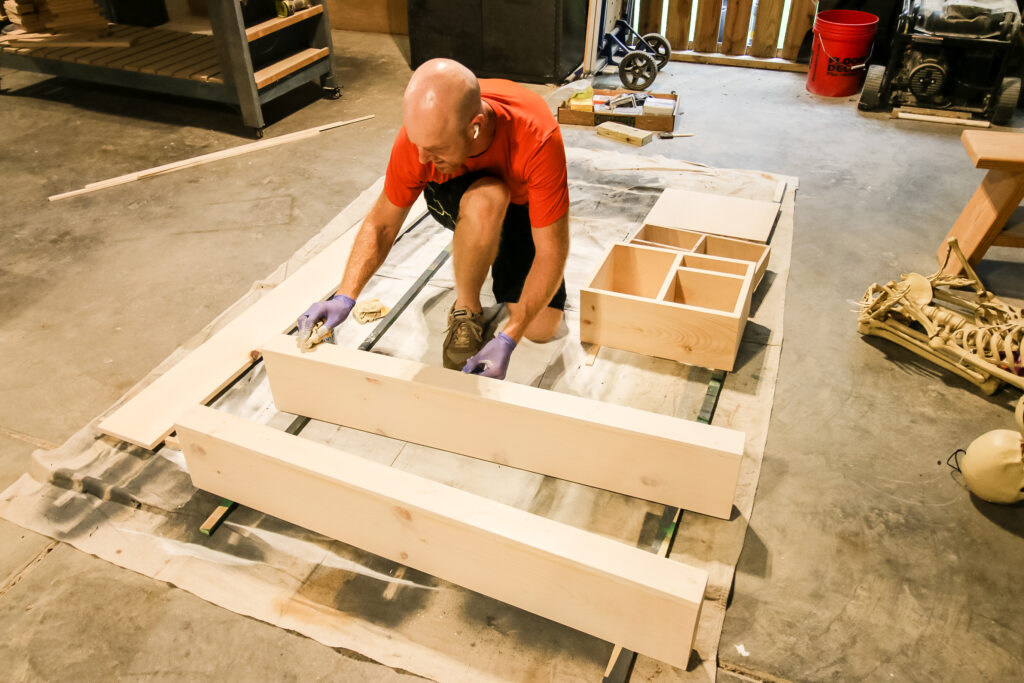
Step five: Finish work
Use wood filler to fill in all the nail holes and cracks. You can check out our full review of the best wood fillers here!
Then, sand everything smooth and apply a wood stain to match your decor!
How to build floating shelf brackets
The best way to hang floating shelves is to build a simple bracket to slide the shelf onto and then attach that directly into the studs on the wall. Here's how to build floating shelf brackets.
Step one: Make cuts, don't sand
Again, no need to sand here. You can wait until it's assembled to do a light sanding.
Step two: Pocket holes
Use a pocket hole jig (our favorite is the Kreg 720 Pro) to drill pocket holes in the end of the brackets.
Step three: Assemble
Using wood glue and pocket hole screws, attach the brackets to the base and then give a light sanding to the sharp edges.
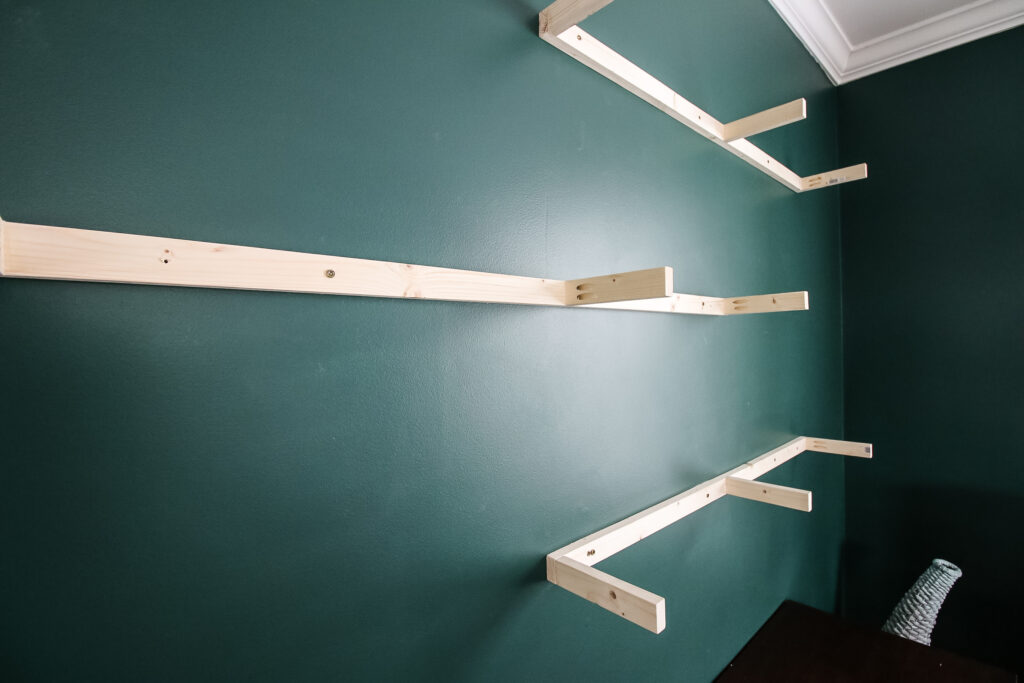
How to install floating shelves
Installing these simple DIY floating shelves is as easy as building them!
The first step is to use a stud finder to locate the studs in the wall you're planning to hang the shelves on. After you've held the stud finder up to your body and said "beep," find the stud on the wall.
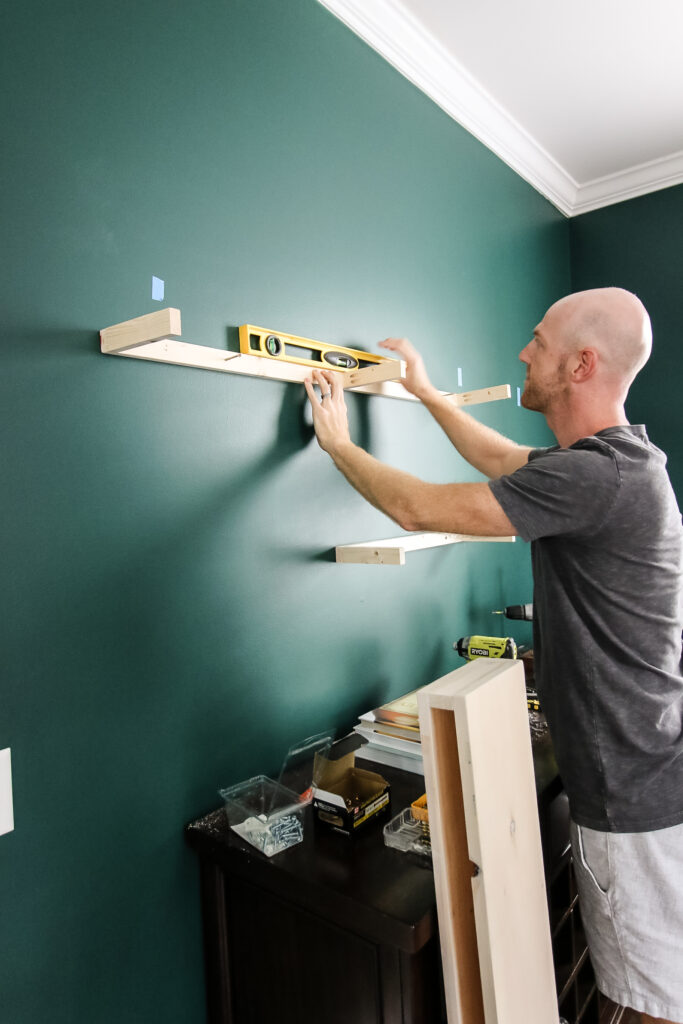
Align the shelf bracket you just built where you want to hang it and mark where the studs will hit. With the shelves being four feet long, you should be able to come in contact with three studs, but you can use heavy duty drywall anchors if you need to.
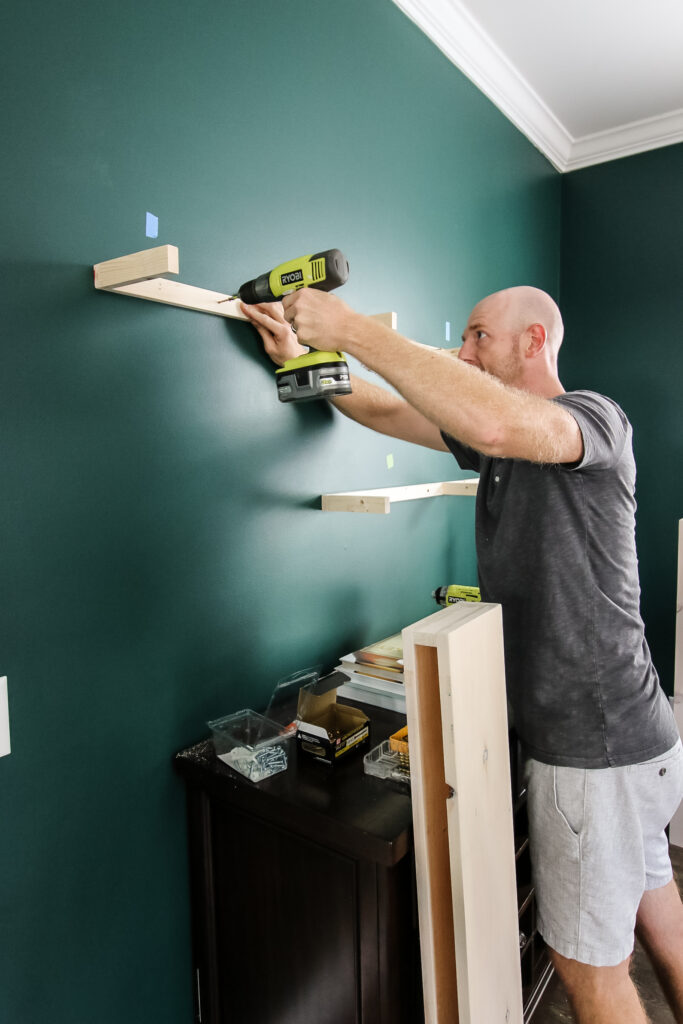
Drill pilot holes in the bracket base and then attach the bracket to the wall using 2 ½" wood screws. Since this is the bracket, you won't need any additional mounting brackets for this project!
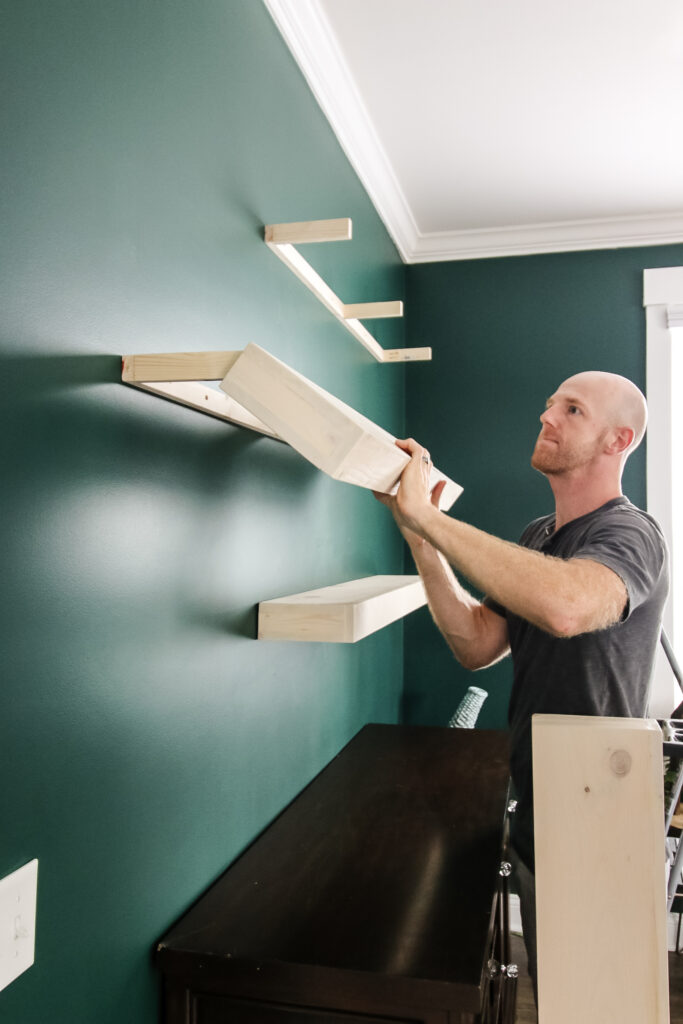
With the bracket attached to the wall, simply slide on the shelf around the brackets and push it flushly against the wall! Then repeat for any additional shelves!
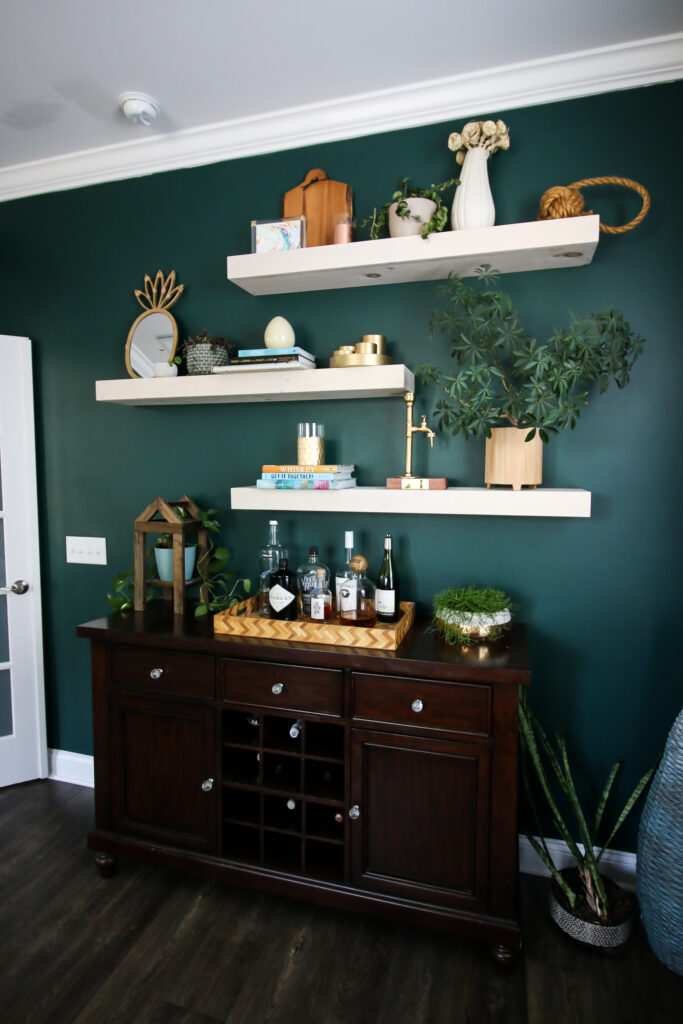
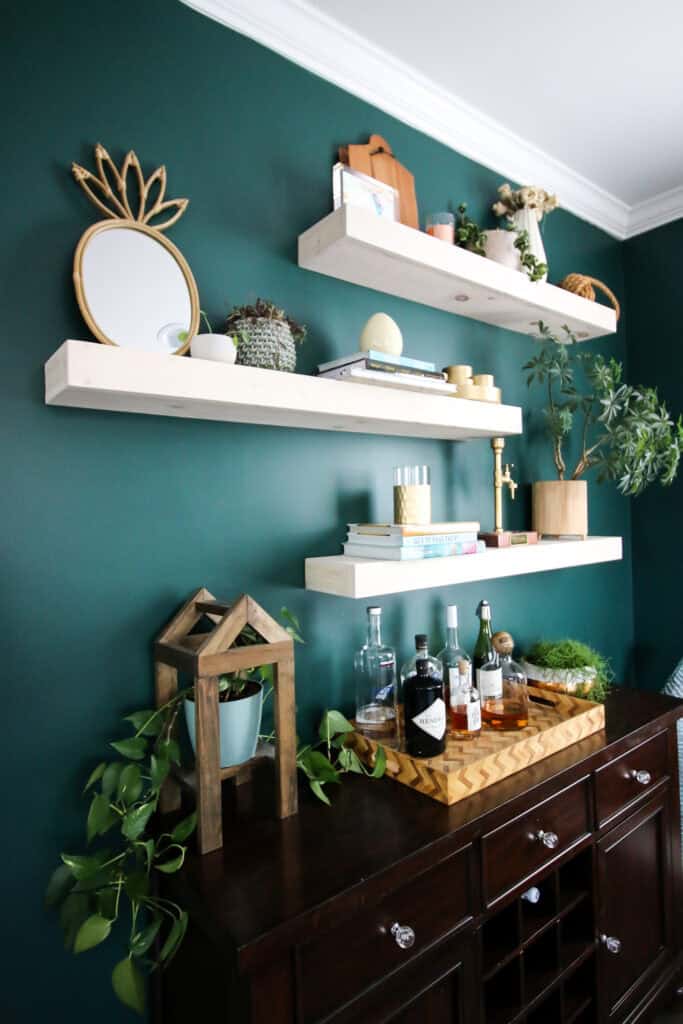
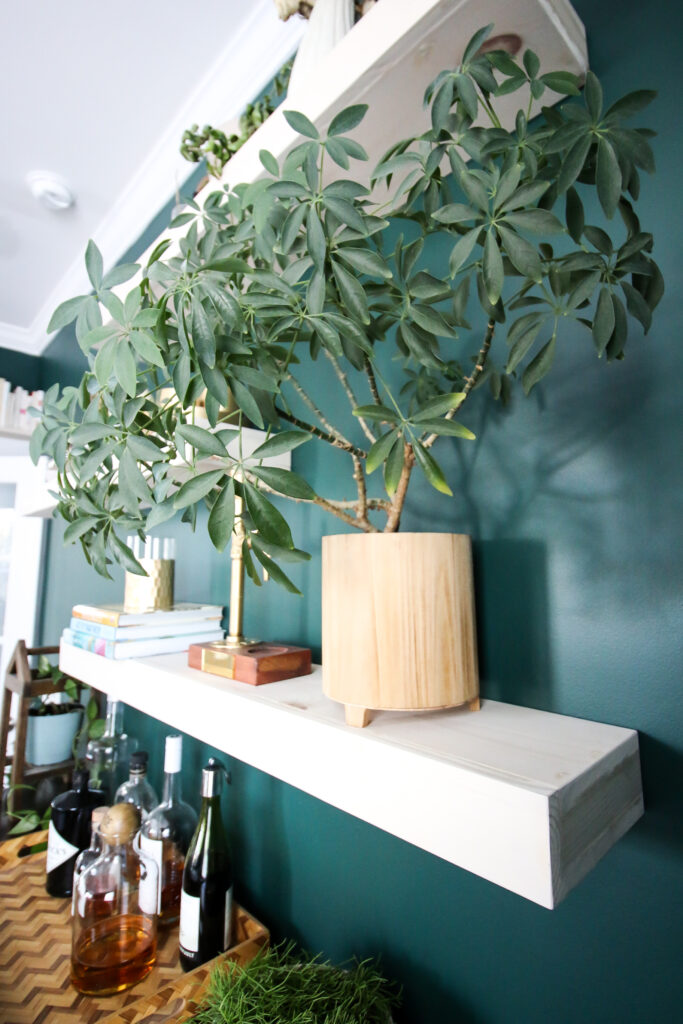
Completed simple DIY floating shelves
We love how these shelves turned out!
These DIY floating shelves were really easy to build and replicate. The width is great for doing a staggered look because they extend further that way.
These shelves are very sturdy without being too heavy and we love how they look with our decor above the bar.
Plus, we can always hide something inside the shelf if we need to...
Simple DIY floating shelf woodworking plans
Like how we did this and want to replicate the project in your own home? Grab our DIY floating shelf plans and get started!
These plans show you how to build a simple DIY floating shelf and the bracket to hold it to the wall. The plans can be replicated for however many shelves you need!
Our woodworking plans include a material list, cut list and step-by-step instructions with computer model imagery to show you want to do!
Basic woodworking information for every project
Here are some of our most popular woodworking articles!
Shopping for wood:
Woodworking project ideas
- 100+ of the best woodworking project ideas!
- 62 easy beginning woodworking projects
- Woodworking project ideas to make and sell
See all our printable PDF woodworking plans!
Our favorite tools + supplies
- See all our favorite tool reviews
- How to use a Kreg jig
- The ultimate wood stain guide
- The best wood fillers for your project
Remember to also always use safety equipment while woodworking and using tools. Make sure you have proper eye protection, ear protection and a good mask to keep yourself safe.

Looking for something?
We've been doing this since 2012 so we have a LOT of blog posts!
Search stuff like: Ceiling Projects | DIY Plant Stands | Thrift Flips

Hey there, I'm Sean, the woodworking enthusiast and builder behind CharlestonCrafted.com! Since 2012, I've been sharing the magic of turning raw materials into beautiful creations. I love teaching others the art and satisfaction of woodworking and DIY. I try to inspire fellow crafters to make something extraordinary out of nothing at all.