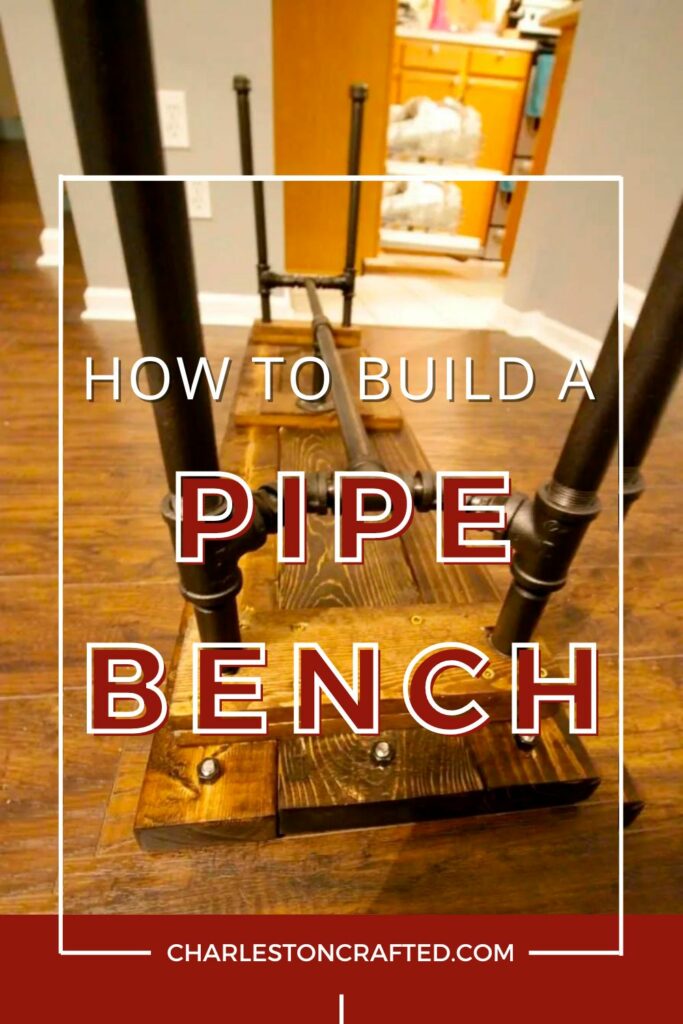
Want to add an industrial touch to your entry or bedroom? How about a bench! Here's a tutorial for how to build a DIY Industrial Pipe Bench!
I love the sleek functionality a bench can add to a space. It's a place to sit and put on your shoes, pull up to a table for extra seating, or just to style to fill an awkward empty space.
As we are making over our entryway, I wanted a simple seating solution to go near our shoe rack.
However, this space is directly adjacent tot he doorway to our kitchen and needed to remain fairly open to foot traffic.
So, we got the idea to build a bench for this space.
I wanted something wood and with black metal - to pull off some of the other hardware, lanterns, and black accents we've added to the space.
I'm obsessed with what we came up with - a wooden base with iron pipe bench legs!
We're nearing the end of the One Room Challenge! We are making over our front room in six weeks!
The room started out completely unfurnished and we are working hard to get it done and decorated with our coastal style. In case you missed it, here is what we have done:
- Week 1: The Front Room Redesign Plan
- Week 2: Painting & Large Furniture
- Week 3: Fireplace Makeover
- Week 4: Little Details & Decor
Love this project? Be sure to check out all of our latest building projects!
This week we focused on getting something going on at the blank wall alongside the stairs. The only thing currently on the wall is our Ikea shoe drawer which we have had for years and love with all the heart eyed emojis.
So much hidden storage in such a small amount of space! I wanted to add something next to the drawers - somewhere I could sit my purse, or that we could sit to put on shoes.
A shallow bench was in order. And art!
I wanted something with ORB metal legs to tie in the black of the hanging lantern lights throughout the first floor as well as the plant stand we have in the corner and a variety of knobs all over the place.
I decided that it would be fun to play with piping (we made this pipe lamp a few years ago) and google lead me to lots of options.
We got the design for a DIY industrial pipe bench from Lowe's, where they have a variety of projects and full plans for you to follow. This is great, but we needed to modify it slightly for the space we wanted and only wanted one bench, not a whole table.
We didn't realize when we started the project how expensive pipe fittings are. According to Lowe's' plan, this project was $$ out of $$$$$ (⅖ for expense). That made it seem like it would be fairly inexpensive.
However, once we started looking at the prices of pipe fittings, we changed from galvanized steel to black iron (about half the cost) and cut out some pieces and still ended up with $100 worth of pipes. Luckily, we were using spare wood we already had to make the top, but we certainly weren't expecting that.
What is $$$$$ worth?? Building a whole house? I wish that Lowes had been more specific with their price guide!
DIY Industrial Pipe Bench
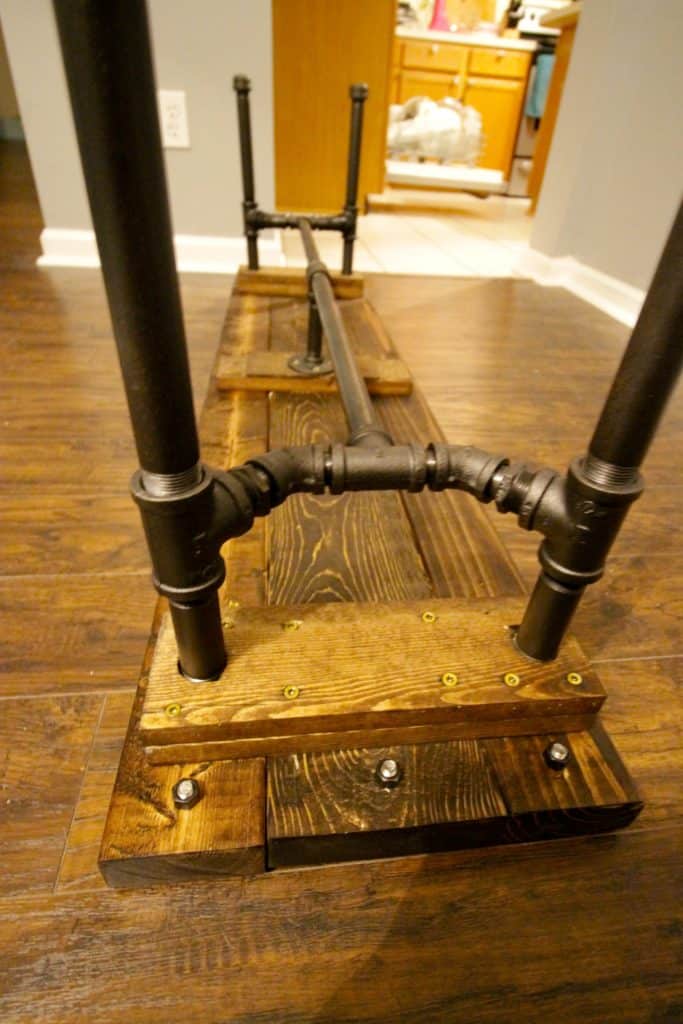
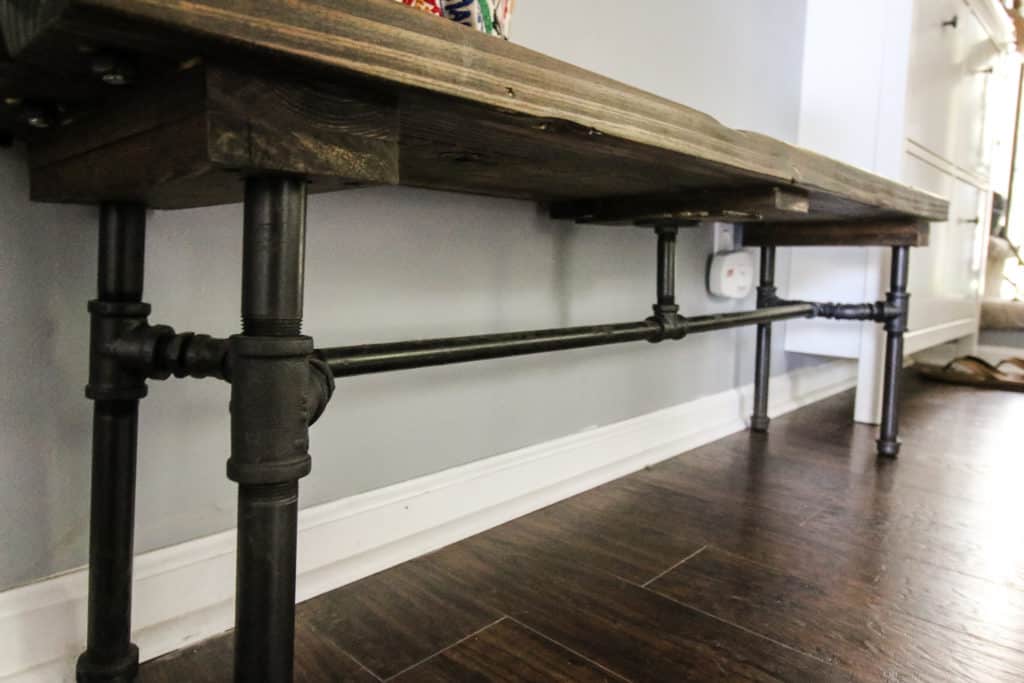
The changes that we made to the official Lowes plans were to use all 1 inch pipes to ¾ inch pipes, use black iron instead of galvanized steel, and we reduced the width of the bench from 18" wide to around 12" wide.
It's a narrow bench but it fits our narrow space and is for more of perching (and bag holding) than long term sitting.
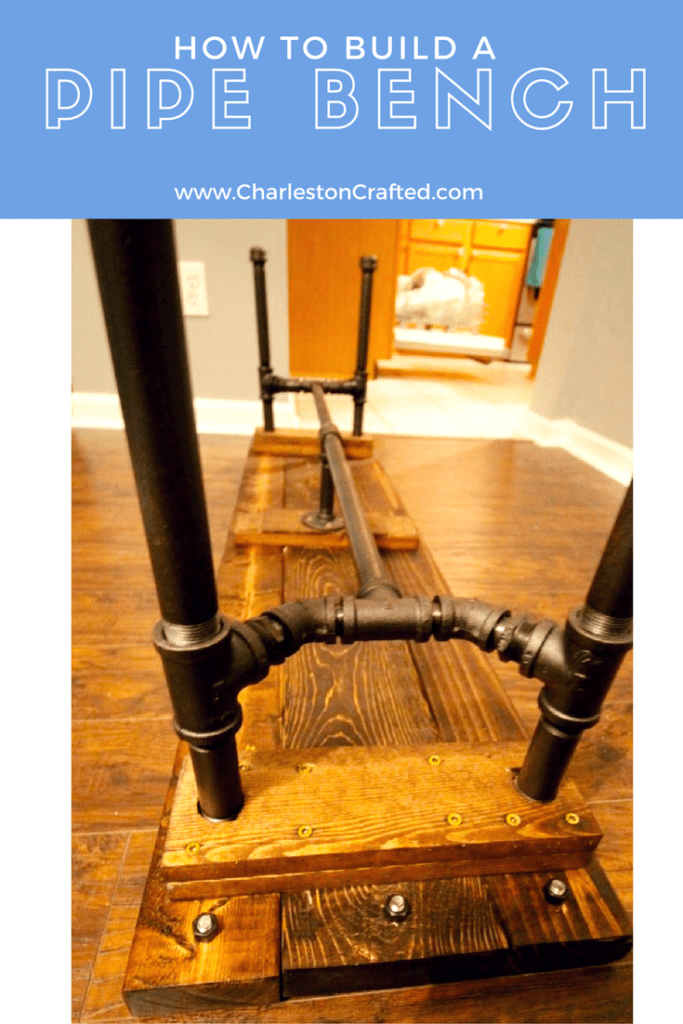
How to Assemble Pipe Bench Legs
Anyways, the pipes were fairly easy to connect, but you have to tighten them. A lot. With tools.
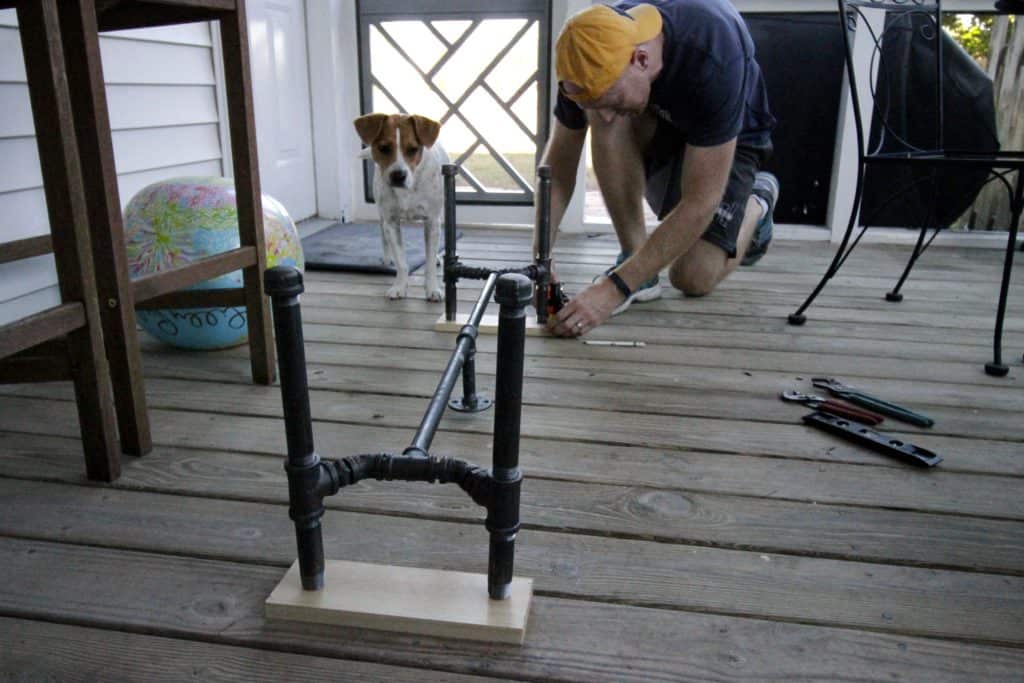
You won't be able to get them tight enough with just your hands.
We used two wrenches to hold and tighten all the fittings. You don't want an unstable bench! In the end, it looked great.
Painting the base
We spray painted the iron work with an oil-rubbed bronze spray paint to match the light fixtures we've been installing.
Lots of thin coats (I think 3 coats) with dry time in between to prevent drips. I let it dry for 36 hours outside to get really dry.
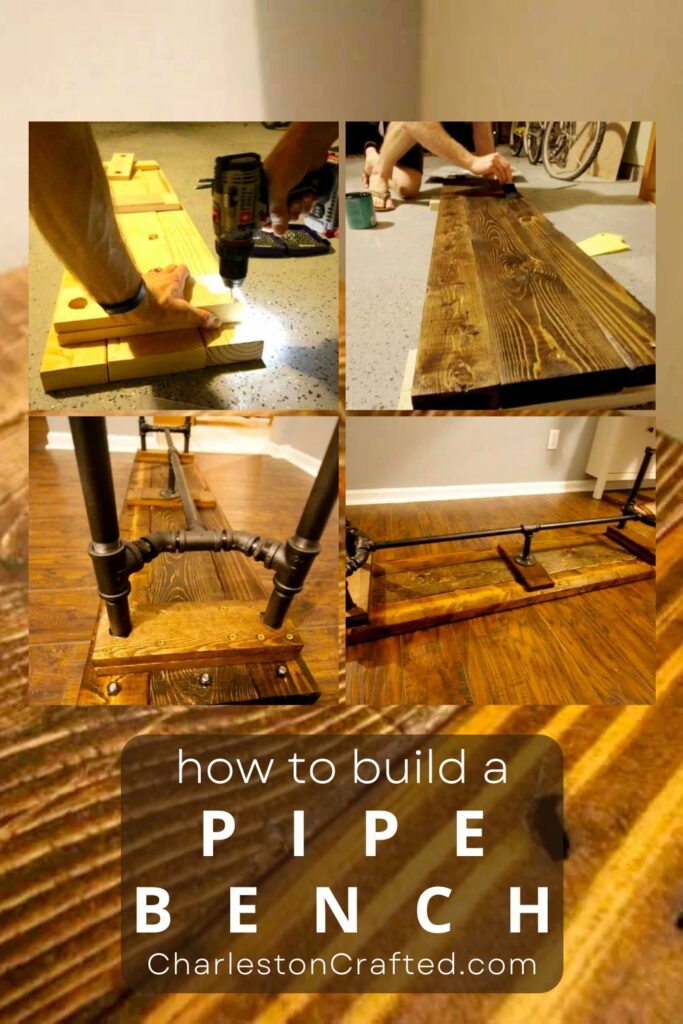
Build a wooden bench seat
Finally came the bench seat. As I mentioned, we used scrap wood we saved from inside the walls of our house when we had the open-concept created last month.
I think that's a pretty cool element that we can create several projects reusing the wood from inside our house!
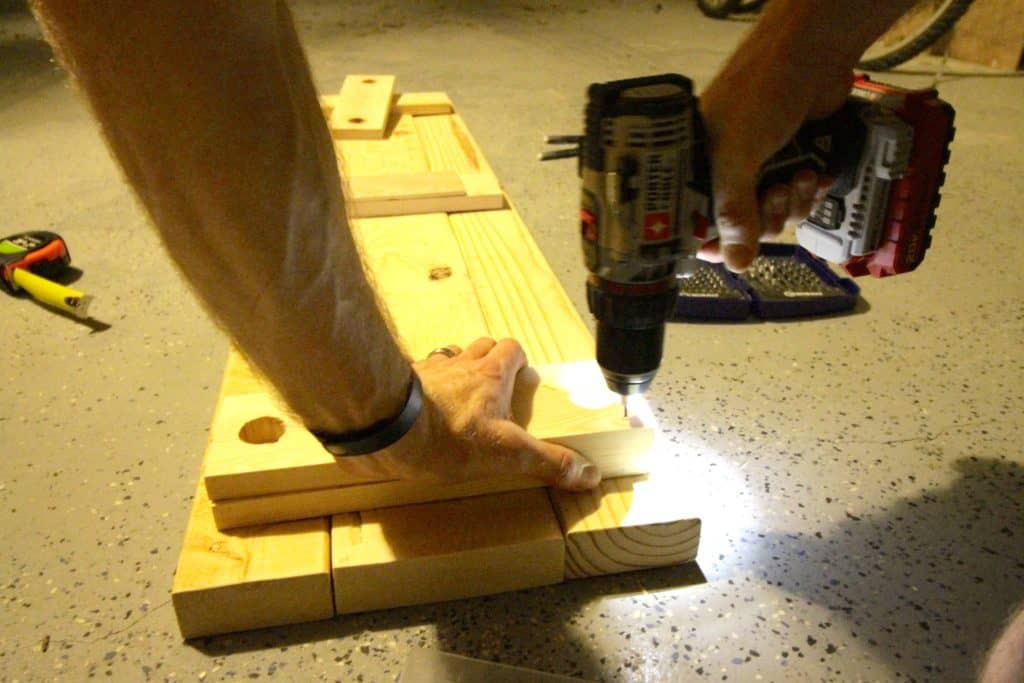
We used a combination of 2x4s and a 2x6 for the seat and cut the pieces to 50 inches long.
We also used 11 inch 1x4s to create cleats to hold the boards together and give the iron legs a place to sit.
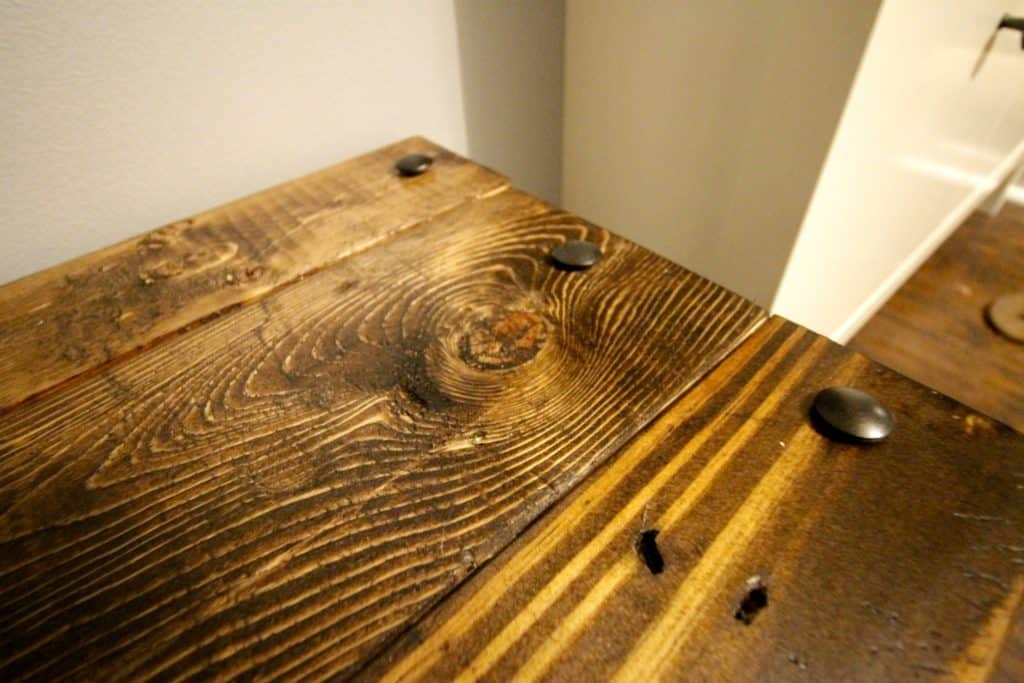
We also added six large bolts (ends spray painted ORB) to the center of each board for a rustic vibe.
We added these on our barn door upstairs and I love them so I wanted to mimic that on the bench.

Once all screwed together, we stained it in our favorite Dark Walnut stain and sealed it with matte poly.
Be sure to check out our Dark Walnut by Minwax wood stain review!
Attach legs to wooden seat
The last step was to fix the iron to the bench. Here we screwed the bench to the pipe in the middle with a flange and deck screws and added some glue to each of the side leg holes to keep them in place with added support.
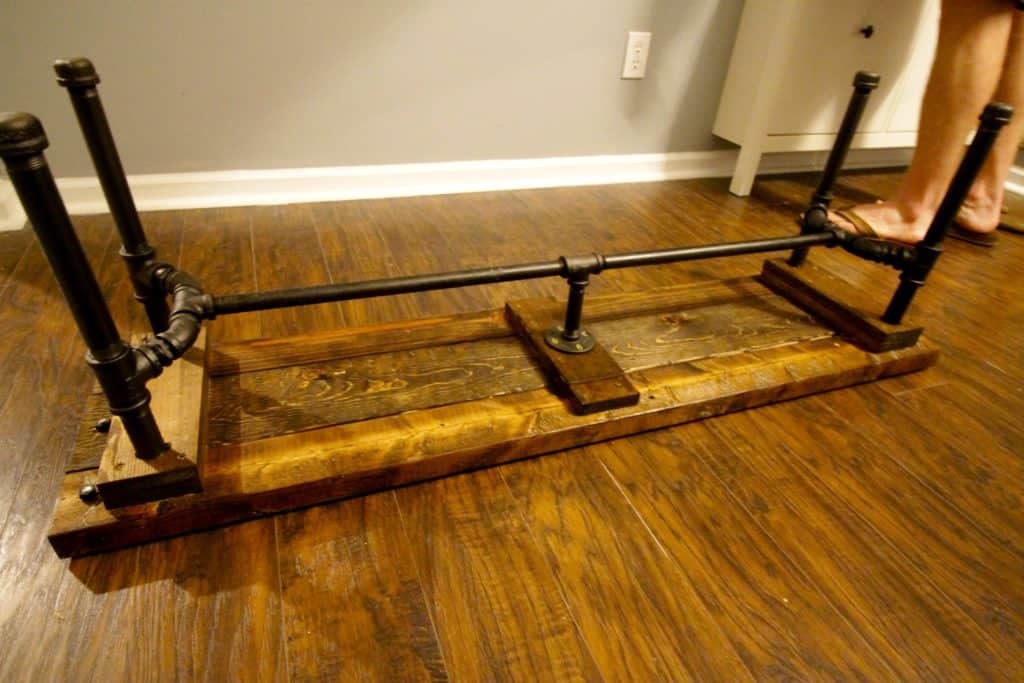
The pipe ends on the sides were inset into holes on the bottom of the wood cleats to help hold them in place.
We definitely used more screws than we needed here, but we were new to the process of furniture making at the time.
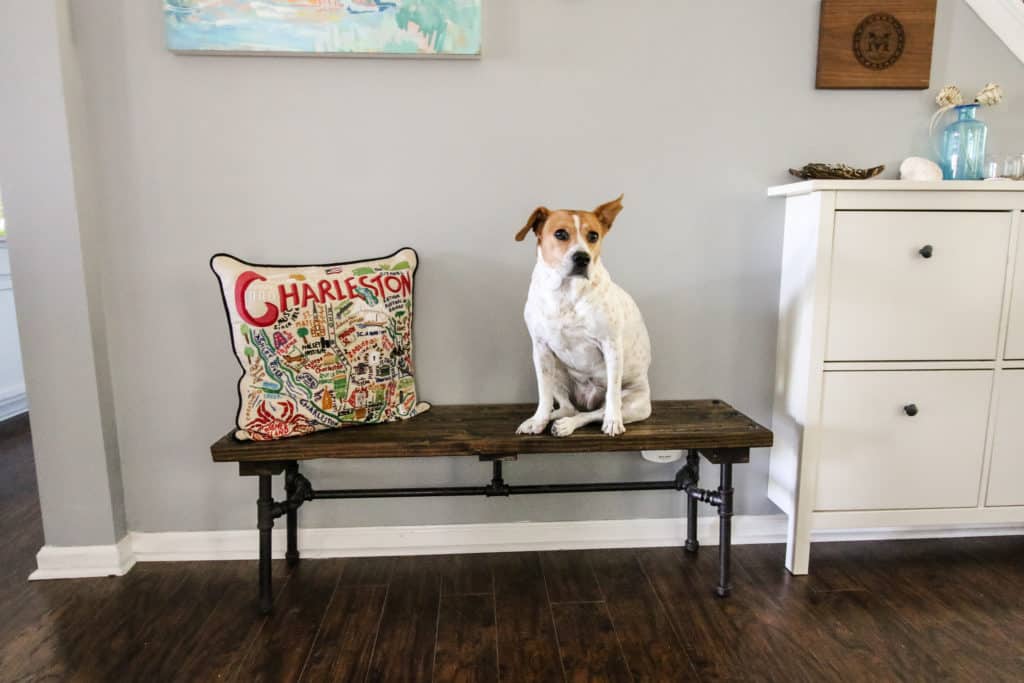
Pipe and wood bench
In the end, our DIY industrial pipe bench turned out great and looks awesome with the rustic elements of our house with our lighting and live edge coffee table!
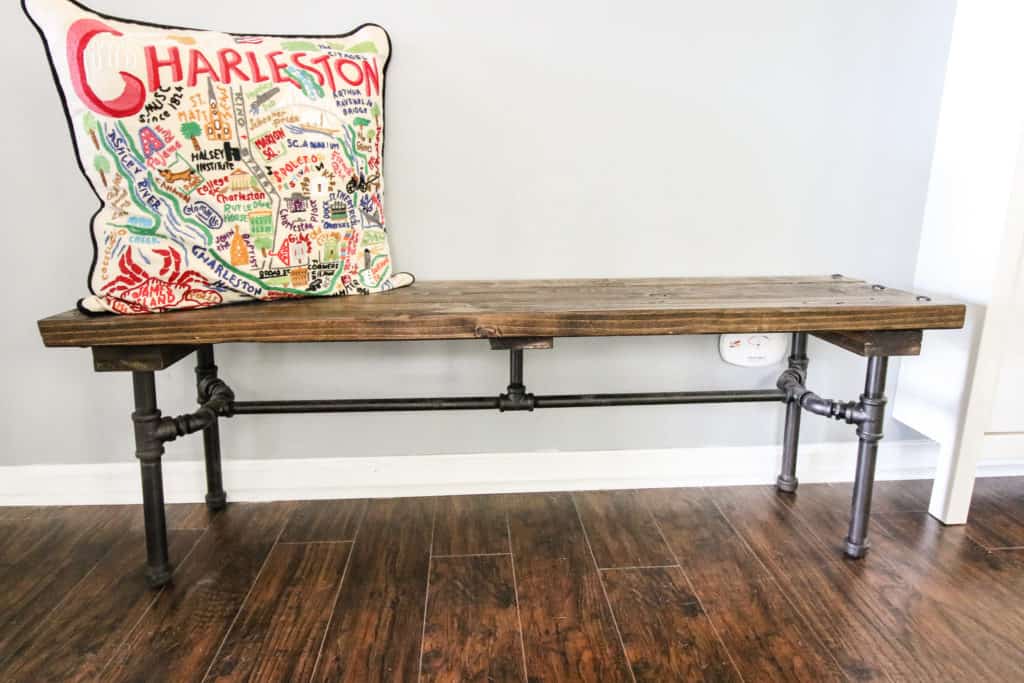
We styled the space with a seascape above it (this was actually Sean's in his apartment bedroom years ago, but I did help encourage him to buy it!) and styled it with the Charleston pillow that I got for Christmas last year.
Hopefully CiCi stays off the bench and doesn't get it all dog hair-y!
Be sure to check out our total Front Room Makeover One Room Challenge reveal & budget breakdown!

Looking for something?
We've been doing this since 2012 so we have a LOT of blog posts!
Search stuff like: Ceiling Projects | DIY Plant Stands | Thrift Flips

Hey there, I'm Sean, the woodworking enthusiast and builder behind CharlestonCrafted.com! Since 2012, I've been sharing the magic of turning raw materials into beautiful creations. I love teaching others the art and satisfaction of woodworking and DIY. I try to inspire fellow crafters to make something extraordinary out of nothing at all.

Kristin @ Postbox Designs says
I love a great DIY! That pipe bench is such a great idea, I love it! Good luck with the final week of ORC, looking forward to seeing your final transformation!
Lola says
Hi there,
Quick question. We would like to do a project like yours, but we would to actually use the bench for sitting at the dining table. Do you think the pipes can hold the weight of 2-3people?
Cheers!
Morgan says
it could 100% hold the weight! It is VERY sturdy! I'd make it a little longer and wider for more comfort for 3 people but the base is VERY strong! Tag me if you make it and share it somewhere, I'd LOVE to see!!
Gary McVey says
what size are the pipes that go straight down from the bench to the floor? Do you have a material list?
Morgan says
The linked Lowes plan has the full material list! We made slight modifications as we described to try to save a little money.
Jessie Mann says
Before you painted the pipes, did you have to clean them? I recently bought the same pipes and found that they have an oily black coating on them. I'm wondering if you had to remove any coating on your pipes before you painted them, and if so, how did you clean them?
Sean says
Hi Jessie! We wiped them down a lot using microfiber rags. They are greasy straight from the store. We didn't wash them beyond that. Good luck with your project!
Skip says
Black pipe fittings are about $1.25 each (flanges, t's, etc.) if you buy 8~20 at a shot on Amazon. 3/4" flanges alone at my local HD or Lowe's are almost $6. I got 'nuff for 2 benches (H legs w/ flanges on all ends) for $100 including the 6" and 7" nipples to get ~15" legs for a 3" thick top bench.
Nice bench.
Skip @ G's Sawdust Factory
Sean says
Thanks Skip! Yeah, this was a fun build, but we weren't really using Amazon for that kind of thing back then. We just went to Lowe's and figured out what we needed to build the system. Thanks for finding this for everyone because this is a much more cost-effective solution!
MADELINE l NEWTON says
now this will be a really strong table ...just what i need ...you have such a great imagination ...wow ...love it ...keep up all of the great ideas ...now to just get hubby to help me ...ayyayayaya...
Antonio says
Hey, I like the idea of a pipe bench. Looks great. I may make one for our back patio.
Thanks. Antonio