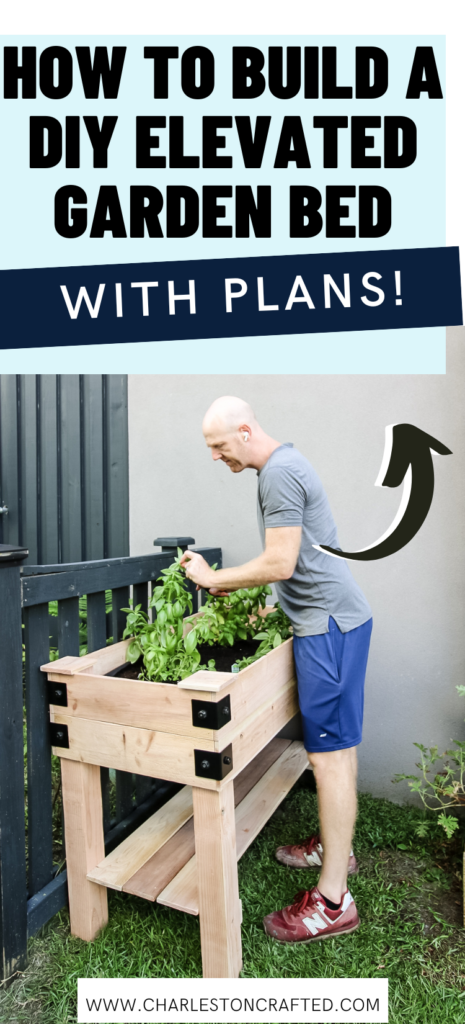
Looking to build a DIY elevated garden bed? You've come to the right place! Learn how to build one and get the woodworking plans to make it easy!
This post was sponsored by National Hardware. All opinions are our own. Thank you for supporting the brands that make Charleston Crafted possible!
They say that when you turn 30, you have to select from a short list of adult hobbies. We didn't care much about World War II history, so we chose gardening.
We have built lots of raised bed gardens and even beautiful flower gardens in our yard in the three years we've lived here and loved them all. Watching flowers and veggies grow has been a joy!
But so far, all of our gardens have been at ground level and we wanted to try our hand at building a standing height garden. One that would keep the critters at bay while also being easier on our backs.
Here's how to build a simple raised garden bed on ground level!
Our DIY standing height potting bench has been one of our most popular posts of all time, so we thought a DIY raised garden bed with legs would also be a hit!
This post is going to share with you how to build an elevated garden bed that will let you grow some great veggies and won't hurt your back in the process. Plus there's storage underneath and it will look great with some beautiful decorative hardware from National Hardware!
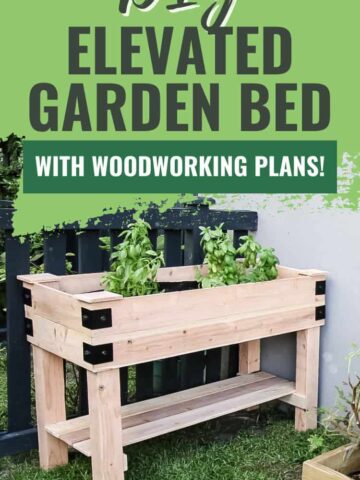
DIY elevated garden bed
It's pretty simple to build a raised garden bed on legs that you can enjoy all season.
Basically, you come up with a simple box design and add legs into it! Who ever said DIY has to be hard!
We added a few embellishments to ours, but this is going to look great in our yard to grow more and more herbs that we can eat on all year long.
Check out these over the railing herb planters we made and love!
Plants in a raised bed garden will also have good oxygen flow and are out of reach of many critters, so this is a great solution to a lot of people's problems.
Building this elevated garden bed out of wood resistant to rot means it will last a long time compared to untreated wood and won't leach any chemicals into the soil like pressure treated wood.
How to build a simple elevated garden bed
Let's dive into the overall instructions on how to build a simple DIY elevated garden bed.
Remember, these instructions give you the overall idea, but if you want the full material list, cut list and step-by-step instructions with computer images, you can get those in our downloadable PDF woodworking plans!
We built this raised garden bed almost entirely out of cedar fence pickets, making it very affordable and accessible to everyone.
Materials needed:
- Cedar fence pickets
- Cedar 4x4 posts
- Wood glue
- Oil finish
- National Hardware Raised Bed Garden Kit
- Soil and plants
- Miter saw
- Drill
- Sander
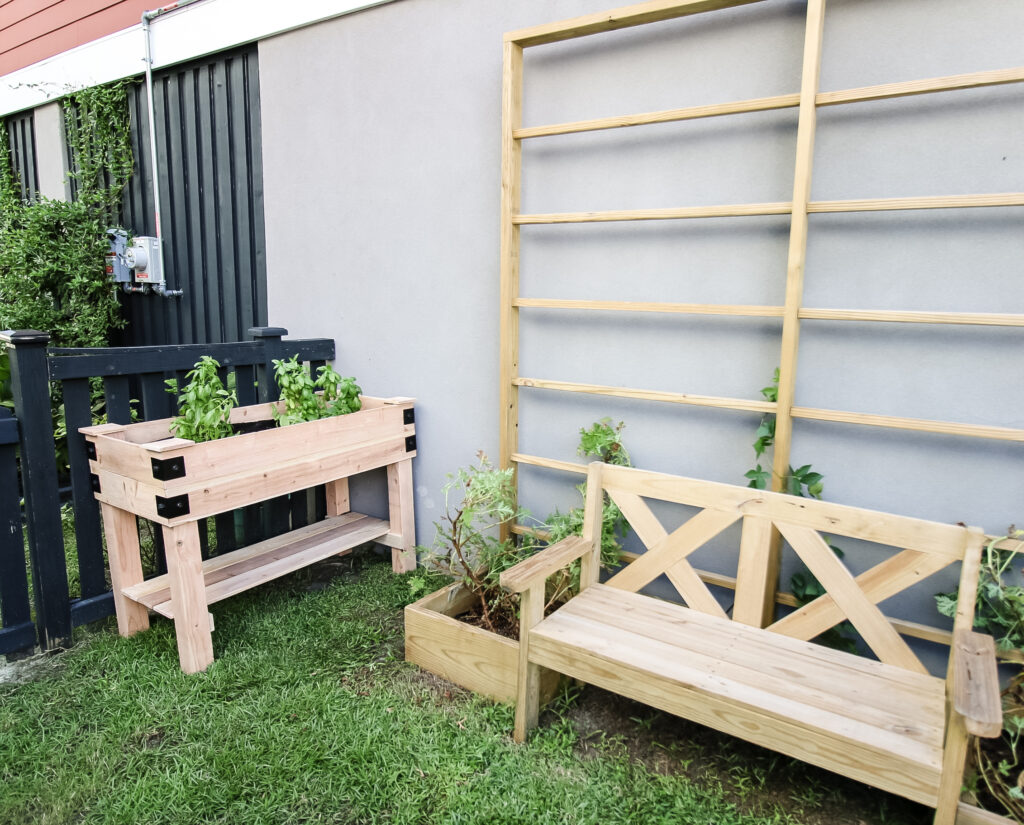
Check out this raised garden bed with a trellis we designed!
What type of wood should you use for a raised garden bed?
The type of wood to use for any garden bed is really a personal preference as there is a lot of discussion on what is considered "good" or "bad."
For this build, we chose to use cedar for everything. We used cedar fence pickets and 4x4s from Home Depot because cedar is naturally rot-resistant and good for outdoor projects.
You can also use pressure treated lumber, but many people deem this as bad because the chemicals can technically leech into the soil, so if you're planting edible plants, you wouldn't want to do that.
The other choice is to use regular lumber and seal it with an outdoor sealant to try to preserve the life, but ultimately it will break down the fastest.
Cypress is similar and we used it for our outdoor dining table and outdoor sectional couch!
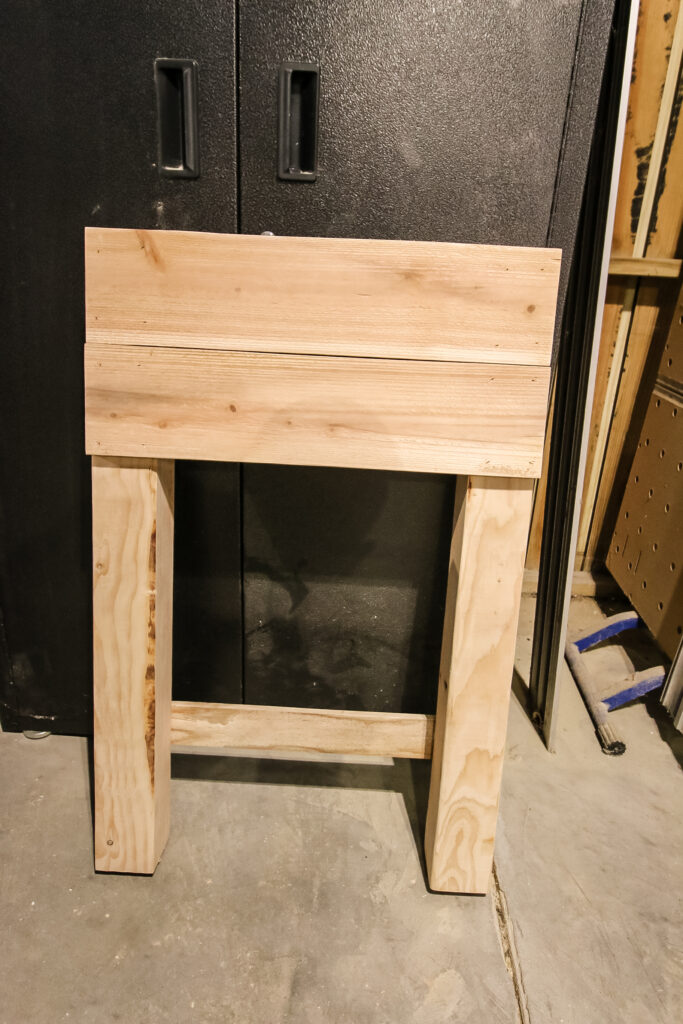
Step one: Build Legs
Start by building the two sets of legs.
We used 4x4 posts from Home Depot for the legs. When we searched online, they came up as a two pack for $90, but in reality at the store, they were $13 each and labeled as douglas fir, but were definitely cedar.
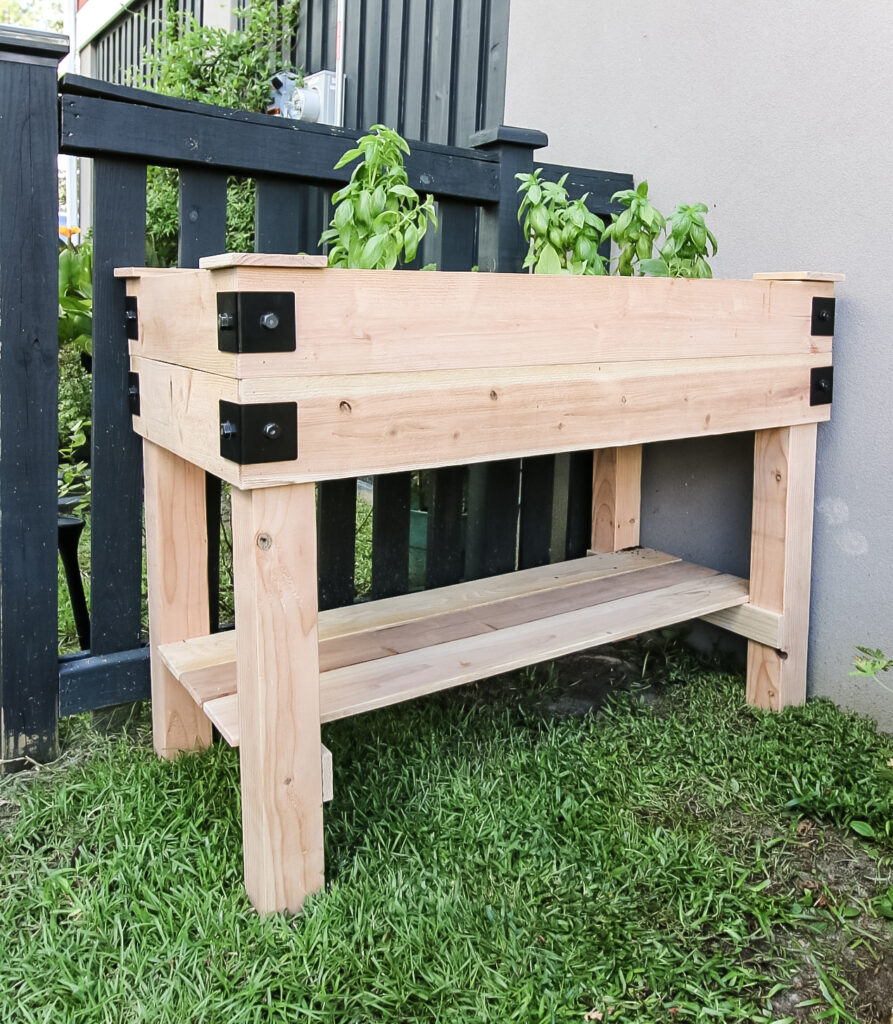
To build the leg sets, we attached cut pickets spanned across the outside of the legs in a double stack, then attach a span on the opposite side down near the bottom. These serve as the outer sides of the bed and the beams that will hold the bases.
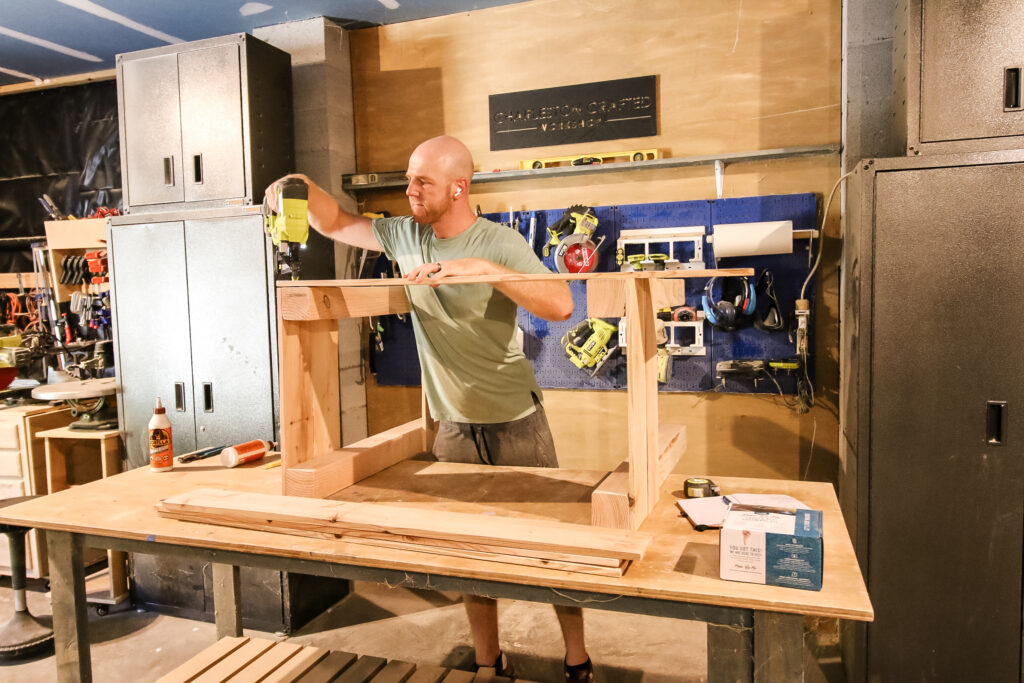
Step two: Attach front and back
Next, we attached the two leg sets using long spans of pickets as the front and back of the garden bed.
These boards were cut to size and then glued and nailed across the legs and side boards from the first step.
These four boards create the rest of the garden bed itself and connect the two sets of legs.
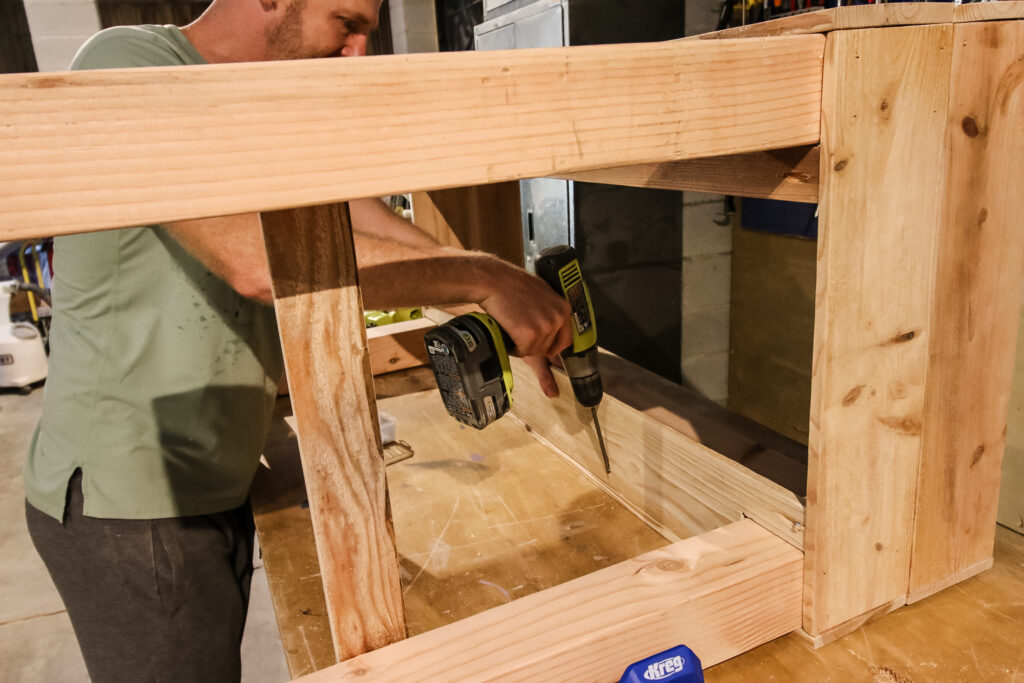
Step three: Attach bottoms
Now it is time to assemble the bottom of the garden bed by attaching five different boards across the underside of the bed.
These could be attached with nails, but we wanted to use pocket holes to keep them a little more secure since they would be holding up lots of dirt.
We used our Kreg 720 Pro pocket hole jig to drill holes in the ends of each board, but two of the boards have cutouts to fit around the legs.
Then we attached all the boards inside the garden bed to create the bottom. Finally, we drilled some holes in the bottom for drainage throughout.
Step four: Attach bases
The last part of the structure of the elevated garden bed is some boards spanned across the two boards at the bottom of the legs.
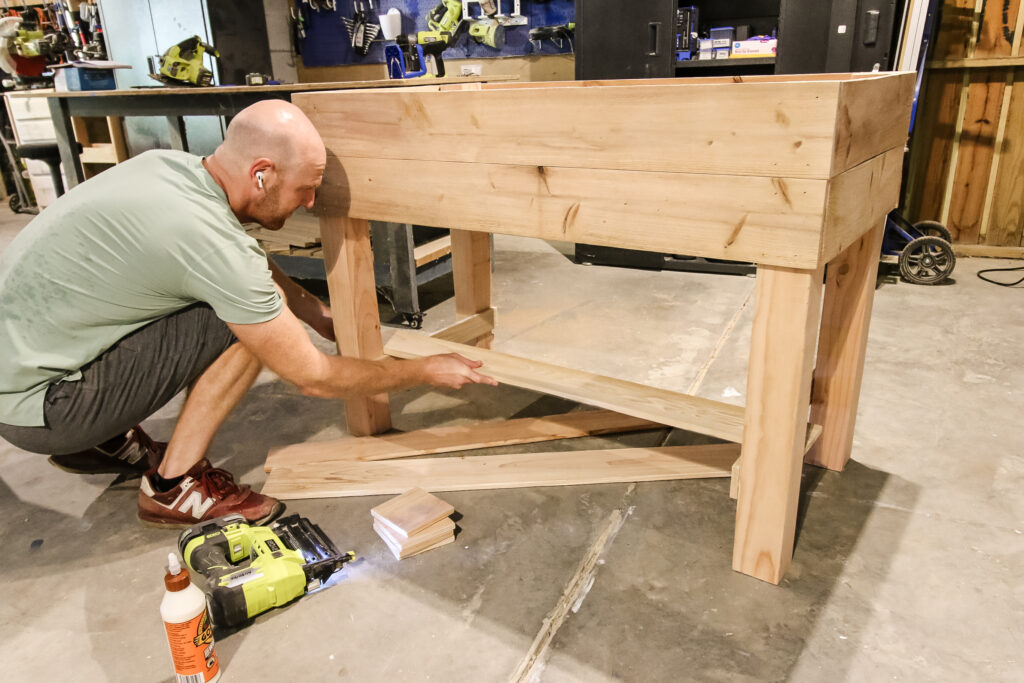
These bottom slats act like a storage shelf for any gardening supplies you might want to store nearby.
Our elevated potting bench also has storage underneath!
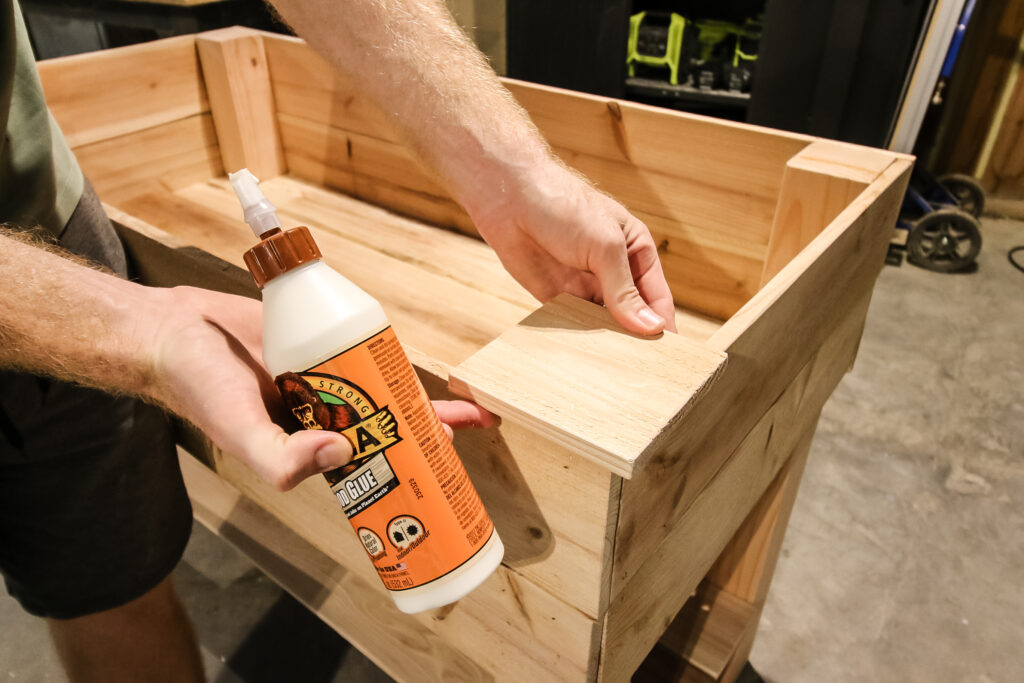
Finally, we glued and nailed some caps on top of the legs to give a finished detail look so the raw ends of the legs wouldn't be visible.
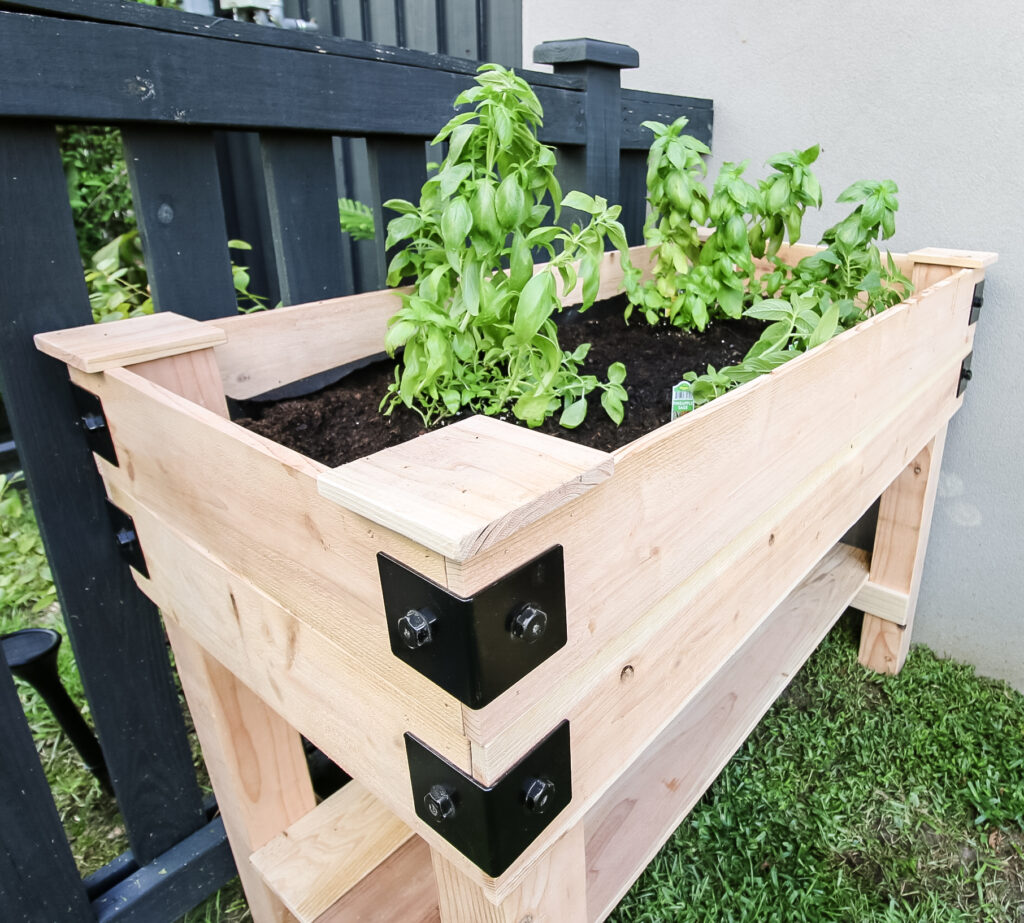
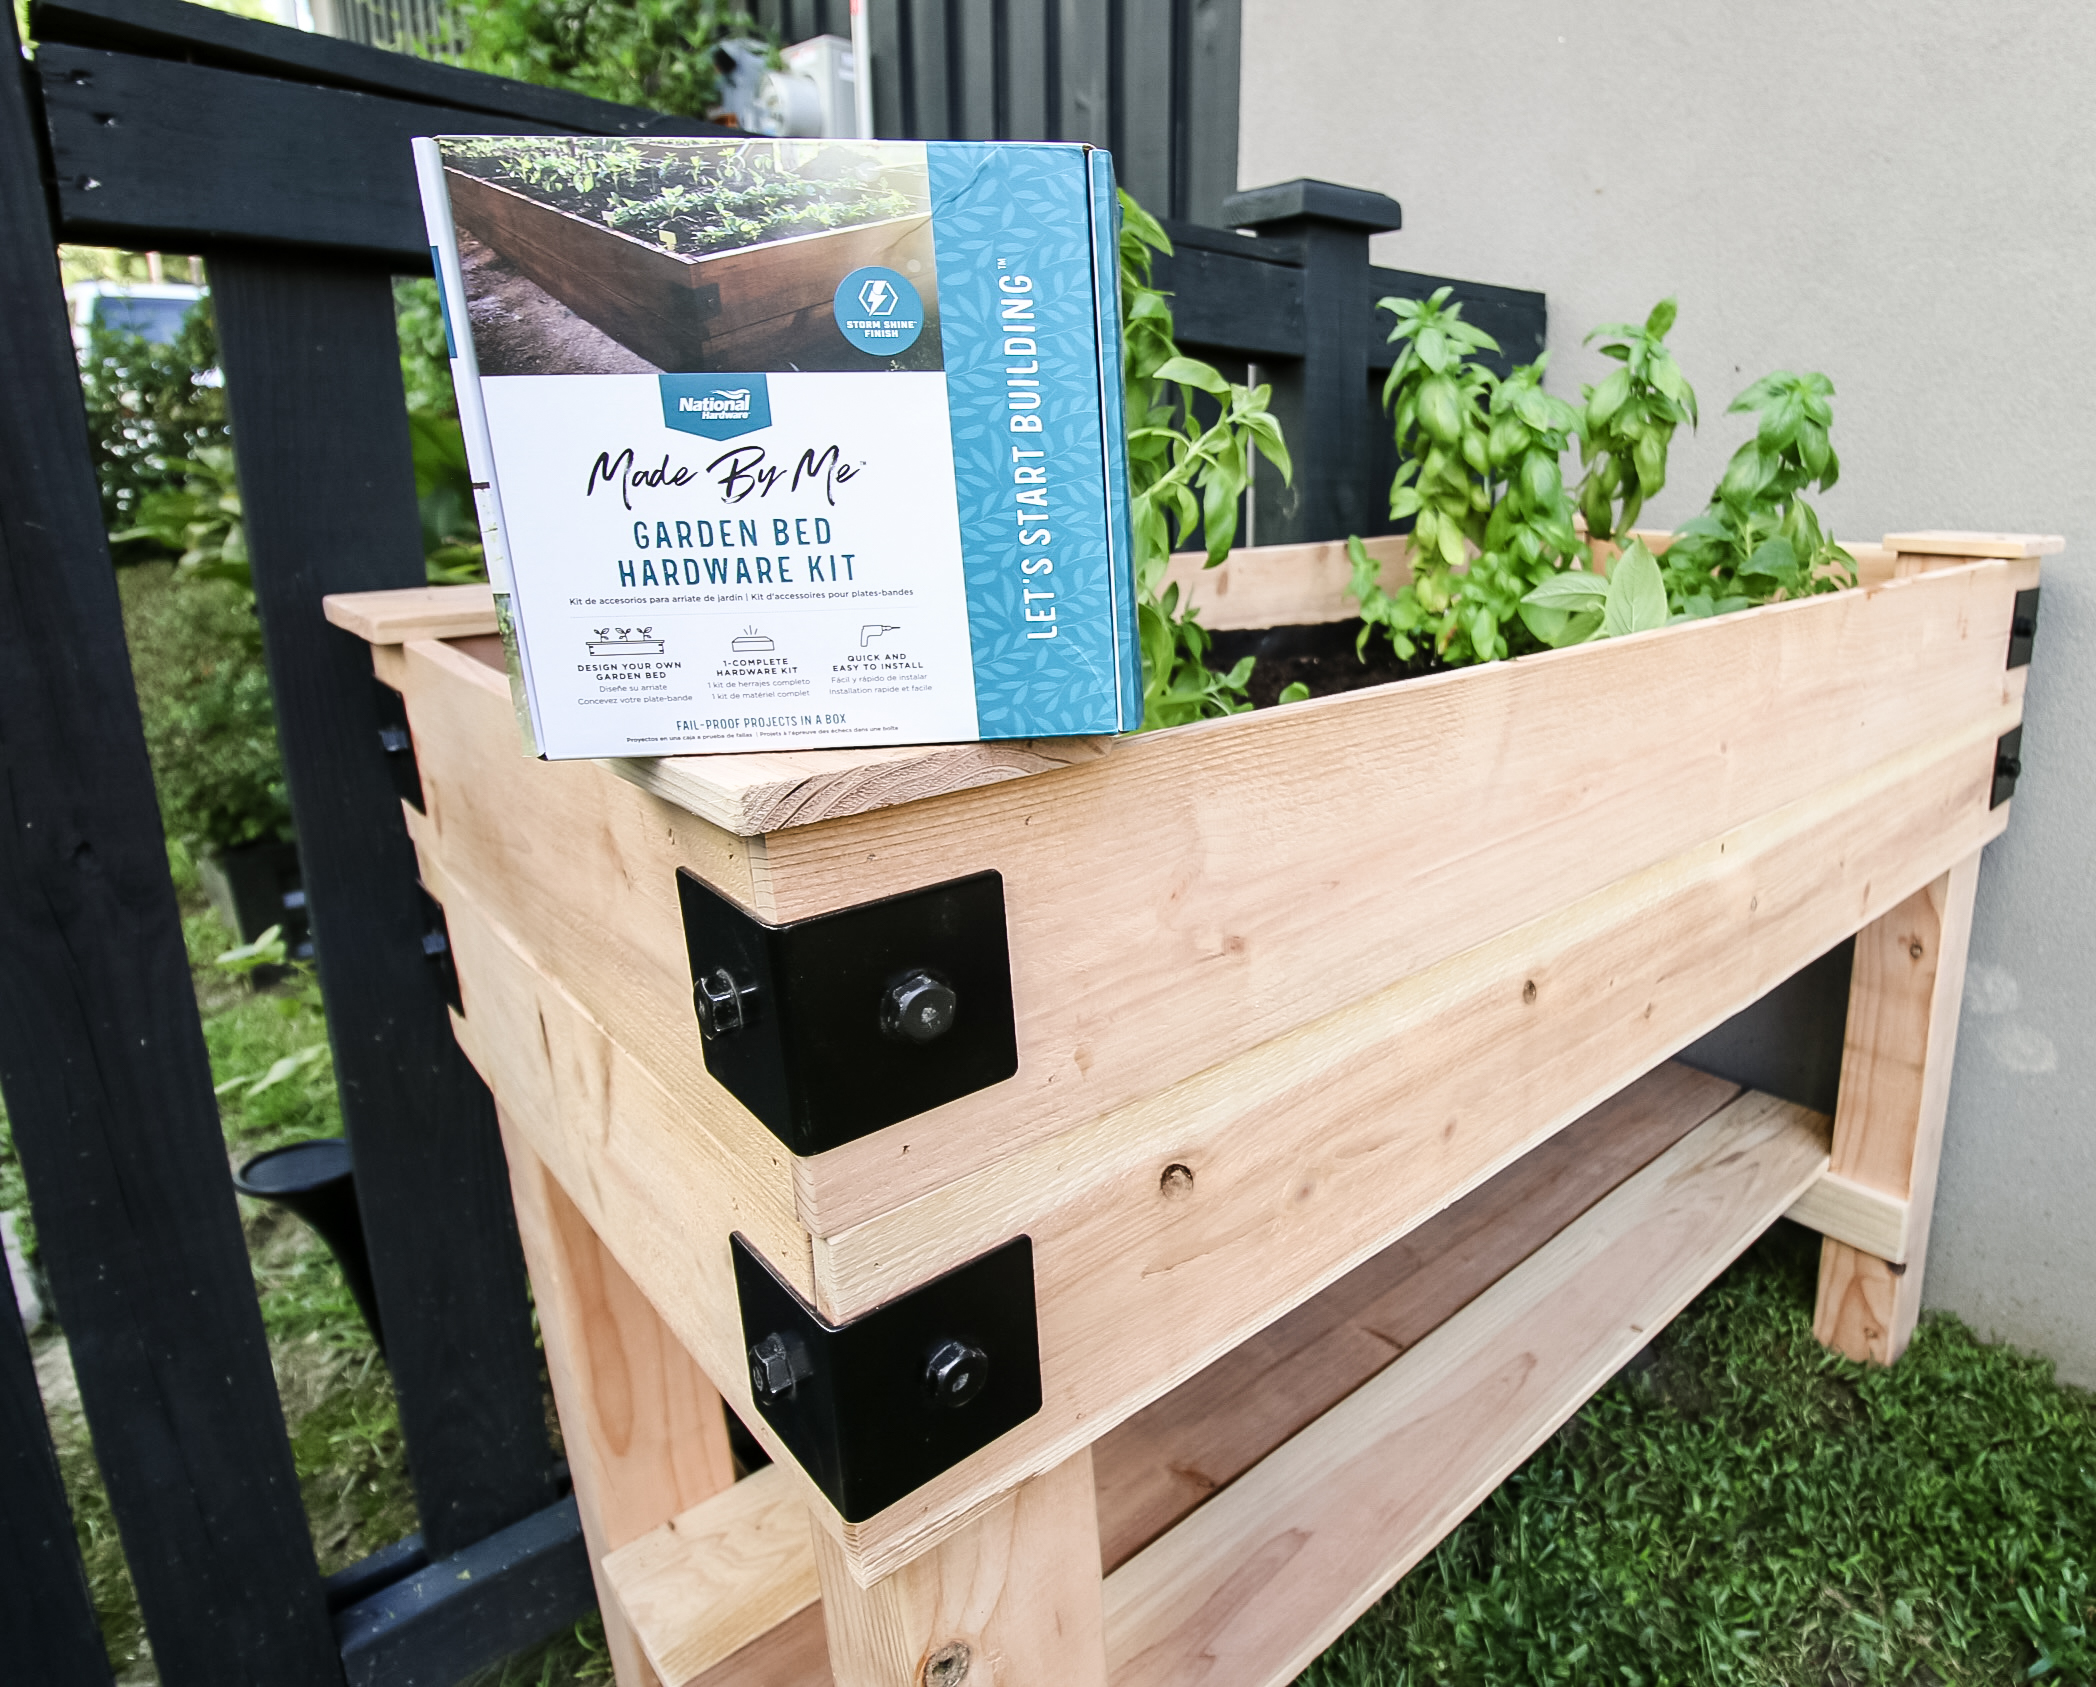
Step five: Add decorative hardware
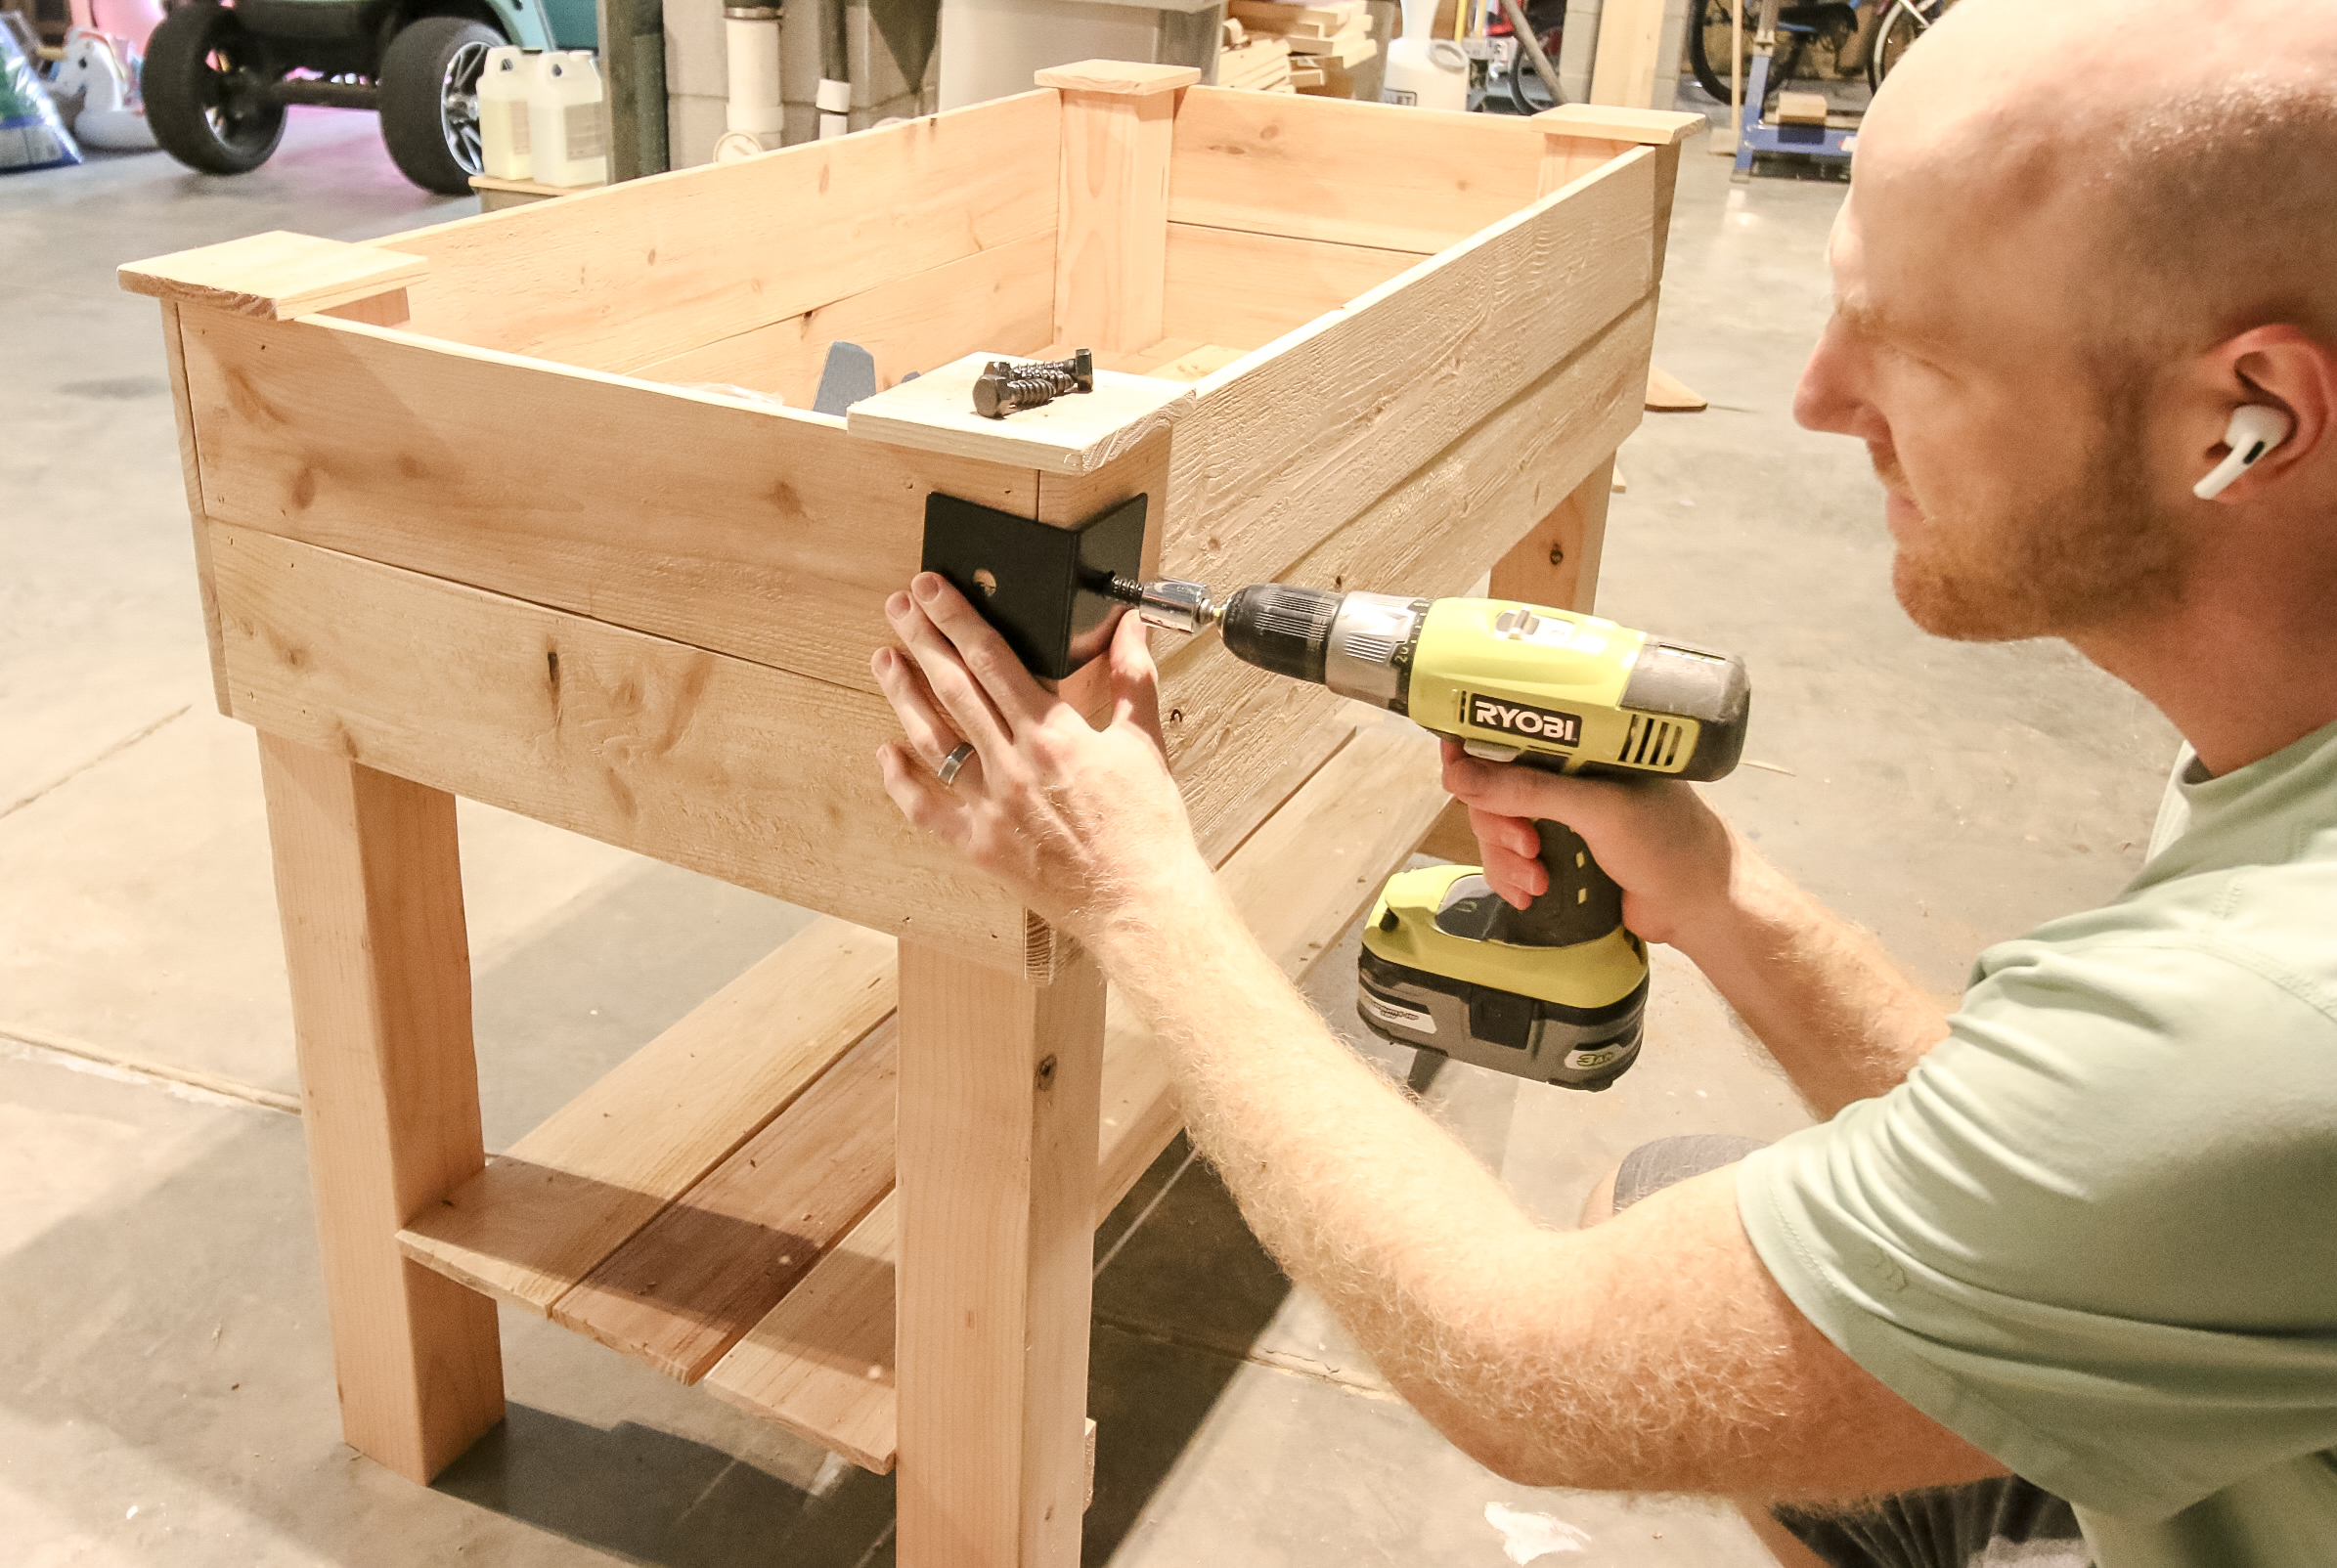
After the raised garden bed was built, we wanted to make it look just a little more finished. So, we decided to add some decorative hardware!
We grabbed the National Hardware Made by Me Garden Bed Hardware kit that includes 8 decorative brackets, screws and instructions to give our bed a nice, finished look!
We used a similar National Hardware kit when we made our standing planters for the top of our front stairs last year and they really brought the whole project together.
These were super easy to install. Each bracket goes on the corner of each level of the wood, meaning each corner ends up with two brackets.
Simply line these up in the center and mark the screw placement. Then drill a pilot hole in those spots.
Finally, line up the brackets with the pilot holes and attach the screw bolts in place to give your garden bed a beautiful finish!
Completed raised garden bed with legs
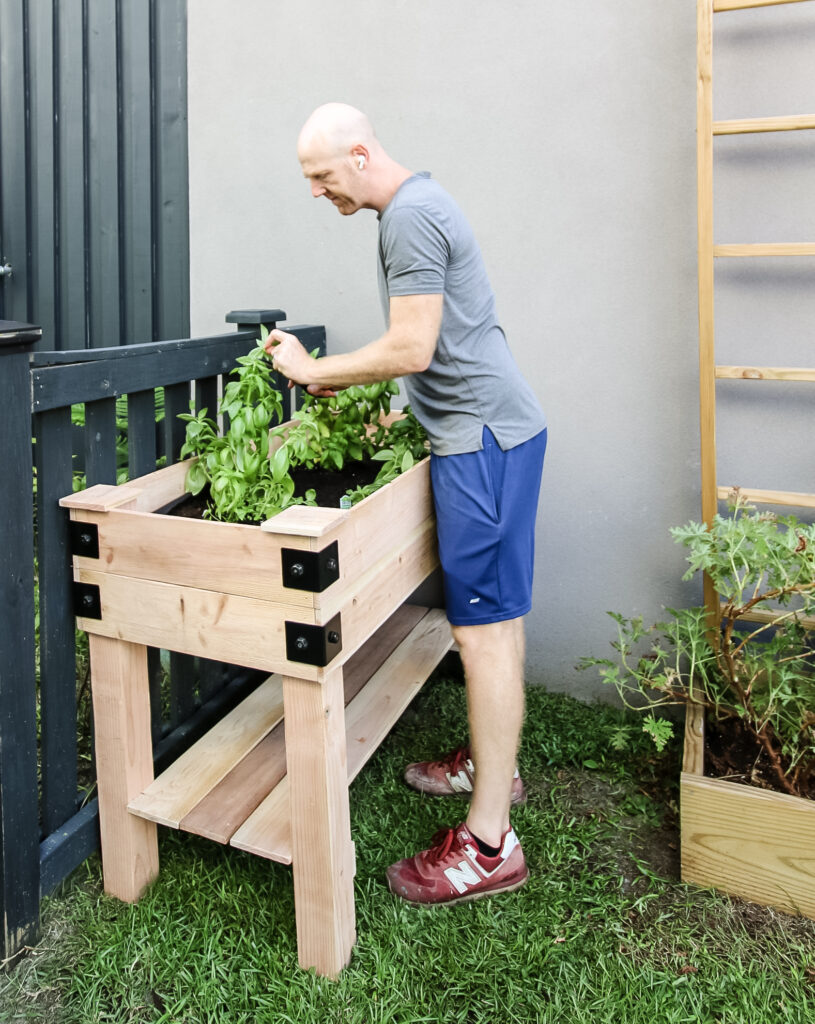
After building your elevated garden bed, it's time to fill it up!
Add your dirt of choice, then plant herbs or your favorite veggies or flowers.
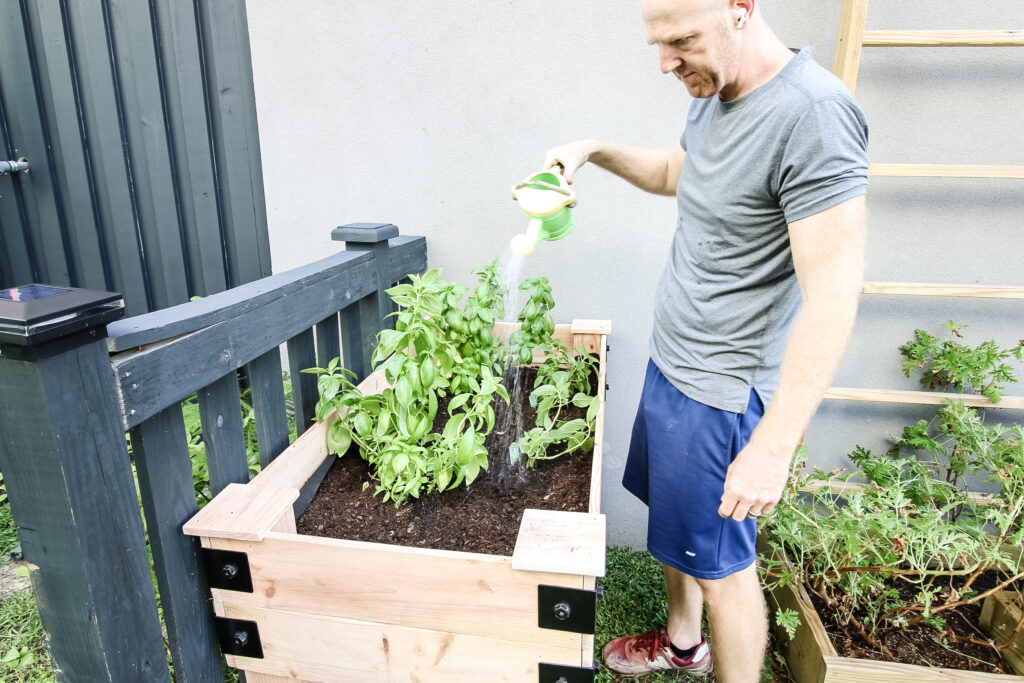
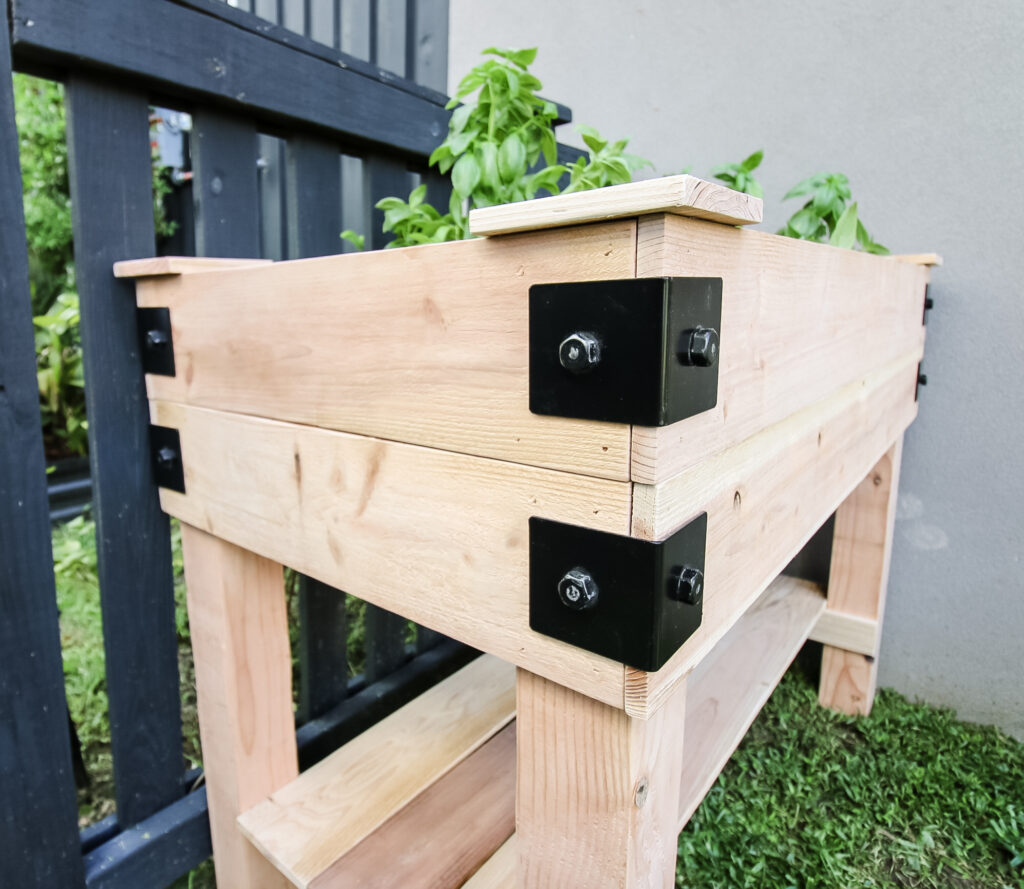
This raised garden bed with legs is such a game changer because you don't have to get down on your knees or hurt your back.
Plus, the cedar and the black decorative hardware look really good together, making this a statement piece for your yard!
It also looks great next to our garden bed with trellis and our garden bench!
DIY elevated garden bed woodworking plans!
If you love this DIY elevated garden bed, you can easily make one for yourself using our woodworking plans!
Our elevated garden bed plans are downloadable PDF format and include the full material list, cut list and step-by-step instructions with computer model imagery.
Using our woodworking plans is the best way to make sure you get exactly what you need to build this plan for yourself! Trust me, we created these plans, so we stand behind them.
Elevated garden bed frequently asked questions!
Elevated garden beds are great for people with bad knees or backs that can't (or don't want to) bend down to garden. They can also provide good air flow and circulation since they aren't embedded in the ground.
You don't technically need to put anything on the bottom of an elevated garden bed because you won't need to worry about weeds growing up, but it doesn't hurt to put a layer of weed barrier on the bottom, just to give a barrier so that wet dirt isn't sitting directly on the wood.
The best raised garden bed plants are anything that doesn't require deep roots or lots of growing space. For instance, carrots and potatoes need a lot of room underground. Stick to herbs, peppers, tomatoes or flowers.
An elevated garden bed should be at least 10" deep with at least 7" of soil so that your plants can thrive.

Looking for something?
We've been doing this since 2012 so we have a LOT of blog posts!
Search stuff like: Ceiling Projects | DIY Plant Stands | Thrift Flips

Hey there, I'm Sean, the woodworking enthusiast and builder behind CharlestonCrafted.com! Since 2012, I've been sharing the magic of turning raw materials into beautiful creations. I love teaching others the art and satisfaction of woodworking and DIY. I try to inspire fellow crafters to make something extraordinary out of nothing at all.


