
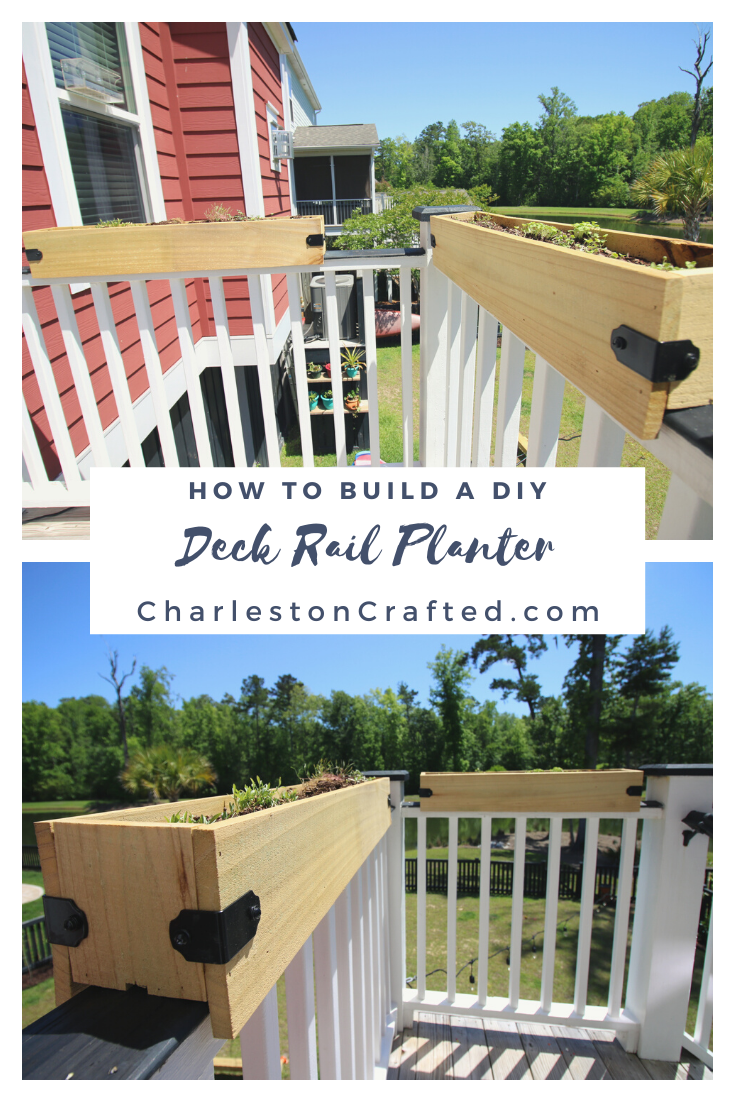
If you have a deck or porch that is begging for some flowers or herbs, you’re going to want to check out this post on how to build simple DIY deck rail planters!
Today we’ve got a really great DIY project for you to use on your deck rails or porch railings!
Ever wanted to have flowers all around you or have herbs nearby for cooking? Well look no further than these DIY wooden railing planter boxes that fit perfectly over a railing!
One thing that isn’t our favorite about having a raised house is that it makes it hard to get to the garden for our veggies while we’re cooking.
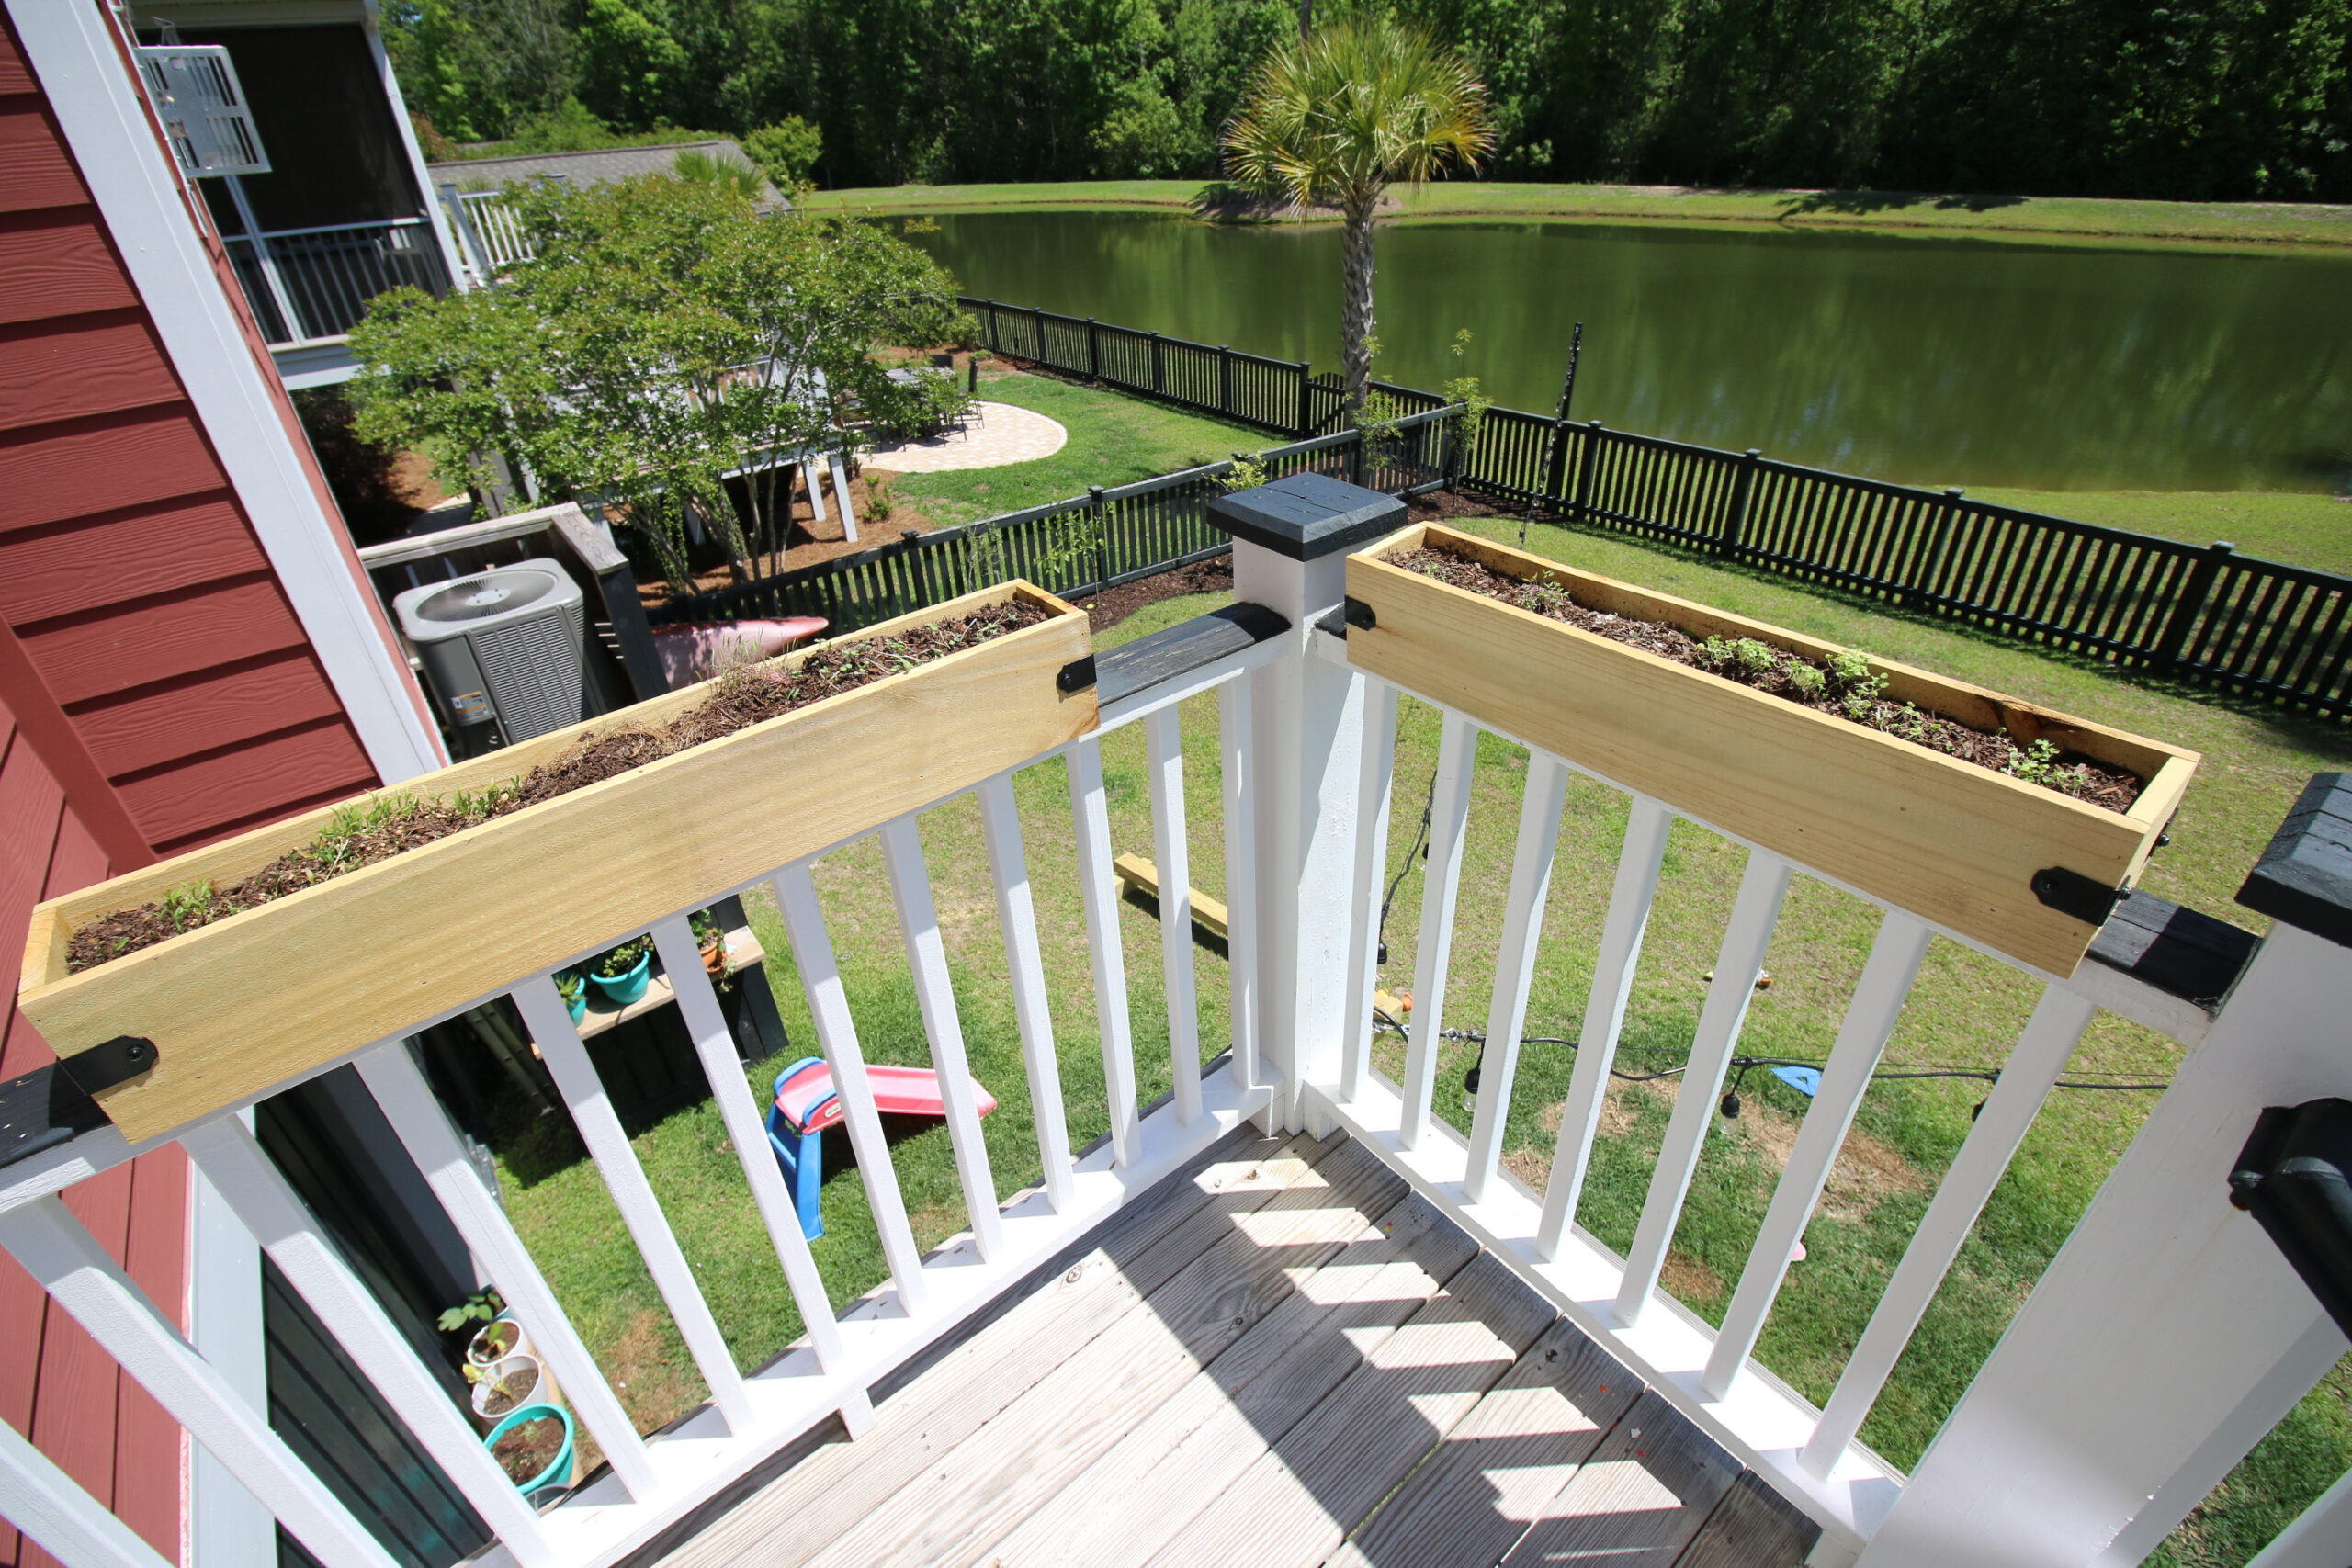
Well, even more frequently, we want quick access to herbs, so we designed these DIY deck rail planters to fit on the railings at the top of the landing from our screened porch!
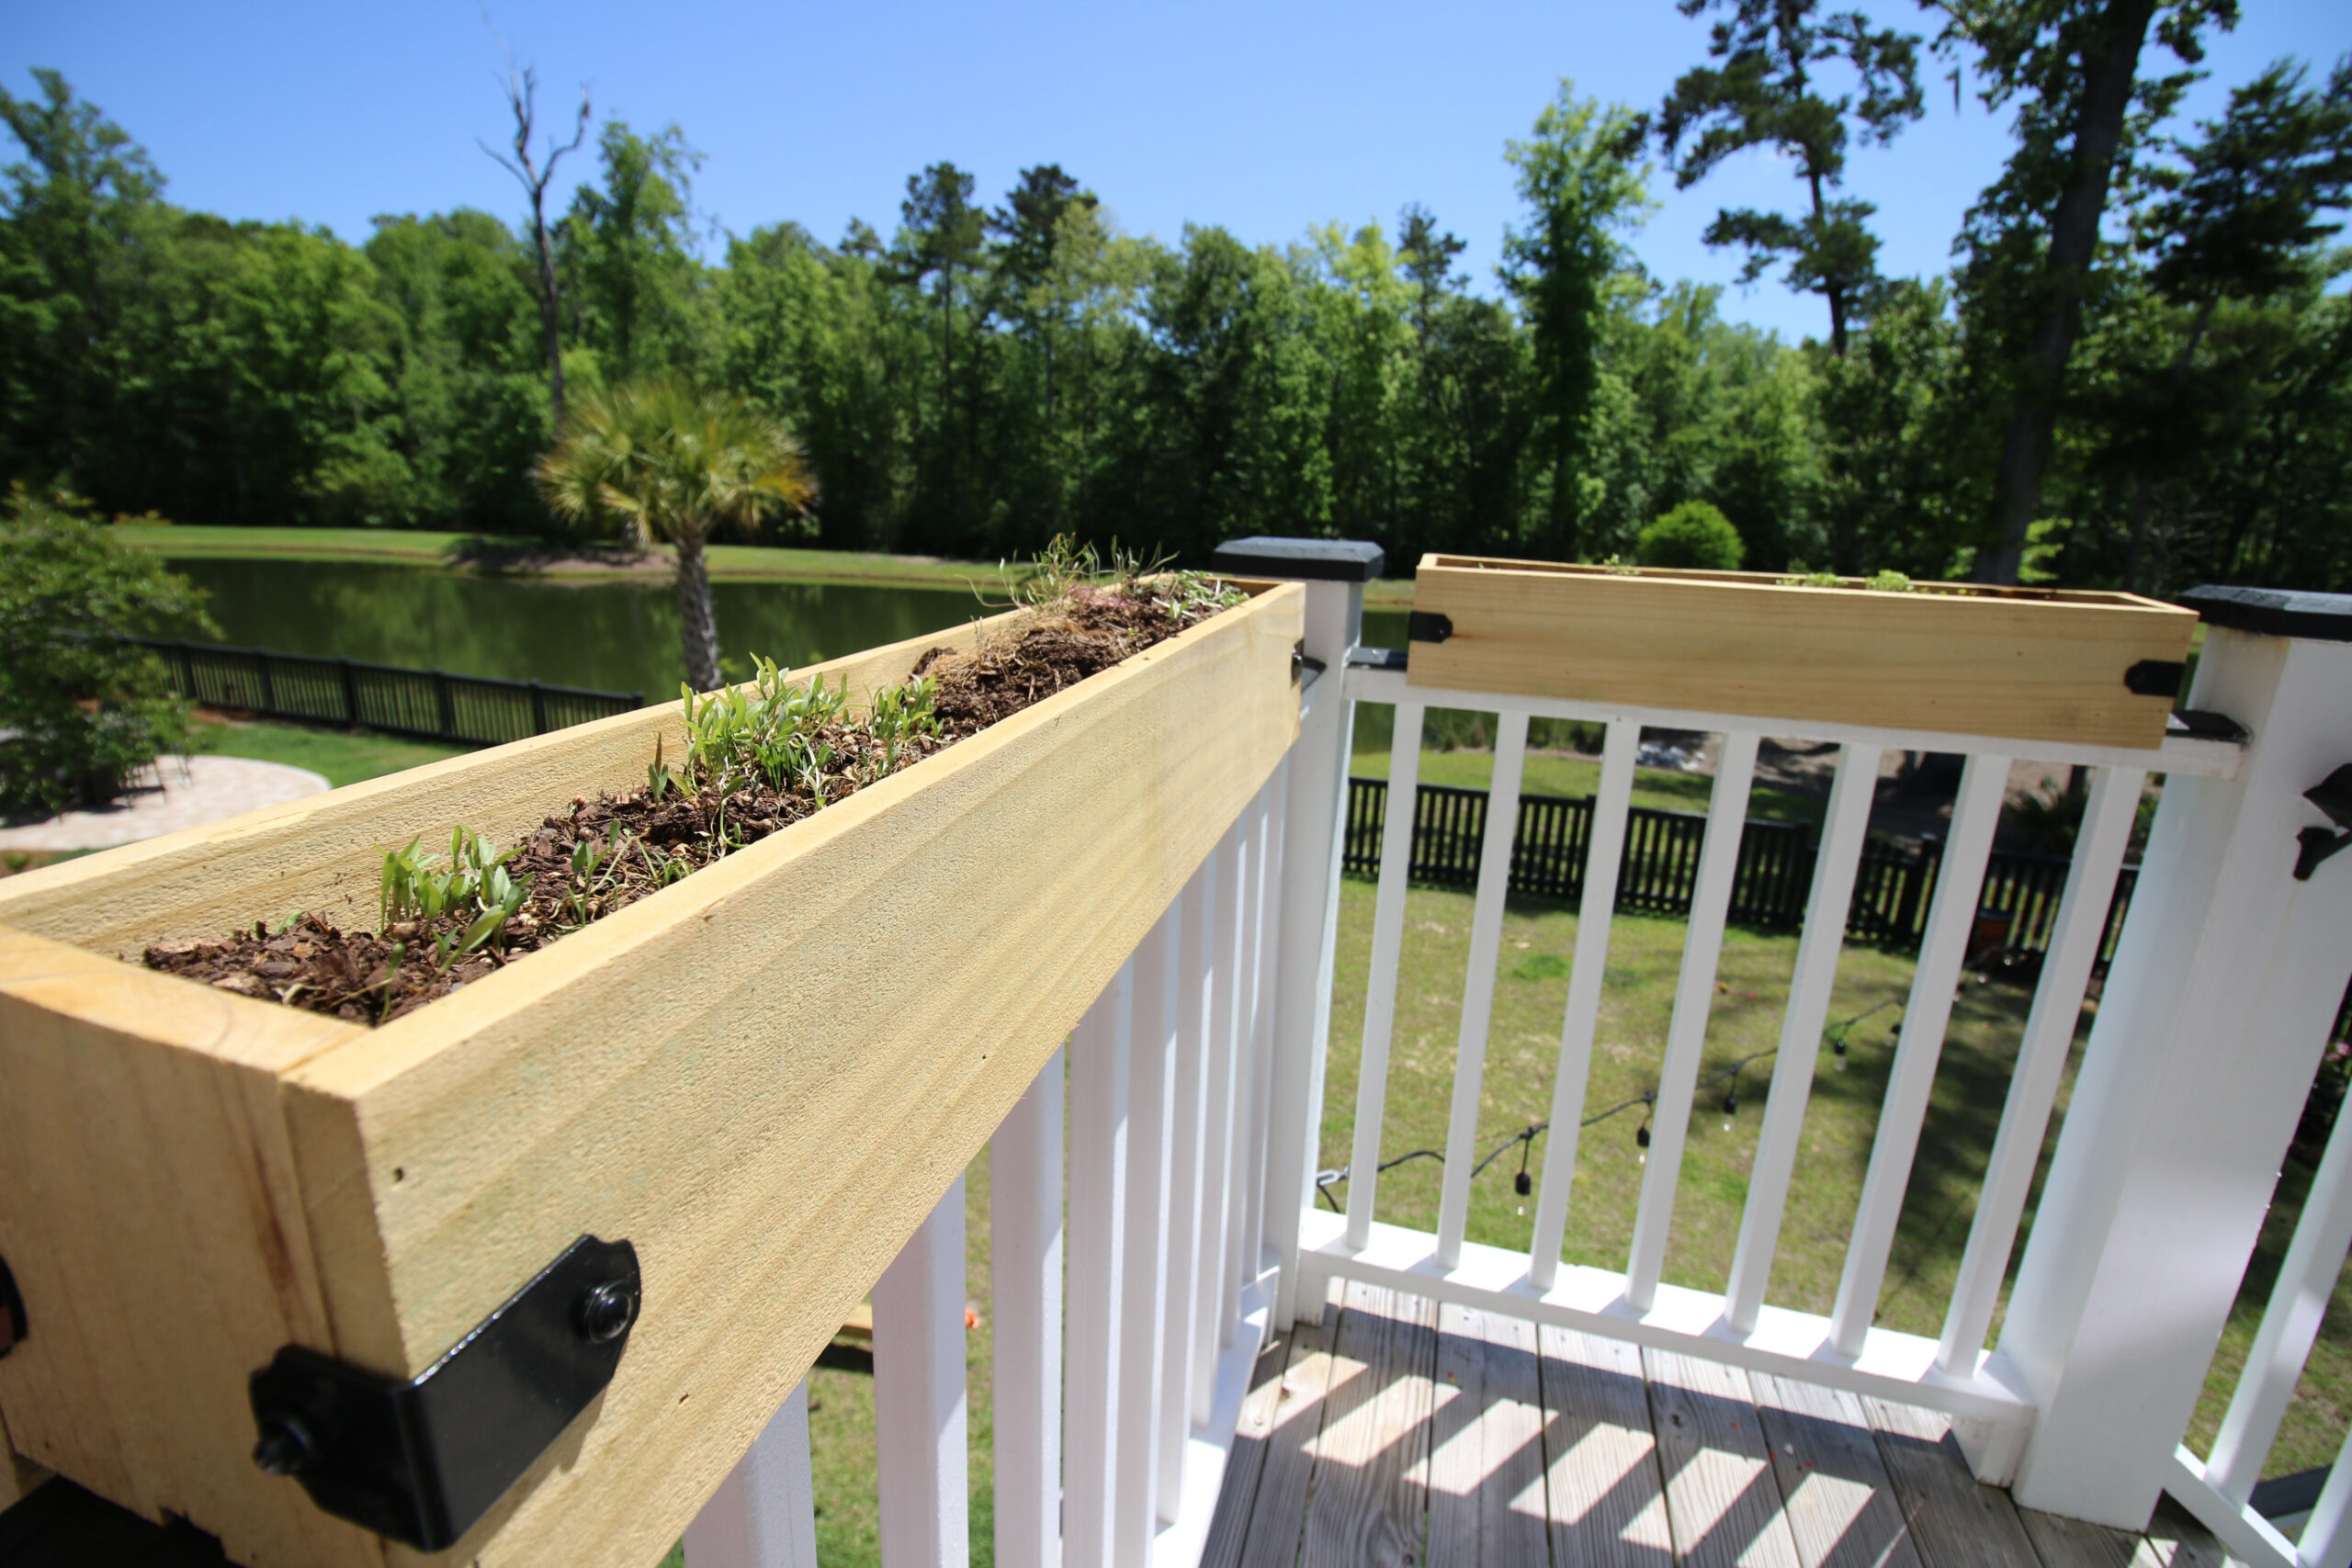
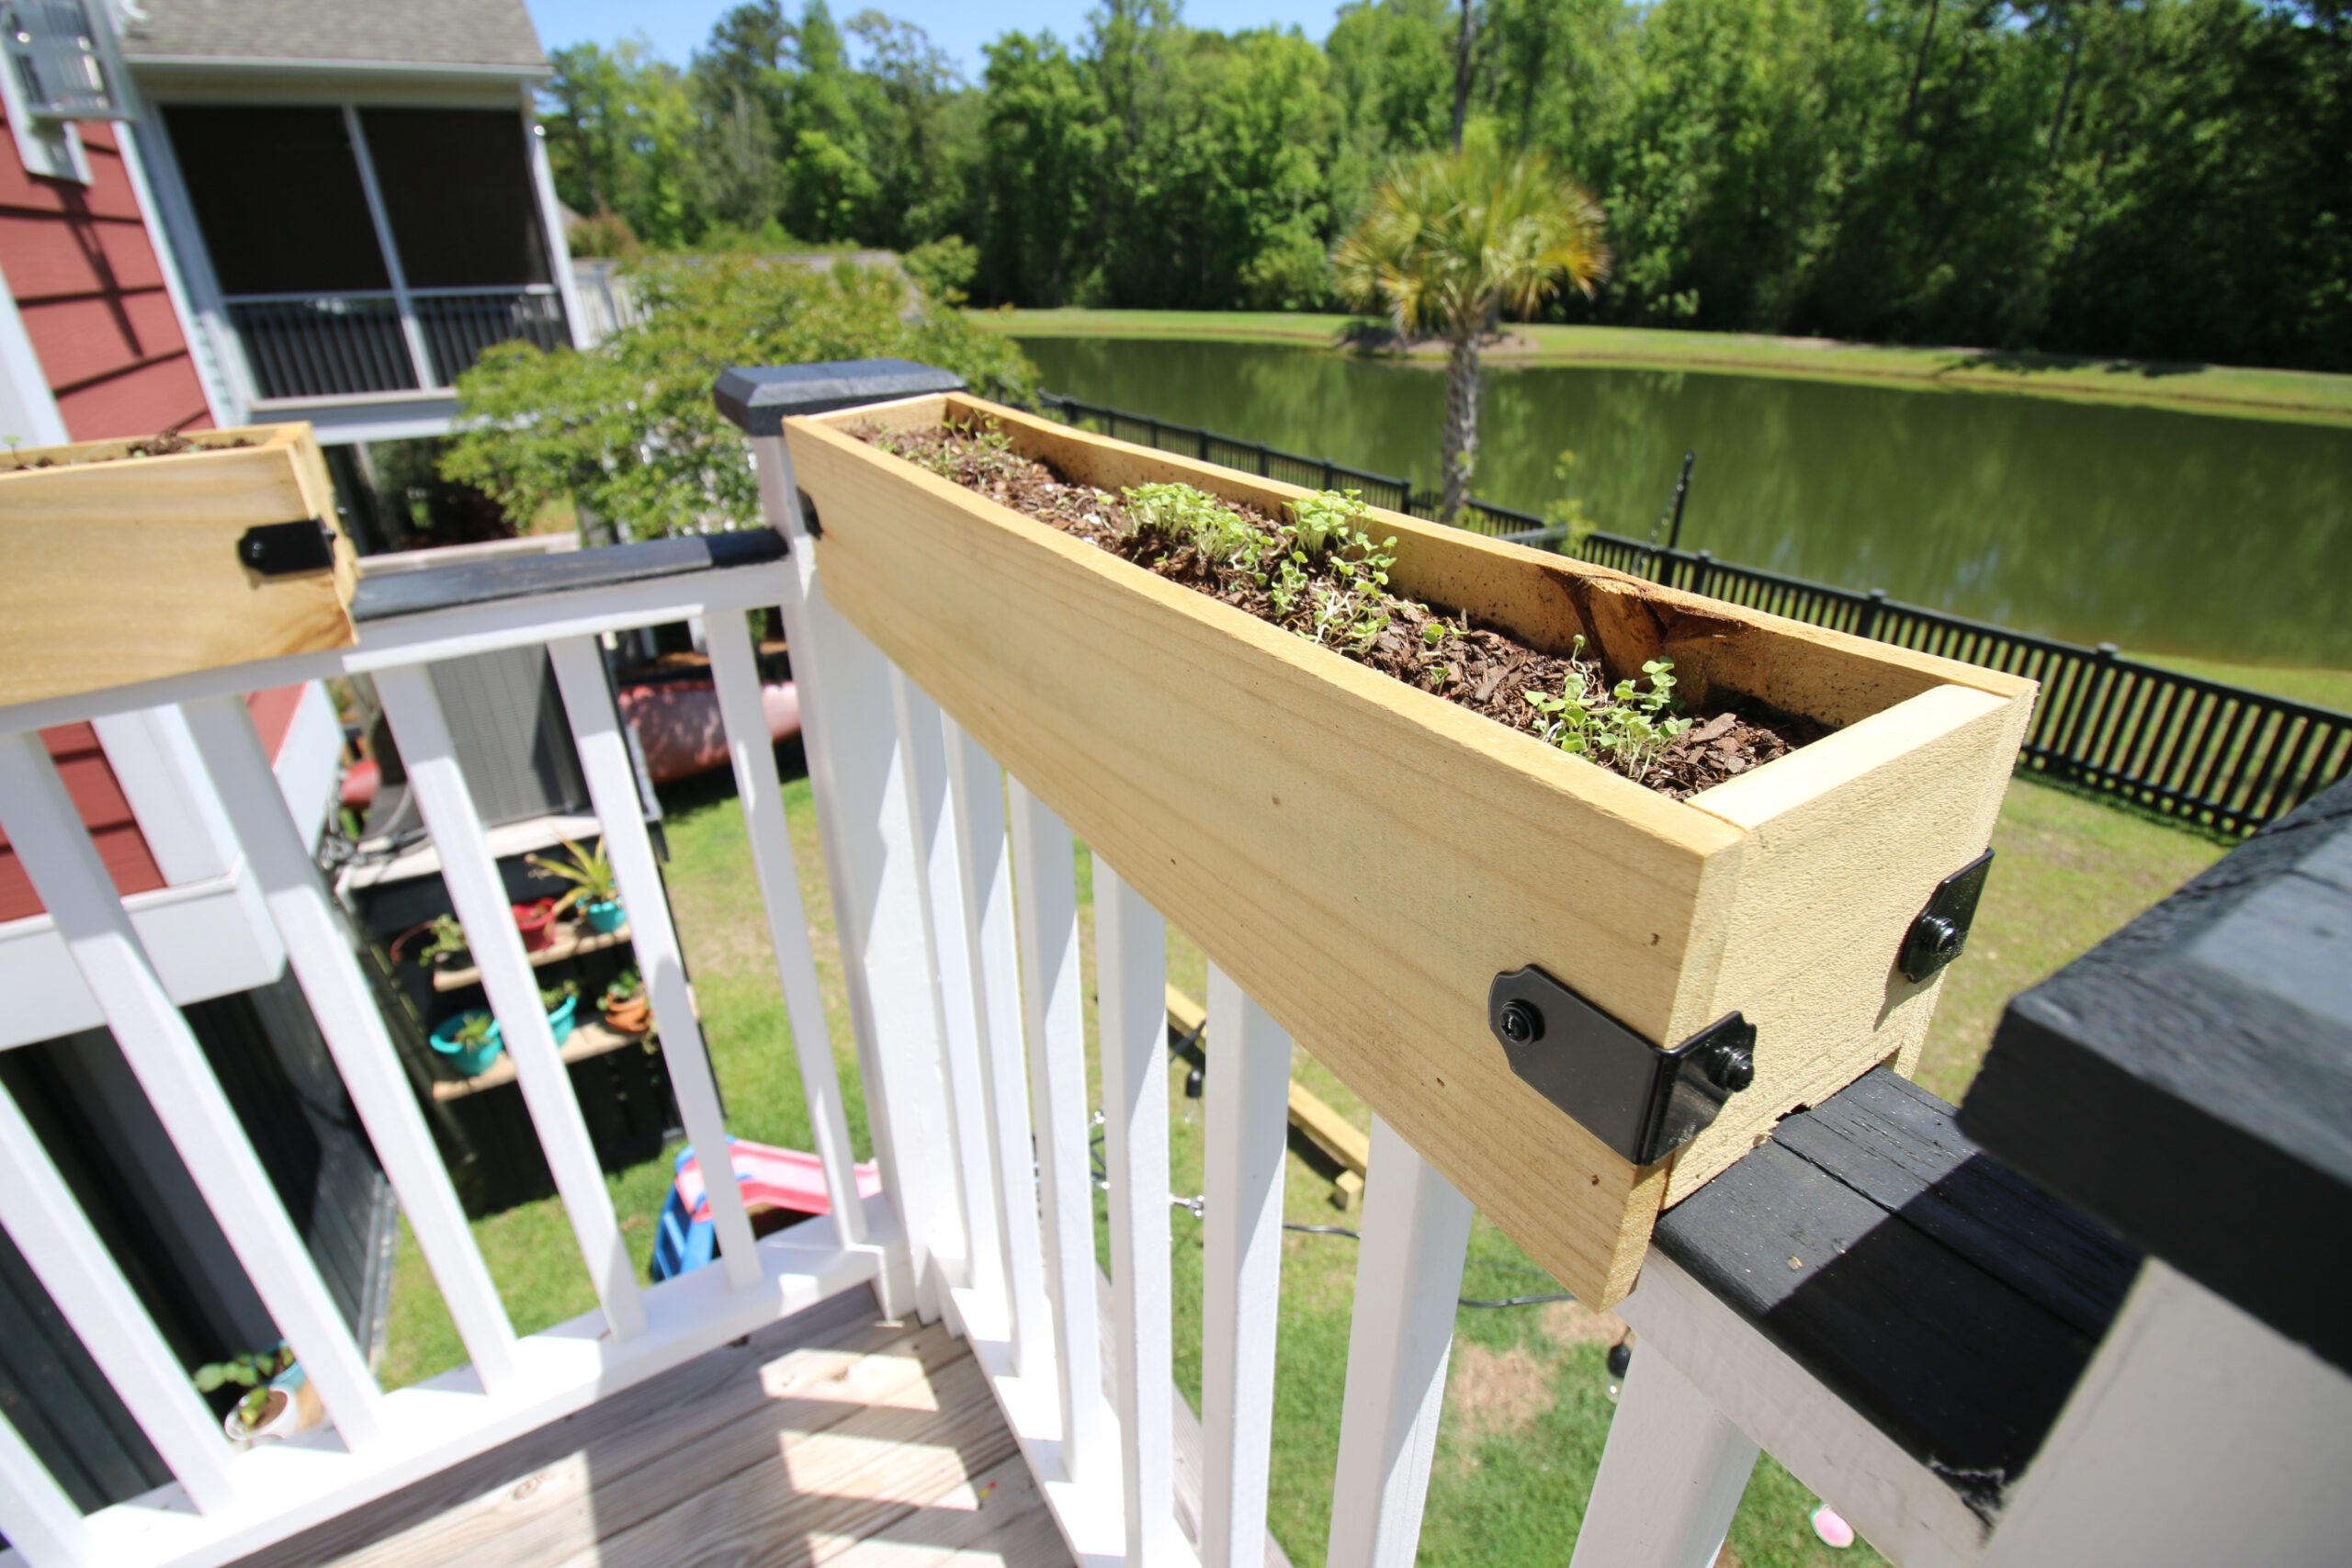
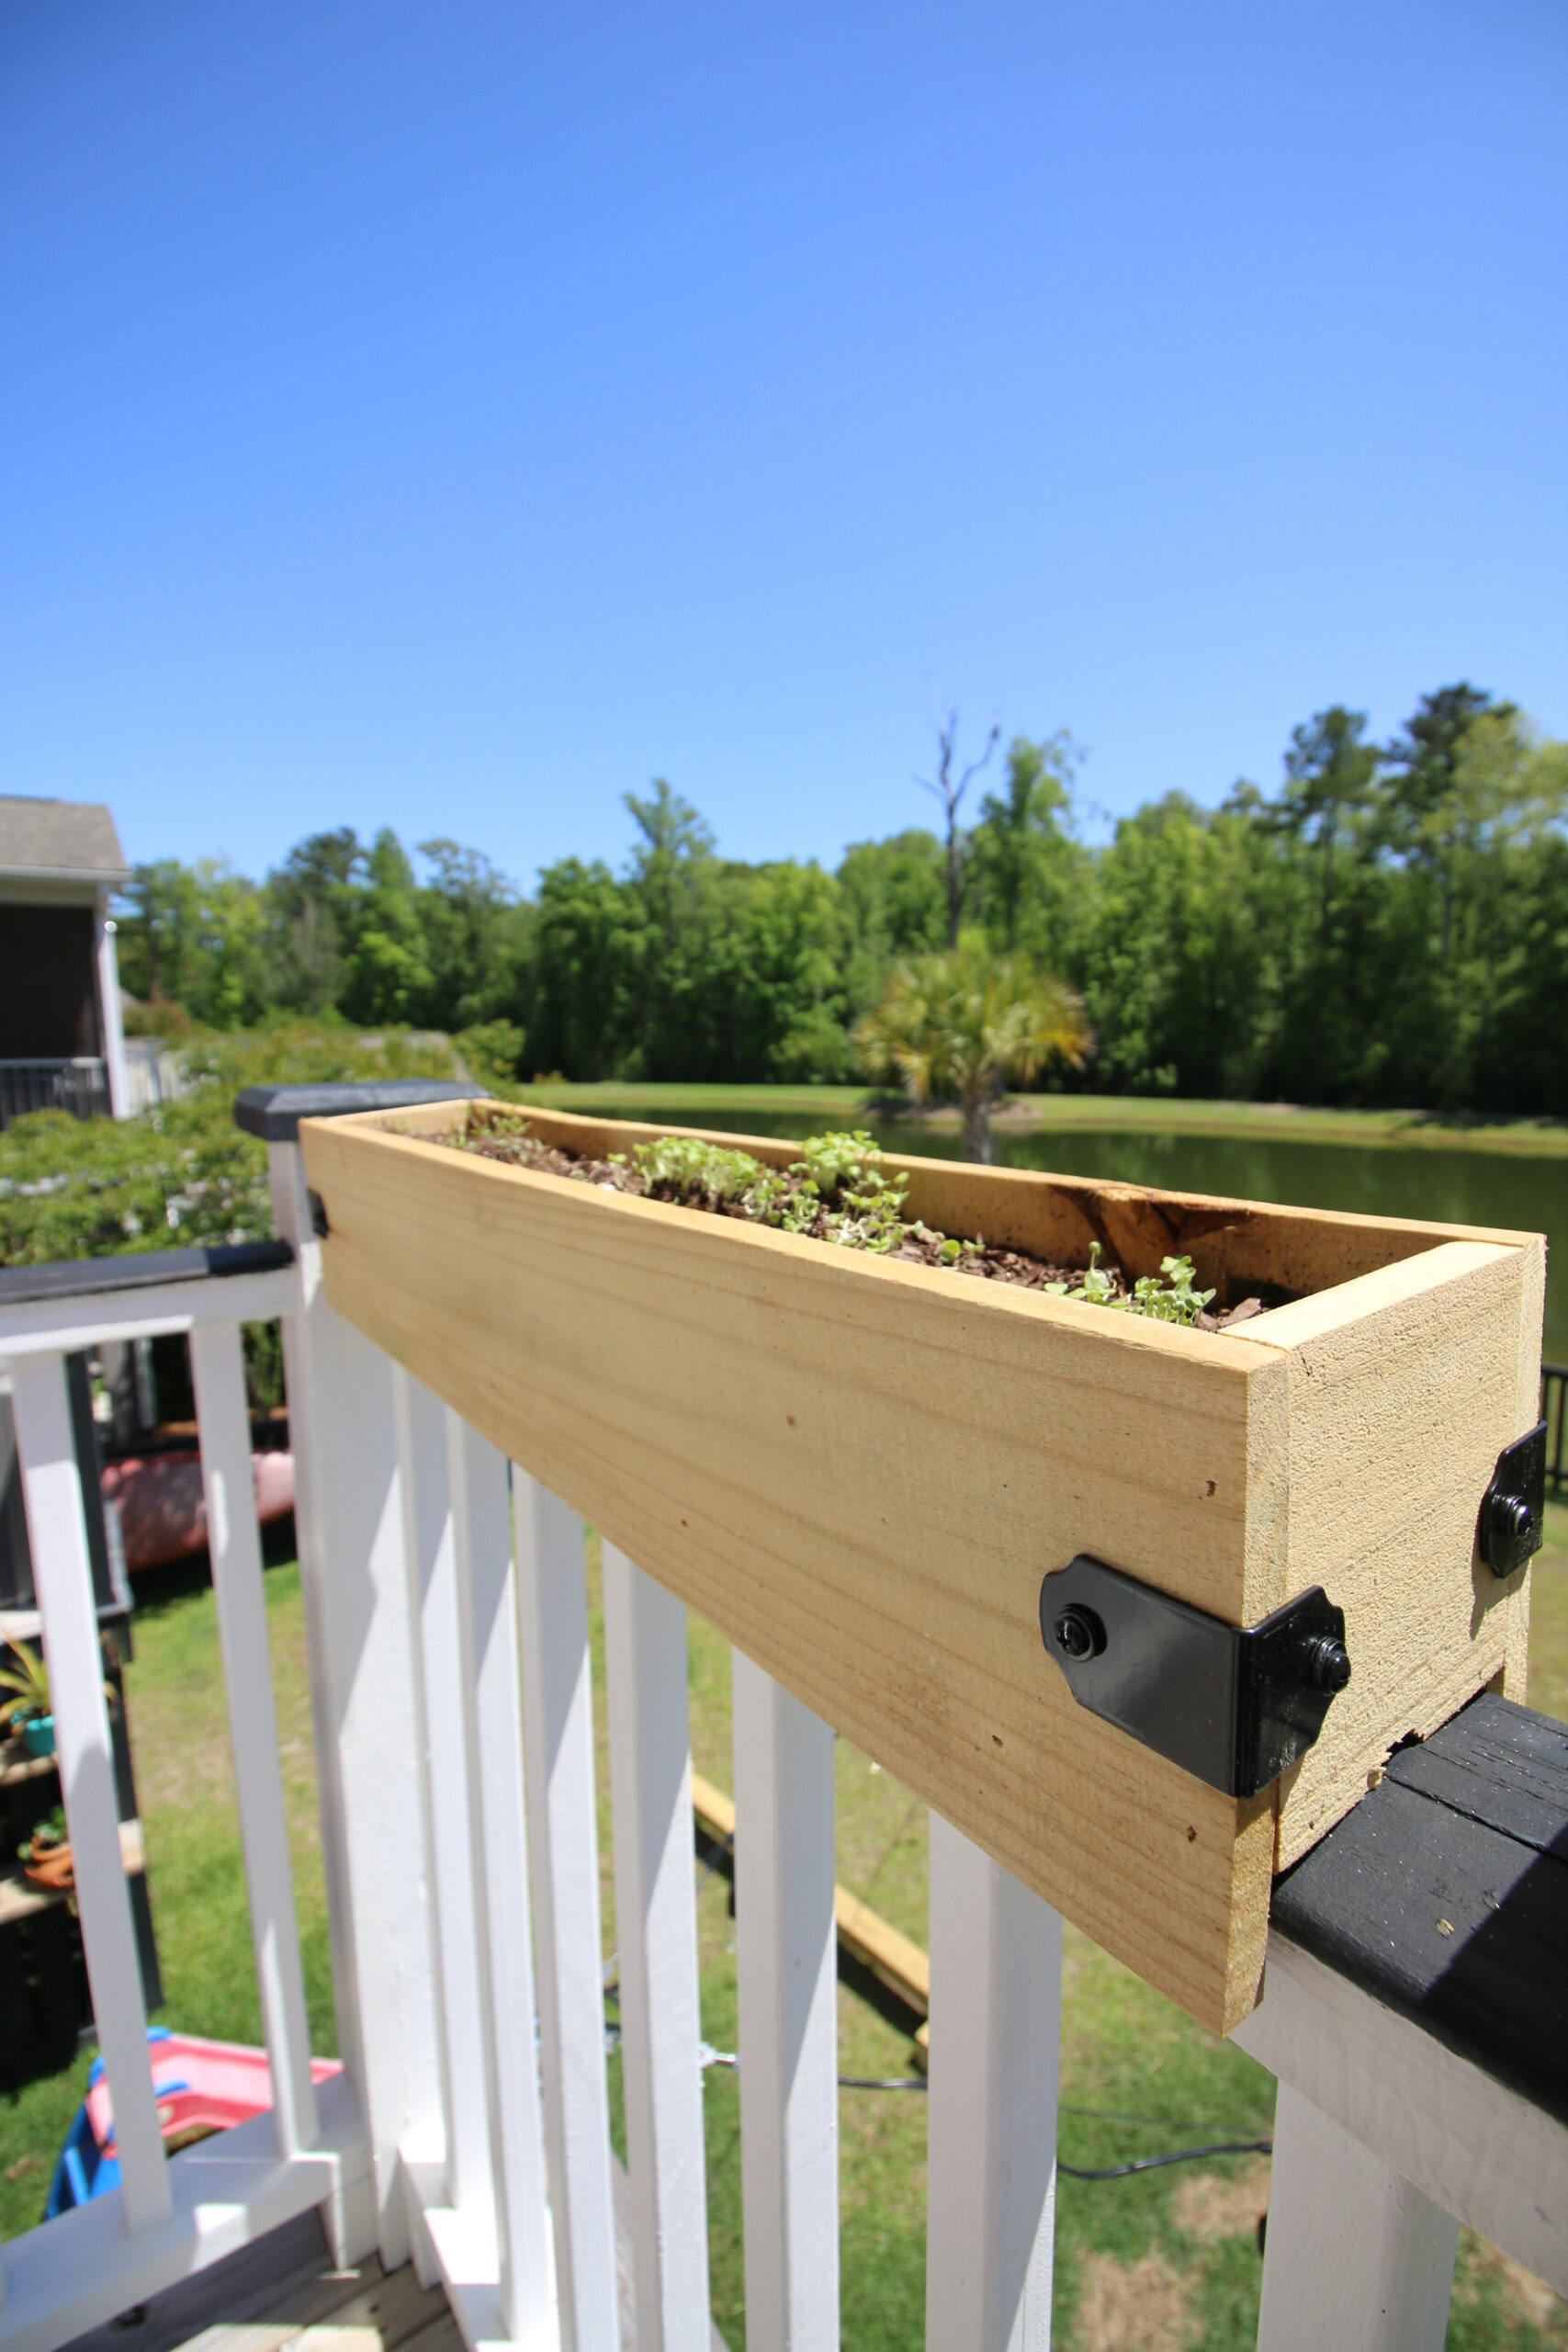
These deck rail planters are specifically made to fit ON TOP of the railing and sit there with lips hanging down to hold them in place.
At our old house, we used fence posts to make DIY hanging planters that were hung on the side of the fence with L-brackets. Check that option out if that’s what you are looking for!
This was a simple and inexpensive DIY project, even at today’s lumber prices.
We were able to make two railing planters with three fence pickets that we had leftover after we built our DIY mini-Christmas tree planters this past winter. Even those are only a few dollars apiece!
So let’s dive into how to build a railing planter for yourself!
DIY railing planters
These DIY railing planters are very simple to make and can also be adjusted depending on the width of your deck railings.
Make sure you download the FREE woodworking plans for our DIY deck rail planters to get the exact material list, cut list, and step-by-step instructions to help you with your build.
If you need to adjust your width, the plans show you exactly what pieces you need to adjust!
You can also build simple raised bed gardens for your herbs and veggies!
If your deck railings are looking bad or rotten, here’s how to replace them!
Tools needed to build DIY deck rail planters
Here are the tools you’ll need to build a DIY deck rail planter:
- Table saw
- Miter saw
- Nail gun (could substitute nails for screws and use drill)
- Cordless drill
- Sander
Materials needed to build DIY deck rail planters
Here are the materials you’ll need to build a DIY deck rail planter:
- Fence pickets
- L-brackets
- Wood glue
- Weed barrier
How to build a deck rail planter
Here are the basic steps needed for how to build a deck rail planter for your home!
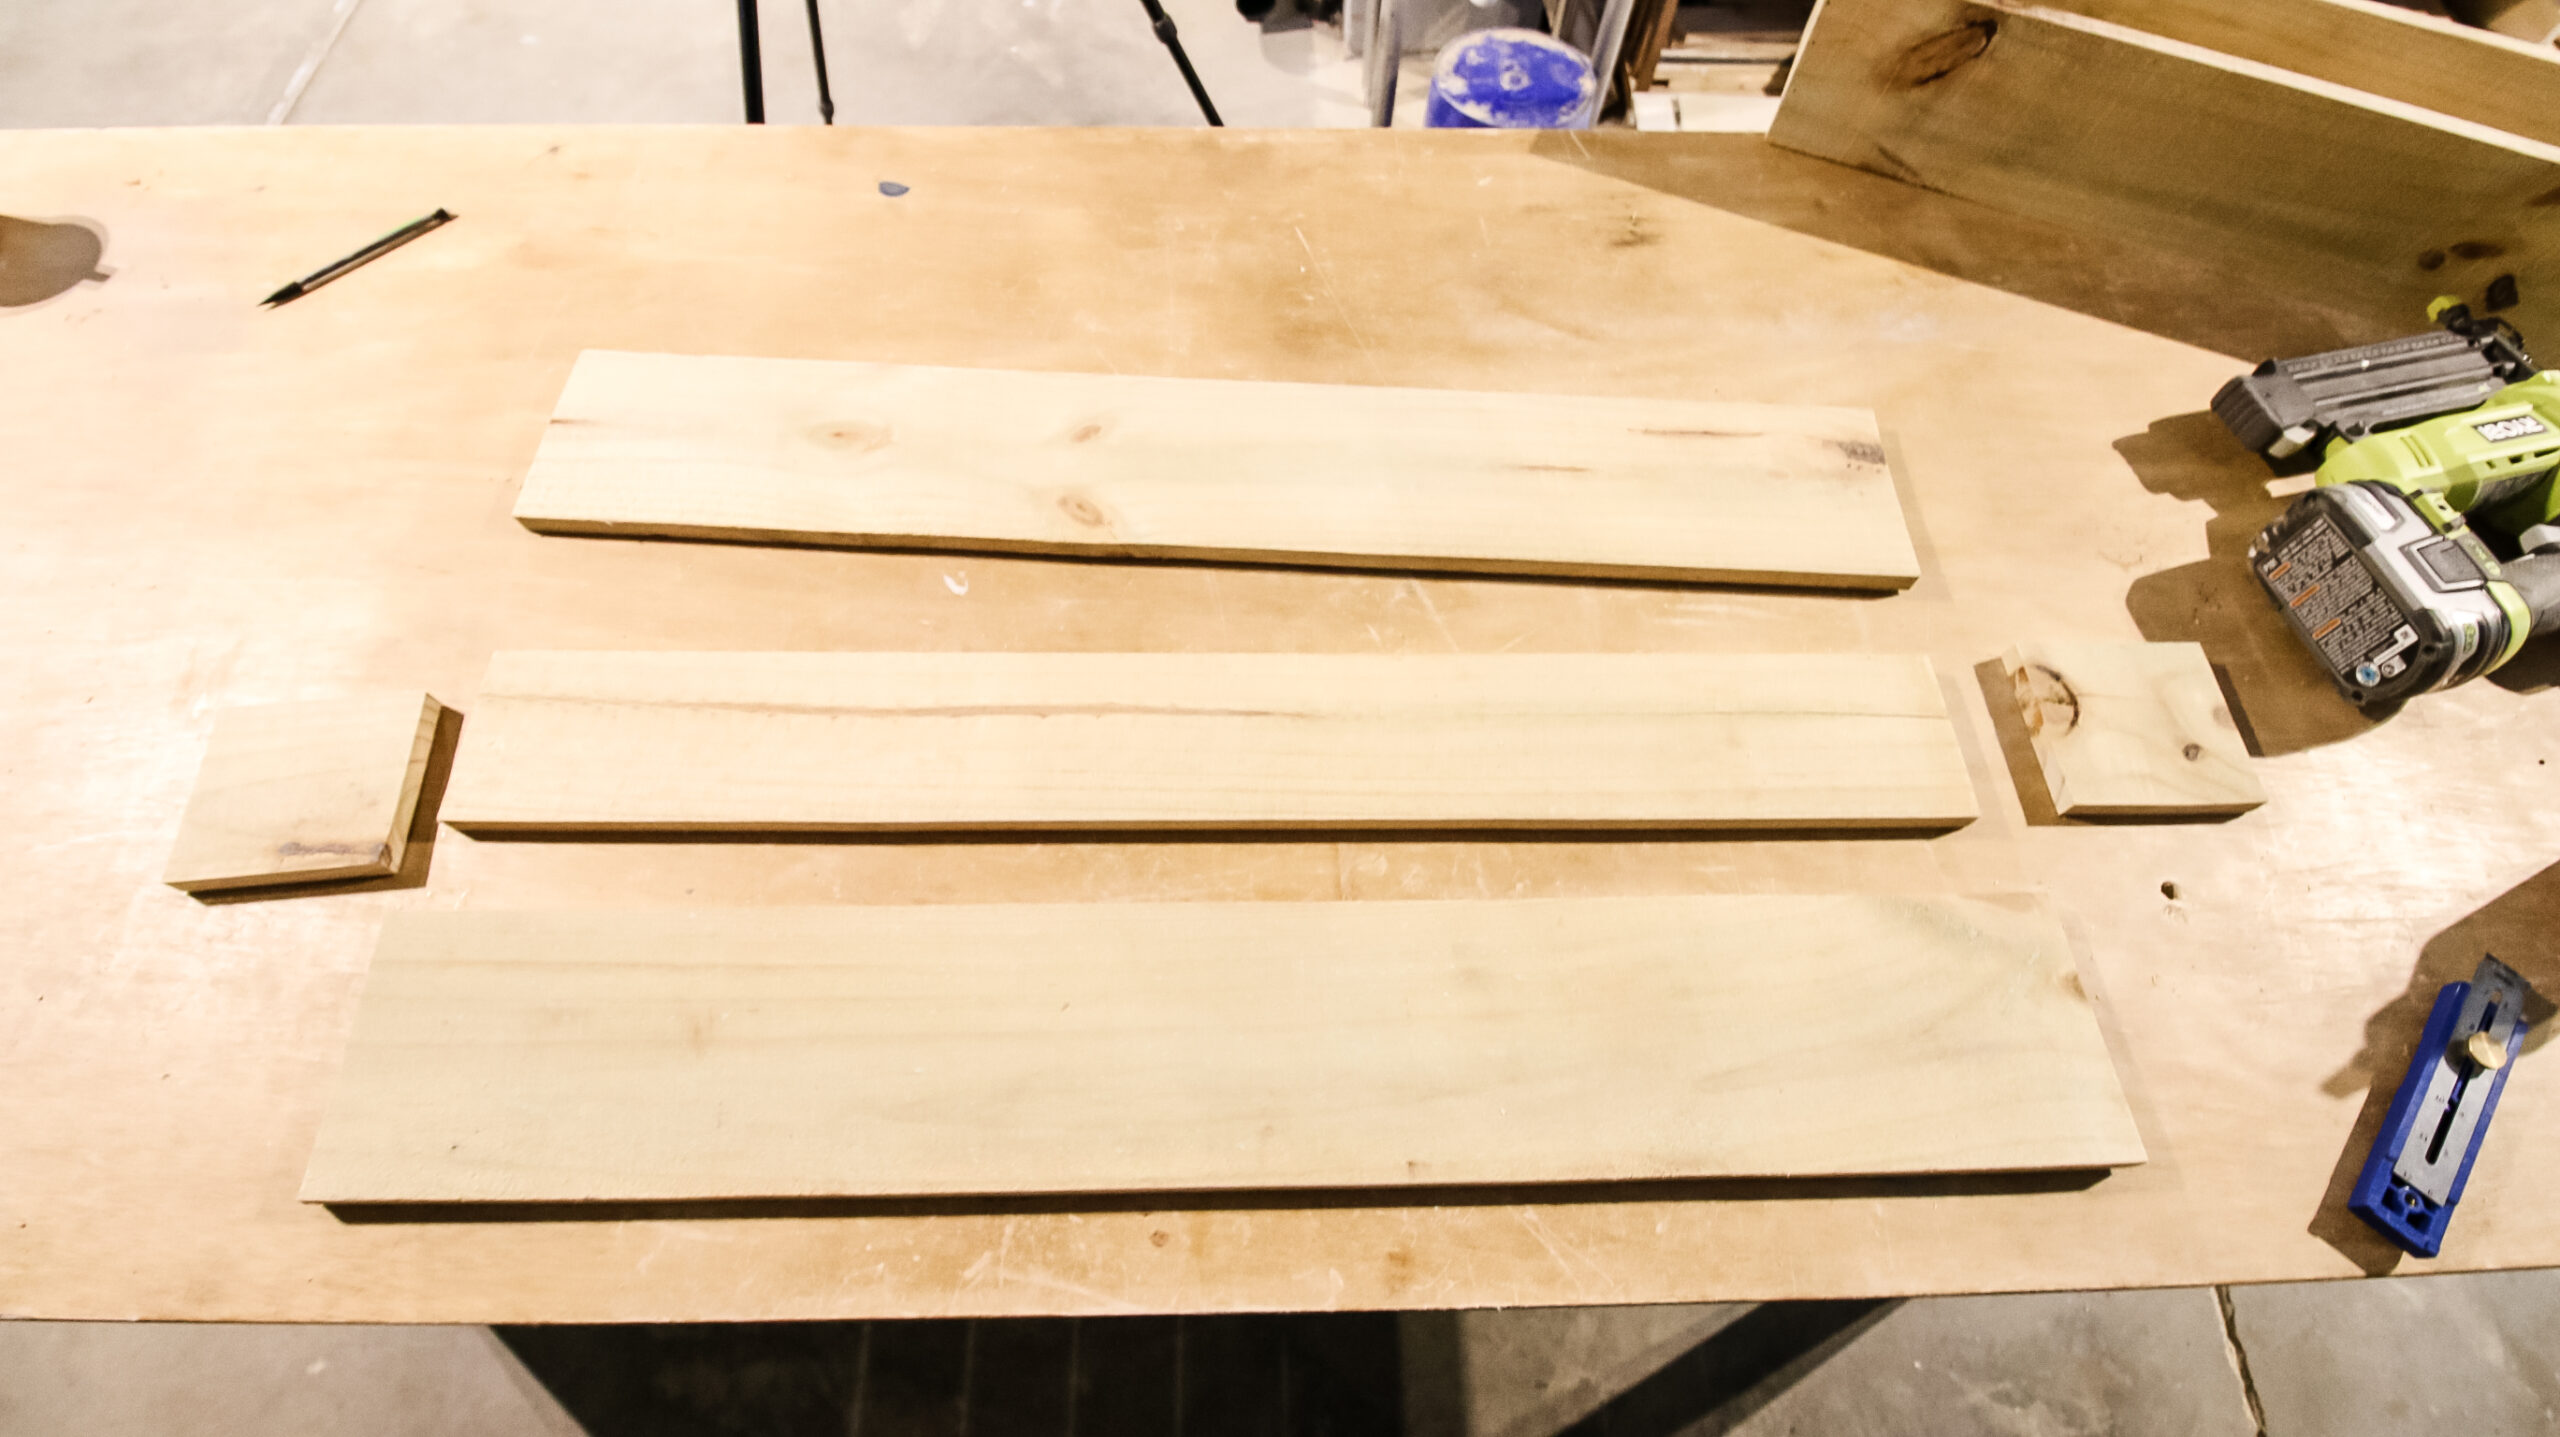
Step one: Make cuts and sand
You can find all the exact cuts and dimensions in your free woodworking plans after you download them, but the cuts include two long sides, two short sides and one base for each planter you want to make.
Cut each piece down to the appropriate dimensions and then sand them smooth.
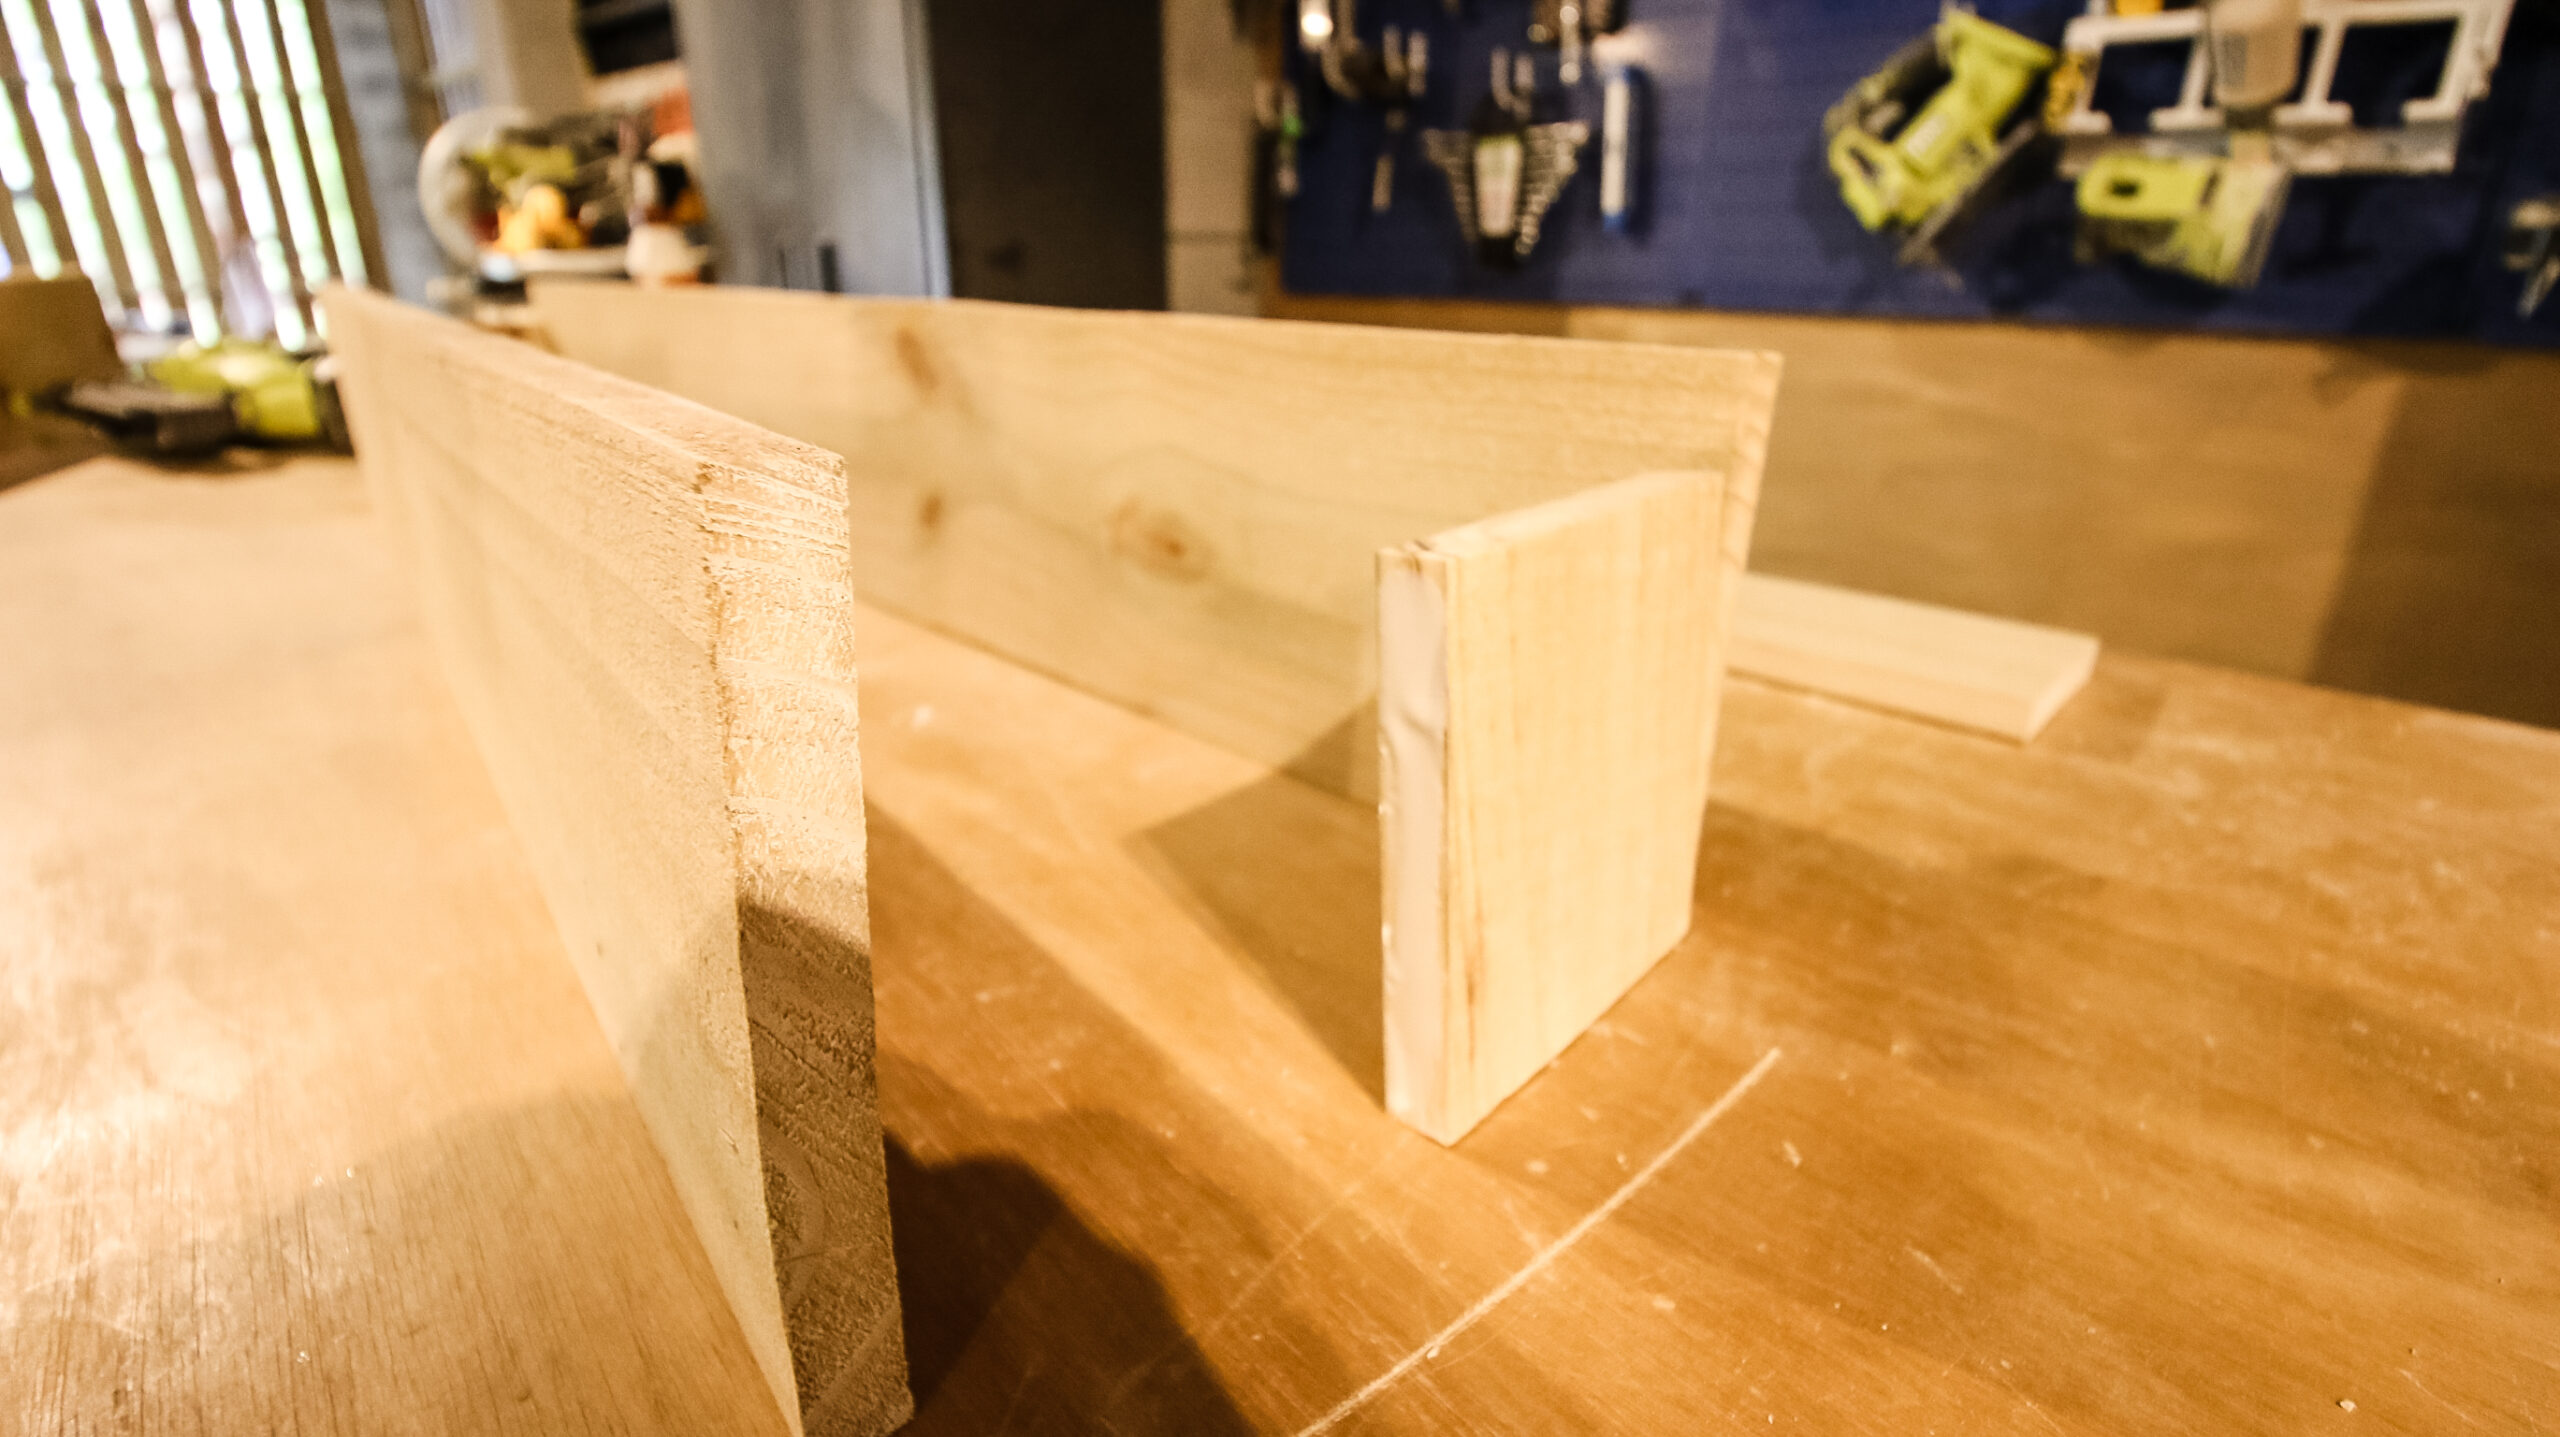
Step two: Build outside box
When everything is cut, start by creating the main box.
Assemble the box upside down so that the top is flush and the bottoms of the short sides are raised up so it can sit around your railing.
Apply a bead of glue to each side of the short sides and then nail them to the inside of the long sides.
If you don’t have a brad nailer, this is where you instead just used screws to attach the sides together.
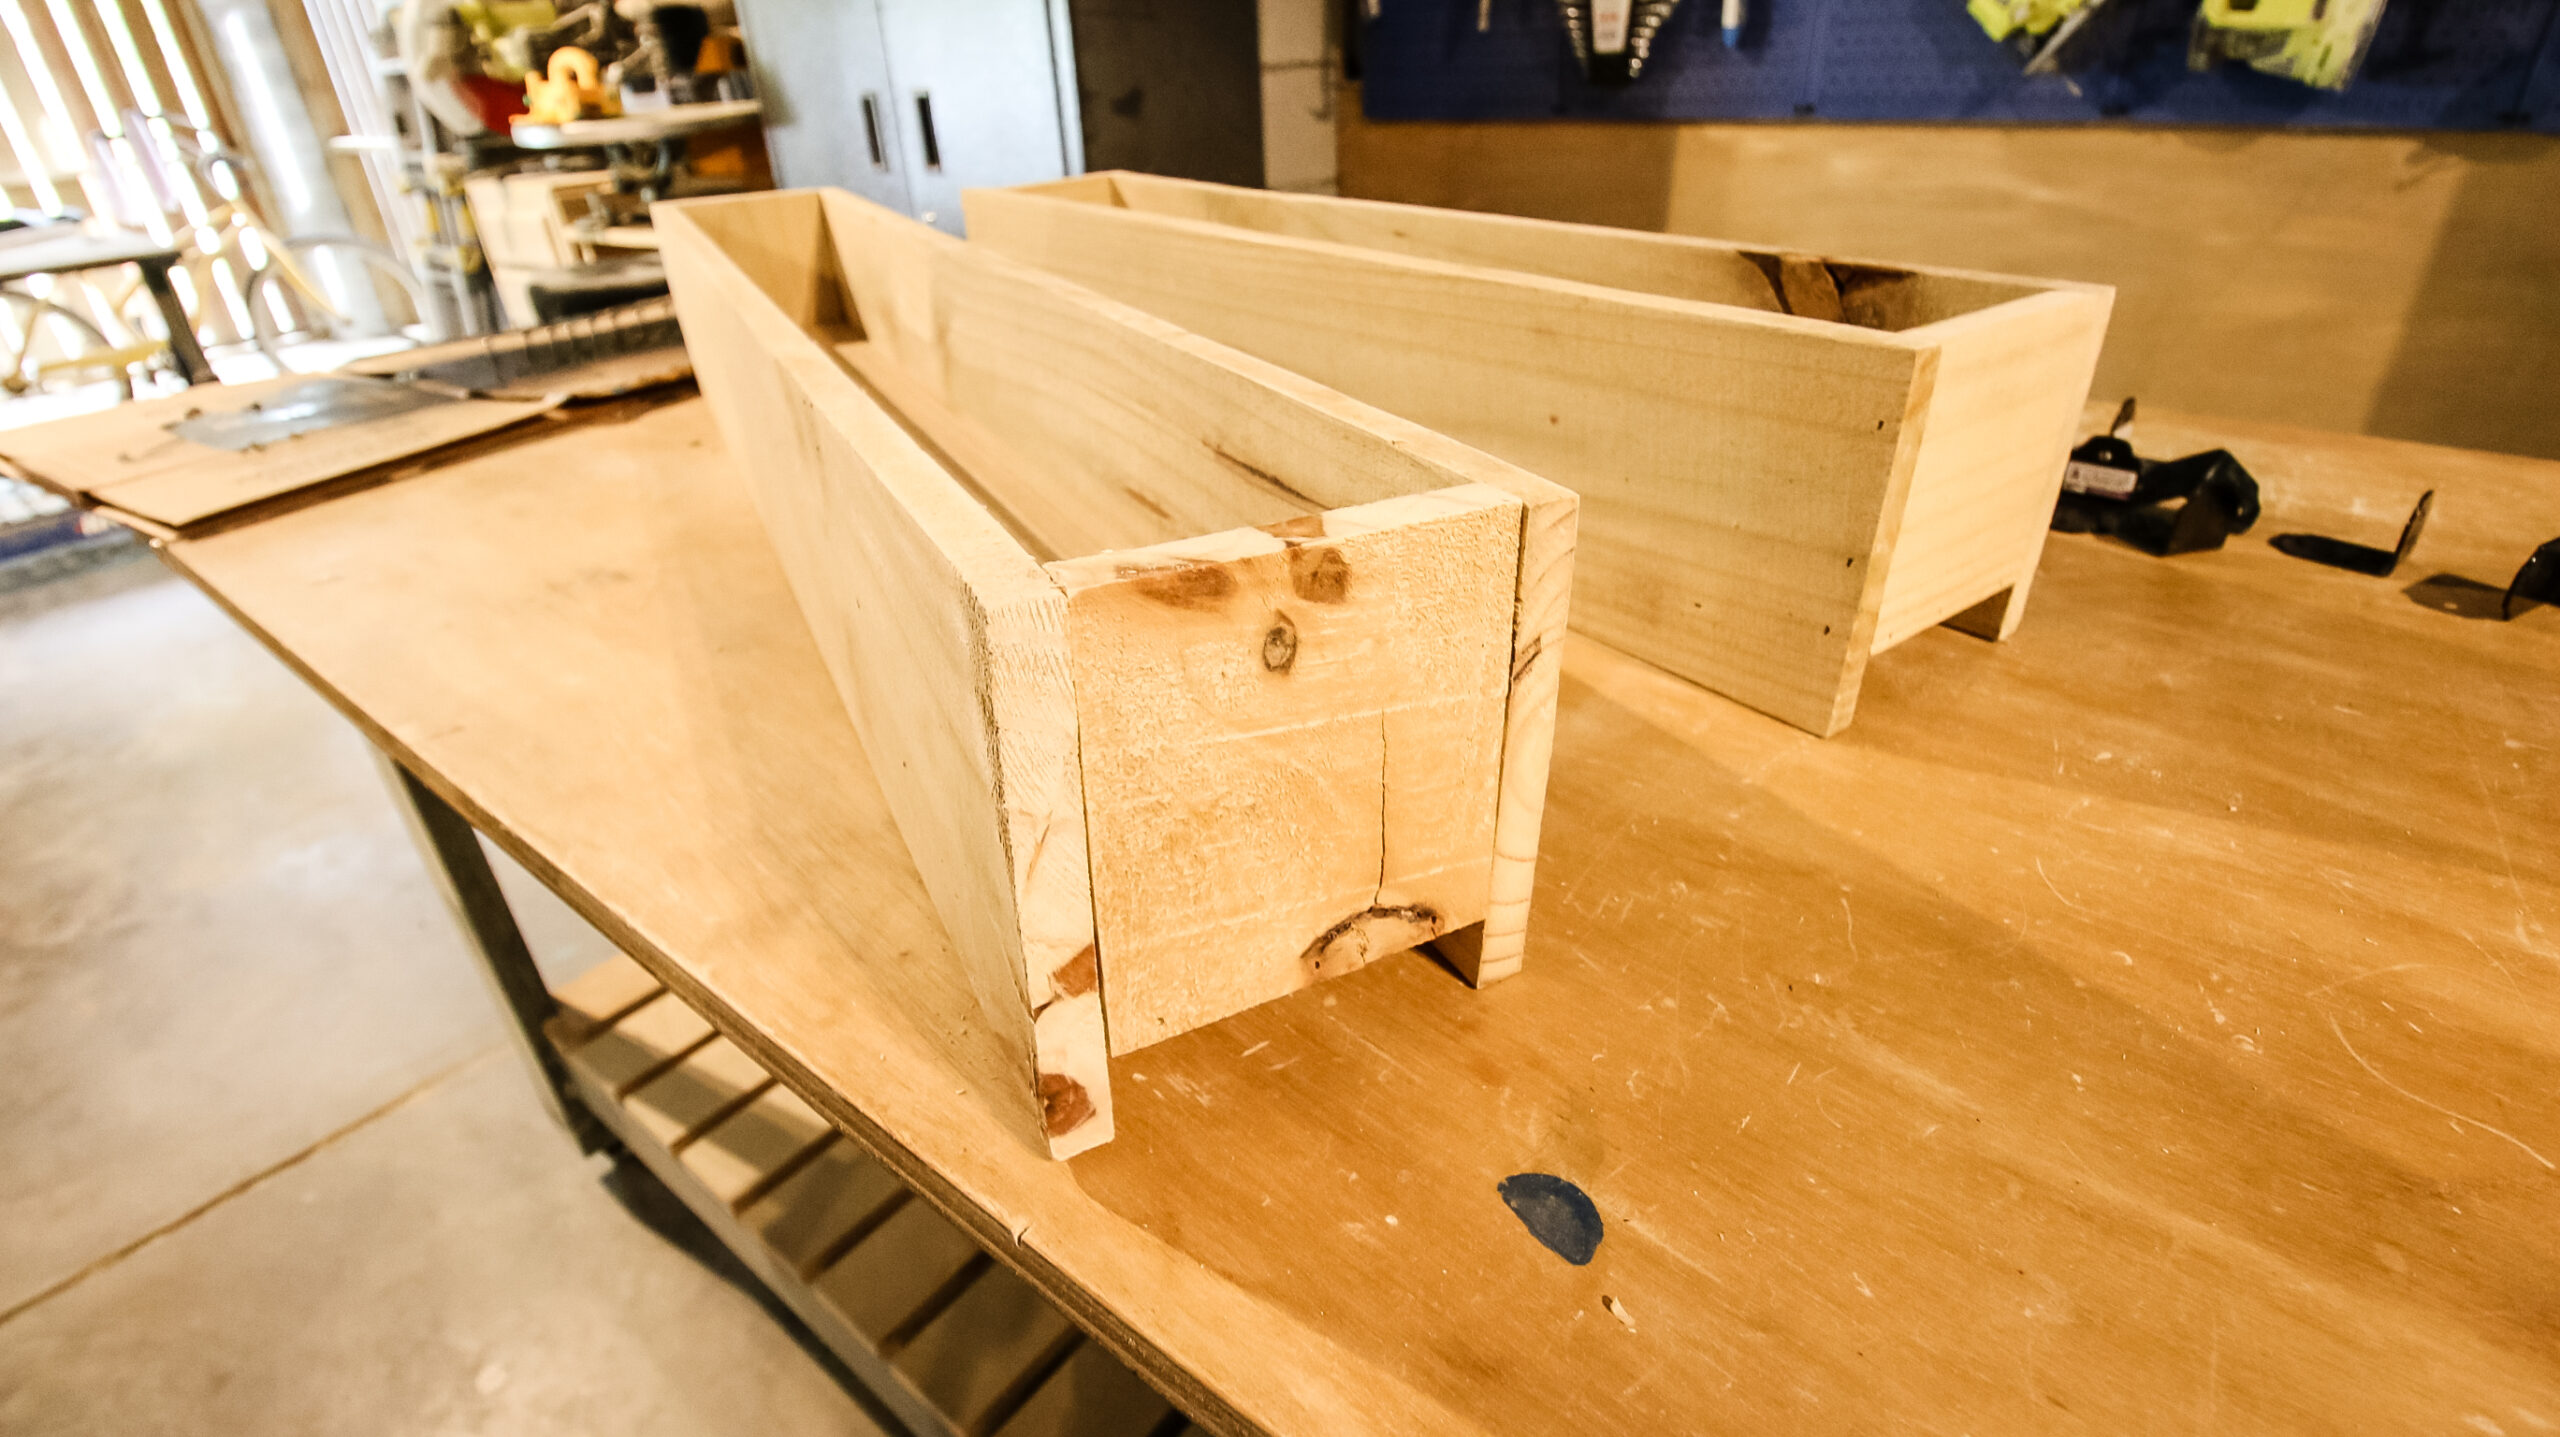
Step three: Attach base
Next, slide in the base piece between all the sides.
The base will be flush with the bottom of the short sides, leaving an inch of space to the bottom of the longer sides. This way, the long sides will hold the planter on the railing.
The base can be attached with wood glue and nails through the sides.
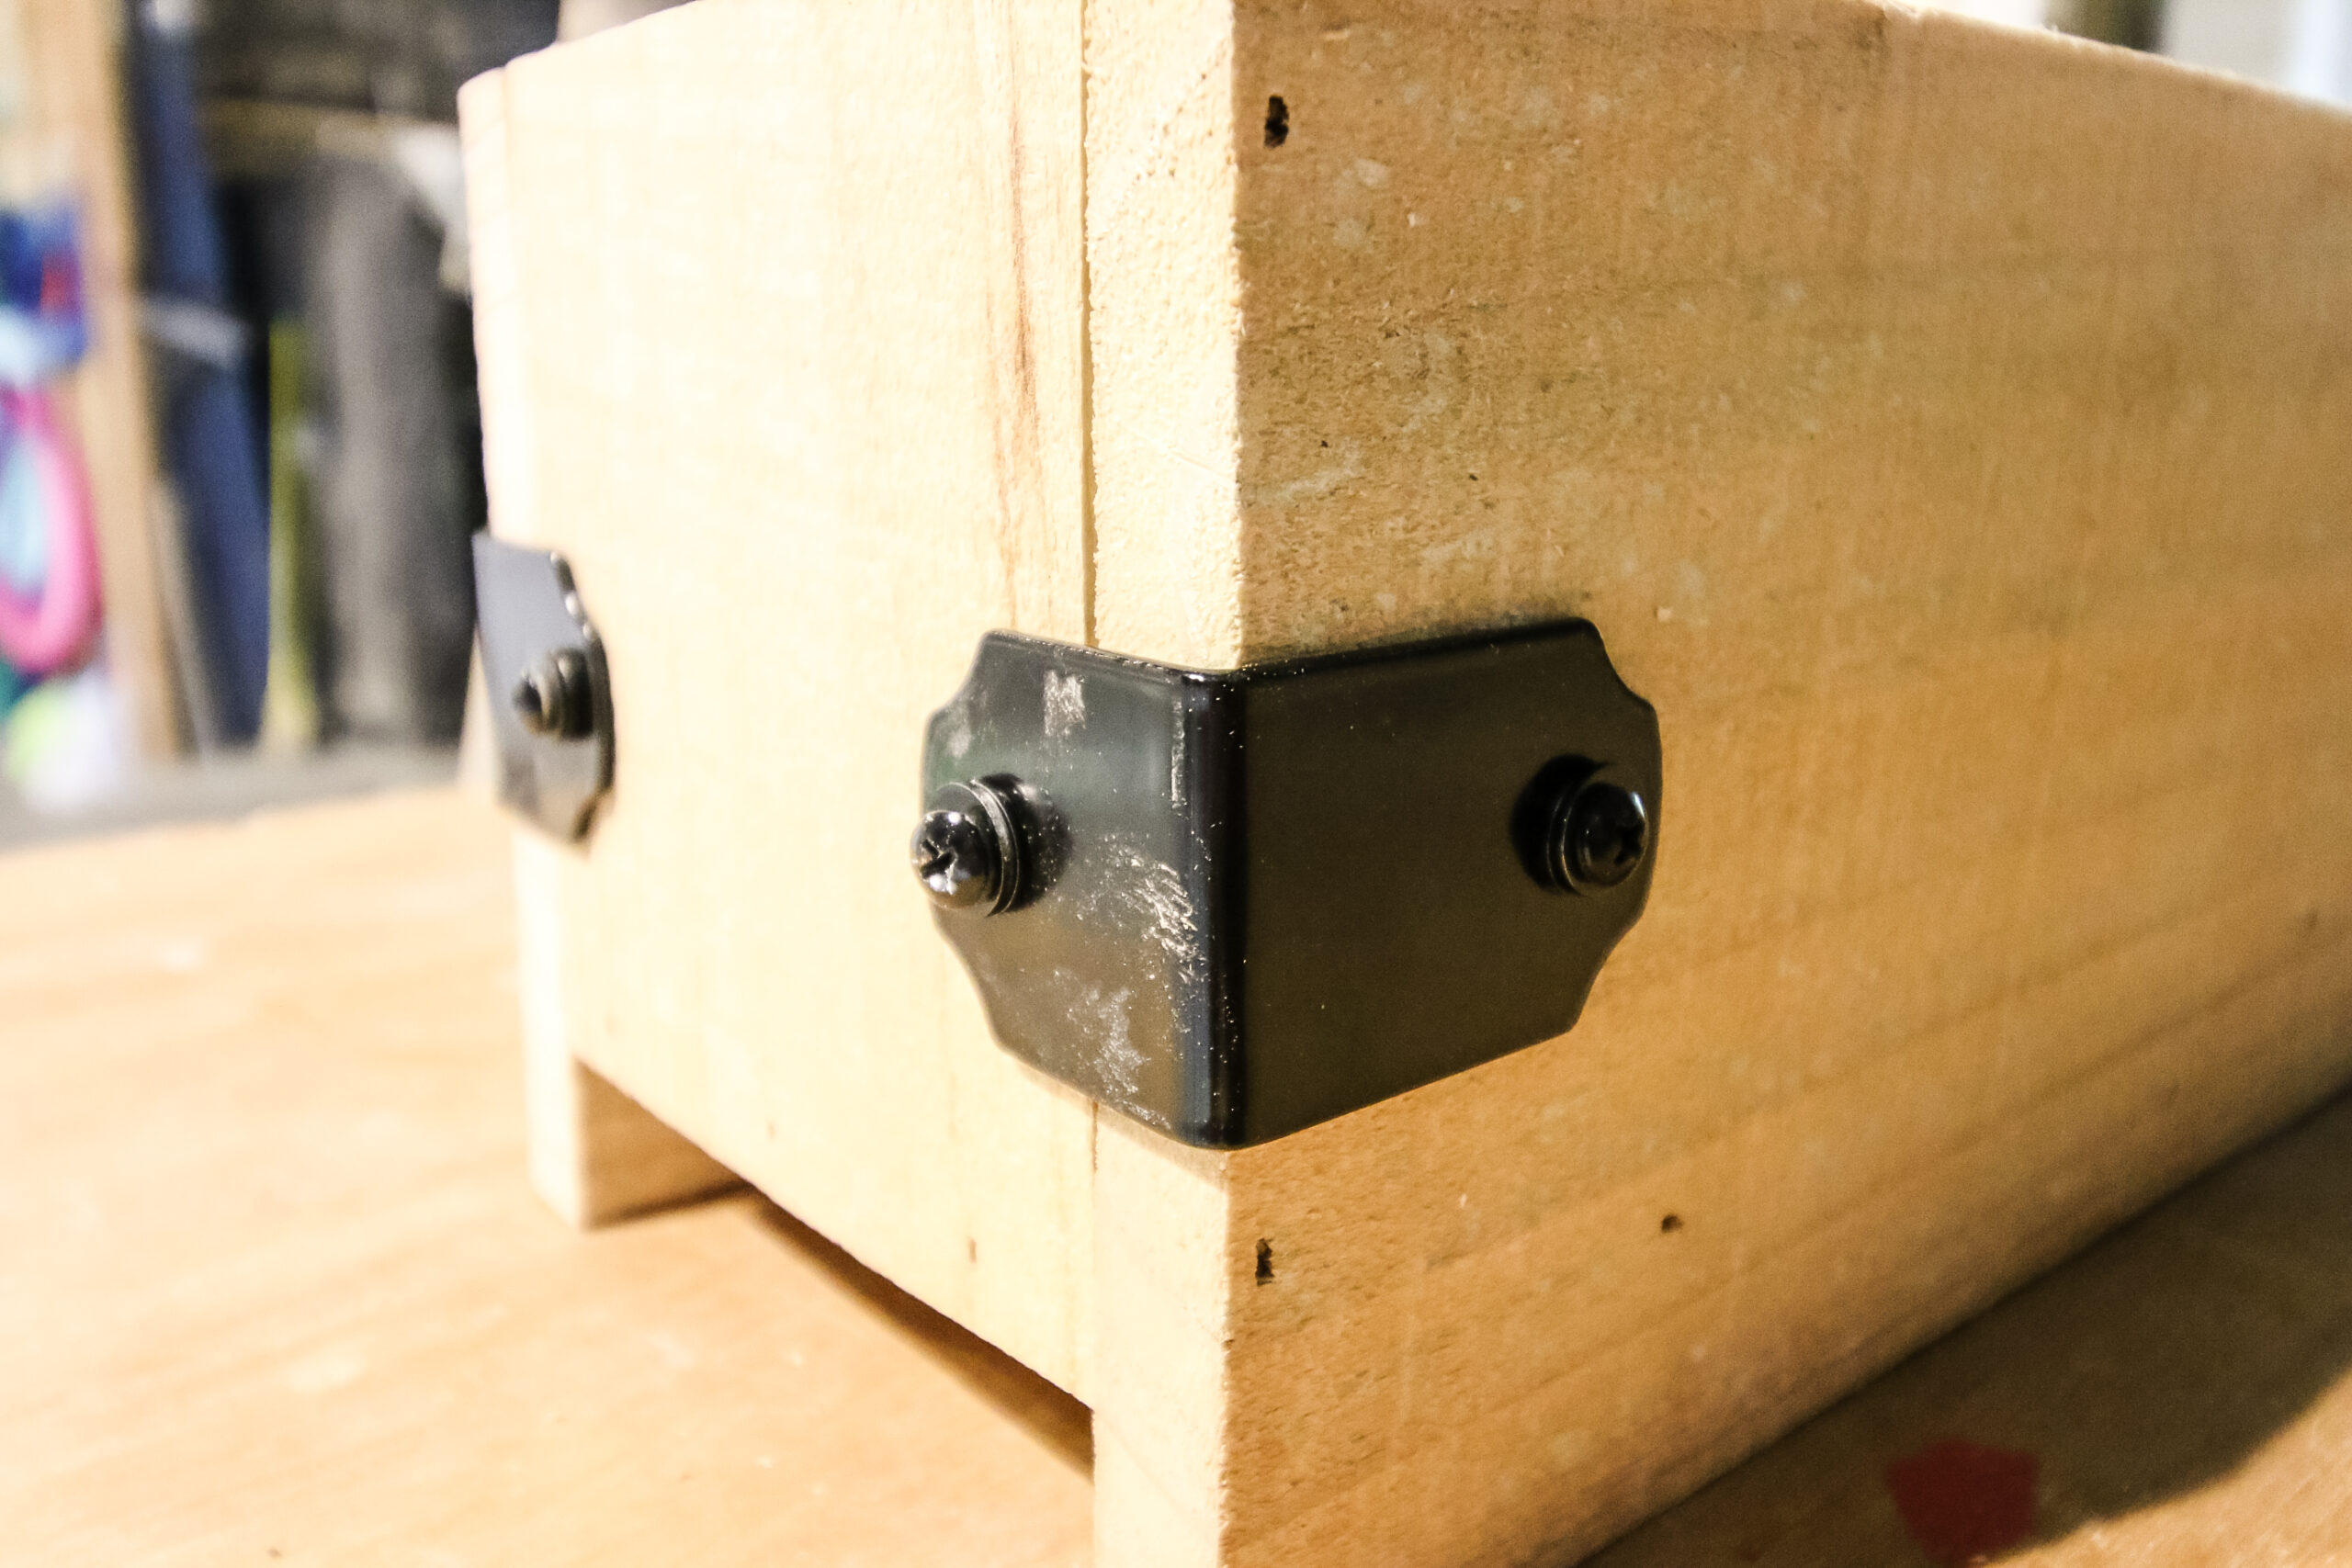
Step four: Add decorative hardware
We had leftover decorative L-brackets from the mini-Christmas tree planter that we added to each corner of our planters.
The brackets do technically hold the pieces together, but they are mostly just for show.
We also used these brackets when we made our kids art display!
Step five: Hang and plant
Finally the planter is done! You can choose to stain or paint the planter, but we left ours natural. If you’re using fence posts, they will hold up just fine.

We stapled weed barrier to the inside so that dirt wouldn’t be in direct contact with the wood, but it’s probably not necessary.
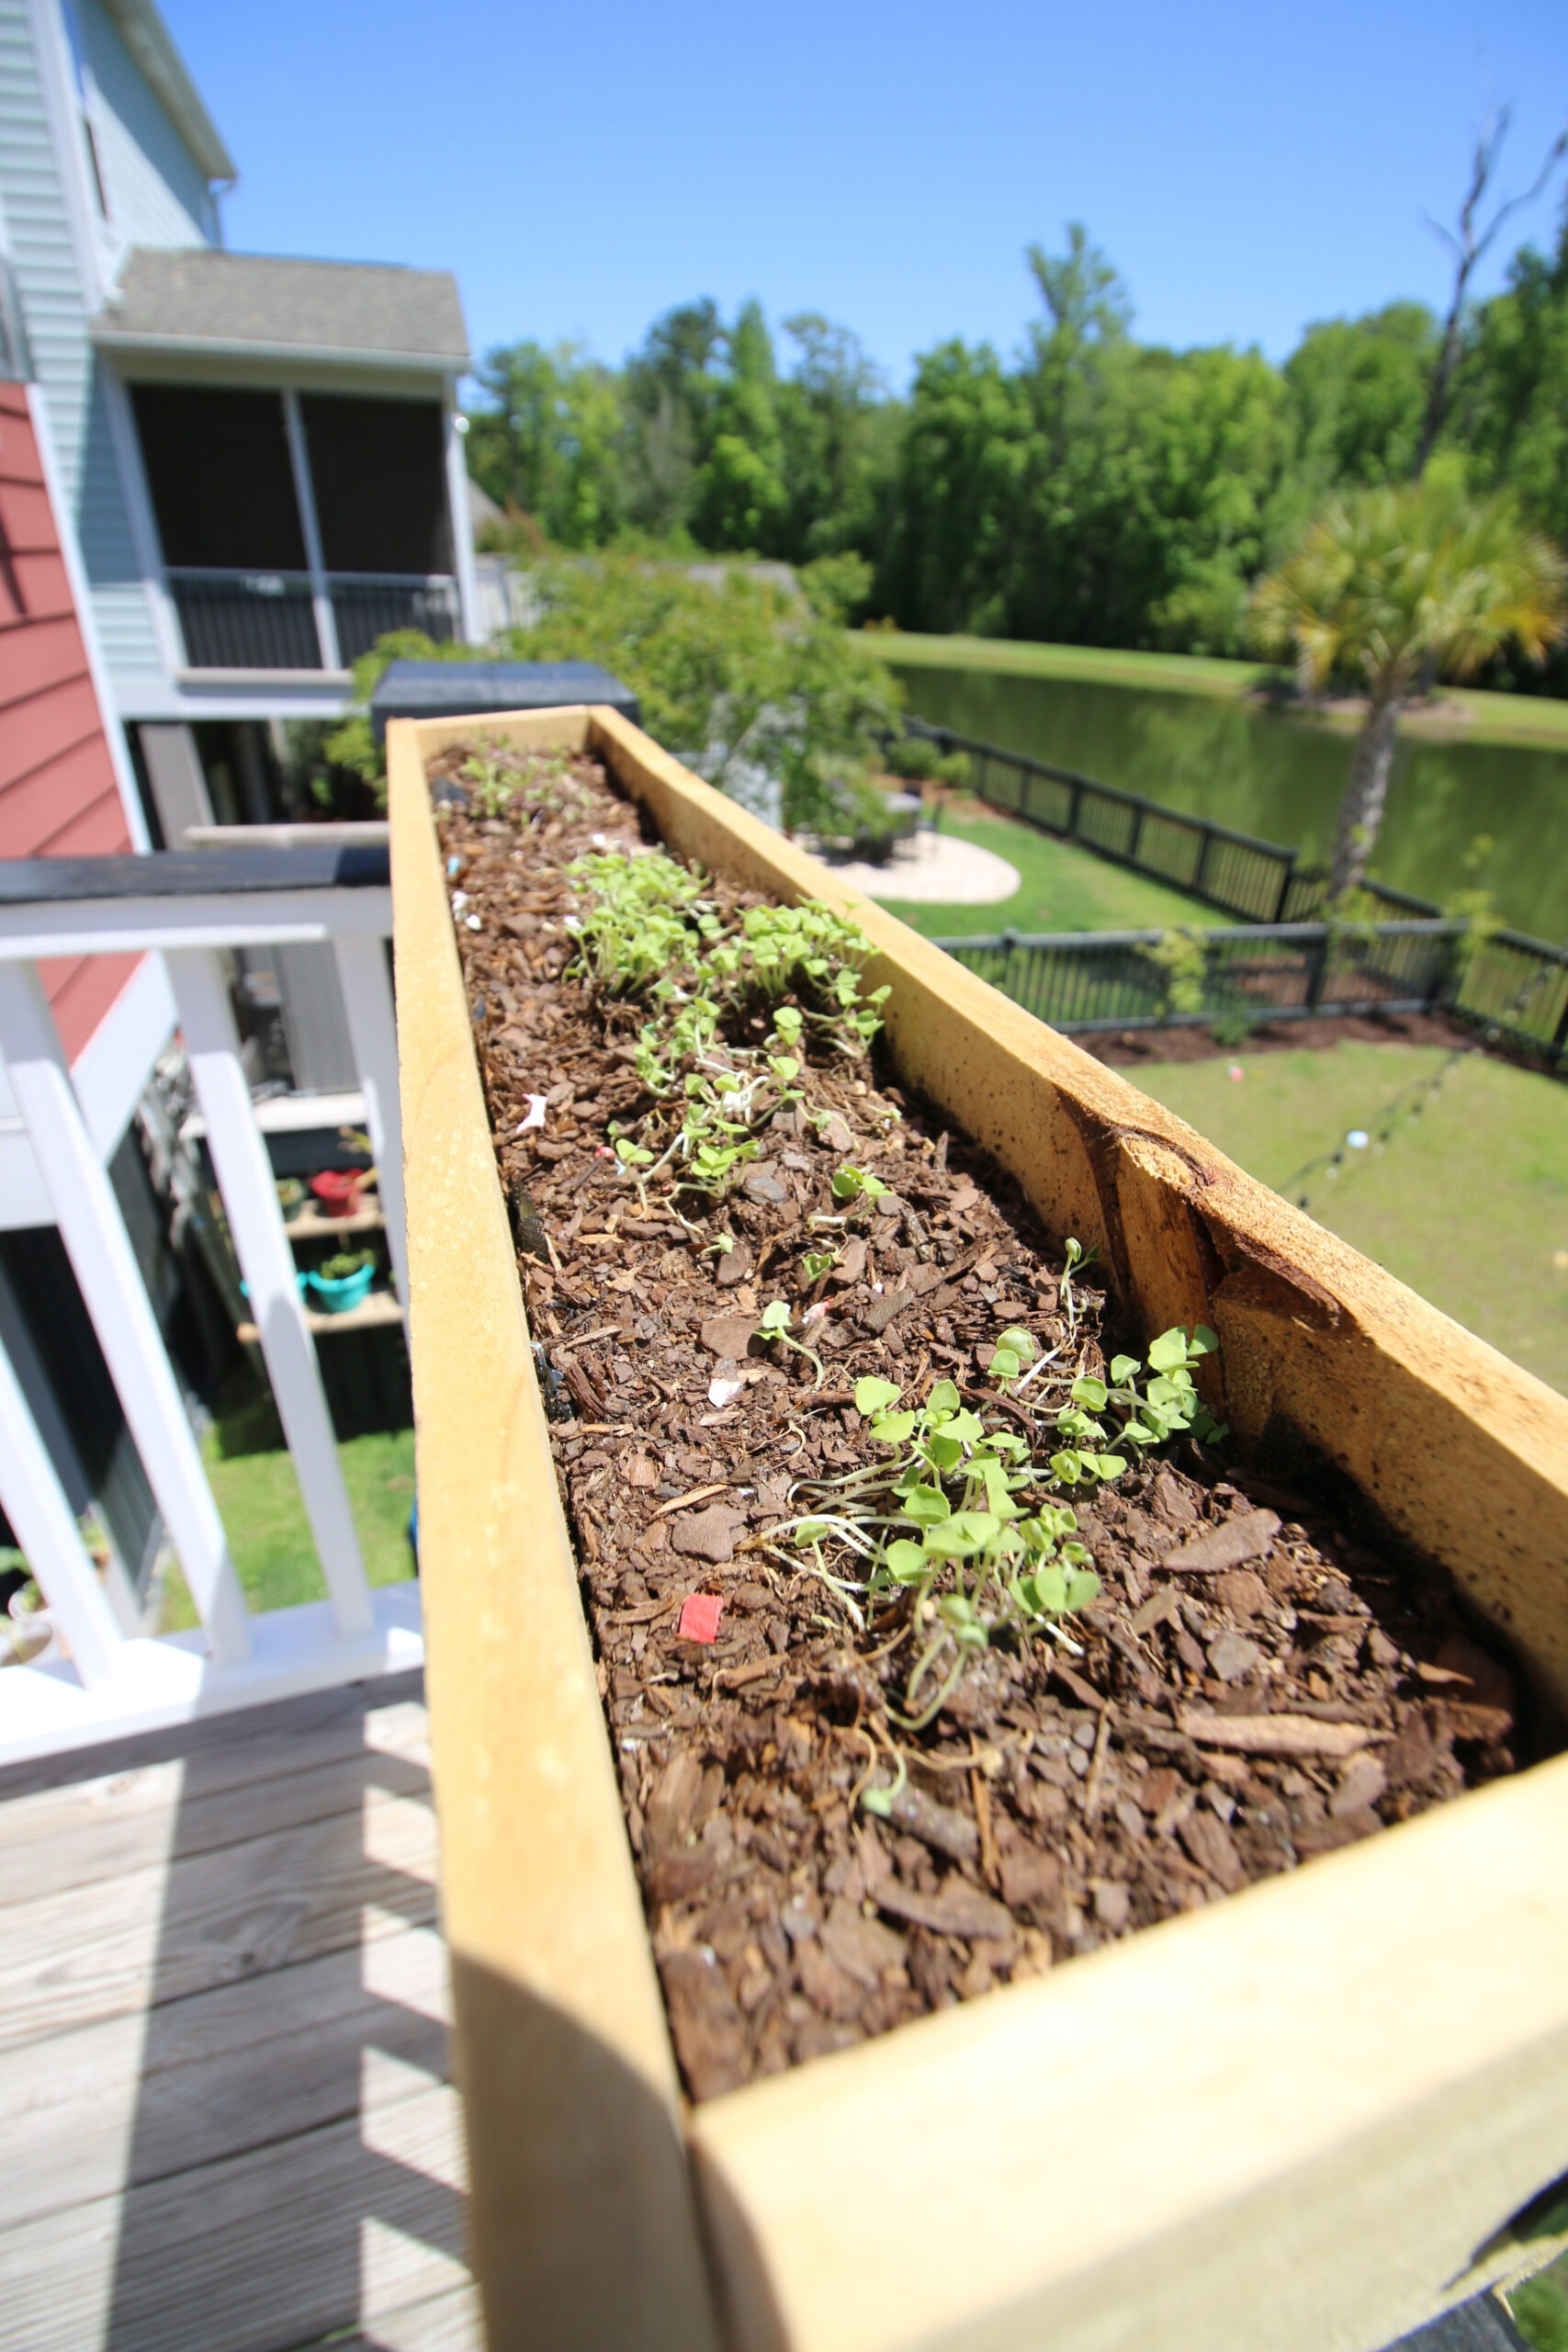
Then, we added our assortment of herb seedlings that we had been growing in jars until they were ready for this. They have grown so nicely!
We can’t wait to start walking out to the railing during dinner to pick the herbs we need and start using them!
Do deck rail planters need drainage holes?
Any planter needs drainage holes, but these should be fine if you don’t glue the long edges of the base. The water should drain out easily through there.
If you need to drill drainage holes to any planter, just use a 1/4″ drill bit and drill a few holes in the bottom of your planter to allow for the water to seep out.
FREE DIY deck rail planter woodworking plans
Want to build a DIY deck rail planter for yourself? Make sure you grab our simple woodworking plans!
The best part is that you can get our deck rail planter plans free! These include our full material list, cut list and step-by-step instructions with computer model imagery to help you along the way.
Enjoy!
Basic woodworking information for every project
Here are some of our most popular woodworking articles!
Shopping for wood:
Woodworking project ideas
- 100+ of the best woodworking project ideas!
- 62 easy beginning woodworking projects
- Woodworking project ideas to make and sell
See all our printable PDF woodworking plans!
Our favorite tools + supplies
- See all our favorite tool reviews
- How to use a Kreg jig
- The ultimate wood stain guide
- The best wood fillers for your project
Remember to also always use safety equipment while woodworking and using tools. Make sure you have proper eye protection, ear protection and a good mask to keep yourself safe.


Looking for something?
We’ve been doing this since 2012 so we have a LOT of blog posts!
Search stuff like: Ceiling Projects | DIY Plant Stands | Thrift Flips


Hey there, I’m Sean, the woodworking enthusiast and builder behind CharlestonCrafted.com! Since 2012, I’ve been sharing the magic of turning raw materials into beautiful creations. I love teaching others the art and satisfaction of woodworking and DIY. I try to inspire fellow crafters to make something extraordinary out of nothing at all.