Your kids make amazing art every day, and you need a great way to display it. Here's how to build a simple DIY art display for your kids that will show off their masterpieces!
This post was sponsored by National Hardware, where you can get all of the hooks, wire, and brackets used in this post. All opinions are our own. Thank you for supporting the brands that make Charleston Crafted possible!
As parents, we are always dealing with the question of what to do with the arts and crafts our kids make.
Of course, our children make the absolute most-beautiful art, but they make a lot of it. Plus, they are so proud of it and want to show it off.
Since we built our kids a DIY arts and crafts table for Christmas, they have been doing even more art, plus our son is in a part time preschool, so there's new masterpieces every day.
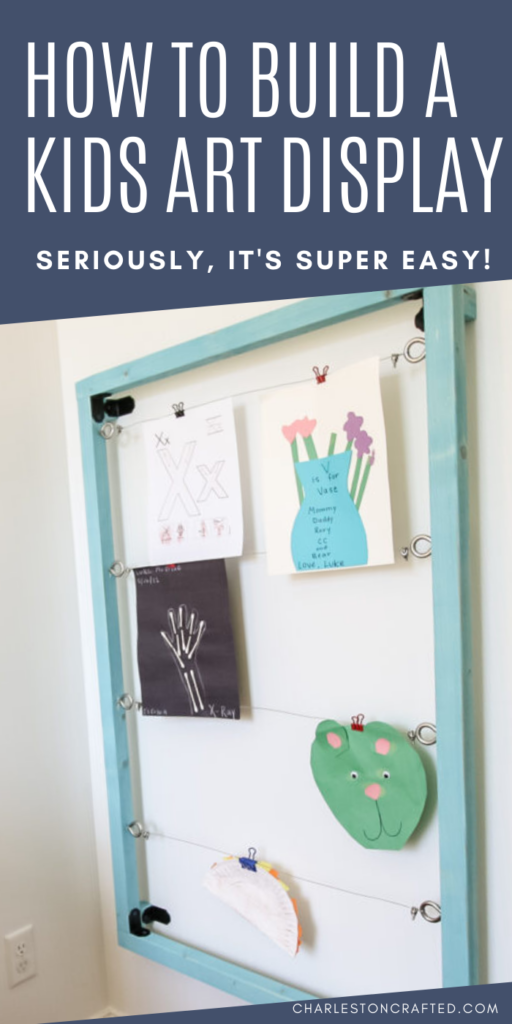
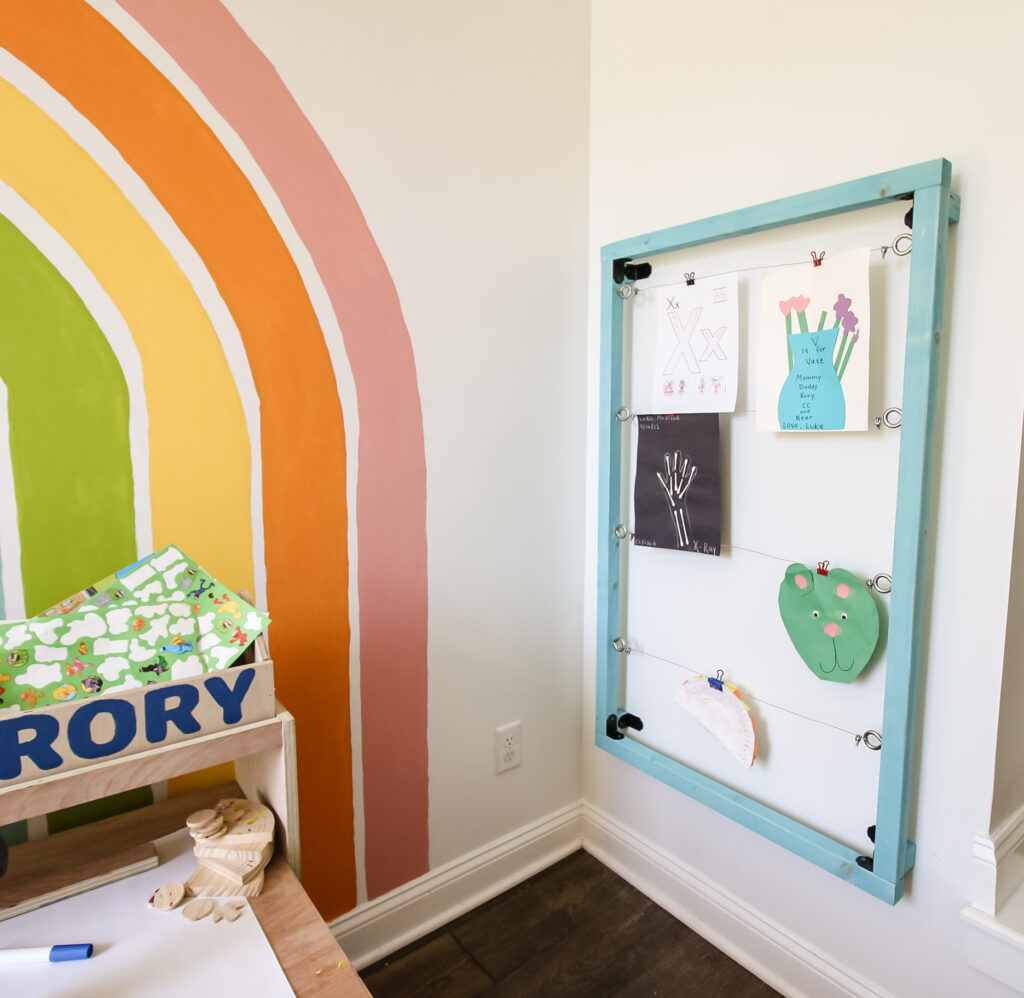
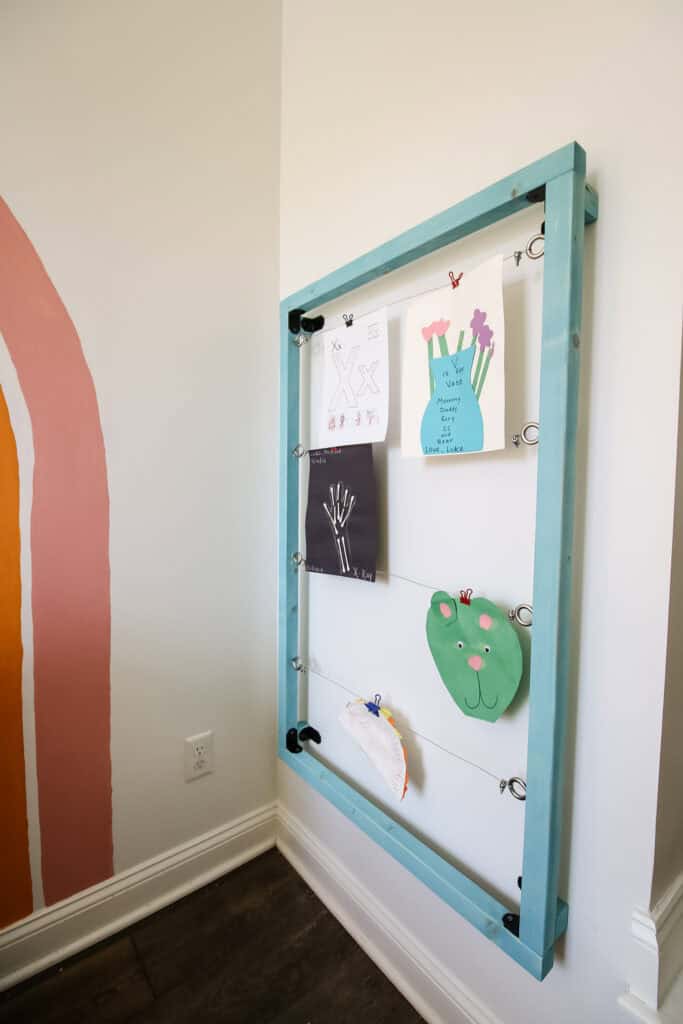
Our kids' art deserves a special display instead of being piled in a box, so we built a simple kids art display to hang on the wall to show off all their work!
Simple DIY kids art display
Displaying your kids artwork is something that means a lot to them. It shows them that you think their art is good enough and important enough to be part of your home's decor, even if just for a little bit.
We decided to hang our kids' art work right behind their art table (click here to get the plans to build our art table!) in our loft, which is their space through and through.
To do this, we decided to build a simple, yet sturdy, way to display our children's art with a wooden frame that was fun and efficient.
Check out our tutorial + woodworking plans for how to build a kids learning tower!
This DIY kids art display is easy to build with simple materials and easy to swap out the art on a regular basis. Let's show you how we did it!
Materials needed to build a kids art display
Here's what you need to build a kids art display:
- (1) 8' 2x4 board or (2) 8' 2x2 boards
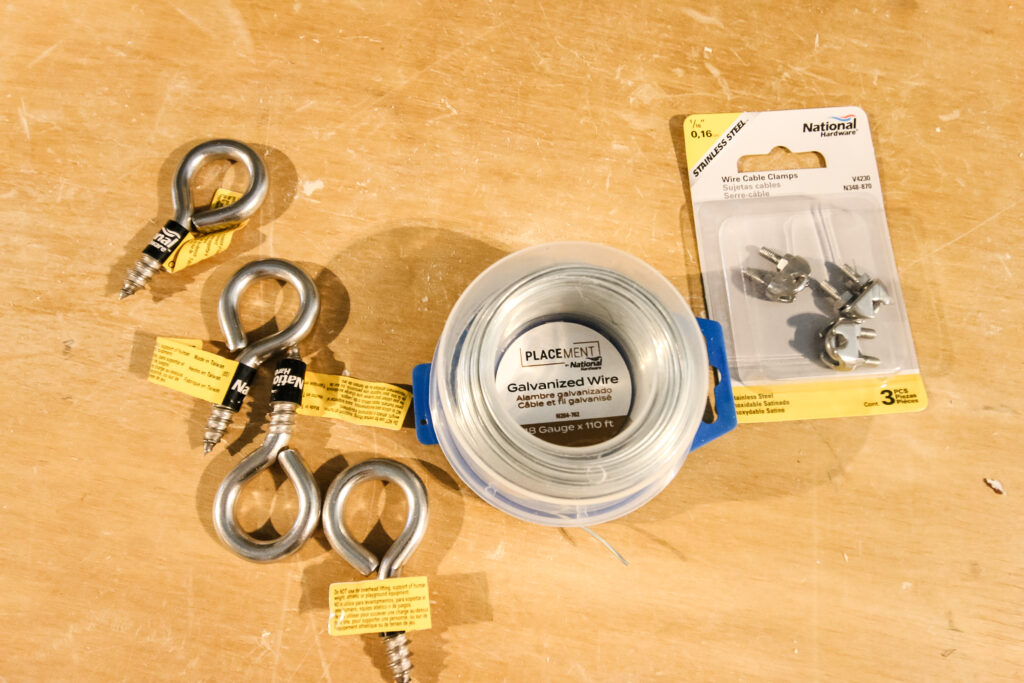
- Hooks
- Wire
- L-brackets
- Wood glue
- Paint or stain
Tools needed to build a kids art display
Here are the tools you need to build this kids art display:
- Table saw
- Miter saw
- Cordless drill
- Sander
How to build a wood frame for a kids art display
We started by cutting the wood needed for the frame. We chose to ripe a 2x4 in half to save a little money, but you could also buy 2x2s to save a step.
With the base widths determined, we cut each piece to length (which you can get in the free woodworking plans!). These pieces included the frame and the pieces to bump it out off the wall.
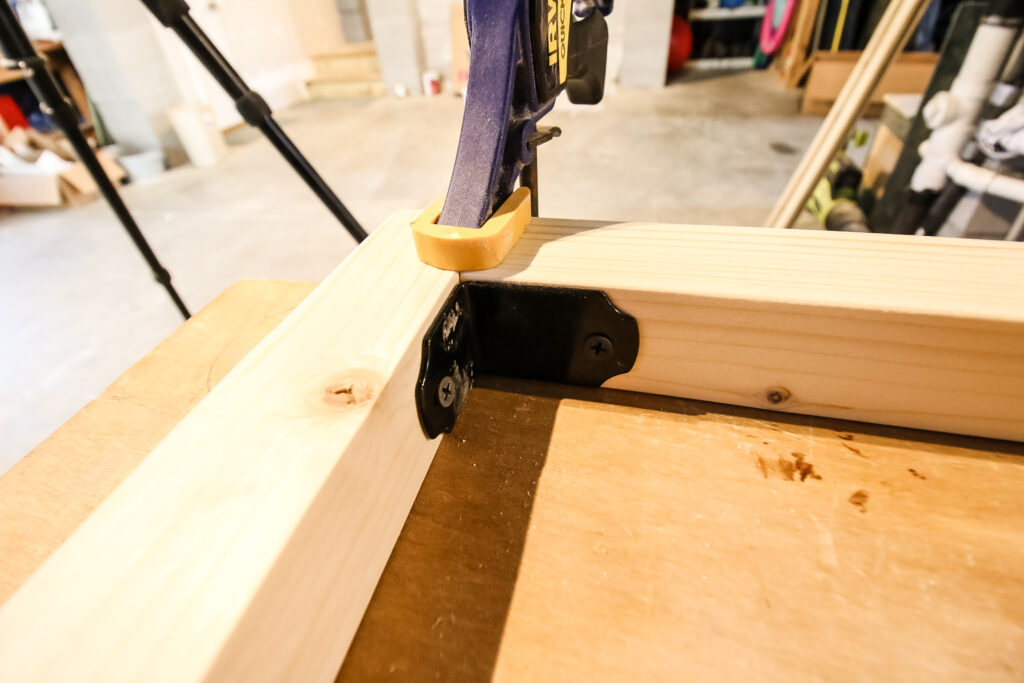
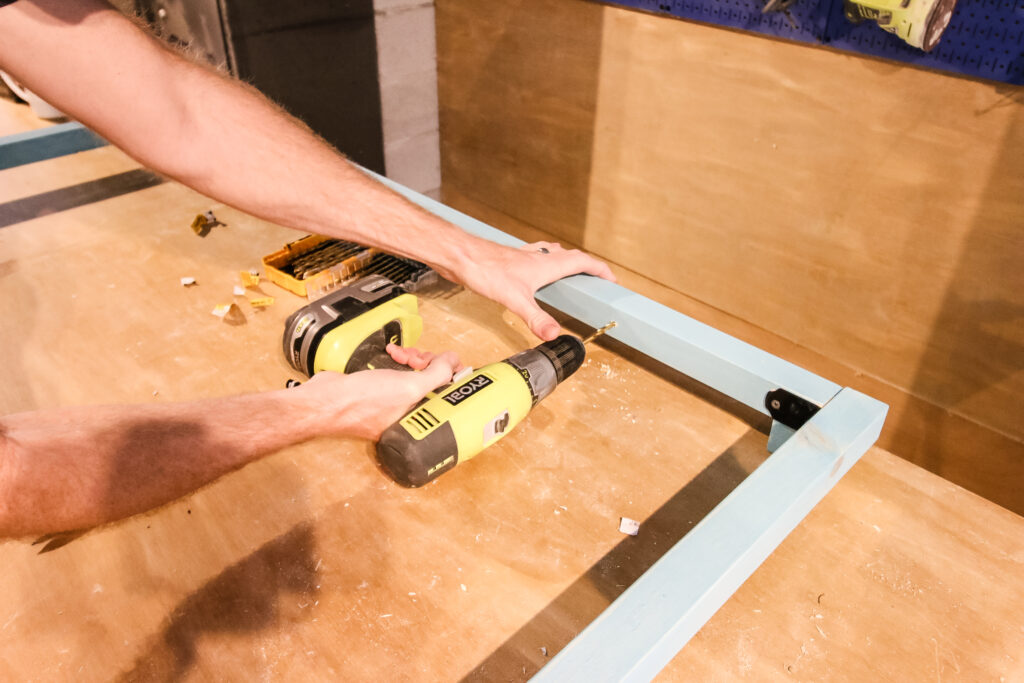
After sanding, we used wood glue and decorative light rafter ties from National Hardware to secure the boards to each other in the corners.
We last used these light rafter ties when we built a pair of outdoor planters for our porch and had a few left over.
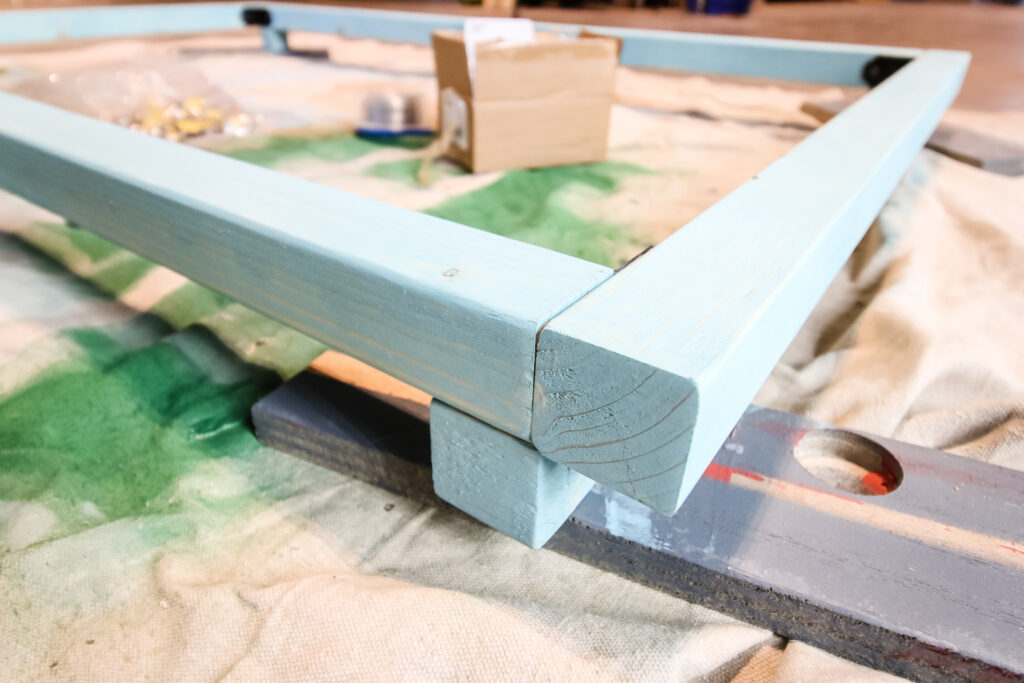
We attached a bracket into each corner to secure the boards together with the wood glue. Then, we used wood glue and clamps to attach the bump out pieces to the back of the frame.
After it was all together, we stained everything with a blue stain that we thought was just super fun for a colorful child's play area.
Stringing wire to hang kids art
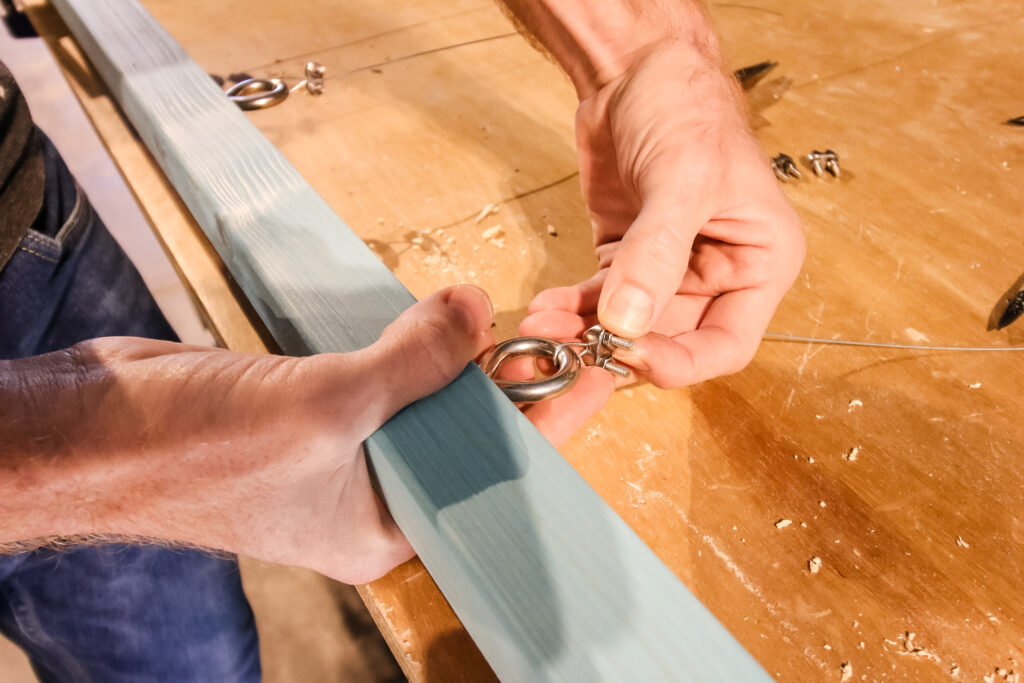
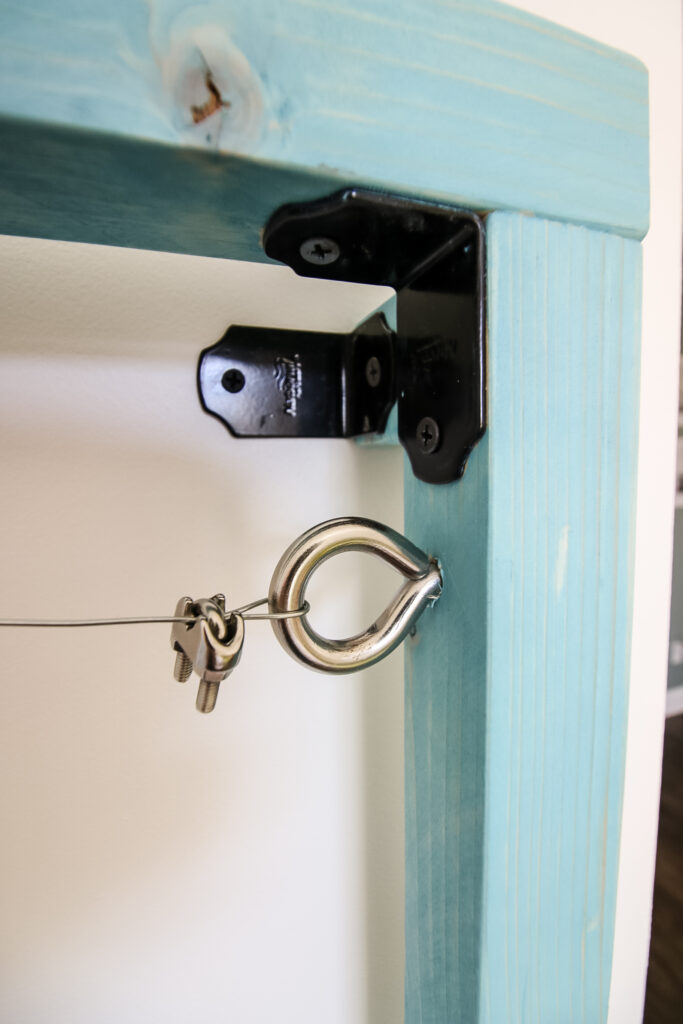
Once the frame was ready, we had to attach the hardware that was going to actually how our child's artwork. To do this, we used screw eyes and 18 gauge wire from National Hardware to string four lines straight across the frame.
The screw eyes were easy to screw into the frame after measuring the points where they needed to be. We pre-drilled holes and twisted them in by hand with no problem.
Then, we strung the wire across the screw eyes to create four different lines to hang our kids art to.
Attaching art display to the wall
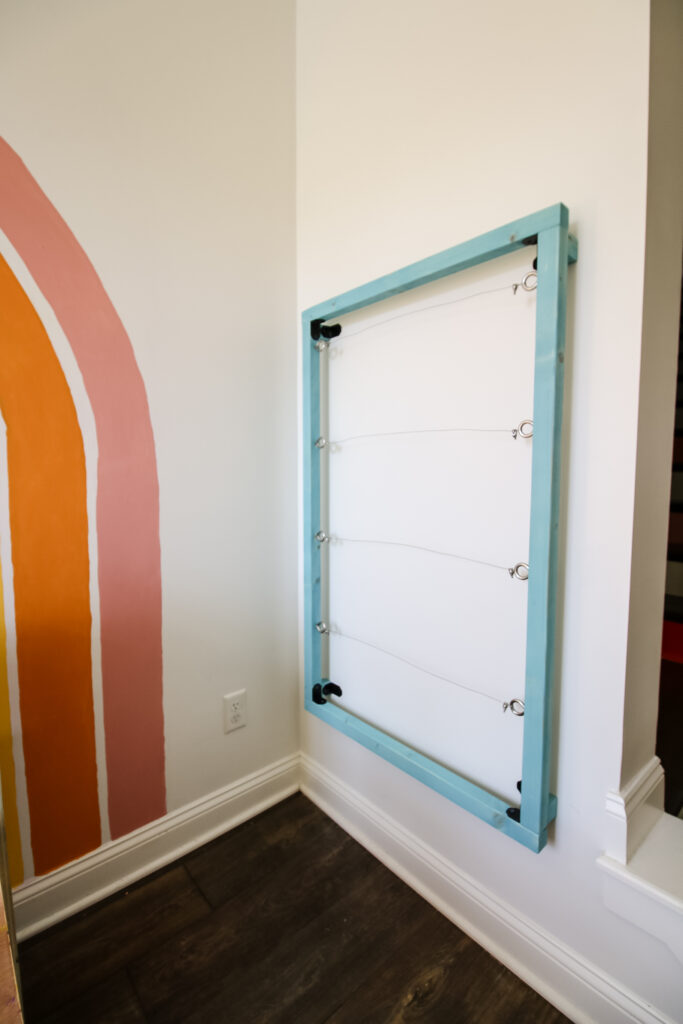
Finally, it was time to attach the art display to the wall. Again, we used the light rafter ties attached to the bump out pieces on the back of the frame.
We held the display in place and marked the position of where the ties would intersect with the wall and added drywall anchors to the wall.
Then, we attached the entire display to the wall with screws through the ties.
Hanging art to the DIY kids art display
We grabbed some fun-colored clips at the store and started hanging up the masterpieces!
These clipped the art on great and now we have a super fun and easy way to display all the arts and crafts our kids make for us at home and school.
This easy DIY project was done in a day and was a simple way to make a big organizational difference in our home. Plus, the kids are pretty proud to see the gallery wall of their artwork!
DIY kids art display woodworking plans
If you like the look of this kids art display, you can easily make the exact same one for your kids by using our woodworking plans!
Our plans include a full material list, cut list, and step-by-step instructions with computer imagery that will help guide you through the process.
This is an inexpensive project that makes a huge difference in your home!
How do I decide what of my kids' art to keep?
It's very hard to decide what of your kids' art to keep and what to display. If we are honest with ourselves, we feel terrible at the idea of getting rid of anything our children make, but it's also unrealistic to think that we can keep it all.
There are a lot of ways to keep and display your kids' art, but how you decide what to keep is a much harder question to answer.
Remember that your children have a short memory when it comes to the things they make and they also won't to have to go through boxes of their art in the attic in the future.
The best way to decide what art to keep is to let your kids help you by deciding what they want. Remember to keep these tips in mind:
- Only keep the favorites
- Only display a few things at once
- Change out the art that is displayed weekly
- Let your kids pick which piece of art they want to keep at the end of the week
- Have a larger "keepsake box" to keep valuable pieces
- Thank the art that isn't chosen for their service and dispose of responsibly
Let us know how you are storing and displaying kids art!

Looking for something?
We've been doing this since 2012 so we have a LOT of blog posts!
Search stuff like: Ceiling Projects | DIY Plant Stands | Thrift Flips

Hey there, I'm Sean, the woodworking enthusiast and builder behind CharlestonCrafted.com! Since 2012, I've been sharing the magic of turning raw materials into beautiful creations. I love teaching others the art and satisfaction of woodworking and DIY. I try to inspire fellow crafters to make something extraordinary out of nothing at all.