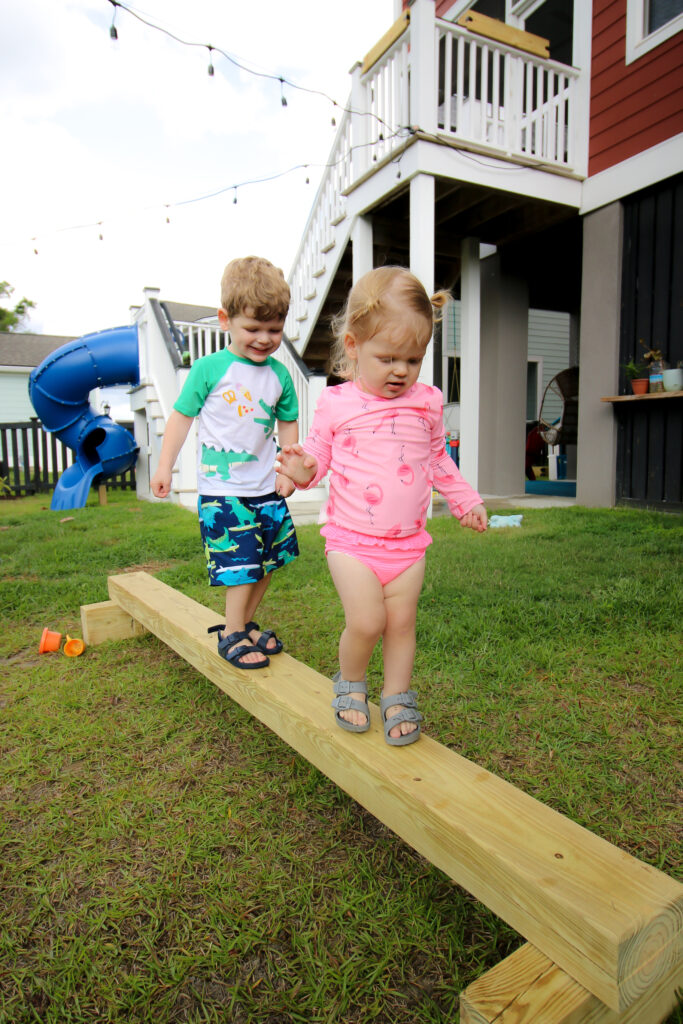
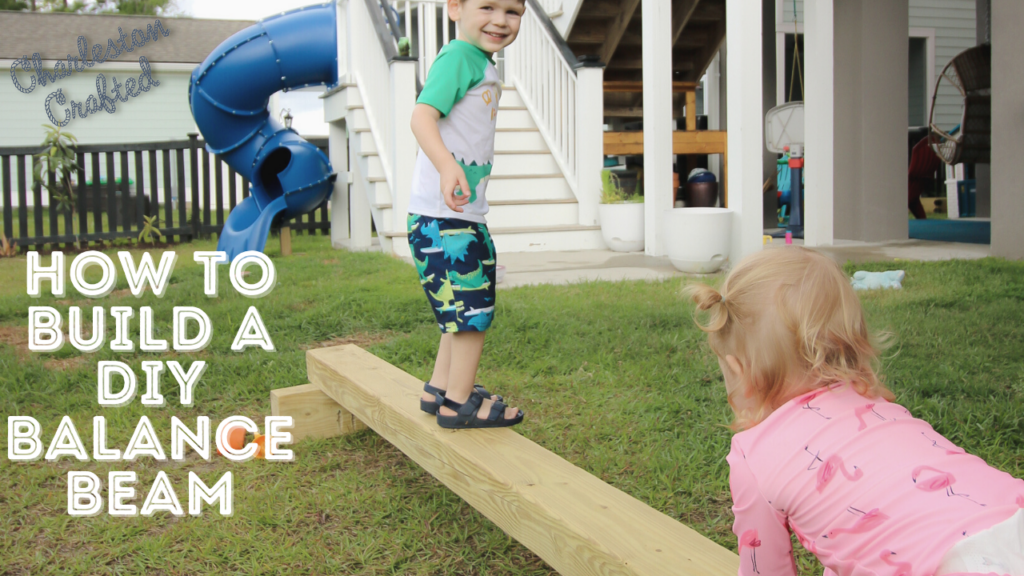
This post will show you how to build balance beams for your toddlers to enjoy in the backyard! This is a simple and inexpensive DIY project to bring joy to your kids!

If you know one thing about toddlers it is that they change activities every 15 minutes. No exaggeration.
That means you need to have lots of different potential things to do on any given day when playing with them because you're constantly switching.
For us, summer is about spending as much of our mornings either exploring our neighborhood or playing in our backyard.
Every morning, the toddler splash table is always a big hit and so is playing with our Pikler-inspired triangle or watering the garden.
One thing our kids have both done since they were around 9 months old is go to The Little Gym, where they learn social skills and basic balance and gymnastics. That's why we added so many Nugget couches to our playroom so we could create different courses and setups for them.
One more things we wanted to add was a simple balance beam that our kids could walk on. We chose to build an outdoor balance beam that could be moved around and used outside on these fun mornings.
This DIY kids balance beam is a simple build made from one board at the home improvement store and we'll show you what you need to buy and how to make a homemade balance beam for yourself!
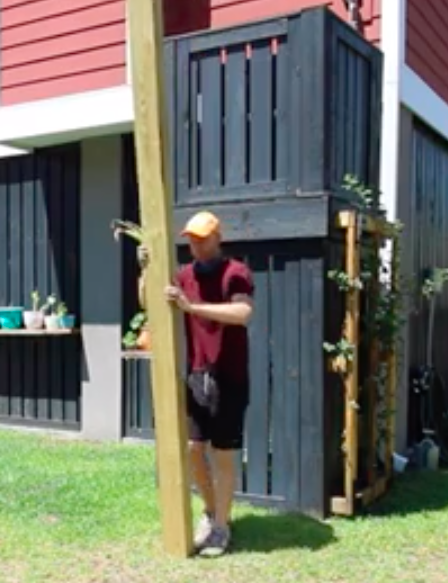
Check out our tutorial + woodworking plans for how to build a kids learning tower!
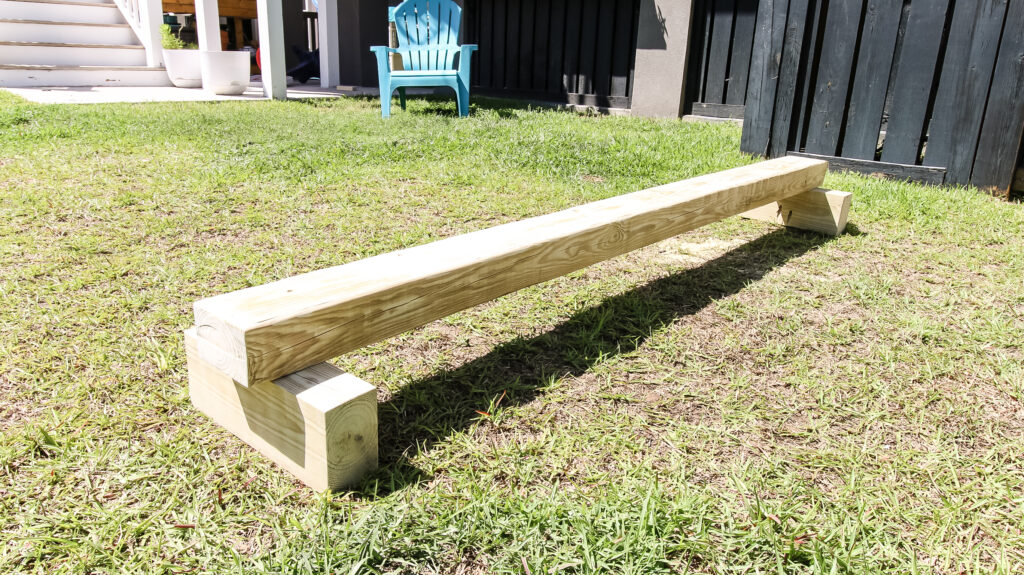
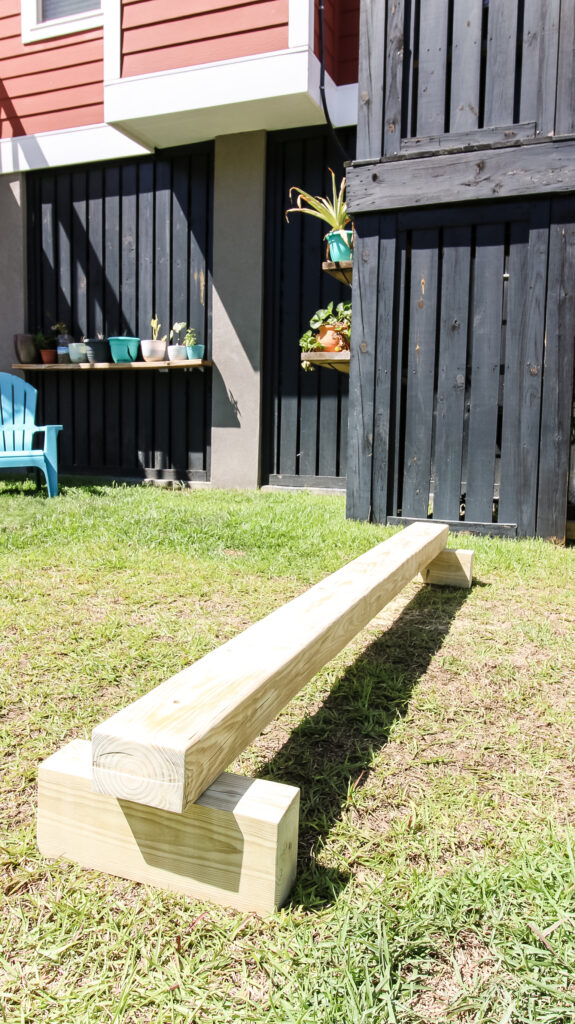
DIY balance beam
Our DIY balance beam was made to be as simple as possible to recreate, using just one board from Home Depot.
There are, of course, other ways to make a kids balance beam, but we designed ours to be low to the ground so that our kids could get on it themselves and be safer when using it.
Let's get into some of the different options you have to make yourself a DIY balance beam and how we made ours!
How do you make homemade balance beams
Here are the tools, materials, and steps needed for how to make a homemade balance beam.
Tools needed to make a DIY balance beam:
- Circular saw
- Cordless drill
- Kreg Pocket Hole Jig XL
- Sander
Materials needed to make a DIY balance beam:
- 4" x 6" x 10' pressure treated board
- 4" pocket hole screws
What material do you use for a balance beam?
There are different choices for what material to use for a DIY balance beam. If you are building your balance beam for outdoor use, make sure to use treated lumber rated for ground contact because it will be sitting on the ground and in the elements at all times. You'll want it to be protected.
If you're building a DIY balance beam for indoor use, don't use treated lumber. You'll need to modify the plans for wood that is indoor use. This might mean building a 2x4 balance beam where you are stacking 2x4 boards together or using a 4x4 board if that is wide enough for your child.
For us, we chose to use a 4x6 post (actual dimensions 3 ½" x 5 ½") because our children are under 2 and 4 years old. The 5 ½" width of this board allows them to use the beam unassisted and work on their skills.
If your child is older or more advanced in gymnastics, you could modify these instructions and use a 4x4 post.
Simple steps for how to make a toddler balance beam
Step 1- Cut board to length
The dimensions of our balance beam are 90" long with two 15" long bases.
We got this from a 10' board off the shelf, cutting the 15" for the bases off each end of the beam.
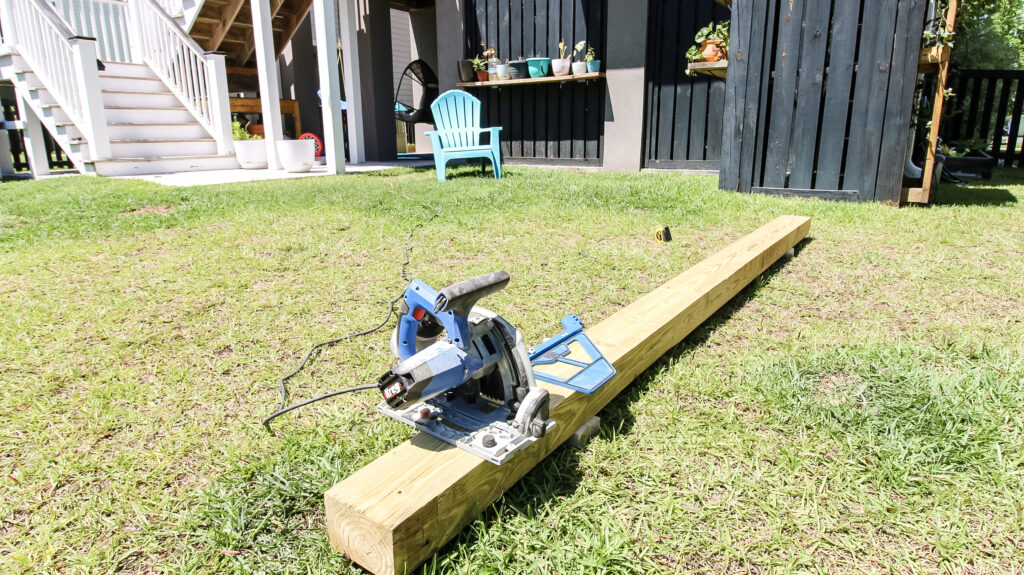
The leg width is based on wanting to have an equal amount of base on each side that is the same width as the beam itself.
Since the beam is so thick, you'll need to mark the line on both sides, cut through one side with the circular saw, then flip the board over and do it again.
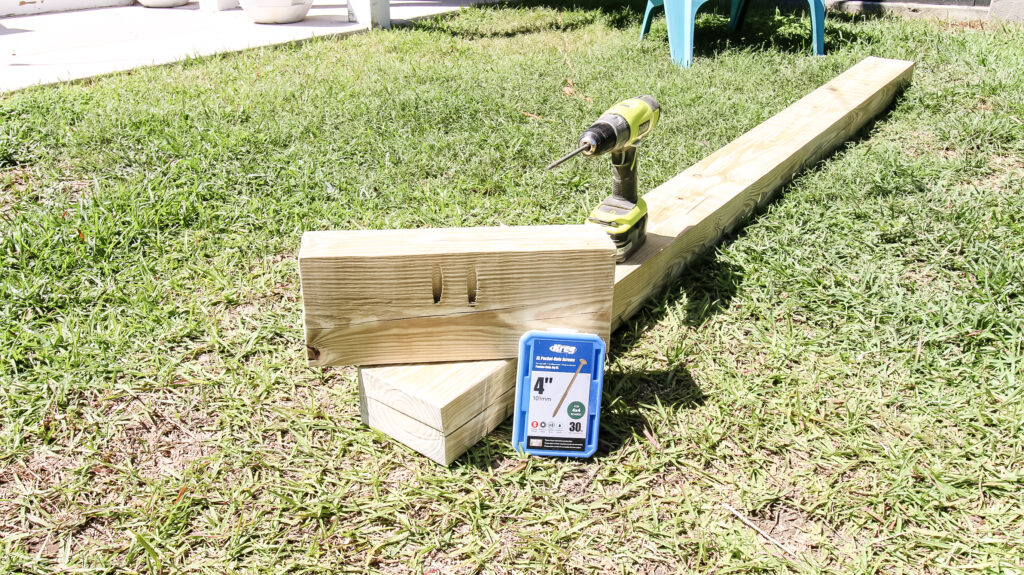
Step 2- Drill pocket holes
Our balance beam is held together with pocket hole joinery. To do this, we used the brand new Kreg Pocket Hole Jig XL.
We recently got this brand new tool and this was the first time we were able to use it. It's a clamp on Kreg jig, specifically to be used 1 ½" or 3 ½" thick boards.
The extra large jig is great for this project because we wanted to make sure these boards were held on tight.
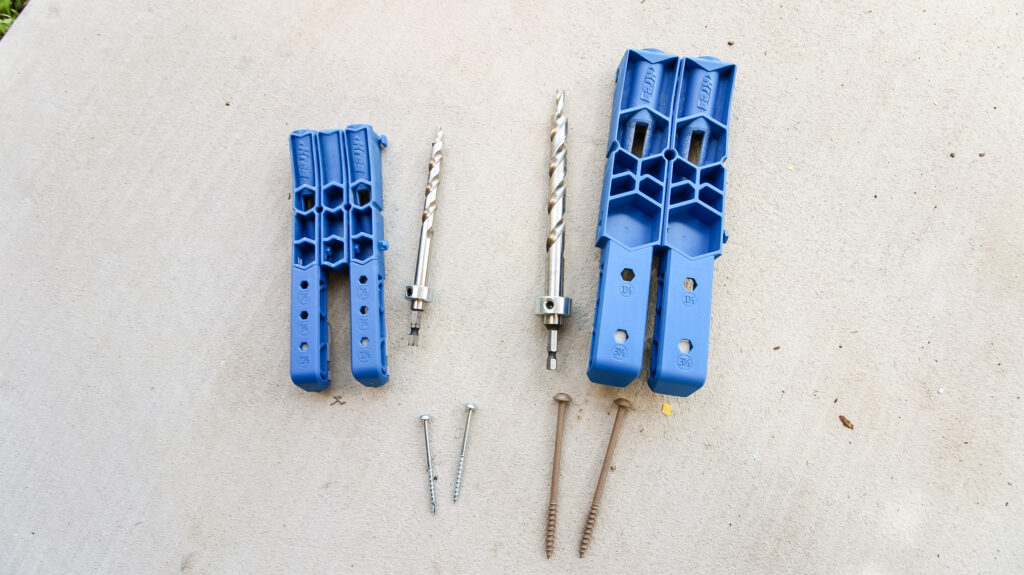
The Kreg XL jig includes a clamp pad, but not a clamp, so we used a squeeze clamp to attach it to each of our base pieces. Then, we drilled a pair of pocket holes on each base.
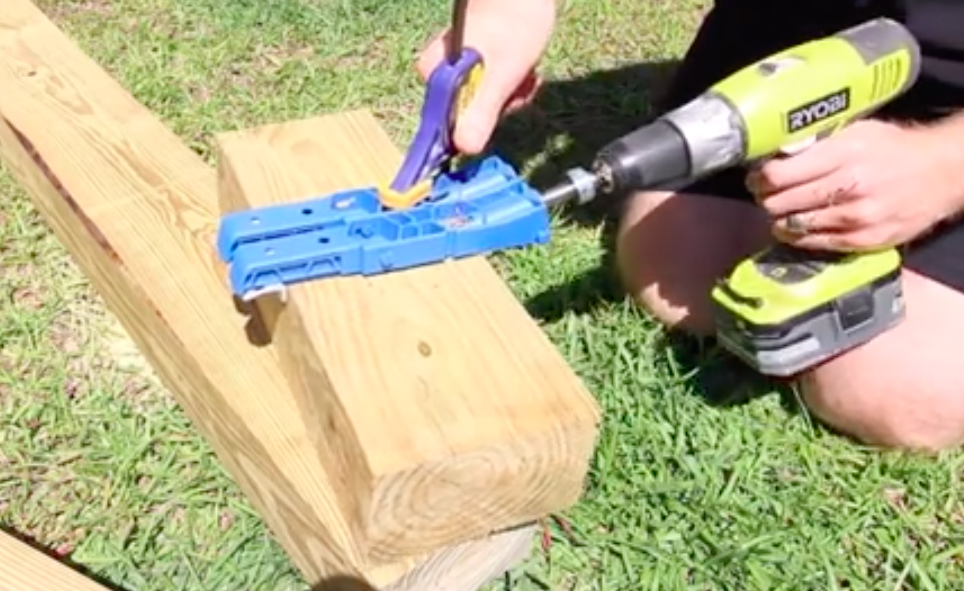
Create the pocket holes at ideal spacing to spread them out to accommodate the width of the beam. Even though the Kreg XL jig is wide, we still unclamped and moved it a little over to get wider spacing on the screws.
This new jig makes it easy to drill extra large pocket holes for extra large boards and it was great to try it here.
Click here to check out our review of all the new products Kreg Tool just reviewed!
Step 3- Sand and smooth beam
Once all your pieces are ready, it's time to get them ready for assembly.
We started by running a rounded router bit around the top edge of the beam to give it a softer edge and be a little safer. Then, we sanded everything down to 240 grit sandpaper.
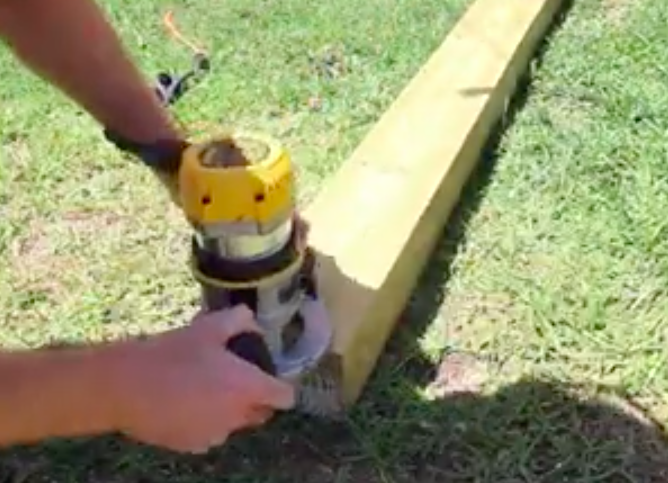
It's really important to make sure your balance beam is sanded super smooth. This is where your kids will be walking (possibly barefoot) and you don't want a treated wood splinter getting in their skin.
Take a little extra time to make sure all the edges are rounded over and everything is smooth as butter.
Step 4- Attach legs
After the boards were ready to go, we used Kreg's new 4" XL pocket hole screws to attach each base to the underside of the balance beam.
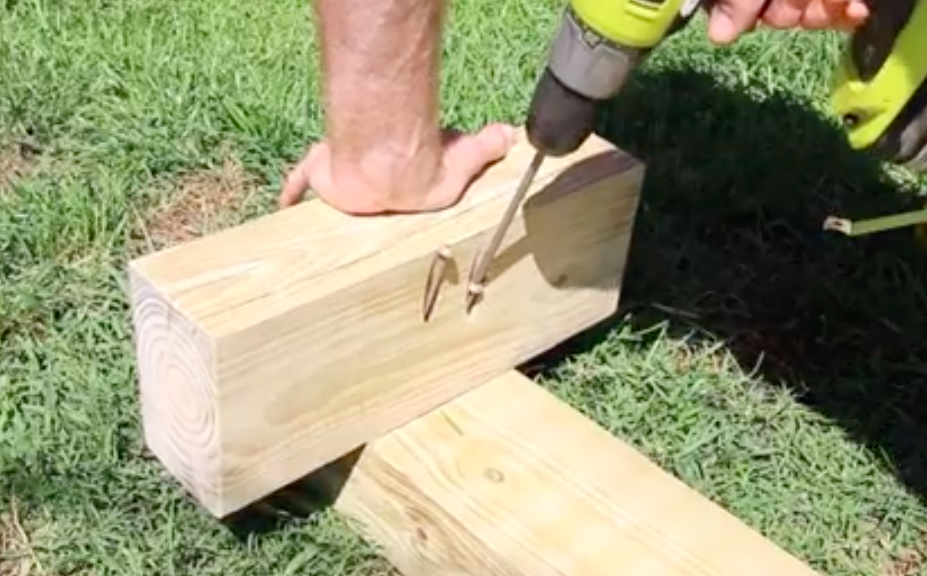
These new screws are super long and also thicker than standard pocket hole screws.
We lined up the holes with the underside of the beam and attached each about 1 ½" in from the end of the beam.
Even with no glue or anything else, these 4" pocket hole screws have impressive holding power. The strength using the Kreg jig makes it a great joint that holds in place and we don't have any concerns about it holding up to our kids weight.
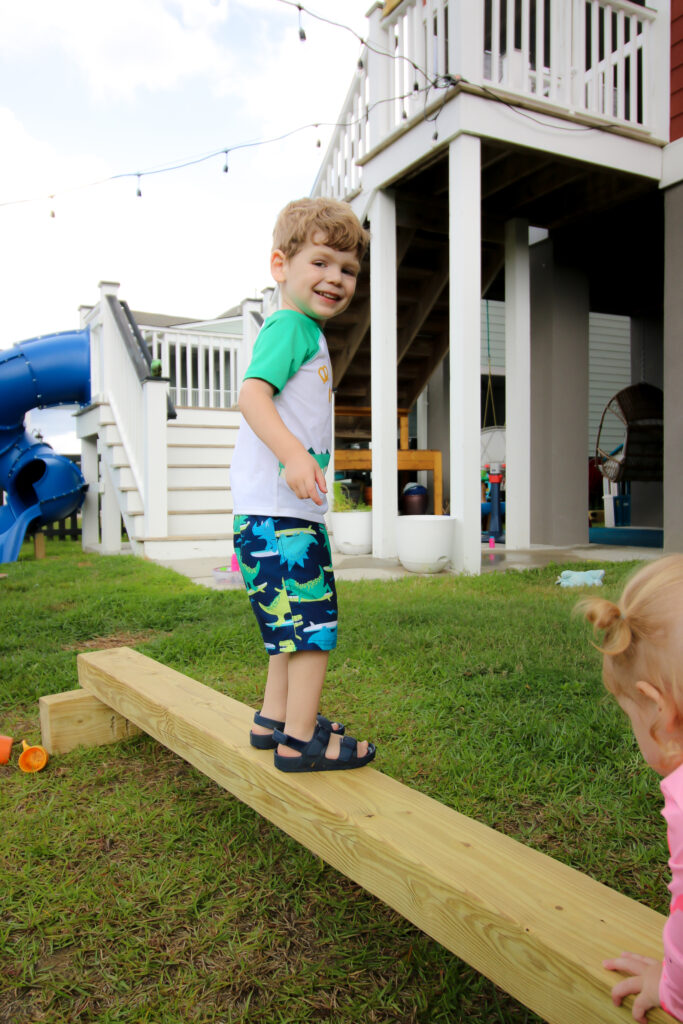
Step 5- Enjoy!
Time to let the kids play!
Our kids love the height of our balance beam because they can climb up themselves. Our 3 year old especially loves that.
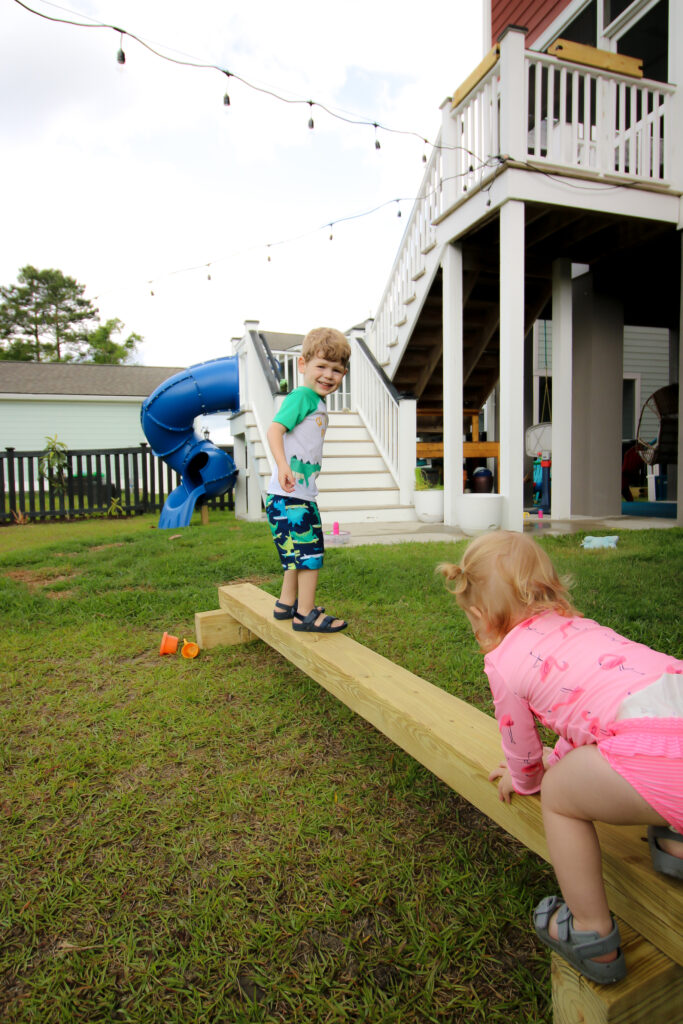
This beam is the perfect width for them because they can practice their balance and coordination but have a low risk of falling off.
Pair this with some other outdoor play equipment and you've got a full gym!
Do you need to pad a balance beam?
A padded balance beam is always safer for kids, especially if they aren't great on their feet.
However, if you're building an outdoor balance beam, the pad will likely get very dirty or moldy being outside.
Adding a pad out of foam, yoga mats or canvas will definitely make your balance beam a little safer if that's something you feel you need. However, with this balance beam, it is so low to the ground and our children are not doing gymnastics moves, we aren't too worried about the need.
DIY kid's balance beam video tutorial!
Make sure to click over and check out our full video tutorial to see how we built this DIY balance beam for kids! This was a fun and easy build and you can see how much our kids are loving it!

Looking for something?
We've been doing this since 2012 so we have a LOT of blog posts!
Search stuff like: Ceiling Projects | DIY Plant Stands | Thrift Flips

Hey there, I'm Sean, the woodworking enthusiast and builder behind CharlestonCrafted.com! Since 2012, I've been sharing the magic of turning raw materials into beautiful creations. I love teaching others the art and satisfaction of woodworking and DIY. I try to inspire fellow crafters to make something extraordinary out of nothing at all.