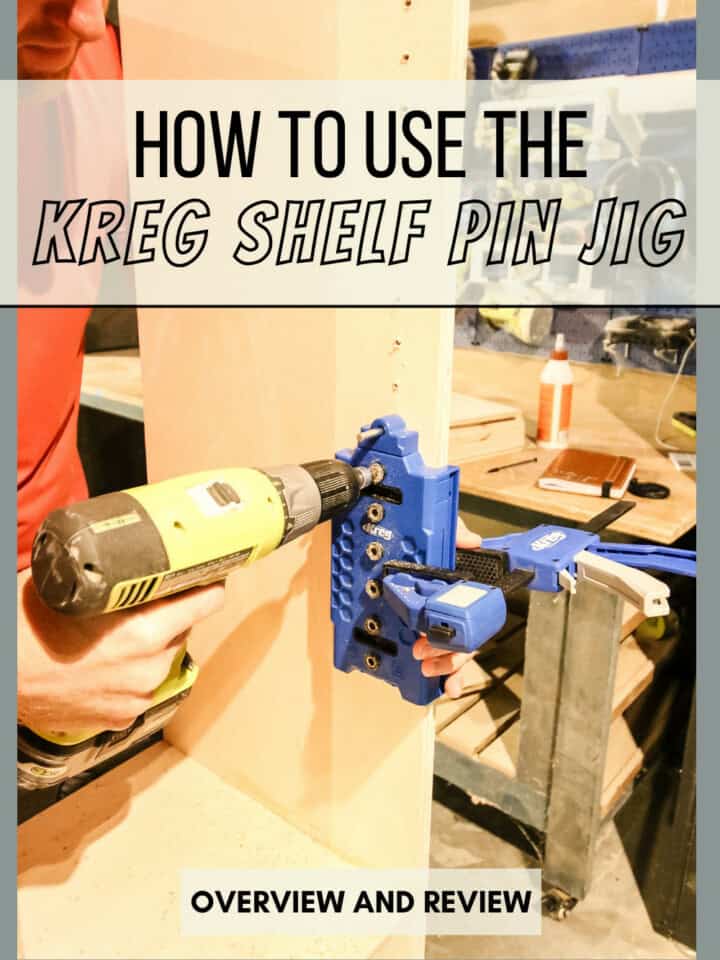
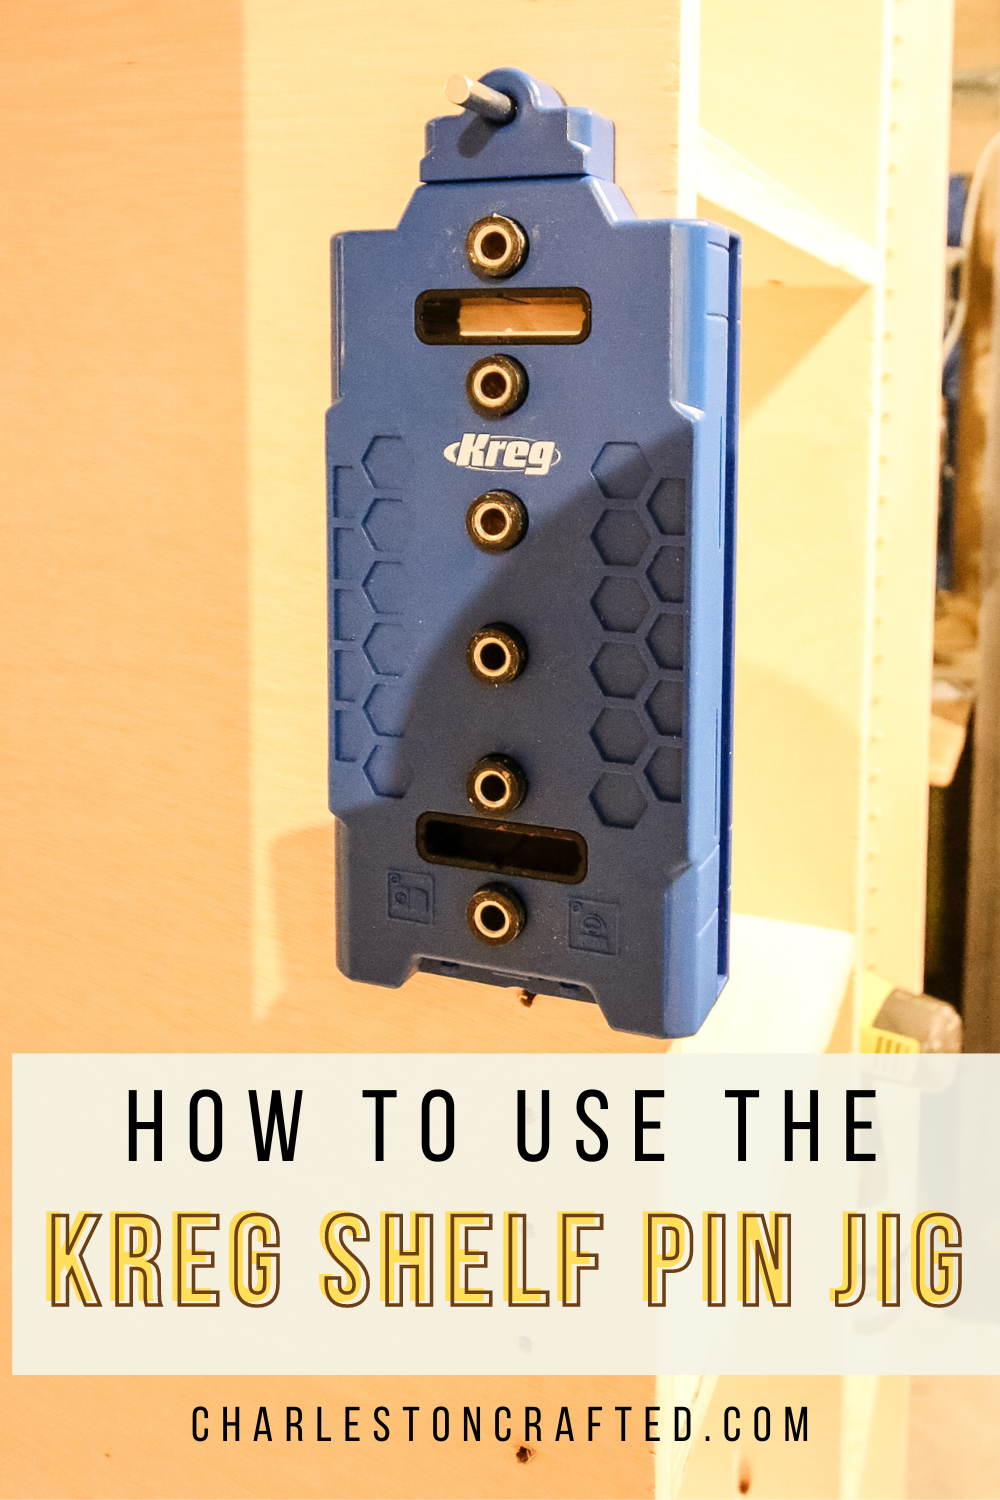
If you're building a cabinet or shelf and want adjustable shelves, you're probably going to use the Kreg Shelf Pin Jig. Let's show you how to use it!
We build a ton of different furniture projects around here, but most of them are in fixed positions.
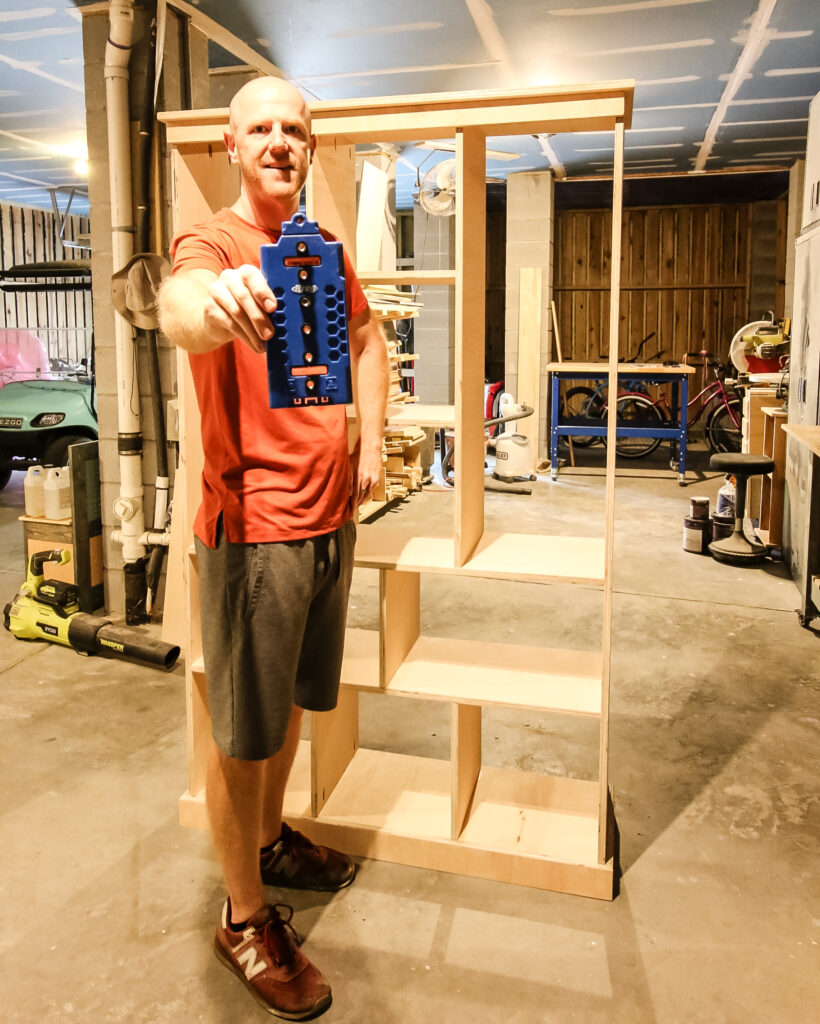
When we recently built our son's DIY bookcase with toy and book storage, we added adjustable shelves.
We wanted adjustable shelves because he was going to use these shelves to display his LEGO builds. Some builds are taller than others, so we wanted to make sure we could move the shelves up and down.
So, we turned to our Kreg Shelf Pin Jig to get ensure precision with our shelf pin holes!
The Kreg Shelf Pin Jig is a really easy tool to use and doesn't require any experience at all. In fact, it's made so you don't need experience.
This post will show you the differences between the two Kreg Shelf Pin Jigs and show you all the simple steps to use it to get quick and easy shelf pin holes.
This DIY fluted buffet table is a great project to use a shelf pin jig on!
Kreg Shelf Pin Jig review
The Kreg Shelf Pin Jig helps you add perfectly spaced holes for your next project that requires adjustable shelves.
The jig helps you make precise holes on all four sides of your bookcase or cabinet and makes it really easy to repeat them without issue.
Kreg offers a 5mm Shelf Pin Jig and a ¼" Shelf Pin Jig.
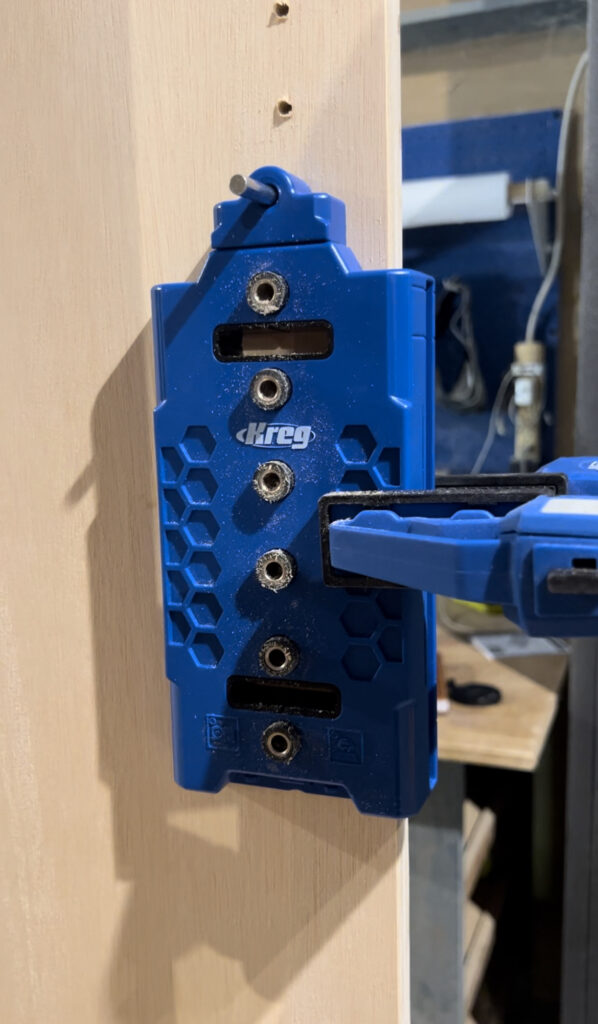
Here's some of the elements of the Kreg Shelf Pin Jig:
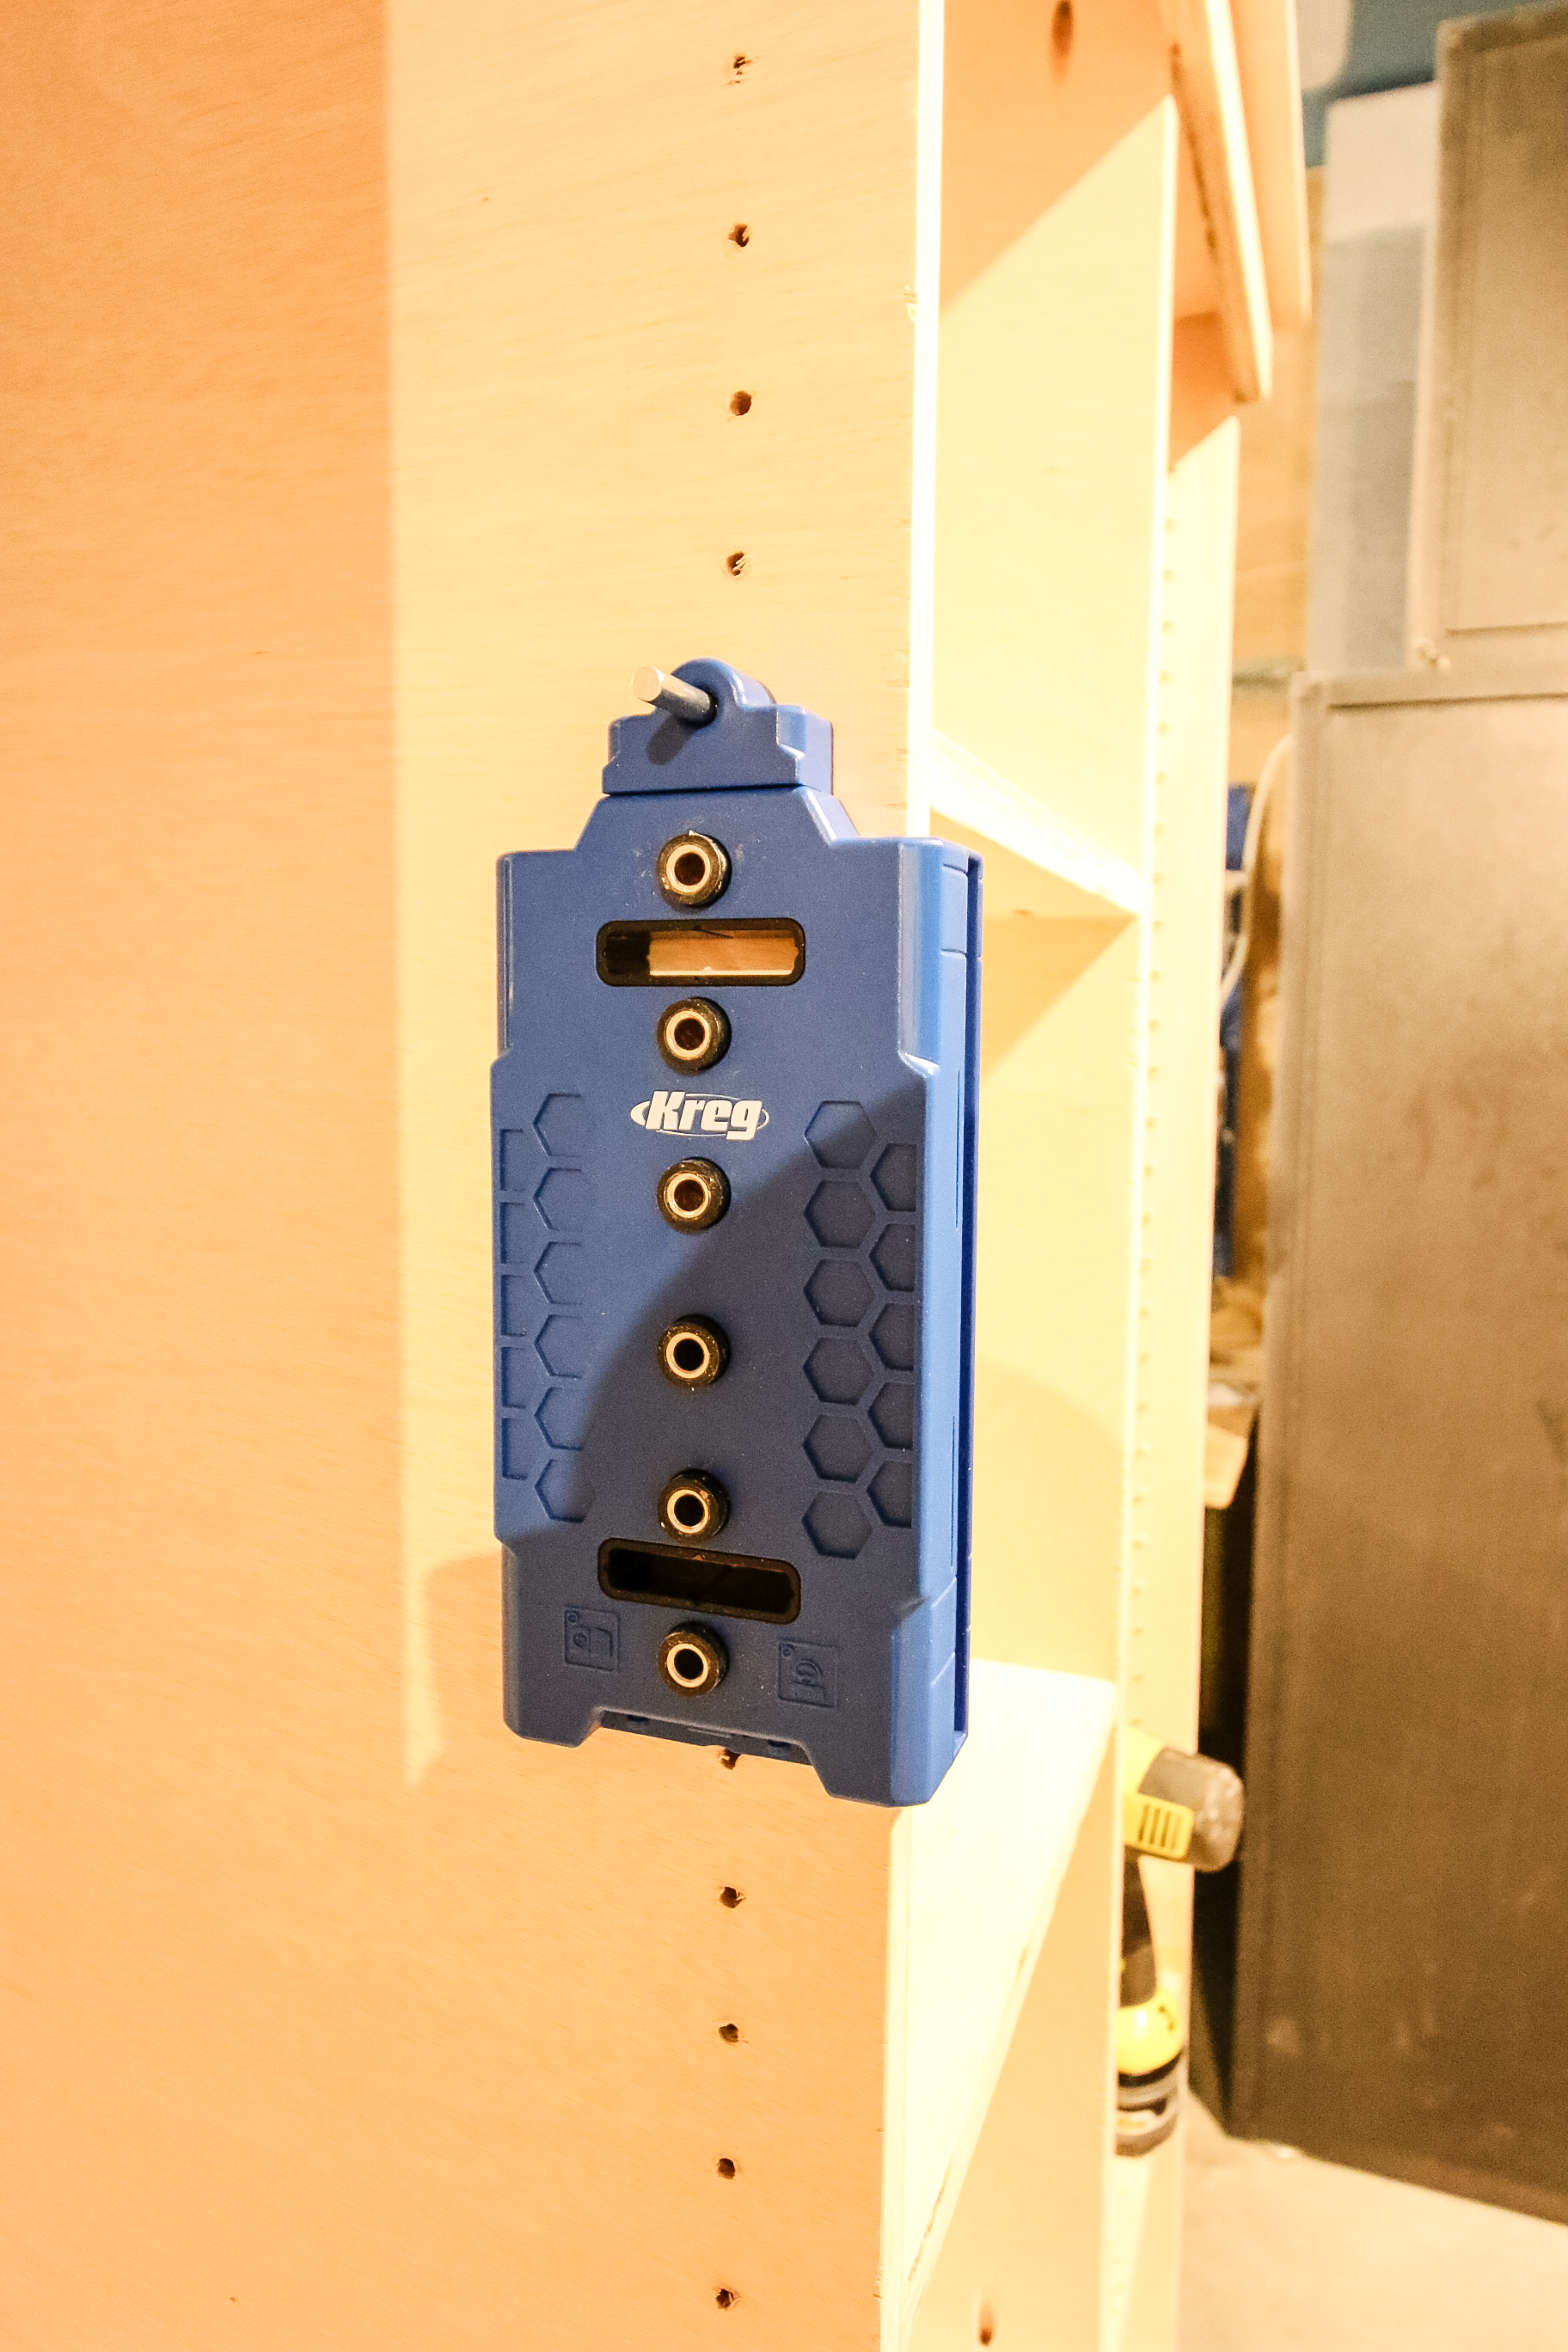
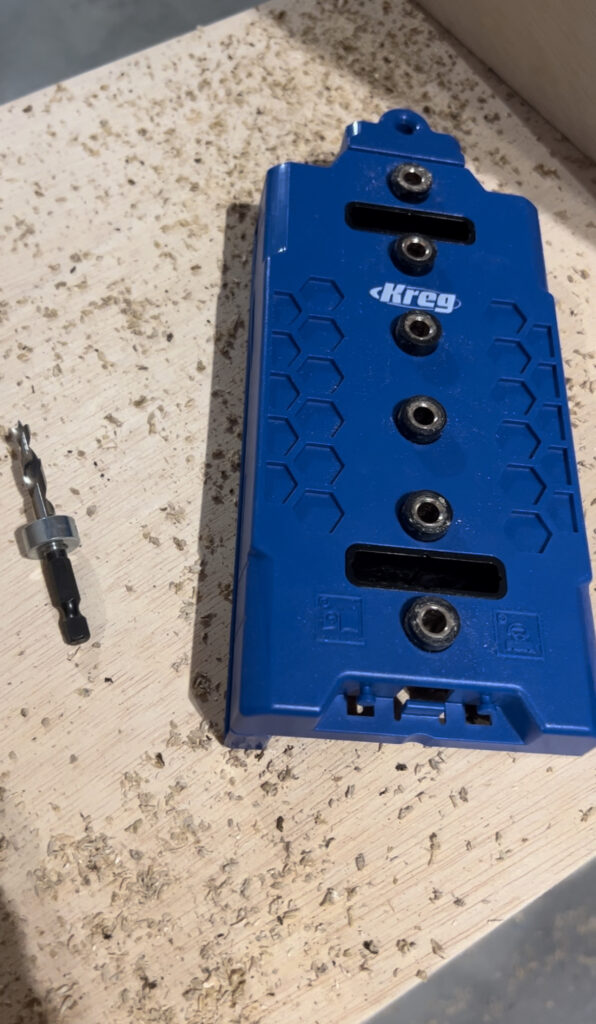
- Jig body- the main part of the Kreg Shelf Pin Jig is the body of the jig itself. It features 6 hardened steel drill guides that are centered for perfectly even hole spacing.
- Reversible fence- the fence slides in and out of both sides of the jig body so you can swap between sides of your workpiece. The fence holds onto the outside of the box casing so that the holes are always the same distance in from the edge.
- Drill bit- The drill bit for the shelf pin jig comes with a stop collar so that each hole is perfectly drill the same depth.
- Locating pin- The locating pin comes in handy after you reach the bottom of the jig. After you unclamp the jig, you slide the pin through the top of the jig and into the last hole you drilled and continue on.
Read all about another great Kreg product- the 720 Pro Pocket Hole Jig!
How do you use a shelf pin drilling jig
Using the Kreg Shelf Pin Jig is a super easy way to get level, wobble-free shelves in your project. Here's how to use the Kreg Shelf Pin Jig.
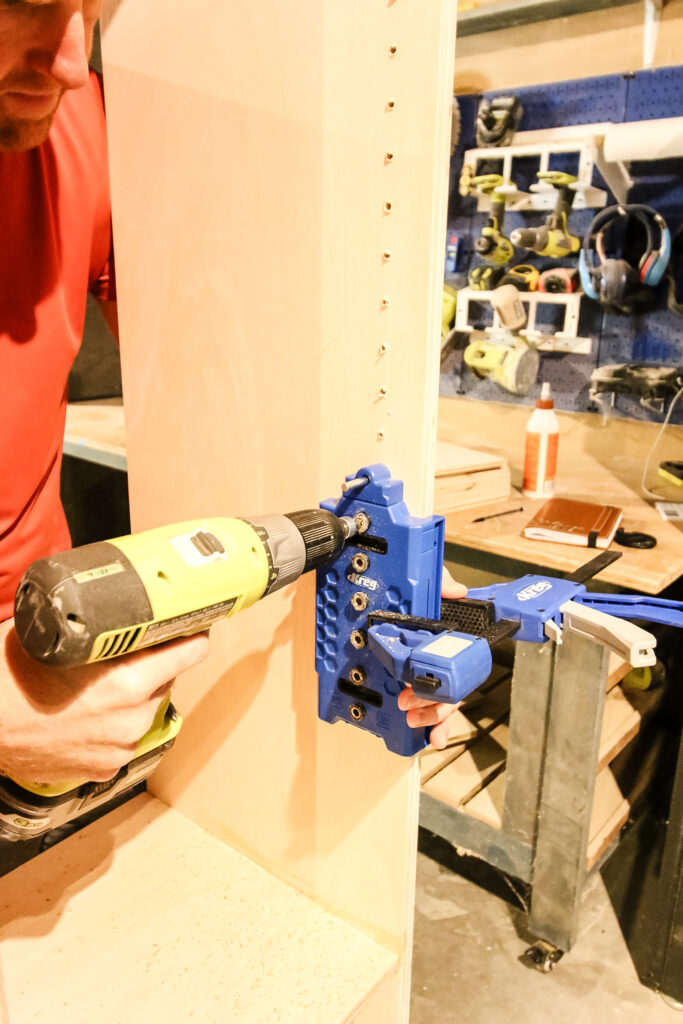
Step one: Align fence and clamp
Start out by attaching the fence to the side of your jig. It slides up and in on either side.
The fence should align with the outside of your cabinet or bookshelf and sit on the face frame.
Place the top of the jig at the top of your workpiece and the fence on the front edge of the box. Then, use a clamp to hold it in place without blocking any of the holes.
If you happen to have two jigs, you can attach them together here and allow you to drill more holes without moving the jig, but I don't really see the need for that.
Step two: Drill pin holes
Now, it's time to drill the first set of pin holes. Use the included drill bit and stop collar to drill into each of the holes on the jig.
If you're using the 5mm jig, you'll have a 5mm drill bit. If you're using the ¼" jig, you'll have a ¼" drill bit.
Either way, you'll have a standard hole size throughout the project and you'll just want to make sure not to combine the jigs on any one project.
Step three: Move shelf pin jig
Once you've drilled all six holes, unclamp the jig from the workpiece.
Next, slide in the locating pin to the top hole on the jig (not the top drilling hole, but the hole at the very top) and push it through, hanging it on the bottom hole you just drilled.
Clamp the jig on and continue this process until you reach the bottom.
Step four: Switch fence and repeat
Next, switch the fence to the other side of the jig and move to the other side of your cabinet or bookcase.
Continue the same process all the way down on this side.
Then, do this again on the back of the project, creating four sets of perfectly aligned holes all the way down on all sides.
Step five: Insert shelf pins
Finally, insert your shelf pins. Again, remember that you should only use 5mm shelf pins if you have the 5mm jig, and you should use ¼" shelf pins if you have the ¼" jig.
The shelf pins may be a little tight to slide in the first time, but wiggle them a bit and you'll get them in.
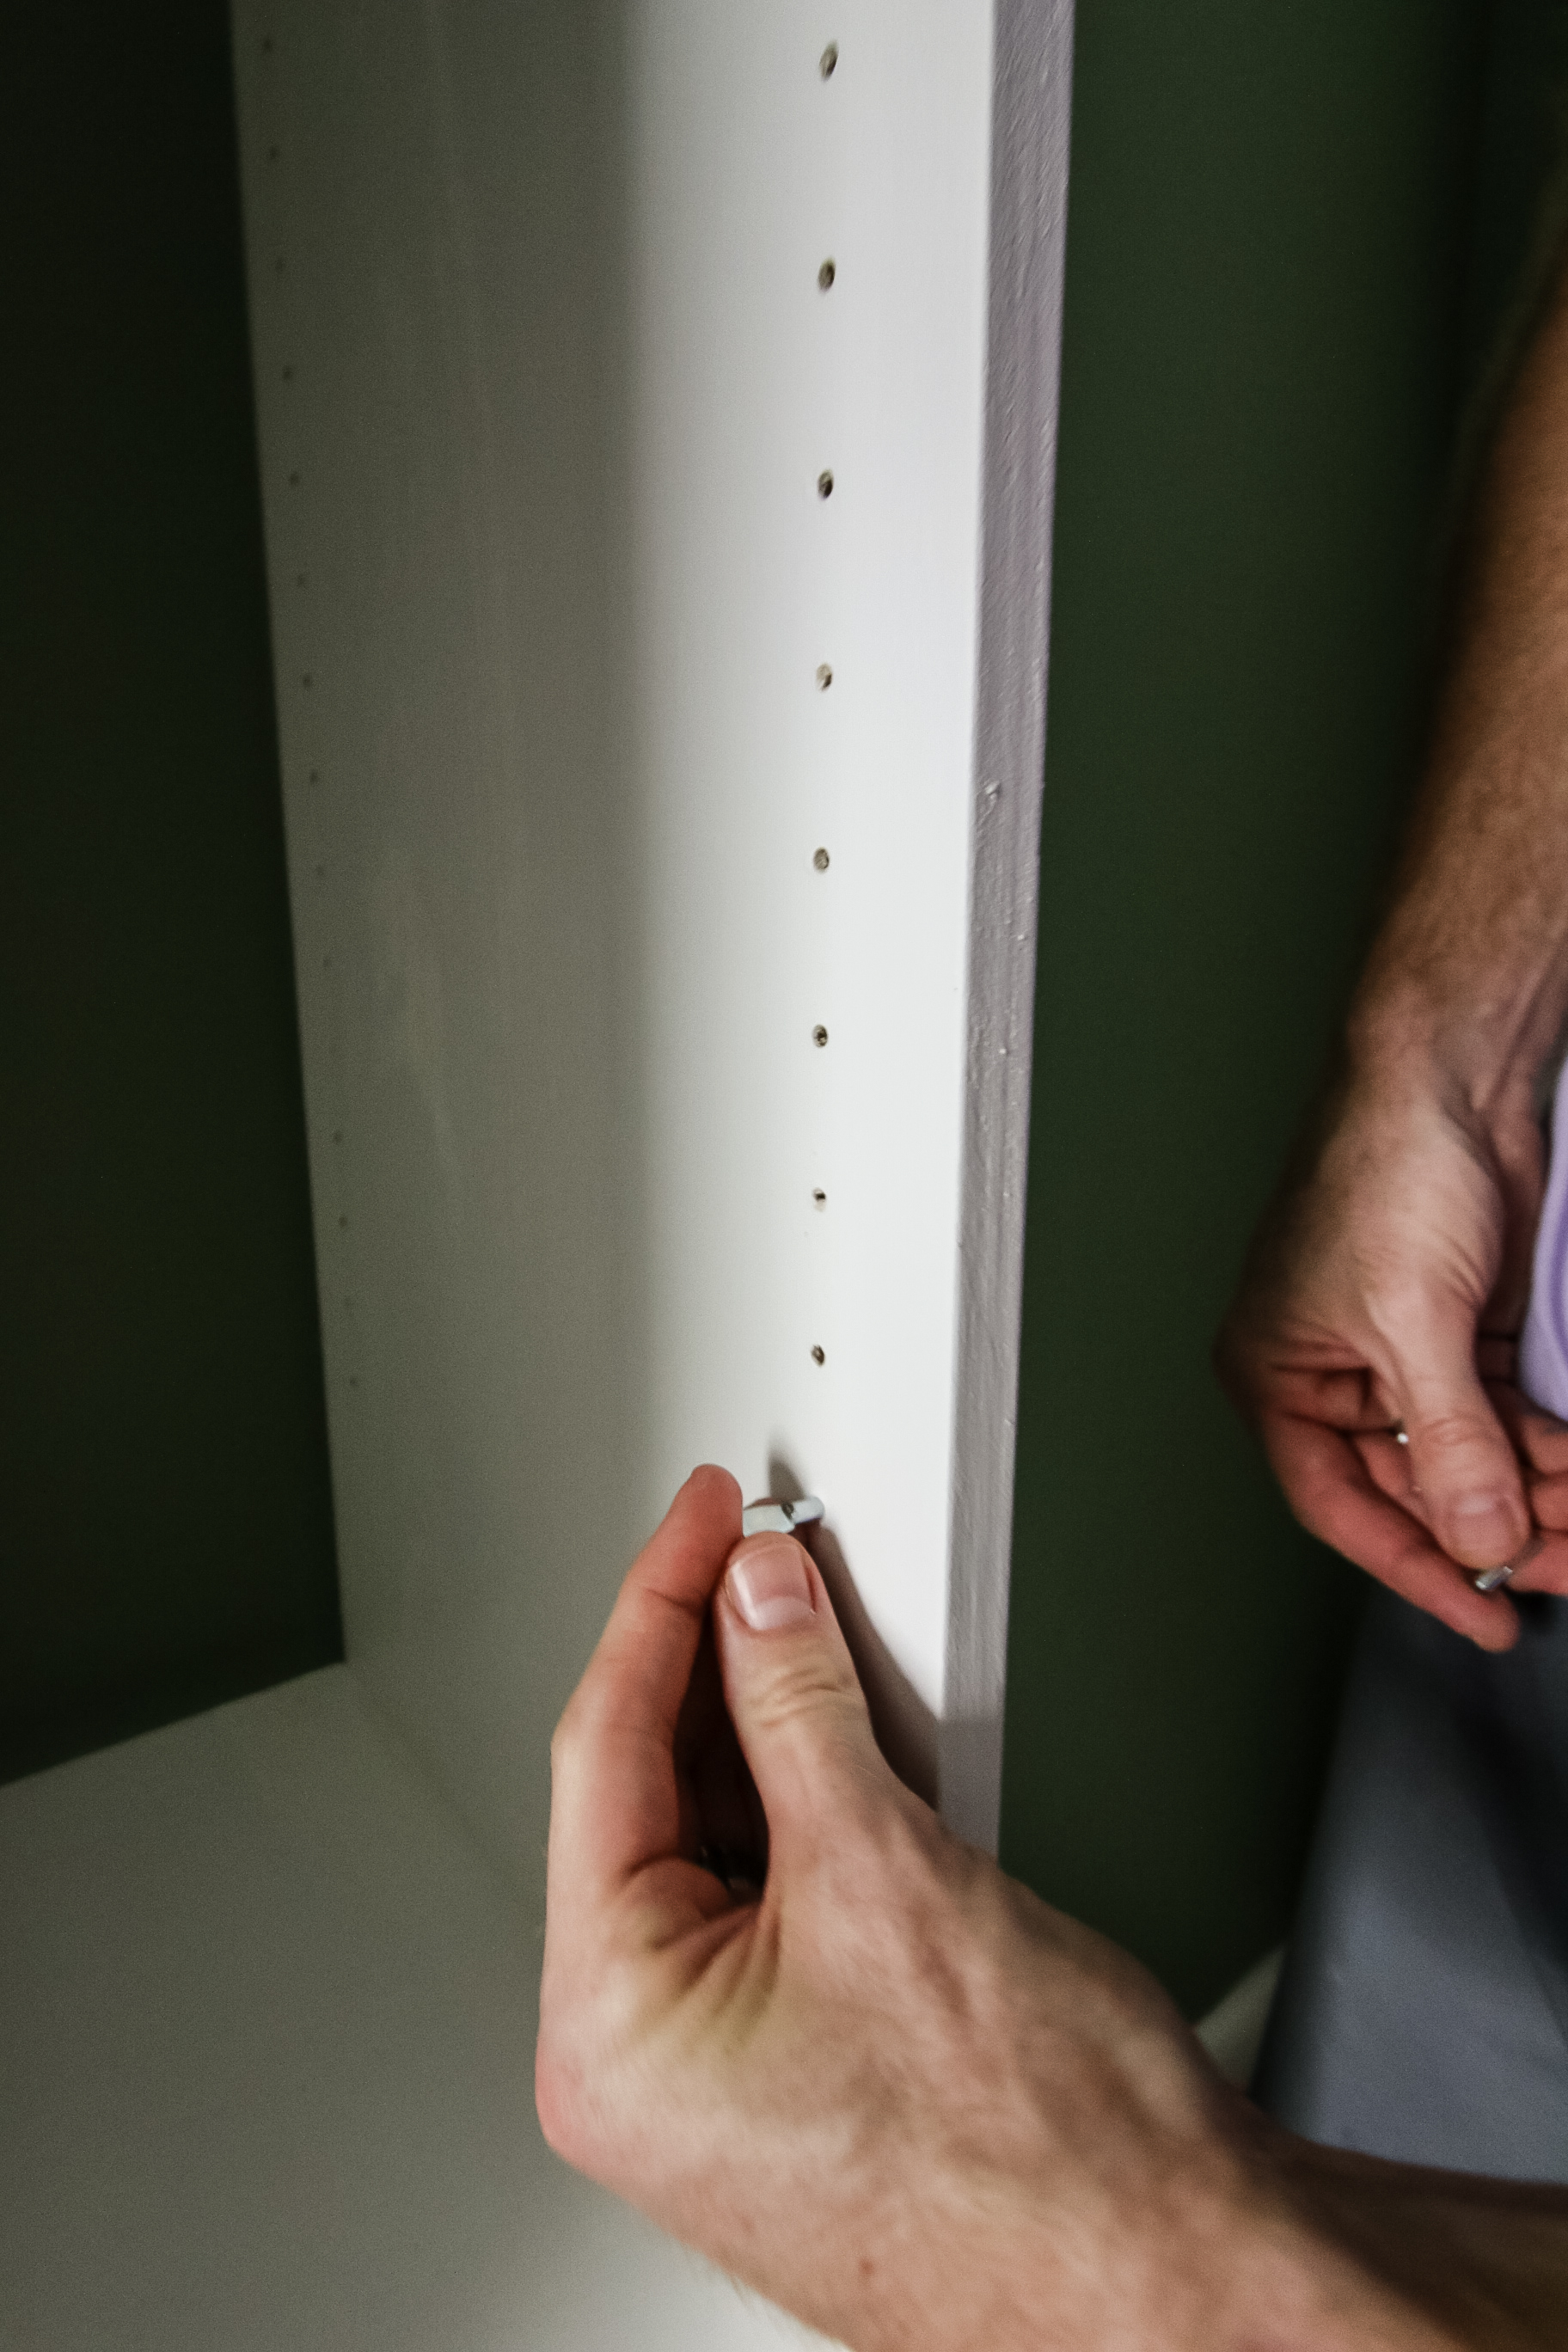
Insert one shelf pin in each row of holes, making sure you do it on the same level all the way around.
Finally, set your shelf on top of the shelf pins.
If you need to adjust the height of the shelf, simply take the shelf off, slide the pins out, and move them to a new position.

What is the best jig for shelf pin holes?
The Kreg Shelf Pin Jig is our choice for the best overall shelf pin jig. Its ability to clamp onto itself and work repeatedly with complete accuracy makes it the best.
However, you need to determine which Kreg Shelf Pin Jig works for you. Kreg offers both a 5mm Shelf Pin Jig and ¼" Shelf Pin Jig.
What's the difference between the Kreg 5mm and ¼" shelf pin jigs? Honestly, besides the slight difference in hole size, I can't figure out what the difference is.
The 32mm spacing for shelf pins is the same on both jigs between holes and the functionality of both are the same. The most important thing to do is make sure you are ordering the correct size shelf pins to fit with the jig you have.
If you have a 5mm shelf pin jig, you'll need the 5mm shelf pins. If you have a ¼" shelf pin jig, you'll need the ¼" shelf pins. Other than that, they are the same.
Before you go...
There's a lot to know about Kreg jigs and cutting solutions. Make sure you take a quick look at them all here!
Interested in the Kreg Jig? Click here to read our full Kreg Jig review and to see all of our Kreg Jig projects.
New to the Kreg Jig? Here is a step by step guide on how to use a Kreg Jig!
OR grab our FREE Kreg Jig Cheat Sheet here! Download the cheat sheet!

Looking for something?
We've been doing this since 2012 so we have a LOT of blog posts!
Search stuff like: Ceiling Projects | DIY Plant Stands | Thrift Flips

Hey there, I'm Sean, the woodworking enthusiast and builder behind CharlestonCrafted.com! Since 2012, I've been sharing the magic of turning raw materials into beautiful creations. I love teaching others the art and satisfaction of woodworking and DIY. I try to inspire fellow crafters to make something extraordinary out of nothing at all.


