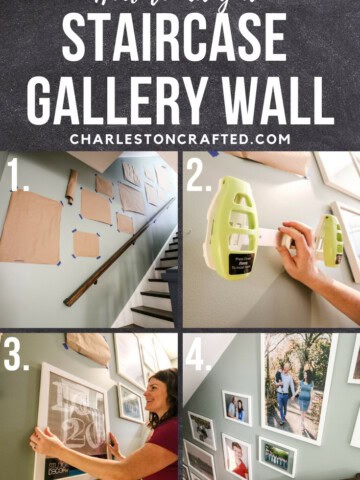
Want to hang a modern staircase gallery wall? Here is a complete guide on how to hang pictures up the stairs easily using a Level Art Tool.
This post was sponsored by National Hardware, a supplier of home hardware products to make your life easier. All opinions are our own. Thank you for supporting the brands that make Charleston Crafted possible!
We technically finished our downstairs living room makeover, and as a part of that we painted the stairway and the wall at the top of the stairs.
However, I've been staring at our stairs for a while and felt like the space was feeling blah.
I tried painting the balusters (jury's still out on whether that was a flop or not, though it only took about 30 minutes and some paint left over from the fireplace).
And we replaced the outdated silver handrail brackets with modern black ones from National Hardware just the other day.
But, I decided that the actual wall was feeling boring and black. So, I decided to hang some pictures down the stairway to give the space a dramatic and personalized look.
We had a gallery wall up the stairs in our old house and I really loved the look.
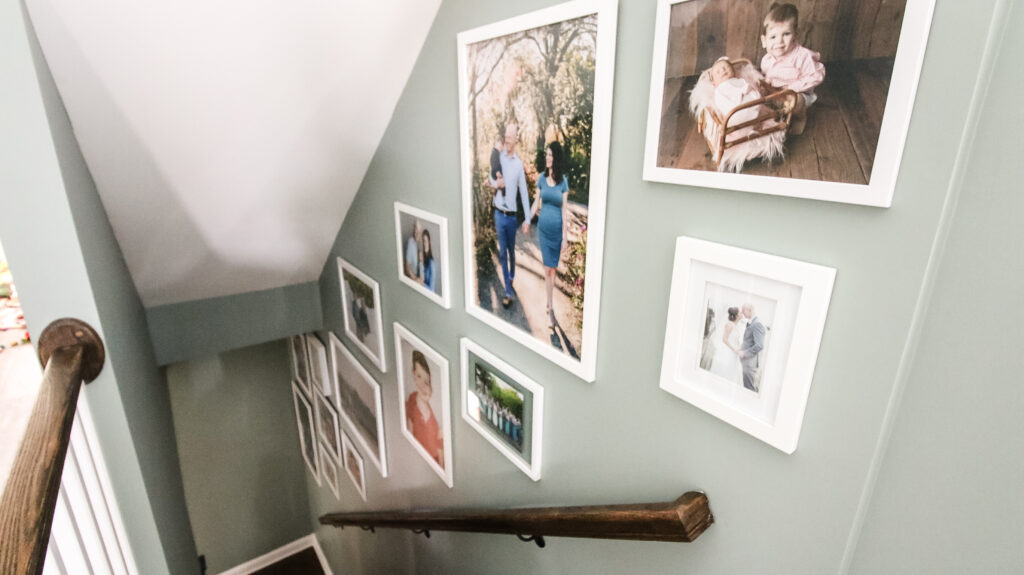
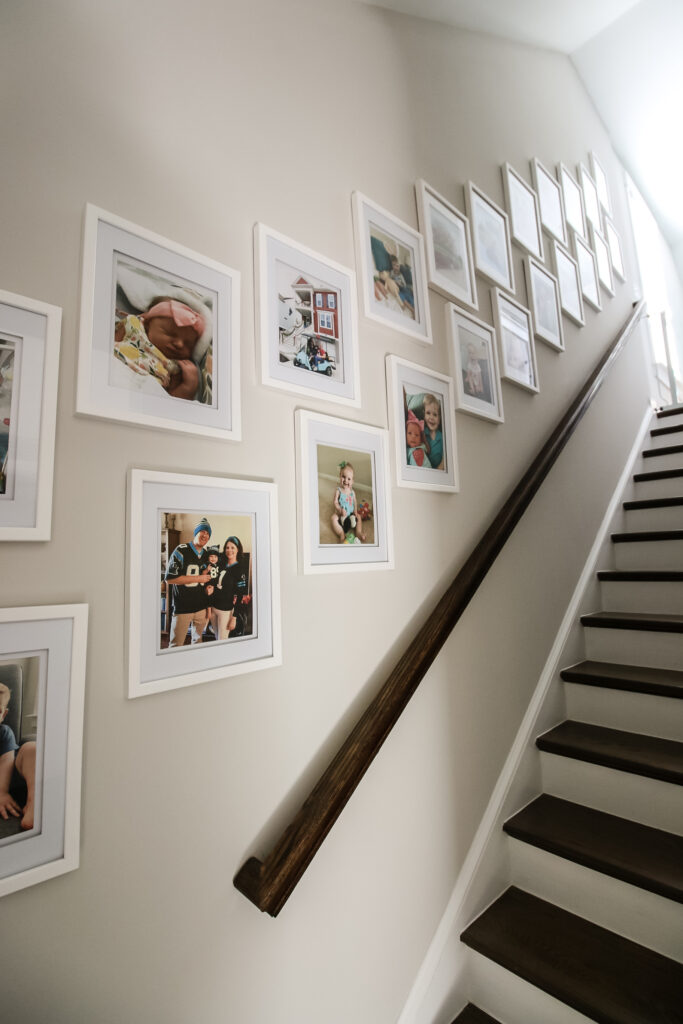
This time, however, I decided that I wanted to focus on a simpler look - with larger frames that are all white and squared off for a more modern look.
Anyways, let's talk about how to do a gallery wall on a staircase and give you a look at our new stairwell look!
How to choose art and frames for a staircase photo wall
The first thing that you should do when designing a gallery staircase is to choose the art and the frames that you want to feature.
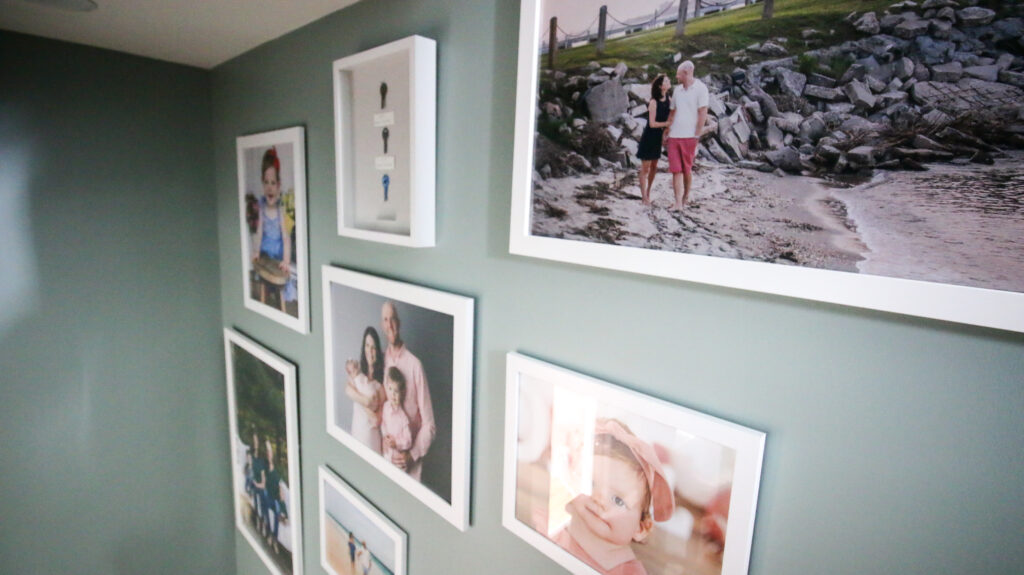
As I mentioned, I decided that I wanted all white frames, nothing ornate but frames with flat white sides.
This is similar to the style of frames I've used (in both white and light wood tones) in other parts of the house and is the look we are currently going for.
When choosing frames, pick hanging frames that are cohesive. They can be all black frames for a modern look, all shades of wood, or even different colors - just look for similar lines in different colored frames.
If you have a gallery wall of multi-colored, different style frames it can look really non-cohesive.
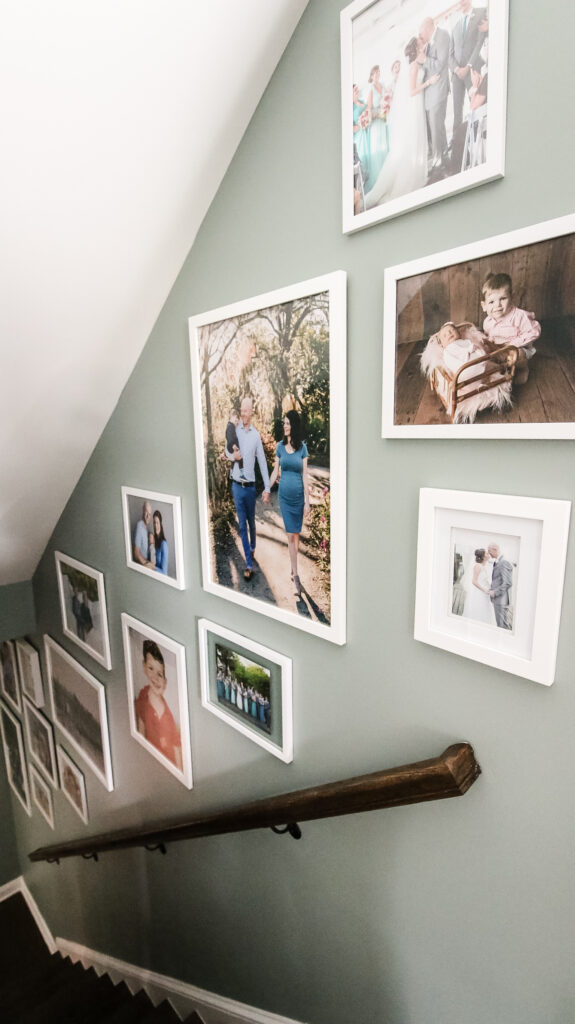
For art, I wanted to feature family photos. We have been getting professional photos taken of the kids a few times a year. We have a neighbor who has a studio in her home and does seasonal "mini photo shoots" for a very affordable price and takes beautiful pictures.
So, I was really excited to show off some of those photos.
I personally prefer to keep gallery walls to one type of thing - so all photos, or all black and white photos, all art, or all collectables. This helps your wall decor feel more cohesive.
You can also do a really powerful gallery wall with just art prints or framed memories from trips or travels. I love the look of an eclectic, collected gallery wall - it's just not what I was going for this time.
With the frames and art in mind, it was time to design the gallery wall.
How to design a staircase gallery wall layout
Designing a gallery wall layout up stairs is a little bit trickier than designing a regular gallery wall layout. But, there are two main options.
Organic
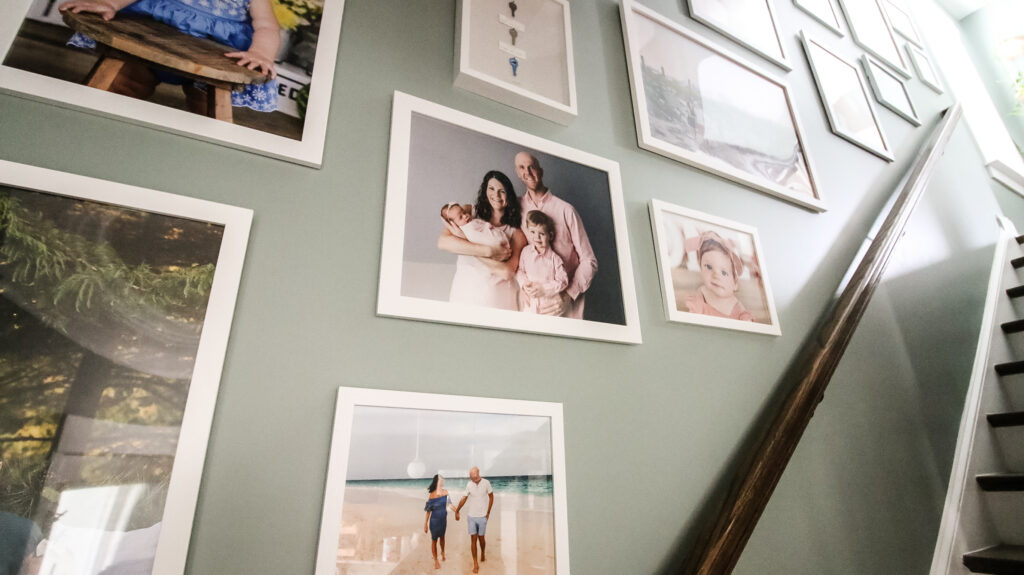
Organic is a nice way of saying "random." Though, it's not really random. Even if frames are spaced without precise measurements, you'll still want to make sure to have cohesive spacing between the frames for a balanced look.
Also, be sure to have a mixture of vertical and horizontal frames for best results.
Symmetrical
Symmetrical gallery walls are more measured and precise with your layouts. This can look really beautiful, for example, if you have a lot of the exact same frame and want them lined up neatly up the wall.
Here's our tutorial for how to build a corner gallery wall!
This is the look that we went for with our other stairway (from the 2nd to 3rd floor of this house). It's a great look too!
How much space should you put between frames in a gallery wall?
One of the biggest decisions when setting your layout for your staircase gallery wall is the spacing in between frames. 2-3" inches is the standard gap - but that depends on the size of the frames. Larger frames can handle a larger gap!
How to arrange photos on staircase walls
Once you have chosen your frames and art and decided if you want an organic or symmetrical layout, it's time to arrange your frames.
There are two methods for doing this!
Lay out the frames on the floor
My favorite way to lay out a gallery wall in general is to lay the frames out on the floor right in front of the wall where they will hang. Re-arrange them in place until you are happy with the layout.
Unfortunately, this doesn't work well for stairwells - unless you are just hanging 3-5 extra large frames.
That's because you can't really lay out frames on the actual stairs and on flat ground it's hard to replicate the slanted space of a staircase wall.
Lay out the frames on the wall with paper
For a staircase, I suggest tracing your frames onto paper, cutting them out, and hanging them on the wall with painter's tape (or other removable tape) to decide your layout.
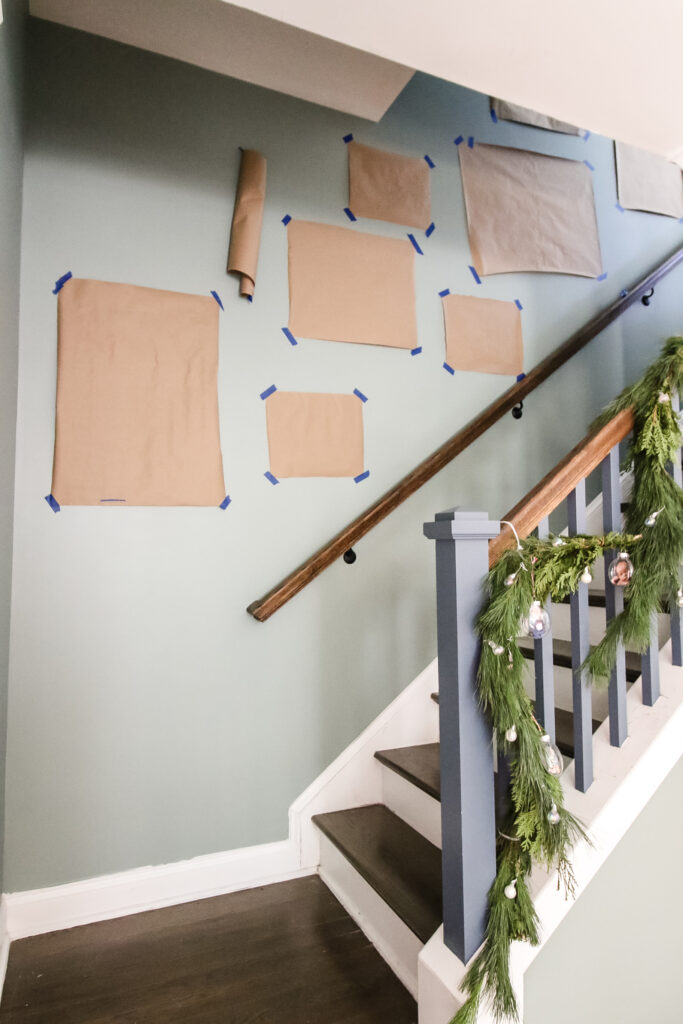
Yes, this is annoying. Yes, it's a waste of paper (use something from the recycling bin to cut down on waste!).
But, it really is the best way to hang art on a stairwell and get the layout right the first time.
How to hang a stairway gallery wall
Once your layout is designed, it's finally time to hang a gallery wall on the stairs! I know, it was a lot of build up - but all that prep work makes this step easy!
Materials + tools needed to hang a staircase gallery wall
- Frames or art of choice
- Measuring tape
- Pencil
- Level Art Tool + nails
- Hammer + hanging hardware
Steps to hang a staircase picture wall
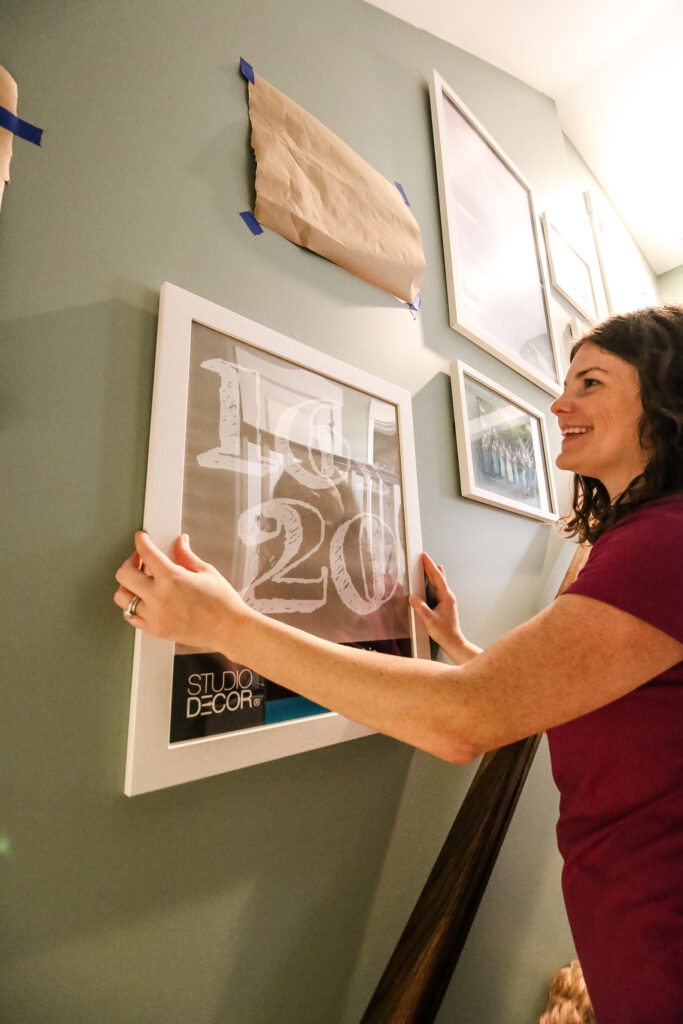
STEP 1: Mark your first frame
Start at the bottom of the stairs. Remove your paper taped to the wall. Hold the frame up in place and mark where the hangers or hooks are on the wall using a pencil.
STEP 2: Hang your first frame
Use the Level Art Tool or a hammer and hanging hardware to hang nails in the marked spots
STEP 3: Hang the frame on the hardware
Hang your frame on the hardware to ensure it's level and you're happy with it.

STEP 4: Repeat
Repeat for each additional frame, working your way up the stairs. If you need a ladder, have someone spot you for safety on the stairs.
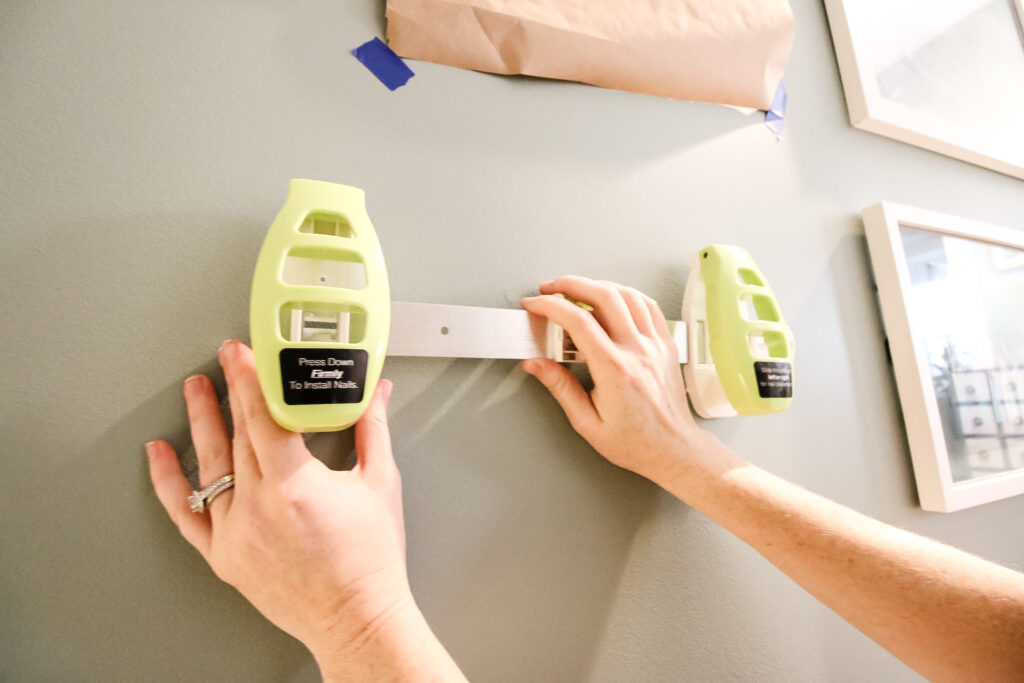
How to use a Level Art Tool to hang art
We hung our frames easily using National Hardware's Level Art Tool.
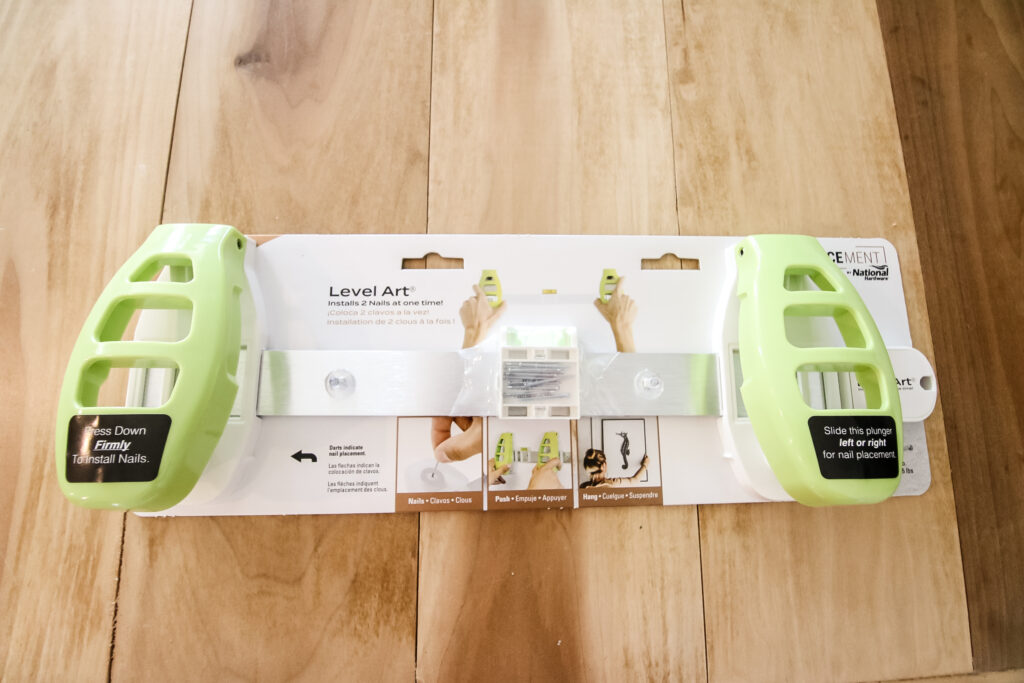
This is a really cool tool that is designed to quickly hang 2 nails at a level distance apart - without a hammer!
It also includes a level to be sure the nails are straight and a magnetic spot to hold your nails as you get set up.
To use the level art tool:
- Measure the distance between the 2 hooks on the back of your frame
- Adjust the sliding pieces on the Level Art Tool to be that distance apart
- Insert nails, head first, into the holes on the back of the tool
- Hold the tool up to the wall. Line the holes (where you just inserted the nails) up with your pencil marks on the wall.
- Adjust the tool so the level bubble is in between the two lines.
- Press each button to push the nails into the wall.
- Remove the tool from the wall. The nails will stay!
- Hang your art on the nails.
I don't know what I expected with this tool but it is super cool! I love that you don't have to juggle a level and a tape measure and a hammer - it's an all in one piece!
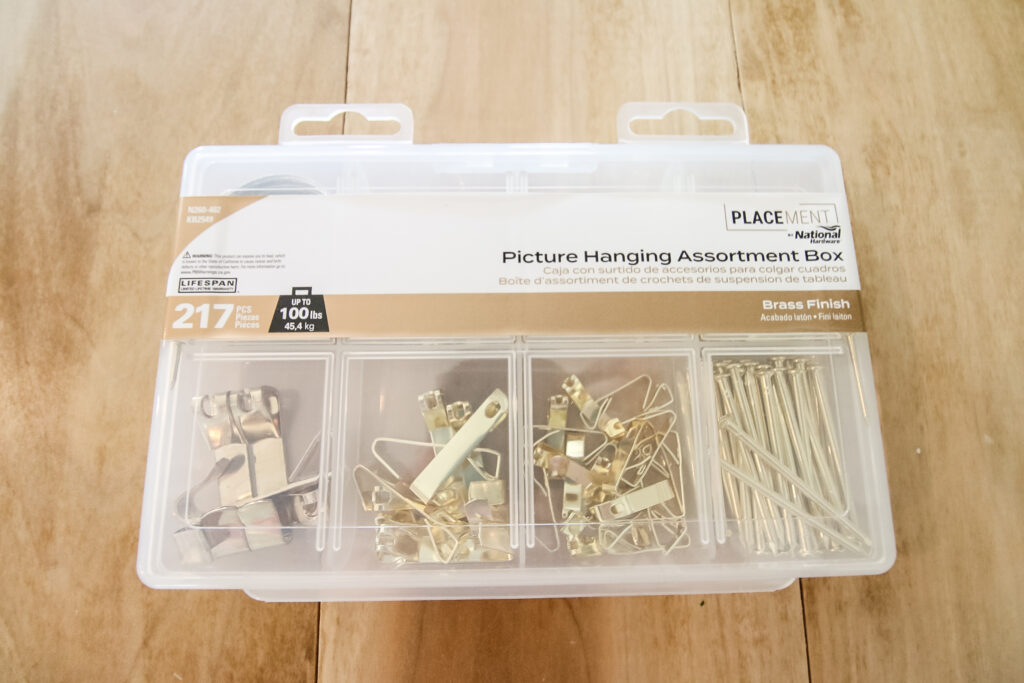
This tool doesn't work for frames with only one hook on the back - well, it works but the level is less useful. Then I used this hanging hardware for single-hook frames!

Have you hung family photos on a staircase? I'd love to see it!

Looking for something?
We've been doing this since 2012 so we have a LOT of blog posts!
Search stuff like: Ceiling Projects | DIY Plant Stands | Thrift Flips

Hello, I'm Morgan, half of the creative force behind CharlestonCrafted.com! With a passion for DIY that dates back to 2012, I've transformed three homes and now I'm dedicated to helping others craft their dream spaces. Let's turn your house into a home together!