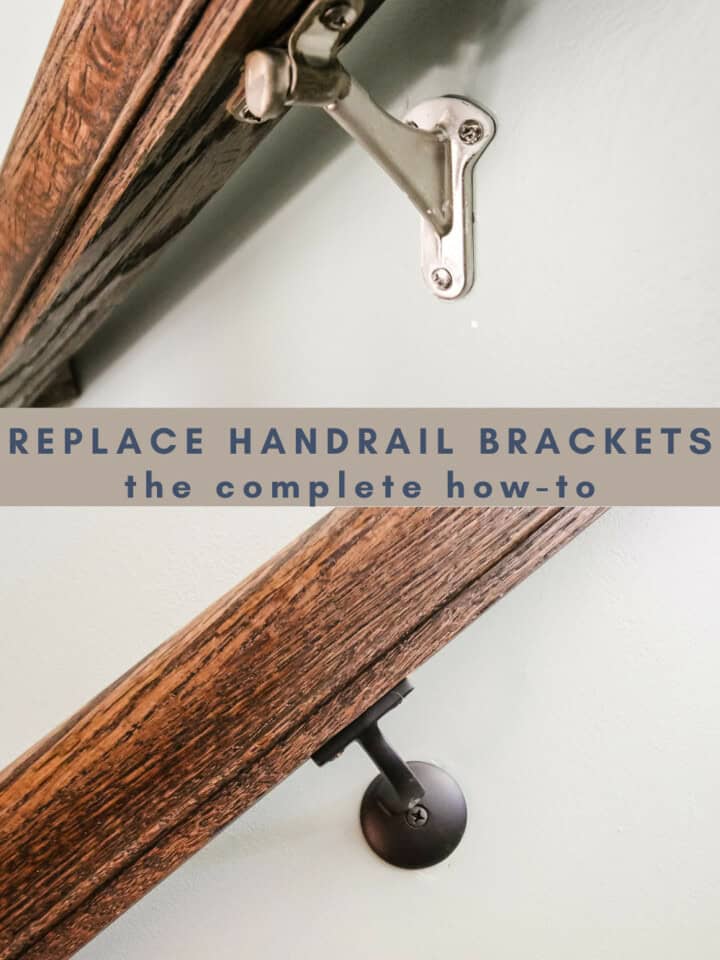
Are you looking to replace your handrail brackets on the stairs? It's a simple project that anyone can do. Whether you need to replace handrail brackets for style or functionality, here's how to do it!
This post was sponsored by National Hardware, a supplier of home hardware products to make your life easier. All opinions are our own. Thank you for supporting the brands that make Charleston Crafted possible!
There are probably 50 little things in your house that if you changed them, you would notice a huge difference. Small little changes can really add up to modernize your home when all brought together.
Some of those elements you might not even think about. One of those things is your handrail brackets.
Did you know that updating the brackets that hold your stair handrail to the wall is an easy swap that can make a huge difference?
When we painted our living room a few months ago, we also took that same color up the stairs to have continuity when you looked around the room. After doing that, our old stair rail brackets looked extremely dated and we also noticed they were covered in paint - not from us.
That's right. Instead of painting the wall and then installing the hand rail, the builders of this house painted AFTER putting on the railing and didn't take it off. So, our brackets were outdated and covered in the old wall color. Yikes.
We decided to install handrail brackets that were modern and sleek and would match the style of our room a little better. This is a low cost, low skill update that can make a big impact!
This post will show you how to add modern handrail brackets to an existing stair rail in just an afternoon!
How to change handrail brackets
Knowing how to update a handrail with new modern brackets is a simple project that can make a big difference.
The important thing with this DIY project is to make sure that you are maintaining the proper spacing of the handrail brackets and keeping them mounted into wall studs.
A properly mounted handrail is imperative when using stairs to ensure you and your family don't have any accidents.
We'll talk about how to update a stair rail with new brackets here and get into more specifics on some things to keep in mind.
Tools needed to replace your handrail brackets
- Drill
- Ruler/measuring device of choice
- Pencil
- Spackle knife or putty knife
Steps to replace your handrail brackets
Here are the steps to replace or change out your stairway handrail brackets.
Step one: remove old handrail and handrail brackets
The first thing to do when replacing handrail brackets is to remove the old handrail from the wall.
This should be a two person job, assuming you are working in a standard size stairway.
It can be dangerous and potentially damage the wall or stair rail if you take it off alone.
Remove the screws holding the brackets in the wall, leaving one screw in the two end brackets until the end. After everything else is removed, remove these two screws and take the handrail off the wall.
Once it is off the wall, lay it on the ground and remove the old handrail brackets from the underside of the handrail.
This would also be an opportunity to change the stain color on your handrail to go for a more modern look.
In our old house, we took the hand rail off and sanded it and the fixed stair rail before staining them to give them a more modern look.

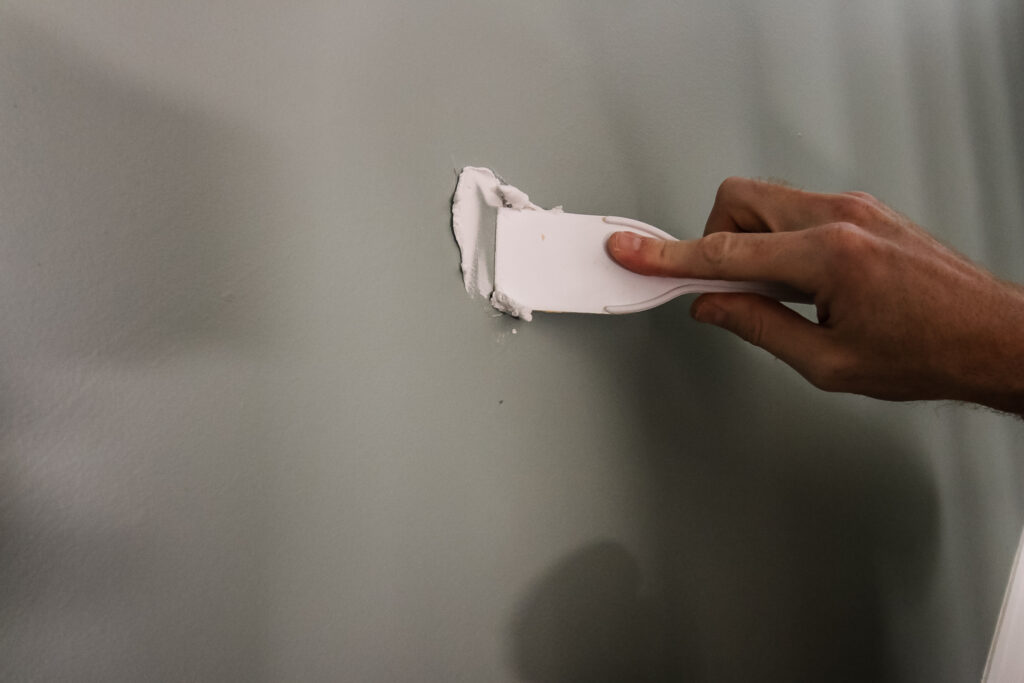
Step two: patch drywall holes from old bracket
Assuming that your new bracket doesn't have holes that line up perfectly with the holes from the old bracket, you'll need to fill and paint over the old holes.
More modern handrail brackets, like the ones we got from National Hardware for this project, might only use one hole for mounting to the wall, so you'll need to cover the old ones.
To make sure we kept the handrail in the same place as it was before, we used a ruler to mark 4" down from the center of where the old holes were.
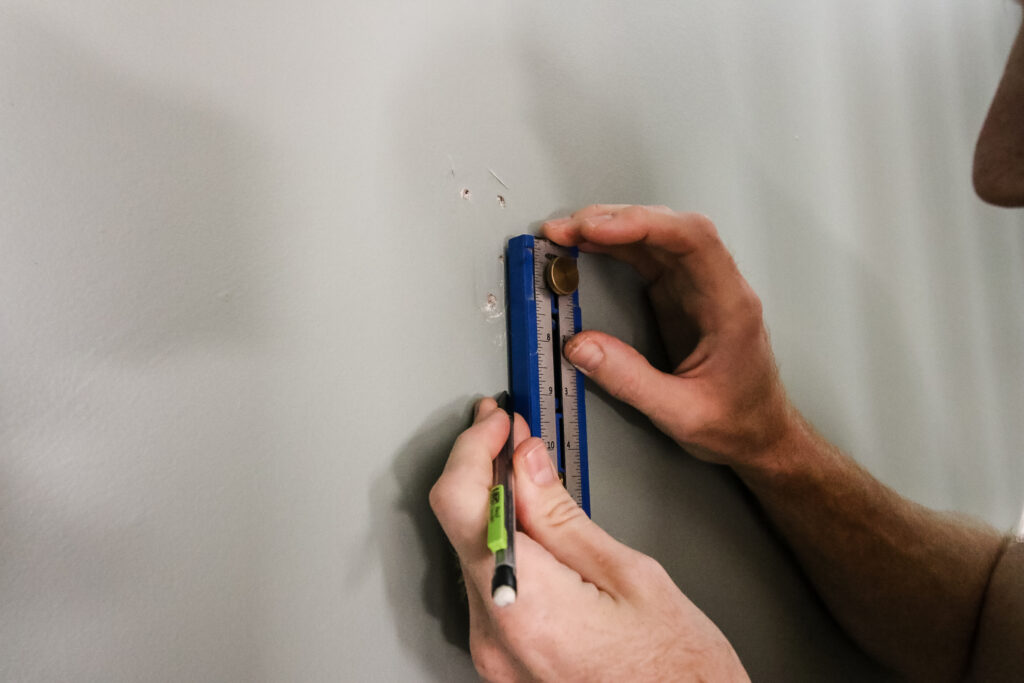
This way, we would still know the right place to rehang the handrail after we had patched and painted.
Fill the old screw holes with spackle, wait until dry, then sand and paint with the existing wall color.
While you're doing this, consider replacing the old cracked caulk on your stairs!
Step Three: swap brackets on handrail
Now it's time to put the new brackets on the old staircase railing.
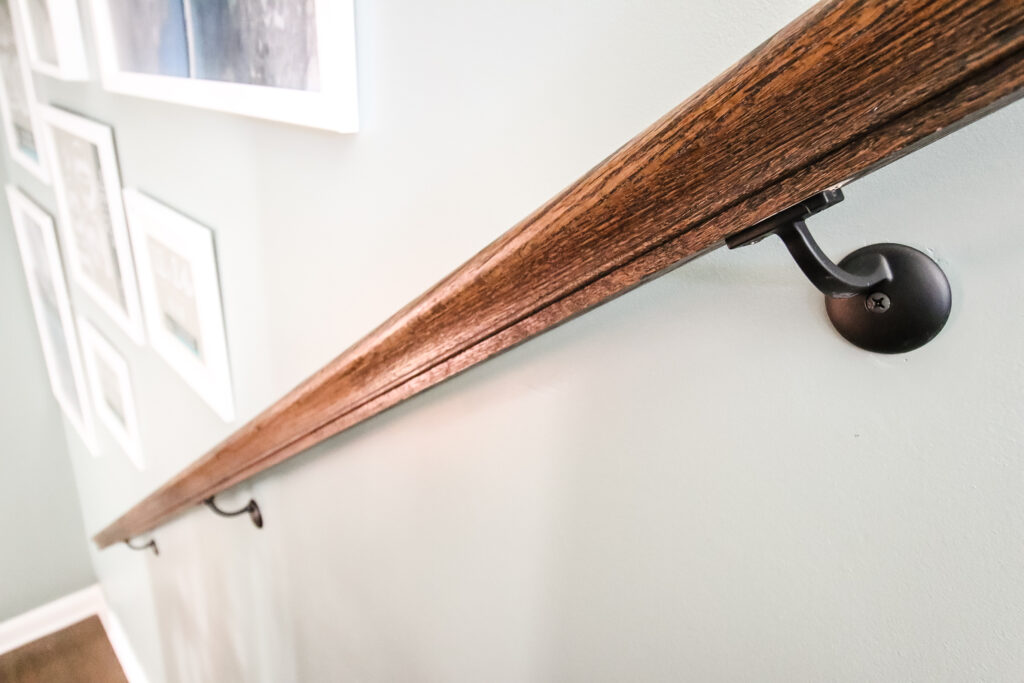
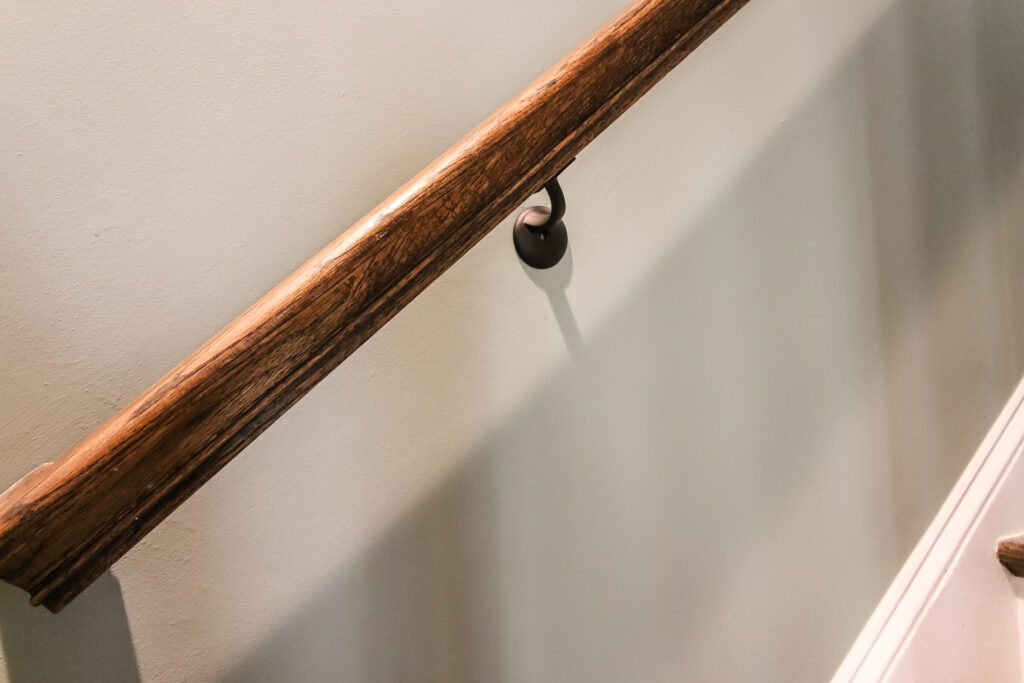
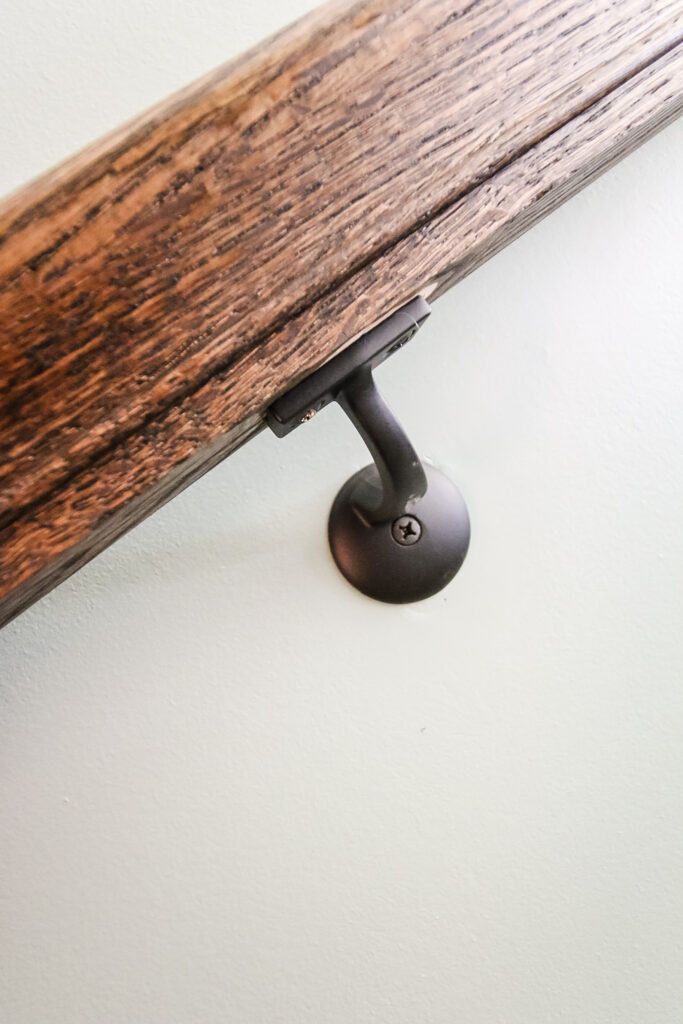
We picked up dark oil rubbed bronze modern handrail brackets from National Hardware for this project.
We loved the round look and single hole design of these brackets for going for a modern look.
There are six different colors of this bracket available from National Hardware, depending on what look you're trying to coordinate with.
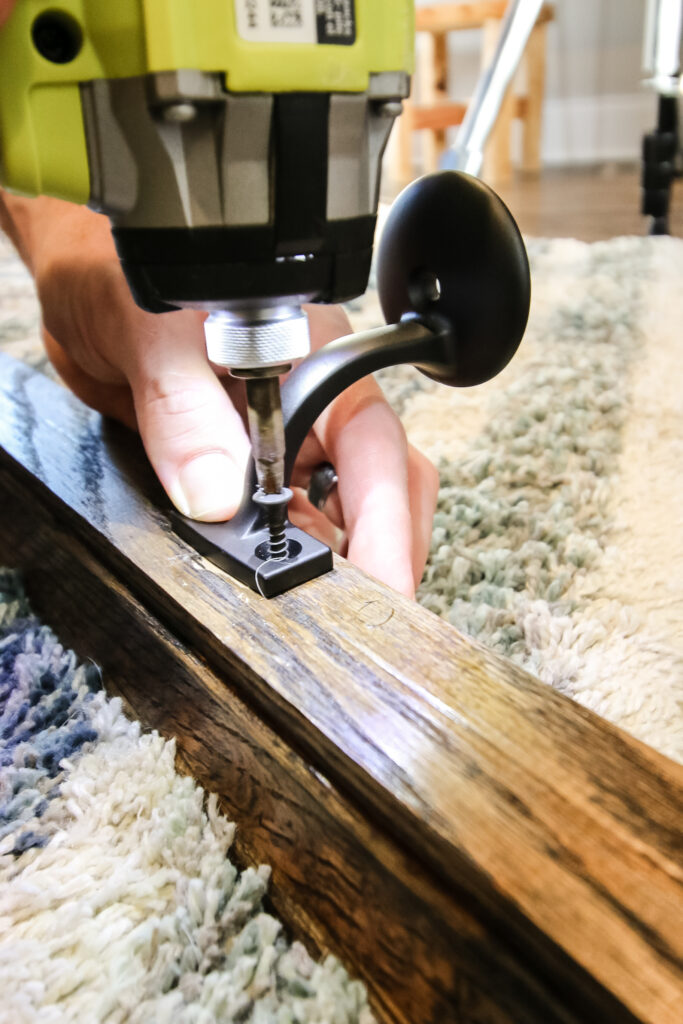
These were easy to install on the handrail because the two screw placements lined up with the existing holes. We simply screwed them into place, ensuring that the bracket faced in the correct direction.
You want to install the brackets onto the handrail first instead of the wall because you want to make sure you have the angle correct.
Attaching the bracket to the wall first might not give you the correct angle for holding up the handrail.
Step four: mark and drill holes
Once the spackle and paint are dry, it's time to mark and drill new holes on the staircase wall.
This should be easy to do if you marked the center point of the old bracket on the wall. You can simply measure back up to that point and mark your hole.
When installing the handrail brackets, do make sure that you are attaching the bracket into a wall stud and using proper handrail bracket spacing code.
Most likely, this was properly done by the builder in order to pass inspection. However, you might still want to verify.
Use a stud finder to make sure your hole will be in a stud. We love these magnetic stud finders that find the stud by magnetizing to the drywall screws in the wall.
Check the handrail bracket spacing code in your area, but most will say that your handrail brackets should be no more than 36" to 48" apart.
If the bracket placement you used in step three doesn't align with the studs, the best bet would be to adjust if possible.
If you can't find a wall stud, make sure you're using an extremely secure drywall anchor.
Mark your holes with a pencil then drill a pilot hole.
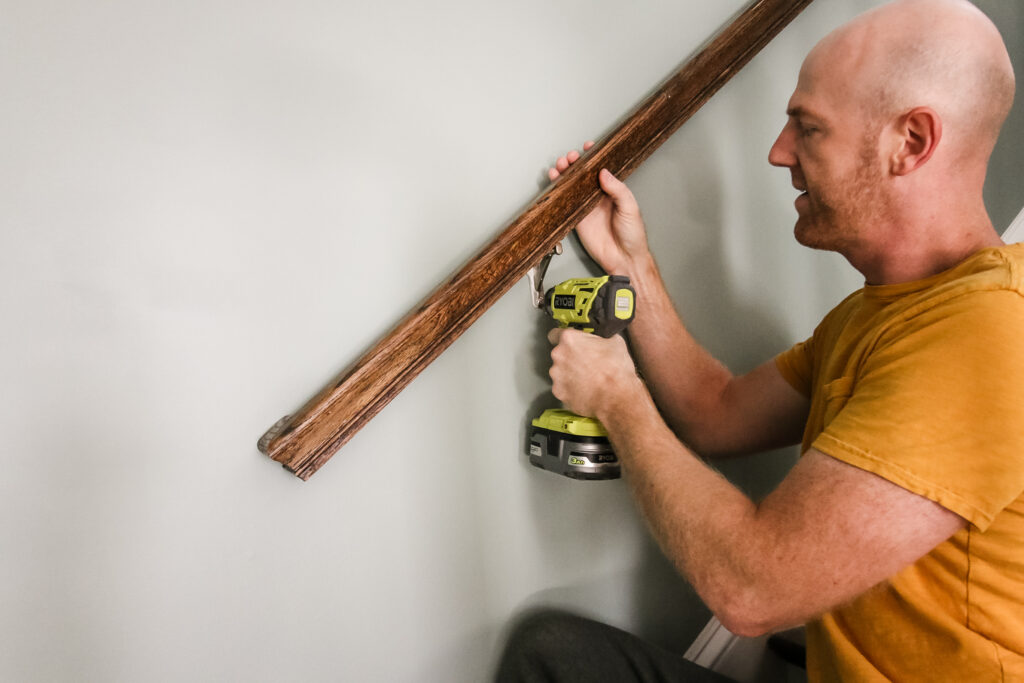
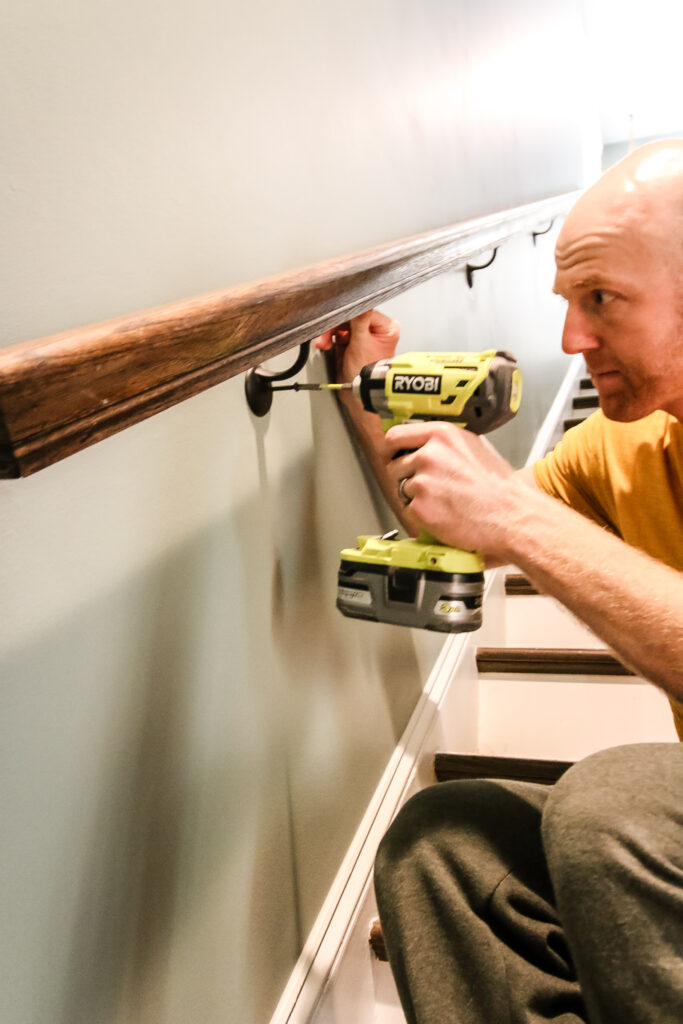
Step five: reinstall handrail
Finally, it's time to reinstall the staircase handrail. Again, this is a two person job.
One person should be holding up the top end of the railing and you on the bottom.
Screw in the bottom handrail bracket first, then move up to the top bracket and screw that in.
Finish off by filling in the remaining brackets in the middle.
How to modernize a handrail
There are several good ways to modernize a handrail in your staircase.
The first is to change out the brackets. This is an easy fix that we just described above. Replacing the brackets can change the look.
The second best way to modernize a handrail is to update or change the handrail itself.
A handrail can be updated by sanding and staining the rail to be a different color or finish, or it can be replace entirely with a different type of wood.
Replacing a handrail with a different railing is a much bigger project because you need to know the angles, length and other factors.
You can also add iron balusters to your fixed stair railing to match black hardware on the handrail for a great modern look.
How many brackets do you need for a handrail?
For a standard length staircase handrail, you'll probably need four handrail brackets.
The length from top to bottom of your handrail should determine a good number of brackets for your space.
The important thing to remember is to have handrail brackets evenly spaced and secured into a stud.

Looking for something?
We've been doing this since 2012 so we have a LOT of blog posts!
Search stuff like: Ceiling Projects | DIY Plant Stands | Thrift Flips

Hey there, I'm Sean, the woodworking enthusiast and builder behind CharlestonCrafted.com! Since 2012, I've been sharing the magic of turning raw materials into beautiful creations. I love teaching others the art and satisfaction of woodworking and DIY. I try to inspire fellow crafters to make something extraordinary out of nothing at all.