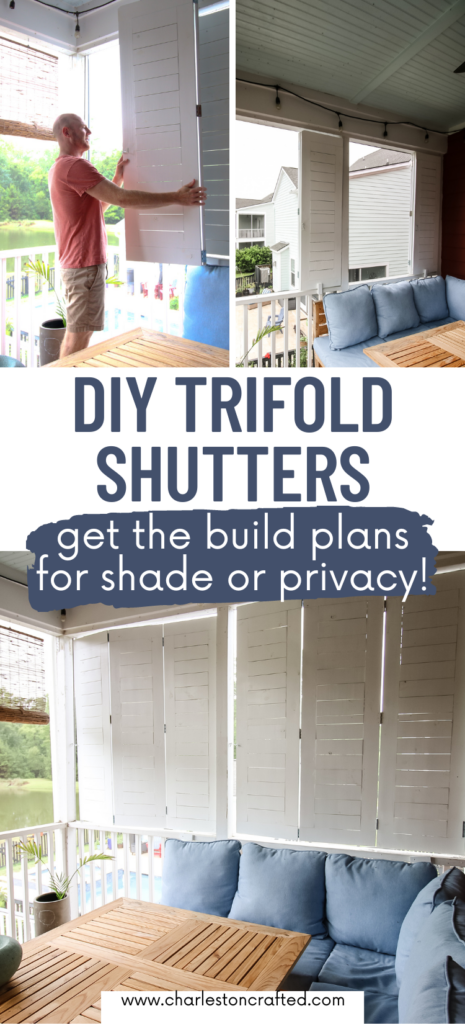
These DIY trifold shutters are a great build for blocking out the sun or creating privacy. Build them individually and connect however many you want!
This post is sponsored by Kreg Tool. All opinions are our own and our opinion is that we love Kreg Tool. Thank you for supporting the brands that make Charleston Crafted possible!
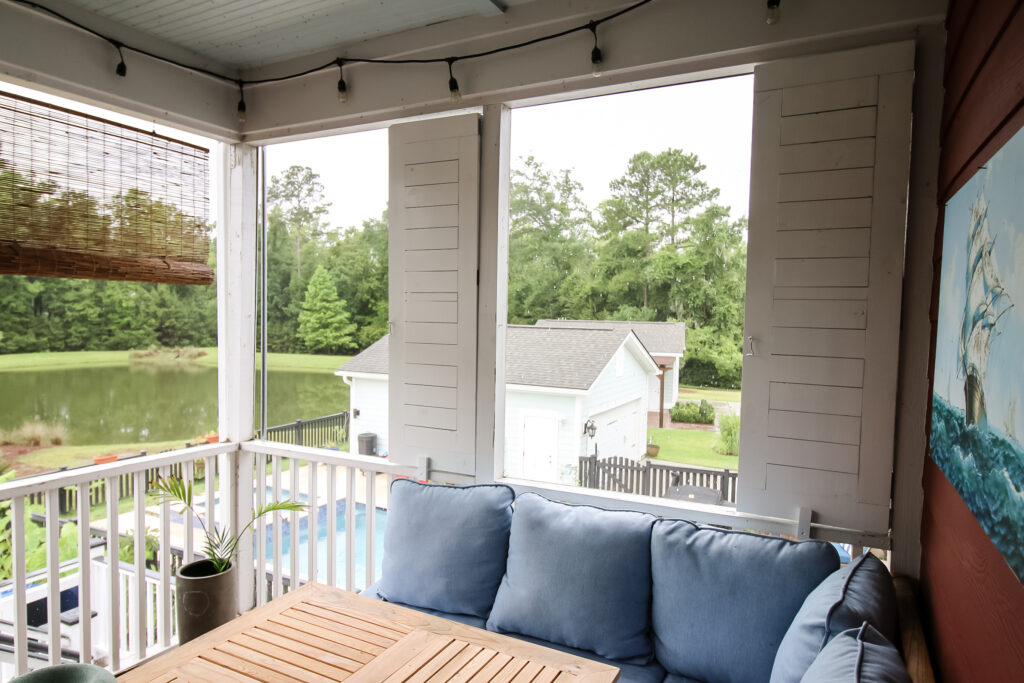
One of our favorite things about our house is our screened porch. From spring through fall, we eat a lot of meals on the screened porch overlooking the pond.
It's such a beautiful space and so much of our year has weather that allows us to eat outside at our DIY square outdoor dining table or sit outside and enjoy the view on our DIY outdoor sectional couch.
Breakfast and lunch are never a problem. However, eating dinner outside isn't possible when it's sunny outside.
The way our house is oriented means the setting sun shines directly into the side of our screened porch. In summer, that makes it impossible to eat out there for dinner because of the heat.
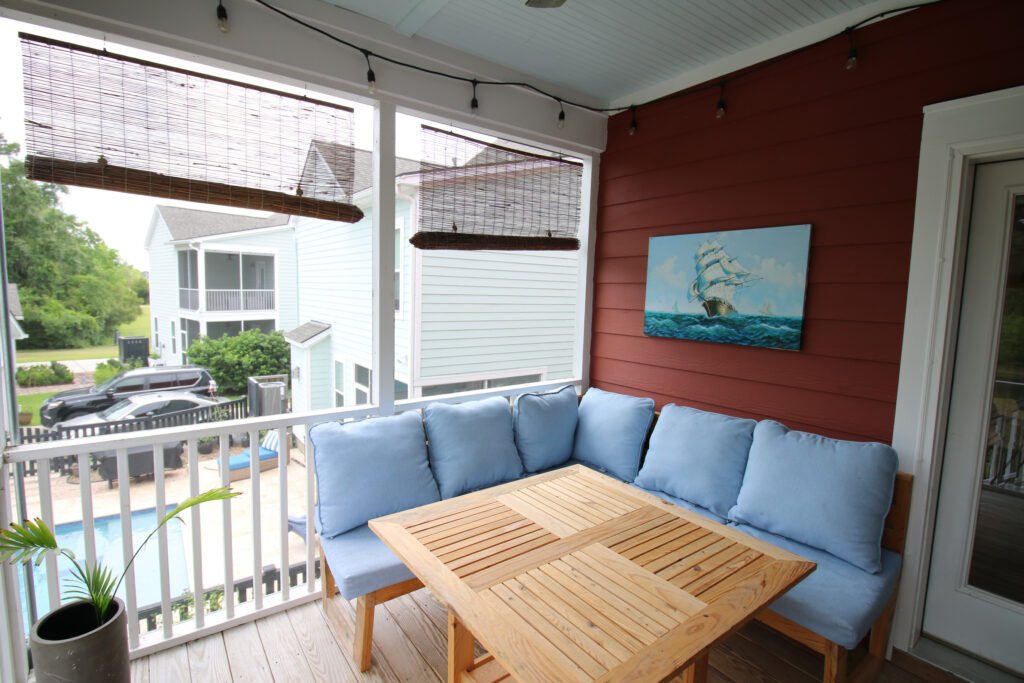
When we first moved in, we hung these bamboo shades, and they help a bit, but in the heat of summer, they don't cut it. So, we needed a better solution.
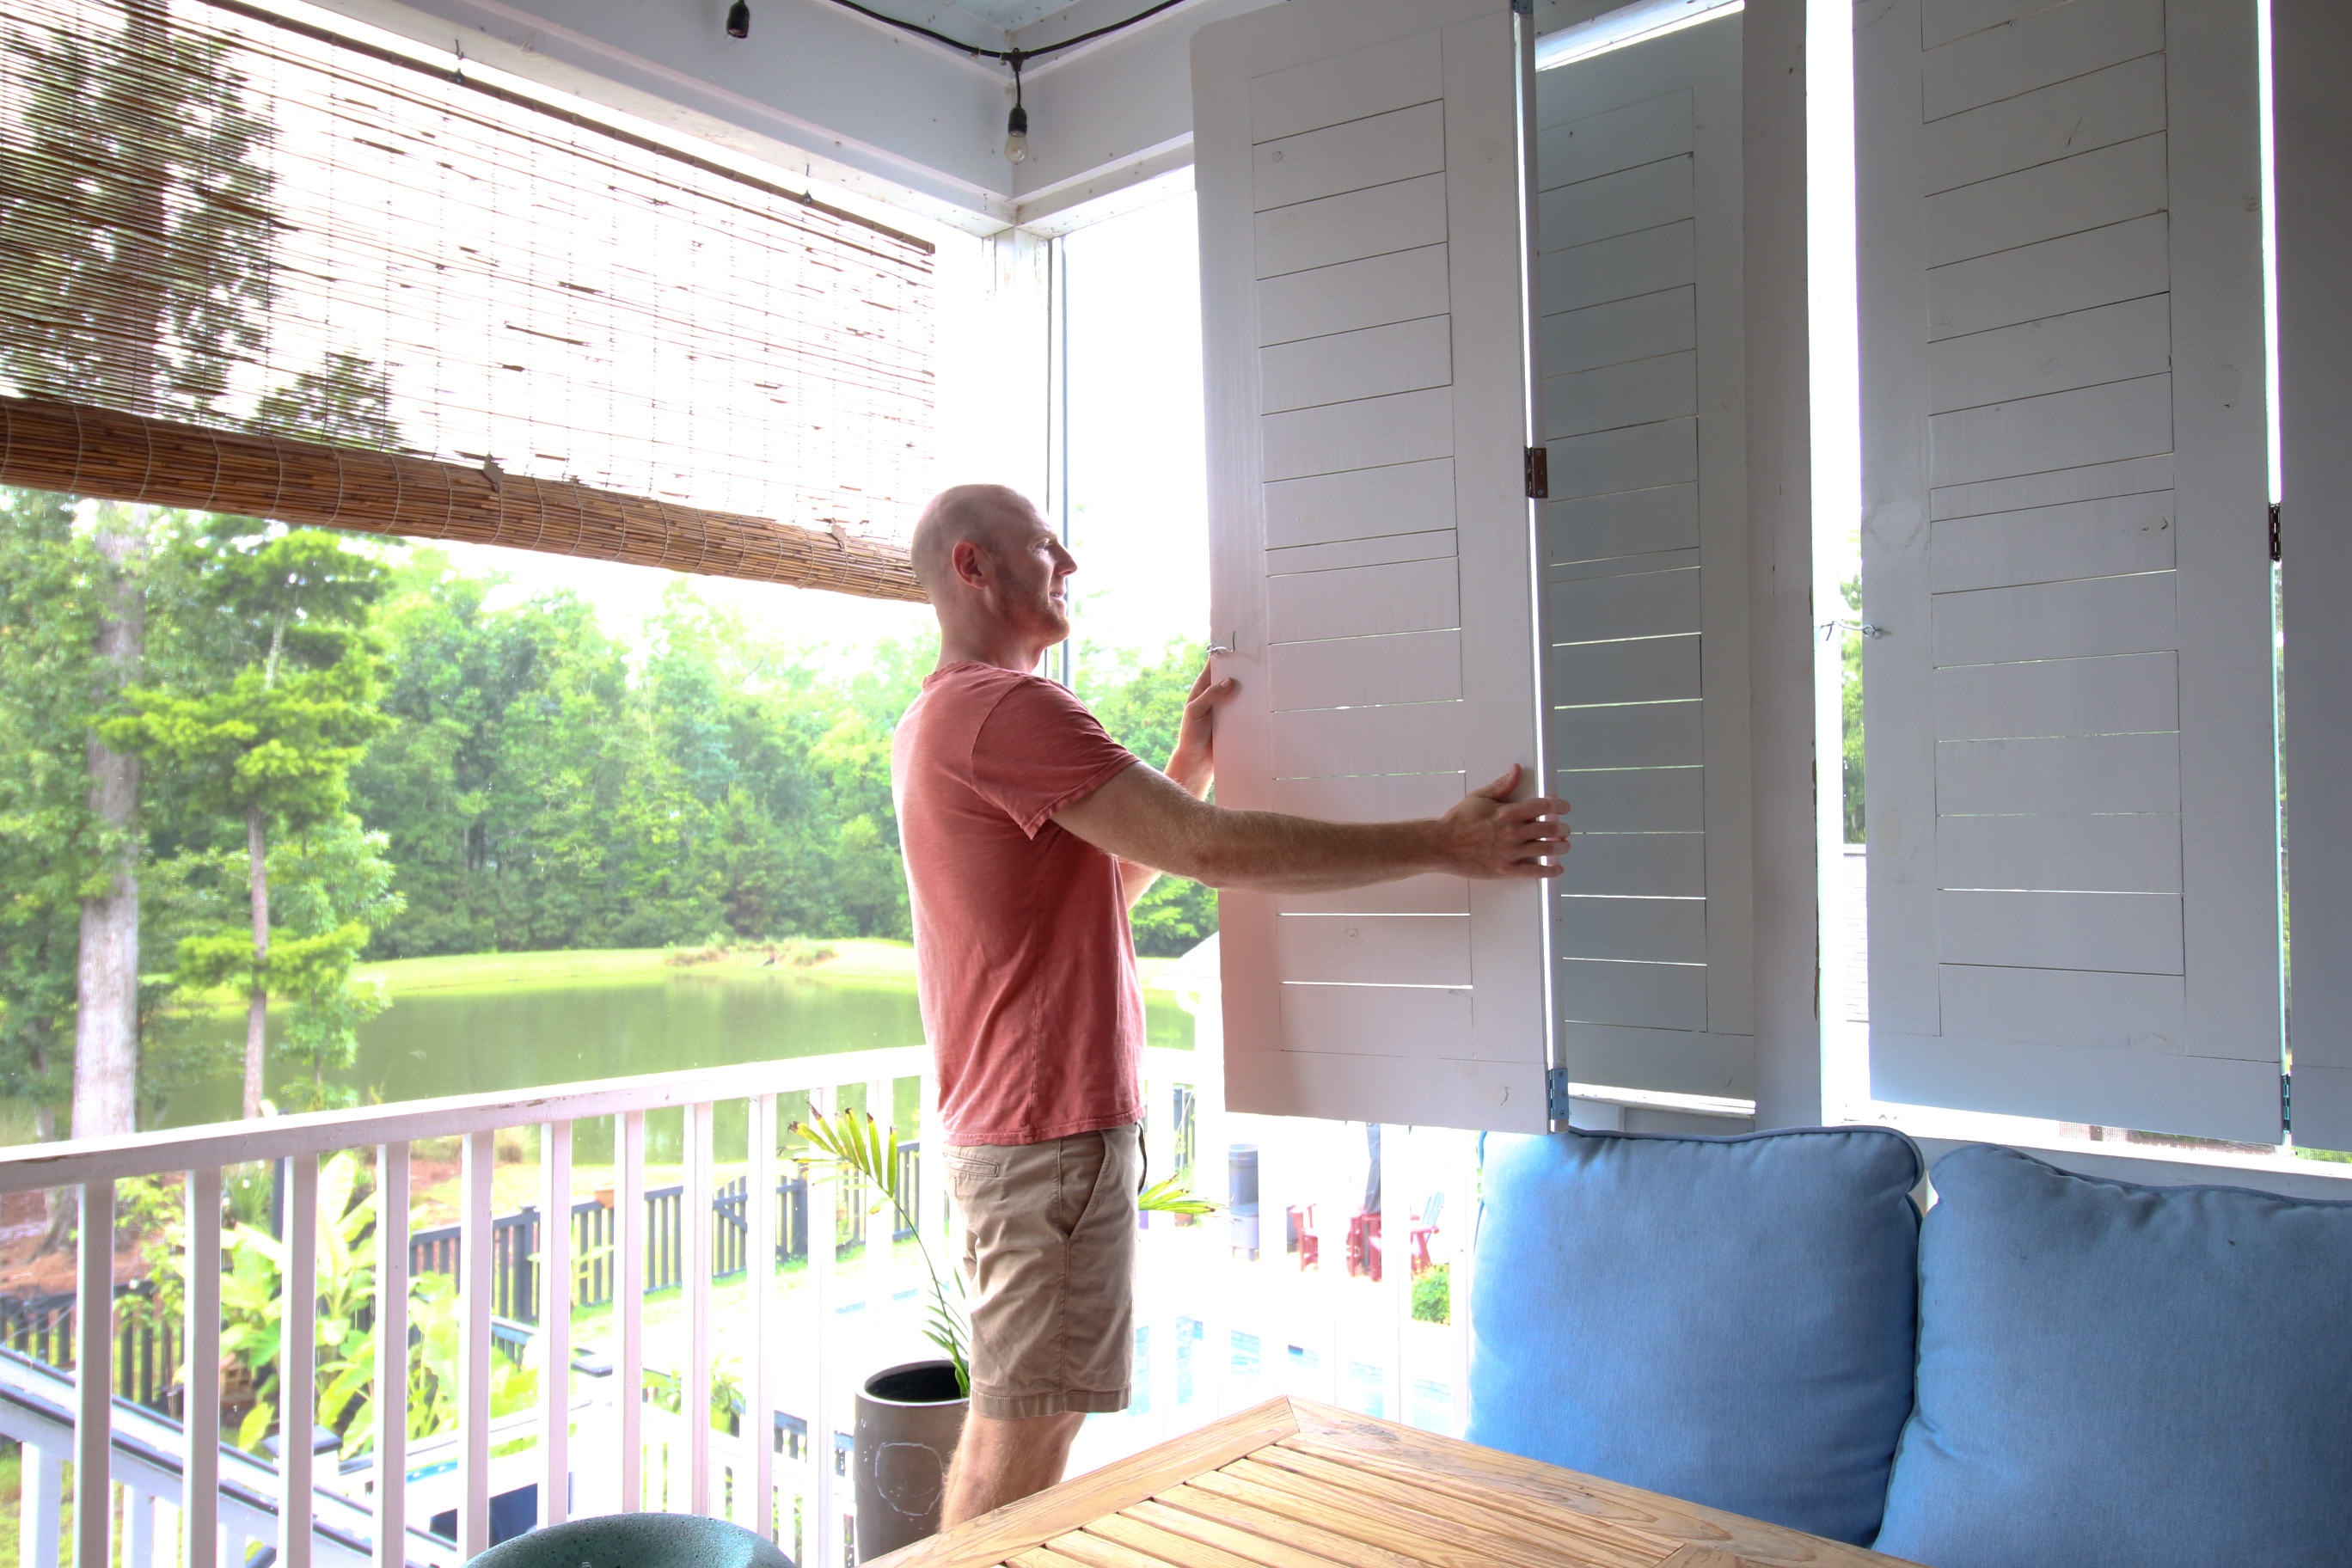
We can't block the view permanently, so we designed some DIY folding window shutters to fit the openings of our screened porch and block the sun!
These shutters are great for us blocking the sun, but they are also great for privacy if you need to shut them to block off your neighbors.
Let's show you how to make shutters for shade!
How to make DIY trifold shutters
These folding DIY shutters are a great way to create privacy or shade. They are also very customizable!
The great thing about this design is that you can make as many of these shutters as you want, depending what you need.

You can make two single panels and use them as actual shutters on either side of a window frame, or you could make DIY bifold shutters if you don't need so much space covered.
We obviously used hinged panels and turned them into trifold shutters and made two of them for each section of our screened porch.
You can also use these as interior shutters if you choose an untreated wood and an interior paint or stain.
This is how we painted the shutters on our old house with a sprayer!
DIY folding shutters tutorial
Let's show you the basics of how to make these folding wood shutters and what you need to make them. Then, make sure you get the full plans over on Kreg Tool's Projects and Plans website where we are hosting them!
We'll talk here about how to make one trifold, but you can adjust the instructions based on how many panels you need.
Materials needed:
- Kreg 720 Pro Pocket Hole Jig
- Kreg 1 ¼" outdoor pocket hole screws
- 1x4x8' outdoor graded boards
- Exterior paint or stain
- Narrow hinges
- Corner braces
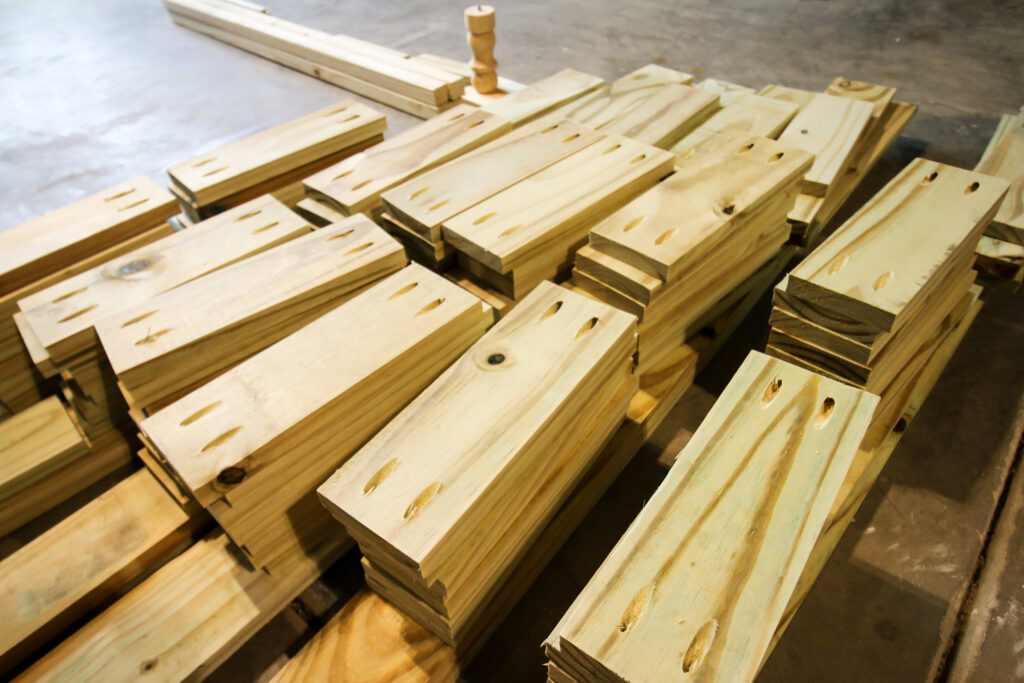
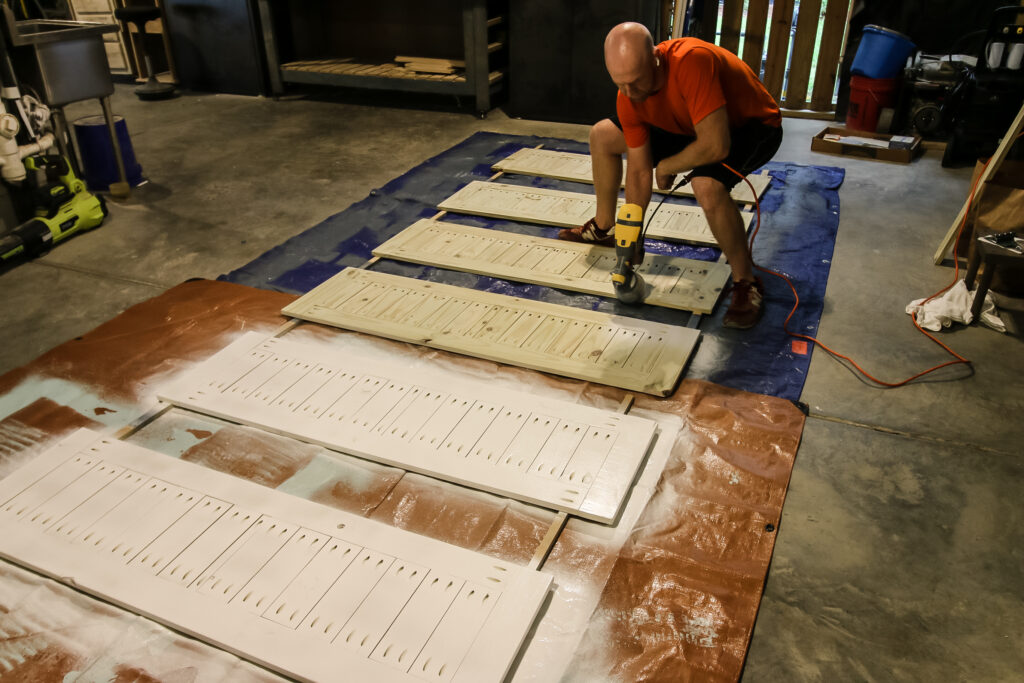
Step one: make cuts and drill pocket holes
Start off by making all the cuts for your shutters. It's so much easier to make all the cuts at once and then go back and work on building.
One thing I'll mention is make sure that your wood is COMPLETELY dried through. I thought the wood was dry, but then after I built our shutters and set them in the sun, there was some various shrinkage. Best to have it dry before construction.
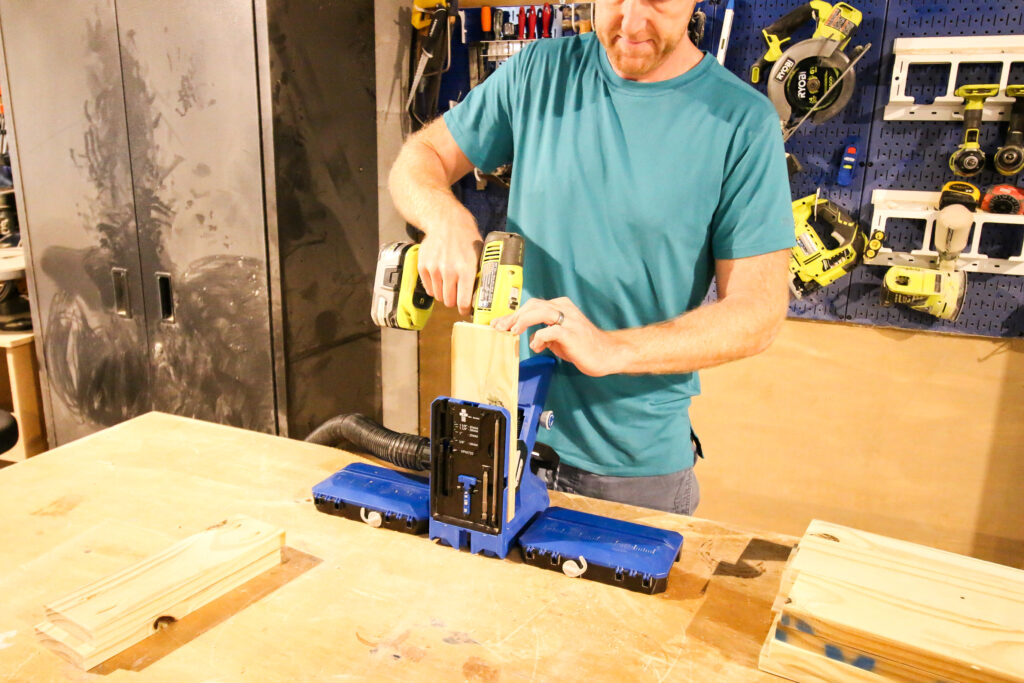
After all your cuts are done, it's time to drill your pocket holes! We started out by using our Kreg 720 Pro pocket hole jig to drill the holes because it is our go-to jig.
The 720 is super easy to use, automatically adjusts to your wood thickness, and has a very sturdy base for doing repetitive cuts.
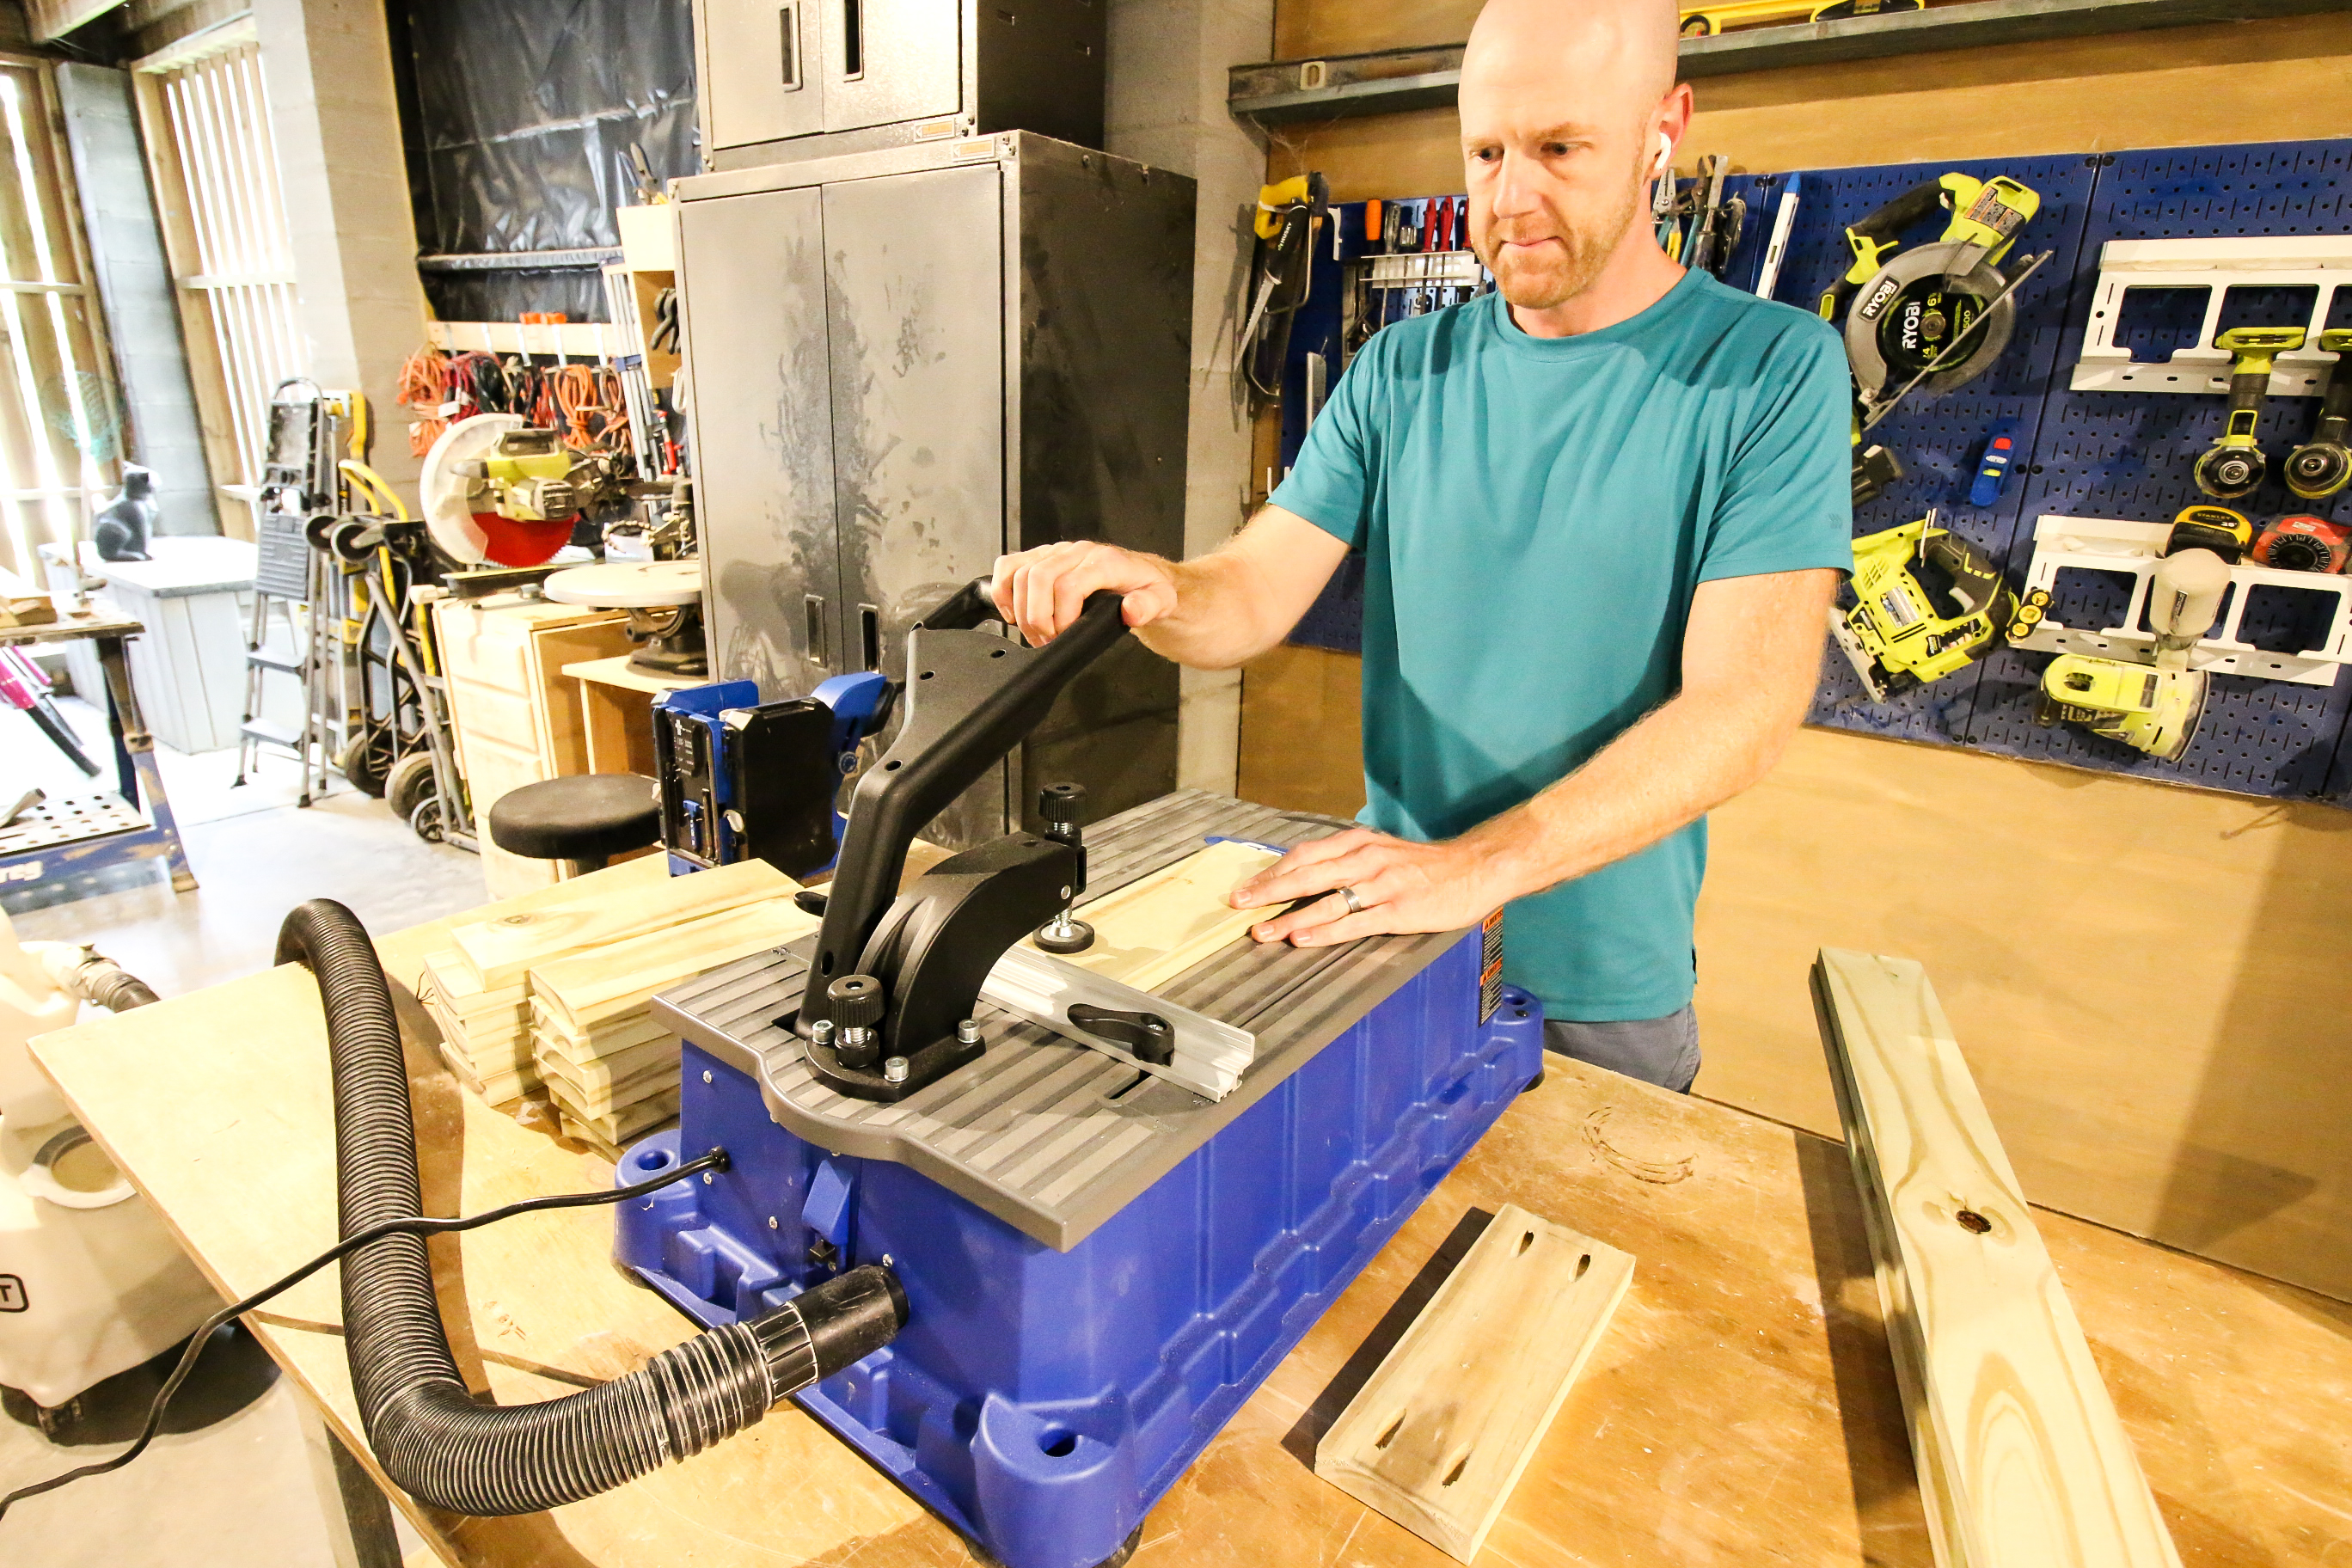
After a while though, we actually switched to our Kreg Foreman because we had soooooooo many holes to drill. The Foreman makes things go even faster and we used that the rest of the way out.
After everything was drilled, it was time to assemble.
Step two: create frame
We started the build by assembling the top of the frame of the shutter panels.
This meant using wood glue and pocket hole screws to attach two long side boards to the top board and doing the same with the top slat in between.
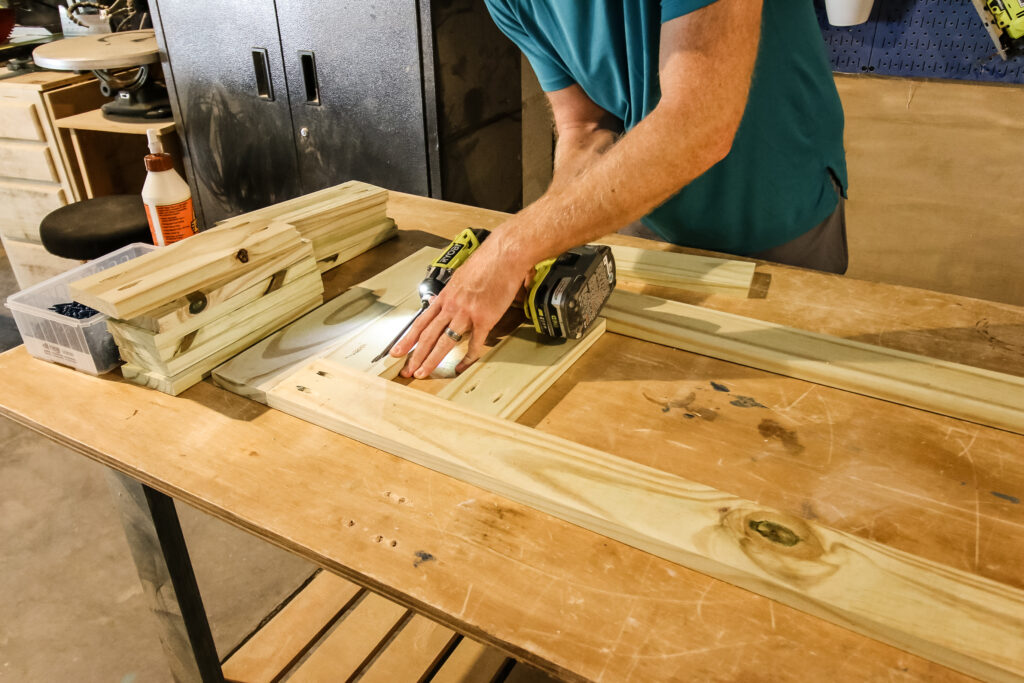
When putting everything together, we used Kreg Blue Kote screws because they are the most water-resistant and rust-resistant screws they make. These are perfect for outdoor projects.
Step three: add inner slats
Next, we added all the inner slats. All these spans needed four pocket screws between the two long sides to hold them in place.
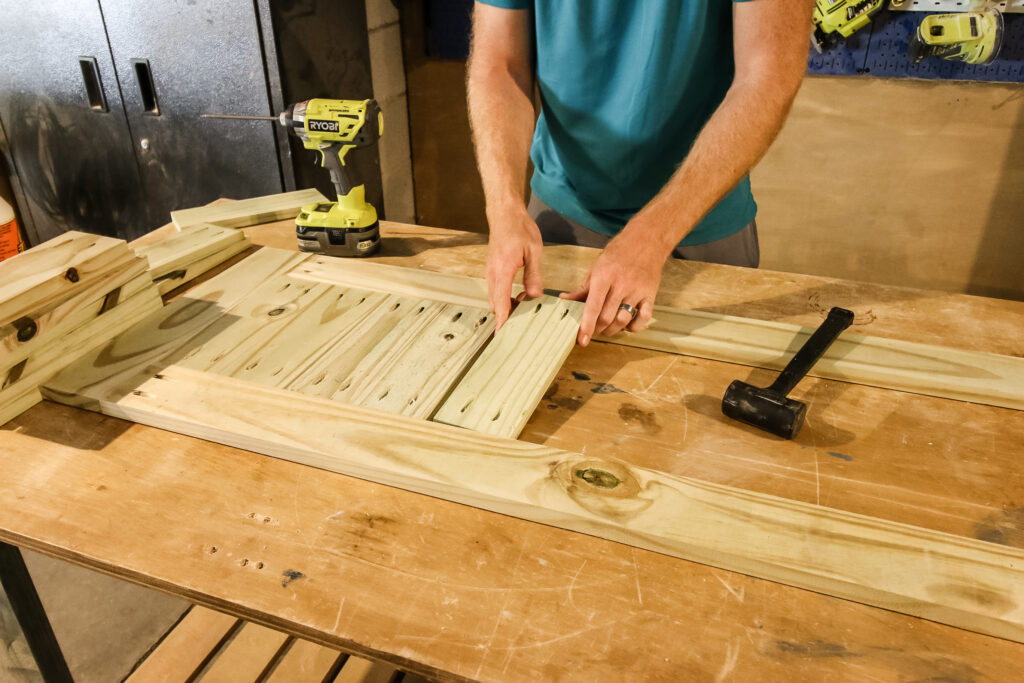
This design was a little more involved than just doing a couple of vertical boards down the middle which would have been a lot less cuts and screws. However, we wanted to keep the curb appeal in mind and how it would look on the inside of our porch and liked the design with a lot of slats better.
Step four: repeat as necessary
After you've made one shutter panel, repeat for as many as you need. We did three to fit each of our spaces, so six total.
It was... a lot. But in the end, it's going to look great.
This is also when we sanded everything smooth. We didn't worry about it after the cuts since there were so many edges that would be touching and covered. So we sanded them as one unit.
Step five: stain or paint
Next up we chose to paint our shutters with our paint sprayer to match the white painted trim that was on the railing and balusters of the screened porch.
We used paint from when we had to build a whole stairway railing last year!
This also gave them more of a beachy vibe and helps keep things looking light and bright on our porch.
Step six: add hardware
After letting the paint cure, we added the hardware. We attached three corner braces to one panel that would serve as the anchor to the post to hold the panels up.
While each shutter frame isn't super heavy on its own, the weight does add up.
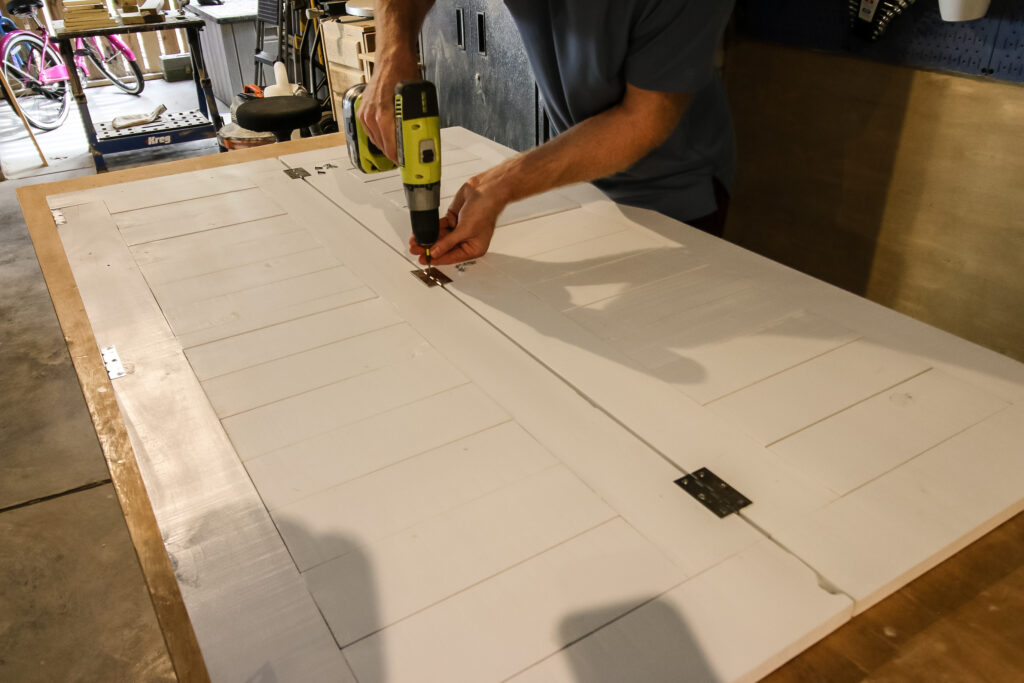
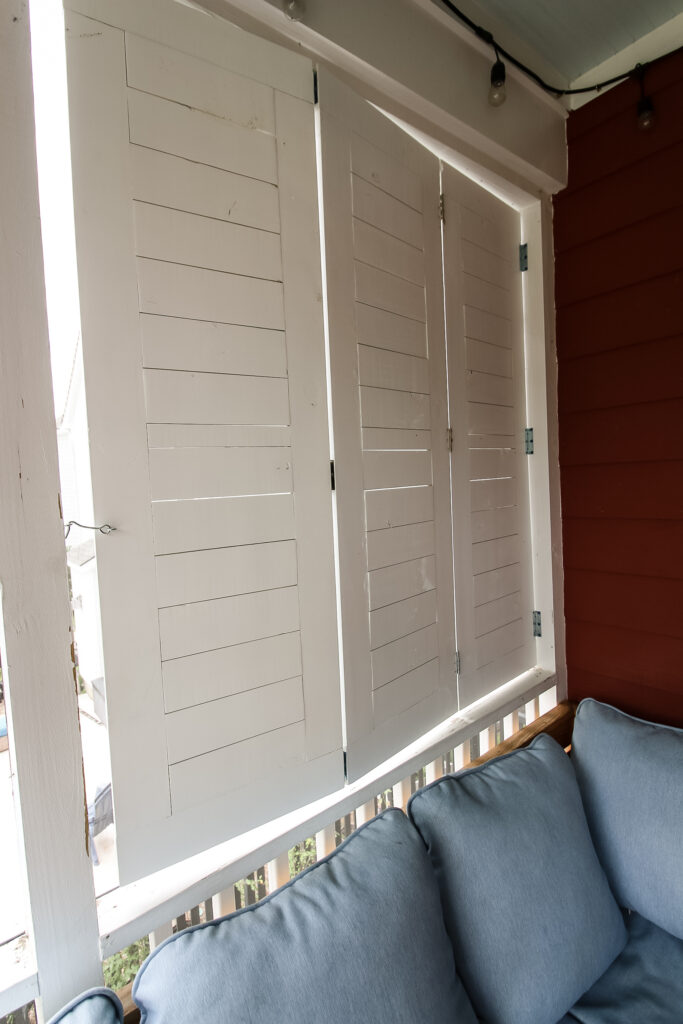
Then we added narrow hinges between each of three shutter panels so that they would accordion open and close. You have to flip the middle panel from the first two so that, when it's open, it has the front in the right direction.
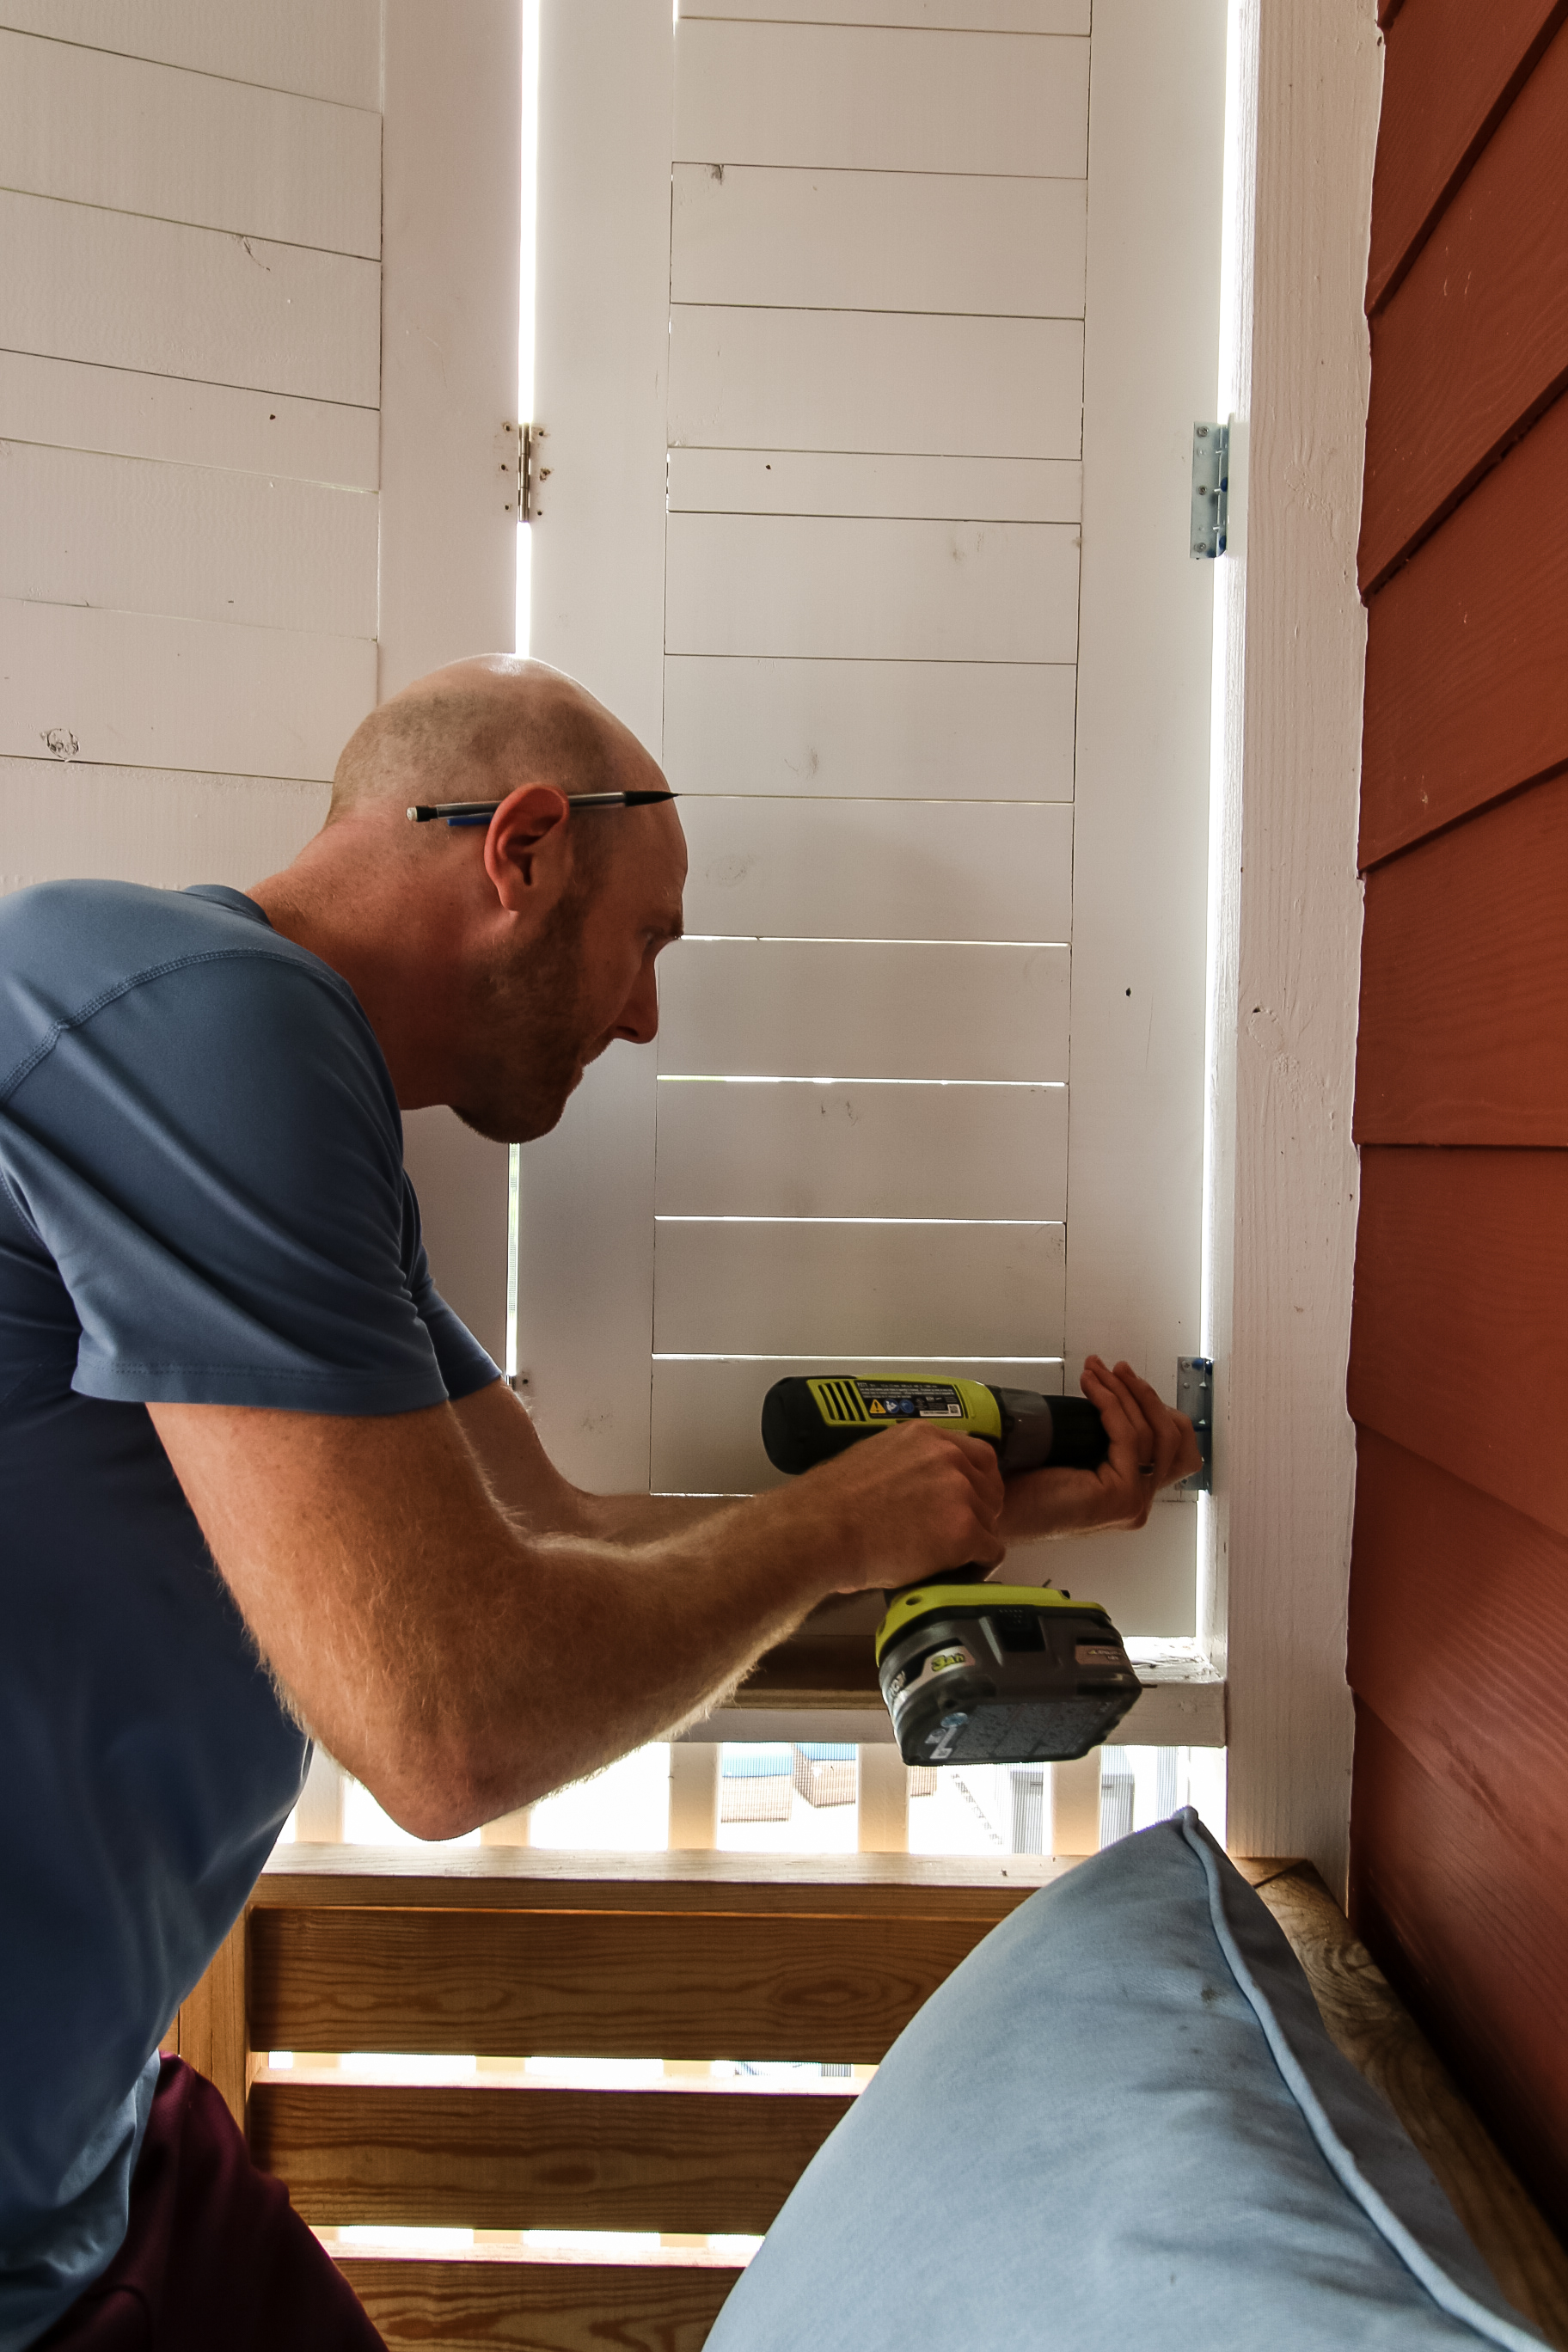
Step seven: install
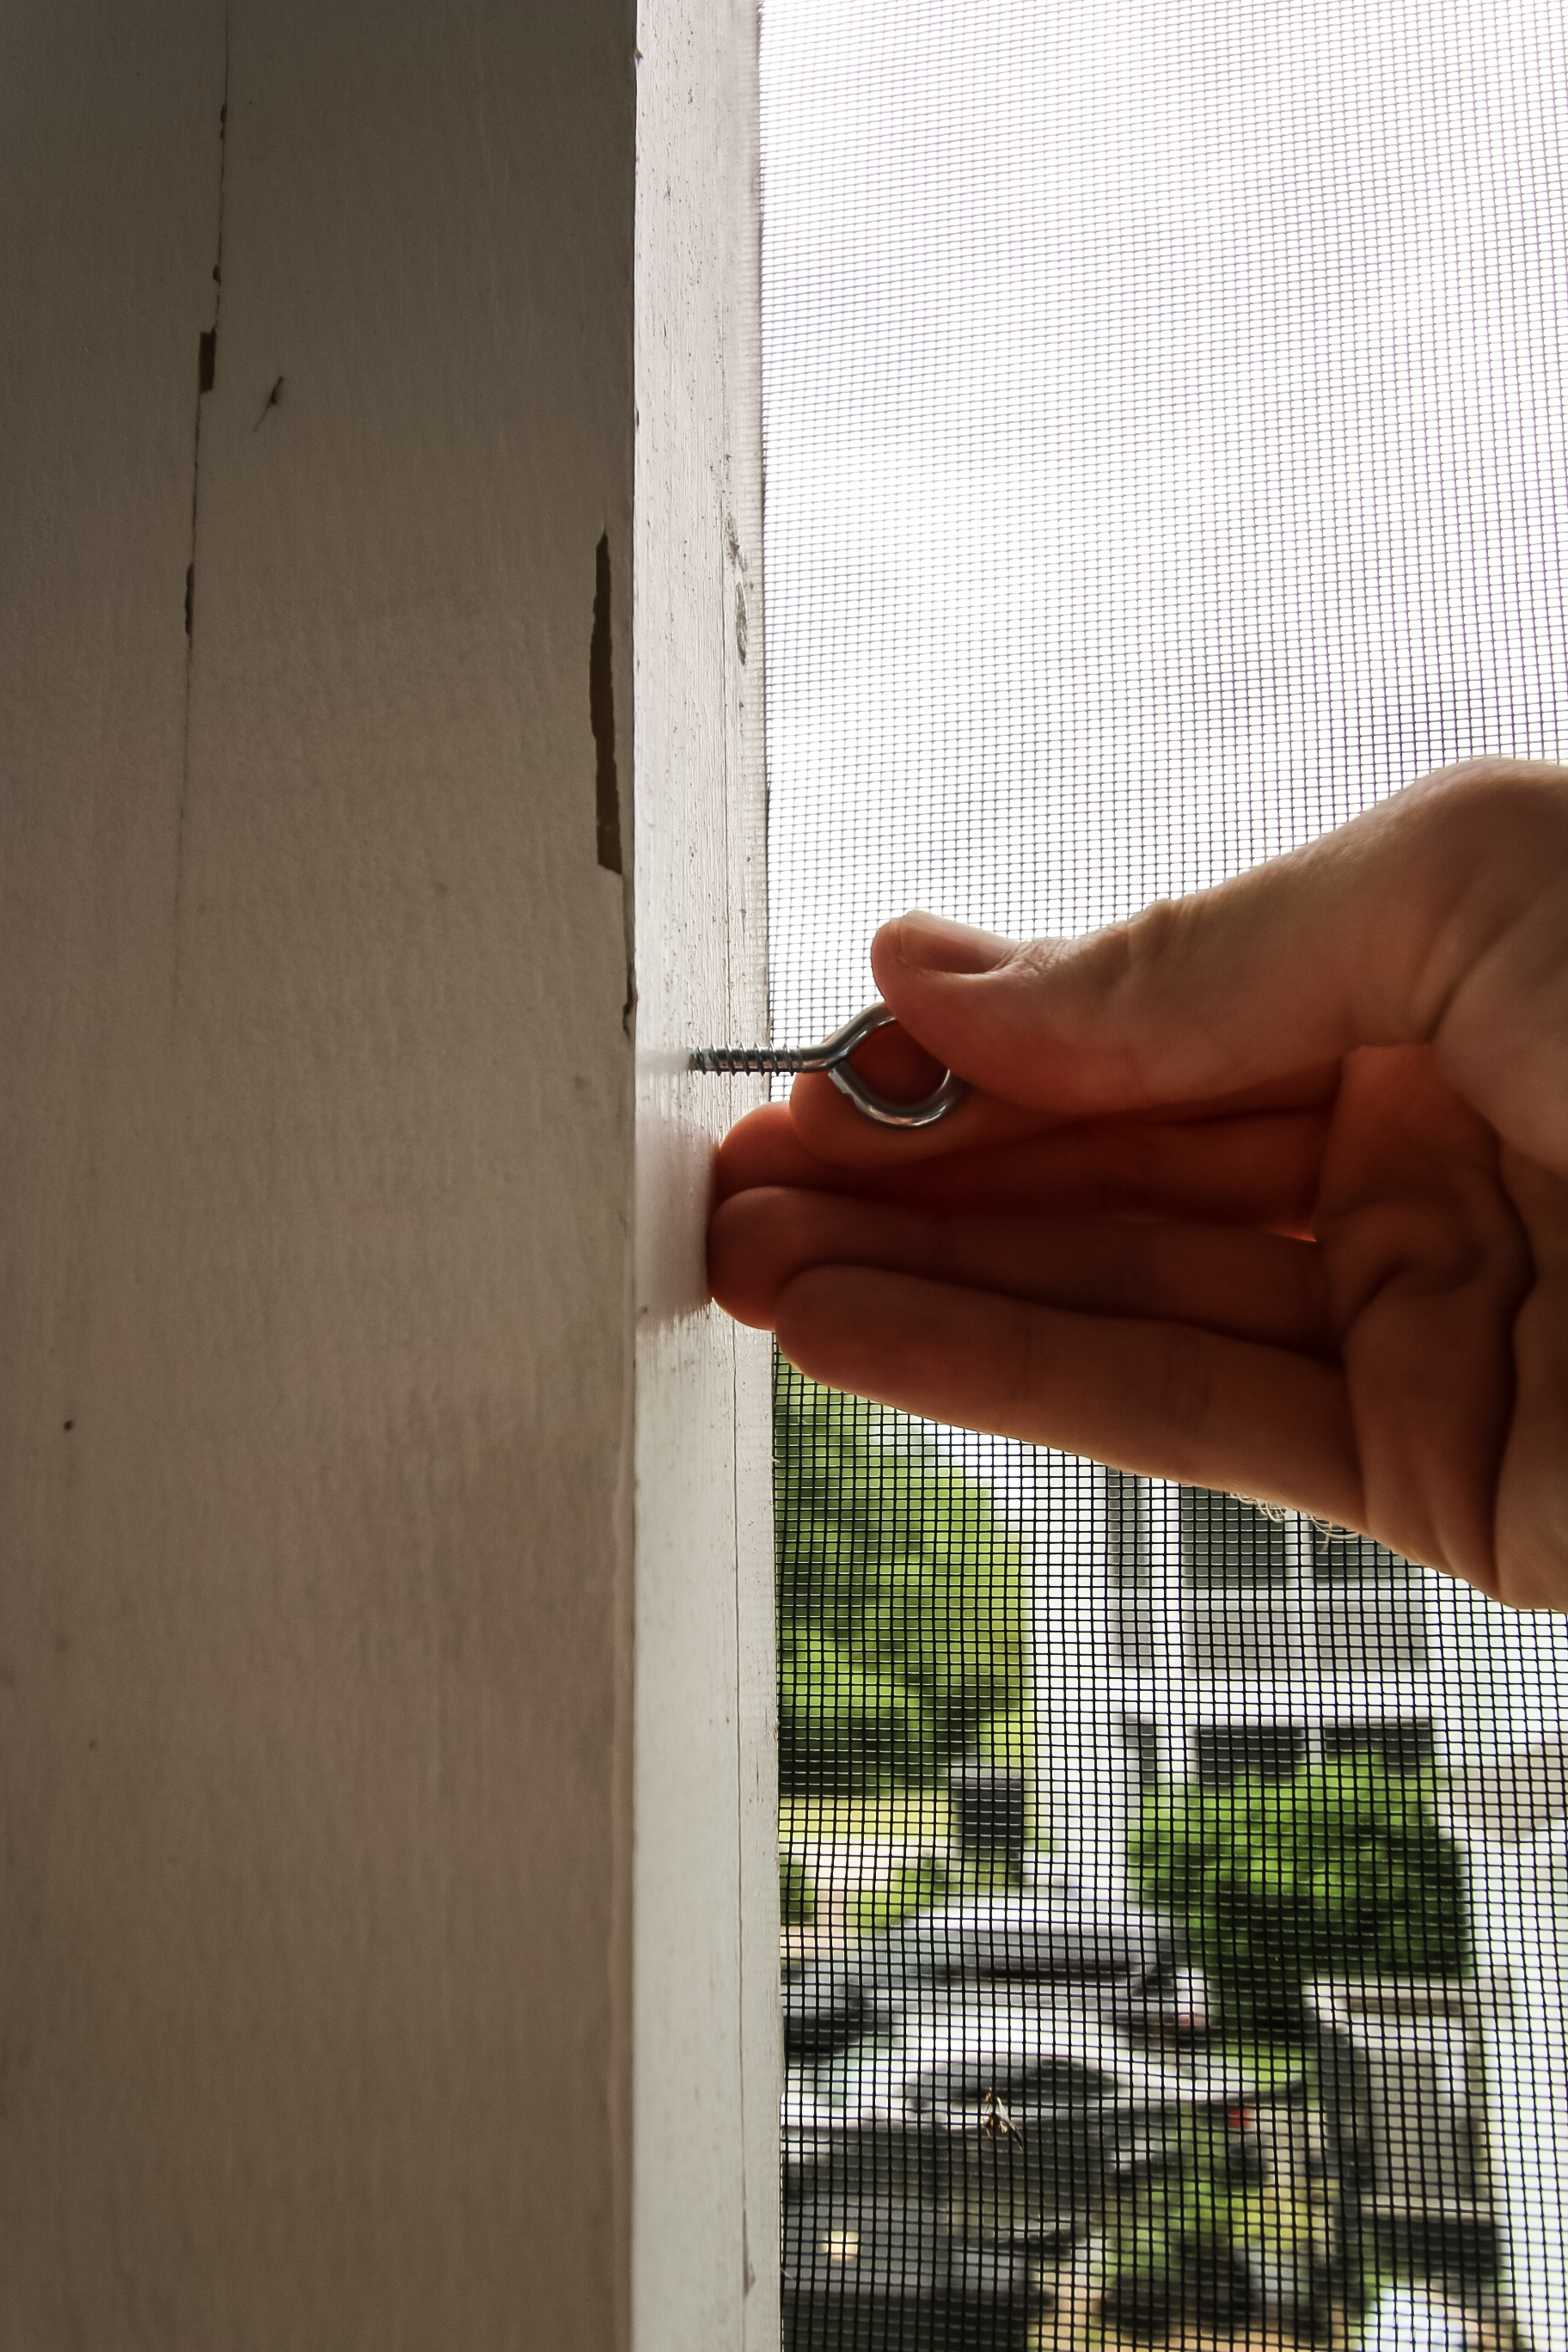
Finally, it was time to install. We put a ½" scrap plywood down on the bottom to serve as a spacer and then attached the anchored panel to the post.
Then we removed the spacer and opened the shutters all the way and added a hook and eye to the far side to keep them open all the way when we want to use them.
We realized that we would then need to make some quick DIY shutter dogs to hold the shutters in place when they were folded up. Since they will be closed most of the time, these needed to be able to hold them in place.
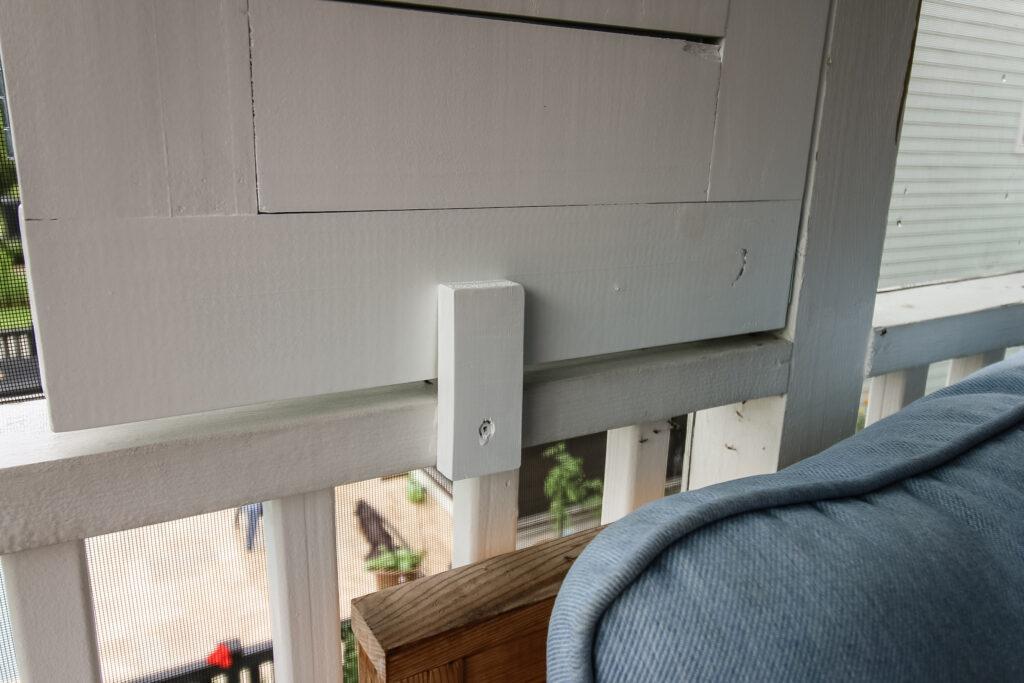
We cut a small piece of scrap wood and then drilled a hole through the lower half and attached that to the screened porch railing with a screw we left a little loose.
Now we can open and close the shutter dog to open and close the shutters whenever we want!
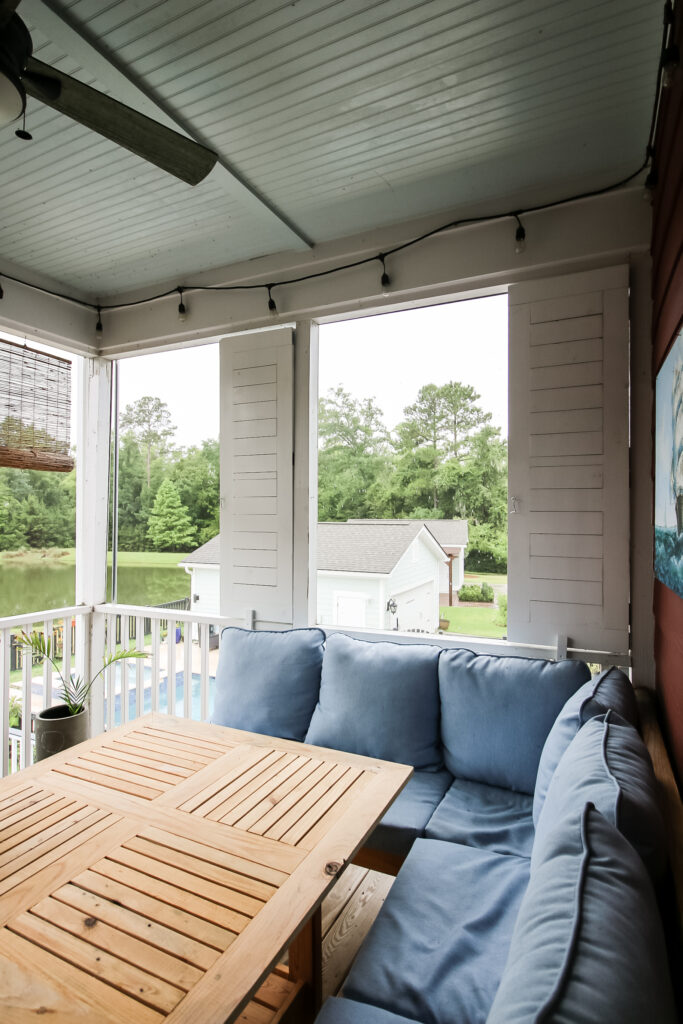
DIY trifold shutters results!
We absolutely love how these turned out! The look completely like part of the porch when they are closed and then open easily when we need them.
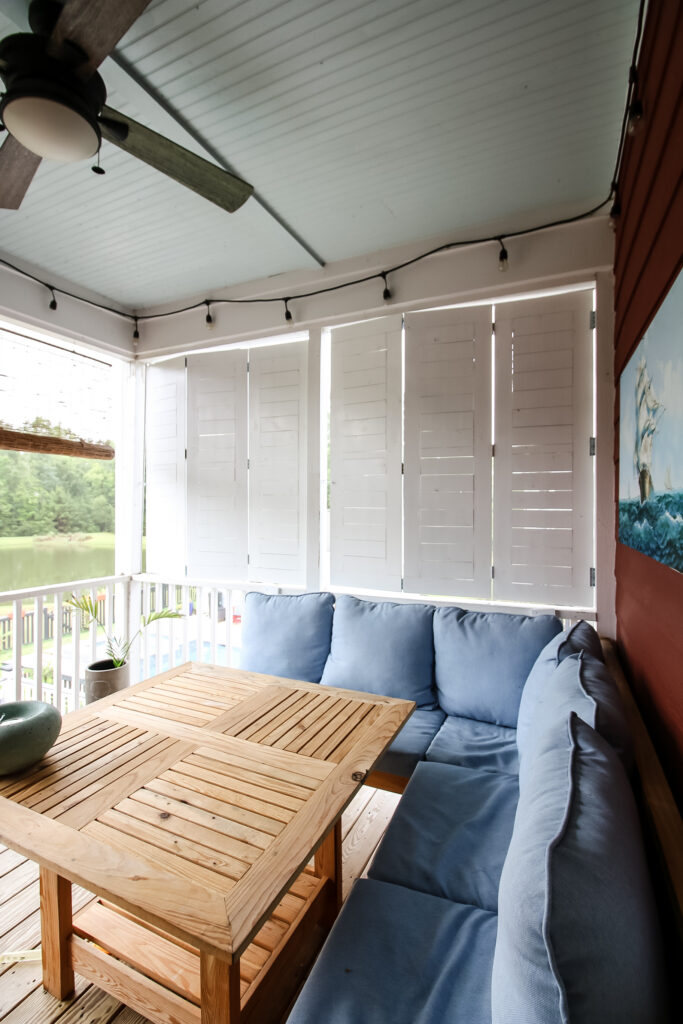
These shutters work so well for blocking out the sun and allowing us to eat our meals in peace (at our DIY square outdoor dining table and DIY modern outdoor sofa) and actually greatly reduce the heat on the porch from eliminating the sunshine.
We love how these DIY folding shutters look and how functional they are!
DIY trifold shutters woodworking plans
Love this project and want to make it your own? Well lucky for you, we've got free woodworking plans available!
We partnered up with Kreg Tool to make these plans free for you! Kreg Tool has tons of free plans on their website (including a lot from us!) that are great for people who want to do some woodworking!
Our plans have a full material list, cut list, and step-by-step instructions with computer model imagery to help you get through this plan exactly how you need!
Remember, you can use these plans for single panels, bi fold shutters, or tri fold shutters!
Can I make my own window shutters?
Absolutely you can make your own window shutters! Follow our tutorial here and the free plans to make individual shutters for beside your windows, or turn them into bifold or trifold shutters for privacy or shade!
Can shutters be folded back?
Yes! Adding hinges to shutters means you can fold them back over a window or you can fold them over on themselves accordion-style for privacy or shade.

Looking for something?
We've been doing this since 2012 so we have a LOT of blog posts!
Search stuff like: Ceiling Projects | DIY Plant Stands | Thrift Flips

Hey there, I'm Sean, the woodworking enthusiast and builder behind CharlestonCrafted.com! Since 2012, I've been sharing the magic of turning raw materials into beautiful creations. I love teaching others the art and satisfaction of woodworking and DIY. I try to inspire fellow crafters to make something extraordinary out of nothing at all.


