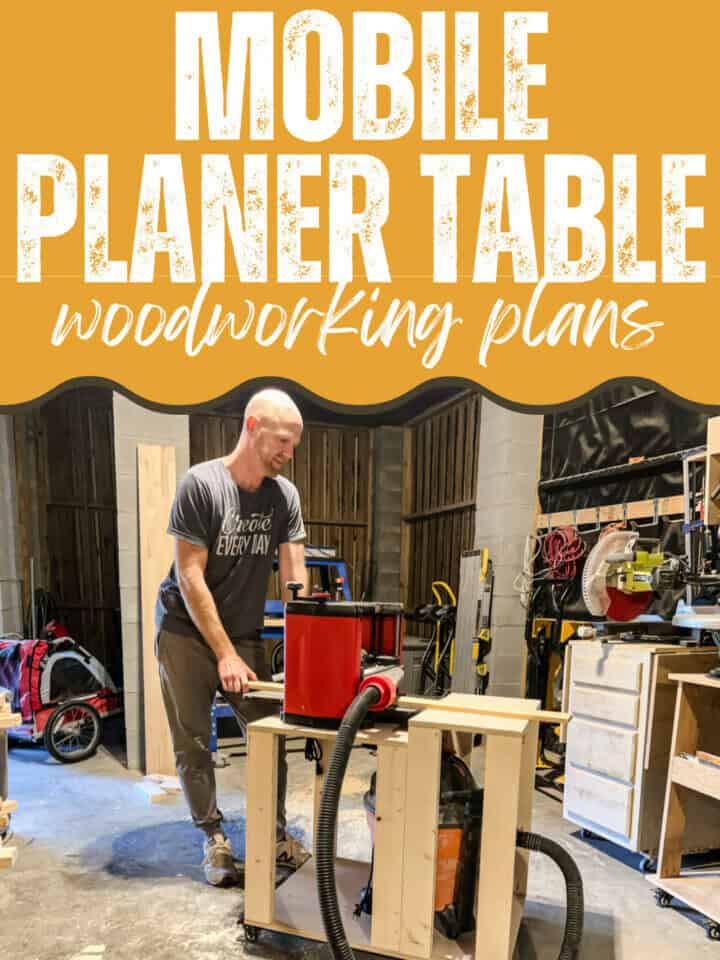
This rolling planer table is a great addition to any workshop. Grab the woodworking plans below to keep your planer mobile so that you can use it where you need it!
This post was sponsored by Kreg Tool. All our opinions are our own and our opinion is that we love Kreg tools. Thanks for supporting the brands that make Charleston Crafted possible!
I don't have a huge amount of space in my workshop, so I have to move everything around whenever I need it or don't need it. I wish I had one of those setups where each tool has its own dedicated space, but unfortunately that's not the case.
My workshop is set up with most everything on wheels, being able to roll it in and out of place as it's needed. My table saw has it's own built in stand and wheels, but I built a mobile scroll saw stand and turned a cabinet into a rolling miter saw stand (that one I need to upgrade soon for sure).
So when I recently purchased my first planer, I knew I needed to build a rolling stand for that as well.
DIY planer table
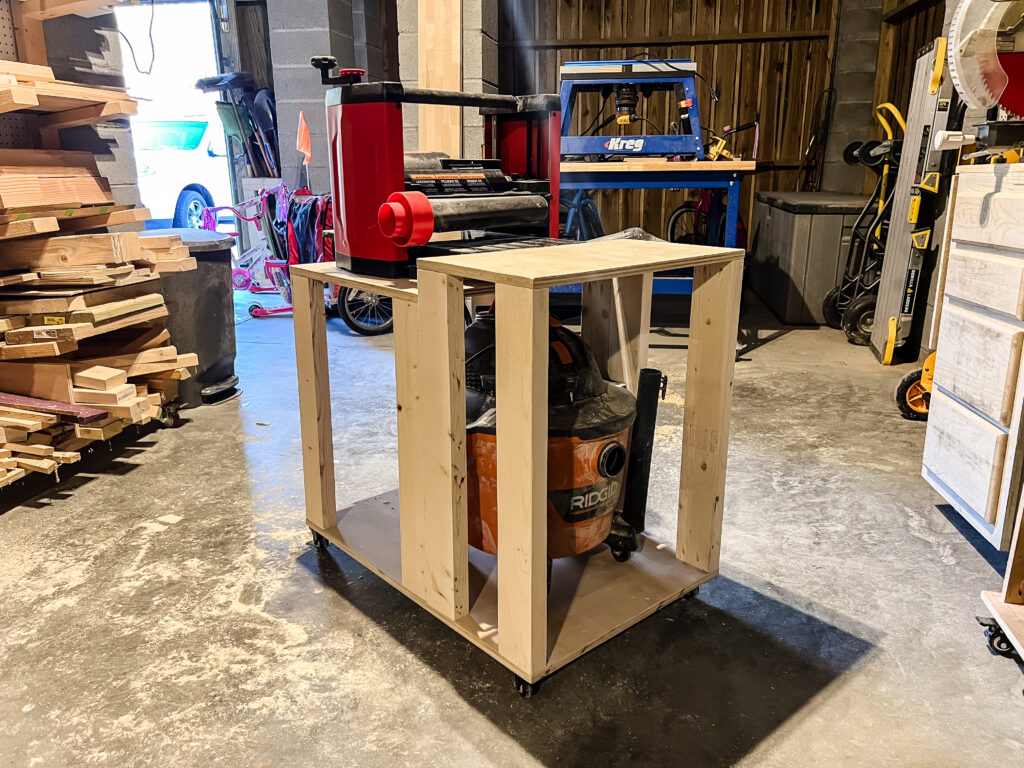
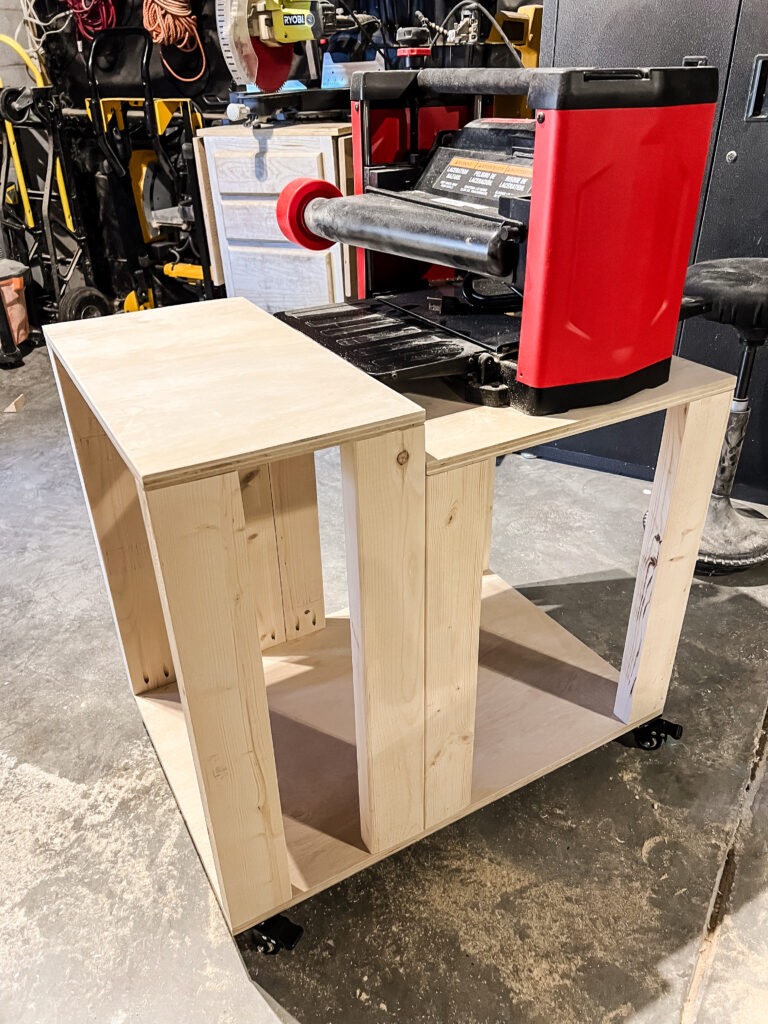
I designed this planer table to have space for my planer, as well as a small outfeed table and space underneath for either a shelf or a shop vac.
The specific measurements on this planer table are designed around my Craftsman Benchtop Planer, so keep that in mind depending on if your planer is a different size.
Materials and tools needed to build a planer table
Here's all the supplies and tools you need to build this planer table. To get the exact shopping list and cut list, grab the free woodworking plans that I've put up on Kreg Tool's Projects and Plans site!
- ¾" plywood
- 2x4 boards
- Kreg 520 Pocket Hole Jig
- 1 ¼" Kreg pocket hole screws
- Locking casters
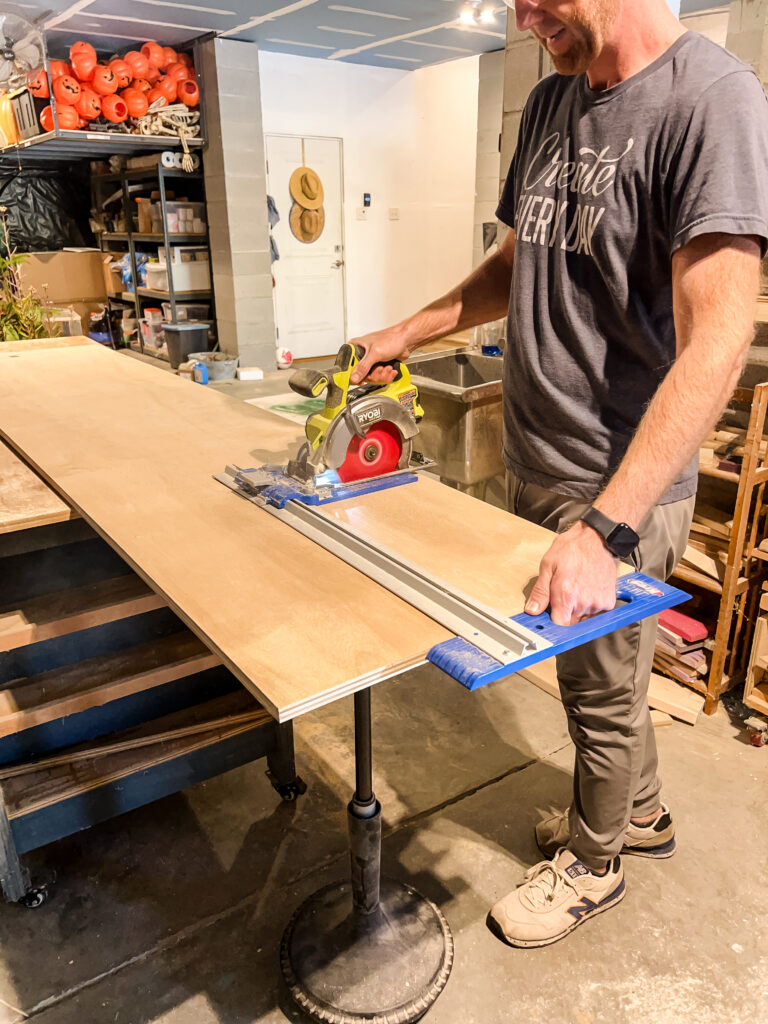
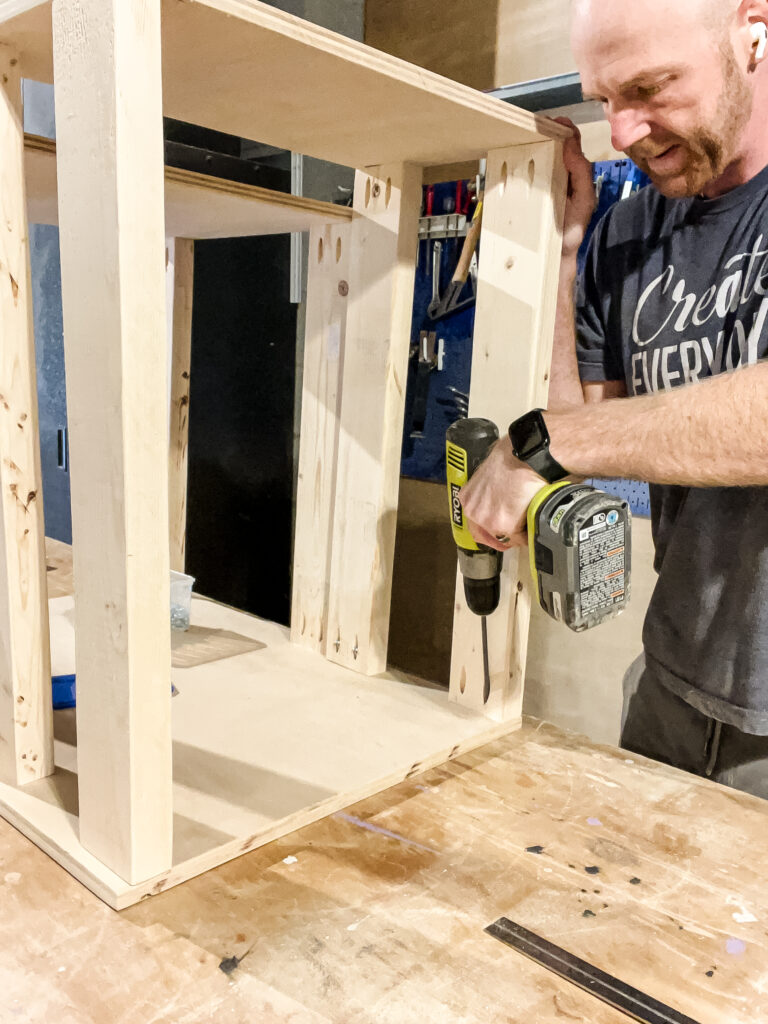
Step one: make cuts and drill pocket holes
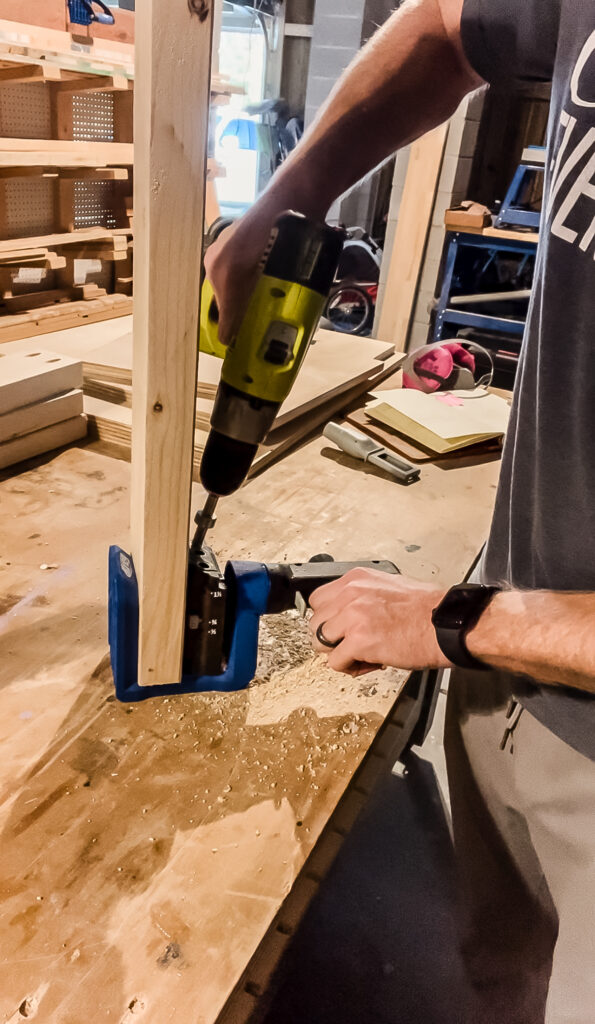
Start by making all the cuts in the woodworking plans, then drilling two pocket holes on each end of all eight of the legs. Now, since your attaching two different thicknesses of wood together, there's a trick. That's why I used my Kreg 520 on this project.
Set the collar depth of the drill bit collar to ¾" instead of 1 ½" thickness, even though you're drilling the holes in the 2x4s. You always need to use pocket hole screws that correspond with the thickness of the wood that the screw is driving into, otherwise it will poke out.
So you can't use a Kreg 720 on this type of project because its AutoMaxx clamping system would set the thickness to the 2x4 and not the ¾" wood you'll be screwing into.
Step two: assemble planer base and outfeed base
Next up, I assembled the base for my planer and for the outfeed table. The outfeed table is set 2 ½" taller than the planer table, which is the height from the bottom of the planer to the top of the built-in outfeed wing.
Making these was as easy as just attaching four 2x4s into the bottom of the bases with wood glue and pocket hole screws.

Step three: attach to base
Next I flipped these both over on top of the base piece and lined them up next to each other in the middle. Then I used pocket hole screws to attach them down into the base.
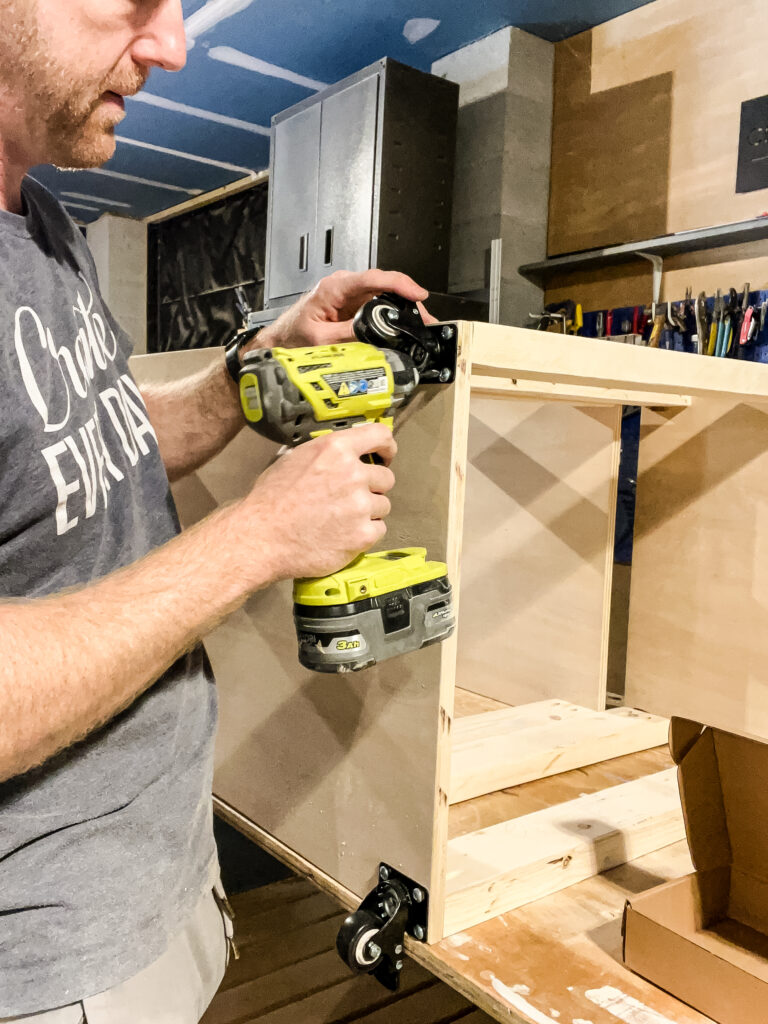
Step four: add casters
Finally, I added some rolling, locking casters that I've used on my other saw tables and my mobile plywood workbench. These are high quality for a low price and they are exactly what I need.
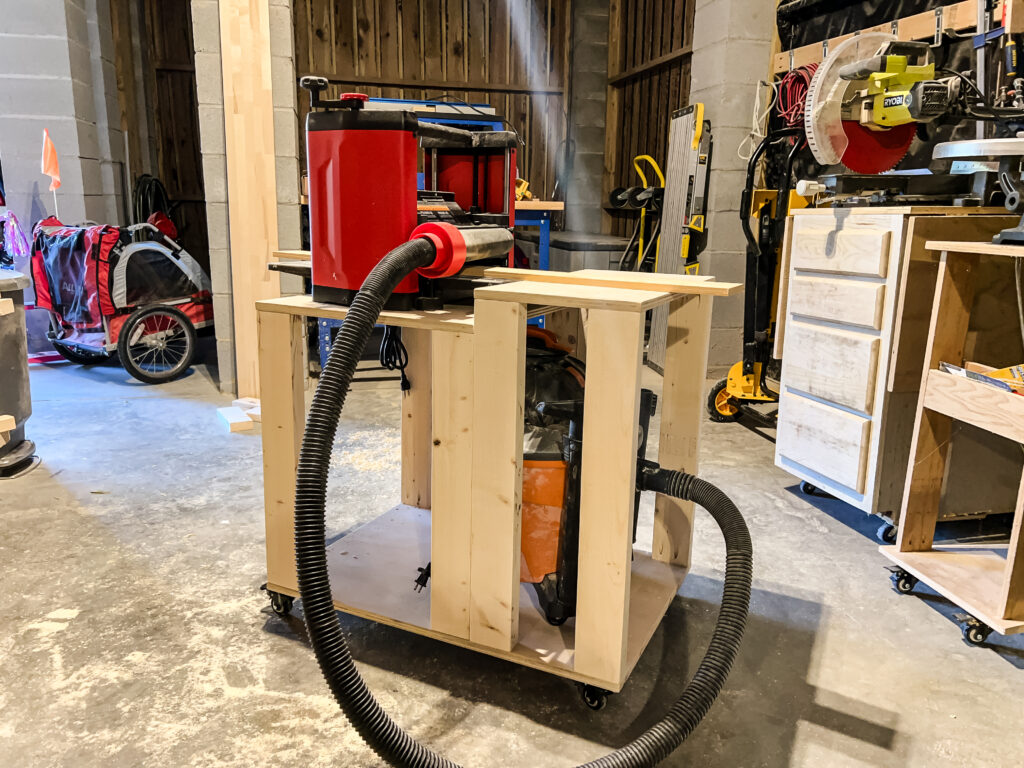
Step five: set up planer
Once it was all assembled, I added my planer on top and opened its built-in outfeed wing so that it was flush up against the outfeed area on my table and screwed the planer down into place.
Now, with this plan, I included a shelf so that you can add one underneath if that would better suit your needs, but you can also leave that out and instead put your shop vac underneath and connect it directly to the planer to easy clean up.
DIY mobile planer table woodworking plans
If you want to build this mobile planer table for yourself, I have free woodworking plans available! I've partnered with Kreg Tool to bring these plans to you for free.
My woodworking plans include a full material list, cut list, and step-by-step instructions with computer model imagery to help you make it yourself.
I made this project an easy and approachable one you can knock out in just a couple of hours and get to work planing your next project.

Looking for something?
We've been doing this since 2012 so we have a LOT of blog posts!
Search stuff like: Ceiling Projects | DIY Plant Stands | Thrift Flips

Hello, I'm Morgan, half of the creative force behind CharlestonCrafted.com! With a passion for DIY that dates back to 2012, I've transformed three homes and now I'm dedicated to helping others craft their dream spaces. Let's turn your house into a home together!


