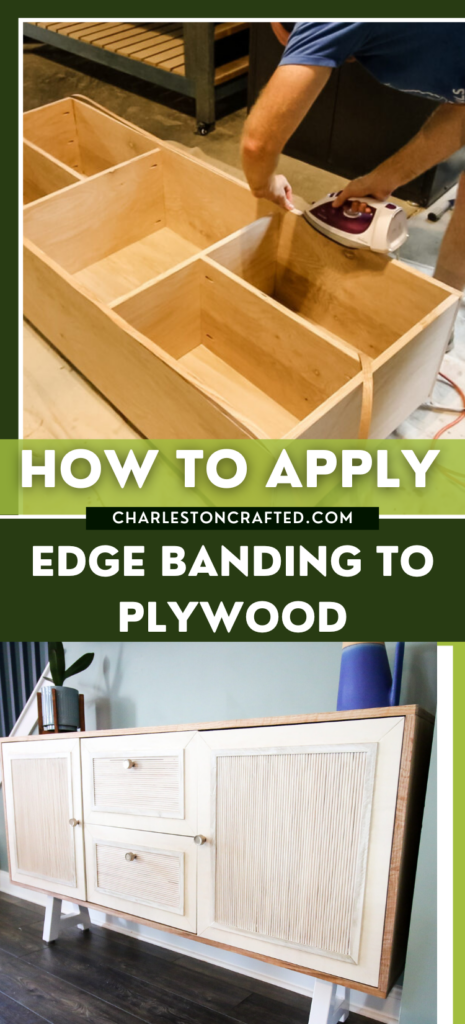
Want to give your plywood project a more finished look? Here is how to apply edge banding to plywood!
We love building with plywood because it allows you to cut very custom sizes of boards out of many types of woods, often at a fraction of the cost compared to using solid wood.
But, the edges of plywood aren't always pretty.
This is because plywood is made like a lasagna - with lots of layers of wood veneer and adhesive to create a super strong layered board.
The layers can look cool - we left them raw on this wood countertop because we dug the look - but often, they look unfinished.
There are 3 options for covering plywood edges: filling them with wood filler, adding a wooden lip, and applying edge banding.
Today we want to dive into the benefits of edge banding and share exactly how to use edge banding on your woodworking project!

What is Edge Banding?
Edge banding is a very thin piece of wood (or other materials) that can be applied to the surface of wood to make it appear to be a solid piece of wood.
It is most typically used to cover the sides or edges of non-solid wood to give it the appearance of wood and help blend to the face to look like a solid board.
Edge banding comes in wood veneer, PVC, and melamine materials.
It can also be purchased as iron-on or glue-on. We always choose iron-on edge banding, because it is SO easy to do.
Edge banding makes your plywood project more visually attractive and can make it more durable and protect the plywood edges!
What is the best edge banding?
There are lots of options to choose from, but here are some of our favorites:
- Birch edge banding - we use a ton of birch plywood so this is our top buy!
- Maple edge banding
- Walnut edge banding
- Red oak edge banding
- Melamine edge banding ¾ inch
How to apply edge banding
Here's how easy it is to install plywood edge banding on your plywood project!
Tools and Materials
Here is a list of the essential tools and materials required for applying edge banding to plywood.
- Edge banding tape
- Box cutter type knife OR an edge banding trimmer
- Clothes iron
- Sand paper
- Clamps
How to choose the right edge banding for your project
Here are some things to keep in mind when choosing the right edge banding product for your project!
Consider the Material: Match the edge banding material to the material of your plywood. Common options include wood veneer, PVC, and melamine. Ensure that the edge banding complements the look and texture of your plywood.
Width and Height Selection: The width and height of the edge banding should cover the entire exposed edge of your plywood. Measure the width and height of your plywood edge, including any bevels or chamfers, and select edge banding that matches or slightly exceeds these dimensions. You can always trim later.
Matching Color and Grain Pattern: If you're using wood veneer edge banding, select a color and grain pattern that matches or complements the plywood's surface. Pay attention to the wood species, stain, or finish to ensure a cohesive look.
Glued or Iron-On: Edge banding is available in pre-glued (iron-on) and non-glued varieties. Pre-glued edge banding has adhesive already applied to one side, making it easier to apply with heat. Non-glued edge banding requires you to apply adhesive separately. We always use iron-on!
Quantity Calculation: Calculate the amount of edge banding you'll need by measuring the total linear feet of exposed plywood edges. Purchase slightly more than your calculated amount to account for any errors or additional projects.
Budget Consideration: Edge banding materials vary in cost. Consider your budget and the project's overall value when selecting the edge banding material. While wood veneer may offer a premium look, PVC or melamine may be more budget-friendly.
Preparation
As with any other woodworking project, preparation is key. You are going to want to take just a few minutes to prepare your plywood surface before applying edge banding.
First of all, you want to make sure that you have a smooth surface. You want to glue edge banding onto the plywood lip and you need a nice flat surface so that the glue will adhere properly.
Large voids or bumps will make it hard to get a nice smooth finished look.
Here's what to look for when buying plywood!
Use wood filler on any gaps and smooth every sand everything really smooth.
Wipe it clean with a cloth to remove dust or debris that could interfere with the adhesion of the glue.
You are ready to go!
How to Apply Plywood Edgebanding
Here are the steps to follow for how to install edge banding:
- Prepare your wood surface for edge banding, ensuring that you have a smooth and clean surface.
- Measure your plywood edge and choose edge banding slightly wider than the edge and in a complementary material.
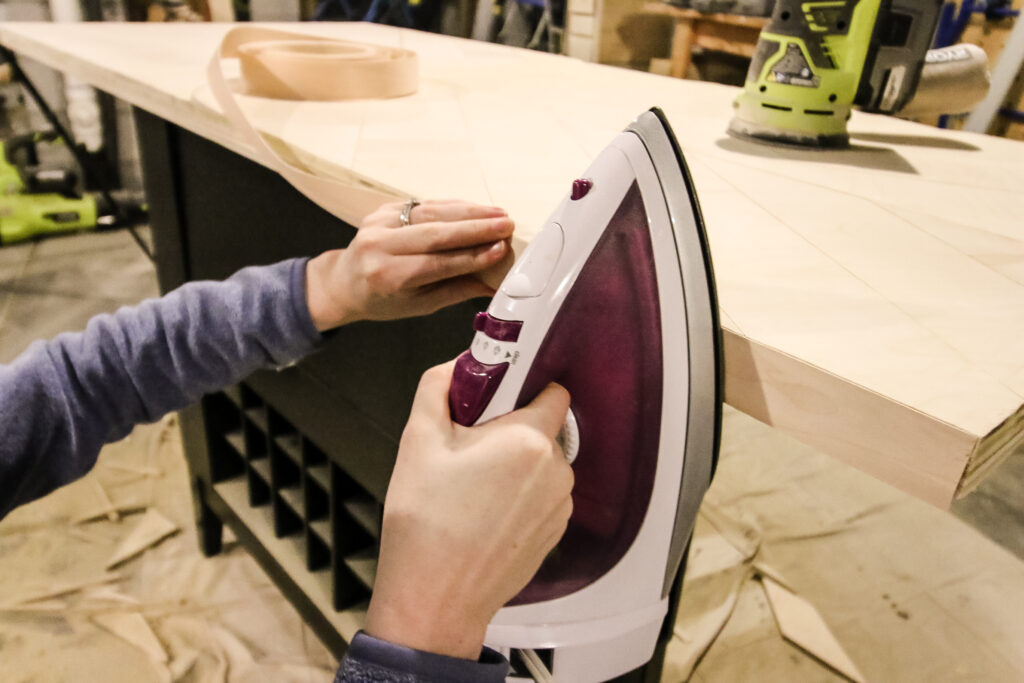
- Plug in your iron.
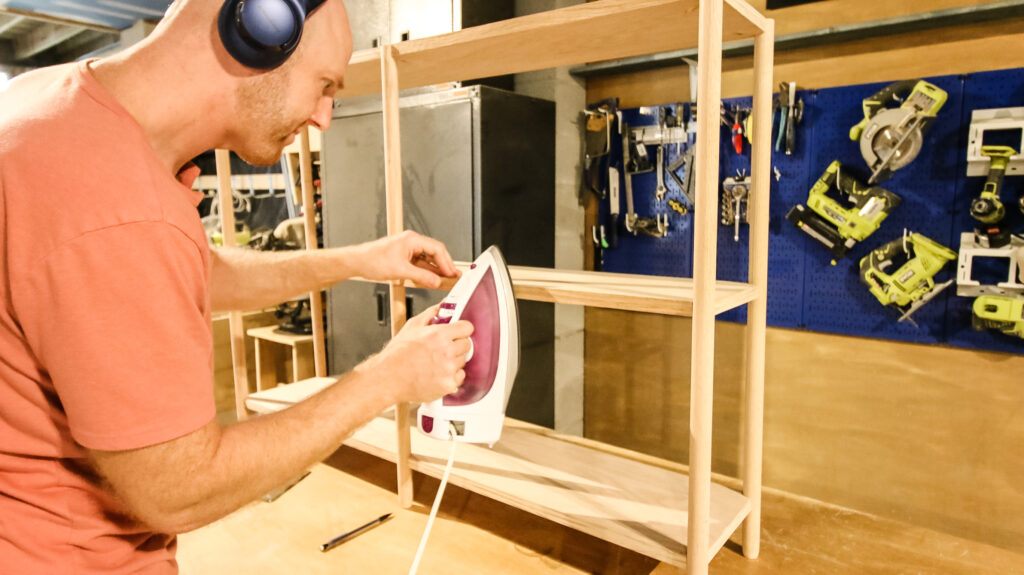
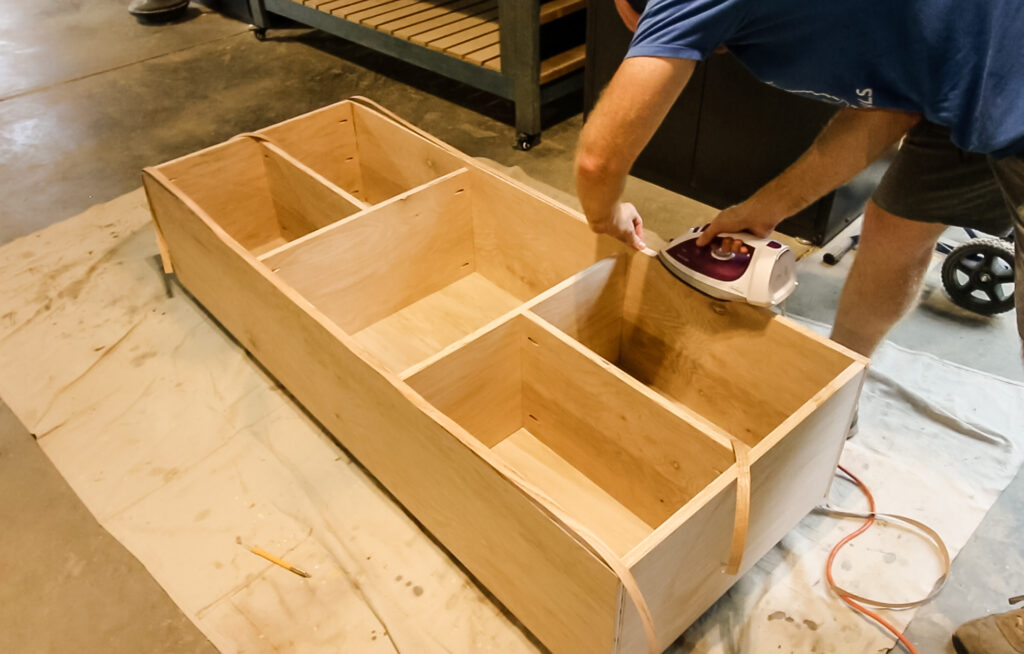
- Start on a flat edge - not a corner. Line the edge banding up and use the iron to heat until the adhesive melts and it holds itself in place.
- Move slowly along the edge, ensuring that the edge banding stays straight and level as you go. It won't take much to melt the glue and adhere and don't stay too long or you'll burn the edge banding.
- Gently bend banding to cover any corners. Apply even pressure.
- When you are done, allow to cool before handling.
- Use a utility knife or edge band trimmer to gently press along the side of the plywood edge and trim off any excess.
- Smooth with sandpaper.
- Wipe clean and you are ready to stain or paint.
Do I need an edge banding tool?
You have the option of purchasing an edge banding trimmer tool to get a clean trim on edge banding edges.
We actually purchased one last year, tried it out, and ended up returning.
Here's the thing - you know how in the kitchen, you can buy so many special tools and appliances? Like there are special cutters just to slice apples or cut the leaves off of strawberries.
That's fine and I guess they work for some people, but I prefer to just use one really good knife for everything.
Similarly, I didn't love the edge banding tool. I can get just as good a result just using a box cutter knife and I don't have another plastic thing bouncing around the garage.
Finishing Touches
The whole point of edge banding is to have your plywood blend seamlessly to look like a piece of solid wood. So, you will want to apply edge banding before finishing your piece.
Then, you can lightly sand the edges and apply the finish of your choice to all sides of the wood surface, including the edge banding.
Here's some plywood projects we've done that we finished off with edge banding!
- Geometric laundry counter
- Oak plywood toy shelf with dowel legs
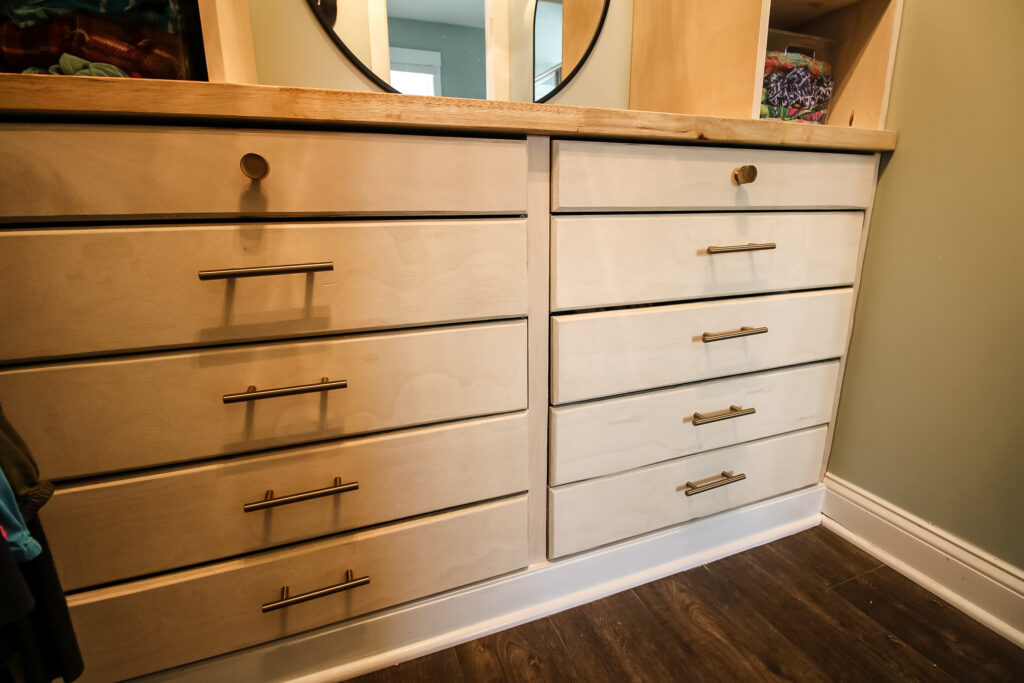
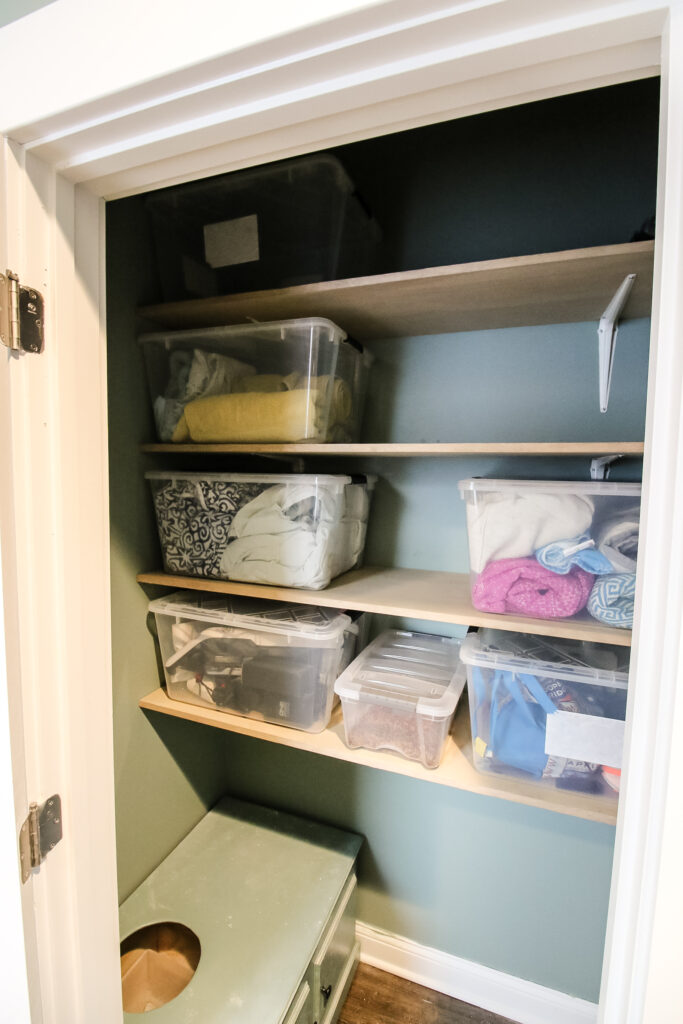
- Built-in closet drawers and cube storage
- Media table with tile top
- Buffet table with fluted drawers and doors
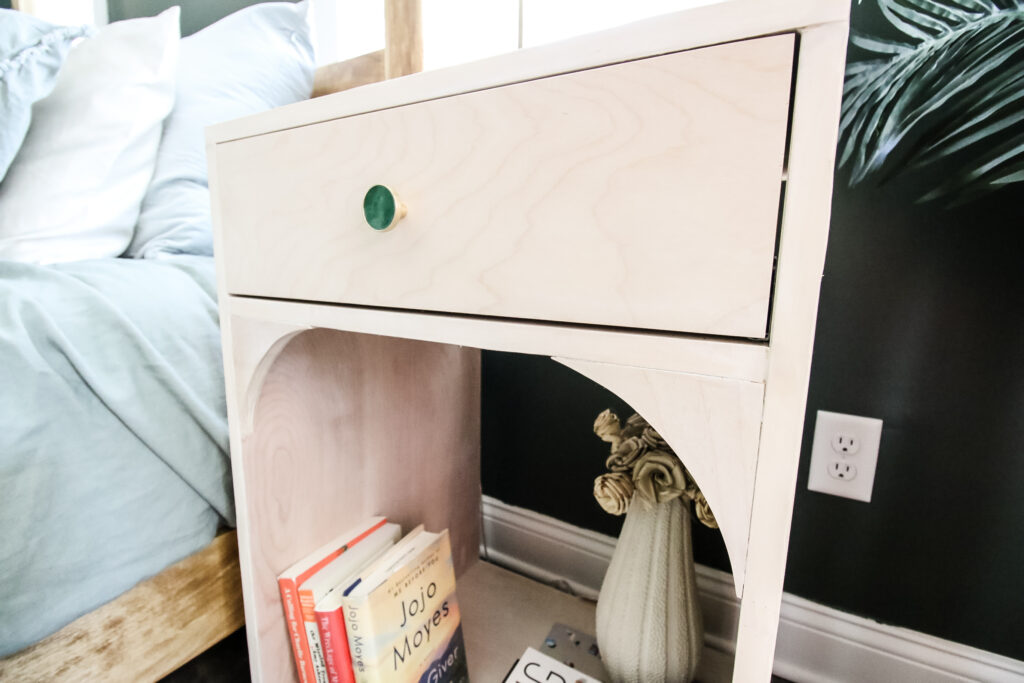
- Bedside tables with arches
Can you stain edge banding?
Wood veneer edge banding is made from very thin wood veneer and so it is stainable, just like your wood.
However, it is important to note that even if you chose the same wood species of veneer that you used for your build, it is possible that the stain will look slightly different on the veneer compared to the rest of the wood.
I suggest testing your stain on a small scrap or discreet spot to be sure you like how they look together stained.
Can you paint edge banding?
Wood veneer edge banding should always be paintable. I do suggest testing your edge banding with your paint to make sure it looks good before tackling the whole project.
However, if you plan to paint your project, even with paintable edge banding, I usually suggest putting wood filler on the plywood edges instead.
The main reason for this is just because edge banding can get kind of expensive, and if you want to find a spot to save a little bit of money on your build, wood filler is usually much cheaper and can give you a similar seamless result when painting your plywood edges.
Maintenance and Care
Edge banding should give you a durable result, but we have had a few maintenance issues with ours in the past.
How to fix peeling edge banding
One issue is when the glue just wasn't fully completely solidified between the edge banding in the plywood edge. This can lead to the edge banding flapping and peeling off.
If this happens, you can use an iron or heat source to try to re-melt the glue.
You could also apply a little wood glue and use tape to hold it in place until the glue has fully dried.
How to fix cracked or broken edge banding
The other issue that we have had with edge banding maintenance is when we added edge banding to a long plywood shelf, and it did not get trimmed perfectly flush, and there was a tiny lip.
We kept large Tupperware on this shelf, and when a large bin was pulled down, it snagged on the edge banding and snapped a piece of it off.
In this case, you can use a heat gun or other heat source to warm up the glue and remove the whole section of edge banding and then replace it and re-stain it as needed.
Totally annoying and a good reminder that it's important to take your time and do a good job when you're doing a project or else you are likely to end up having to do it twice.
Edge banding is a great tool for making plywood projects look more high end. Definitely experiment with iron on veneer edging to see if you like the look!
Any more questions about edge banding?

Looking for something?
We've been doing this since 2012 so we have a LOT of blog posts!
Search stuff like: Ceiling Projects | DIY Plant Stands | Thrift Flips

Hello, I'm Morgan, half of the creative force behind CharlestonCrafted.com! With a passion for DIY that dates back to 2012, I've transformed three homes and now I'm dedicated to helping others craft their dream spaces. Let's turn your house into a home together!


