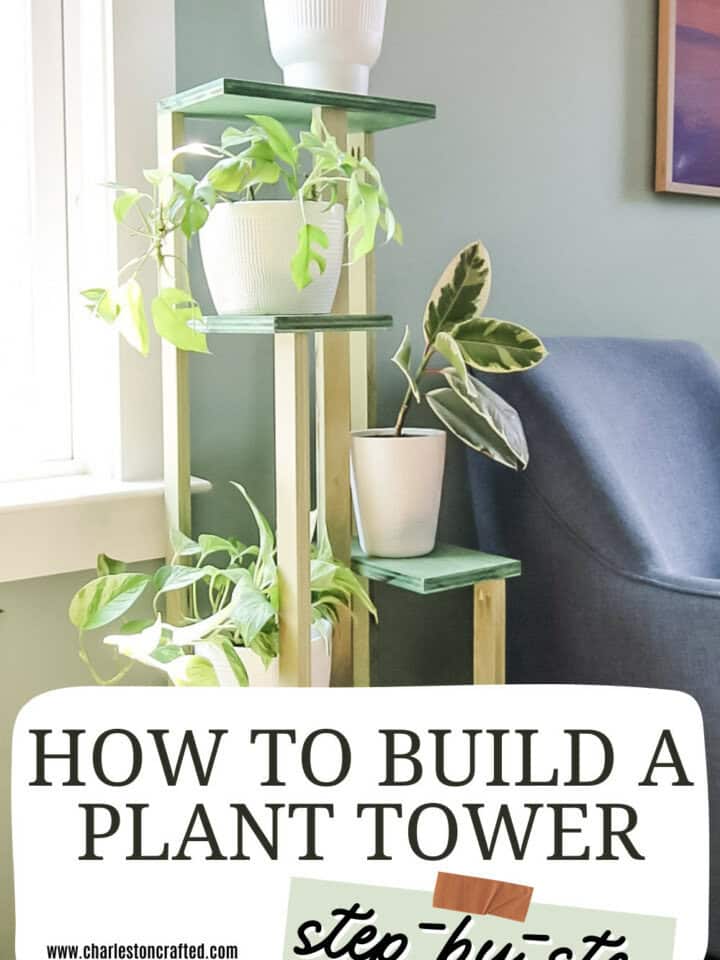
Need to fill the corner of a room with plants? Try building this tiered plant stand tower that adds vertical height and holds tons of potted plants!
This post was sponsored by Kreg Tool and their Projects and Plans site. All opinions are our own. Thanks for supporting the brands that make Charleston Crafted possible.
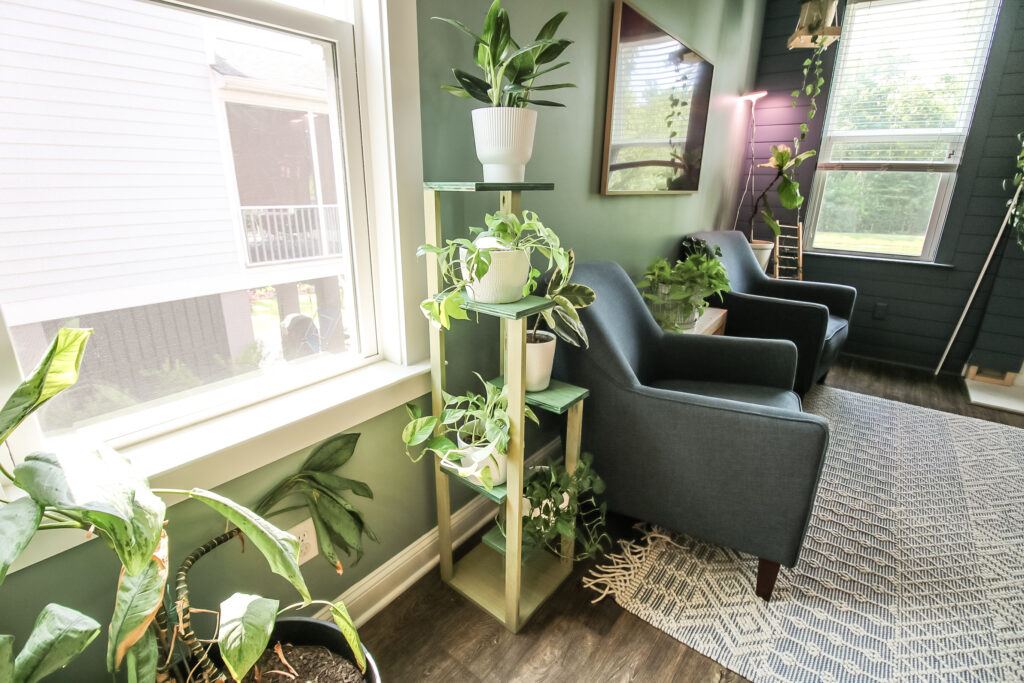
Ever since we put in our shiplap fireplace in our living room, it has been the focal point of our gathering room. But it's such a great accent wall too that we've enjoyed putting in lots of plants in front of the sides to add to the height.
Last year, we built a three tiered plant stand with a hanging bar that held all of our indoor potted plants (seriously, it holds so many plants it's crazy). But when we started our kitchen renovation, we tore down the wall that the plant stand was up against and had to move it to the screened porch.
So we needed a smaller version that could fit into the corner of our living room by the fireplace wall and still hold some of our favorite potted plants that we didn't want outside.
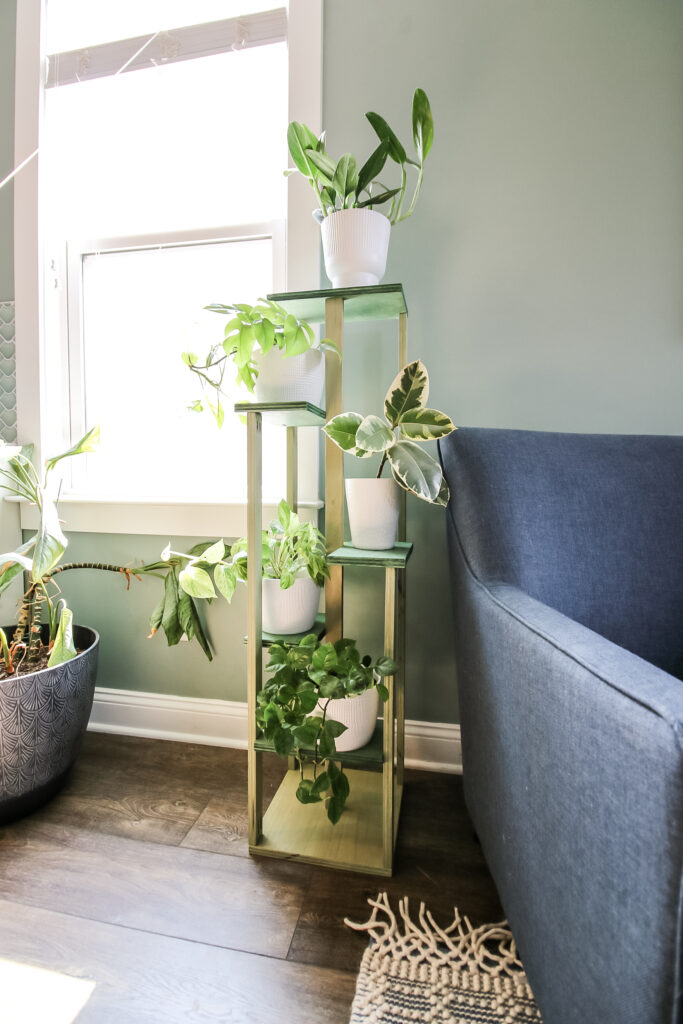
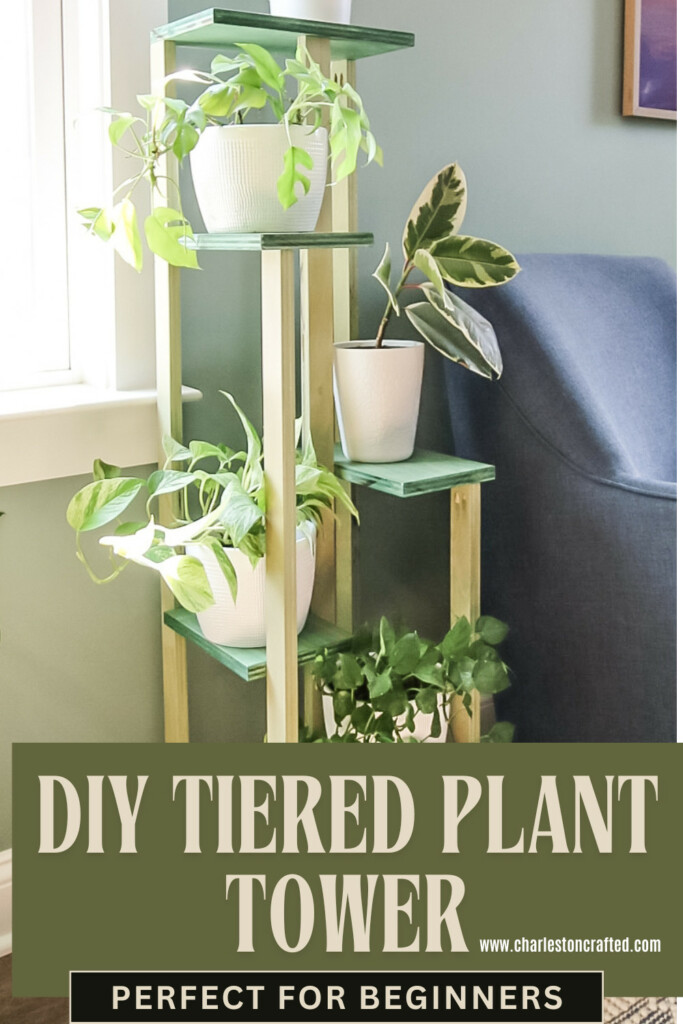
With that, we designed this tower style vertical plant stand that holds lots of plants and shows them off while adding some vertical interest to the space!
Need a plant stand that shapes around a corner? Try this three tiered corner plant stand!
How to make a vertical plant stand tower
This plant stand is really simple to build and doesn't require a lot of materials. You can build it all with less than one sheet of plywood, or with scraps you have from other projects.
You can also build this with some solid boards if you'd prefer or whatever you have on hand. But grab your Kreg jig and your drill and let's get to work!

Materials needed to build this plant tower:
Here's what you need to build this design!
Use your leftover plywood to build this three tiered rolling plant stand!
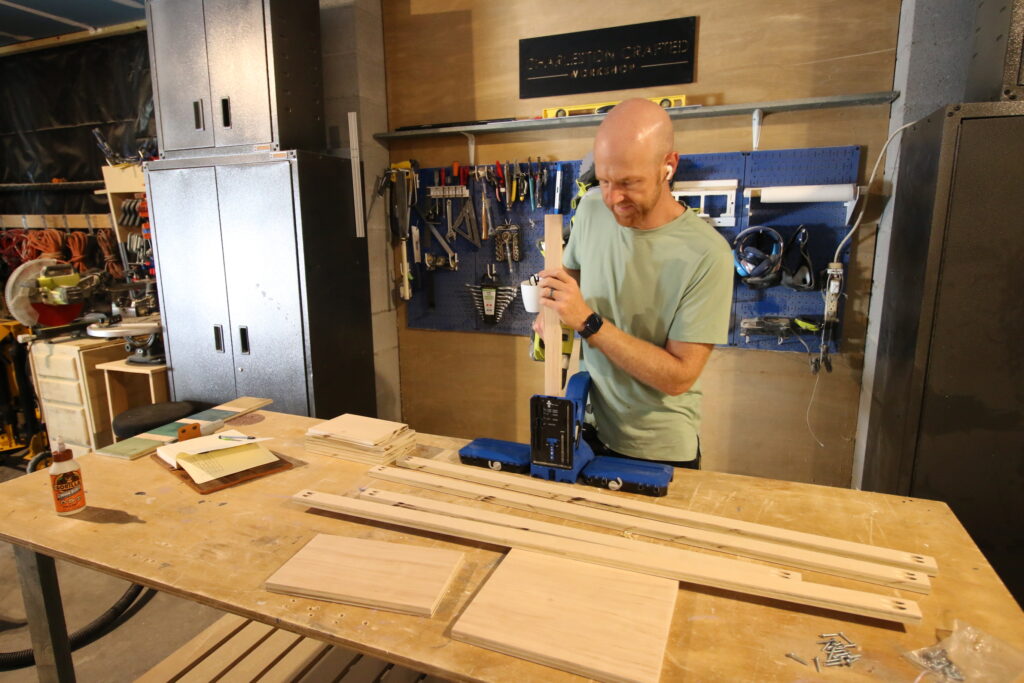
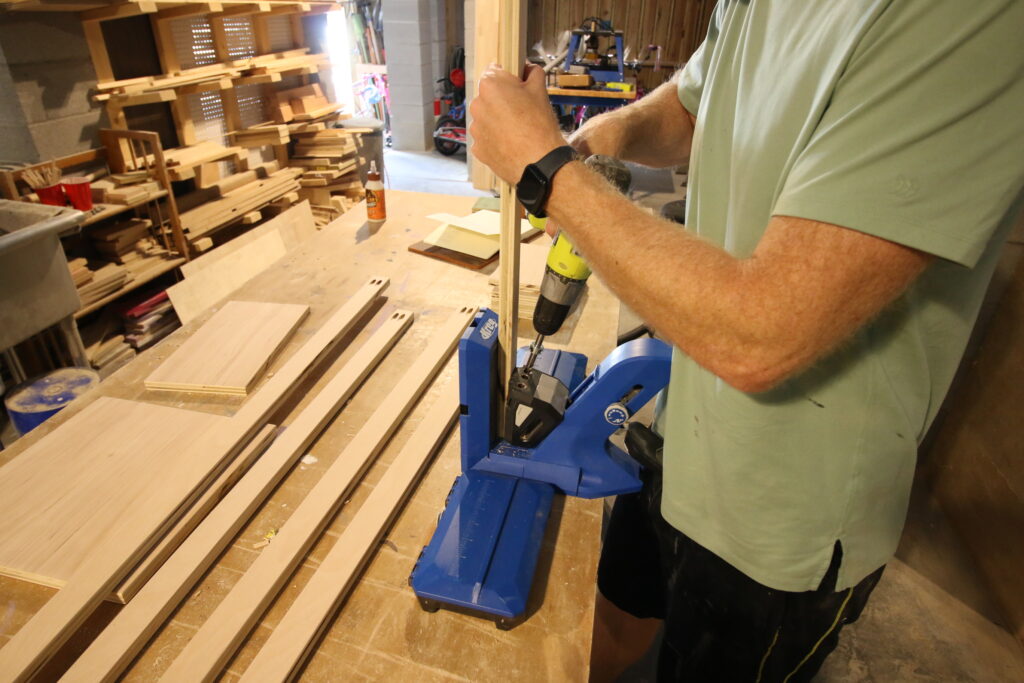
Step one: Make cuts and drill pocket holes
I personally prefer to make all my cuts and drill all my pocket holes first, when possible. This is a great project for that!
I've got all the cuts and pocket hole placements in the full woodworking plans you can get here!
To make all the pocket holes, I used my Kreg 720 Pro pocket hole jig. It's my go-to jig of choice for standard woodworking.
I prefer the 720 because it can hold all types of wood quickly and easily- long, short, wide or narrow. Check out my full review of the Kreg 720 here and see if it's right for you!
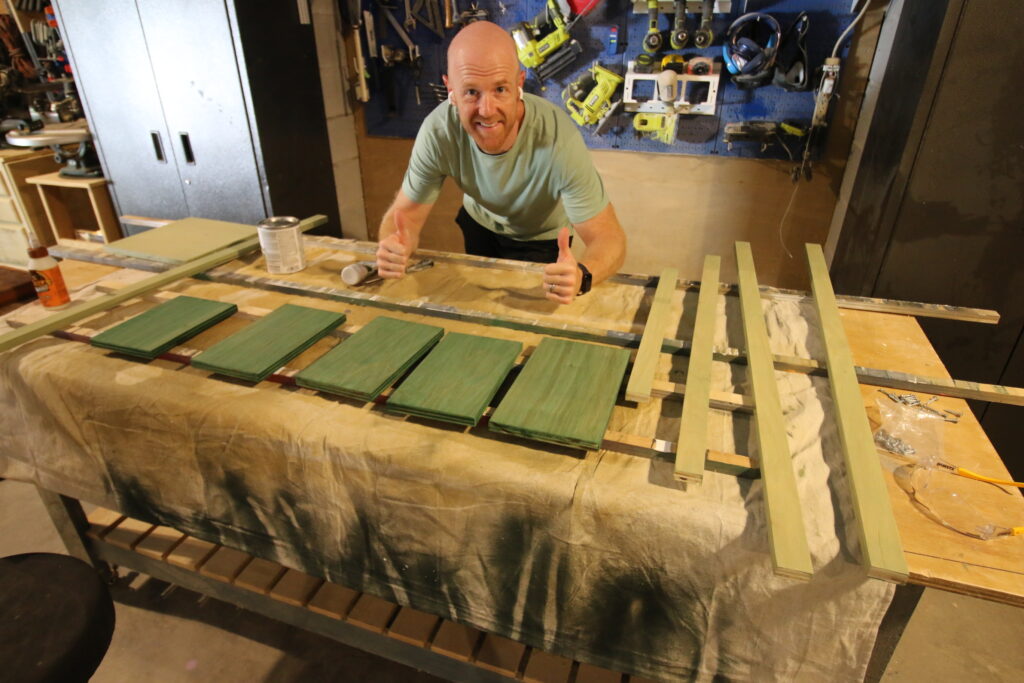
Step two: Stain or paint all pieces
I always debate whether to stain a woodworking project before I put it together or after. It's a lot easier to do it when the project is whole, but sometimes that doesn't work, like this time, when I wanted a two-toned look.
We wanted an earthy feel for this plant stand tower, so we decided to try a couple of different green stains that would play together and with our wall color.
We went with a darker green stain for the shelves and a lighter color for the base and legs. With the two-toned look, it's obviously much much easier to do this before putting it together!
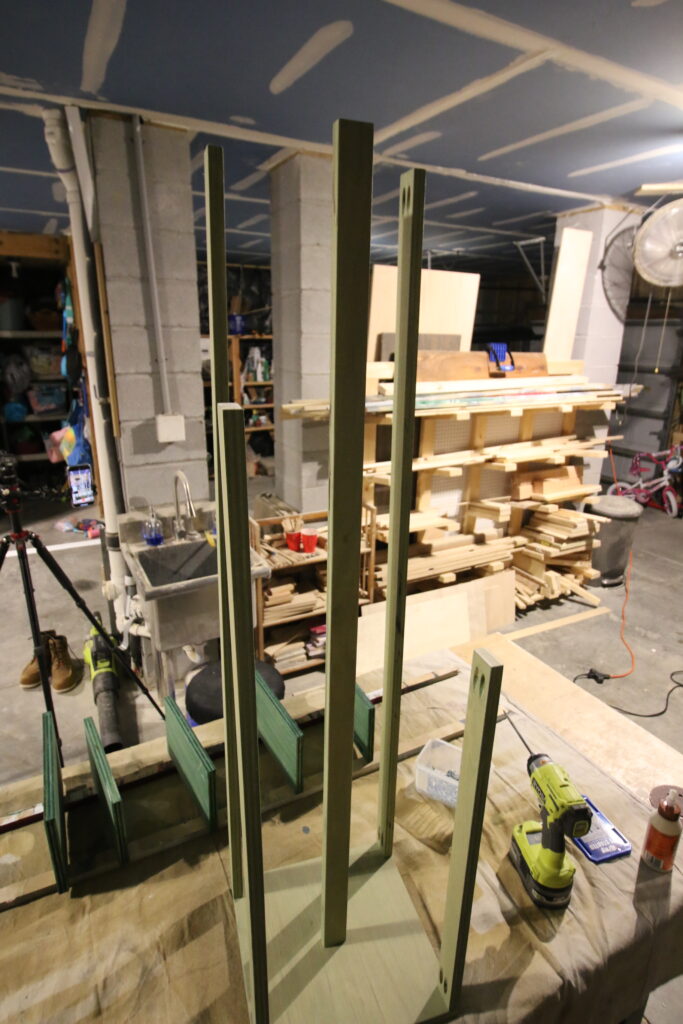
Step three: Attach legs
When it was time for assembly, I started by attaching the legs to the base. Each corner of the base gets a leg, but they aren't all the same length, which is what helps with the tiered look of the plant stand.
There's also a leg in the middle that helps hold all the shelves in place so that there are three points of connection for the shelves. That keeps them sturdy so they can't wobble, especially with heavy potted plants.
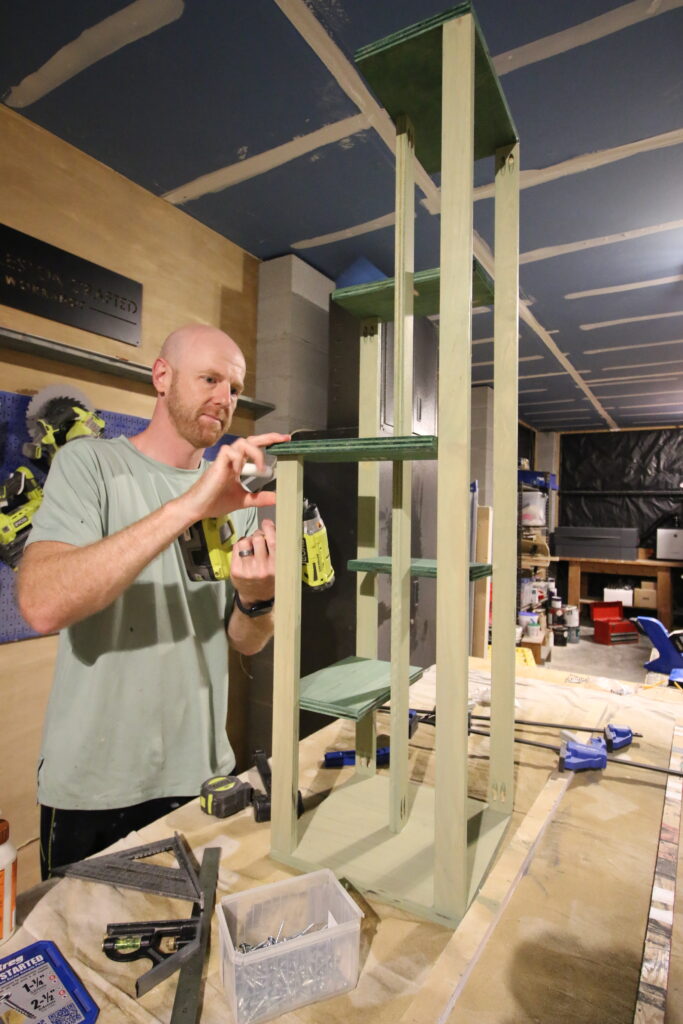
Step four: Attach shelves
Final part of assembly was attaching the shelves. I connected everything with wood glue and Kreg pocket hole screws through the holes I drilled earlier.
Three of the shelves at least partially rest on top of the legs, but the other two shelves are completely screwed in between the legs. I've got the exact placement of the shelves in the full woodworking plans, so be sure to download those for free!
After everything was secured, I added a coat of polyurethane to the whole thing (this can be done when assembled since it's going on both stain colors) and gave it a light sanding before bringing it inside and putting it in place!
Step five: Load plants
Finally, I got it into place and loaded it up with a variety of plants! The tiered setup of this plant stand is great for different types of plants.
You can put some small plants, tall plants and trailing plants all on the same plant stand and they can all shine without covering each other up!
If you're a houseplant enthusiast, this is a great way to show off a lot of your plants!
This plant stand sits right under a live edge hanging plant shelf in our ceiling!
Tiered corner plant stand woodworking plans
We absolutely love how this plant stand tower turned out! It holds a bunch of different plants of all shapes and sizes and adds vertical height to the corner of our living room.
If you love how this turned out and want to make one for yourself, you can get the woodworking plans for this project free! Thanks to our friends at Kreg Tool for sponsoring this project, we've been able to put the plans for this project on their Projects and Plans site for free!
The plans include the full material list, cut list and step-by-step instructions you need to build this plant stand yourself. Plus, you can check out other plant stands and lots of other great projects there too!

Looking for something?
We've been doing this since 2012 so we have a LOT of blog posts!
Search stuff like: Ceiling Projects | DIY Plant Stands | Thrift Flips

Hey there, I'm Sean, the woodworking enthusiast and builder behind CharlestonCrafted.com! Since 2012, I've been sharing the magic of turning raw materials into beautiful creations. I love teaching others the art and satisfaction of woodworking and DIY. I try to inspire fellow crafters to make something extraordinary out of nothing at all.